

Page 1
IMPORTANT NOTE
Carefully remove all the parts from the carton and put
them individually on a soft cloth to prevent scratches
or other damages occuring to the wood parts.
We have taken great care in the design of this
product and request that you carefully and strictly
follow our assembly instructions to ensure a
completed product as it was designed.
Part List
A.
Top
1 pc.
B.
Leg
4 pcs.
Nut Cap
Nut
Spring Washer
Flat Washer
B
C.
Stretcher
1 pc.
B
C
Hardware List
Key Wrench
1 pc.
Bolt
8 pcs.(+1 extra)
Flat Washer
Spring Washer
Nut
Nut Cap
B
B
Spring
Washer
16 pcs.(+1 extra)
Flat
Washer
16 pcs.(+1 extra)
Nut
16 pcs.(+1 extra)
Nut Cap
16 pcs.(+1 extra)
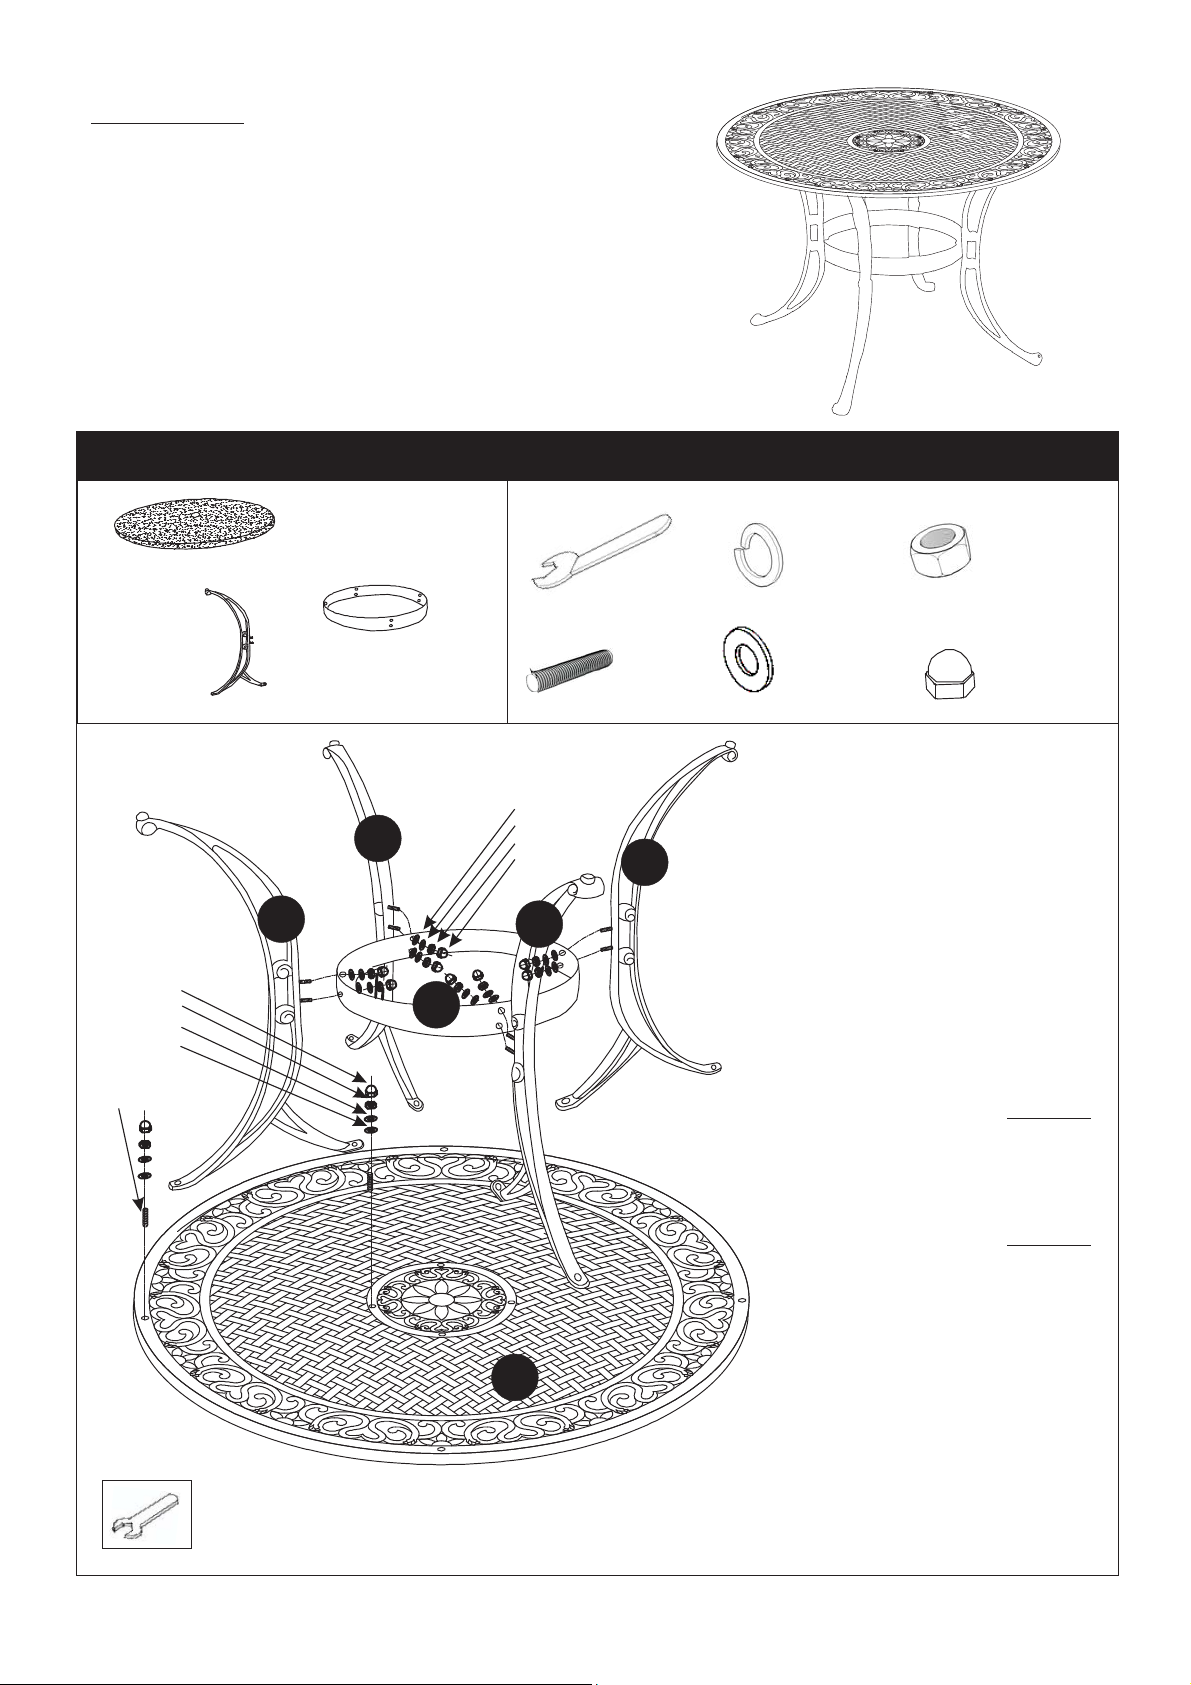
Table Assembly
Place Top (A)
upside down on a soft cloth.
Insert all Bolts into
the pre-drilled holes of Top (A).
Attach 2 adjacent Legs
(B) to Top (A) with Flat Washers,
Spring Washers, and Nuts.
Bolt
A
Please keep the Key Wrench as you
may need to retighten the Bolts in the future.
Tighten all Nuts, only ,
half way
with Key Wrench.
Attach Stretcher (C) to unit with
Flat Washers, Spring Washers
and Nuts, tighten .
half way
Attach 2X Legs (B) to
unit with Flat Washers,
Spring Washers and Nuts.
Tighten all Nuts completely
with Key Wrench.
Cover all Nuts with Nut Caps.
Turn the table to it’s upright position.
 Loading...