

Page 1
Assembly Instruction
ToolsRequired: Flatheadscrewdriver,Phillipsscrewdriver,pliers,wire cutters,wirestrippers, electricaltape,safety glasses.
LightSource:
EstimatedAssembly Time:
Preparation:
present.Ifany partsaremissing ordamaged,do notattemptto assemble,install,or operatethefixture. Contactcustomerservice forreplacement
parts.
Warnings and Cautions
Turn off electricity at circuit breaker or main fuse box before installation. Consult a licensed electrician if in doubt.
These instructions are provided for your safety. It is very important you read them completely before installing the fixture. We strongly
recommend that a licensed, professional electrician perform the installation.
Disconnect fixture from power source before replacing bulbs. Make sure bulbs are given sufficient time to cool before removal. Do not subject
glass parts to any shock while in operation or shattering may result.
Care of Tiffany Style Shade
A new tiffany lamp shade has an oil film applied to the shade that protects the tiffany shade from scratches during shipment. If the oil applied is
too heavy you can remove the excess oil film with a paper towel. Gently wipe away the excess oil.
For general cleaning of tiffany shades use a gentle lemon oil-based furniture polish applied to a soft cloth and wipe gently.
If a white powder appears on the soldered joints of the tiffany shade this is a normal oxidation process. Use a small amount of lemon oil or
mineral oil applied directly to oxidized areas and the soldered area will return to like new.
(2)A19 MediumBase75W Maximum,Alternate bulb(2)19W CFL.
30-45minutes
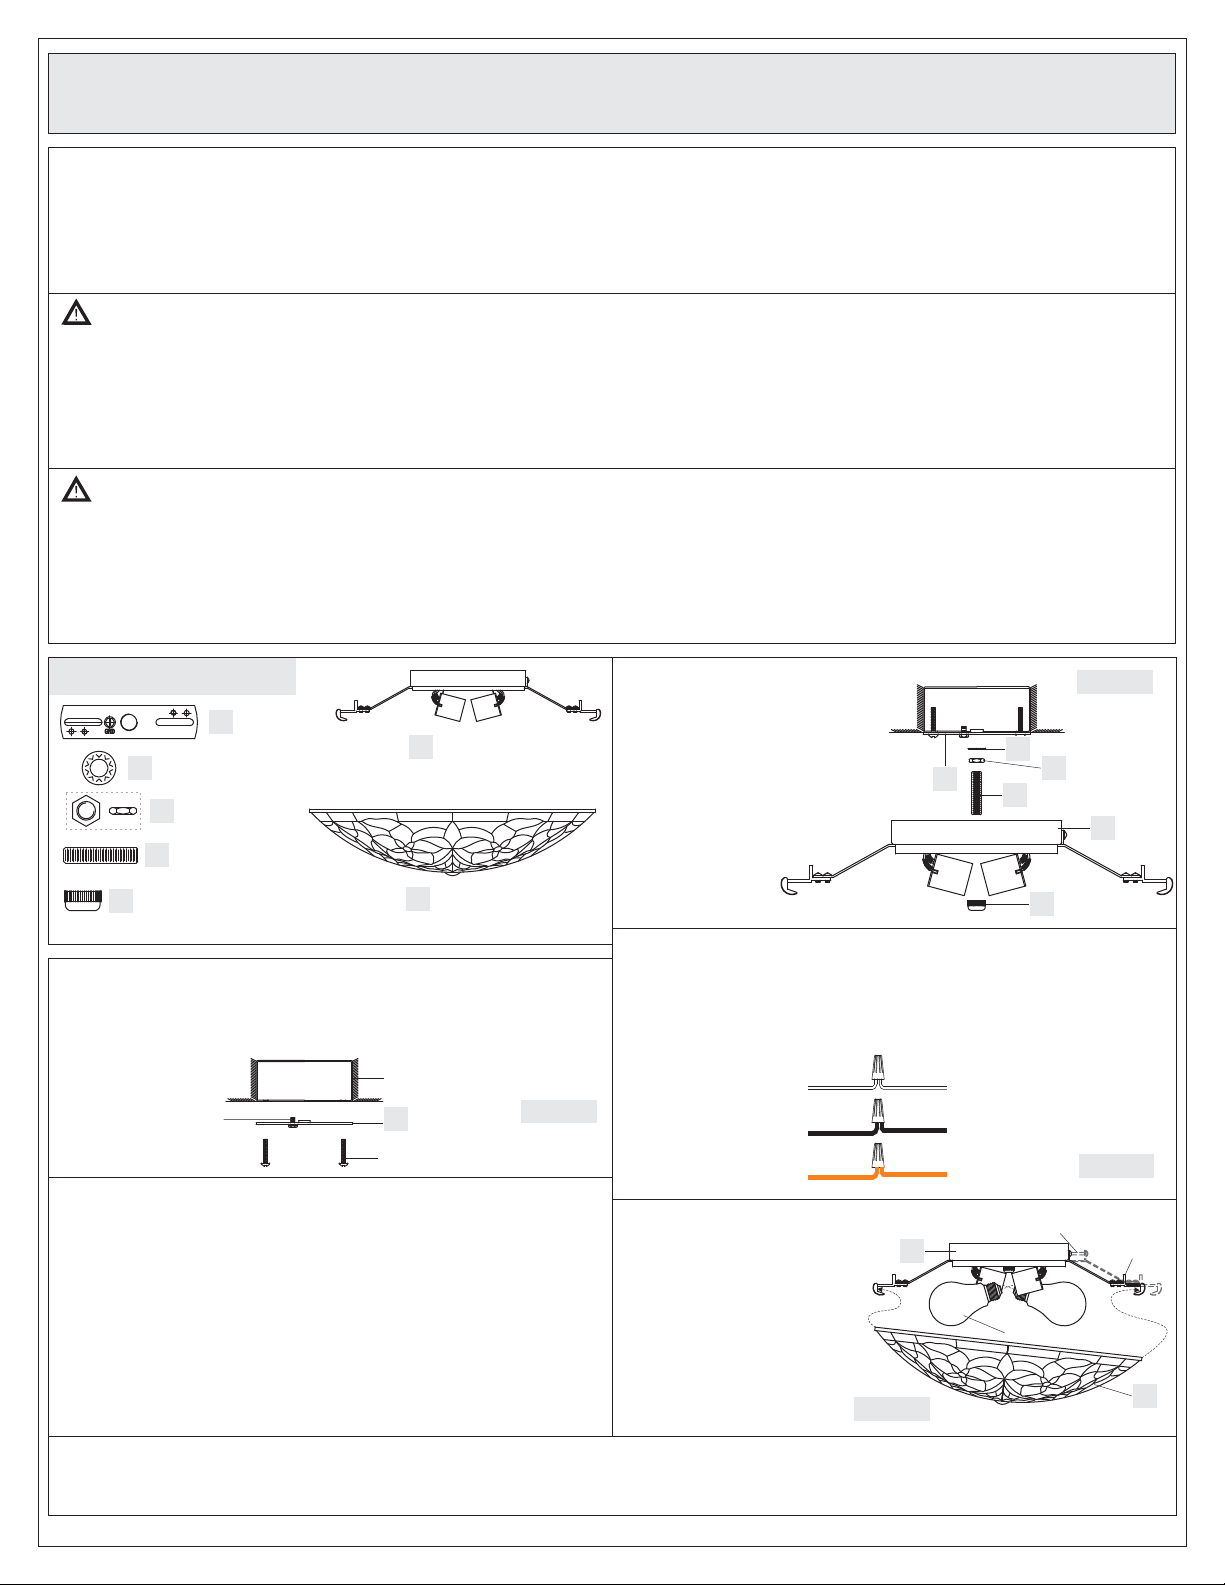
Identifyandinspect allpartsbefore beginninginstallation.Check packagecontentlist anddiagramsbelow tobesure allpartsare
Package Contents
Crossbar
A
x1
Lock Washer
B
x1
Hex Nut
C
x1
Nipple
D
x1
Lock Ball
E
x1
STEP 1 Install Crossbar-
A. A)Attach the Crossbar ( to the Outlet Box with the head of the Green
Ground Screw facing you. Secure it with Outlet Box Screws (not
included) Tighten until snug..
Green Ground
STEP 2 Install Nipple and Fixture Body-
* Pliers is required for this step.
A. Thread Hex Nut (C) to the middle of the Nipple (D). Place Lock
Washer (B) over the Nipple (D) and then thread the Nipple (D) into
the Crossbar (A) until the Nipple (D) is about 0.375” above the
Crossbar (A).
B. Place the Fixture Body (F) over the Nipple (D) against the ceiling to
determine the correct position of the Nipple (D). Thread the Lock Ball
(E) onto the Nipple (D). Adjust the Nipple (D) to allow the Fixture
Body (F) to rest against the ceiling when held in place by the Lock
Ball (E).
C. Remove the Lock Ball (E) and the Fixture Body (F). Tighten the Hex
Screw
Fixture Body
F
x1
Shade
G
x1
Outlet Box
A
Outlet Box Screw
(not included)
Figure 1
(Step 2 Continued)
Nut (C) against the Crossbar
(A) to secure in place.
D.RefertoStep3forwire
connections.
E. Place the Fixture Body (F)
back over the Nipple (D) and
secure with Lock Ball (E).
Hand tighten until snug.
STEP 3 - Wire Connections
A. Use standard wire connectors (not included) to make all wire
connections. Twist connectors until wires are tightly joined together.
Wrap each connection with approved electrical tape and carefully
stuff all the connected wires into the Outlet Box.
White wire
from supply
Black wire from
supply (or Red)
Ground wire
from supply
STEP 4 - Install Bulbs and
Shade
A. This fixture uses standard
bulb with a medium screw
base. Maximum 75 watts.
Insert bulb and screw
snugly into place.
B. Locate the Shade (G) wedge
in the two Shade Holders
Figure 4
A
F
B
D
White wire
from fixture
Black wire
from fixture
Ground wire
from fixture
Spring End
Bulb (not included)
Figure 2
C
F
E
Figure 3
Shade
Holder
G
1of2
Page 2
(Step 4 Continued)
without Spring. Pull the Shade Holder with the Spring out and
position the Shade (G) onto the bottom of the Fixture Body (F). The
Shade Holder will engage the Shade (G) after release.
Your fixture is now completed assembly and ready to use. Enjoy!
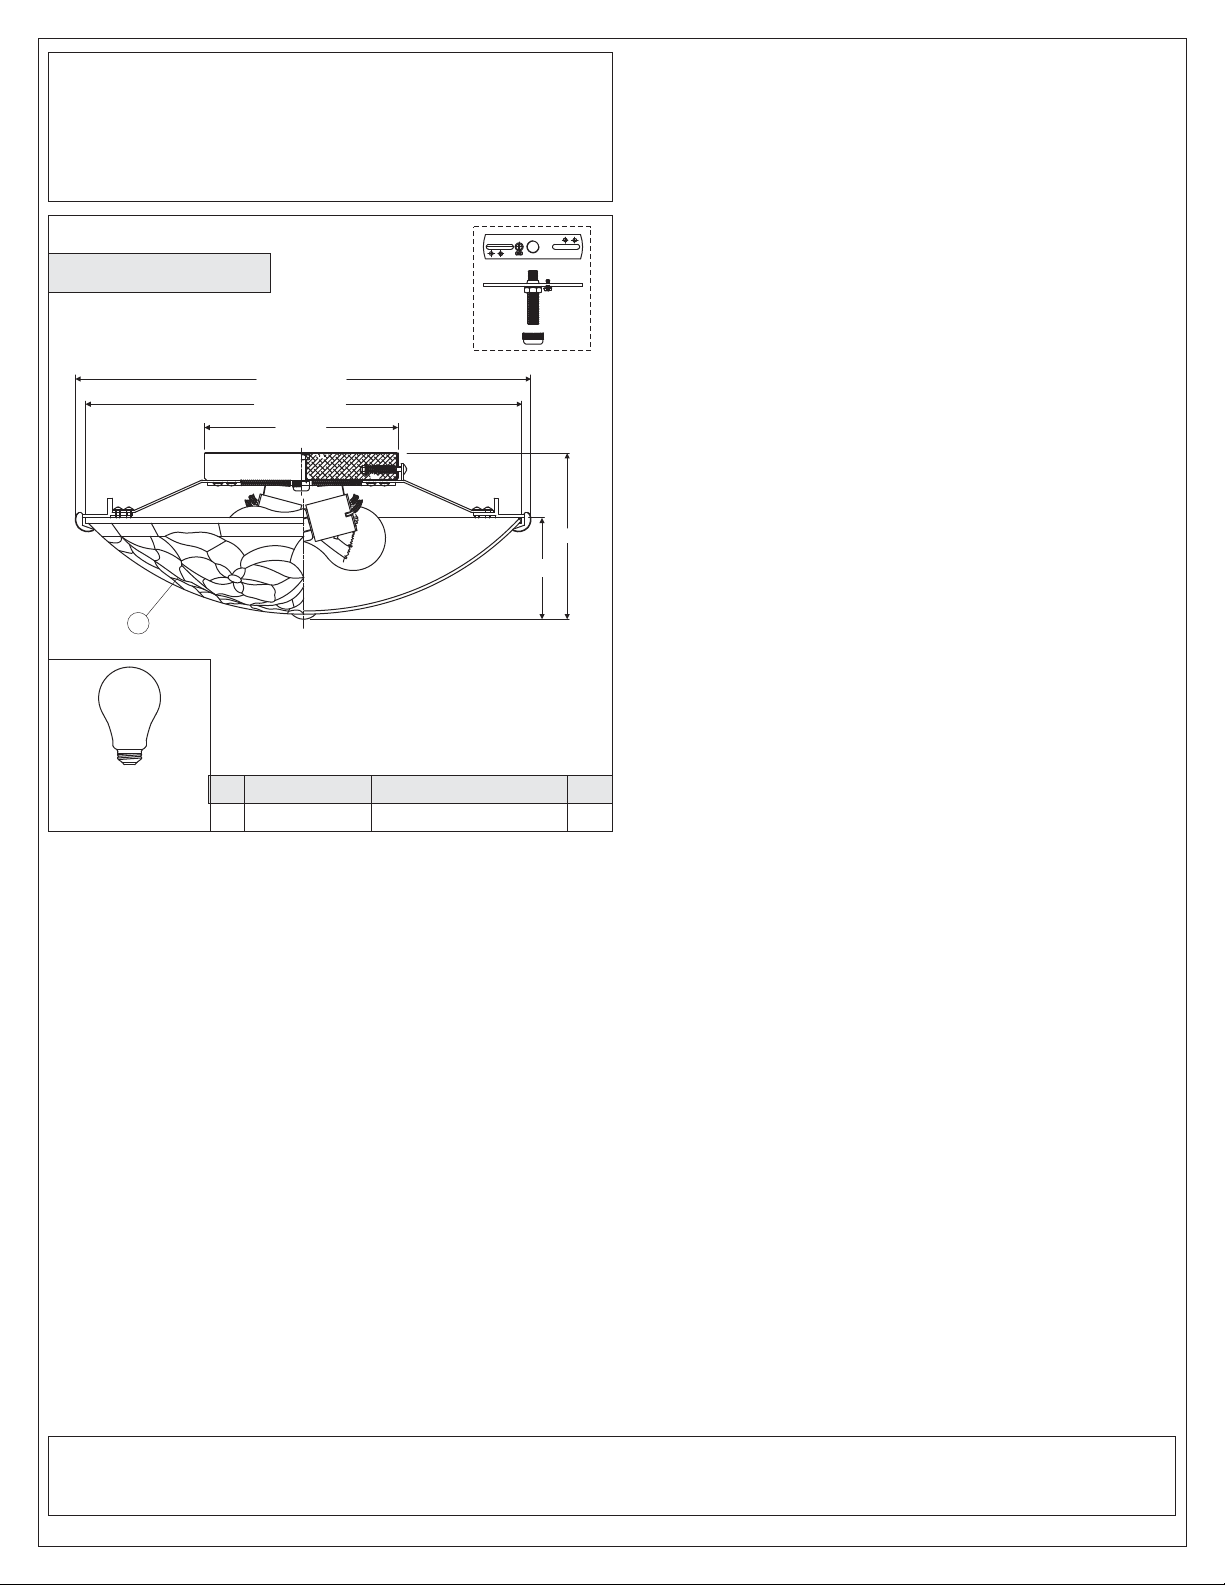
FINISH: VINTAGE BRONZE
16.25” Dia.
15.75” Dia.
7” Dia.
PART NU MBER
3.5”
1
5.5”
(2) 75W
Medium
Base
Bulbs
(Not Supplied)
NOTE: ALL DIMENSIONS ARE ROUNDED
UP TO THE NEAREST 1/4"
REPLAC EME NT PART
PART NUMBER
SHADE
Q T Y
.
1
2of2
 Loading...