

Page 1
August International Ltd
United Kingdom
Telephone:+44 (0) 845 250 0586
www.augustint.com
DVB-T405
Freeview TV WiFi Transmitter
EN
FR
DE
IT
ES
Trasmettitore WiFi per TDT
Transmisor TV TDT WiFi
DVB-T WiFI Transmitter
Transmetteur Wifi TNT
Page 2
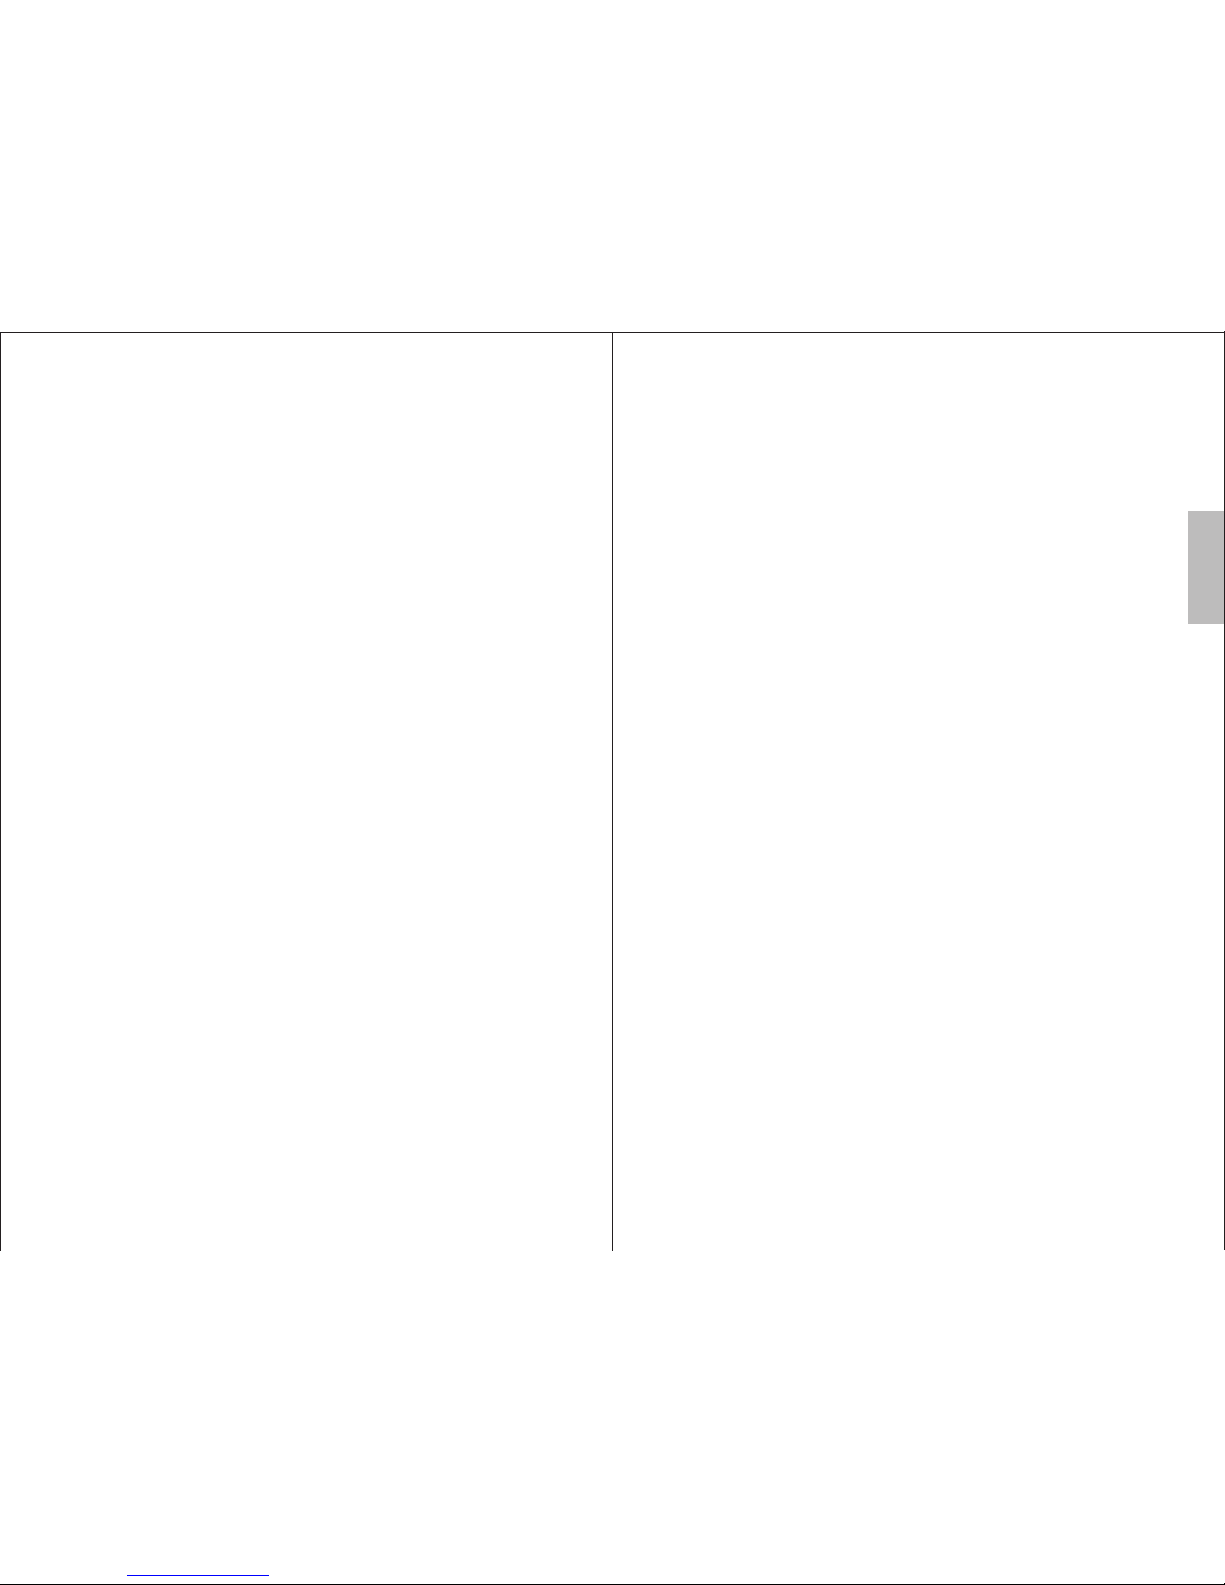
User Manual
Thank you for purchasing the August DVB-T405 Freeview
TV WiFi Transmitter. You may already be familiar with using
similar products but please take the time to read these
instructions carefully. They are designed to familiarise you
with the product’s many features and to ensure that you get the
very best from your purchase.
Safety
Please read the Safety Instructions before using this product to
ensure your safety and the safety of others.
Disposal
Please ensure the product and its accessories are disposed in
compliance with WEEE (Waste Electrical and Electronic
Equipment) Directive and any other applicable regulations.
Please check with your local authority for current disposal
regulations.
Customer Service
If you need help, please contact our Customer Service:
Telephone: +44 (0) 845 250 0586
Email: [email protected]
English
Page 3

Quick Start Guide
DVB- T405
Please fully charge the DVB-T405 before first use. To charge,
use the power cable to connect the DVB-T405 to a powered
USB port. Whilst charging, the Charging LED lights red and
turns off once fully charged.
PLEASE NOTE: The TV signal strength in some areas may not
be sufficient to support TV reception using a portable antenna.
The distance from the closest transmitter and other factors such
as surrounding buildings, the walls of your house, weather and
electromagnetic interference caused by power and
telecommunication infrastructure may affect signal strength.
Changing location may improve signal reception and a rooftop
antenna designed for digital TV can be used to achieve the best
possible reception.
1.
2.
3.
4.
5.
6.
7.
Open the Play Store or App Store on your smartphone or
tablet, or scan the QR code below then download the
“Siano TV” App.
Connect the DVB-T405 to an antenna. It is suggested that
you use a rooftop antenna when searching for TV channels
for the first time.
Switch on the DVB-T405, the power indicator LED will
flash and then stay lit.
Connect your Smartphone or Tablet to the "Meron" WiFi
Network, the default password is “Meron”. If you are
unfamiliar with the WiFi feature of your Smartphone or
Tablet, refer to its user manual for detailed instructions.
Open the Siano TV App on your Smartphone or Tablet.
Open Settings - Scan Channels. Choose the country where
you are located and tap Scan.
Once the scan is complete tap “Done” then tap “Live TV”.
The list of found channels will be displayed. Tap a channel
to start watching Live TV.
English
Page 4
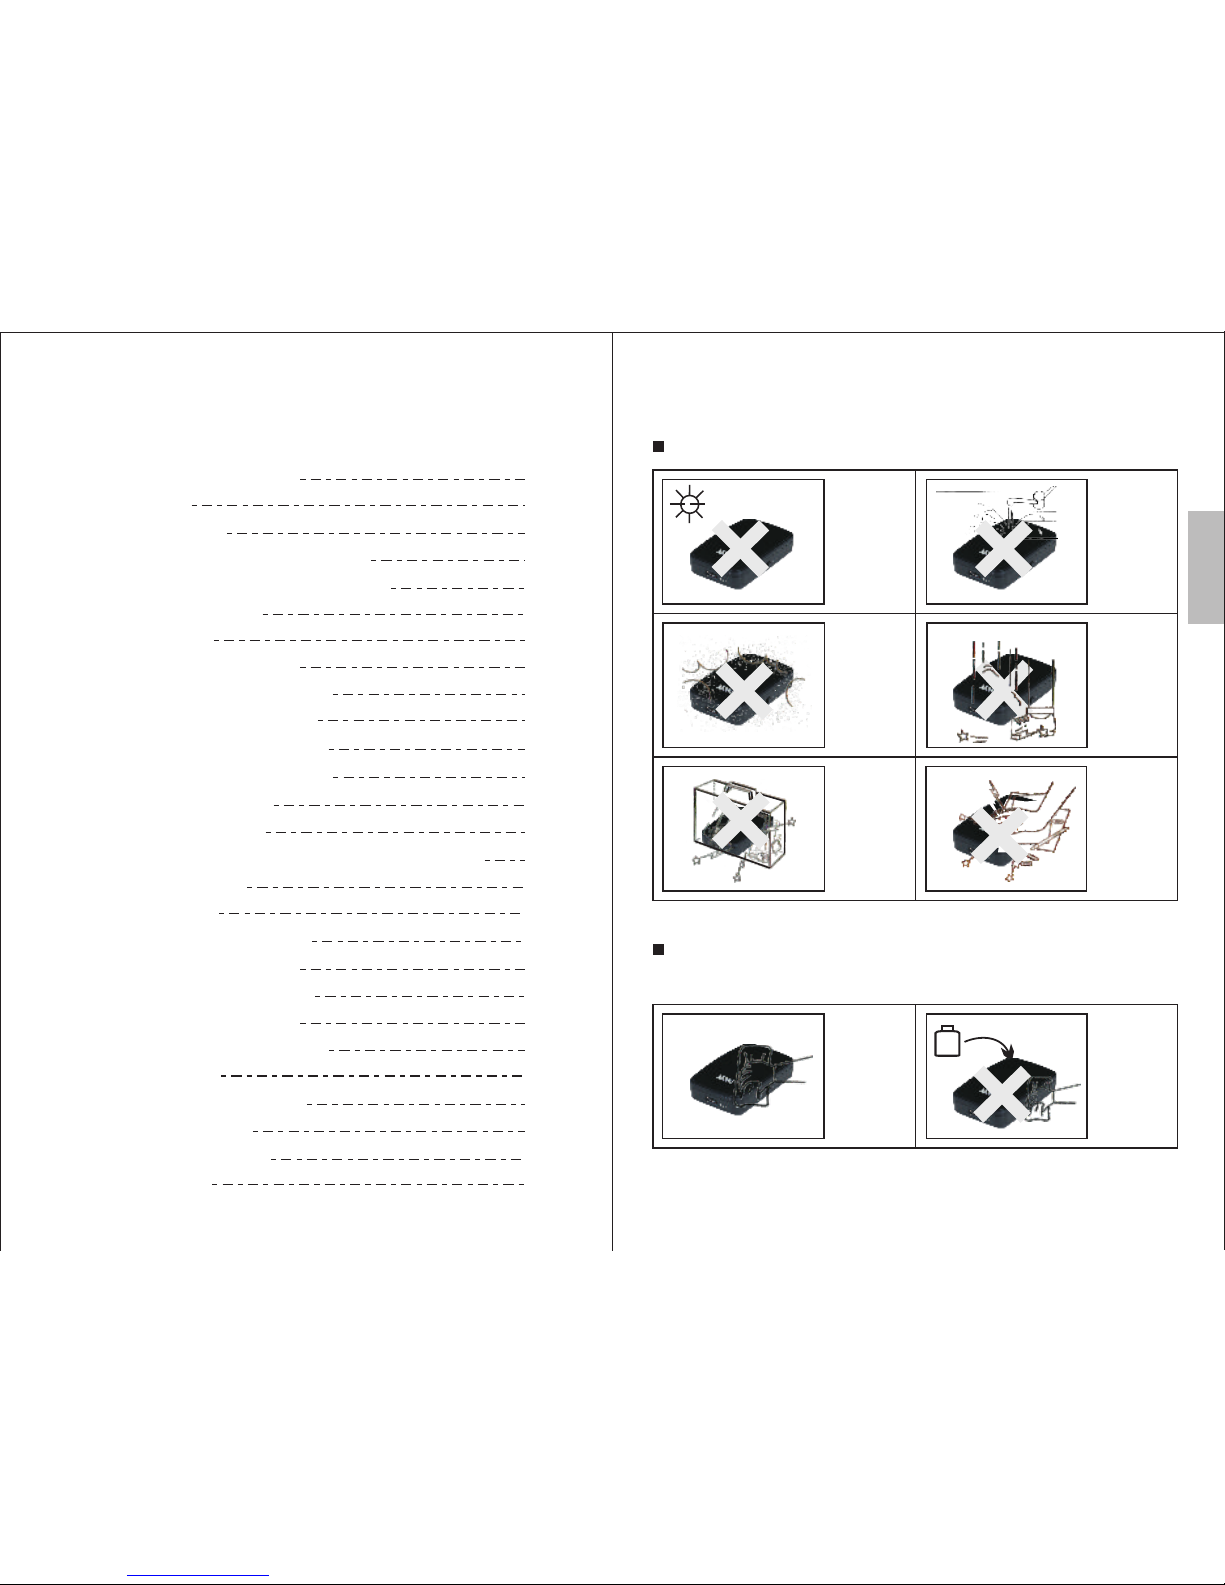
1. Safety Instructions
Maintena nce
Please unplug all connection wires before cleaning this machine.
Storage an d Use
Never expose
the Transmitter
to moisture,dust
oil or smoke.
Never put this
machine in
containers that
are unstable as
this may cause
damage.
Never extrude
or chafe this
machine with
sharp objects.
Keep this
machine away
from hot or
cold places.
Working
temperature of
this device is
0゚C ~ 50゚C,
storage
temperature is
-10゚C ~ 60゚C.
Keep the
away from
water or damp
environment.
Transmitter
Avoid
dropping or
exposing to
impacts.
Please wipe this
machine
and buttons with
a softcloth. Only
clean the screen
with professional
LCD TV screen
cleanser.
Never wipe this
machine with an
abrasive cloth,
detergent
powder, alcohol
and benzene etc.
various
propellants or
chemical
cleaning products.
Alcohol
-1-
Contents
English
1. Safety Instructions
2. Features
3. Accessories
4. Part Names and Functions
5. Installation and Connection
6. Unit Operation
6.1 Live TV
6.1.1 Close Live TV
6.1.2 Channel Control
6.1.3 Settings Wheel
6.1.4 Volume Control
6.1.5 Display Settings
6.1.6 Recording
6.1.7 Timeshift
6.1.8 Channel and Status Information
6.2 Recordings
6.3 Settings
6.3.1 Scan Channels
6.3.2 Sort Channels
6.3.3 Meron Settings
6.3.4 Select Device
6.3.5 Timeshift Buffer
6.3.6 About
7. Charging the device
8. Specifications
9. Troubleshooting
10. Warranty
1
2
2
2
3
4
4
4
5
5
5
5
5
5
5
6
6
6
6
6
7
7
7
7
7
8
8
Page 5
DVB-T405
Freeview TV WiFi Transmitter
EN
FR
DE
IT
ES
Trasmettitore WiFi per TDT
Transmisor TV TDT WiFi
DVB-T WiFI Transmitter
Transmetteur Wifi TNT
-3-
5. Installation and Connection
2. Main Features
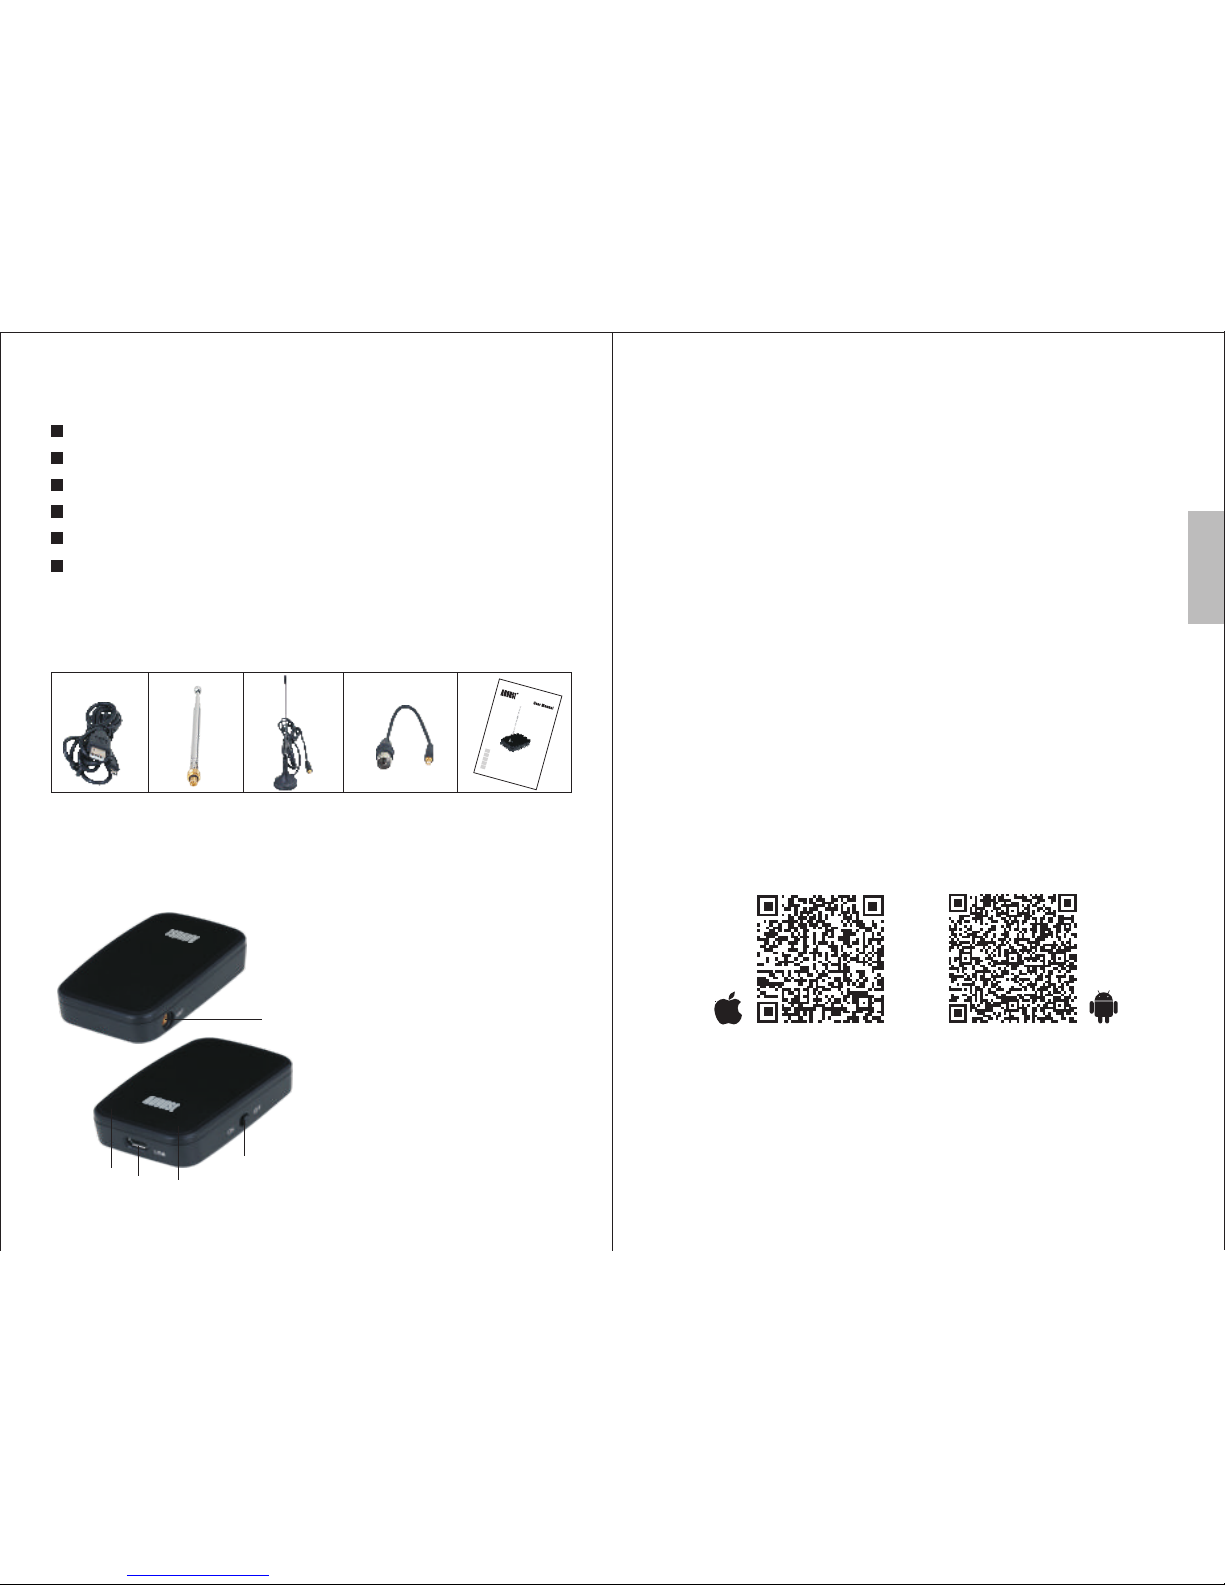
3. Accessories
Power Cable Telescopic Antenna Antenna Adaptor User ManualPortable Antenna
4. Part names and Functions
1.Antenna Sock et
2.Power LED
3.Power Socket
4.Charg in g L ED
5.Power Switch
-2-
Live Digital TV on your Apple and Android devices
Tra nsmits live TV wirelessly to your device
Compact and lightweight design
Portab le for optimum reception
Rechargeable battery
Operating range: up to 10m
Please ful ly charg e the DVB-T405 before first use. To
charge, use the powe r cable to connect the DVB-T405 to a
powered US B port. Wh ilst charging, the Charging LED
lights red a nd turns off once fully charged.
PLEASE NOT E: The TV signal strength in som e areas may
not be sufficient to s upport TV receptio n using a portable
antenna. The distance from the closest transmitter and other
factors su ch as surrounding build ings, the walls of your
house, wea ther and electromagne tic interference caused b y
power and te lecommunication infrastructure may affect
signal str ength. Changing locat ion may improve signal
receptio n and a rooftop antenna des igned for digital TV can
be used to ach ieve the best possible re ception.
Open the Pla y Store or App St ore on your smartphone or
tablet, or s can the QR code below then do wnload the
“Siano TV” App.
Connect th e DVB-T405 to an antenna. I t is suggested that
you use a roof top antenna when search ing for TV
channels f or the first time.
Switch on th e DVB-T405, the power ind icator LED will
flash and th en stay lit.
Connect yo ur Smartphone or Tabl et to the "Meron" WiFi
Network, t he default password is “M eron”. If you are
unfamili ar with the WiFi feature of your Sma rtphone or
Tablet, refer to its user m anual for detailed inst ructions.
Open the Sia no TV App on your Smartphone or Tablet
Open Setti ngs - Scan Channels. Choo se the country
where you ar e located and tap Scan.
Once the sca n is complete tap “Done” then tap “Live
TV”. The list of found c hannels will be displayed. Tap a
channel to s tart watching Live TV.
1
2
3
4
5
English
1.
2.
3.
4.
5.
6.
7.
Page 6
-5--4-
6. Unit Operation
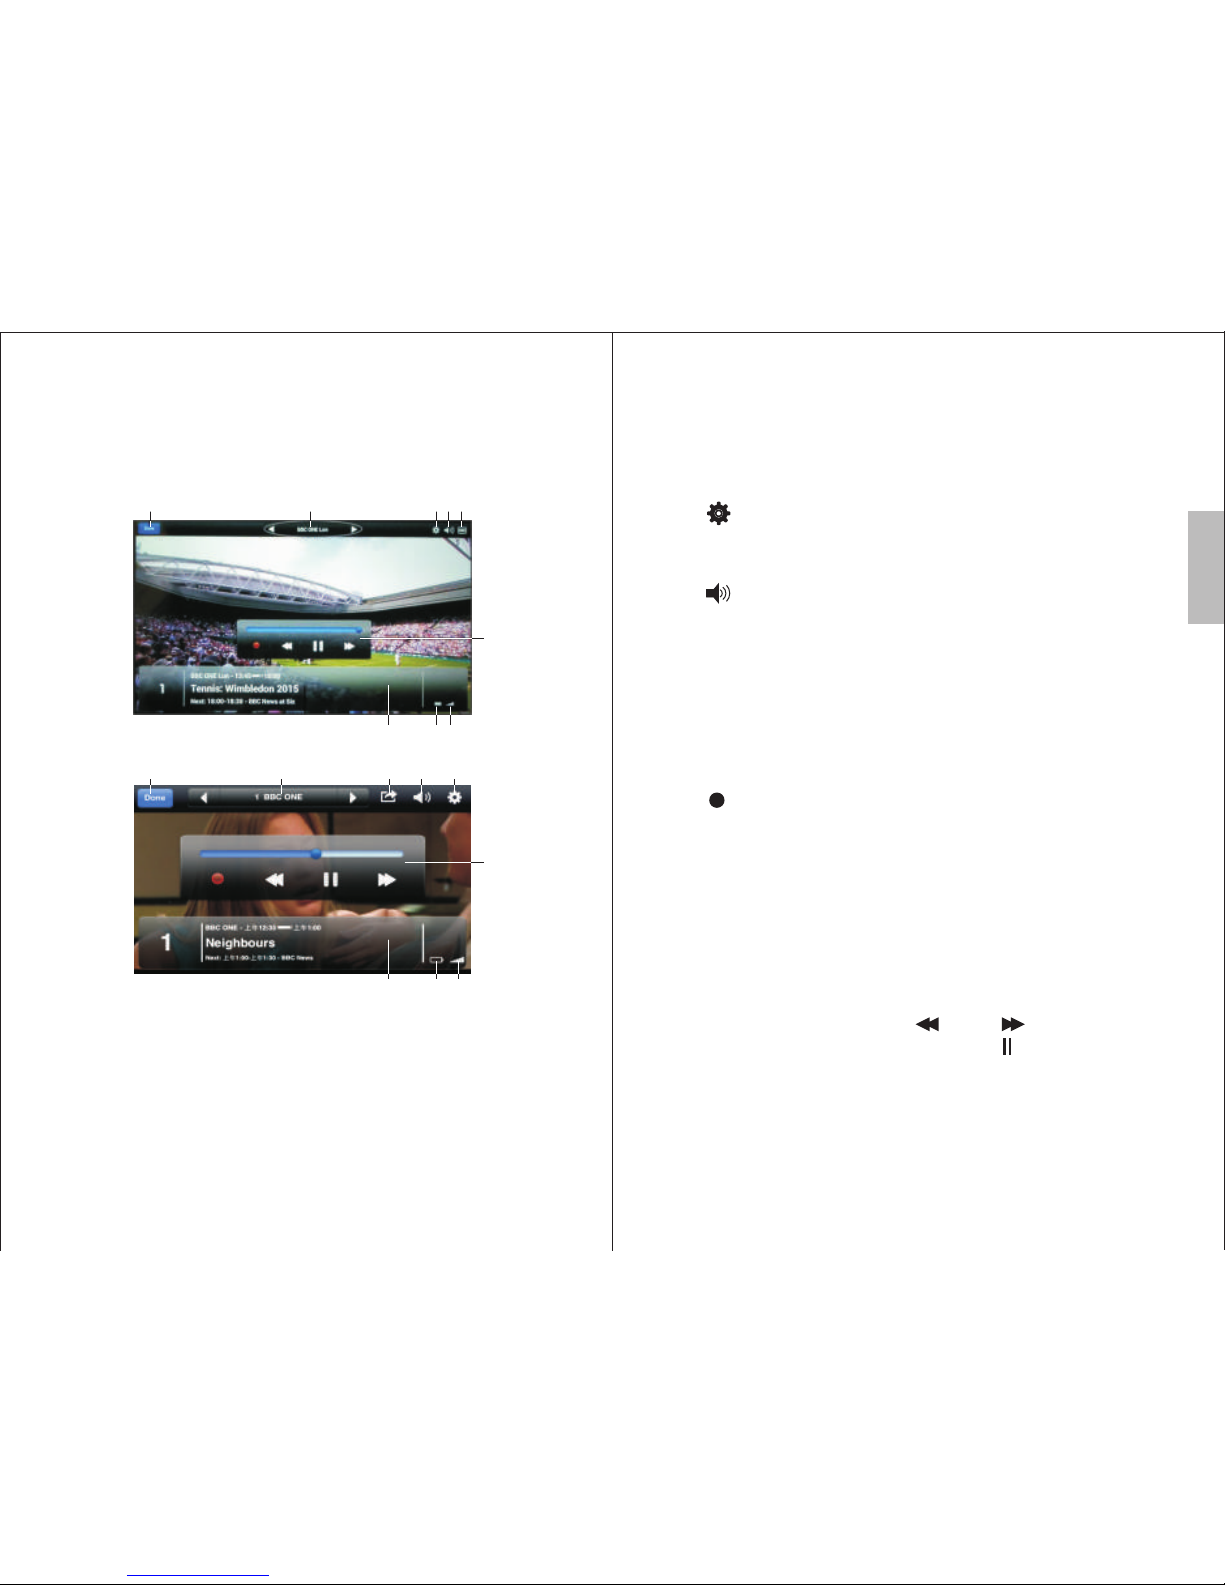
6.1 Live TV
Tap the screen whilst watching Live TV to bring up the
program in formation and control bars.
1. Close Live TV
2. Channel controls
3. Settings Wheel
4. Volume
5. Display Settings
6.1.1 Clos e Live TV
Tap “Done” to close live TV and return to the channel list.
6.1.2 Chan nel Control
Tap<◄> or <►> to move down or u p one channel in the
stored lis t. Tap the current chan nel name to access the quick
channel li st.
6.1.3 Sett ings Whe el
Tap < > to choose from a list of av ailable audio
language s, as well as Display Setti ngs on Apple de vices.
6.1.4 Volume Con trol
Tap < >to access the volume c ontrol. Use the slider to
control th e volume.
6.1.5 Display Settings
Tap the currently used display settings icon to access and
change the current display setting.
Note: Display Settings can be accessed from the Settings
Wheel on Apple Devices
6.1.6 Recording
Tap < >to start recording the playing TV program, tap again
to stop recording. Recordings are saved to iTunes on Apple
devices and to internal storage on Android devices and can be
played back through the recordings option in the main menu
(see 6.2).
6.1.7 Timeshifting
Timeshifting allows you to rewind, fast forward and pause
Live TV by temporarily recording the broadcast to your
Smartphone or Tablet.
The blue slider shows which part of the timeshift is being
played. You can slide it or tap < >and< >to move back
and forwards through the timeshift. Tap < > to pause the
current program and <►>to resume playback.
Note:To adjust the length of the available timeshift, see 6.3.5
Timeshift Buffer for further information.
6.1.8 Channel and Status Information
The channel information and status bar displays information
about the currently playing channel and program.
English
8 9
1 2 3 4 5
6
7
Scree n on Andro id Devi ce
Scree n on Apple D ev ice
1 2 10 4 3
8 9
7
6
7. Status and information bar
8. DVB-T405 Battery Icon
9. TV Signal Strength Icon
10. Share
6. Recording and Timeshift control
Page 7
6.2 Recordings
Select “Recordings” from the main menu to access your saved
recordings. Tap a recording to display the file information and
access the play and delete options.
6.3 Settings
6.3.1 Scan Channels
Scan Channels allows you to rescan for TV channels.
1. Choose the country where you are located and tap Scan.
2. When the scan is complete tap “Done”. The list of found
channels will be displayed. Tap a channel to start watching
Live TV.
6.3.2 Sort Channels
To sort your Channel list, and change the position of a channel,
use < > to slide a channel to a new position.
6.3.3 Meron Settings
Sleep Timer
To set the DVB-T405 to automatically stop transmitting after a
period of inactivity, the sleep timer can be used. Select between 5
/ 10 / 30 minutes to start a sleep timer and the DVB-T405 will
enter sleep mode once the selected time has elapsed. Whilst set to
never, the DVB-T405 will continue to transmit until manually
switched off.
In sleep mode, the DVB-T405 Power LED will flash blue every
4 seconds, to reconnect turn the DVB-T405 off then on.
Battery
The battery icon shows the battery status of the DVB-T405. It
turns red when battery charge is low and the device should be
recharged.
Meron Info
Meron Info shows the DVB-T405 version, tuner type, IP address
and the option to Reset to Factory Defaults. When selecting
Reset to Factory Defaults a confirmation window will appear.
Tap “Reset” to reset the device. Note that when reset to factory
default, the DVB-T405 will lose all custom settings.
English
-6- -7-
7. Charging the device
8. Specifications
Receive r DVB-T, ISDB-T
Receive f re quency
Supported S martphone a nd
Tablet O perating Sy st ems
Supported WiFi protoc ol
Operati ng R ange
Viewing Tim e
Charg ing Time
48.25 to 86 3. 25 MH DVB-T
64 to 863MH z IS DB-T
z
iOS 5.0 or hi gh er
Mac OS
Android 4 .0 o r higher
IEEE 802. 11 b/g/ n
10m
3 hours
2 hours
Battery 600mAh, Lit hium batter y
Dimensi on s 68 x 42 x 18mm
Net Weight 45 g
To charge, use the power cable provided to connect the DVBT405 to a powered USB port. Whilst charging, the Charging
LED lights red and turns off once fully charged.
6.3.4 Select Device
If more than one DVB-T405 is in range, use this option to select
the DVB-T405 that you wish to use.
6.3.5 Timeshift Buffer
Timeshift buffer allows you to select how much time is available
when using Timeshift. If your device is low on available memory
then use a smaller value for Timeshift.
Dragging the slider to the left side disables Timeshift and
recordings.
The amount of time available to Timeshift is dependent on the
internal storage of your Smartphone or Tablet.
6.3.6 About
The “about ” section shows informa tion about the app and
your devic e.
Page 8
10. Warranty
This product is guaranteed for twelve months from the date of
the original purchase. In the unlikely event of any defect arising
due to faulty materials or workmanship, the unit will be either
replaced or repaired free of charge (where possible) during this
period. An alternative product will be offered in the case that the
product is no longer available or repairable.
This warranty is subject to the following conditions:
The warranty is only valid within the country where the
product is purchased.
The product must be correctly installed and operated in
accordance to the instructions given in this user manual.
The product must be used solely for domestic purposes.
The warranty only covers the main unit, and does not cover the
accessories.
-8- -9-
English
Signal too weak, please check the antenna
connection or upgrade to an amplified or rooftop
aerial. Tablet or Smartphone too far away from
the DVB-T405, or walls etc. blocking the WiFi
signal. Location Services may be interfering with
the connection. Try disabling location service
access via WiFi in Settings.
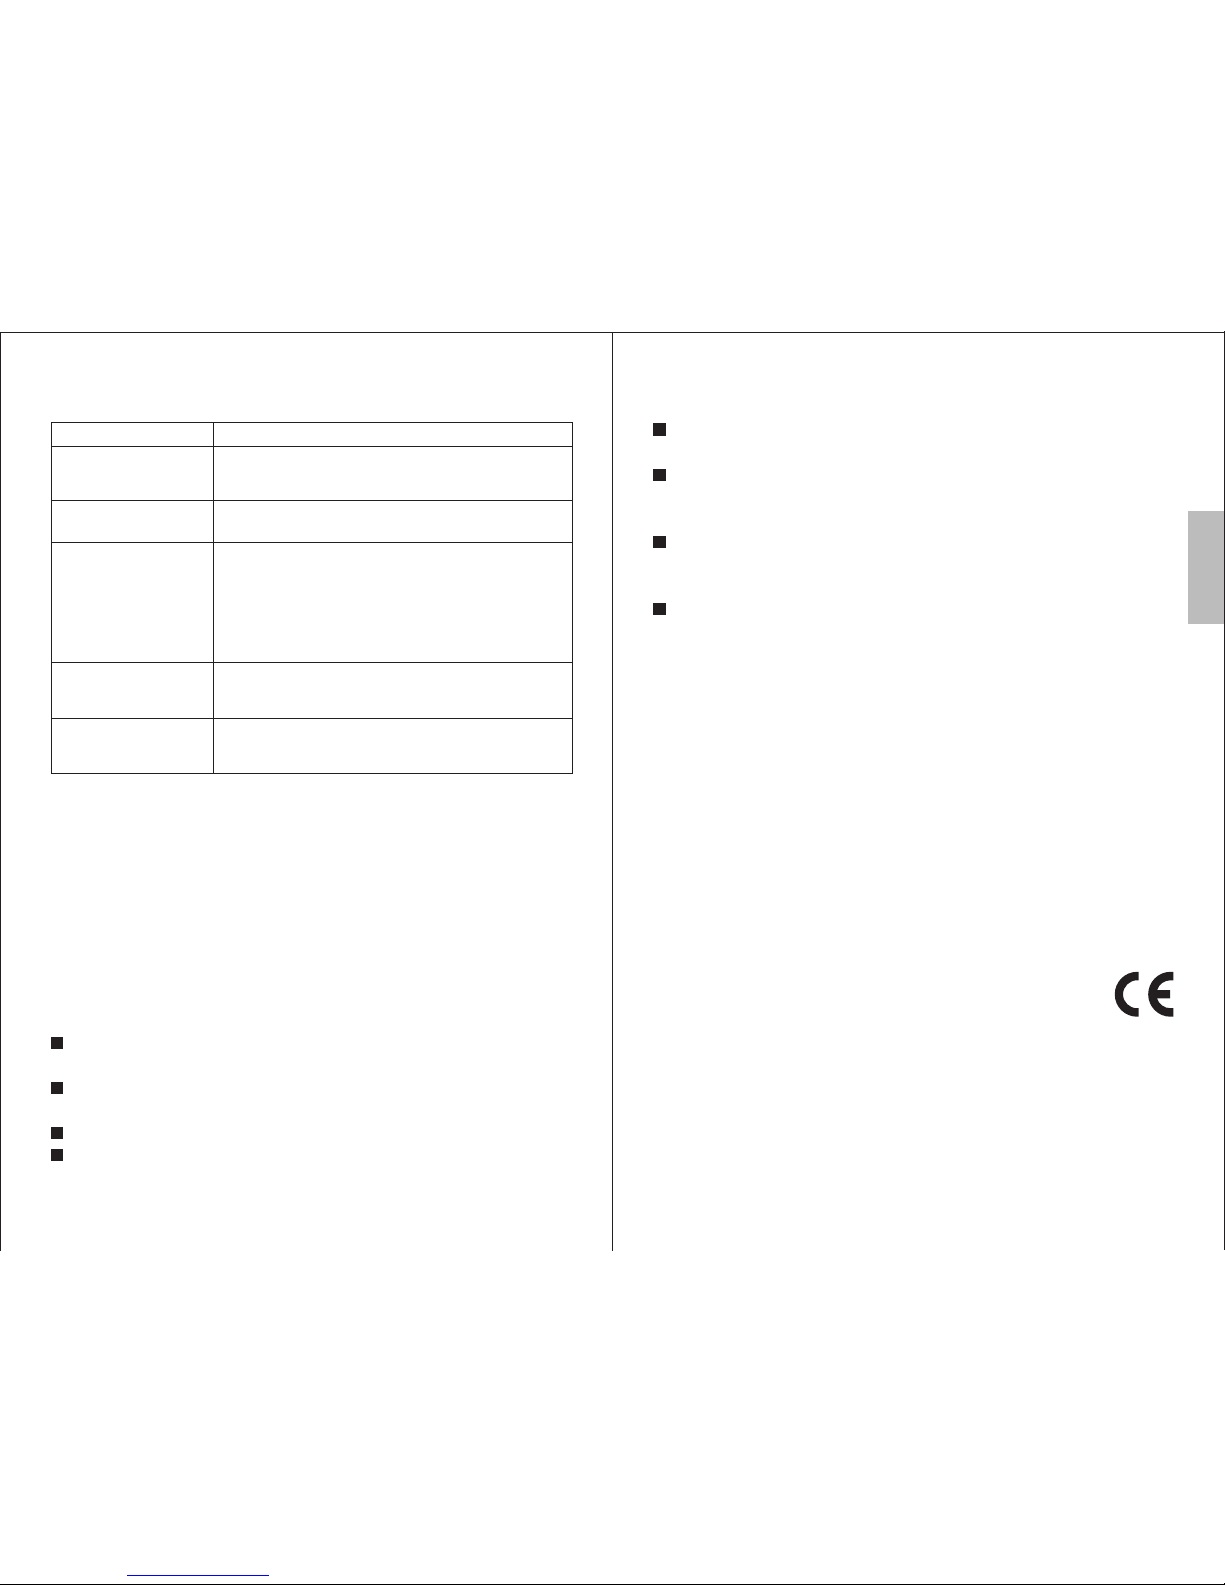
9. Troubleshooting
Questions Possible ca uses and solu ti ons
No Image
No Sound
Picture fre ezing or
breaking up , and/or
sound disto rted
Signal too weak, please check the antenna
connection or upgrade to an amplified or
rooftop aerial.
Raise the volume of your tablet or smartphone.
Check the connection to the target audio device.
No Signal
Signal too weak, please check the antenna
connection or upgrade to an amplified or
rooftop aerial.
Not Recordi ng
Check available space for recordings and delete
if necessary. You may need to remove files from
your smartphone or tablet to create space.
The warranty does not cover damage caused by misuse,
negligence, accident or natural disaster.
The warranty will be rendered invalid if the product is resold
or has been damaged by inexpert repairs. The manufacturer
disclaims any liability for incidental or consequential damages.
Please consult our customer adviser before returning any
product; we are not responsible for any unexpected product
returns.
Any faulty product must be kept and returned in the
original packaging with all the accessories and the original
copy of the purchase receipt.
The warranty is in addition to, and does not diminish, your
statutory or legal rights.
Customer Service:
Telephone: +44 (0) 845 250 0586
Email: [email protected]
This product is in compliance with the essential requirements
and other relevant provisions of Directive 1999/5/EC. The
declaration of conformity may be consulted at August
International Ltd, Unit 5 Swains Mill, Crane Mead, Ware
SG12 9PY, England.
 Loading...