

Page 1
August I nte rnation al Lt d
United K ing dom
Tel: + 44 (0 )845 250 0586
www.august int .com
FM / DAB / DAB+ Radio Receiver with Bluetooth
EN
FR
FM / DAB / DAB+ Radio Récepteur avec Bluetooth
DE
UKW / DAB / DAB+ Radioempfänger mit Bluetooth
IT
FM / DAB / DAB+ Ricevitore Radio con Bluetooth
ES
FM / DAB / DAB+ Receptor de Radio con Bluetooth
PL
FM/DAB/DAB+ Odbiornik Radiowy z Bluetooth
DR245
Page 2
User Manual
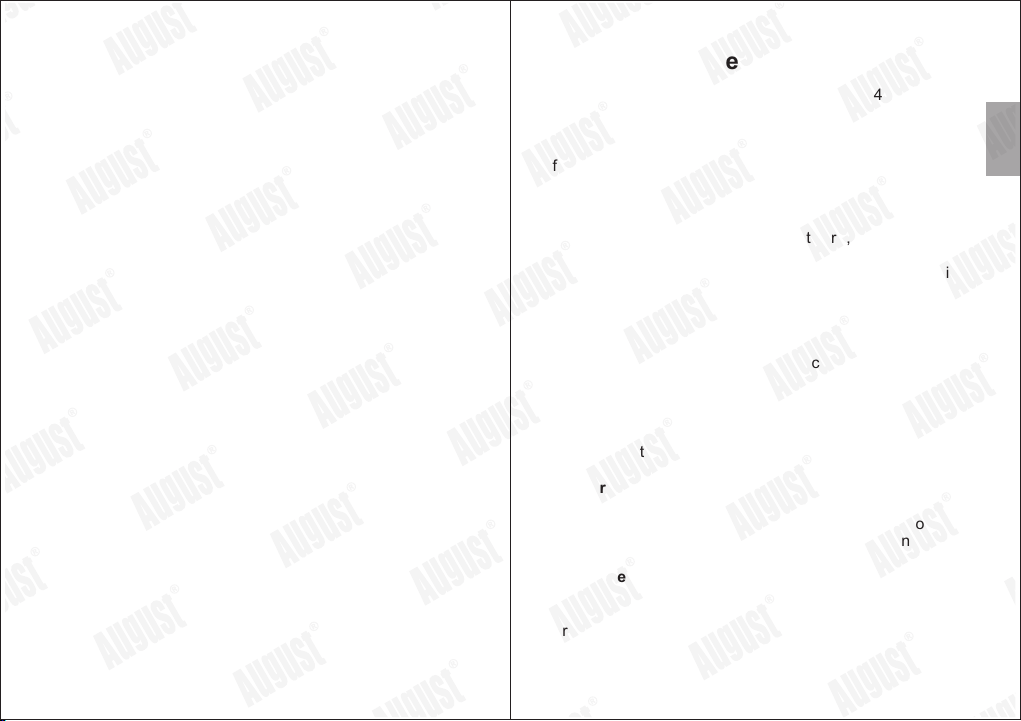
Thank you for purcha sing the August DR245. This
user manual is desig ned to familiarize you with all the
features of this dev ice. Please take the time to read
this user manual car efully, even if you are already
familiar with a simi lar product.
Safet y
To ensure the safety of yo u and others, please read the
Safety Instructions b efore using this device. Please do
not disassemble th e DR245, it can be unsafe and will
invalidate the man ufacturer's warranty.
Disposal
Please ensure the pr oduct and accessories are
disposed of in compl iance with the WEEE (Waste
Electrical and Ele ctronic Equipment) Directive and any
other regulation s applicable to your country. Always
check with the envir onment agency and any other
relevant authori ties for current disposal regulations .
Decla rat ion o f Con for mity
The Declaration of C onformity can be found on our
website at http://aug ustint.com/en/declaration/
Customer S erv ice
You can con tact us by phone on: +44 (0)845 250 0586
or by email at: servic [email protected] should you
require further te chnical support or customer service.
English
Page 3
1. Safety Instructions
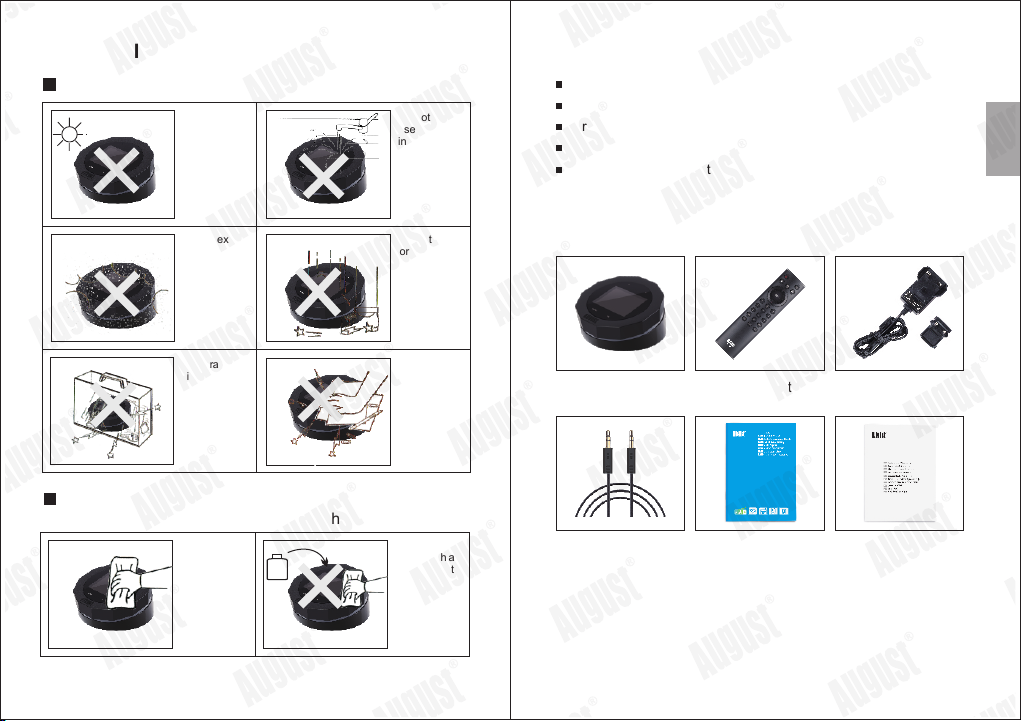
Storage and Us e
Do not store or
use this device
in extreme
temperatures.
Do not store or
use this device
in wet or damp
environments.
2. Main Features
DAB / DAB+ and FM Radio Tuner
Wireless Bluetooth Connection
Crystal Clear 2.4' Coloured LCD Display
Control from a Distance with included Remote Control
Add up to 20 Preset Stations for Quick Access
English
Do not expose
this device to
dust, oil or
smoke.
When transporting
this device store
securely to avoid
impact damage.
Maintenanc e
Please unplug all leads before cleaning this device.
Wipe the
devic e and
butto ns with
a soft cloth.
Alcoho l
-1-
Do not drop
or strike this
device.
Do not scratch
this device with
sharp objects.
Never wipe this
device with an
abrasive cloth
or apply
detergent,
alcohol or
chemical based
cleaning
products.
3. Box Contents
DR245
Audio Cable
Power AdaptorRemote Control
Quick Start Guide Safety and Warr anty
-2-
Page 4
4. Part Names and Functions
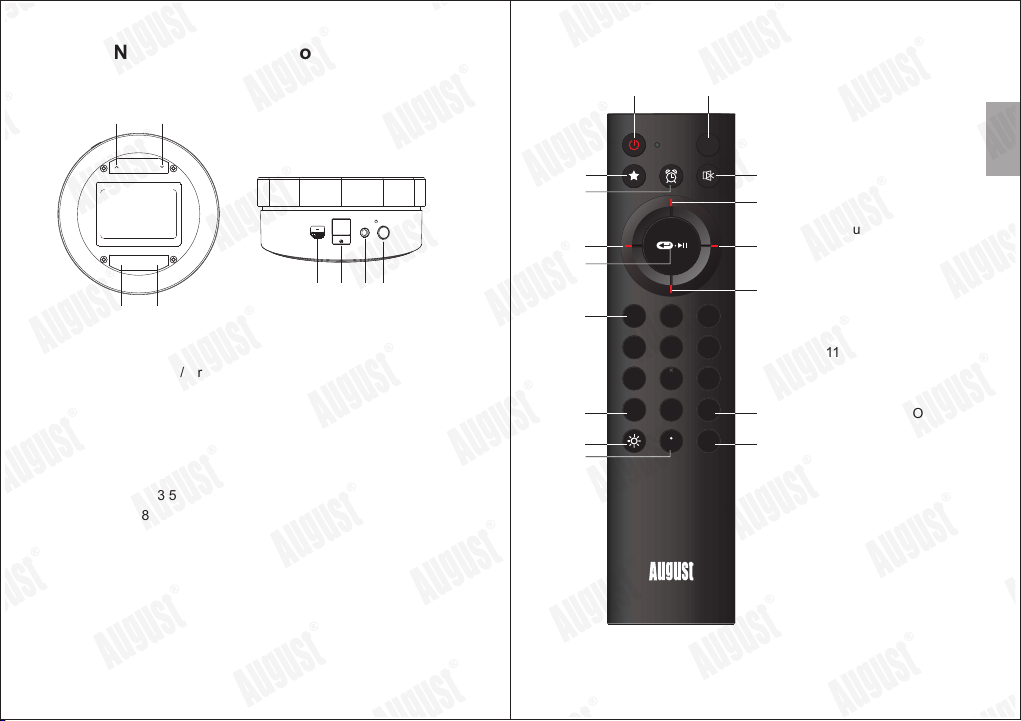
4 1 Devic e.
1
2
5V 1.5A
MENU OK
5 6 7 8
3 4
1. UP / Previous
2. Down / Next
3. Menu
4. OK / Play / Pause
5. Micro USB Power Socket
6. Antenna
7. 3.5 mm Audio out Socket
8. Standby / Mode
4 2 Remot e .
5
8 9
0
PAIR
DR245
MODE
MENU
2
English
1. Standby
5
6
2. Mode
3. Favourite
4. Alarm
5. Mute / Unmute
6. Up / Next
7. Left / Volume Down
10
3
6
8. Right / Volume Up
9. OK / Paly / Pause
10. Down / Previous
11. Number Pad
12. Scan
13. Menu
14. LED Ring On / Off
INFO
16
15. Pair
16. Information
1
3
4
AUX / MODE
ANT
7 8
9
11
1 2
4
7
SCAN
12 13
14
15
-3- -4-
Page 5
5. Operations
5.1 Pow er and connecti on
1. Connect the power adapt or to t he micro USB power
socket.
2. Plug the power adaptor in to th e mains power socket.
3. Connect your audio devi ce to t he AUX socket via a
3.5mm audio cable.
Once the DR245 is powered, i t wil l turn on and enter DAB
mode. A full scan will be launched au tom atically.
5.2 Mod e
1. Press and hold on the DR245 f or 3 se conds or
press on the remote to set the D R24 5 into standby
mode or wake it up from standb y.
2. Press on the DR245 or press o n the r emote
to change between DAB, FM an d Blu etooth mode. The
DR245 will enter selecte d mod e automatically after 3
seconds.
5.3 DAB
DAB mode allows you to liste n to Di gital Audio Broadcasts,
DAB radio stations have a hi ghe r sound quality and less
interference than thei r FM eq uivalent.
When you enter DAB mode for th e fir st time, or if there are
no channels saved on the DR2 45, a c hannel scan will
begin automatically. Once the scan has completed, the
channels will be saved and the DR 245 w ill begin playing
the first channel found.
5.3.1 Stations
1. Use / on the DR245 or Up / Down on th e rem ote to
see station list.
2. Use / on the DR245 or Up / Down on th e rem ote to
select a station.
-5- -6-
3. Press OK on the DR245 or on the r emo te to
change the station.
5.3.2 Pre-set and Recall
To preset a s tat ion :
1. Press and hold button on the r emo te for 3 seconds.
2. Save to Preset will be show n on th e screen.
3. Use Up / Down on the remote to se lec t a preset number.
4. Press to save the current s tation to preset.
To recall a p res et st ati on:
1. Press button on the remot e.
2. Preset Recall will be sho wn on t he screen.
3. Use Up / Down on the remote to se lec t a preset station.
4. Press to change the curre nt st ation to selected
station.
20 preset stations can be sa ved i n total, once a station is
saved in preset, user can us e the n umber pad on the
remote to enter the preset n umb er and change to the
saved station.
5.3.3 Vol ume
Use Left / Right on the remote t o cha nge the volume. Press
to mute the DR245
5.3.4 DAB Radio Settings
1. Press MENU on the DR245 or ME NU on t he remote to
see DAB radio settings.
2. Use / on the DR245 or Up / Down on th e rem ote to
select one setting.
3. Press OK on the DR245 or on the r emo te to enter
the setting.
■ Station List
To see all DAB radio stations sa ved o n the DR245. User
can change the stations fr om th e list
English
Page 6
■ Full Scan
To perform a full scan.
■ Manual Tune
Manual scan for stations o n the s elected frequency.
■ Prune Invalid
The Prune Invalid functi on ca n be used to remove any
stations saved on the DR24 5 tha t are not available.
■ DRC
Dynamic Range Compression ( DRC ) balances the
differ enc es in v olume between the loudest and quietest
audio being broadcaste d. This can reduce the need to
adjust volume when the sou nd be ing b roadcasted changes
volume.
Note: DRC is managed by the br oad caster and may not be
utilized by all stations .
■ System Settings
Please refer to full secti on 5. 6 for more information.
5.4 FM Mo de
FM radio mode allows you to li ste n to FM broadcasting
(87.5 – 108MHz) and view RDS ( Rad io Da ta System)
information.
5.4.1 Scan
- Press and hold / on the DR245 or U p / Dow n on the
remote to scan for a stat ion , the radio will turn to the next
station found.
- Press / on the DR245 or Up / Down on t he re mote to
turn the radio up or down in 50K Hz st eps for fine tuning.
5.4.2 Pre-set and Recall
■ Preset a station:
1. Press and hold button on th e rem ote for 3 seconds.
2. Save to Preset will be show n on th e screen.
3. Use Up / Down on the remote to se lec t a preset number.
4. Press to save the current s tation to preset.
■ Recall a preset station:
1. Press button on the remot e.
2. Preset Recall will be sho wn on t he screen.
3. Use Up / Down on the remote to se lec t a preset station.
4. Press to change the curre nt st ation to selected
station.
20 preset stations can be sa ved i n total, once a station is
saved in preset, user can us e the n umber pad on the
remote to enter the preset n umb er and change to the
saved station.
5.4.3 FM Radio Settin gs
1.Press MENU on the DR245 or ME NU on t he remote to
see DAB radio settings.
2.Use / on the DR245 or Up / Down on th e rem ote to
select one setting.
3.Press OK on the DR245 or on the r emote to enter
the setting.
■ Scan Setting
Toggle between scan of Stron g Sta tions Only and Al l
Stations.
■ Audio Setting
Choose between Stereo All owe d (de fault and
recommended) or Forced M ono a udi o output.
English
-8--7-
Page 7
■ System Settings
Please refer to full secti on 5. 6 for more information.
5.5 Blu etooth
The DR245 can connect to Blu eto oth enabled source
devices to playback audi o.
■ Connection
1. Turn on the DR245.
2. Press on the DR245 or press o n the r emote
to change to Bluetooth mod e. DR 245 will enter
Bluetooth mode automat ica lly in 3 seconds.
3. Pair your source device t o 'DR 245'.
Note: The DR245 will autom ati cally connect to a paired
source device when the Blu eto oth is enabled on the source
device.
To pair to a new device, press on th e rem ote.
PAIR
■ Bluetooth Music Con tro l
- Play and Pause
Press OK on the DR245 or press o n the r emote
- Next
Press on the DR245 or press Up o n the r emote
- Previous
Press on the DR245 or press do wn on t he remote
- Vol ume U p
Press right on the remote
- Vol ume D own
Press left on the remote
5.6 Sys tem Settings
1. Press MENU on the DR245 or ME NU on t he remote in
any mode.
2. Use / on the DR245 or Up / Down on th e rem ote to
select System Setti ngs .
3. Press OK on the DR245 or on the r emo te to enter
the System Settings.
4. Use / on the DR245 or Up / Down on th e rem ote to
select one setting.
5. Press OK on the DR245 or on the r emo te to
enter.
■ Time/D ate
- Set Time/Date
- Auto Update
- Set 12/24 Hour
- Set Date Format
- Clock Style
■ Backlight
- Timeout
- On Level
- Dim Level
■ Language
User can change the system l ang uage.
■ Factory Reset
The factory reset will res tor e all settings back to factory
defaults.
■ Software Version
5.7 Alarm
The alarm clock can be set wit h two s eparate wake up
times.
-10--9-
English
Page 8
5.7.1 Set the Al arm C loc k
1. Press on the remote to ente r ala rm setup.
2. Use Up or Down on the remote to s ele ct Alarm1 or
Alarm2.
3. Press OK to enter Alarm set up wizard.
- Alarm On / Off
- Frequency Daily / Once / Weekends / Weekda ys
- Wake Up time
- Source Buzzer (Only )
- Duration 15/30/45 /60 /90/120 minutes
5.7.2 Snooze
When the alarm goes off, press any button to snooze the
alarm for 10 minutes, pres s on th e remote to turn off the
alarm.
6. Specifications
DAB Radio Frequency
FM Radio Frequency
Bluetooth Version
Bluetooth Profile
Transmission Frequency
Power Adaptor
Standby Power Consumption
Power Consumption
Dimensions
Weight
174.928 - 239.2MHz
87.5 - 108MHz
v4.2
A2DP, AVCTP, AVDTP, AVRCP,
GAVDP, HFP, HSP
2.4GHz
Input AC 100 - 240V ~ 50/60Hz
Output DC 5V, 1.5A
<1W
7.5W
97(L) x 97(W) x 50(H) mm
152 Gram
-11- -12-
7. Warranty
This pro duct is guarantee d for twelve mon ths from the dat e of
the orig inal purchase. In t he unlikely ev ent of any defec t
arisin g due to faulty mater ials or workma nship, the uni t will be
either r eplaced or repair ed free of charg e (where possi ble)
during t his period. An alter native produ ct will be offered in case
the prod uct is no longer avai lable or repai rable.
This war ran ty is subje ct to t he follow ing c onditio ns:
The warr anty is only valid wi thin the count ry where the
produc t is purchased.
The prod uct must be correct ly installed a nd operated in
accord ance to the instruc tions given in t his user manua l.
The prod uct must be used sole ly for domesti c purposes.
The warr anty only covers th e main units, an d does not cover
the acce ssories.
The warr anty does not cover t he damage caus ed by misuse,
neglig ence, accident an d natural disa ster.
The warr anty will be render ed invalid if th e product is res old
or has bee n damaged by inexpe rt repairs. The manufac tures
discla im any liability fo r incidental o r consequent ial
damage s.
Please c onsult our custom er adviser bef ore returnin g any
produc t; we are not respons ible for any une xpected prod uct
return s.
Any faul ty product must be kept and returne d in the origina l
packag ing with all the acce ssories and th e original cop y of
the purc hase receipt.
The warr anty is in addition t o, and does not di minish, your
statut ory or legal rig hts.
Custom er Se rvice:
Telephone: +4 4 (0) 845 250 0586
Email: s ervice@august int.com
This product is in compliance with the essential requirements and
other relevant provisions of Directive 2014/53/EU. The
Declaration of conformity may be consulted online at
http://www.augustint.com/en/declaration.
English
 Loading...