

August Doorbell Cam Installation Manual

August Doorbell Cam
Installation Guide
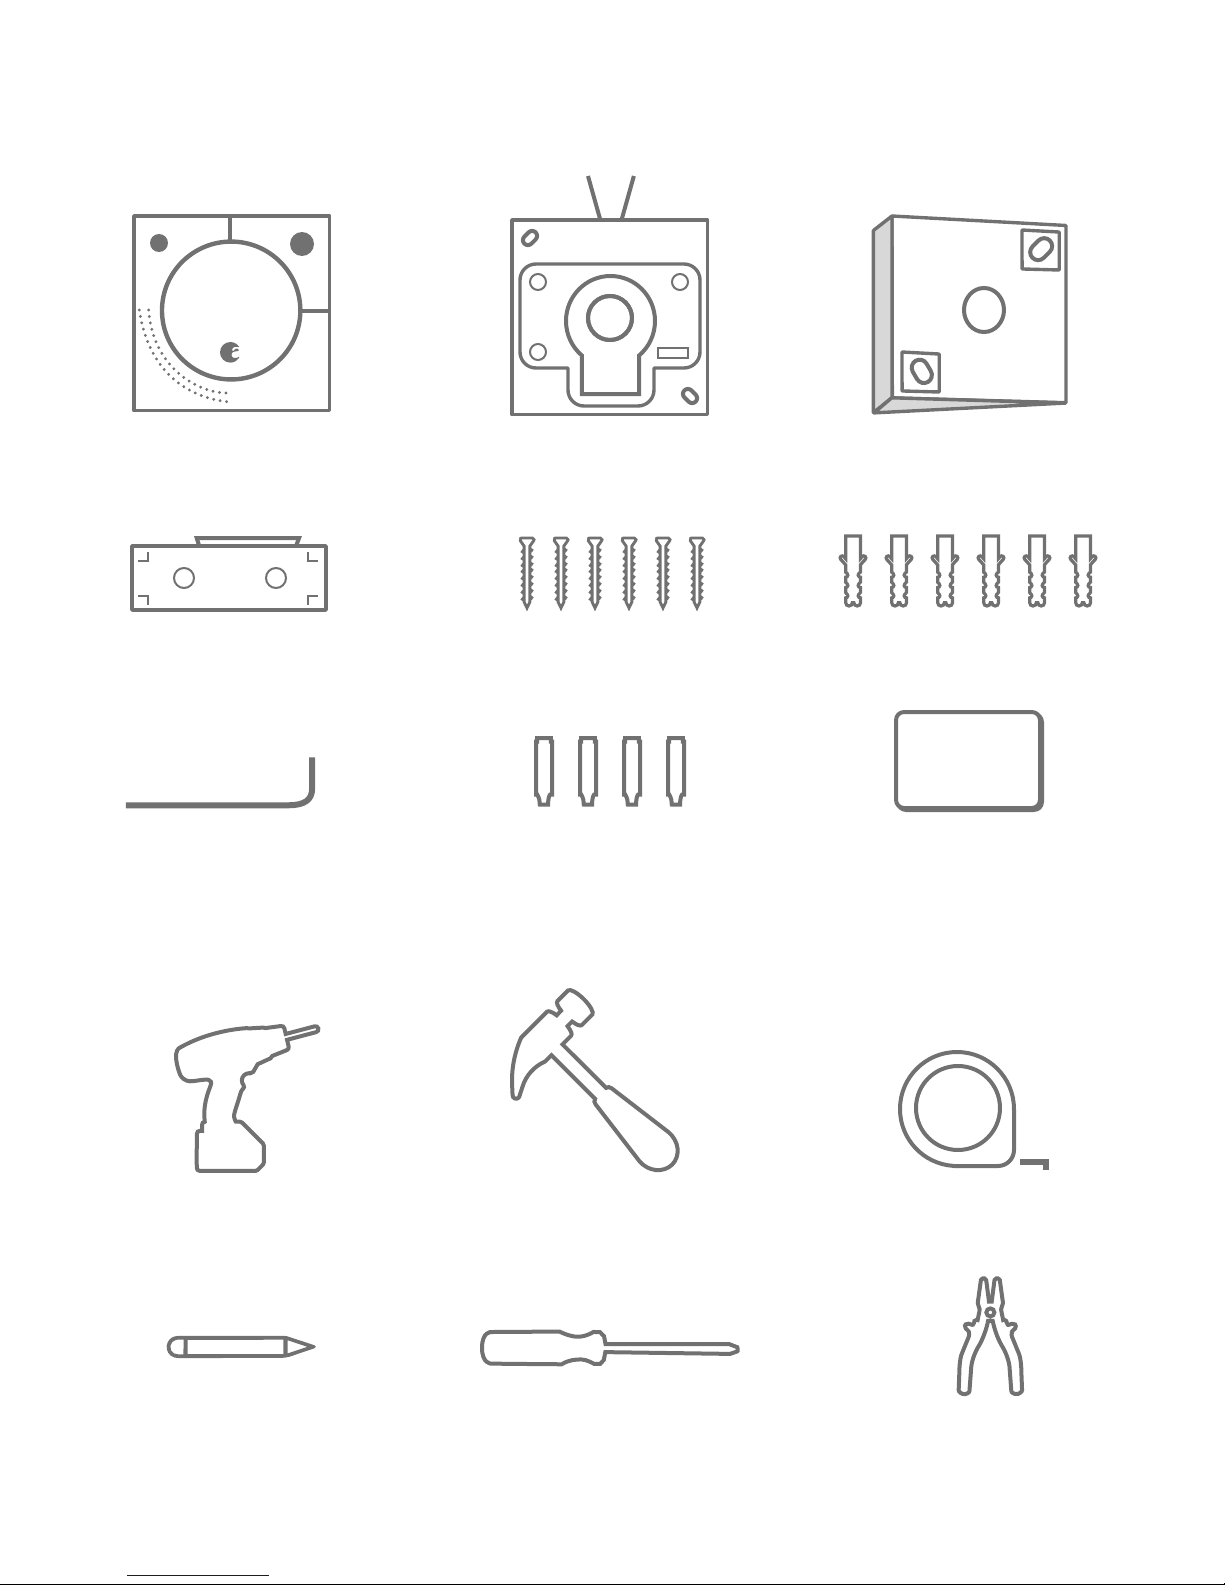
Inside the Box
August Doorbell Cam
Smart Keypad Spacer
Hex Key Four (4) Dolphin Connectors
What you need
Mounting Plate and Spacer
Six (6) 1” Screws
Wedge
Six (6) 1” Anchors
Putty
Drill w/ drill bit set
Ballpoint Pen
Hammer
Phillips Screwdriver
Tape Measure
Pliers or Crimping Tool
1
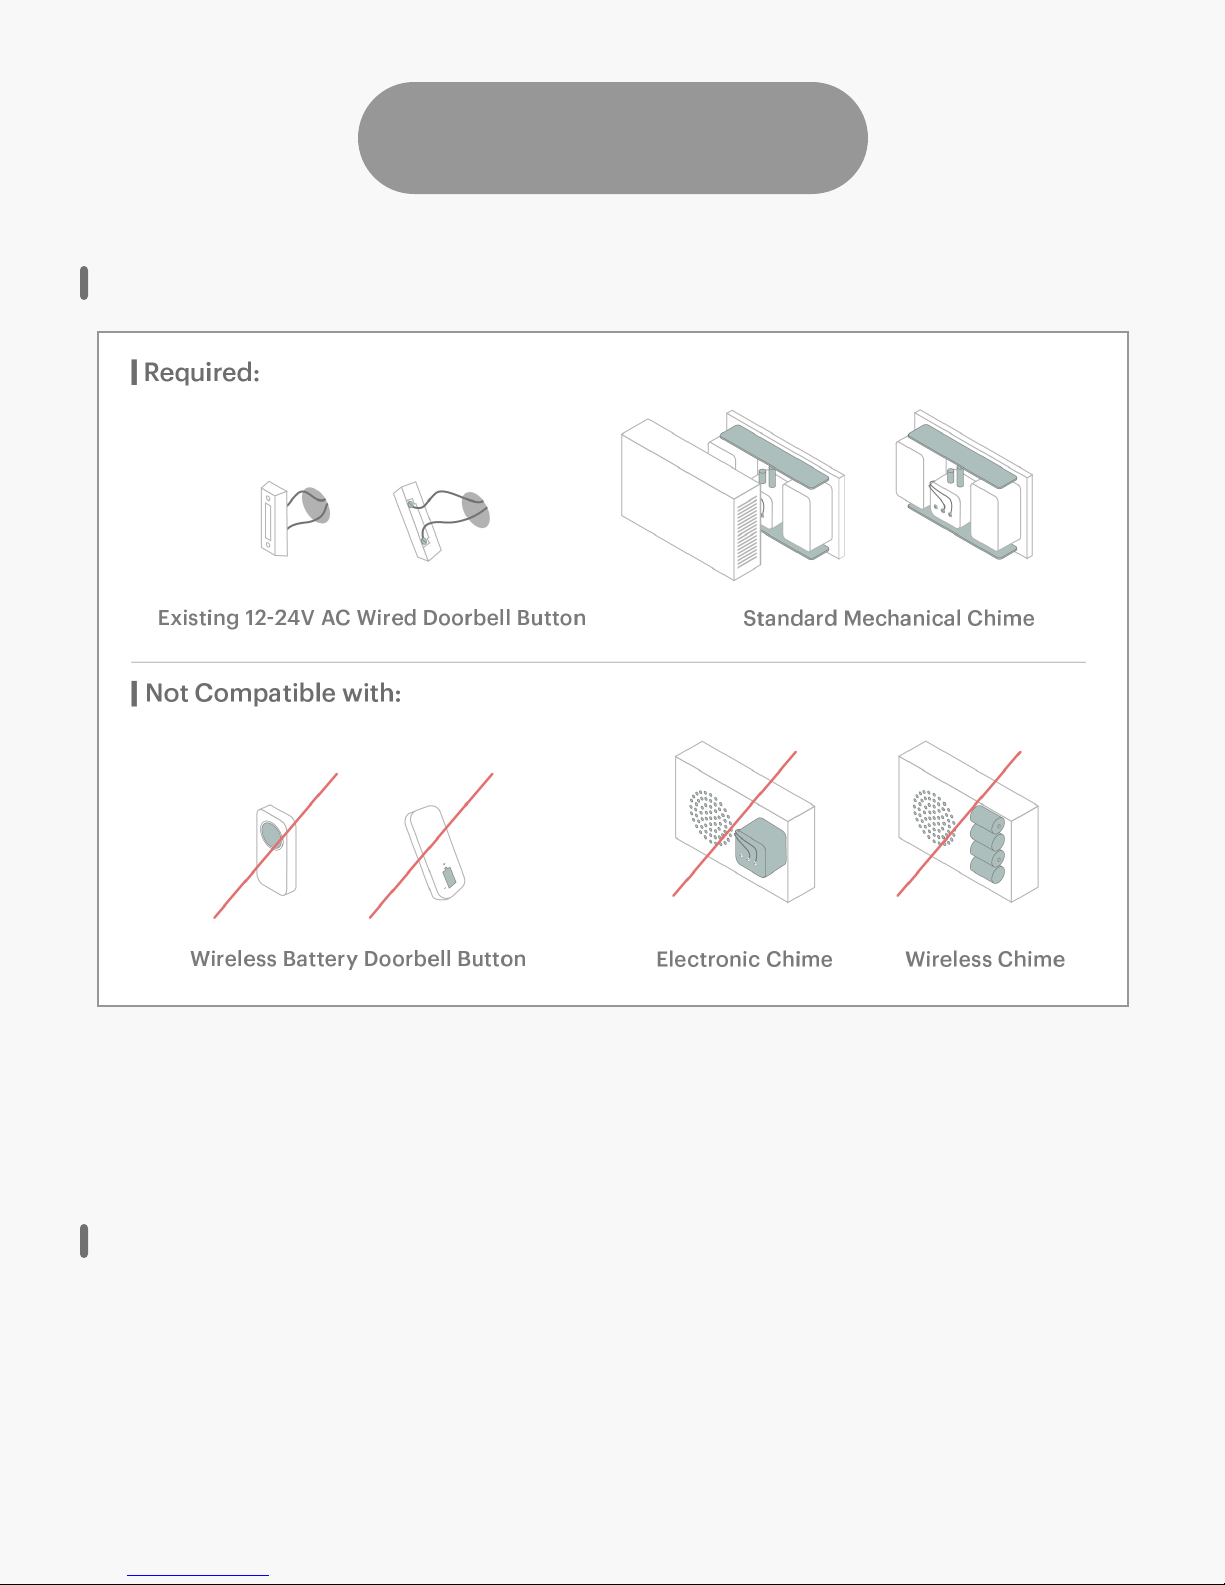
Before You Begin
Check doorbell chime type
If your existing doorbell has a speaker, it's a digital chime. If it has a mechanical mechanism
(usually in the form of two pistons that strike metallic keys), it's a compatible mechanical
chime. You'll need to ensure that your doorbell is getting 16-24V from the transformer.
Allow time for charging doorbell cam
As part of the installation and setup process, you’ll be asked to charge the Doorbell Cam’s
internal battery for 30 minutes after you’ve mounted it to your doorbell wiring. Please
factor this time into your planning.
2

Optimize your wireless connection
For best performance, your Wi-Fi access point should be within 15-20ft of your door. Try
to ensure that your Wi-Fi access point is on the same floor and as close to your Doorbell
Cam as possible. If it is too far, the Doorbell Cam will not get a proper signal. Multiple
stories or brick/stone walls within your home may also contribute to signal interference.
Be aware of your installation surface
Surfaces such as brick, concrete, cement siding and stucco will require a masonry
bit for drilling.
Certain surface types such as brick and stucco can cause Wi-Fi interference. Stucco,
for example, usually contains metal mesh wiring which can dramatically reduce the
strength of your Wi-Fi signal.
3

Determine your drill bit size
If you’d prefer to have someone come and help you out, we partner with:
Hellotech: https://www.hellotech.com/august
Pro.com: https://pro.com/augusthomes
4
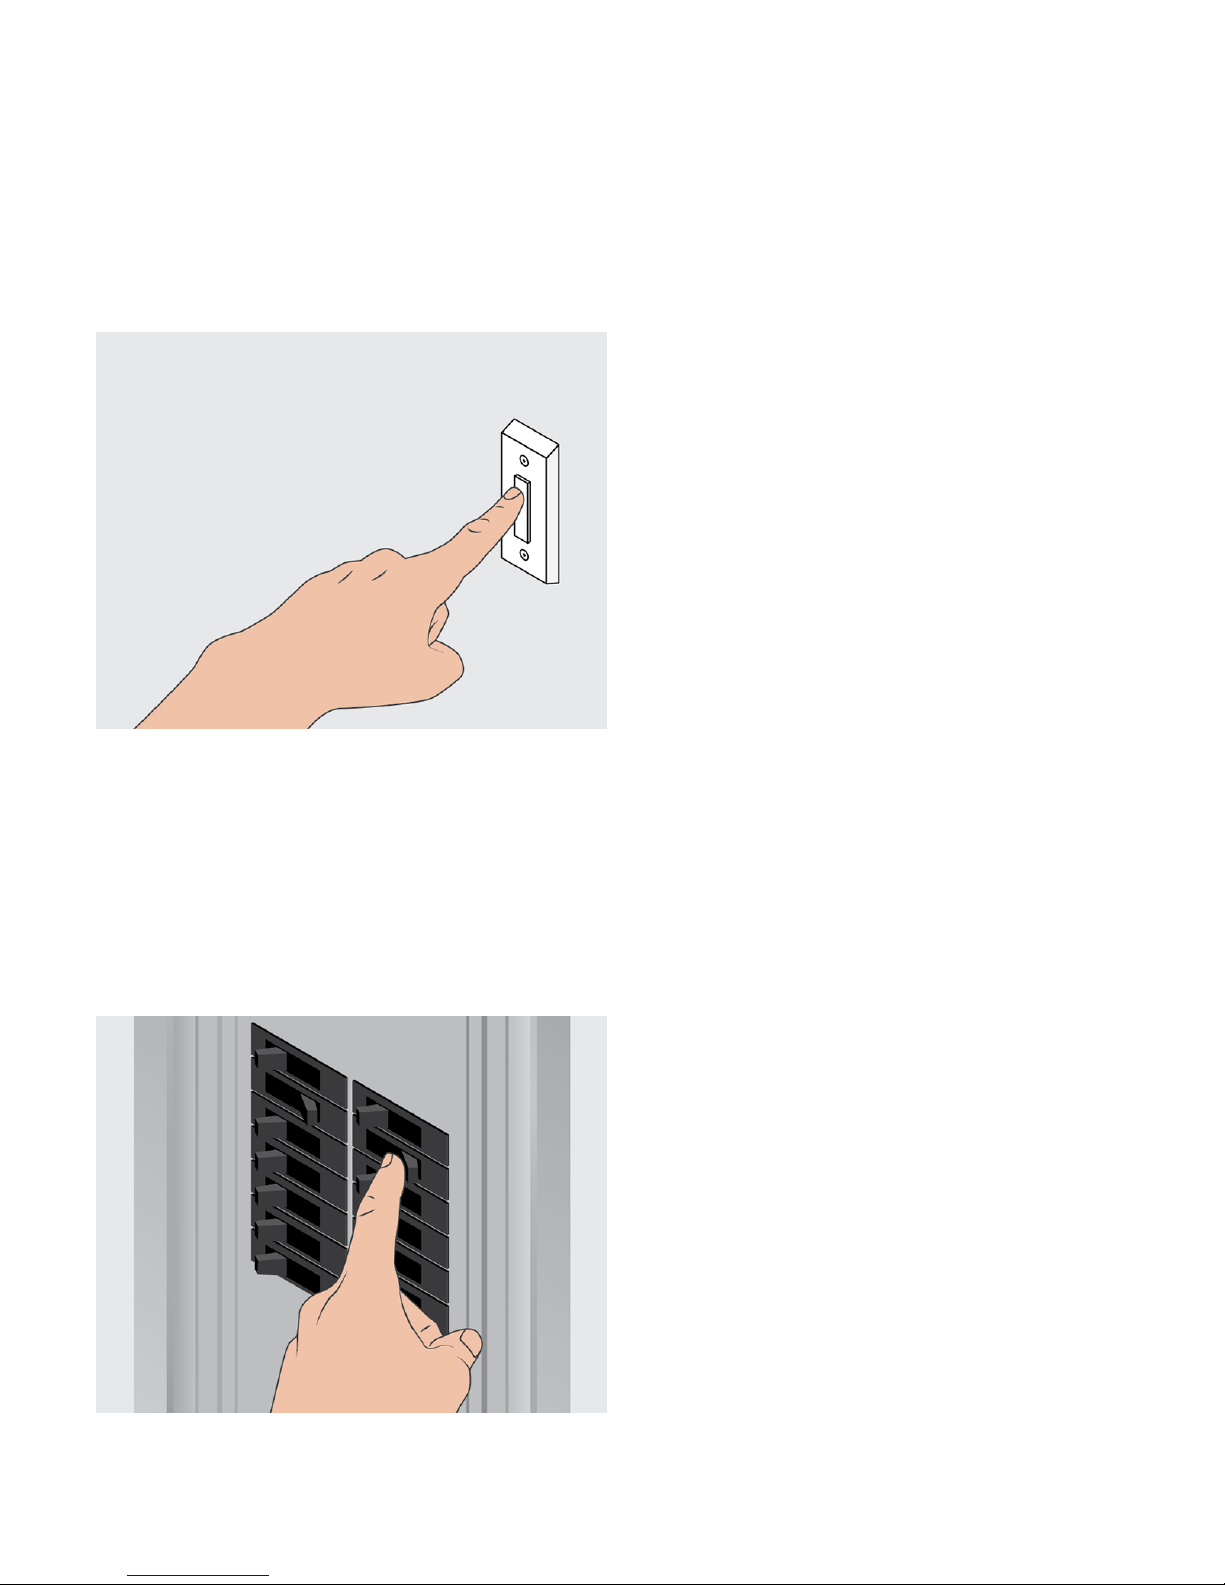
1. Test your current doorbell
Confirm that your existing doorbell works by pressing it. This might sound obvious,
but it never hurts to double check! August Doorbell Cam will only work properly
when installed onto a working 12-24 volt wired doorbell system.
2. Turn o power
Turn o the circuit breaker or fuse that your doorbell is connected to, then verify
that the power has been turned o by pressing the doorbell button again—you
should not hear your doorbell chime this time.
5
 Loading...