

Page 1
1
JS5001K
5 INCH LED MONITOR & COMPACT CAMERA KIT
INSTRUCTION MANUAL
SPECIFICATIONS
JS5001 MONITOR
- TFT Panel: New Grade A LCD, LED Backlight
- LCD Size: 125mm (5-Inch) Diagonal
- Display Format: 16:9
- Resolution: 800 x 480
- Brightness: < 450 CD/M2
- Viewing Angles: 90 Deg. Left/Right/Up/Down
- Video System: Auto PAL/NTSC Select
- Video Connections: 2 x 4-Pin (Female)
- Reverse Trigger: Assignable to Cam 1 or 2 (via Menu)
- Camera View: Input Selectable (CAM Button),
Input Override in Reverse Mode
- Monitor View: Normal/Mirror Image Select
- Guidelines: Selectable
- Audio: On Board Speaker
- Main Menu: Brightness/Contrast/Colour/Volume/Reset/
Slideshow/Language/Reverse Priority & Delay
- Casing Material: 100°C Heat/Flame Proof (UL94V-0) ABS
- Power Input: 10-32V DC (Negative Ground)
- Dimensions: 136W x 102H x 25D mm (excluding brackets)
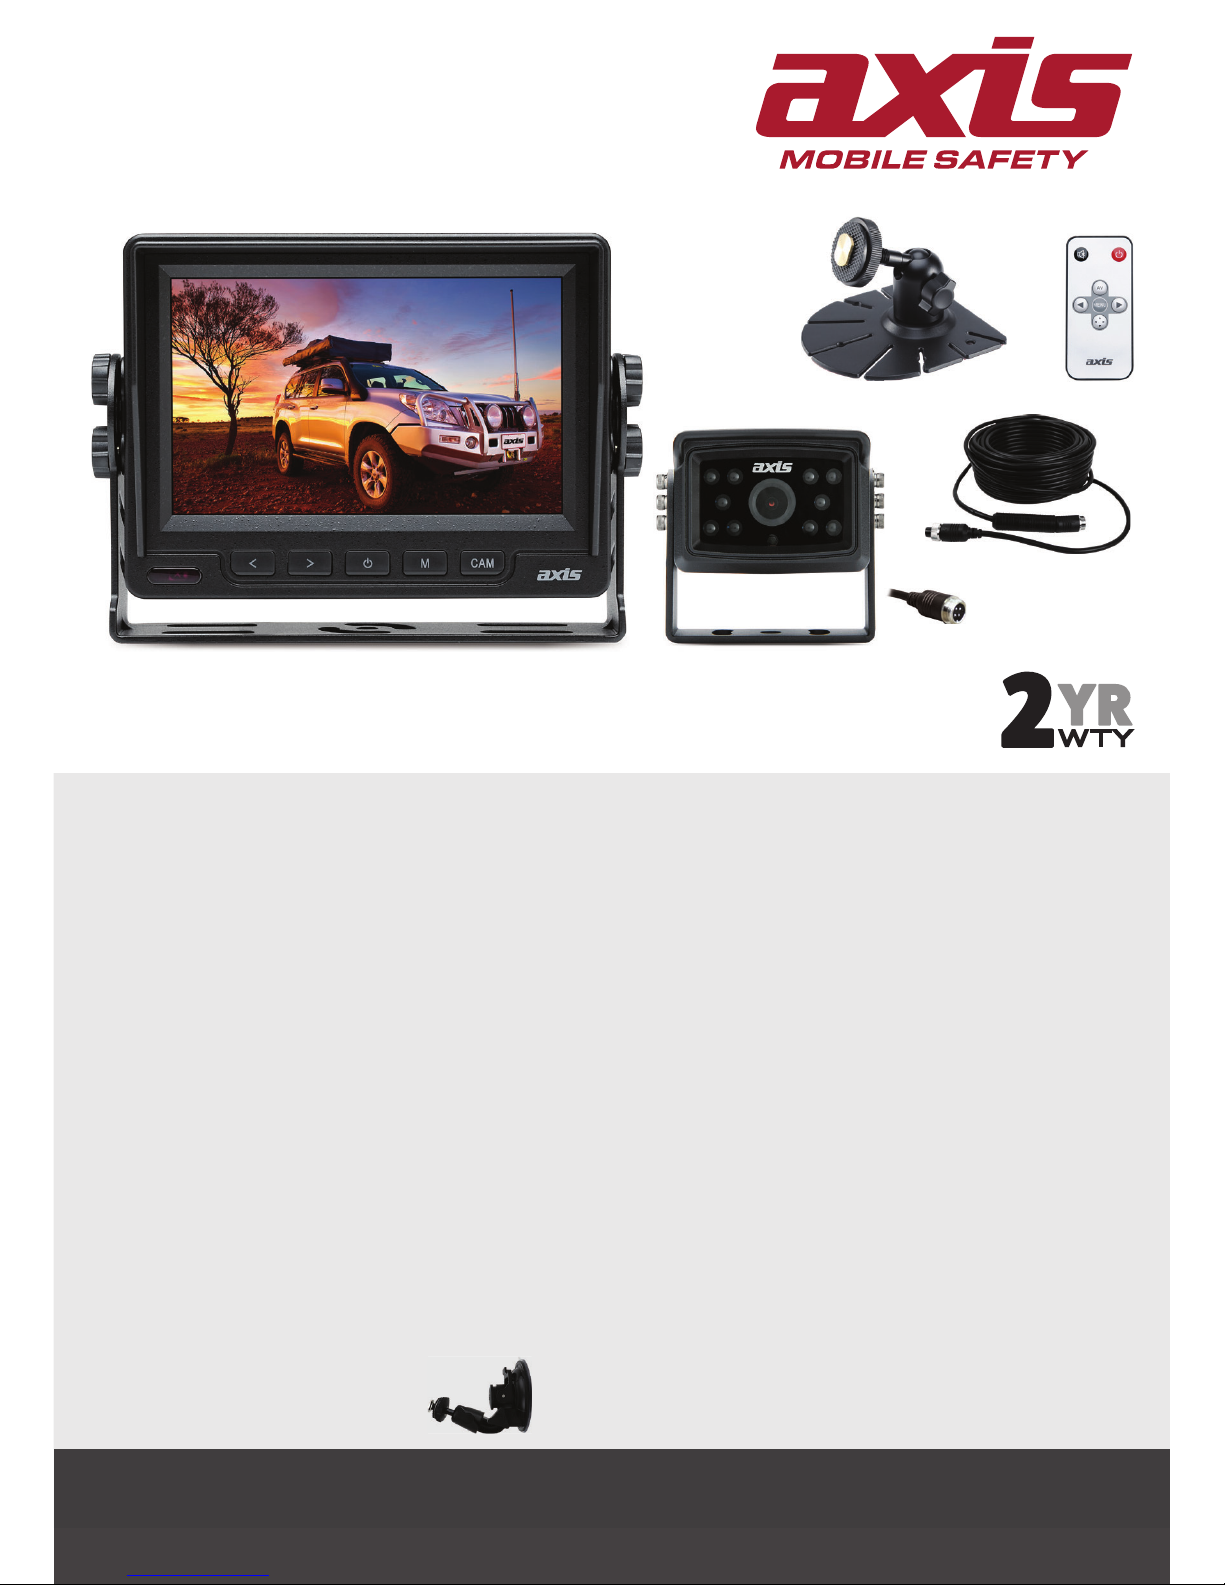
- Included: Stand Mount, U-Shape Mount,
Remote Control, Power Cable Assembly,
Sunshade
Optional: Glass Mount Bracket (BKT101)
CAMERA
- Image Device: 1/3” Nextchip NVP2040 CCD
- Image Sensor: Sony ICX639XK
- Viewing Angle: 105° (Diagonal)
83° (Horizontal)
- Signal System: PAL
- TV Lines: 600
- Image Orientation: Mirror
- Night Vision: 10 LED
- Illumination: 0.1 Lux with IR on
- Ingress Protection: IP67
- Operating Temp: -20 ~70°C
- Power Supply: 8-50V DC
- Power Consumption: 200mA
- Dimensions: 56W x 42H x 63D mm
(excluding bracket)
- Connector: Terminated to 4-Pin Male
- Warranty: 2 Years
- Accessories: Metal Mounting Bracket
- Included: Installation Hardware,
15M Extension Cable
(4-Pin Female to 4-Pin Male)
Page 2
2
Thank you for choosing this versatile AXIS monitor!
Please take time to read through the simple instructions below.
CAUTIONS:
• Securely install the monitor in a location that will not hinder driver vision
or control.
• Keep the monitor away from moisture and heat sources
• Clean the display with a soft dry cloth. Do not use chemical cleaners.
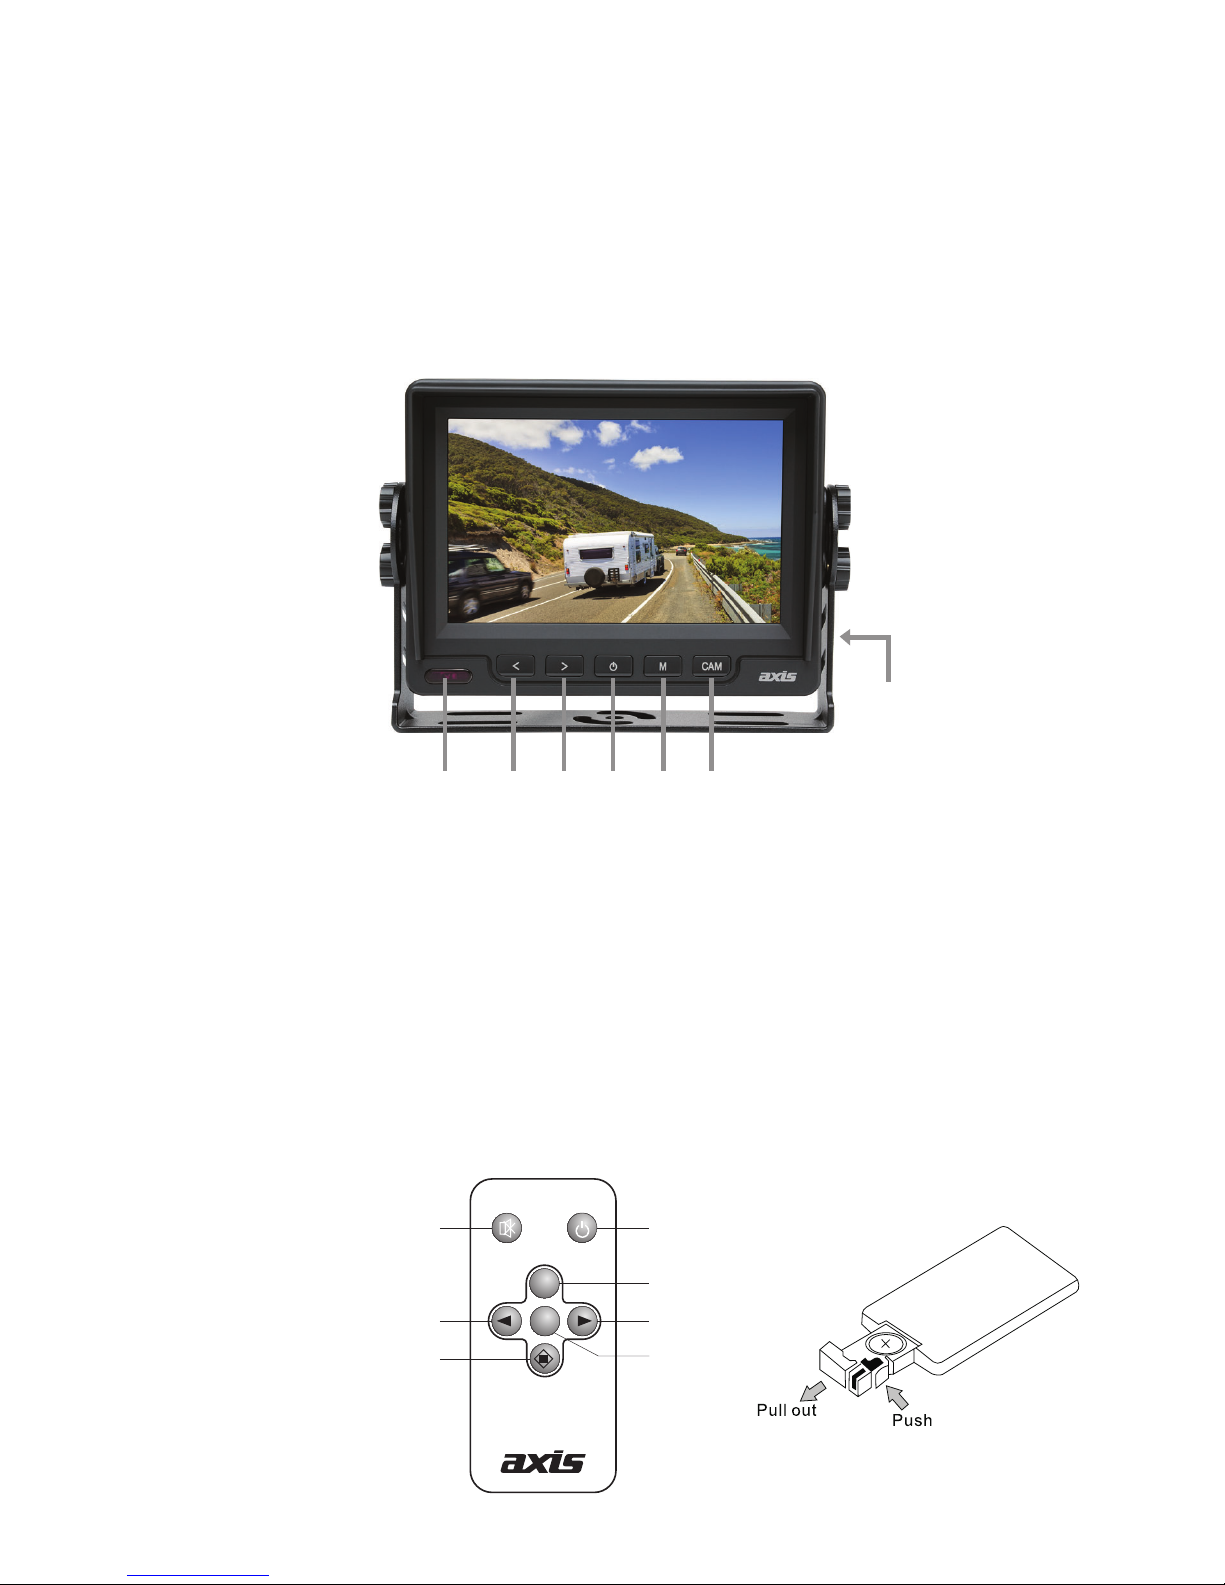
MONITOR FUNCTIONS:
1. Remote Control Receiver
2. Decrease Button
3. Increase Button
4. Power On/Off
5. Menu Button
6. Camera Selection (to change between cameras)
REMOTE CONTROL:
• Aim directly at the reception window
• Replace battery (CR2025) if the range reduces or will not operate.
(1) Mute
(2) Power
(3) AV
(4) Menu
(5) Decrease
(6) Increase
(7) Orientation
[Up/Down/Left/Right]
P.P
MENU
AV
(to adjust settings in Menu)
}
23456
Built-In
Speaker
1
1
5
7
2
6
3
4
Page 3
3
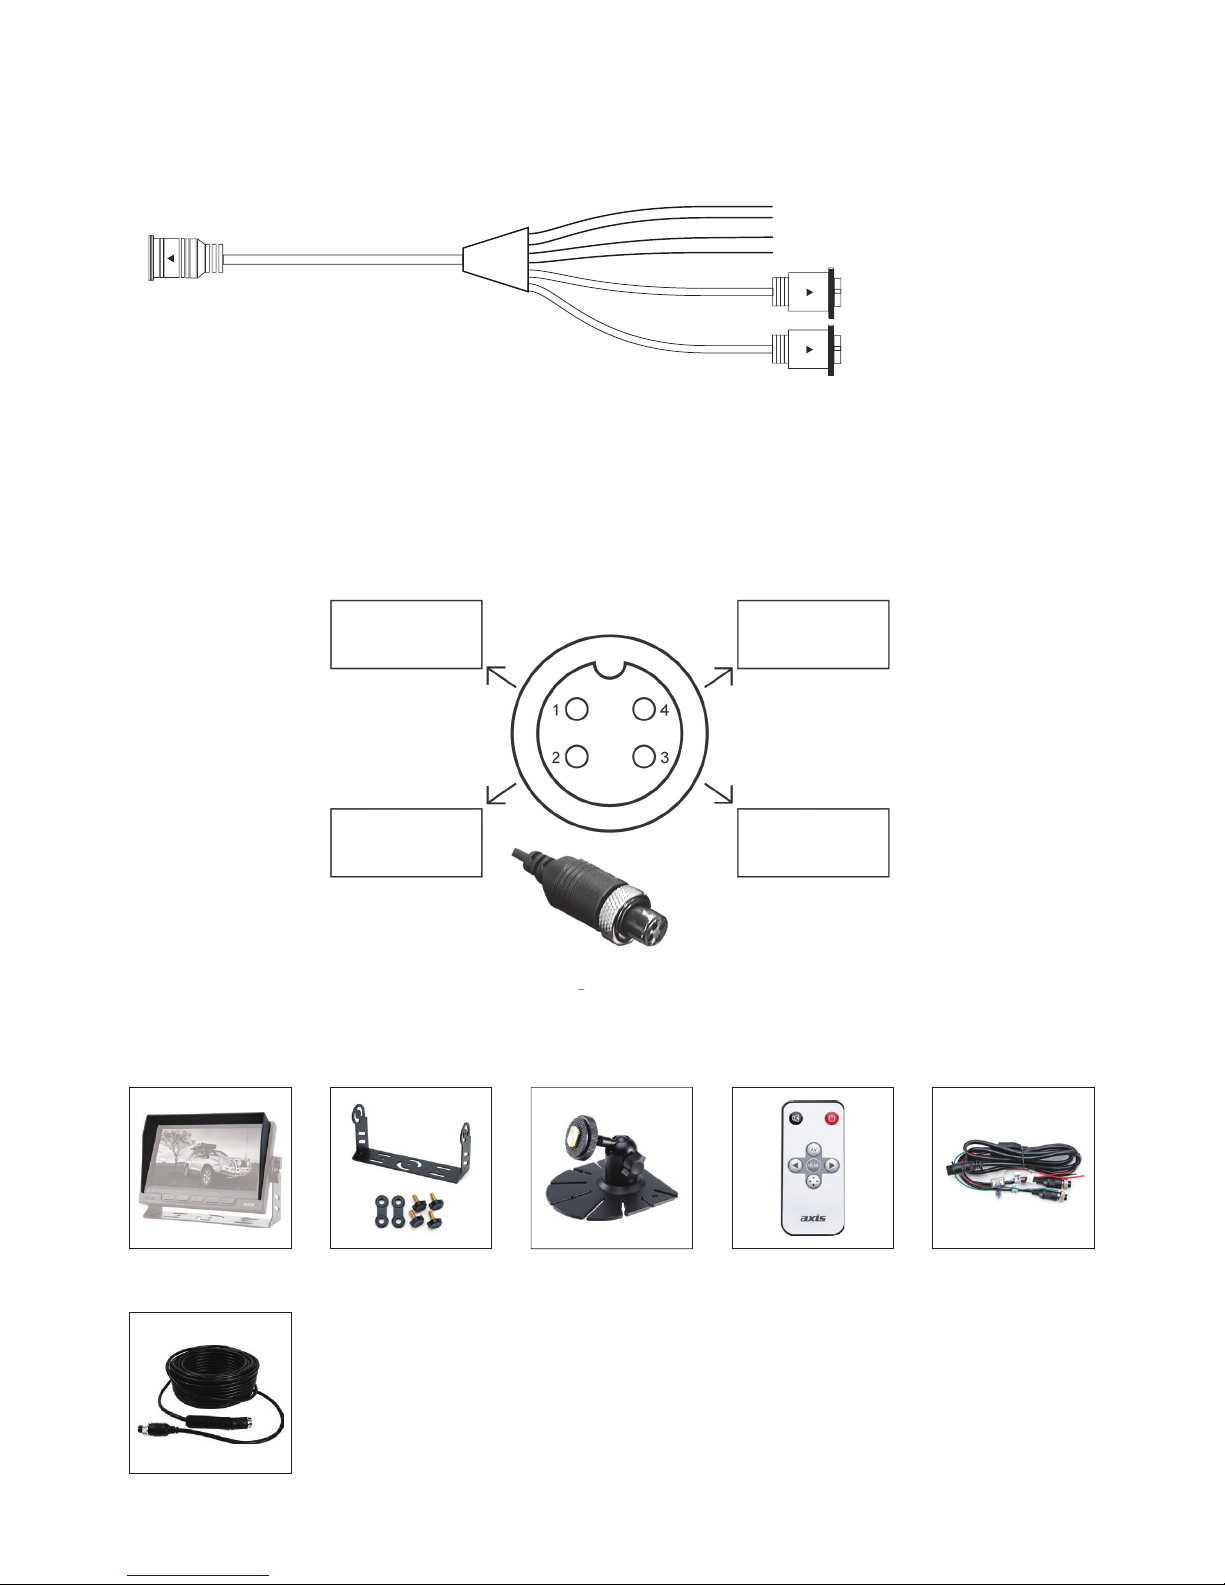
CONNECTIONS:
ACCESSORIES:
9 Pin Male
4 Pin Female Video V1
4 Pin Female Video V2
Green - Reverse Trigger
Black - Ground
Brown - Dimmer Control
Red - 12 - 24V
Note: Cam 2 has reverse trigger control.
Denition: Connector Front View
VIDEO
AUDIO
GROUNDPOWER
15m Lead
Leads &
Adaptors
Bracket Remote ControlU-shape MountSunshade
Page 4
4
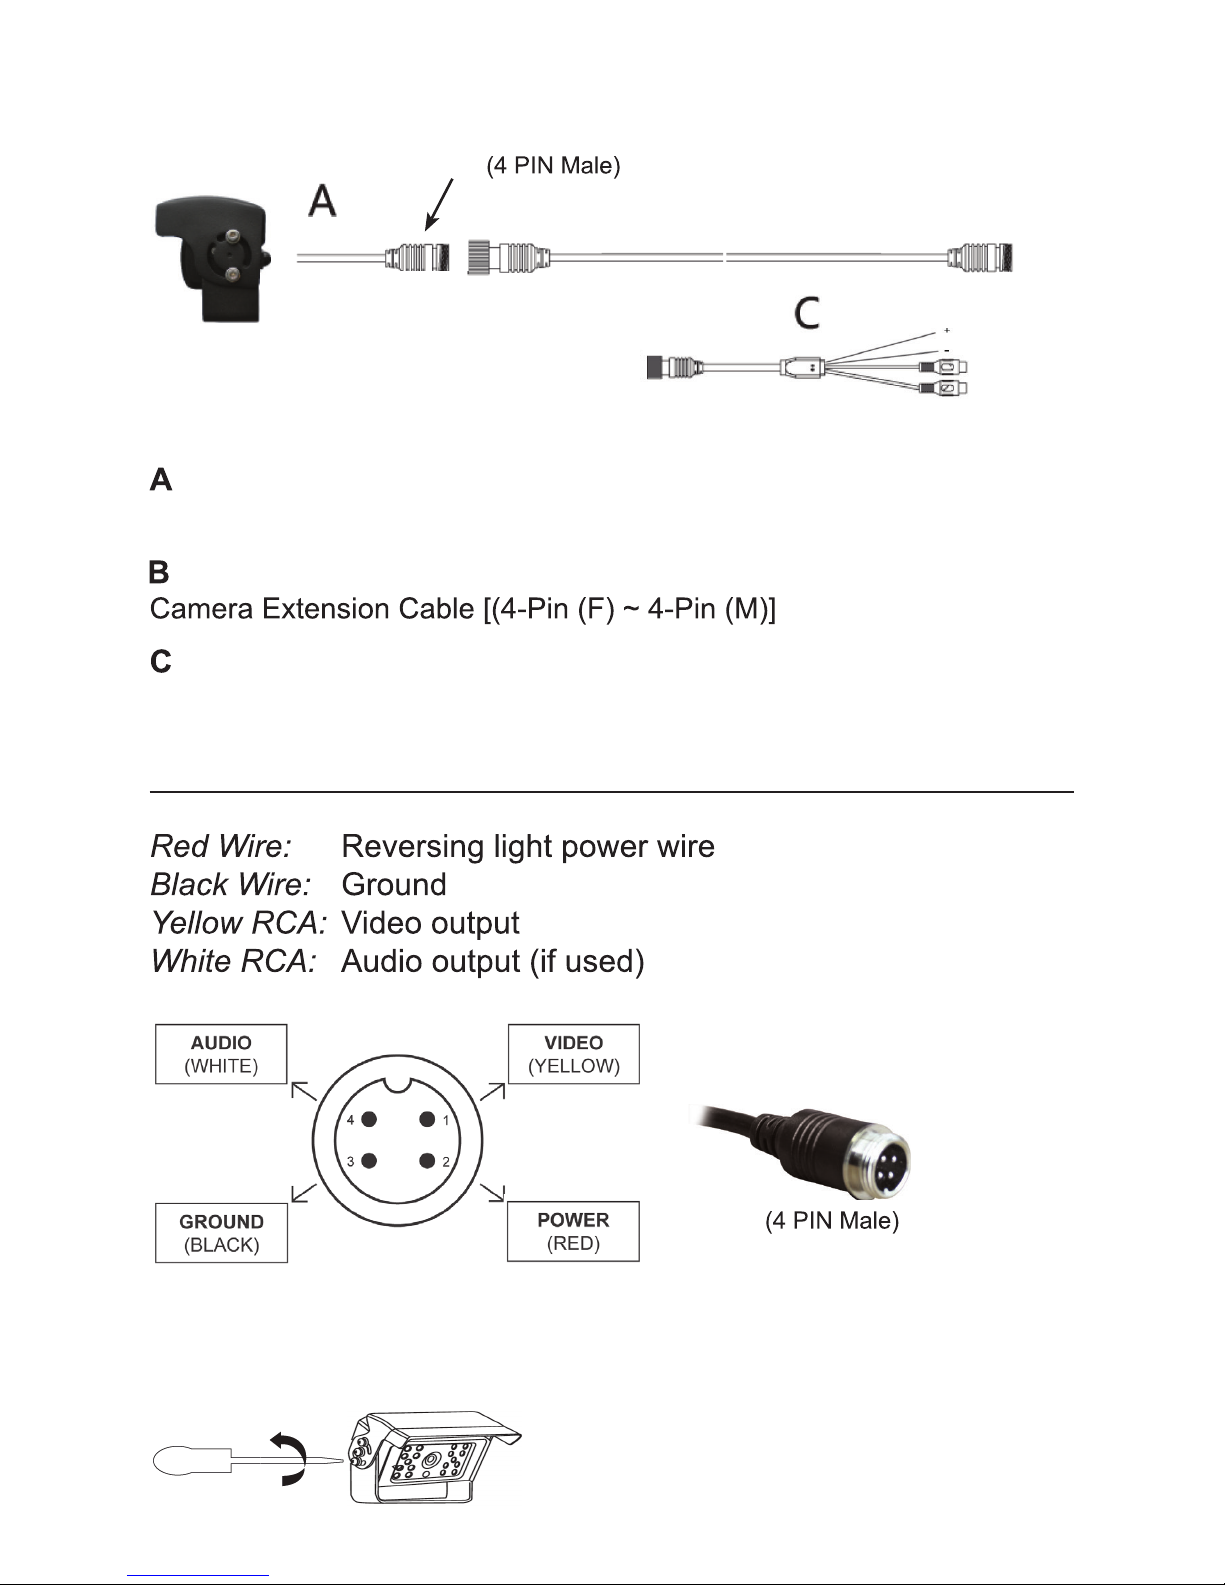
CCD Camera [Termination to 4-Pin (M)]
Use when connecting to a monitor with RCA input
[AX4P-F/RCA-M]
To adjust the camera mounting angle
(Optional Adapter) - 4-Pin (F) to RCA (M)
(15 Metre Cable)
(15 Metre Cable)
[OPTIONAL]
to RCA Connection
White (audio)
Red
Black
Yellow (video)
B
CAMERA WIRING DIAGRAM:
*
*
Note: White (Audio) Connector Not Used
Page 5
5
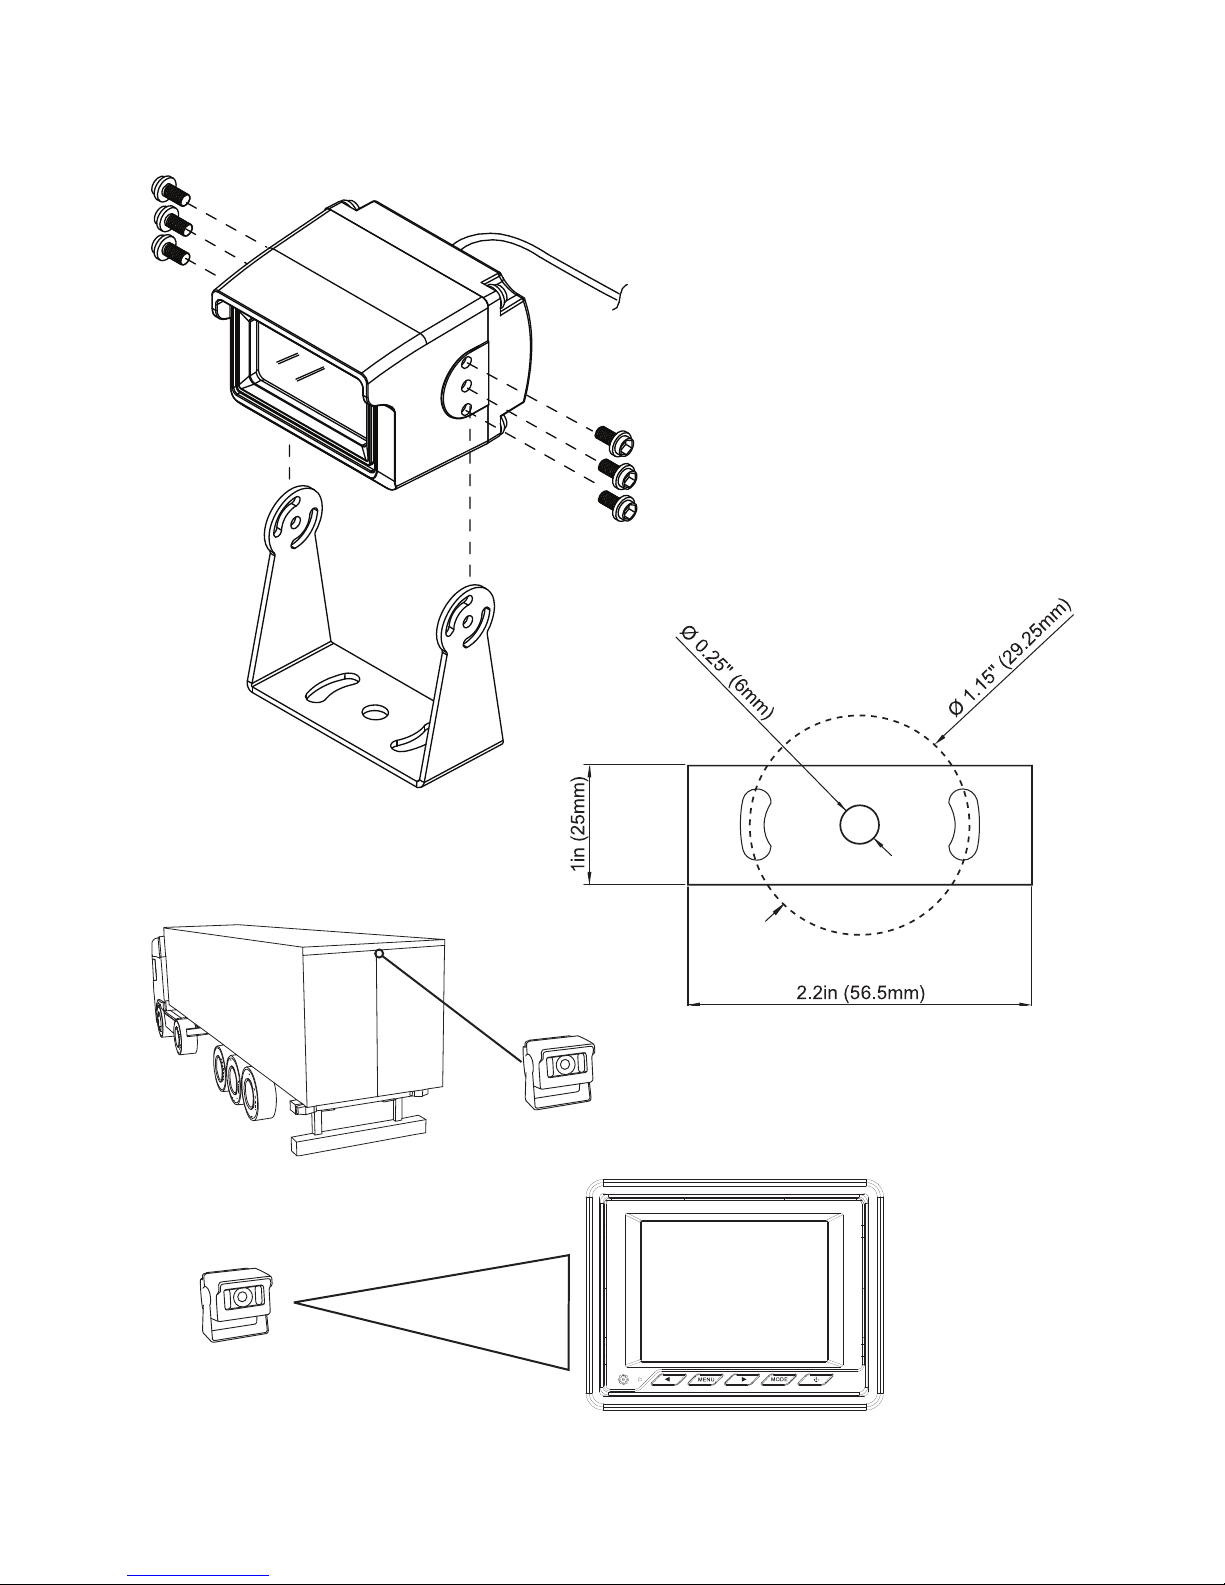
CAMERA INSTALLATION:
Disclaimer
Camera monitor systems are an invaluable driver aid but do not exempt the driver from taking every normal
precaution when manoeuvring.
Page 6

6
NOTES
Page 7

7
NOTES
Page 8

8
JS5001K
 Loading...