

SPS300
SCR400
SCR400D
Instruction Manual
TM
Designed and Engineered by
part number
revision code

IFC BLANK
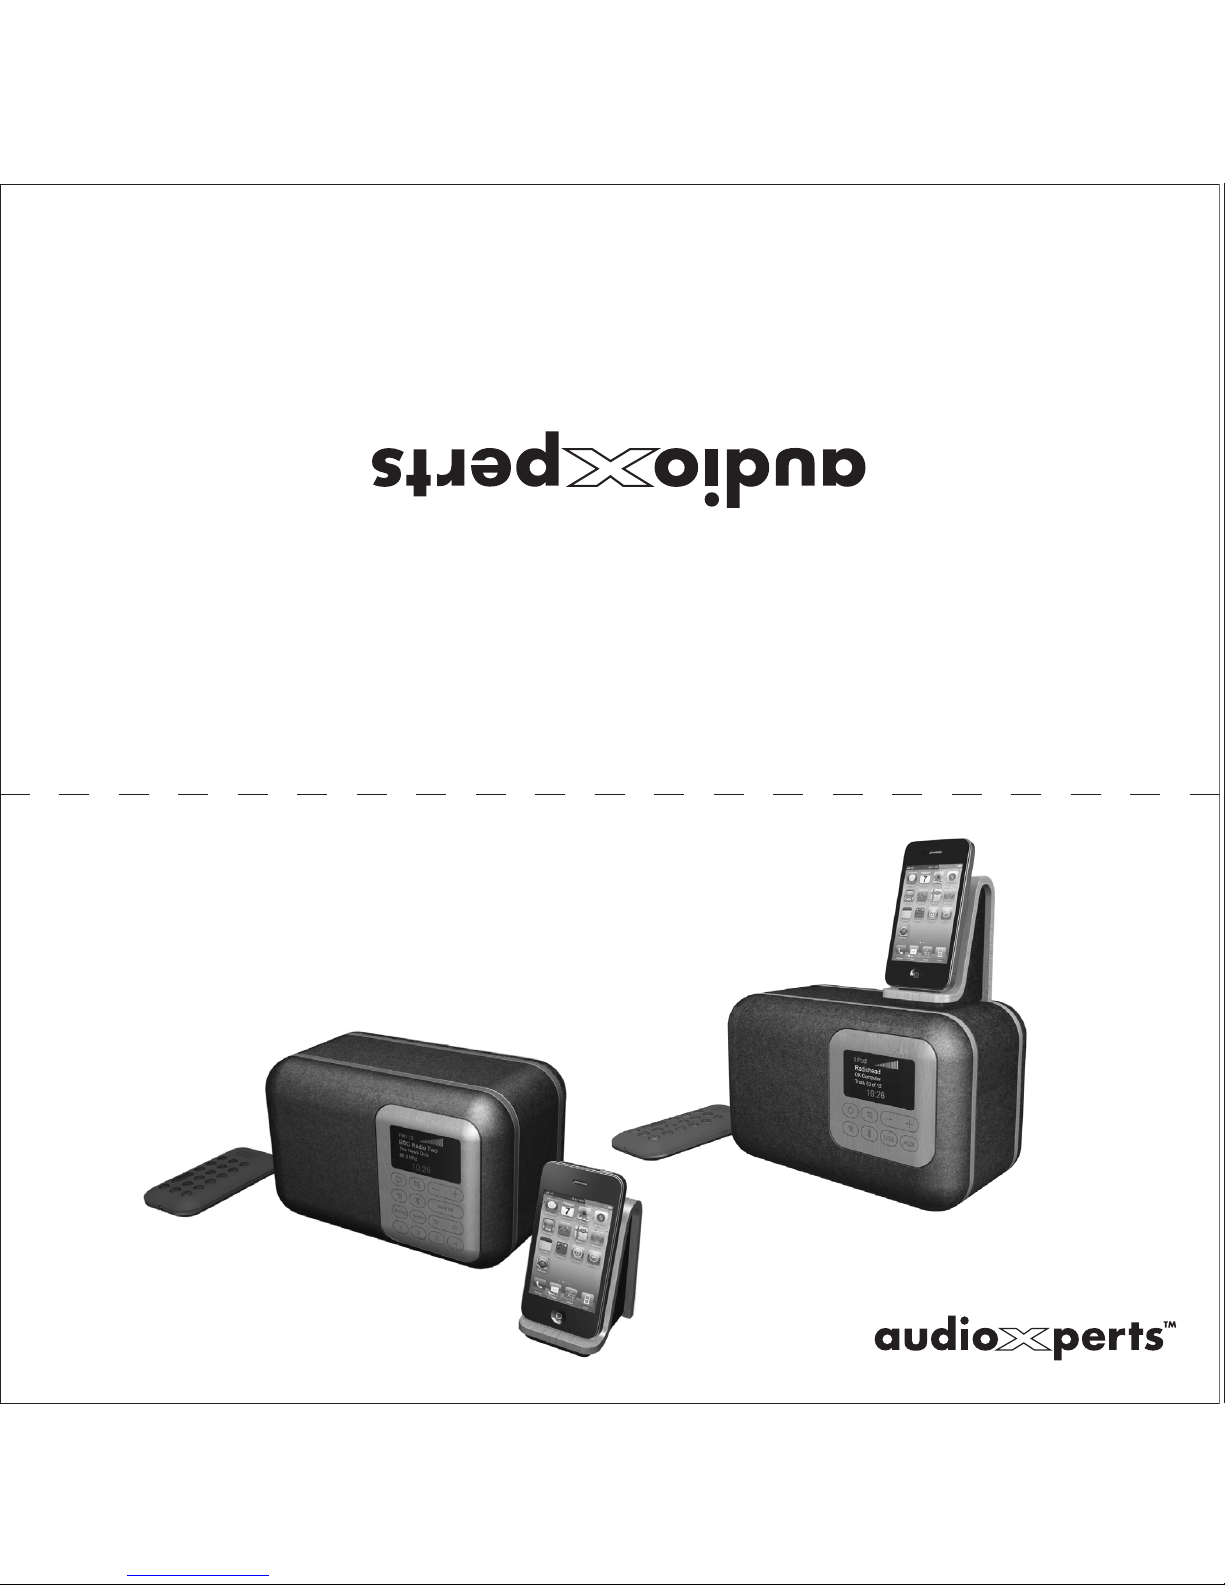
Congratulations!
Thank you for selecting the SPS300, SCR400 or SCR400D by
AudioXperts. EVA Compact Music Systems are designed and en gineered from the ground up by the AudioXperts team, providing
environmentally friendly and aesthetically pleasing tabletop audio
systems that deliver great sound to music lovers around the globe.
This owner’s manual provides you with important information on
setting up and enjoying your new music system. Please keep this
manual and all packaging materials in a safe place in case you
need them at a later date.
Technical Specifications
Amplifier Power 15-watt RMS
Driver 4” Full range
Inputs Optical, 1/ 8 ” mini-stereo and USB audio inputs
Output
1
/ 8” mini-stereo headphone output
Dimensions 91/ 2 x 6 x 55/ 8” (240 x 152 x 143mm)
Key Features – All Models
w Unique eco-friendly woven wool cover and bamboo case
w Bluetooth with CSR aptX® codec for crystal clear, full band -
width wireless music streaming
w Matching bamboo bent wood dock
w USB jack for connection and charging of iPod, iPhone, or iPad
w Auto-dimming LCD TFT Display for clean, clear, crisp graphics
w Touch sensitive front panel controls
w Stereo Headphone output & Auxiliary inputs
w Expansion port for connection to EVA +Channel AC250 or PS200
for true stereo performance
w IR Remote control
w Designed and engineered by AudioXperts
SCR400 and SCR400D Additional Features
w SCR400 – High sensitivity FM tuner with 8 presets
w SCR400D – FM tuner, plus DAB tuner, each with 8 presets
w Full featured, dual alarm clock
w Touch sensitive snooze bar
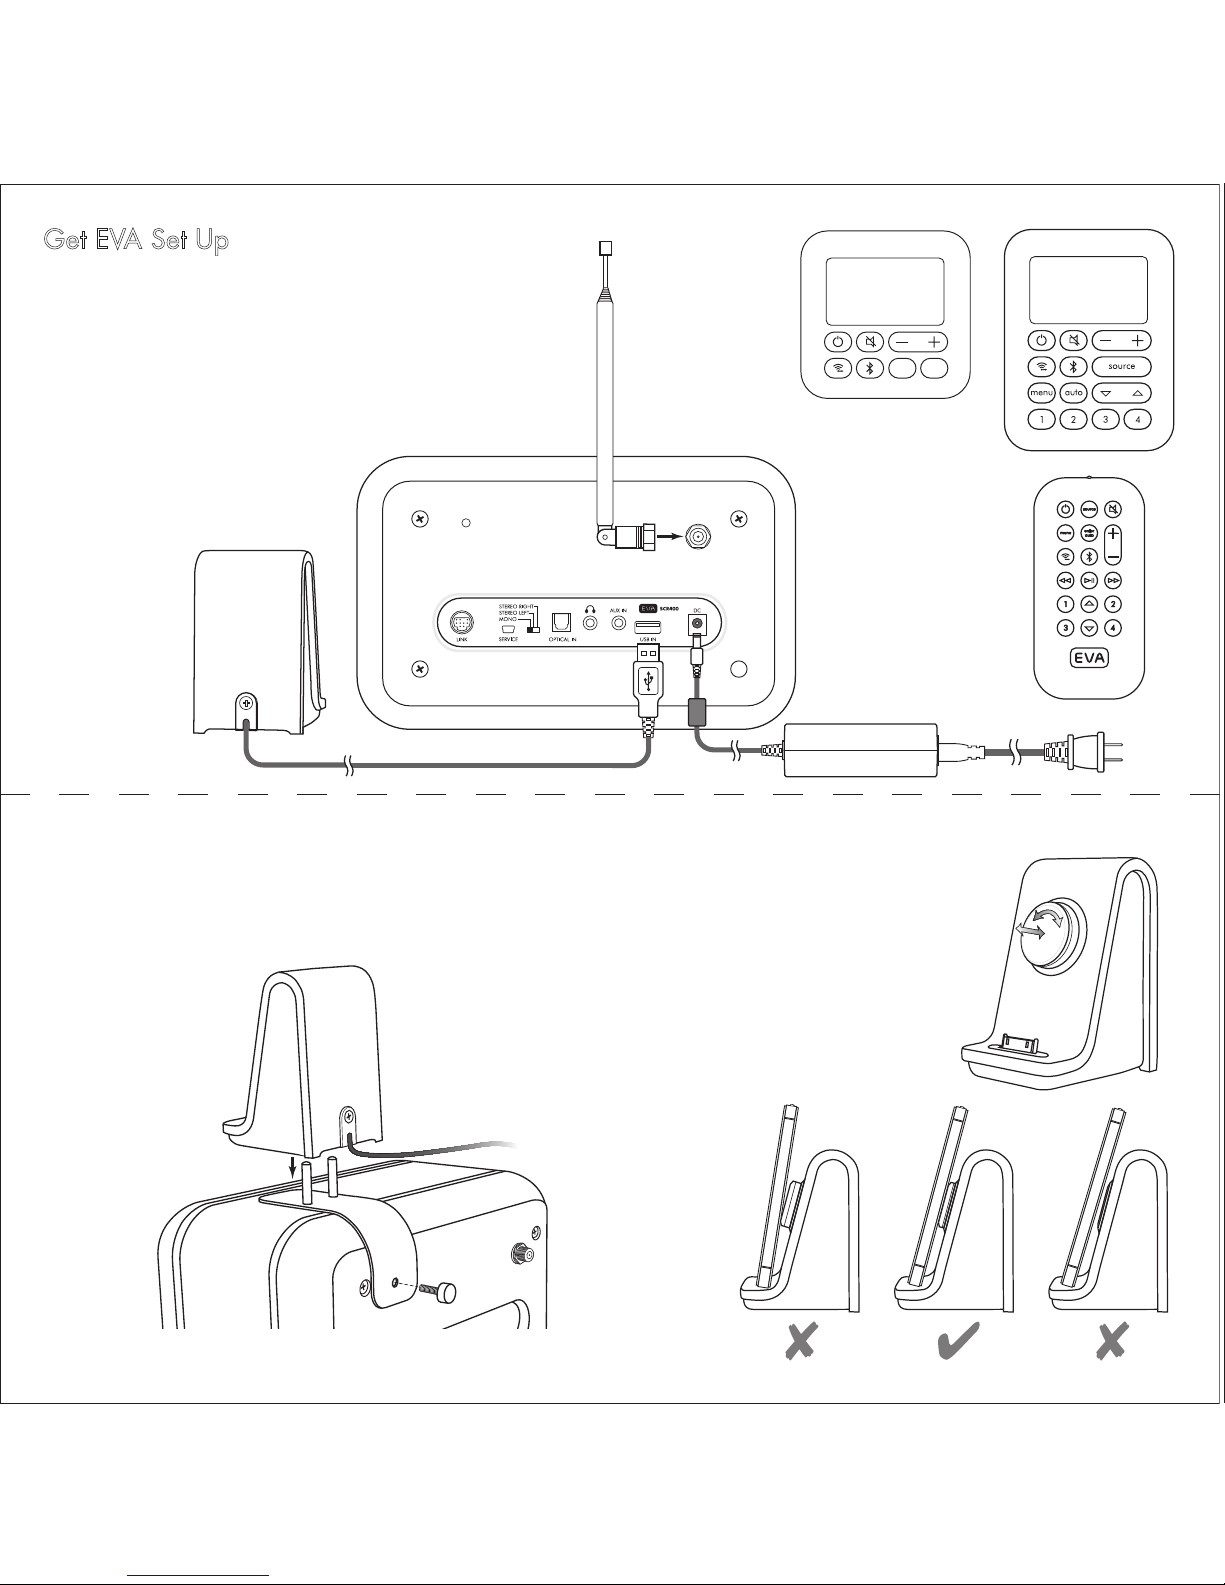
Get EVA Set Up
Select a location where it will be convenient to connect the
power supply, the EVA Dock and any other components you
want to connect. With the SCR400(D) you’ll also want space
to raise the antenna. There should be a good line-of-sight to
the front of the unit so the remote control sensor in the display
window can receive signals.
Antenna – SCR400(D) only
If you want to mount the EVA Dock on the top of your unit, set
the adapter in place and secure it with the large thumbscrew.
Push the holes in the bottom of the Dock onto the adapter posts.
Adjust the support disc on the Dock to
hold your phone or MP3 player at the
proper angle to minimize stress on the
dock connector.
USB AUX
SPS300
Front Panel
SCR400(D)
Front Panel
EVA
Remote

Power – Press to turn EV
display briefly shows the EVA logo and
the date and time, then the last input is
recalled. If the time and date have not
been set, a reminder message is displayed.
Source – Press to display the source
menu. Press again to highlight the next
available source. Press AUTO (AUTO/ ENTER
on remote) to select the source. If nothing
is connected to the USB input it will not
appear on the list. The DAB inputs appear only on the
SCR400D.
Volume +/– Press to change the volume
level. A single press changes the volume
one step. Press and hold to change
the volume two steps per second.
USB
Press and hold for more than 5 seconds to change
the volume very quickly. The display volume indicator
changes to reflect the volume adjustments.
Mute – Press to temporarily turn the
press , to gently restore the sound
level. When the sound is muted, the
volume bar indicator in the display is
replaced with MUTE.
Bluetooth Input – Press to select the Blue -
tooth input. EVA will look for previously
paired devices. When it finds one, the
device name appears in the display. If
more than one device is available, press
the button again the select the next device. If no
device is found a notice appears in the display. See the
“Bluetooth Connections” and “Bluetooth Pairing” sections
for more information.
FM1 / 2
Wireless / Dock Input – Press to select
the source connected to the Optical input
on the back of the EVA unit. Information
from the source appears in the display.
USB and Aux Input – SPS300 front panel
only. Press to select the USB or Auxiliary
inputs. If a USB flash drive with music files
is plugged into the USB input, the con tents list appears in the display. When
an iOS device is connected to the USB
input, using the EVA Dock or a cable, the
iPod menu appears in the display.
Navigation Buttons – SCR400(D) and Remote only –
Use to scroll through menu or playlist choices and to
select radio stations on the SCR400(D).
iPod
> All
Playlists
Artists
Albums
USB
USB
AUX
ENTER/ AUTO on remote, ENTER on SCR400(D) front panel –
Used to select highlighted choices in various menus and
playlists. Starts SCR400(D) radio station seek mode.
Menu Button – SCR400(D) and remote only –
SCR400(D) – Displays the menu to set
the alarm functions, the time and date
setting function and the Settings menu.
The Settings menu lets you adjust the
snooze time, alarm sound, display col or, time format and the Region setting,
which adjusts the FM radio to operate
properly in various parts of the world.
SPS300 – Press the remote MENU button to display the
Settings menu, where the display color can be adjusted.
Use ▼▲ to highlight the options in the menus, then press
MENU again to select the option.
ALAR M ON
TIME DATE
SETTINGS
The Basic Controls
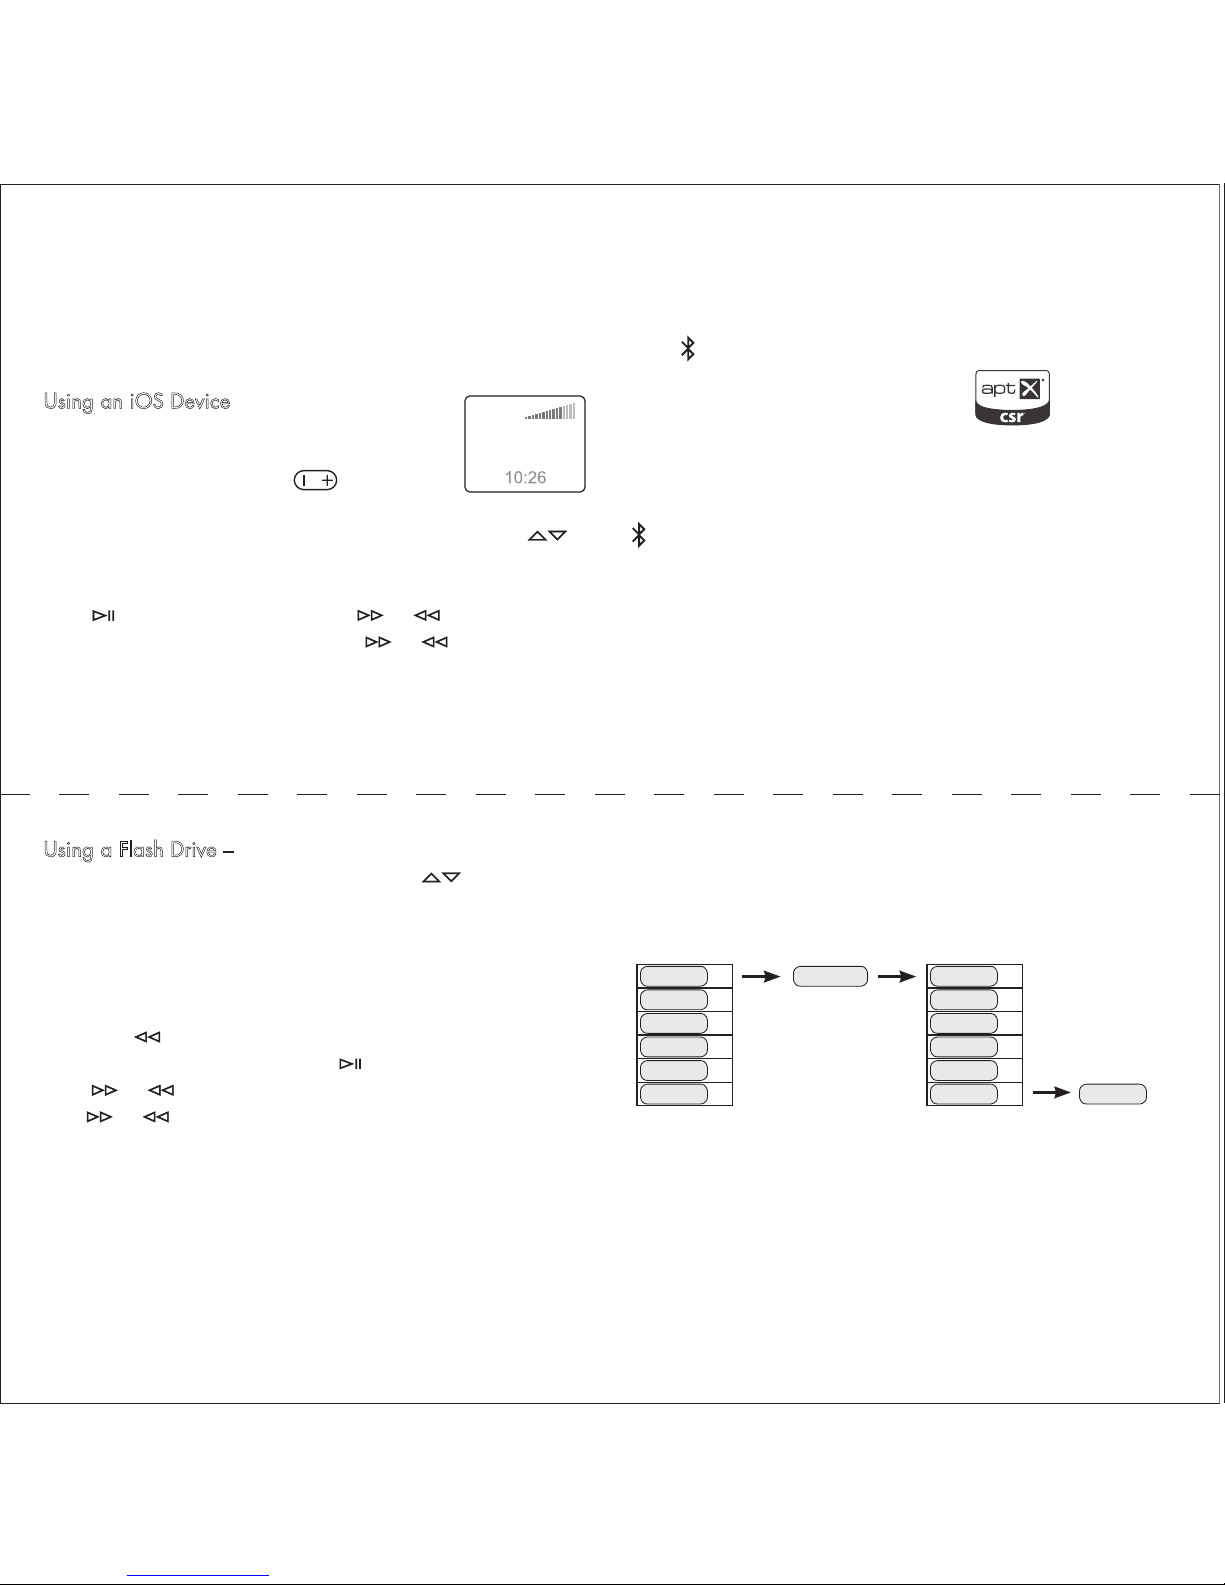
Typically the USB input is used to connect iOS devices, either via
the EVA Dock or directly via a cable. The device is charged
while it’s connected to the USB input. A USB flash drive with
music files on it can also be connected.
Using an iOS Device – When an iOS device
is connected, its name appears in the display.
The volume control of the device is locked –
use the front panel or remote button.
Make music selections using the device onscreen controls, as usual. Scroll up or down playlists with
.
There is also a full set of music play controls on the EVA Remote.
Press to start or pause play. Press or to skip to the
next or previous track. Press and hold or to fast forward
or rewind.
EVA works with:
iPod
> All
Playlists
Artists
Albums
iPod touch (1st - 4th generation)
iPod nano (4th - 6th gener )
iPhone 4S, 4, 3GS, and 3G
) iPad (3rd generation)
iation) iPad, iPad 2
Device F Device G Device G
Device E Device F
Device D Device E
Device C Device D
Device B Device C
Device A Device B Device A
6 6
5 5
4 4
3 3
2 2
1 1
Add Device G
Device A deleted
Paired Device List
New Paired Device List
Using a Flash Drive – When a flash drive is connected the
table of contents appears in the display. Use
to navigate
through the folders and tracks. When a track is highlighted it
will start playing automatically after 2 seconds, or when you
press AUTO.
To back up a folder level, mute the sound or pause playback,
then press on the remote. The other music play controls on
the remote operate normally. Press to start or pause play.
Press or to skip to the next or previous track. Press and
hold or to fast forward or rewind.
ct
When the Bluetooth input is selected, EVA looks for available
previously paired devices. When a device is found, its name
appears in the display. If more than one device is available,
press again to select the next device. If no device is found a
warning message appears in the display.
Before EVA can make a Bluetooth connection to a device, it must
be “paired” with it. First be sure the device you want to pair to
EVA is on and its Bluetooth system is active. Then press and hold
for two seconds to initiate pairing.
When a device is found, its name appears in the display. If the
device supports SSP , EVA auto matically pairs with it after two seconds. If the device does not
support SSP, then you may need to enter the code “1234” on
the device to complete the pairing process.
EVA can pair with six devices. If you have paired with six
devices, and then pair with another, the oldest paired device is
deleted from the pair device list.
Using the USB Input Bluetooth Connections
Bluetooth Pairing

SCR400 FM Radio Operation
Press SOURCE to display the source menu. Use
to highlight FM1 or FM2 in the display,
then press ENTER. The last station tuned in is
recalled. The FM station group is shown in the
upper left of the display. Any RDS data the sta tion is broadcasting appears in the display. If the station tuned in
is stored in a preset, the preset number appears in the display. In
this example, the station is preset 2 of the FM1 group.
Manual Station Tuning – Press to tune up or down the
radio band. A single press will tune up or down one step. Press
and hold the button to rapidly move through the radio band.
Auto FM Station Seek – On the front panel,
press AUTO to start the seek mode, then press
or to start seeking up or down the band. Or
press and hold or on the remote to start
the seek mode. When a strong station is found
it starts playing.
FM1 / 2
99.50 Mhz
SCR400D DAB Radio Operation
Press SOURCE to display the source menu. Use
to highlight DAB1 or DAB2 in the display,
then press ENTER. The last station tuned in is
recalled. The DAB station group is shown in the
upper left of the display. If the station tuned in
is stored in a preset, the preset number also appears in the
display. In this example, the station is preset 4 of the DAB1
group.
First Time Use – The first time the DAB radio is
used, the system automatically goes into seek
mode. The first 8 stations found will be put into
the available presets.
Manual Station Tuning – Press AUTO to display
a list of available stations. Scroll up or down the
list with . After 2 seconds the highlighted
station is selected.
Using Presets – The SCR400 can store up to 8 FM station
presets, 4 in each group, FM1 and FM2. To recall a preset
station, you must select the FM station group in which the station
was stored, then press the appropriate preset button.
Storing a Preset – Select the FM station group
in which you want to store the station. Tune in
the station using .
Press and hold the button for the preset where
you want to store the station. When the preset
number appears in the display, the preset is
stored. In this example the station is stored in the
FM2 station group, in preset 4.
FM2
107.9Mhz
FM2 / 4
107.9Mhz
Using Presets – The SCR400D can store up to 8 DAB station
presets, 4 in each group, DAB1 and DAB2. To recall a preset
station, you must select the DAB station group in which the
station was stored, then press the appropriate preset button.
Storing a Preset – Select the DAB station group
in which you want to store the station. Tune in
the station as described above in the Manual
Station Tuning section.
Press and hold the button for the preset where
you want to store the station. When the preset
number appears in the display, the preset is
stored. In this example the station is stored in
the DAB1 station group, in preset 4.

Using the Auxiliary Input
Press source on the remote control or the front panel of the
SCR400(D). Use
to highlight the Aux input, then press
auto/enter on the remote, or enter on the SCR400(D) front panel.
On the SPS300 you may use the front panel aux button. Connect
a standard 3.5mm stereo cable between the Aux input on the
EVA system and the output of the device being connected.
Note that the output of some devices can be fairly high. Especially when the headphone output of the device is the source.
Keep the volume setting of the device fairly low to prevent
overloading the EVA inputs.
EVA Dock Connector Cap
If you want to use your
EVA system with a phone
or MP3 player that is not
an iOS device, or if you
want to use your iOS device horizontally, use the
supplied connector cap as
shown. Connect the device to the EVA system via
Bluetooth or a USB cable.
SCR400(D) Alarm Clock Operation
The alarm can be either a radio station or one of two alarm
sounds. See the “Adjusting the Settings” section for more
information.
Turn the Alarm On – Press menu to display the
Menu screen. Alarm On is highlighted. Press
menu again to turn the alarm on. The symbol
appears in the display and the Alarm Time Set
screen is displayed.
If necessary use to adjust the alarm time.
The press menu to set the alarm time and return
to the main screen.
Turn the Alarm Off – Press menu to display the
Menu screen. Alarm Off is highlighted. Press
menu again to turn the alarm off. The alarm can also be turned
off by touching the Snooze bar on the top of the unit twice within 10 seconds of the alarm sounding.
ALARM ON
TIME DATE
SETTINGS
Snooze Functions – When the alarm sounds,
touch the Snooze bar to delay the alarm for a
period of time. The display shows the remaining snooze time. The default snooze time is
5 minutes. See the “Adjusting the Settings”
section for information on how to adjust the snooze time.
If the Snooze bar is touched again before the snooze time has
ended, the snooze time is reset and starts counting down again.
4:55 MINUTES

Adding an EVA +Channel Speaker
You can connect an EVA +Channel Accessory Speaker to your
SPS300 or SCR400(D) to provide true left/right channel stereo
sound, or to be a mono extension speaker.
The AC250 features an independent full-featured dual alarm
clock with a touch sensitive snooze bar. The PS200 simply adds
a second speaker. Both units have the same full range speaker
and powerful amplifier found in the SPS300 and SCR400(D).
Connect the two units with the multi-pin cable supplied with the
+Channel speaker and set the mode switch as appropriate.
set mode
switch
SPS300 or SCR400 PS200 or AC250
Adjusting Settings
SPS300 – Press menu on the EVA remote to show the Display
Color selection screen.
SCR400(D) – Press menu on the SCR400(D)
front panel or the EVA remote to display the
Menu screen. Use to highlight Settings,
then press menu to display the Settings menu.
Again use to highlight the option you
want, then press menu to select it. The options
are Snooze Timing, Alarm Sound, Display
Colour, Time Format and Region. Note: The last
two options won’t appear in the menu. Use
to scroll down to these options.
Snooze Timing – The default snooze time is 5
minutes. Press to adjust the time setting,
then press menu to set the time. If the snooze
time is set to 0 minutes, the snooze function is
turned off.
ALARM ON
TIME DATE
SETTINGS
5 MINUTES
Time Format – Time can be displayed in 24 or
12 hour format with AM and PM indications.
Use to highlight the time format you want,
then press auto to select it.
Region – The Region setting adjusts the radio
frequency range and tuning increments for
various part of the world. The options are
Europe/Asia, North America and Japan. Use
to highlight the appropriate region, then
press auto the select it.
12HR
24HR
MENU
EU/ASIA
NA
JAPAN
MENU
Alarm Sound – Use to highlight the option
you want. After a few seconds the highlighted
option will be selected. Or press auto to select it.
If Radio is selected, the last selected station
preset plays for 5 seconds.
Display Colour – Use to highlight one of
the display colour options. As the options are
highlighted the display colour scheme appears
in the display. Press auto the select the display
colour scheme and return to the main screen.
If Service is Required
Finished Goods RA Requests:
(855)4MY - XPRT (469-9778) x 3, or
email sales@audioxperts.com
Authorized Warranty/Service Centers, Tech Support and Parts:
(855)4MY - XPRT (469-9778) x 22, or
email support@audioxperts.com or
visit our website at www.audioxperts.com
©2012 AudioXperts, Inc. AudioXperts and EVA are trademarks
of AudioXperts, The Bluetooth figure mark, word mark, and
combination mark are registered trademarks of Bluetooth SIG.
Apple, iPhone, iPod, iPod touch, iPod nano and AirPort Express
are trademarks of Apple Inc. registered in the U.S. and other
countries. Specifications are subject to change without notice.
All rights reserved. Unauthorized use is strictly prohibited.
Limited Warranty Information
– Five Years Parts and Labor
– Two Years Over the Counter Exchange
The AudioXperts warranty protects the original owner, provided
the AudioXperts product was purchased within the continental
United States, Alaska or Hawaii from an authorized dealer. In
all instances a copy of the original “dated” bill of sale must be
presented whenever warranty service is required.
The warranty is limited to AudioXperts product and does not
cover damage to any associated equipment. The warranty does
not cover the cost of removal or reinstallation of theproduct. The
warranty becomes void if the serial number has legal rights, and
you may also have other rights, which vary from state to state.
NOTE: Repair of AudioXperts products must be made by an
authorized dealer or service center. Unauthorized repair will
void the warranty and is done at the risk of the owner.

Federal Communications Commission (FCC) Interference Statement
This device complies with part 15 of the FCC Rules. Operation is subject to the following two
conditions: (1) This device may not cause harmful interference, and (2) this device must
accept any interference received, including interference that may cause undesired operation.
The users manual or instruction manual for an intentional or unintentional radiator shall caution
the user that changes or modifications not expressly approved by the party responsible for
compliance could void the user's authority to operate the equipment. In cases where the
manual is provided only in a form other than paper, such as on a computer disk or over the
Internet, the information required by this section may be included in the manual in that
alternative form, provided the user can reasonably be expected to have the capability to
access information in that form.
Note: This equipment has been tested and found to comply with the limits for a Class B digital
device, pursuant to part 15 of the FCC Rules. These limits are designed to provide reasonable
protection against harmful interference in a residential installation. This equipment generates,
uses and can radiate radio frequency energy and, if not installed and used in accordance with
the instructions, may cause harmful interference to radio communications. However, there is
no guarantee that interference will not occur in a particular installation. If this equipment does
cause harmful interference to radio or television reception, which can be determined by turning
the equipment off and on, the user is encouraged to try to correct the interference by one or
more of the following measures:
—Reorient or relocate the receiving antenna.
—Increase the separation between the equipment and receiver.
—Connect the equipment into an outlet on a circuit different from that to which the receiver is
connected.
—Consult the dealer or an experienced radio/TV technician for help.
RF Exposure Warning
This equipment must be installed and operated in accordance with provided instructions and
the antenna(s) used for this transmitter must be installed to provide a separation distance of at
least 20 cm from all persons and must not be co-located or operating in conjunction with any
other antenna or transmitter. End-users and installers must be provide with antenna
installation instructions and transmitter operating conditions for satisfying RF exposure

compliance.
IC Statement for Canada
This Class B digital apparatus complies with Canadian ICES-003 and RSS-210.
Operation is subject to the following two conditions: (1) this device may not cause
interference, and (2) this device must accept any interference, including interference
that may cause undesired operation of the device.
Cet appareil numérique de classe B est conforme aux normes canadiennes ICES-003
et RSS-210. Son fonctionnement est soumis aux deux conditions suivantes : (1) cet
appareil ne doit pas causer d'interférence et (2) cet appareil doit accepter toute
interférence, notamment les interférences qui peuvent a-ecter son fonctionnement.
 Loading...