

Page 1
user guide
XMCK-10A
Important: This manual contains important safety and operating information. Please read, understand, and
follow the instructions in this manual. Failure to do so could result in personal injury, death, and/or damage
to your Xpress accessories, and/or to your vehicle or property
Page 2

2
Congratulations
Thank you for purchasing the Audiovox Xpress XM® Satellite Radio Reciever Kit.
You are one step closer to experiencing the latest innovation in XM
Satellite Radio. XM Satellite Radio will revolutionize your vehicle or
Congratulations
in-home entertainment.
XM is America’s number one satellite radio service with more than 7 million
subscribers. Broadcasting live daily from studios in Washington, DC, New York
City, the Country Music Hall of Fame in Nashville, Toronto and Montreal, XM’s
2006 lineup includes more than 170 digital channels of choice from coast to
coast: the most commercial-free music channels, sports, talk, comedy, children’ s
and entertainment programming; and the most advanced traffic and weather
information.
XM the leader in satellite-delivered entertainment and data services for the
automobile market through partnerships with General Motors, Honda, T oyota,
Hyundai, Nissan, Subaru, Suzuki and Porsche, is available in more than 140
different vehicle models for 2006. XM’s industry-leading products are available
at consumer electronics retailers nationwide. For more information about XM
hardware, programming and partnerships, please visit http://www.xmradio.com.
Required subscription for service sold separately. Premium Channels available at
additional monthly costs. Installation costs and other fees and taxes may apply,
including a one-time activation fee. All fees and programming subject to change.
College sports games subject to availability. Subscriptions subject to Customer
Agreement included with the XM Welcome Kit and available at
http://www.xmradio.com. Only available in the 48 contiguous United States
©
2006 XM® Satellite Radio Inc. XM is a trademark of XM Satellite
Radio. All rights reserved. All other trademarks are the property of their
respective owners.
Page 3

3
FCC Information
Please note that the power cable that has been supplied with your device is supplied
with permanently attached ferrite beads at each end. It is the responsibility of the user to
use the cable with the ferrite beads.
The user is cautioned that changes or modifications not expressly approved by XM
Satellite Radio Inc. can void the user’s authority to operate this device.
This device complies with Part 15 of the FCC Rules. Operation is subject to the following
two conditions: (1) This device may not cause harmful interference, and (2) this device
must accept any interference received, including interference that may cause undesired
operation.
This equipment has been tested and found to comply with the limits for a Class B digital
device, pursuant to Part 15 of the FCC Rules. These limits are designed to provide
reasonable protection against harmful interference in a residential installation.
This equipment generates, uses, and can radiate radio frequency energy and, if not
installed and used in accordance with the installation instructions, may cause harmful
interference to radio communications. However, there is no guarantee that interference
will not occur in a particular installation. If this equipment does cause harmful
interference to radio or television reception, which can be determined by turning the
equipment off and on, the user is encouraged to try to correct the interference by one or
more of the following measures:
- Reorient or relocate the antenna of the affected receiver.
- Increase the separation between the XM equipment and the affected receiver.
- Connect the XM equipment into an outlet on a circuit different from that to which
the affected receiver is connected.
- Consult the dealer or an experienced radio/TV technician for help.
Warning: The FCC and FAA have not certified XM Satellite Radio Receivers for use in
any aircraft (neither portable nor permanent installation). Therefore, XM Satellite
Radio, Inc. cannot support this type of application or installation.
FCC Information
Page 4

4
Table of Contents
Congratulations ...............................................................................................2
FCC Information ...............................................................................................3
Table of Contents ............................................................................................ 4
List of Illustrations ...........................................................................................6
Xpress System Components ..........................................................................8
Table of Contents
Introduction ...................................................................................................... 9
Optional Accessories ...................................................................................... 9
XM Activation ................................................................................................. 10
GETTING STAR TED ........................................................................................ 12
Controls.................................................................................................................. 13
Receiver Control Features .................................................................................... 13
Basic Operation...................................................................................................... 16
Turning Xpress ON and OFF.................................................................................. 16
Menu Options.................................................................................................17
FM Frequency ........................................................................................................ 19
FM ON or OFF Feature ..................................................................................... 19
Finding an FM Frequency ................................................................................. 20
Brightness + Contrast ............................................................................................ 22
Backlight Timer ...................................................................................................... 23
Audio Level ............................................................................................................ 25
Antenna Aiming (Home Installation) ...................................................................... 26
Direct Tune............................................................................................................. 27
Search Mode .......................................................................................................... 28
Channel Skip/Add................................................................................................... 29
Memory Recall ....................................................................................................... 30
Tune Select ............................................................................................................ 31
Tune Select Erase All ........................................................................................ 31
Tune Select Erase Some ................................................................................... 32
Select By Song ................................................................................................. 33
Select By Artist ................................................................................................. 33
Page 5

Table of Contents (Cont)
Stock Ticker ............................................................................................................. 34
Add Stock ............................................................................................................ 35
Erase Stock ......................................................................................................... 36
Erase All Stock .................................................................................................... 36
Erase Some Stock ............................................................................................... 37
Info Extras ............................................................................................................... 37
Display Screen Mode ............................................................................................... 39
Scrolling Display .................................................................................................. 40
Background Mode ................................................................................................ 41
Set Clock .................................................................................................................. 42
Time Zone ............................................................................................................ 43
12 / 24.................................................................................................................. 45
Savings Selection ................................................................................................ 46
Auto-On .................................................................................................................... 47
Auto-Off / Sleep Timer ............................................................................................. 47
Set Factory Defaults ............................................................................................... 48
Exit Menu.................................................................................................................. 49
Search Button........................................................................................................... 50
Memory .................................................................................................................... 51
Preset / Direct .......................................................................................................... 52
Number Buttons 0-9 ............................................................................................ 53
Direct ................................................................................................................... 53
Preset (A, B, C) ................................................................................................... 53
Turning Xpress OFF ...................................................................................................... 54
Remote Control .............................................................................................. 54
Remote Control Features......................................................................................... 54
Care and Cleaning ......................................................................................... 58
Troubleshooting.............................................................................................59
Specifications ................................................................................................60
Warranty........................................................................................................ 61
User Notes..................................................................................................... 63
5
Table of Contents
Page 6

6
List of Illustrations
Figure 1. Your Receiver 8-Character Alphanumeric ID .............................11
Figure 2. Xpress Receiver Unit .................................................................. 12
Figure 3. Xpress Receiver Unit Display Screen........................................15
Figure 4. XM and Audiovox Logos Power ON Screen .............................. 17
List of Illustrations
Figure 5. Active Channel Screen ............................................................... 17
Figure 6. Main Menu Screen ...................................................................... 18
Figure 7. FM OFF Screen ........................................................................... 20
Figure 8. FM Frequency Screen ................................................................ 21
Figure 9. Brightness and Contrast Screen ................................................ 23
Figure 10. Backlight Timer Options .............................................................. 24
Figure 1 1 . Selecting 20-Second Backlight Timeout ..................................... 24
Figure 12. Audio Level Screen .................................................................... 25
Figure 13. Antenna Aiming Screen ..............................................................26
Figure 14. Direct Tuning Screen ..................................................................27
Figure 15. Search Mode Screen .................................................................. 28
Figure 16. Skip/Add Channel Screen ........................................................... 29
Figure 17. Memory Recall Screen ................................................................ 30
Figure 18. Tune Select Screen .................................................................... 31
Figure 19. Tune Select Erase All Screen ..................................................... 32
Figure 20. Tune Select Erase Some Screen ............................................... 32
Figure 21. Select by Song Confirmation Screen .........................................33
Figure 22. Select by Artist Confirmation Screen .........................................34
Figure 23. Stock Ticker Screen .................................................................... 34
Page 7

List of Illustrations (Cont)
Figure 24. Add Stock Screen ...................................................................... 35
Figure 25. Erase Stock Screen ................................................................... 36
Figure 26. Erase All Stock Screen .............................................................. 36
Figure 27. Erase Some Stock Screen.........................................................37
Figure 28. Info Extra Screen ....................................................................... 38
Figure 29. Display Screen .......................................................................... 39
Figure 30. Scrolling Display Screen ........................................................... 40
Figure 31. Background Setting Screen ......................................................41
Figure 32. Set Clock Screen Setting Time Zone.........................................42
Figure 33. Time Zone Set Screen ............................................................... 43
Figure 34. 12 / 24 Hour Selection Screen ..................................................44
Figure 35. Daylight Savings Selection Screen ........................................... 45
Figure 36. Auto-On Screen ........................................................................ 46
Figure 37. Auto-Off / Sleep Timer Screen.................................................. 4 8
Figure 38. Setting Factory Defaults Screen ............................................... 49
Figure 39. Category Search Screen .......................................................... 50
Figure 40. Scanning Search Screen ..........................................................51
Figure 41. Memory Selection Screens ....................................................... 51
Figure 42. Memory Selection Screens ....................................................... 52
Figure 43. Direct Channel Entry Screen .....................................................53
Figure 44. Exit Screen.................................................................................54
Figure 45. Xpress Receiver Remote Control ..............................................55
7
List of Illustrations
Page 8
8
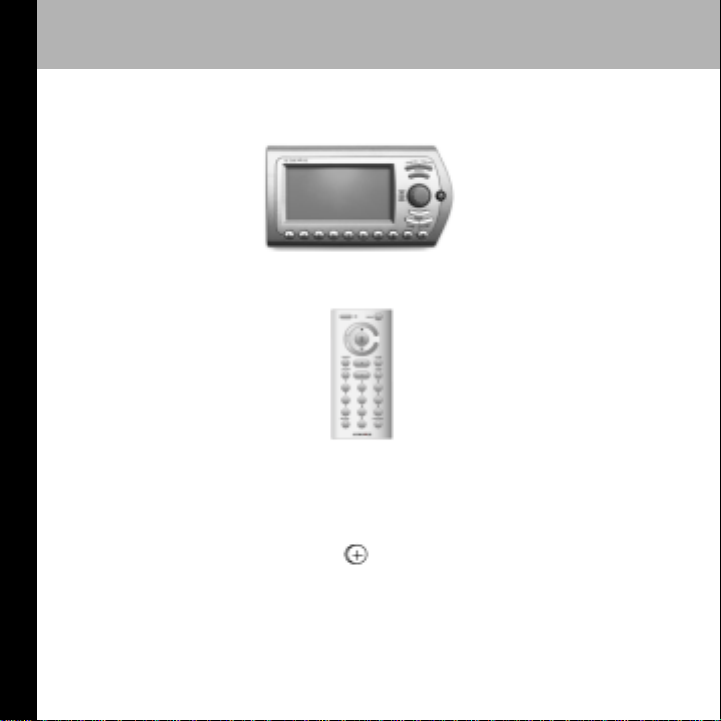
Xpress System Components
XM Receiver Model Xpress
Xpress System Components
3 Vdc Battery for Remote,
Remote Control Unit
Part Number 136-4042
(1) CR2032
Page 9

Introduction
The Audiovox Xpress XM receiver processes the XM satellite signals
received by the externally mounted antenna (purchased separately for
Home or Boom Box Kits). The Xpress XM receiver recognizes and
decodes the incoming XM broadcast signal and provides an audio|
signal to your radio or other audio output equipment.
NOTE: When installed in a vehicle, the XM signal can be received and
processed virtually anywhere as long as there are no obvious satellite
signal obstructions such as nearby tall buildings, high terrain, parking
garages or tunnels.
The Xpress XM receiver is typically installed in an accessible location of
the vehicle (dash area), consistent with line-of-sight operation of the
remote control, and/or within easy reach of the driver. For home use,
situate the Xpress XM receiver close to your stereo receiving equipment.
Optional Accessories (sold separately)
o Xpress Home Kit: Part Number XMH-10A
o Xpress Boom Box: Part Number XMF5X007-ES
o Xpress 2nd Vehicle Kit: Part Number XMC-10A
o Audiovox FM Direct Adaptor: Part Number XMFM-1
o Audiovox RCA Cables: Part Number SAT RCA
9
Introduction
Page 10

10
XM Activation
Activating your XM radio service is easy. You have one of two choices
to activate your service: Online or by Phone.
Activation
®
Online Activation Process
First, please make sure the Xpress XM receiver is working properly by
XM
tuning to the XM Preview channel (#1). If you can hear XM Preview, your
equipment is ready.
NOTE: The antenna must be installed on the outside of your vehicle for
best performance.
Next, make sure you have a credit card and your XM Radio Receiver ID
handy. You can display your ID by tuning your XM Radio to channel ‘0’,
one down from XM Preview. (For tuning instructions see the Receiver
Control Features section of this guide.)
To obtain the XM radio identification (ID) number, tune to channel 0 and
press the Rotary/Select Knob. The 8-character alphanumeric XM radio
ID will appear on the screen. Write the alphanumeric ID below (Figure 1)
for future reference.
NOTE: No adjustments are allowed in this mode. To exit the Radio ID
screen, tune to any channel by turning the rotary knob and press.
Page 11
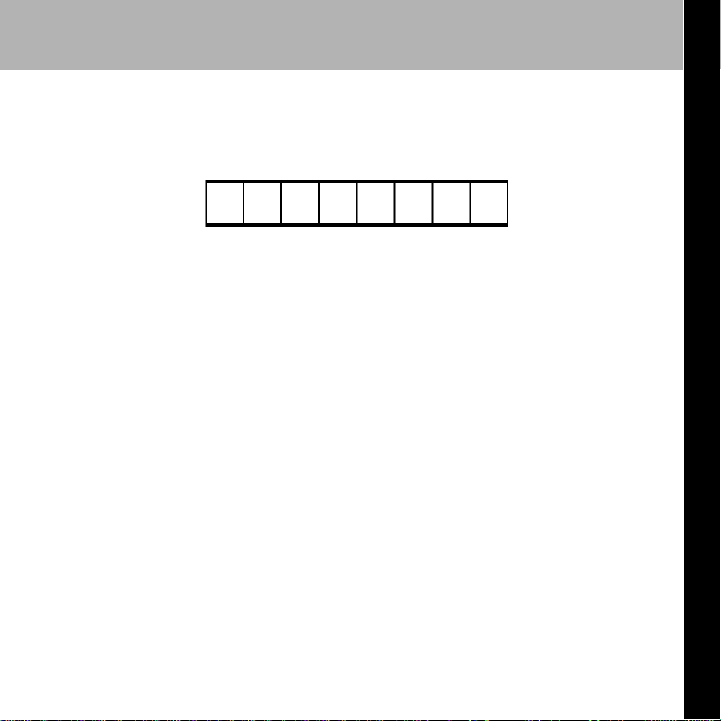
Please check your 8-character alphanumeric XM radio ID code carefully .
There is no “I” (eye), “O” (oh), “S” or “F” used. You may wish to double
check your ID code on the outside of your tuner box.
Enter the ID code below:
Figure 1. Your Receiver 8-character alphanumeric ID
Online Activation Process
Once the ID code is obtained, log on to XM at http://activate.xmradio.com
and follow the easy instructions to activate your Xpress XM receiver.
Call-in Activation Process
Call XM at 1-800-XM RADIO (1-800-967-2346). One of XM’s friendly
Customer Care representatives will take the necessary information and
walk you through the activation process. After the activation request is
submitted you should keep your receiver ON for at least 1 hour. This will
complete the activation process. When the Xpress XM receiver is activated, you will be able to access over 170 digital radio channels.
11
XM
®
Activation
Page 12

12
Getting Started
The Audiovox Xpress XM receiver provides:
• 7 control buttons
• 1 Rotary/Select Knob
• 10 number keys.
Getting Started
LCD
DISPLAY
PRESET KEYP AD
(NUMBER) BUTTON
Figure 2. Xpress Receiver Unit
DISPLAY
BUTTON
SEARCH
BUTTON
MENU
BUTTON
POWER / IR
EYE BUTTON
JUMP
BUTTON
ROTARY /
SELECT
KNOB
MEMORY
BUTTON
PRESET/DIRECT
BUTTON
Page 13

Controls
Receiver Control Features
Display Button - This button allows the user to choose one of four (4)
different formats to display the Artist, Song Title and data service
information on the LCD screen.
Search Button - This button allows the user to search the next channel
category as well as between preset channels or perform a continuous
search. The continuous search will scan all available channels in all
categories or all channels within a Preset group stopping at each one
for four (4) seconds until the user presses the search button again to
make a selection.
Menu Button - The MENU button is used to access “Menu Options”
which allows the user to make feature function adjustments for
personal preferences. Upon entering the main menu mode, use the
Rotary/Select Knob or the Remote Control UP and DOWN buttons to
highlight the desired function and then press the Rotary/Select Knob or
press the (XM) Select Button on the Remote Control to enter.
Rotary/Select Knob – The Rotary/Select Knob is the primary control
for navigating through the various lists and option menus available. This
knob has a dual purpose. In the default mode, this knob provides
sequential tuning through the available program channels. When the
knob is turned in a clockwise “CW” direction the unit tunes up one
channel at a time. When the knob is turned in a counter clockwise
“CCW” direction the unit tunes down one channel at a time.
13
Getting Started
Page 14

14
When in the list or menu mode, turning the knob CW and CCW scrolls
UP and DOWN through the various menus and lists. The current
selection from the list will be highlighted on the display. When the item
is highlighted, press the Rotary/Select Knob to enter the selection.
Power Button - This button applies power to and removes power from
Getting Started
the Xpress XM receiver. This button is also the Xpress XM receiver’s
receiver eye (IR).
Memory Button (mem.) - This button allows the user to capture and
store the current program data information (Artist & Song Title). You
can store up to 20 Artist/Song Title combinations.
Jump Button – This button allows the user to jump to the previous
channel (i.e., switch between the current and previous channel).
Preset/Direct Button (pre./dir.) - Each momentary press of the
PRESET button allows the user to switch between three (3) banks of
Channel presets (10 presets in each A, B, and C bank) plus Direct
channel entry. When in any of the three preset banks, momentarily
pressing any of the number buttons will recall the stored channel. In the
Direct mode, use the number buttons to directly enter the desired
channel number followed by pressing the Rotary/ Select Knob.
Keypad Buttons 0-9 - These buttons are used to directly enter a
desired channel number. They are also used when entering and
recalling preset channel numbers that have been stored.
Page 15

Display Screen Features - Shown below is an example of an active
Display Screen (see Figure 3). Pressing the DISPLAY button from the
Default display switches between the artist name/song title screen,
artist name/song title with stock screen, artist name/song title with
sports screen, or large letter format. When the letter size changes, the
field will scroll. This feature is useful when viewing the display at a
distance.
Momentary Preset Indicator
(Stays on for 2-seconds)
Time
Signal
Strength
15
Getting Started
Channel
Number
Artist
Song
Title
Stock, Sports,
and More Info
Figure 3. Xpress Receiver Unit Display Screen
Channel
Name
Page 16

16
Basic Operation
With the Xpress XM receiver properly installed, activated and connected
to your home/vehicle audio system or boom box, proceed as follows:
Turning Xpress ON and OFF
Getting Started
Set up your Audiovox Xpress XM receiver using the installation
instructions included in this Kit (Home Kit, or Boom Box Kit), or with the
help of a professional installer.
NOTE: Refer to Antenna Aiming during the installation procedure.
Press the Power button to turn the unit ON. When the unit turns ON the
XM logo will appear for 3-seconds (curved lines on either side of the XM
logo gradually appear) (see Figure 4) followed by the Audiovox logo.
These screens will be followed by the active channel
(see Figure 5), which defaults to the last tuned channel setting prior to
power being turned OFF. When the unit is shut OFF the XM logo will
appear and the curved lines on either side of the XM logo gradually
disappear.
NOTE: If this is the first time using the Xpress XM receiver, the screen
will alternately display the preview channel screen and a number of
messages, including: “Activate Your XM 1-800-XM RADIO”. If not, go to
channel 1 using the Rotary/Select Knob on the Xpress XM receiver or
the CH Up/Down buttons on the remote control.
Page 17
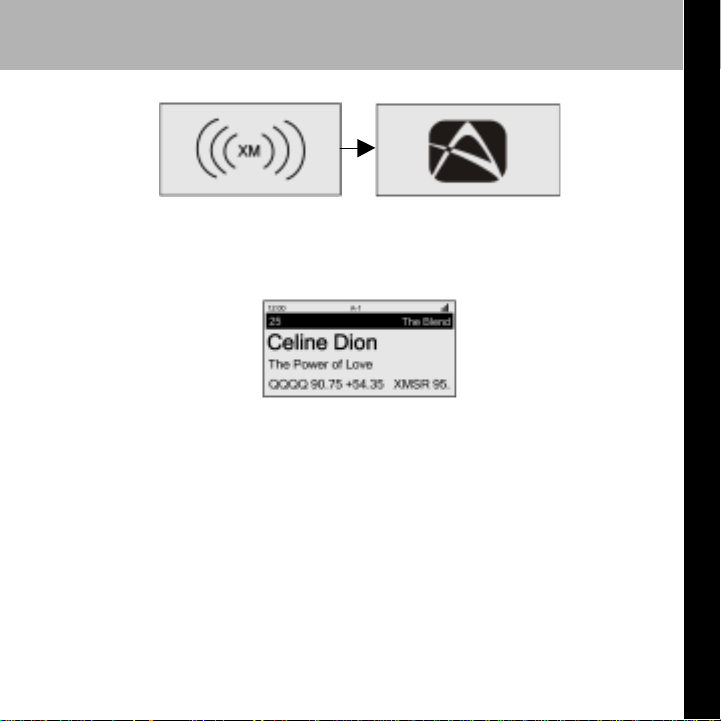
Figure 4. XM and Audiovox Logo Power ON Screen
Figure 5. Active Channel Screen
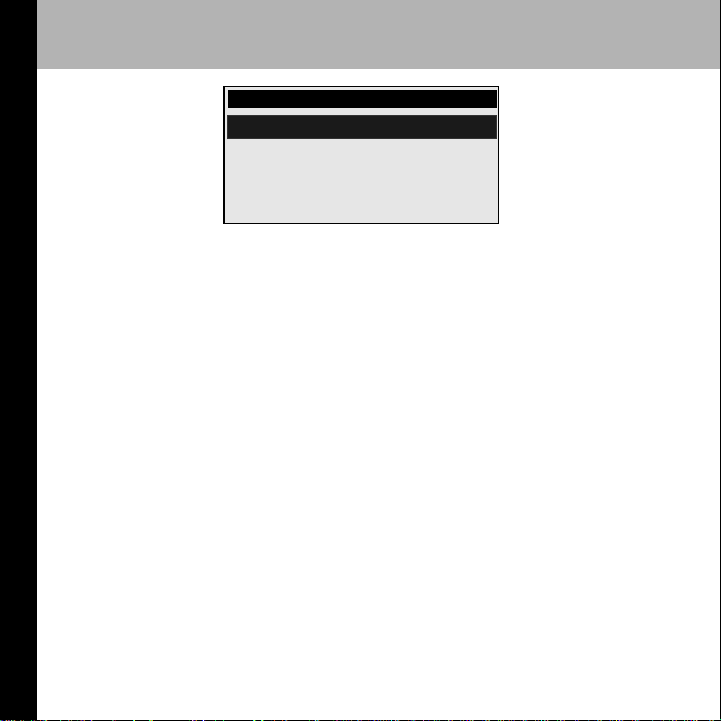
Menu Options
To enter the Menu Options page, press the MENU Button on either the
remote control or the main unit. The Main Menu list will appear on the
screen (see Figure 6). Using the Rotary/Select Knob, highlight the
option you wish to adjust, turning CW scrolls DOWN and CCW will
scroll UP through the various menus and lists. The current selection
from the list will be highlighted on the display. When the item is
highlighted, press the Rotary/Select Knob to enter the selected menu
item.
17
Menu Options
Page 18
18
FM Frequency
Brightness + Contrast
Menu Options
The following options are available:
Backlight Timer
Audio Level
MENU
Figure 6. Main Menu Screen
• FM Frequency
• Brightness + Contrast
• Backlight Timer
• Audio Level
• Antenna Aiming
• Direct Tune
• Search Mode
• Channel Skip/Add
• Memory Recall
While in the menu screen function, if a button is not pressed within
12 seconds from the previously selected function, the unit exits the
menu screen function and reverts to the default screen display.
NOTE: Upon setting and confirmation of a Menu selection, pressing
the Menu button will exit the Xpress XM receiver to the active screen
(See Figure 5).
• TuneSelect
• Stock Ticker
• Info Extras
• Display Screen Mode
• Set Clock
• Auto-On
• Auto-Off / Sleep Timer
• Set Factory Defaults
• Exit Menu
Page 19

FM Frequency
The following Frequency Setting adjustments are possible only when
using the Xpress XM receiver in your vehicle.
NOTE: The Xpress XM receiver has an internal FM Modulator, which
allows you to play the audio through any standard vehicle FM receiver.
In certain urban areas of the country where strong FM stations may
overpower the Xpress XM receiver FM transmitted signal, an FM direct
adapter may be needed to achieve a clean audio signal (Part Number
XMFM-1) in your vehicle.
FM ON or OFF Feature
19
Menu Options
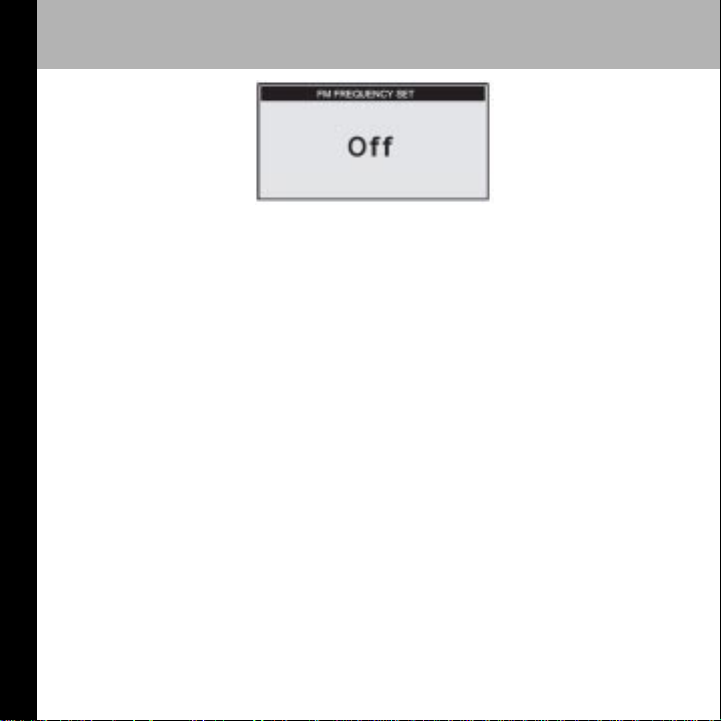
This feature allows the user to turn the FM Modulator ON or OFF when
the Xpress XM
receiver is used in the Vehicle cradle only. It is
recommended that you turn the FM Modulator OFF if you are using the
low level audio outputs in your particular application (optional cable
needed SAT-RCA) (see Figure 7). Upon entering the “FM Frequency”
mode the FM Modulator will be OFF by default. To turn the FM
Modulator ON, turn the Rotary/Select knob CW/CCW or use the UP and
DOWN buttons on the Remote Control to the highlight the desired fre-
quency (88.1, 88.3, 88.5,.......107.9).
Page 20
20
Menu Options
The selected frequency must be an unused frequency or a frequency used by a
low powered FM station in your area. If not, the strong signal from the FM station
may overpower the Xpress XM receiver FM transmitted signal which may result
in interference.
Finding an FM frequency at http://xmradio.com/fmlocator
If you choose to use the FM modulator to listen to XM in your vehicle, you will
need to find a suitable FM frequency in order to get the best sound. A suitable FM
frequency is an unused frequency or weak station that is not located near a
strong FM station in your area.
Steps to follow:
1. Go to http://xmradio.com/fmlocator for recommended FM frequencies in
your area.
2. Enter your local USPS Zip Code.
3. You will see the recommended FM frequencies in your area. T ry the “vacant”
channels first. (Remember that 87.9 is not a frequency that is available on
XM products).
4. Set your vehicle’s FM radio to one of the recommended frequencies. Now
set your XM receiver to the same frequency using the menu settings.
5. If the audio quality is not satisfactory, you can repeat these steps by
choosing another frequency .
Figure 7. FM OFF Screen
Page 21

21
This chart represents the FM channels in the Washington, DC area. The
spikes represent the strength of the FM channel. Someone in DC would
choose a “vacant” channel like 92.9 that is unused and located between
two weaker channels.
Sample Search Results for Major US Markets:
Menu Options
City:
New York City
Los Angeles
Chicago
Houston
Washington, DC
Zip Code:
10199
90052
60607
77201
20090
FM Channels:
88.5, 91.9, 95.1
99.1, 101.5, 107.9
89.1, 90.7, 91.1
88.1, 95.1, 97.3
92.9, 97.7, 98.1
With the FM Frequency highlighted, press the Rotary/Select Knob or the
(XM) Select button on the remote control to confirm the selection
(see Figure 8).
Figure 8. FM Frequency Screen
Page 22

22
Brightness + Contrast
This feature allows the user to adjust the brightness and contrast of the
unit’s display (see Figure 9). Upon entering either the brightness or
contrast adjustment mode, a horizontal bar graph is displayed with a
minus (-) sign on the left and a plus (+) on the right. Use the Rotary/
Menu Options
Select Knob to highlight the contrast or the brightness adjustment. Once
the desired adjustment is highlighted, press the Rotary/Select Knob to
enter the adjustment mode. If there is no activity for 12 seconds, the XM
receiver will exit to the active channel screen.
Brightness Mode: Turn the Rotary/Select Knob CW or use the UP arrow
on the Remote Control to increase the screen’s brightness. Turn the
Rotary/Select Knob CCW or use the DOWN arrow on the Remote Control to decrease the screen’s brightness. Once the desired setting is
obtained, press the menu button twice to return to the active channel
screen.
Contrast Mode: Turn the Rotary/Select Knob CW or use the UP arrow
on the Remote Control to increase the screen’s contrast. Turn the
Rotary/Select Knob CCW or use the DOWN arrow on the Remote
Control to decrease the screen’s contrast. Once the desired setting is
obtained, press the menu button twice to return to the active channel
screen.
Page 23

NOTE: When the Receiver is to be used in battery-operated
accessories, such as the Xpress Boom Box, to maximize
battery life, it is suggested that the brightness setting be reduced
to a minimal level.
Figure 9. Brightness and Contrast Screen
Backlight Timer
The Backlight Timer feature allows the user to set the amount of time the
display backlight is turned on, or the period before the display darkens,
provided no other button has been pressed during the selected time-out
interval; time increments of 10, 20, and 30 seconds are presented for
selection at your discretion. This user-friendly option subdues the
display during sleep hours or other particular periods.
23
Menu Options
Page 24

24
ROTATE DIAL TO CHANGE
Always On
10 Seconds
20 Seconds
Menu Options
30 Seconds
Figure 10. Backlight Timer Options
If the desired backlight time is 20 seconds, turn the Rotary/Select knob
CW to scroll down through the timer selections until 20 Seconds is
highlighted (Figure 10); then press the Rotary/Select knob. The
selection will appear as shown in Figure 11.
BACKLIGHT TIMER SET
20 Seconds Set
Figure 11. Selecting 20-Second Backlight T imeout
Page 25

As a result, the display backlight will turn off 20 seconds after this
selection is entered, provided no other button is pressed in the
meantime.
Audio Level
This feature allows the user to set the audio output signal level (see
Figure 12). Upon entering the audio level mode, a horizontal bar graph
is displayed with a minus (-) sign on the left and a plus (+) on the right.
Use the Rotary/Select Knob to adjust the audio level. When the Rotary/
Select Knob is turned CW the audio level signal is increased. When the
Rotary/Select Knob is turned CCW the audio level signal is decreased.
The UP and DOWN buttons on the Remote Control also provide a
similar function. When the desired setting is achieved, press the
Rotary/Select Knob or (XM) Select Button on the Remote Control to
confirm.
NOTE: To prevent distortion caused by overdriving the audio playback
device input, it is recommended that you adjust the audio level signal to
mid-range.
25
Menu Options
Screen displayed when the
FM Frequency is set to “OFF”
Figure 12. Audio Level Screen
Screen displayed when FM
modulator is set to “ON”
Page 26

26
Antenna Aiming (Home Installation)
This feature allows the user to aim the antenna to optimize XM signal
reception (see Figure 13). Upon entering the antenna aiming mode, a
horizontal bar graph is displayed with a minus (-) sign on the left and a
plus (+) on the right. The horizontal bar graphs represent the repeater
Menu Options
signal and satellite transmission signal strength. Position the antenna to
optimize either the satellite or terrestrial signal. When the optimal
setting is achieved, press the Menu button on the unit or the Menu on the
Remote Control to exit this screen and to return to the main menu.
NOTE: When the Antenna Aiming screen is selected, this screen
does not time-out like the other menu screens. This screen will
stay active until the Menu Button is pressed again.
Satellite Signal
Level
errestrial Signal
T
Level
Weak Strong
Figure 13. Antenna Aiming Screen
Page 27

Direct Tune
Turn the Rotary/Select Knob CW or CCW to highlight choice Direct Tune
“On” or Direct Tune “Off”. When the desired setting is highlighted, press
the Rotary/Select Knob or the (XM) Select Button on the remote control to
confirm (see Figure 14). The direct tune function when enabled (ON),
allows the user to manually tune to a channel using the Rotary/Select
Knob or the remote control UP and DOWN buttons. The unit will
automatically switch to the selected channel without pressing the
Rotary/Select Knob or the (XM) Select Button on the remote control. When
direct tune is set to off, this allows the user to manually tune to a channel
using the Rotary/Select Knob or the remote control UP and DOWN
buttons. The Rotary/Select Knob or the (XM) Select Button on the remote
control must be pressed to confirm the selection.
Figure 14. Direct T uning Screen
27
Menu Options
Page 28

28
Search Mode
This feature allows the user to change the way the search button on the
Xpress XM receiver functions. The Search button can be set to search
categories, to scan through all presets (A, B, C) or all available
channels.
Menu Options
Upon entering this mode, two options are displayed “Search by
Category” and “Search by Scanning” (see Figure 15). Use the Rotary/
Select Knob or the UP and DOWN buttons on the Remote Control to
switch between the options. When the desired setting is highlighted,
press the Rotary/Select Knob or the (XM) Select button on the Remote
Control to make the selection. Once a selection is made a screen will
appear to confirm the selection “Search by Category” or “Search by
Scanning Set”.
Figure 15. Search Mode Screen
Page 29

Channel Skip/Add
The Channel Skip/Add function provides the ability to skip over certain
channels when using the Rotary/Select Knob or the UP and DOWN
buttons on the Remote Control. Upon entering this mode, a channel list
is displayed with the current channel in play highlighted (see Figure 16).
In front of each channel is a plus sign (+) signifying that the channel is
not skipped or a minus sign (-) signifying the channel is skipped. Rotate
the Rotary/Select Knob to navigate the list and highlight the channel to be
adjusted. Once a channel has been highlighted, pressing the Rotary/
Select Knob changes the plus sign (+) or the minus sign (-) to the
opposite sign and adds/subtracts the channel from the channel skip list.
To exit to the active channel screen press the menu button twice.
PRESS XM BUTTON TO SKIP
ABC News & Talk
-
124
Weather Channel
+125
127
+
CNBC
+129 Bloomgberg New
Figure 16. Skip/Add Channel Screen
29
Menu Options
Page 30

30
Memory Recall
This feature allows the user to capture and store the current program
data information (Artist & Song title) with up to 20 listings (20 Artist/Song
Title combinations) (see Figure 17).
Press and release the memory (mem) button to save the information of
Menu Options
the current song or program. The Xpress XM
entries, after which any new information that is saved will replace the
oldest entry in memory. To recall saved information, press and hold the
memory (mem) button for 3 seconds. The Xpress XM
provide a continuous view of the Channels, Songs and Artists held in
memory . Rotating the Rotary/Select Knob CCW will access the previous
memory content or CW to access the next memory content. The UP and
DOWN buttons on the Remote Control also provide a similar function.
To exit to the active channel screen press the menu button twice, press
the jump button twice or wait 12 seconds.
receiver can hold up to 20
receiver will
Figure 17. Memory Recall Screen
Page 31

Figure 18. T une Select Screen
Tune Select
This feature allows the user to store current program information (Artist
and Song title) for future comparison against the incoming XM signal. The
Xpress XM receiver can hold up to 20 entries, after which any new
information saved will replace the oldest entry in memory.
To store a song or artist, press and hold the Rotary/Select Knob or the (XM)
Select Button on the remote control until the unit emits a confirmation tone.
When the exact Artist or Song is detected on another XM channel, the user
will be notified via a confirmation tone. An alert will also appear on the
screen for approximately 8 seconds identifying that a match was found.
Pressing the Rotary/Select Knob or the (XM) Select Button on the remote
control while this screen is active forces the unit to jump to the channel
currently playing before desired Artist or Song.
Tune Select Erase All
To delete all entries from the Tune Select list go to menu options then use
the Rotary/Select Knob or the UP and DOWN buttons on the remote
control to choose “YES” or “NO” (see Figure 19). Press the Rotary/Select
Knob or the (XM) Select Button on the remote control to confirm the
selection.
31
Menu Options
Page 32

32
Menu Options
Figure 19. Tune Select Erase All Screen
Tune Select Erase Some
To delete individual and multiple artists/song titles from the Tune Select list
use the Rotary/Select Knob or the UP and DOWN buttons on the remote
control to choose the Artist name or Song title (see Figure 20). Press the
Rotary/Select Knob or the (XM) Select Button on the remote to mark the Artist
or Song title for removal from the Tune Select list.
Press menu to delete marked items and exit the mode.
Figure 20. Tune Select Erase Some Screen
Page 33

Select By Song
This feature enables the Xpress XM receiver to search all other XM
channels for stored content by song title. Use the Rotary/Select Knob
or the UP and DOWN buttons on the remote control and select the
“Select by Song”. Press the Rotary/Select Knob or the (XM) Select
Button on the remote to confirm the selection (see Figure 21).
Figure 21. Select by Song Confirmation Screen
Select By Artist
This feature enables the Xpress XM receiver to search all other XM
channels stored content by artist title. Use the Rotary/Select Knob or
the remote control up down buttons and select the “Select by Artist”.
Press the Rotary/Select Knob or the (XM) Select Button on the remote to
confirm the selection (see Figure 22).
33
Menu Options
Page 34

34
Menu Options
Figure 22. Select by Artist Confirmation Screen
Stock Ticker
This feature allows the user to monitor various stocks. The Xpress XM
receiver can monitor up to 20 stock symbols. Use the Rotary/Select
Knob or the remote control UP and DOWN buttons to select “Add Stocks”
or “Erase Stocks” (see Figure 23). Press the Rotary/Select Knob or the
(XM) Select Button on the remote control to confirm your selection.
Figure 23. Stock Ticker Screen
Page 35

Add Stock
Two screens will appear “Please Wait” and “Enter Symbol” (see Figure
24). When the “Enter Symbol” screen appears use the Rotary/Select
Knob or the remote control UP and DOWN buttons to select each letter in
the stock symbol. Press the Rotary/Select Knob or the (XM) Select
Button on the remote control to confirm each letter of the symbol.
NOTE: The Xpress XM receiver will sometimes complete the entry.
When the entry appears on the screen press the Rotary/Select Knob or
the (XM) Select Button on the remote control to confirm symbol.
To exit this mode press the menu button twice.
35
Menu Options
Figure 24. Add Stock Screen
Page 36

36
Erase Stock
This feature allows the user to erase Stock Tickers individually or all
together (see Figure 25). Use the Rotary/Select Knob or the UP or
DOWN buttons on the remote control to highlight the desired action,
and press the Rotary/Select Knob or (XM) Select Button on the remote
Menu Options
control to confirm the selection.
Figure 25. Erase Stock Screen
Erase All Stock
Use the Rotary/Select Knob or the remote control UP or DOWN buttons
to select/highlight either “NO” to quit or “YES” to confirm the deletion of
all stock tickers stored in memory. Press the Rotary/Select Knob or the
(XM) Select Button on the remote control to confirm the selection.
Figure 26. Erase All Stock Screen
Page 37

Erase Some Stock
This feature allows the user to erase Stock Tickers individually (see
Figure 27). Use the Rotary Select Knob or the Up and Down buttons on
the Remote Control to confirm the deletion. The stock will be
immediately removed. To exit this function, press the Menu button to
revert to the previously active screen (Figure 5). A message will appear
on the screen “Stock List Changes Saved”.
Figure 27. Erase Some Stock Screen
Info Extras
This feature allows the user to display the available Info Extras,
primarily sports information. When “Sports” is selected you can receive
XM Satellite Radio broadcasts sports information such as various team
scores etc. (see Figure 28). Use the Rotary/Select Knob or Up and
DOWN buttons on the remote control and select “Sports”. Press the
Rotary/Select Knob or the (XM) Select button on the remote control to
confirm the selection.
37
Menu Options
Page 38

38
To select the various sports available use the Rotary/Select Knob or the
Up and DOWN buttons on the remote control to highlight and choose
the desired sport. Press the Rotary/Select Knob or the (XM) Select
button on the remote control to confirm the selection and have the XM
receiver display teams, if available, for the selected category . To select
Menu Options
the teams, use the Rotary/Select Knob or UP and DOWN buttons on the
remote control to highlight the desired team. Press the Rotary/Select
Knob or the (XM) Select button on the remote control to confirm the
selection. A “+” indicates team is selected, a “-“ means team is not
selected.
Menu Options
Figure 28. Info Extras Screen
Page 39

Display Screen Mode
This feature allows the user to personalize the display of the unit to
individual preferences. Upon entering Display Screen mode
(see Figure 29), the user can adjust the way information is viewed. Use
the Rotary/Select Knob or the remote control UP and DOWN buttons to
highlight the setting you wish to adjust, then press the Rotary/Select
Knob or the (XM) Select button on the remote control to confirm the
selection.
Figure 29. Display Screen
39
Menu Options
Page 40

40
Scrolling Display
The Scrolling Display feature allows the user to program the Xpress XM
receiver to scroll stock tickers or Info Extras information across the
bottom portion of the screen (continuous stream of information). The
paging mode feature presents the data one page at a time and is useful
Menu Options
when viewing the display at a distance. Upon entering Scrolling
Display mode (see Figure 30), use the Rotary/Select Knob or the
remote control UP and DOWN buttons to highlight either “Scrolling On”
or “Scrolling Off” then press the Rotary/Select Knob or the Remote’s
(XM) Select button. Selection acceptance is confirmed by an audio beep
and confirmation screen.
Figure 30. Scrolling Display Screen
Page 41

Background Mode
The Background Setting feature allows the user to change the color of
the characters being displayed to white characters on black (Negative
Display) or black characters on a white background (Positive Display).
Upon entering Background Setting mode (see Figure 31), use the
Rotary/Select Knob or the remote control UP and DOWN buttons to
highlight either “Negative Display” or “Positive Display” then press the
Rotary/Select Knob or the Remote’s (XM) Select button. Selection
acceptance is confirmed by audio beeps and confirmation screen.
Figure 31. Background Setting Screen
41
Menu Options
Page 42

42
Set Clock
This feature allows the user to personalize the clock display. The clock
data is provided via the XM
users settings. Use the Rotary/Select Knob or the UP and DOWN
buttons on the remote control and highlight one of the three options on
Menu Options
the Set Clock Screen (See Figure 32). Press the Rotary/Select Knob or
the Remote’s (XM) Select button to set your selection. Refer to the
following paragraphs for additional instructions.
Figure 32. Set Clock Screen Setting Time Zone
signal, and is displayed according to the
Page 43

Time Zone
This feature is used to set the clock to the Time Zone in which the user
resides (see Figure 33). Use the Rotary/Select Knob or the remote
control UP and DOWN buttons to highlight the desired time zone. Press
the Rotary/Select Knob or the Remote’s (XM) Select button to enter your
selection. Acceptance is confirmed by an audio beep and confirmation
screen.
Figure 33. Time Zone Set Screen
43
Menu Options
Page 44

44
12/24 Hour
This feature is used to set the time displayed to either a 12 hour
(Default) or 24-hour format (see Figure 34). Use the Rotary/Select Knob
or the remote control UP and DOWN buttons to highlight either “12 hour
Clock” or “24 Hour Clock” then press the Rotary/Select Knob or the
Menu Options
Remote’s (XM) Select button to enter your selection. Acceptance is
confirmed by an audio beep and confirmation screen.
Figure 34. 12 / 24 Hour Selection Screen
Page 45

Savings Selection
This feature allows the user to enable or disable Daylight Savings Time
(see Figure 35). Use the Rotary/Select Knob or the remote control UP
and DOWN buttons to highlight either “Standard” or “Daylight Savings”
then press the Rotary/Select Knob or the Remote’s (XM) Select button to
enter your selection. Acceptance is confirmed by an audio beep and
confirmation screen.
Figure 35. Daylight Savings Selection Screen
45
Menu Options
Page 46

46
Auto-On
The Xpress XM receiver is configured to shut down when the vehicle is
shut OFF or power is disconnected. By default, when the power to the
unit is reapplied the user must press the Power button to turn the unit
back ON. This feature allows the user to program the Xpress XM
Menu Options
receiver to automatically turn ON when the power to the unit is
reapplied (much like a vehicle radio).
When in the Auto-On menu use the Rotary/Select Knob or the Remote
control UP and DOWN buttons to highlight either “On” or “Off” (see Figure
36). When the desired setting is highlighted, press the Rotary/Select Knob,
or the remote’s (XM) select button to enter your selection. Acceptance is
confirmed by an audio beep and confirmation screen.
Figure 36. Auto-On Screen
Page 47

Auto-Off / Sleep Timer
This feature allows the user to program the Xpress XM receiver to
automatically shut OFF if the unit remains in an inactive state for a
period of time ranging between 15 Minutes and 3 hours (see Figure
37). There are 6 available settings:
· 15 Minutes
· 30 Minutes
· 45 Minutes
· 1 Hour
· 2 Hours
· 3 Hours
This feature is useful in preventing the vehicle battery from draining in
cases where the unit is installed with a constant power source. It is also
useful as a Sleep Timer turning the Xpress XM receiver OFF
automatically after a period of time.
When in the Auto-Off / Sleep Timer mode use the Rotary/Select Knob
or the Remote Control UP and DOWN buttons to highlight one of the six
(6) time settings you wish to select.
When the desired time setting is highlighted, press the Rotary/Select
Knob, or the remote’s (XM) select button to enter your selection.
Acceptance is confirmed by an audio beep and confirmation screen.
47
Menu Options
Page 48

48
Menu Options
Figure 37. Auto-Off / Sleep Timer Screen
Set Factory Defaults
This feature allows the user to reset the Xpress XM receiver back to the
original factory settings. Upon entering the Factory Default mode, use
the Rotary/Select Knob or the UP and DOWN buttons on the remote
control to switch between the “No” or “Yes” function.
Page 49

If “Yes” is selected all of the users preset settings are erased and the
unit returns to the original factory default settings. The second and third
screens will appear to confirm the selection (see Figure 38).
NOTE: Once “Yes” is selected the change cannot be undone and all
user personal settings will be lost.
NO
YES
Figure 38. Setting Factory Defaults Screen
Exit Menu
To exit the menu options rotate the Rotary/Select Knob CW or press the
down arrow on the remote control to highlight “Exit Menu”. Press the
Rotary/Select Knob or the (XM) Select button on the remote control to
confirm the selection.
49
Menu Options
Page 50

50
Search Button
The Search button provides the ability to search by category or to scan
directly through each of the available channels or through each of the
presets (A, B, C) depending how the button is setup (see Search Mode
section for setup instructions).
Menu Options
When the Xpress XM receiver is set to “Search by Category”, each press
of the Search button will advance through all available categories. When
a desired category is reached rotate the Rotary/Select Knob to select
the desired setting and press the Rotary/Select Knob or the (XM) Select
button on the remote control to enter the selection.
When the unit is set to “Search by Scanning”, it will continuously search
through the presets (A, B, C) or all the available channels (in five (5)
second intervals) in the direct mode until the Search button, Rotary/
Select Knob or the (XM) Select button on the remote control is pressed
to confirm the selection.
Figure 39. Category Search Screen
Page 51

51
Figure 40. Scanning Search Screen
Memory
This feature allows the user to program into memory favorite song titles,
artist names and channel information. To make an entry, press the
memory (mem.) button and a “Saved in Memory” confirmation screen
will appear (see Figure 41). Up to 20 entries can be stored. When 20
entries have been stored any new information that is saved will replace
the oldest entry in memory.
Menu Options
Figure 41. Memory Selection Screens
Page 52

52
To recall the saved information, press and hold the memory (mem.)
button for three (3) seconds and the MEMORY RECALL screen will be
displayed (see Figure 42). If there is more than one (1) entry in memory ,
use the Rotary/Select Knob or the remote control UP and DOWN
buttons to scroll through all stored entries.
Menu Options
To exit this mode, either press the Menu button twice or Jump button
once. This mode will also time-out after 10 seconds and return to the
active screen.
Figure 42. Memory Selection Screens
Preset / Direct
The pre./dir. button determines whether the numbered buttons 0 through
9 will operate as a keypad for entering channel numbers directly, or as
presets (A, B, C) used to select channels. The unit informs the operator
by displaying the selected mode (DIRECT, PRESET A, PRESET B,
PRESET C) on the top line of the display.
Page 53

Numbered Buttons 0-9
The numbered buttons (0 through 9) provide the operator with a means
of selecting channels by entering the channel number when the unit is
set to DIRECT, or selecting preassigned channels when the unit is set to
operate in PRESET (A, B, C).
Direct
When the unit is set to operate in this mode, channel selection can be
accomplished by entering its number directly. (e.g., to select #23, press
23.) The unit will display the following screen and change to the desired
channel 2 seconds later.
Figure 43. Direct Channel Entry Screen
Preset (A, B, C)
The unit has the capability of storing three sets of 10 preassigned
channels for a total of 30 preassigned channels. To assign a channel to
a number button, tune in the desired channel and hold down the desired
number button until the unit signals acceptance by issuing one short
beep and displaying a screen to confirm for about 1 second.
53
Menu Options
Page 54

54
Turning Xpress OFF
T o turn the Xpress XM receiver OFF, press the power button on the Xpress
XM receiver or on the remote control. The following screen will appear,
the curved lines on either side of the XM logo gradually disappear and
the unit will shut down.
Figure 44. Exit Screen
T urning Xpress Off / Remote Control
Remote Control
Remote Control Features
The wireless remote control supplied with the Xpress XM receiver is
capable of operating most of the features from a remote location. Each
button on the remote control functions in the same way as the button on
the Xpress XM receiver. For a full description of a keypad button and
function refer to the preceding sections in this manual. For optimal
operation of the remote control, always aim it toward the Remote
Sensor on the front panel of the main unit.
Page 55

(+) Button
(-) Button
Figure 45. Xpress Receiver Remote Control
Menu Button (menu) – The MENU button is used to access “Main Menu”
options which allows the user to make feature function adjustments and
set personal preferences. Upon entering the main menu mode, use the
UP and DOWN buttons to highlight the desired function. Press the (XM)
SELECT button to confirm the selection.
55
Remote Control
Page 56

56
Select Button (XM) – This button is used to confirm a desired channel/
category selection and various menu options. This button is also used to
program the ARTIST/SONG into the Tune Select feature by pressing and
holding for two (2) seconds (see Tune Select).
Mute Button (mute) – This button is used to mute and un-mute the
Remote Control
selected audio.
Jump Button (jump) – This button allows the user to jump from the
current channel to a previous channel (i.e., switch between current and
previous channel).
Number Buttons (0-9) – These buttons are used to select preset
numbers and to directly enter a channel number.
Memory Button (mem) – This button allows the user to capture and
store the current program data information (Artist & Song Title). You can
store up to 20 artist/song title combinations.
Display Button (disp) – This button allows the user to choose one of
four (4) different formats presenting the Artist, Song Title and data
service information on the LCD screen. Pressing the Display button
while viewing the active display switches between the artist name/song
title with data service ticker (sports, stock options, etc.) screen. When
the letter size changes, the field will scroll. This feature is useful when
viewing the display at a distance.
Preset/Direct Button (pre./dir.) – Each momentary press of the
PRESET button allows the user to switch between 3 banks of Channel
presets (10 presets in each A, B, and C bank, plus Direct (Dir)
channel entry.
Page 57

When in any of the three preset banks, momentarily pressing any of
the number buttons will recall the stored channel. In the Direct mode,
use the number buttons to directly enter the desired channel number.
Search Button (search) – Depressing the search button will cause the
unit to initiate a search based on the search mode stored in the unit.
Channel Up Button – This button is used to scroll through upper
channels in the channel list as well as navigate to the next higher line in
a list of menu options.
Channel Down Button – This button is used to scroll through lower
channels in the channel list as well as navigate to the next lower line in a
list of menu options.
(+) Button – This button is used to tune to the next higher channel
number.
(-) Button – This button is used to tune to the next lower channel number .
Power Button – This button is used to turn the power to the unit ON and
OFF.
IR Transmitter – The IR Transmitter sends the wireless commands to
the main unit. It must be pointed in the direction of the main unit in an
unblocked path to function correctly.
57
Remote Control
Page 58

58
Care and Cleaning
• Keep the unit away from excessive moisture or where it may get
wet.
• It is strongly recommended that the unit be installed and kept
Care and Cleaning
away from heat sources or direct sunlight.
• When cleaning, use only a soft, dry cloth.
• Never use any chemicals, abrasives, solvents, alcohol based
cleaning solutions or ammonia.
• Always operate the unit where air can circulate completely around
the unit.
Page 59

Troubleshooting
Troubleshooting
59
Troubleshooting
Page 60

60
Specifications
Audio Output 3.5mm Diameter Min-Stereo Jack
Specification
AUX (Audio) Input 3.5mm Diameter Min-Stereo Jack
Power Supply: 5 Volt, 2 Amp Maximum, Negative
Ground,DC Input.
CAUTION: Use only the Audiovox
approved adapter specified in the
kit for the Xpress XM
Radio Receiver, or the unit could
be severely damaged.
Antenna 1 RF SMB Connector
Dimensions H X W X D
2.44 Inches X 4.44 Inches X 1.22 Inches
(62.0mm) X (112.7mm) X (31.0mm)
®
Satellite
Page 61

12 MONTH LIMITED WARRANTY
AUDIOVOX ELECTRONICS CORPORATION (the Company) warrants to
the original retail purchaser of this product that should this product or any
part thereof, under normal use and conditions, be proven defective in
material or workmanship within 12 months from the date of original
purchase, such defect(s) will be repaired or replaced with new or
reconditioned product (at the Company's option) without charge for parts
and repair labor.
To obtain repair or replacement within the terms of this Warranty, the
product is to be delivered with proof of warranty coverage (e.g. dated bill
of sale), specification of defect(s), transportation prepaid, to an approved
warranty station or the Company at the address shown below.
This Warranty does not extend to the elimination of externally generated
static or noise, to costs incurred for installation, removal or reinstallation
of the product, damage to speakers, accessories, or vehicle and home
electrical systems, malfunction of satellite transmissions, repeater signal
or receiver unit.
This Warranty does not apply to any product or part thereof which, in the
opinion of the Company, has suffered or been damaged through
alteration, improper installation, mishandling, misuse, neglect, accident,
or by removal or defacement of the factory serial number/bar code label(s).
61
Warranty
Page 62

62
12 MONTH LIMITED WARRANTY (Continued)
THE EXTENT OF THE COMPANY'S LIABILITY UNDER THIS WARRANTY
IS LIMITED TO THE REPAIR OR REPLACEMENT PROVIDED ABOVE
AND, IN NO EVENT, SHALL THE COMPANY'S LIABILITY EXCEED THE
Warranty
PURCHASE PRICE PAID BY PURCHASER FOR THE PRODUCT.
This Warranty is in lieu of all other express warranties or liabilities. ANY
IMPLIED WARRANTIES, INCLUDING ANY IMPLIED WARRANTY OF
MERCHANTABILITY, SHALL BE LIMITED TO THE DURATION OF
THIS WRITTEN WARRANTY. ANY ACTION FOR BREACH OF ANY
WARRANTY HEREUNDER INCLUDING ANY IMPLIED WARRANTY
OF MERCHANTABILITY MUST BE BROUGHT WITHIN A PERIOD
OF 48 MONTHS FROM DATE OF ORIGINAL PURCHASE. IN NO
CASE SHALL THE COMPANY BE LIABLE FOR ANY
CONSEQUENTIAL OR INCIDENTAL DAMAGES FOR BREACH OF THIS
OR ANY OTHER WARRANTY, EXPRESS OR IMPLIED, WHATSOEVER.
No person or representative is authorized to assume for the Company
any liability other than expressed herein in connection with the sale of this
product.
Some states do not allow limitations on how long an implied warranty
lasts or the exclusion or limitation of incidental or consequential damage
so the above limitations or exclusions may not apply to you. This
Warranty gives you specific legal rights and you may also have other
rights which vary from state to state.
U.S.A. : AUDIOVOX ELECTRONICS CORPORATION, 150 MARCUS BLVD.,
HAUPPAUGE, NEW YORK 11788 (1-800-645-4994)
128-7351
Page 63

User Notes
63
User Notes
Page 64

Audiovox Electronics Corporation
150 Marcus Blvd.
Hauppauge, New York 11788
U.S.A.
1 800 645 4994
www.audiovox.com
Printed on Recycled Paper
©2006 Audiovox Electronics Corporation. All rights reserved.
XM name and related logos are trademarks of XM Satellite Radio Inc.
XMCK-10A
128-7454G
 Loading...