

Audiovox UniStreamONE Installation Manual
UniStreamONE
Universal Bluetooth
Integration Kit
Installation Guide/User Manual

2
iPhone is a trademark of of Apple Inc., registered in the U.S. and other countries.
Bluetooth® is a trade mark of Bluetooth Special Interest Group (SIG) Inc.
Android is a trademark of Google Inc.
Other trademarks and trade names are those of their respective owners.

3
Table of Contents
Warning and Safety! ........................................................................................................ 4
Congratulations On Your Purchase! ................................................................................ 5
Product Registration ........................................................................................................ 5
UniStreamONE Kit Contents ........................................................................................... 6
Frequency Conguration Settings ................................................................................... 6
Installation ....................................................................................................................... 8
BCS1M Bluetooth Module Controls and Indicators ....................................................... 10
Radio Illustration ........................................................................................................... 11
Pairing Your Phone ....................................................................................................... 12
Operation ...................................................................................................................... 13
Troubleshooting .............................................................................................................20
Firmware Update ........................................................................................................... 21
Compliance Information ................................................................................................ 22
4
Warning and Safety!
Please read these instructions carefully before proceeding. Failure to follow instructions may result in improper
operation or injury. Neither Audiovox Electronics Corporation nor Apple Inc., its regional ofces, distributors or
resellers take any responsibility for any damage or injury as a result of using the integration kit.
• Do not open, disassemble or alter the interface in any way.
• Do not insert anything into the casing.
• Do not cut or try to alter cables in any way and always use the correct connections.
• Only operate unit when the vehicle is stationary or ask passengers to operate it for you.
• Do not allow the Apple iPhone to distract you from driving.
• Exercise good judgement and keep your eyes on the road at all times.
• Do not expose unit to extreme temperatures, humidity or shock.
• Keep the unit and iPhone away from uids.
• Keep away from children! - Interface components may contain small parts, that may be broken or
disassembled and components may become loose from vibration and heat. Small components and
packaging materials may be a choking hazard when handled by children.
5
Congratulations On Your Purchase!
Thank you for purchasing this integration kit. Please review this booklet before operating the unit. The
UniStreamONE was designed and manufactured to seamlessly integrate with your vehicle’s factory audio system.
Product Registration
We recommend registering your Audiovox product so you can receive news about important rmware updates
and have unlimited access to our online support system.
To register your Audiovox product, please complete the following steps:
1. Visit http://www.audiovoxoei.com .
2. Look up and save the serial number of the product.
3. Complete the product registration form.
4. Submit the form.
5. Save the registration sheet in a safe place for future reference.
If you are unable to complete the registration via internet, please call Audiovox at 1-800-645-4994.
Prior to installation, make sure the Interface Module’s rmware is up to date to ensure compatibility
with the latest features and enhancements. Please refer to page 21 to update rmware.
6
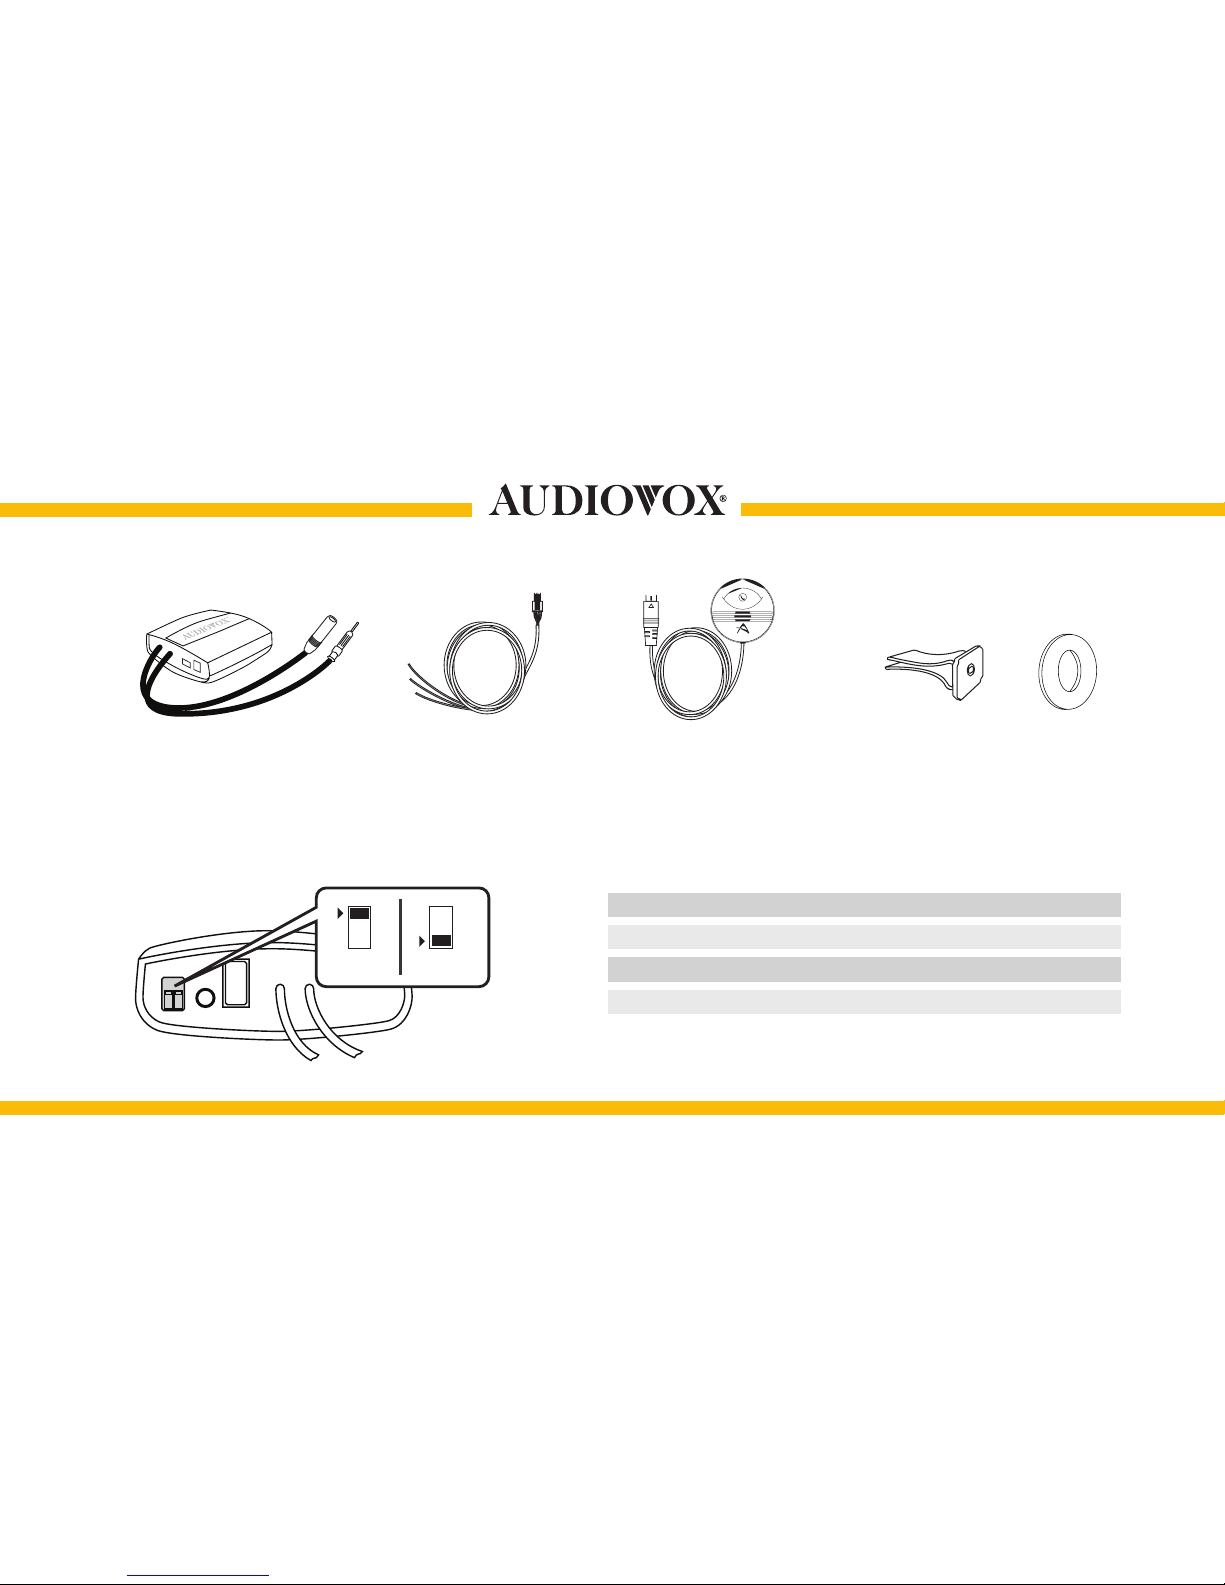
Interface Module
Power Cable
BCS1M Bluetooth
Module
Clip and 2-sided Mount
UniStreamONE Kit Contents
Frequency Conguration Settings
ON/OFF Switch Positions
Interface
Module
Frequency Selector Switch
ON
12
OFF
FM (MHz) DIP Switch 1 DIP Switch 2
88.7
93.3
97.5
107.7
OFF
ON
ON
OFF
OFF
OFF
ON
ON
NOTE - Congure the switches to an unused frequency
in your area, then tune your radio to that frequency.
7
Attention installer! Please read the following!
Audiovox strongly recommends that the Interface Module be installed in an easily accessible place!
DO NOT PLACE IT BEHIND THE RADIO AND DO NOT HIDE IT UNDER THE CARPET!
Whether the Interface Module is professionally or self installed, put the Interface Module where you can get to it
easily in the future. (Have the installer show you where the Interface Module is located.)
Installing the Interface Module behind the radio will make it difcult to:
• Add possible future upgrades, change software, add new features, improve operation
• Access the DIP switches located on the module.
• Remove the module in case of failure.
MAKE SURE THAT THE INTERFACE MODULE IS INSTALLED IN AN ACCESSIBLE PLACE!

8
Installation
1. Verify compatibility. Certain radios require antenna
adapter(s) that are not included in the kit.
2. Disconnect the battery.
3. Remove the radio from the car.
4. Set the DIP Switches for the Frequency Selector
Switch to the desired setting. See page 6.
ON
12
OFF
5. Install the Universal cable. Plug the factory radio
antenna into the receptacle on the Interface
Module.
6. Test for 12V constant, 12V switched, and ground
sources. Splice into the sources with leads from
the power cable.
7. Route the Interface Module to the glove box or
another accessible location.
 Loading...