

Page 1

Important!
Before You Start Using Your
Sprint PCS Vision Smart Device
(You'll thank us later.)
Installing the Pocket PC
Desktop Software on Your
Windows® Operating System
Synchronizing Your Sprint
Smart Device PPC-6700
PCS VisionSM
Page 2

Page 3

This guide will walk you through
the necessary steps to complete,
verify, and perform ActiveSync®.
This guide will help you install the Pocket PC Desktop
Software on your Windows
synchronize your Sprint PCS Vision Smart Device for the
first time.
If you have previously loaded any Pocket PC
Note:
If you need assistance, please call us at: 1-888-987-HELP
(4357).
software or device USB drivers, please remove
the prior software and follow this guide to
install the new Pocket PC Desktop software.
operating system, and
Important
Microsoft
!
the ActiveSync software.
DO NOT plug in the USB cable before loading the
!
software.
®
Outlook® must be closed before loading
1
Page 4
Step
1
When you insert the PPC-6700's Installation CD:
The Setup program should launch automatically.
If auto-run is not enabled on the PC, you can manually
launch the Setup program by doing the following:
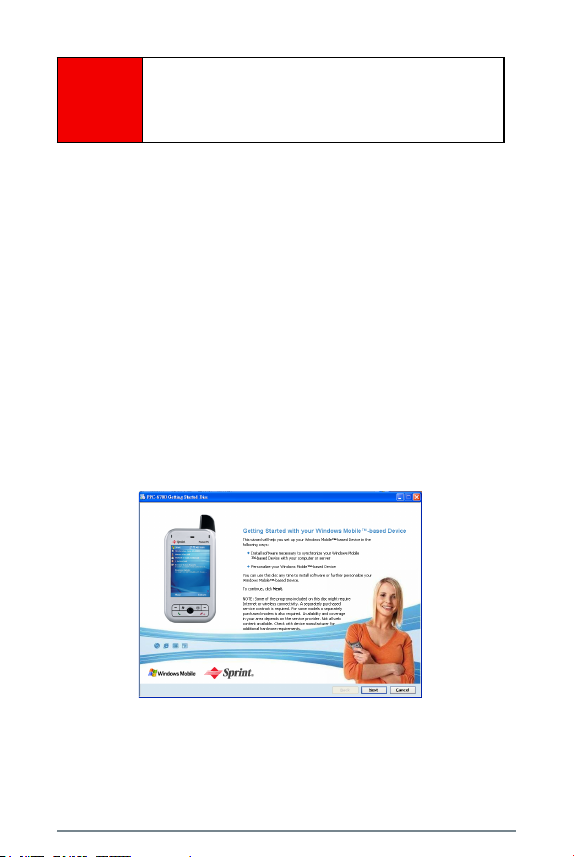
When the Setup program launches, you will see the
Welcome screen.
Insert the Installation CD into
your PC's CD-ROM drive.
1. Double-click My Computer on the Desktop.
2. Select the appropriate CD drive for the PC.
3. Double-click setup.exe to run the Setup
program.
2
Page 5

Step
2
Install Microsoft® ActiveSync®.
On the Welcome screen, click Next to start installing
Microsoft
synchronize your Sprint PCS Vision Smart Device with the
PC.
Click
which will guide you through the setup progress. Follow
the step-by-step instructions to complete the installation.
®
ActiveSync® on your PC. This is required to
Next again to launch the ActiveSync Setup Wizard,
Click “Next” to start
installing ActiveSync
3
Page 6

Step
4
Restart Your Computer.
3
After the software has been completely installed, restart
your PC. When your PC boots up, verify that the
icon appears in the Notification area of your Desktop (the
lower right corner of your Desktop screen).
Once you connect your device to your PC (see Steps
5 and 6 on the following pages), ActiveSync will
automatically detect your device and prompt you to set
up a partnership. When it is connected successfully, the
ActiveSync icon turns GREEN.
The status of ActiveSync icon:
— not connected.
— connected.
The ActiveSync icon
ActiveSync
Page 7

Step
4
After installing ActiveSync, you can explore the following
features on the Installation CD:
Repair or install critical programs
Click to repair or install Microsoft Outlook or
Microsoft ActiveSync.
Add new programs to my device
Click to install additional programs from this disc or
from the Internet. Please note that when you choose
Download from Web, you must first have an Internet
connection.
Add music, pictures, or videos to my device
Click to copy files from PC to your PPC-6700 quickly.
Learn more
Click to get more information online.
About this disc
Click to display the Disc Version information.
More features on the
Installation CD.
5
Page 8

Step
5
Your PPC-6700 comes with a USB cradle, which allows
you to connect to an available USB port on your desktop
PC to run ActiveSync, and to recharge your device with
the supplied AC adapter
Connect the USB cradle to your PC
Connect the USB cable
to the cradle, and then
insert the USB cable
into an available USB
port on your PC.
Charge the battery using the USB cradle
Insert the supplied AC
adapter into the adapter
port on the cradle, and
then plug the other end
into a standard power
outlet.
Connect the USB Cradle to
your PC.
.
Note:
6
You will be able to synchronize and recharge
the device simultaneously using the USB cradle.
Page 9

Step
6
With the USB cradle attached to PC, insert your PPC-6700
into the slot on the front of the cradle
Then, follow the prompts to select your partnership
settings, synchronization method, and synchronization
settings. Once setup is completed, click Finish. ActiveSync
will launch to synchronize the selected information
between your Sprint PCS Vision Smart Device and your
desktop PC.
If ActiveSync doesn’t launch automatically, right-click
on the ActiveSync icon in the Notification area (see
page 4), and then select Open Microsoft ActiveSync.
If ActiveSync does not automatically recognize
your PPC-6700, select File, and then Get Connected to
connect manually.
Insert Your Device into the USB
Cradle and Run ActiveSync®.
.
7
Page 10

Helpful Hints
If you are having difficulties with the software
installation, please refer to the Website:
www.sprintpcs.com.
Never start an ActiveSync operation while your
system is booting up. ALWAYS wait until you see the
ActiveSync icon in the Notification area (see page 4)
prior to starting an ActiveSync operation.
For more information about avoiding problems and
diagnosing common errors, please visit our Website:
www.sprintpcs.com.
If you need further assistance, please call us at:
1-888-987-HELP (4357).
8
Page 11

System Requirements for
ActiveSync 4.0
To connect your device to the PC, you must have
Microsoft® ActiveSync® installed on your PC. ActiveSync
4.0 is included in the Installation CD and is compatible
with the following operating systems and applications:
Microsoft® Windows® 2000 Service Pack 4
Microsoft® Windows® Server 2003 Service Pack 1
Microsoft® Windows® Server 2003 IA64 Edition Service Pack 1
Microsoft® Windows® Server 2003 x64 Edition Service Pack 1
Microsoft® Windows® XP Professional Service Packs 1 and 2
Microsoft® Windows® XP Home Service Packs 1 and 2
Microsoft® Windows® XP Tablet PC Edition 2005
Microsoft® Windows® XP Media Center Edition 2005
Microsoft® Windows® XP Professional x64 Edition
Microsoft® Outlook® 98, Microsoft® Outlook® 2000 and
Microsoft® Outlook® XP, and Microsoft® Outlook® 2003
messaging and collaboration clients
Microsoft® Office 97, excluding Outlook
Microsoft® Office 2000
Microsoft® Office XP
Microsoft® Office 2003
Microsoft® Internet Explorer 4.01 or later (required)
Microsoft® Systems Management Server 2.0
9
Page 12

10
 Loading...