

Page 1
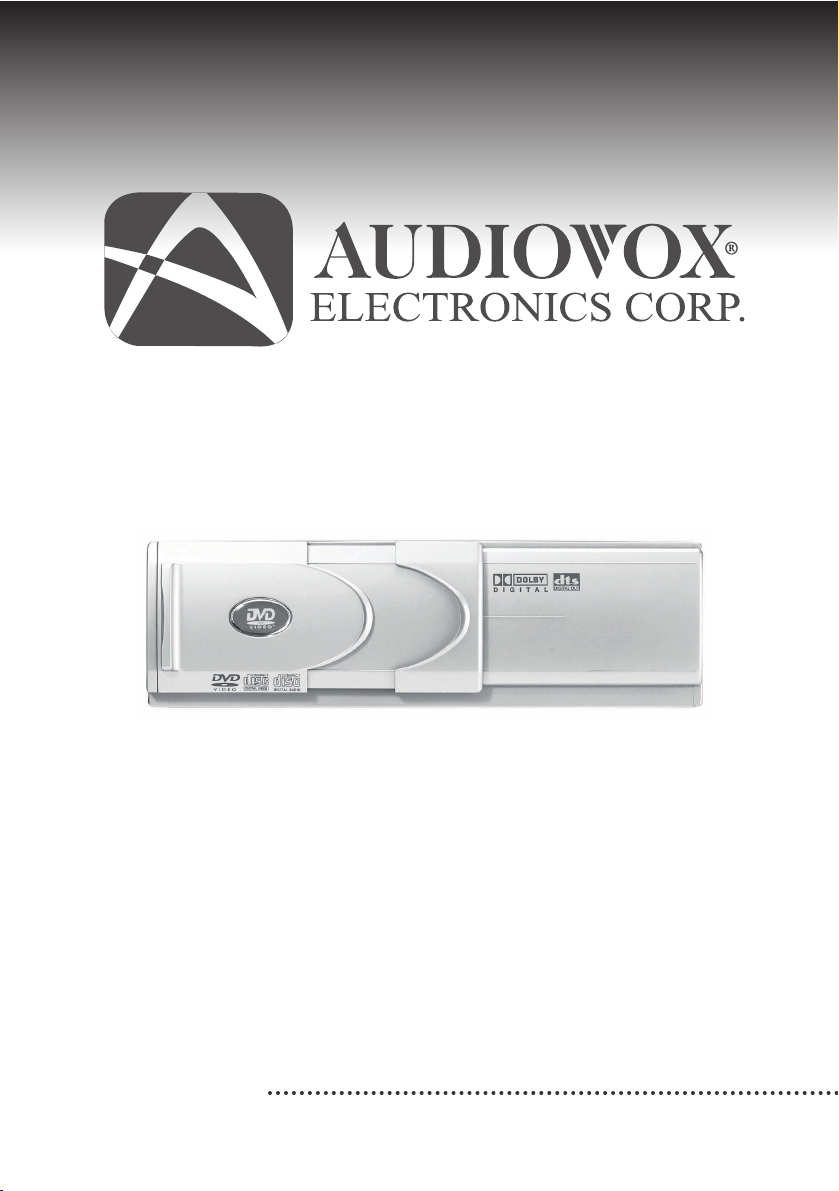
ULTRA SLIM MULTIFUNCTION CAR 6 DISC DVD CHANGER
PAV6D
PAV6D
PAV6D
128-6908
Page 2
■■
Thank you for purchasing the DVD Changer
The DVD Changer offers the following features:
6-disc DVD VIDEO/ VIDEO CD/ AUDIO CD/ CD-RW/MP3 capability.
Dual video outputs (front and rear seats)
FM MODULATOR (OPTIONAL)
COMMAND CONTROLLER (OPTIONAL)
Remote Control
We hope you will read this manual so you understand the diverse functions contained in
this unit and use the DVD Changer to its full potential. Please keep this manual
for future reference.
■■
The local number of this device is ″″1″″.
■■
The TV signal output format is selectable and can
be either ″NTSC″or ″PAL″.
■■
The symbols used for this manual ( , , ) have the following meanings;
INTRODUCTION
DVD
VCD
CD
DVD
VCD
CD
CD-ROM
Disc contains DVD Video
Disc contains VIDEO CD
Disc contains AUDIO CD
Disc contains files created by a PC
Page 3

Cautions when handling the discs
For safe and effective operation
Types of the discs available
Before using the device (power on)
Remote Control
Names and functions of each unit
Power off
Play & stop
Fast play
Movement to next/previous chapter or track
Slow play
Voice Selection
Subtitle Selection
Selection of screen angles
Selection of disc
Selection of PBC function
Display of disc list
Change of screen display
Basic operation 1 for change of setup
Basic operation 2 for change of setup
TV screen change 1 (vertical/horizontal image ratio)
TV screen change 2 (vertical/horizontal image ratio)
Setup for the optical digital output
Other setups
Names and functions of each unit
How to use the magazine
Descriptions about DVD CHANGER operation
Wiring 1 (SVC-680A)
Wiring 2 (SVC-680B)
Wiring 3 (SVC-680C)
TABLE OF CONTENTS
■■
Before Use
■■
Basic operations
■■
Other operations
■■
Before use
■How to use DVD CHANGER
■■
Trouble shooting (before returning DVD CHANGER to us)
■■
Specifications
■■
Wiring diagrams
1~2
2~3
4~5
5~7
7~8
9~13
13~14
14~15
15~16
16~17
17~18
18~19
19~20
20~21
21~22
22~23
23~24
25~27
28
29
29~30
30~31
31~32
33~37
38
39~40
41~46
47~50
50~51
52
53
54
Page 4

HANDING COMPACT DISC
1
Dirt, dust, scratches, and warped discs can cause skips in the playback and deterioration
of sound quality.
Please follow these guidelines to take care of your discs:
Use only compact discs with the mark
Fingerprints, dust, and dirt should be carefully wiped off the disc’s playing surface (shiny
side) with a soft cloth. Wipe in a straight motion from the inside to the outside of the disc.
Never use chemicals such as record sprays, household cleaners or thinner to clean
compact discs. Such chemicals can irreparably damage the disc’s surface.
Discs should be kept in their storage cases when not in use.
Do not expose discs to direct sunlight, high temperatures or high humidity for extended
periods.
Do not stick paper, tape, or labels on the disc surfaces nor write on them with any type
of marker.
Page 5

SAFETY PRECAUTIONS
This device is designed to be operated in a DC 12V negative ground system.
Please install and operate the device as specified by this manual.
Do not open the device to repair it. There are no user serviceable parts.
Do not allow the unit to come in contact with excessive moisture, especially when cleaning.
Clean with a damp cloth.
Condensation
If the CD Changer is exposed to excessive moisture, the unit may not read the disc.
Allow sufficient time for the optical lens to dry.
Video/audio trouble
When your car is driven on a rough road you may experience video/audio skipping.
This situation is unavoidable and CD Changer will operate correctly when the road
surface becomes smooth again.
For safety reasons, when changing video media it is recommended that the vehicle is not
in motion, and that you do not allow children to unfasten seat-belts to change video media
or make any adjustments to the system except through the remote control. System
adjustments can be accomplished using the remote control unit, while seat-belts remain
fastened. Enjoy your entertainment system and remember the safety of all of the
passengers in the vehicle should always remain the number one priority.
Use care to prevent dirt and foreign objects from entering the DVD Changer compartment.
Be especially careful not to spill liquids of any kind onto the media controls or into the
system. If liquid is accidentally spilled onto the system, immediately turn the system OFF
and consult a qualified service technician
When the vehicle is parked in direct sunlight or in an extremely cold place for a long period
of time, wait until the cabin temperature of the vehicle is at a comfortable temperature
before operating the system
The driver must not attempt to operate any function of the DVD Changer while the vehicle
is in motion. Give full attention to driving and to the road. Pull off the road and park in a
safe place before inserting or extracting DVD’s from the system. A remote control is
included with the system to allow the rear seat occupants to operate most system
functions without distracting the driver or removing seat belts.
2
Page 6
3
■■
The following disc types may be used with this DVD Changer.
Disc type and logo mark Size of disc Max. playing time
Approx. 133 min. (SS/SL)
Approx. 242 min. (SS/DL)
Approx. 266 min. (SD/SL)
Approx. 484 min. (DS/DL)
SS= one side DS= both sides
SL= one-side layer DL= dual layers
Video CD 5 inch (12㎝) Approx. 74 min.
Audio CD 5 inch (12㎝) Approx. 74 min.
CD-ROM 5 inch (12㎝) MP3 : MP3 music files
■■
The following discs types cannot be played by the DVD Changer:
DVD-R DVD-RAM DVD-ROM DVD-Audio
CD-G Mixed CD(Date) Active Audio(Date) VCD Multi-session disc
In case you designate other regional numbers but “1”or “ALL”for DVD Video display
You can play by TV method setting disc recorded with TV signals but NTSC or PAL
When session is closed, the Multi-session disc will not be played.
Note:
The discs recorded with CD-R and CD-RW can be played, but successful playback
depends on the recording conditions.
■■
Dual layer DVD Video disc
When you play a dual layer disc, you may experience a time lag between the end of first
layer and the start of second layer. Namely, the images may be stopped or the sound
will mute for a few seconds. Such problems are common for any dual layer disc.
■■
Local Region numbers (locally limited numbers)
The local region number for this device is “1”
There are local region numbers assigned for DVD play and DVD video discs. If these
numbers are not matched, the disc will not play. This device cannot play discs with other
local numbers but “1”or “ALL”.
DVD Video
5 inch (12㎝)
DISC TYPES
Page 7

4
Note :
The disc with “ALL”local number allotted will not be limited in terms of the coverage.
Such a disc can be played with the DVD players with any local number allotted.
The discs with no local numbers indicated
1. They can be played with the DVD player with the same local number.
2. played with the DVD players with “ALL”allotted.
The discs recorded in TV signal formats other than NTSC or PAL cannot be played
even if their local number is “1”or “ALL”.
■■
PBC (play control) - compatible video CD
This device is compatible with PBC-compatible video CDs.
In addition to the typical sound or animation plays, PBC-compatible video CD uses the
PBC menus recorded in the disc, so that CD may be played in an interactive mode.
■■
TV signal formats (NTSC/PAL)
NTSC/PAL modes can be set up in the SET-UP mode of this device.
Page 8

5
When wiring is completed, you should follow the procedures provided below before
operating the DVD Changer.
The DVD Changer is designed to play DVD video/video CD/audio CD. The video signals
may be directly connected to the video input and the audio signals can be connected to the
AUX input of FM modulator head unit, respectively using a DIN cable.
■■
When connecting the DVD CHANGER with a FM MODULATOR
Setting for operation
1. Insert the disc into the magazine and then install the magazine into the DVD Changer.
Then the DVD Changer checks the disc in the magazine.
2. Turn on the power for the car stereo and then connect the audio signals.
3. Set the radio at 88.7MHz. (Frequency is determined depending on the type of FM
modulator.)
4. Turn on the monitor and then switch to video mode.
Note : Please refer to the manuals for car stereo and monitor.
Power on and play
1. Turn on the power for the monitor by pressing the power button of the remote control.
The initial screen will display “DISC CHECK”enabled.
After disc checks the number 1 disc will be played.
2. Use the car stereo and control buttons to adjust the audio (volume, balance, tone, etc.)
according to your preference. Adjust the video (shade, contrast, tone, etc.,) using the
monitor controls.
Note.
When the magazine is inserted, the device will check the discs in each tray to set the disc
list. When “DISC BEING CHECKED”is displayed, the disc list is being set. If you want to
play the disc without waiting for disc list setting, please press DISC UP/DN(▲,▼) and the
ENTER button.
When using a DVD, the title menu screen and DVD menu screen will be displayed
depending on the type of discs. When using a video CD, the PBC menu screen will be
displayed depending on the type of discs.
The playback information will differ depending on the disc types (DVD/video CD/audio
CD/MP3).
Refer to the manuals for the car stereo and monitor.
Pre-Operational Check
Page 9

6
■■
When connecting DVD CHANGER directly with Head Unit
1. Insert the disc into the magazine and then install the magazine into DVD Changer.
The DVD Changer will check the disc in the magazine.
2. Turn on the monitor and change the switch.
3. Turn on the car stereo and press DVD Changer mode and the button of the car stereo
to switch to DVD Changer. The initial screen will display “DISC CHECK”enabled.
When disc checking is complete, the number 1 disc will be played.
When you press DISC UP/DN (▲,▼)ENTER button during disc checking, disc
checking will be stopped to play the disc you have designated.
4. Adjust the audio(volume, balance, tone, etc.,) by using the car stereo control buttons.
And adjust the video (shade, contrast, tone, etc.,) by using the monitor controls.
Note.
When you insert the magazine, the DVD Changer will check the discs in each tray to set
the disc list. When “DISK BEING CHECKED”appears it means that a disc list is being
set.
If you want to play a disc without waiting for disc list setting, press DISC UP/DN(▲,▼)
ENTER button.
When using a DVD, the title menu screen or DVD menu screen will display depending
on the disc type. In case of video CD, the PBC menu screen will be displayed.
The playback information displayed differs depending on types of discs (DVD/video
CD/audio CD/MP3).
The power source for DVD Changer can be turned on/off using the car stereo controls.
When using a remote control optical receiver, do not use the power button of on the remote
control.
The displays of car stereo may not match the ones controlled by remote control.
(Namely, if the switcher is set to repeat mode, it will not be shown on the display of car
stereo.)
Please refer to the manuals for car stereo and monitor.
Page 10
7
■■
How to insert the battery
1. Press the cover of the battery and
pull it towards you.
■■
When the battery is discharged, please dispose of the battery according to local
environmental codes.
■■
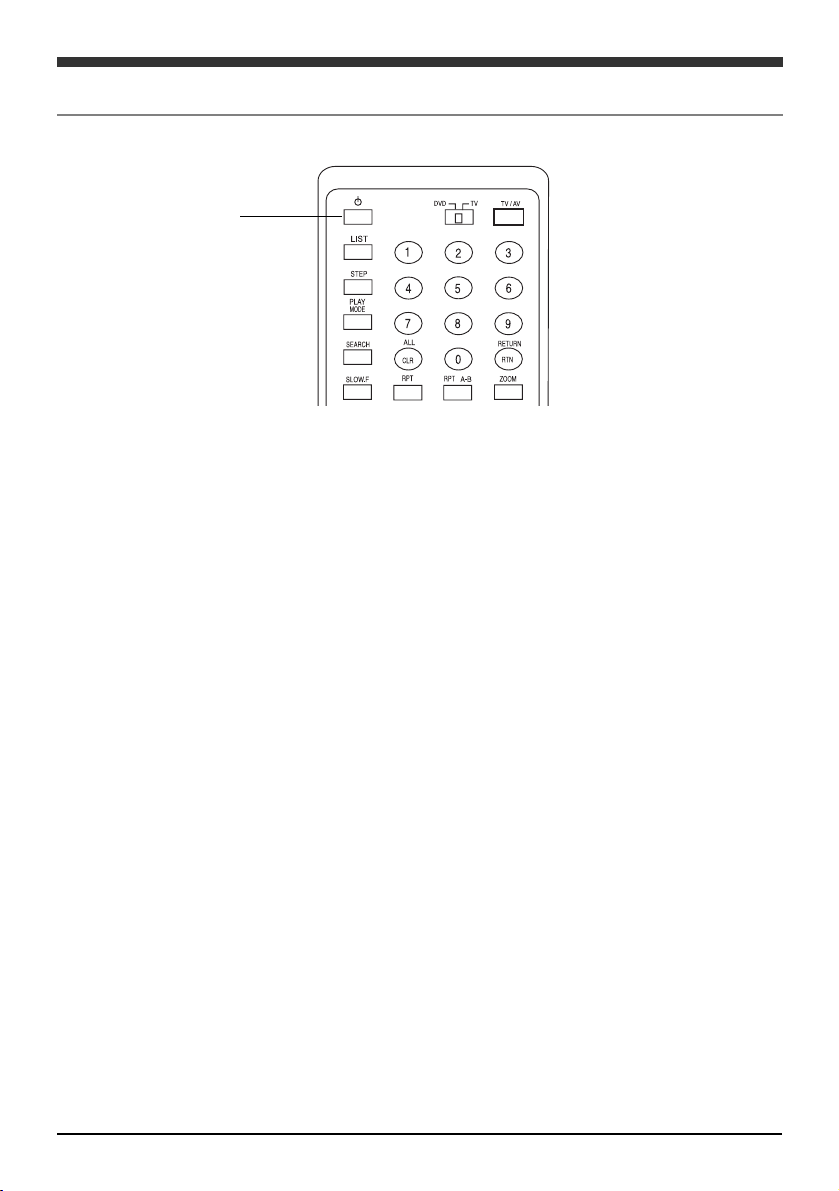
Remote control operation
Aim the remote control towards the photo receiver of the sensor. The remote control
will work within about 15 degrees vertically and horizontally and approxmately 10 feet
(3meters) from the photo sensor.
Note.
As the battery is discharged, the range of the remote control operation may be narrowed.
When range decreases, replace the battery.
Remote Control
2. Insert a lithium battery (CR-2025)
and then, push to close the cover.
Page 11
8
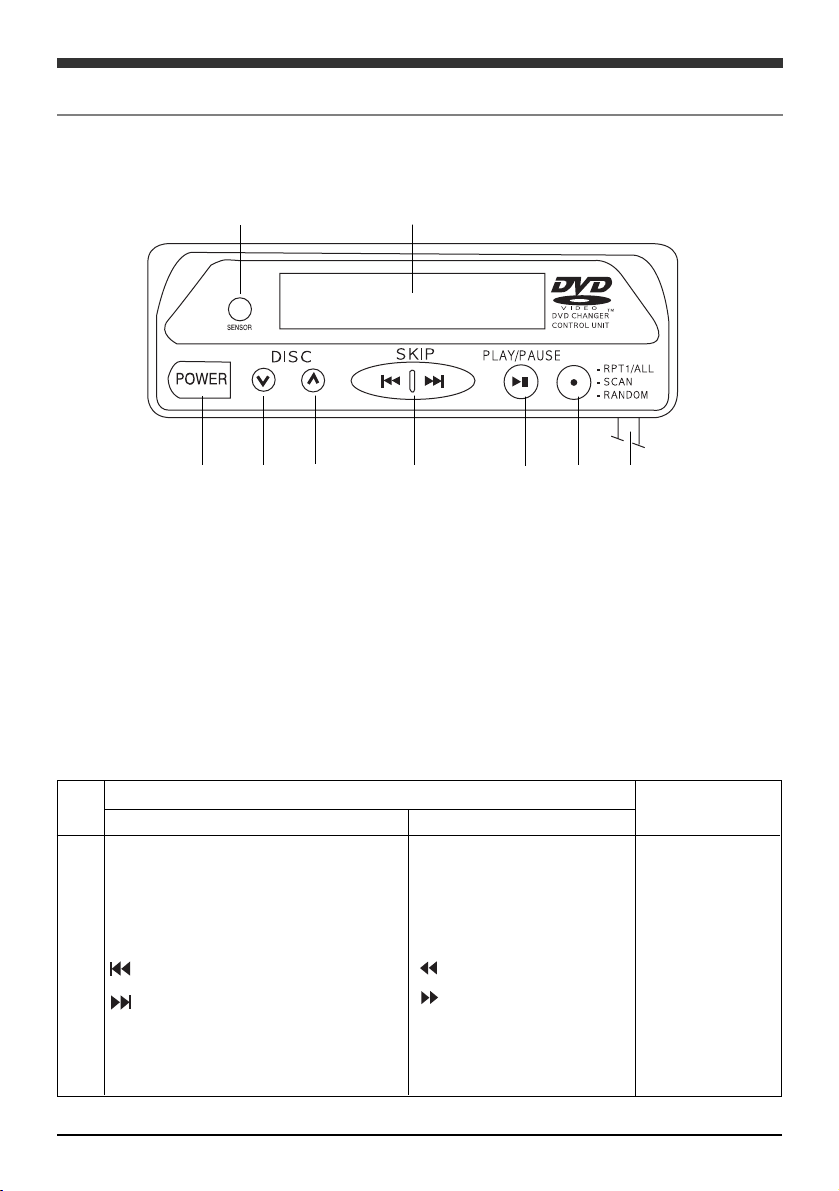
① POWER ON/OFF BUTTON
② DISC DOWN SELECT BUTTON
③ DISC UP SELECT BUTTON
④ TRACK UP/DOWN SELECT BUTTON
⑤ PLAY/STOP SELECT BUTTON
⑥ REPEAT ONE→ SCAN ONE→ RANDOM ONE TOGGLE SELECT BUTTON
⑦ REMOTE CONTROL SENSOR
⑧ LCD DISPLAY
⑨ COMMANDERFM MODULATOR CONNECTION CABLE JACK
1
2
3
4
5
6
7
SHORT PRESS
POWER button
DISC-DOWN button
DISC-UP button
(TRACK UP button)
(TRACK DOWN button)
PLAY / STOP
REPEAT ONE/ALL/SCAN/RANDOM
KEY FUNCTION
LONG PRESS(1.5SEC)
(CD Fast Play button)
(CD Fast Play button)
NO
Controls and Indicators
▶▶
COMMANDER
①
②
③
④
⑤
⑥
⑧
⑦
⑨
REMARK
DOUBLE KEY
DOUBLE KEY
TOGGLE KEY
Page 12

9
REMOCON
Caution : The Amp buttons on the lower part of the device are used with our
designated amplifier, do not use them for this DVD device.
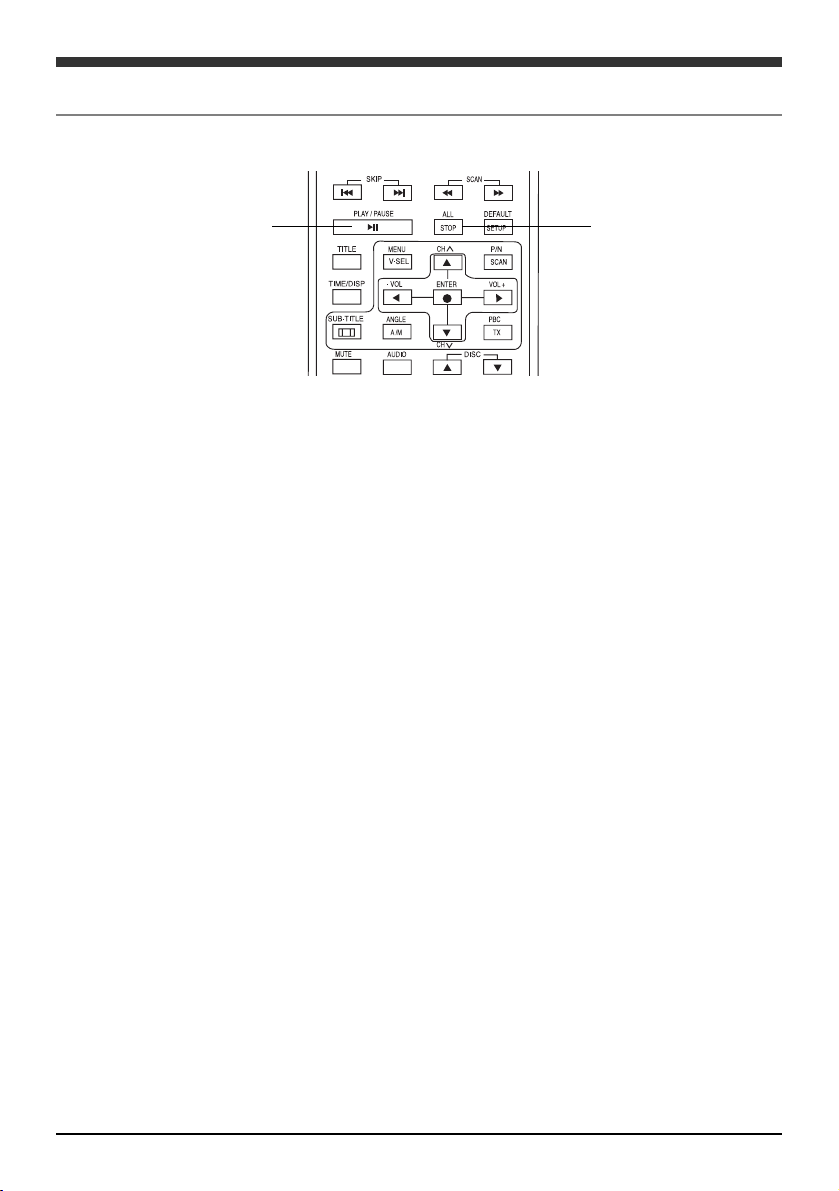
1. Power button
Turn the power source for DVD CHANGER ON/OFF
2. Screen (subtitle) select button
When this button is pressed during DVD play, you can switch to the subtitle language
recorded.
3. Voice (audio) select button
When you press this button during DVD play, you can switch to audio language recorded.
If a disc is recorded with mix of video and audio CDs, it can be switched to an audio
output format (RIGHT, MONO, LEFT MONO, STEREO).
For example, if a disc is recorded with L-CH: English and R-CH:
Chinese, L-CH/R-CH Chinese will be played when R-CH MONO audio is selected.
1.Power button
18.Disc List button
16. Random paly button
17. Search button
7. Clear button
26. Slow button
4.Repeat button
10.Skip button
20.Play button
13. Title button
25.Disc menu button
14.Screen display button
2.Screen select button
15. Angle button
3. Voice select button
6.No button
22. Return button
21. Zoom button
5. Interval repeat button
19. Fast play button
11. Setup button
12. Stop button
8. Cursor button
9. Enter button
24. PBC play mode
23. Disc UP/DOWN
Page 13

10
4. Repeat button
This button allows you to repeat disc play.
5. Interval repeat button (A~B)
When this button is pressed during play, it will allow you to repeat a selected part of
the title or track you want.
6. Number button (0~9)
You may use this button during PBC play to switch to the search mode or program list setup.
7. Clear button
You may clear the number which you entered by mistake.
8. Cursor button
This button may be used when you select an item from the screen.
9. Enter button
You may use this button when selecting or playing a disc.
10. Skip button ( , )
When this button is pressed during play, you will skip/return to the chapter or track.
When you press this button ( ) while DVD/video CD is paused, you will skip
over the next frame to play the disc.
11. Setup button
When this button is pressed during stop, you will return to the setup screen.
12. Stop button (■)
DISC play will be stopped by this button.
13. Title button
When you press this button during DVD play, you will move to the title menu screen.
14. Screen display button (TIME/ DISP)
When you press this button during DVD or video CD play, the working time will be displayed.
When you press it again, you may change the format of the time display.
When you press it during audio CD play, you may change the format of the time display.
15. Angle button
When this button is pressed during DVD play, the angle will be changed.
This function may be used for a multi-angle recorded screen.
16. Random play button (PLAY MODE)
When you press this button during audio CD play, the play format changes between
Page 14

11
scan, random and ordinary play.
INTRO SCAN → INTRO SCAN OFF → RANDOM → RANDOM OFF
17. Search button
When pressed during DVD play, you can select your desired title or chapter for play.
When pressed during VCD play, you can select the desired time for play.
18. Disc list button (LIST)- Displayed only after full loading
The disc list included in the magazine will be displayed. You may select your desired
disc from the disc list screen for play or limit the disc to a certain format.
19. Fast play button ( , )
When pressed during play, you will play the disc fast forwards or backwards.
20. Play button ( ▶ )
This button will play the disc.
If this button is pressed during fast forwards or backwards play, next frame play or
slow play, you will switch to the ordinary play mode.
Pause button ( ‖‖)
When this button is pressed during play, DVD or video or audio will stop temporarily.
If this button is pressed again, the device will return to the play mode.
21. Zoom button
This button will be activated only for DVD or video CD.
Whenever it is pressed, zooming will toggle among ZOOM ××1, —××1.5, —××2, —××4, — OFF.
22. Return button
This button will move you to the previously selected screen from setup or other procedures.
23. Disc UP/DOWN (▲ ,▼)
This button will allow you to select and play your desired disc.
24. PBC play MODE
During play, this button will display the PBC menu recorded in the PBC-compatible video CD.
25. Disc menu button (MENU)
This button will be activated only for DVD or video CD.
For DVD : This button will display the ROOT menu, or allow you to play from a certain
time if there is no such menu.
For VIDEO CD : This button will display the menu during PBC ON, if the disc is a PBC
compatible disc.
26. Slow button
The disc will be played slow.
Page 15
12
■Power button (when using FM modulator and commander)
When turning on the power again (beginning to play the disc again), you are advised to
set the FM radio receiver at 88.7 MHz or 89.1 MHz (the frequency selected by Frequency
Select switch on the FM modulator). Then press the power button. The disc begins to
be played from the position where previous play was stopped.
Note :
When you want to listen in a different car stereo mode (radio mode or CD mode), turn off
DVD CHANGER power. Otherwise, excessive radio noise or receiver trouble could result.
■When DVD CHANGER is directly connected with the receiver of a CD switching
controller
Please turn off the car stereo or switch to other modes (radio mode, CD mode, etc.).
If you want to turn on the power again (play again), follow the procedures below.
Then, the disc begins to play from the position where the previous play was stopped.
In case the power for car stereo is off, turn it on. (In case the device mode is not set up,
press the Enter button of the switcher mode.)
When you listen another car stereo mode (radio mode or CD mode), press the Car
Stereo Switcher select button.
Note.
Do not use the power button for remote control.
Please refer to the car stereo manual.
Power button
Power OFF
Page 16
13
■■
Play stop
Press the Stop button. The upper part of the screen shows “STOP”, disabling the play
mode. (And the play resume function will be activated.)
■■
Play resume button
Pressing the Stop button during play will store the position of play stop. This is called
play resume function. If this function is activated, the device will indicate the tray
number, track and time of MP3, audio CD and CD-RW discs.
In any of the following cases, the play resume function will be disabled.
- When the Stop button is pressed again
- When the magazine is removed and then, inserted again.
If you want to play it again, press the PLAY button.
■■
Pause (temporary stop)
Press the Pause button.
In the case of an audio CD, play will be stopped with the operating time flashing.
In the case of a DVD or video CD, the video will be stopped (the sound will also be stopped).
If you press the Pause button again, the disc will be played from the point where it was
stopped.
In some cases video or audio may be stopped just after DVD or video CD begins to be
played. Such problems are caused not because of a machine trouble but because of
the disc features. Regardless, if you press the Play button again, the disc will be played.
Play/pause button
Stop button
Play Stop
Page 17
Fast play button
14
Fast Play
■ DVD and video CD
During play, press ( or ) button.
If you want to play fast forwards, press [ ] button.
When pressing this button, the upper part of the screen will display FAST FWD
××
1, —××2, —××4, —××8. Then, the disc will be played fast forwards.
If you want to play fast backwards, press [ ] button.
When pressing this button, the upper part of the screen will display FAST BWD
××
1, —××2, —××4, —××8. Then, the disc will be played fast backwards.
If you want to reduce the speed of fast forwards or backwards play:
During fast forward play, press [ ]button, or press [ ] button during fast backward
play.
If you want to return to the normal play speed,
Press the Play button[ ▶ ].
Note.
During fast forward or backward play, the sound will be disabled.
For some discs, the intervals which cannot be activated by fast forward or backward
play may be included. At such intervals, the playing speed will be automatically set at
the ordinary speed.
■■
Audio CD, MP3 CD
During play, press [ or ] button.
If you want to play the disc fast forwards, press [ ] button.
When pressing the button, the disc will be played in the order of FAST FWD ××2 →
—××16 → PLAY
If you want to play the disc fast backwards, press [ ] button.
When pressing the button, the disc will be played in the order of FAST BWD ××2 →
—××16 → PLAY
Page 18

15
If you want to return to the normal speed, Press the Play button [ ▶ ].
Note.
During fast forward or backward play, the sound may be disabled or skipped over.
When the end of the disc is reached during fast forward play, the next disc in the
magazine will be automatically selected. When the end of the disc is reached during fast
backward play, play of the first track will begin.
Page 19

16
During play, press the skip button[ , ].
If you want to move to next chapter or track, press [ ]button.
Example of forwards skip button :
If you want to return to previous chapter or track, press [ ]button.
Example of backwards skip button :
Pressing[ ]button once will move you to the chapter being played or the beginning of
the track.
■■
When moving directly to next/previous chapter or track
For a DVD
If you want to move directly to your desired chapter, press the Search button, chapter number
and Enter button in that order.
Example of pressing Search button :
Example of selecting chapter 8 :
For a CD, CD-RW, MP3
If you want to move directly to your desired track, press the track number and Enter button.
Example of selecting track 8 :
Note.
Chapters are parts of the audio or image recorded on the DVD. Tracks are divisions of
audio or image (in case of video CD) recorded on a video CD or audio CD.
For some discs, their chapters or tracks may not allow for such a function.
SKIP FWD 008
Skip button
Movement to Next/ Previous Chapter or Track
SKIP BWD 007
TITLE : 01/04 CHAPTER : 000/ 017
TITLE : 01/04 CHAPTER : 008/ 017
SELECT : 008
Page 20

17
■■
Press Slow button.
■■
The disc will be played in the order of SLOW FWD ××1/2
→→ —— ××
1/4
→→ ——××
1/8
→→
BWD ××1/2
→→ —— ××
1/4
→→ —— ××
1/8 →→PLAY.
Note.
During slow play, the sound will be disabled.
Slow play may not be activated depending on disc type or its running positions.
For some discs, slow play may degrade the image quality of the disc.
If you want to return to normal play :
Press Play button.
Slow button
Slow Play
Page 21

18
Some discs contain multi-language audio tracks. In such cases, you may select your
desired language as follows;
During play, press Audio Select button.
The voice language selected will be displayed on the upper part of the screen for 3 seconds.
Example of a voice display :
With a voice language displayed, use the voice select button to select your desired
voice language. When you press the button, the voice language will be selected from
the language list recorded on the disc.
Press the Enter button.
If not pressed after selection, the voice language will be automatically selected 3
seconds later.
Note.
This function can be used only when multi-language voices are recorded in the disc.
The voice language may be switched also on DVD menu or setup screen.
Some disc may only allow to select audio via it’s title or disc menu.
Audio select button
Switch to voice
AUDIO 02/03 ENGLISH
Page 22

19
In some DVD discs, a screen language is recorded. In such a case, you may select to
display the screen language or hide it. In addition, some discs include multi-languages
recorded. In such a case, you may select your desired screen language.
During play, press sub-title Select button.
Then, the language selected will be displayed on the upper part of screen for 3 seconds.
Example of a subtitle display :
When a screen language is displayed, use the screen select button to select or deselect it.
(You may want to erase the screen language.)
Whenever pressing the screen select button, the screen languages will be toggled.
Press the Enter button.
If you do not press Enter after selection, the screen language will be selected about 3
sec. later.
Note.
This screen language selection function can be used only for the discs with multi-
languages recorded.
In some discs, this function will not work.
This function will not work for the screen languages displayed on DVD menu or setup screen.
In such a case, switch the screen language menu on DVD menu or setup screen.
If a screen language is included in both disc and setup, switch it on the setup screen.
At stage2, you may use the up/down cursors to select a screen language.
subtitle select button
Subtitle Selection
SUBTITLE 01/02 ENGLISH
Page 23

20
Some DVD discs have the scenes recorded to be viewed from diverse angles.
You may select your desired angle to view it.
While the scenes recorded from diverse angles are played, press the screen angle button.
Then, your selected angle will be displayed on the upper part of the screen for about
3 seconds.
Example of on angle display :
While an angle number is displayed, use the screen angle button to select your desired
angle. If you do not press Enter button after selection, the angle will be selected about
seconds later. (When the angle number display has disappeared)
Note.
The function can be used for the scenes recorded from multi-angles.
The numbers of recorded angles differ depending on discs and scenes.
You may change the angles during ordinary play.
You cannot change the angles during slow play or frame-preceding play.
If a scene whose angle can be changed emerges, it will switch to the selected angle at stage 2.
At stage 2, you may use up/dn cursors to select an angle number.
Screen angle button
Change of screen angles
ANGLE 01/03
Page 24

21
Press the disc select button[ ▲ or ▼ ].
If you want to proceed to next disc, press [ ▲ ] button..
If you want to return to the previous disc, press [ ▼ ] button.
Note.
During disc selection, the trays not containing the discs will be skipped over.
You may select a disc from the displayed disc list included in the magazine.
The playing procedures differ depending on the type of discs selected.
DVD :
When select a disc, it will be played from the beginning.
The functions after disc selection will differ depending on the types of discs.
For example, some discs will be played again from its beginning.
Sometimes, title menu screen or DVD menu screen will be displayed.
When title menu screen or DVD menu screen is displayed, select the desired
menu item you wish to play.
Video CD/ Audio CD
When you select a disc, the first track will be played.
When the last track has been played, the next disc in the magazine will be automatically
selected.
In case of some PBC (play controlled)-compatible video CD, the menu screen will be
displayed after its selection. Select the item to have it played. When the selected item is
played, the menu screen will be displayed again.
Disc select button
Selection of DISC
Page 25
22
PBC function button
PBC play function
When PBC menu screen is displayed, use the number buttons ( 0~9 ) to enter the item
number you want to use.
If you want to enter the item number “10”
Press ( 1 ). Then, “- -1” will be displayed on the upper left of the screen.
Press ( 0 ). Then, the display on the upper left of the screen will turn to “- -10”.
Press the Enter button.
For other selections, repeat steps and .
Note.
This device is set initially at PBC OFF MODE.
If you enter a wrong number, press Clear button to delete it.
If you want to stop PBC playback and go to normal playback please refer to the chapter
describing“PBC playback and ordinary playback”
The PBC menu is stored in the disc and the contents may differ depending on the type of
disc.
If using a compatible video CD, pressing Disc Menu button during play will move to the
menu.
If you want to display the PBC menu during PBC play,
Press the Return button.
PBC play and normal play (PBC OFF MODE)
Pressing PBC button at PBC play mode will toggle to the normal play mode.
This function will display the PBC menu when using a video CD. The following describes
when an interactive menu is played.
Playback Control(PBC) Function
Page 26

23
Disc list
The magazine tray numbers and the disc list in the tray will be displayed.
Tray #1 includes audio CD.
Tray #2 includes video CD.
Tray #3 includes DVD.
Tray #4 is currently being read.
Discs have not been checked for trays #5 and #6.
Disc list display button
Display of disc list
You may display the disc list that is included in the magazine or check the disc formats
(DVD, video CD, audio CD). you can also select your desired disc to be played.
Press the List button
Then, the screen showing the disc list will appear.
Page 27

24
About disc list
When the magazine is inserted, the DVD Changer checks the discs in each tray to create
the disc list. While the disc list is being created, pressing the Play button will stop the
checking process and begin to play first disc.
Note.
The tray not including the disc or the tray including the disc which cannot be played by
the DVD Changer will be displayed as “-”.
Only the number will be displayed for the tray including the disc not checked.
To turn off the screen displaying the disc list, Press List or Return button.
If you want to select a disc to be played,
Use the cursor button to select the tray including desired disc from the disc list.
Press the Enter button.
The selected disc begins to be played.
Page 28
25
When the display button (TIME/DISP) is pressed, the following screens are displayed
depending on the disc contents.
▶▶
Playing a DVD
PLAY
NTSC
DVD : 01
TITLE
CHAPTER
TIME
REMAIN
SUB TITLE OFF
AUDIO KOREA
RPT OFF
AC-3
Display info button
Displaying playback information
01 / 09
004 / 044
00:06:25
01:58:00
00 / 03
01 / 03
1/1
Playback status
Video signal standard
Disc information
Current TITLE
Current CHAPTER
Elapsed time
Remaining time
Subtitle status
Audio / Language status
Repeat mode status
Camera angle
Sound effect
■■
Description
Page 29

26
▶▶
Playing a VIDEO CD
■■
Description
TRACK 09 / 12 TRACK information
PBC OFF Play control button
▶▶
Playing an AUDIO CD
Page 30

27
▶▶
Playing MP3 CD
■■
When a MP3 CD is played, its file, folder and title will not be displayed.
■■
Pressing the screen display button (TIME/DISP) will display title, producer, disc number
and the year of production. (Korean ones will not be displayed.)
Page 31

28
If you want to stop playing, press the Stop button.
(You can only change the setup while the DVD Changer is in the stop mode.)
Press the Setup button. The setup screen will be displayed.
Use Up/ Dn cursor button to select the item and press Enter button.
The setup screen for the item selected will be displayed.
Setup button
Basic operation 1 Changing Setup (DVD)
Page 32

29
Note :
The contents setup will be maintained until changed.
If you want to return to the previous screen during change of setup,
Press Return button or left cursor button.
If you want to stop or terminate the setup change procedure,
① Press the Setup button.
Then, ″■″screen will be displayed again.
② Press the Play button.
Play mode will be activated.
Note.
In case of video and audio CDs, the play resume function will be activated from the
position where the play was stopped.
In case of a DVD, the disc will be played from the start. If the setup has not been
changed, the play resume function will be activated from the position where the play
was stopped.
Basic operation 2 Changing Setup
Page 33

30
There are two types of monitors. The ordinary monitor has 4:3 horizontal/vertical image
ratio, while the wide monitor has 16:9 image ratio. Any of the following 3 types can be used
for some DVDs, which may store multi-image ratios. Set the image ratio according to your
monitor type.
■■
4:3 Letter Box
This can be selected for an ordinary monitor. If a wide image DVD of 16:9 image ratio is
played, the vertical length will be compressed with black bands on upper and lower parts
of screen.
■■
4:3 Pan & Scan
This can be selected for an ordinary monitor. If a wide image DVD of 16:9 image ratio
is played, some of the left and right parts of the screen will be cut.
■■
16:9 Wide screen
When a wide image DVD of 16:9 ratio is played, it can be played full-screen on a wide
monitor. To have the image displayed full-screen, set the monitor at “Full”or
an equivalent mode. Refer to the manual of your monitor for details.
Run steps 1 and 2 for Basic operation to change the setup and to display the setup
screen.
Use Up/ Dn cursor button to select “ SETUP ”and press Enter button.
The setup screen will be displayed.
TV screen change1(vertical/horizontal image ratio)
Setup button
Page 34

31
Use Up/Down cursor button to set an image ratio(4:3 Letter Box, 4:3 Pan & Scan, 16:9
Wide Screen) and press Enter button. Then, the main setup screen will be displayed
again.
Note.
When you have selected an image ratio which is not stored in the disc, any image ratio
stored in the disc may be used during play. Some discs include only a single image ratio.
If you setup “16:9 WideScreen”for an ordinary monitor, the image may be distorted.
For an ordinary monitor, use the setup 4:3 Letter Box or 4:3 Pan & Scan.
If a wide monitor is set at “Full”or an equivalent mode and the DVD Changer is set for
″4:3 Letter Box or 4:3 Pan & Scan″, the image may not look natural. If you want to use
a wide monitor to view ″4:3 Letter Box or 4:3 Pan & Scan″image, set the monitor to 4:3
image ratio.
Use Up/ Dn cursor button to setup a TV signal format (MULTI, NTSC, PAL) and press
the Enter button. Then, the main setup screen will be displayed again.
TV screen change2 (vertical/horizontal image ratio)
Page 35

32
If you want to stop playing, press Stop button.
When you press Stop button during play, “PRE-STOP”will be displayed on screen.
You may press the button again only with “STOP”displayed. Pressing Setup button will
display the following screen:
■Select AUDIO SETUP with the cursor.
Stop button
Setup button
Setup for the optical digital output
Page 36

33
■Analog output is the default for audio output.
If you want to change to optical output, set ″SPDIF/RAW (or PCM)″for the audio output.
■Select “MAIN PAGE”and then “EXIT SETUP”from Setup menu. Press Play button to
change to optical output.
※※
About RAW and PCM
RAW : Selectable when Dolby digital decoder is connected with the audio. When
Dolby digital format (signal) audio is played, it will be output without its
change.
PCM : Selectable when Dolby digital decoder is not connected with the audio.
Dolby digital format (signal) audio will be changed to linear PCM before
output.
Page 37

34
Setup for digital audio output
You may change DVD audio language.
Use Up/Dn cursor to select your desired language and press the Enter button.
■This is a mode selecting PCM voice signal recorded in DVD.
■Use Up/Dn cursor to select “LPCM OUTPUT”and press the Enter button.
※ About LPCM 48K and LPCM 96K
LPCM 48K :Selected when DVD sampling frequency is set at 48KHz.
LPCM 96K :Selected when DVD sampling frequency is set at 96KHz.
Other setups
Page 38

35
You may change the subtitle language of DVD.
Use Up/Dn cursor to select your desired subtitle language and press the Enter button.
Change the disc menu language
■Use Up/Dn cursor to select your desired language and press the Enter button.
This mode sets a local code.
Select your desired local code and change it.
Page 39

36
Parental control
■PARENTAL CONTROLS DESCRIPTIONS
For general audience. No age requirement.
Parental Guidance suggested. some material may not be suitable
for children.
Parents Strongly cautioned. Some material may be inappropriate
for children under 13.
No one 17 and under allowed.
Some material may be inappropriate for children under 13.
8 Adult
1G
2
3PG
4PG 13
5
6PG-R
7CN-17
Limited strongly cautioned.
■Use Up/Dn cursor to select desired region code and press Enter button.
■The local codes are as follows.
USA, CANADA
KOREA
JAPAN, FRANCE, ITALIA, GERMANY, BRITAIN
Page 40

37
■Use Up/Dn buttons to select Password Change and press the Enter button.
■Enter a PASSWORD and press the Enter button.
Note.
The default password in “5700”, use this password incase you forgot the current
password.
Setting password.
Page 41

38
■Use Up/Dn cursor to select INITALIZE, then RESET and press Enter button to initialize
the setup menu.
Note.
All settings except parental control and password will be restored to factory settings.
Initializing the setup menu.
Page 42

39
Names and functions of each unit
Page 43

40
■How to insert DVD into magazine.
How to use the Magazine
Holding tab, pull the tray
out to the fully open position.
Insert DVD with its label side up.
Push the tray back in.
The trays are numbered ascending from bottom-to-top.
6 discs (one for each tray)
①①
①①
Page 44

41
How to insert and eject the magazine
■How to insert DVD into magazine.
Slide magazine compartment
door to the right (open).
With magazine label up, push
the magazine into the Changer
compartment.
Press Eject button (2) below
magazine compartment to
release the magazine.
Slide the magazine compartment
door to the left (close).
Eject button
Page 45

42
Description about DVD CHANGER actions
■ As previously explained, after proper connections insert a DVD into the magazine
and then insert the magazine into DVD CHANGER.
The DVD CHANGER then checks if a DVD is inserted and generates a ‘click’ sound.
Use the supplied cables to interconnect the system.
Refer to the associated manual for each product for details.
Page 46

43
How to load
■ Remove the transport screws.
Remove 3 transport screws on the bottom of the unit that protect the device during
transportation. Attach a cover label to the holes. Keep the screws for moving the
main body in the future for service, etc.
■Set the loading angle.
Set the loading angle (A) on each side to the desired position (0 degree; horizontal,
22.5, 45, 67.5 and 90 degrees:vertical)
Page 47

44
■Attach cover tape over each adjustment lever after adjustment.
■■
Horizontal installation
❶ Composition
❷ Temporary removal
Page 48

45
❸ Punching the carpet
❹ Final mounting
Note.
Refer to accessories for parts.
Slanted installation
Turn loading angle to 45 degree position.
■■
Vertical installation
❶ Composition
Page 49

46
❷ Temporary removal
❸ Punching the carpet
❹ Final mounting
Note.
Refer to the accessories list for parts.Suspended installation(upper installation)
When installing the main body in the trunk under the rear window :
- Check if the main body can be suspended horizontally.
- The main body should not affect the torsion bar of the trunk lid.
- Select the loading position properly.
Note.
Ensure that no objects are present on the opposite side of the installation surface
before punching holes.
Page 50

47
❶ Composition
❷ Punching
❸ Completion
Note. Refer to the accessories for parts.
Page 51

48
Trouble shooting 1(before returning DVD CHANGER to us)
Some troubles can be caused due to errors in the basic installation setup and
interconnections. Please review the troubleshooting guide prior to returning the changer for
service.
The power source
cannot be turned on.
The magazine cannot
be installed.
Disc cannot be played.
Trouble
Cause
Shooting
The fuse may be burnt.
Power wires not correctly
connected.
Inserting method may not be
correct.
The disc may not be inserted or it
may be inserted up-side-down.
The disc may be dirty.
The battery voltage of your
vehicle may be low.
A disc which cannot be played by
the device may be inserted.
A DVD whose local number
cannot be supported by the
device may be inserted.
An audio/video limiting functions
may be activated to disable DVD.
While TV format switch is set at
NTSC, a disc recorded with PAL
format may be inserted.
While TV format is set at PAL, a
disc recorded with NTSC format
may be inserted.
Replace the fuse. If the fuse is burnt
again, refer it to your supplier.
Check if the device is well connected.
Insert the magazine correctly.
Insert the disc with its labeled side
upwards.
Clean the disc, removing the dusts.
Charge the battery. If the device
does to work, please refer to your
supplier.
Make sure to use only disc with
contents that are supported by this
player.
The local number of the device is “1”.
Use the DVD with the local region
number of “1” or “ALL”.
Check the Parental levels at the
setup menu.
Check the TV signal format of the
disc.
Check the TV signal format of the
disc.
When pressing a
function button, a
hand icon is displayed
to disable the device.
Poor color or tone
quality of image
Brightness, tone or hue may not be
set correctly.
The disc being played may not
allows this function.
Only functions that are allowed by the
contents of the disc can be used.
Adjust brightness, color or hue on the
monitor connected to the device.
Page 52

49
The image is displayed.
No sound
Poor sound or image
quality
The remote control
will not work.
Brightness may be set lowest.
The parking brake is released.
The wire connection may be
wrong.
Set the volume at the lowest.
Wrong connection
You may have set fast forwards or
backwards play, pre-frame or slow
play.
Filthy or scratched disc
Vibration may occur at the position
where the switcher is installed.
Poor color or tone of the image
The LED transmitter of remote
control may not aim at the receiver
of the control sensor.
The remote control may be far
away from its sensor.
The photo space between remote
control and its sensor may be
blocked.
The battery may be discharged.
The battery may not have been
correctly inserted.
Adjust the brightness adequately.
If the parking brake is not released,
the monitor linked to the front seat
video output will not display the image.
Check the connection.
Adjust the volume of car stereo or
monitor connected with the device.
Check the connection.
No sound will be generated during fast
forwards or backwards play, pre-frame
or slow play.
Clean the disc. Do not use a scratched
disc.
When the device vibrates, the sound
may be interrupted. When vibration
stops, the device will work normally.
The monitor may have been aged or
deteriorated.
The photo emission point should aim at
the photo receiver.
The remote control should be used
within 3 meters (10feet) from its sensor.
Any obstruction should be cleared.
Replace the battery.
Check the polarity +/-) and insert the
battery correctly.
Page 53

50
Trouble
Cause
Shooting
The screen is not
dispalyed.
No subtitles are
displayed.
The screen will not
disappear.
Voice or screen
language selected
cannot be used.
The image ratio
selected at setup
stage cannot be used.
Troubleshooting 2(before returning DVD CHANGER to us)
The screen may not be included in
the DVD being played.
The subtitle may be set at “Off”
The screen cannot be played.
Select a subtitle to be played.
There will be no toggle among
languages if multi-languages are not
stored in the disc.
There will be no toggle between
languages.
You cannot switch to an image ratio
not stored in the disc. In such a case,
you cannot use the image ratios
stored in the disc.
Only a single language may be
included in the DVD being played.
The DVD being played may
prohibit the toggle between
languages.
You may have selected a language
that is not available in the DVD
being played.
You may have selected an image
ratio not stored in the DVD being
played.
The angle cannot
be changed.
Device displays a
message stating that
this title cannot be
played.
Video CD menu
screen will not be
displayed.
The angles cannot be changed for the
disc or scene not stored for multiangles.
You cannot change the angle.
Check the PARENTAL control levels
in the setup menu.
Use a PBC-compatible video CD.
Only a single angle may be
included in the DVD being played
or parts of an image may be stored
for multi-angles.
The DVD being played may
prohibit angle change.
PARENTAL control is enabled and
prohibits play of this DVD.
A video CD not compatible with
PBC may be used.
Page 54

51
Specifications
Type
Local Region Code
Playable disc
TV signal format
Pickup
Channel
Frequency response
Dynamic range
Signal/noise ratio
Total harmonic distortion
Channel separation
Wow and flutter
Output level
Power requirement
Drain current
Size (L××W××H)
Weight
6-disc DVD CHANGER
1 (USA , CANADA)
Type : DVD, video CD, audio CD, MP3
Size : 5 inches(12㎝)
NTSC color/PAL color (selectable)
Photo semi-conductor laser (DVD:DPD, CD: 3-beam)
2-channel stereo, 5.1 channel (optical cable)
20㎐∼20㎑
90dB
90dB
0.01%
85dB
Below measurement limit
1Vrms
DC 12V(Usually 14.4V)
1A(Maximum)
About 255×168×76㎜
About 2.2㎏
■■
PLAYER main body
■■
FM modulator (option)
Size (L××W××H)
Weight
About 150×26×45㎜
About 220g
Page 55

52
Wiring diagram
Wiring 1
FM MODULATOR TYPE CONNECTION
Page 56

Wiring diagram
Wiring 2
HEAD UNIT/TYPE CONNECTION
53
Page 57

Wiring diagram
Wiring 3
NO COMMUNICATION WITH HEAD UNIT.
54
Page 58

PRINTED IN KOREA
 Loading...