

Page 1

OWNER
’’
S MANUAL
MODEL : PAV-6CDP
6 COMPACT DISC AUTO CHANGER
Page 2
1
* Tracks from 6 CDs stored in the disc magazine can be selected and
played.
* Horizontal, vertical, angled and suspended installation.
* Do not install the unit in a location where it may be
subjected to :
- direct sun or other forms of excessive temperature.
- excessive heat.
- fluid, rain or moisture.
- excessive dirt or dust.
- excessive vibration.
* This unit is designed to be operated on a 13.8 volt DC
negative ground electrical system only.
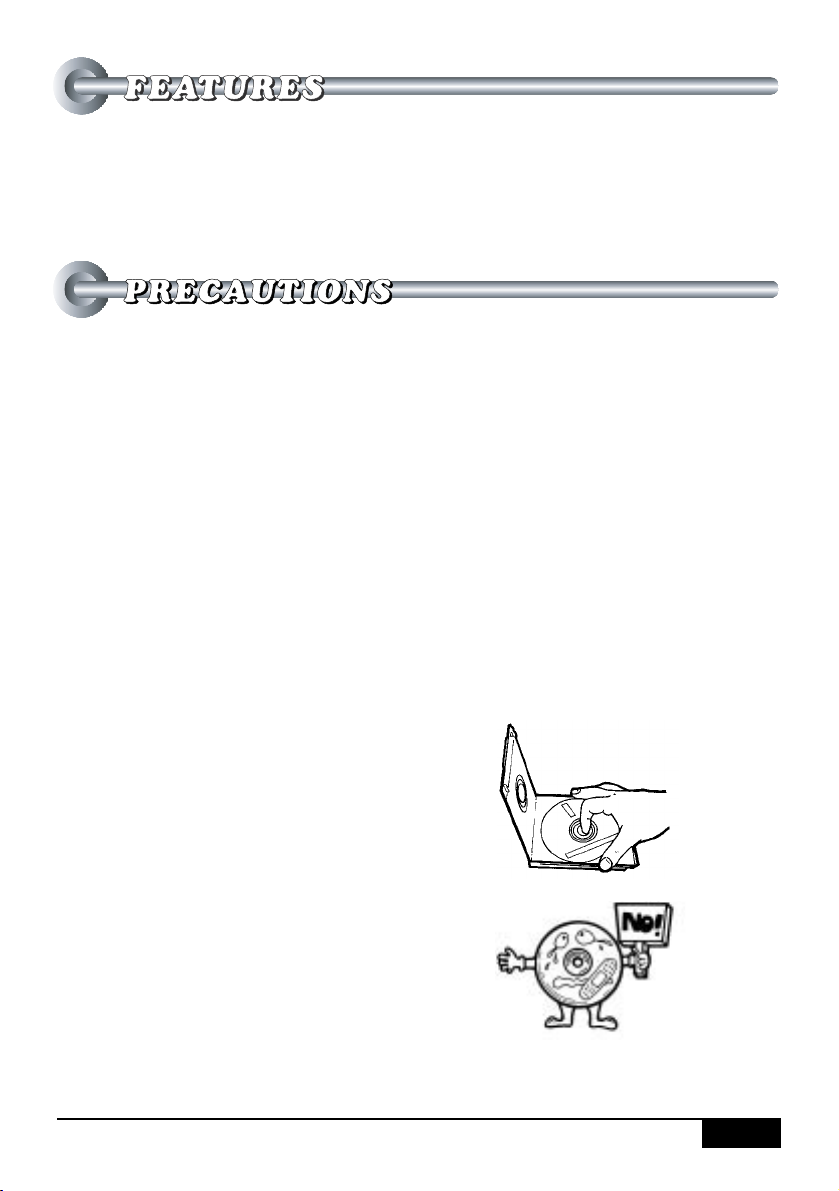
Notes on CDs
* A defective or soiled disc stored in the disc magazine can
cause sound to drop out during play.
* Always handle a disc by holding its inner and outer edges.
* Do not touch the surface of the
unlabeled side of the disc.
* Do not stick paper or tape etc.
onto a disc.
Page 3
2
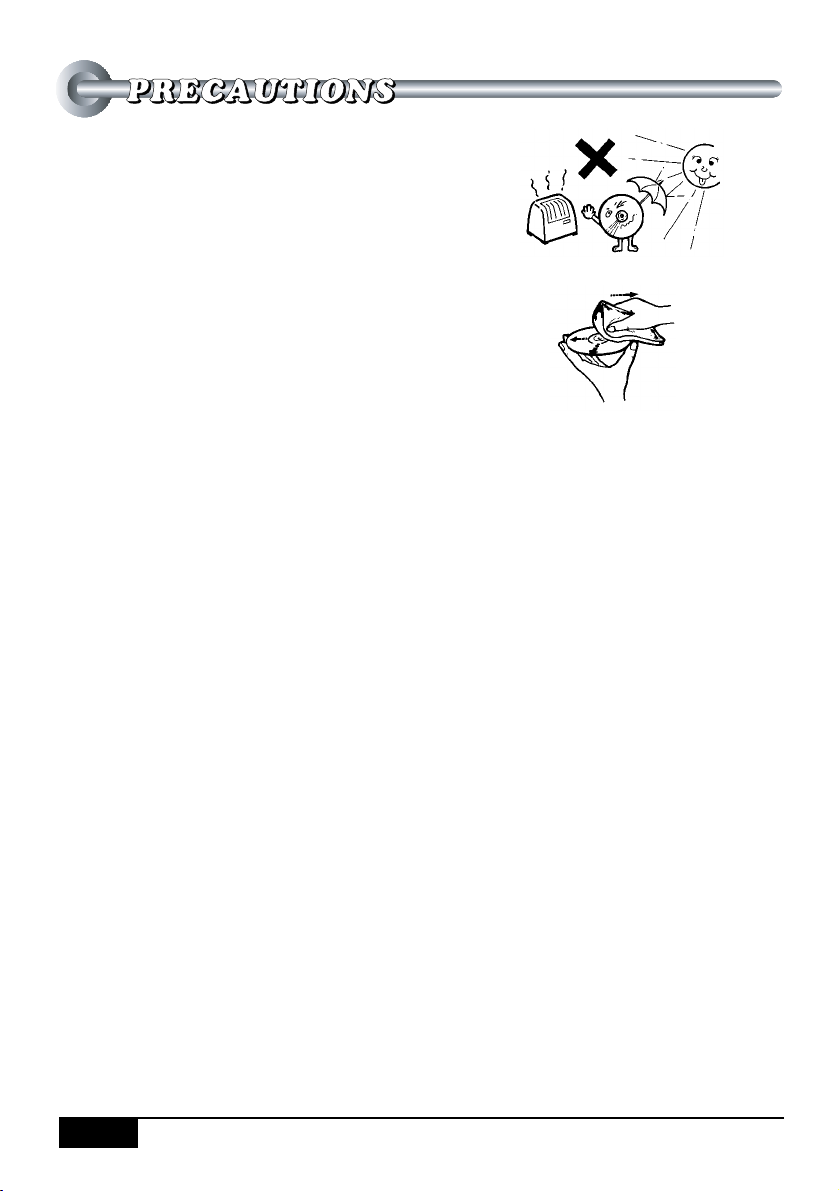
* Do not expose the discs to direct
sunlight or excessive heat.
* Clean the discs before inserting
them into the disc magazine.
Always clean a disc from center
outward with a cleaning cloth.
* Never use solvents such as benzine or alcohol to clean a disc.
* You cannot play an 8cm(3 inch) CD even with the specially
designed adapter.
Notes on the disc magazine
* Do not leave the disc magazine in a place subject to
excessive temperature or humidity.
* Do not insert more than one disc per slot.
* Do not drop the disc magazine.
Page 4
3
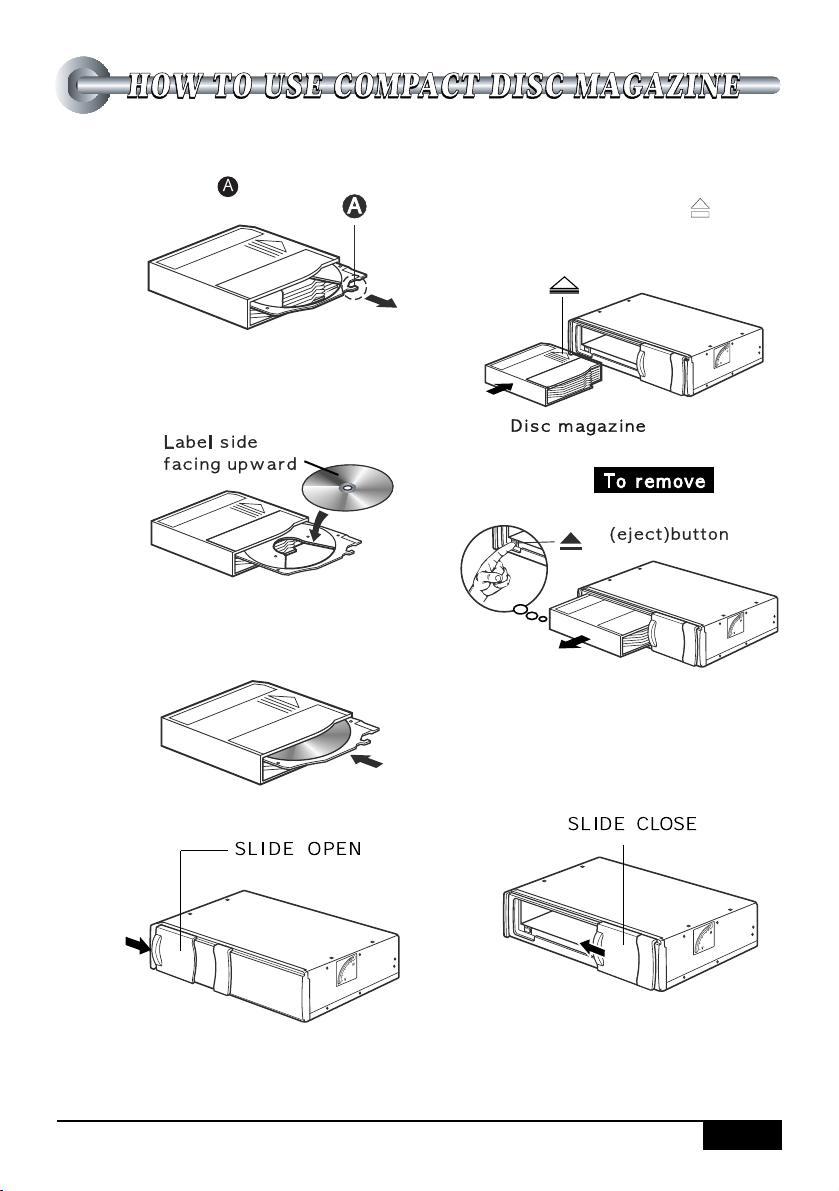
1. * Pull out the slot by pulling
the part with finger.
* With the label side up, insert
a CD all the way
6 discs, one in each slot
* Push slot and close it.
3. Insert the magazine firmly
(which has been taken out
of the unit) with the
mark visible on the top side.
* Press the eject button and pull
out the disc magazine.
2.
4.
Page 5

4
Precautions
Select the mounting location very carefully by referring to the following points
* Make sure that there is not a fuel tank, wiring or piping on the other side of
the mounting surface.
* Make sure that the installation of the unit will not hinder the movement of the
trunk lid or interfere with the spare tire etc.
* Use only the supplied mounting kit for a safe and proper installation.
Supplied mounting kit
BRACKET X 2
Double-sided
tape X 1
TAPPING
SCREW X 4
Adhesive
label X 1
WASHER
SCREW X 4
PLATE
BRACKET
BOLT X 4
NUT X 4
Page 6

5
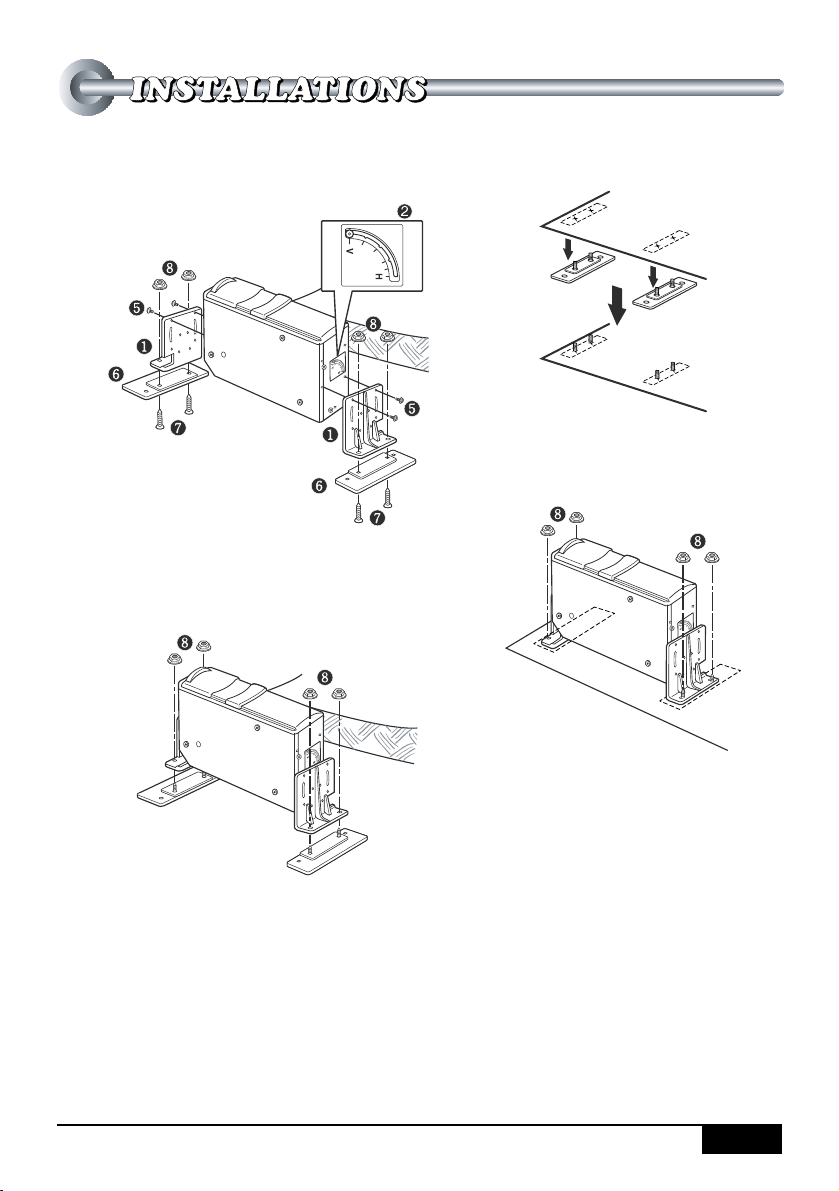
Installing the unit
Mounting angle setting lever
Be sure to adjust Mounting Angle
Setting Lever(A) to appropriate
angle; 0°for horizontal, 22.5°
angle, 45°angle, 67.5 angle, 80°
angle, or 90°for vertical.
Removing the transport
screws
Find the 3 transport screws at the
bottom of the unit, which lock the
unit’s mechanism during transport.
Remove these screws before
installation and attach the supplied
adhesive labels ④ over the holes.
Retain these screws and replace
them in the original positions if the
unit is transported for service or
maintenance.
Page 7

6
After adjustment, be sure to
attach the Double side Tape .
Note
Do the same procedure on
the other side of the unit.
Horizontal installation
Construction
Removing temporarily
Making holes on the carpet
Completion
Note
About parts numbers ❶❷
❺❻❼❽,refer to page 4.
angled installation
Be sure to turn the mounting
angle setting dial to the 45。
position.
Page 8
7
Vertical installation
1. Construction
2. Removing temporarily
3. Making holes on the carpet
4. Completion
Note
About parts numbers ❶❷❺
❻❼❽, refer to page 4.
Page 9

8
Suspended installation
When installing the unit in the
trunk under the rear window
shelf, observe the following.
- Make sure that the unit is
suspended horizontally.
- Select the mounting location
carefully so that the unit does
not hinder the movement of
the torsion bars of the trunk
lid.
- Make sure that there is nothing
on the other side of the
mounting location before drilling
the holes.
- Select the correct size screw to
avoid damaging the vehicle rear
deck.
1. Construction
2. Making holes
3. Completion
Note
About parts numbers ❶❷❺,
refer to page 4.
Page 10

9
When connecting, run the
supplied connecting cable and
connect to Audiovox model
PAV-9 as illustrated here.
Caution
Make sure to disconnect the ground
wire terminal of the car battery before
making a connection in order to
prevent short circuiting.
Note
Use only the supplied connecting
cable.
For complete operation instructions,
refer to pages 18,19 and 20 in the
PAV-9 owner’s manual.
System
Usable Disc
Power Source
Weight
Dimensions(WXHXD)
Frequency Response
S/N Ratio
Channel Separation
T.H.D
Output Power
Note
The design features and/or specifications are subject to change
without notice.
6 CD Change system
Compact disc (12cm)
DC 13.8V Negative ground
1.9kg(4.2 lbs)
254×63×157mm(10”×2.5”×6.2”)
20~20kHz
90dB
70dB
0.03dB
700 mV
General
Page 11

PRINTED IN KOREA
12 MONTH LIMITED WARRANTY
Applies to Audiovox Video products
AUDIOVOX ELECTRONICS CORPORATION (the Company) warrants to the original retail
purchaser of this product that should this product or any part thereof, under normal use and
conditions, be proven defective in material or workmanship within 12 months from the date of
original purchase, such defect(s) will be repaired or replaced with reconditioned product (at the
Company’s option) without charge for parts and repair labor.
To obtain repair or replacement within the terms of this Warranty, the product is to be delivered
with proof of warranty coverage (e.g. dated bill of sale), specification of defect(s), transportation
prepaid, to the Company at the address shown below.
This Warranty does not extend to the elimination of externally generated static or noise, to
correction of antenna problems, to costs incurred for installation, removal or reinstallation of the
product, or to damage to tapes, discs, speakers, accessories, or electrical systems.
This Warranty does not apply to any product or part thereof which, in the opinion of the
Company, has suffered or been damaged through alteration, improper installation, mishandling,
misuse, neglect, accident, or by removal or defacement of the factory serial number/bar code
label (s). THE EXTENT OF THE COMPANY’S LIABILITY UNDER THIS WARRANTY IS
LIMITED TO THE REPAIR OR REPLACEMENT PROVIDED ABOVE AND, IN NO EVENT,
SHALL THE COMPANY’S LIABLITY EXCEED THE PURCHASE PRICE PAID BY
PURCHASER FOR THE PRODUCT.
This Warranty is in lieu of all other express warranties or liabilities. ANY IMPLIED
WARRANTIES, INCLUDING ANY IMPLIED WARRANTY OF MERCHANTABILITY, SHALL BE
LIMITED TO THE DURATION OF THIS WRITTEN WARRANTY. ANY ACTION FOR BREACH
OF ANY WARRANTY HEREUNDER INCLUDING ANY IMPLIED WARRANTY OF
MERCHANTABILITY MUST BE BROUGHT WITHIN A PERIOD OF 30 MONTHS FROM DATE
OF ORIGINAL PURCHSE. IN NO CASE SHALL THE COMPANY BE LIABLE FOR ANY
CONSEQENTIAL OR INCIDENTAL DAMAGES FOR BREACH OF THIS OR ANY OTHER
WARRANTY, EXPRESS OR IMPLIED, WHATSOEVER. No person or representative is
authorized to assume for the Company any liability other than expressed herein in connection
within the sale of this product.
Some states do not allow limitations on how long an implied warranty lasts or the exclusion or
limitation of incidental or consequential damage so the above limitations or exclusions may not
apply to you. This Warranty gives you specific legal rights and you may also have other rights,
which vary from state to sates.
U.S.A : AUDIOVOX ELECTRONICS CORP, 150 MARCUS BLVD., HAUPPAUGE, NEW
YORK 11788 *1-800-645-4994
CANADA : CALL 1-800-645-4994 FOR LOCATION OF WARRANTY STATION SERVING
YOUR AREA.
128-6852
 Loading...