

Page 1
Color TFT LCD Monitor
MM56A
Owner’s Manual
Released: 02-11-04
128-6544
1 of 12
Page 2
EXPLANATION OF GRAPHIC SYMBOLS
CAUTION
CAUTION: TO REDUCE THE RISK OF ELECTRIC SHOCK DO
NOT REMOVE COVER (OR BACK) NO SERVICEABLE PARTS
INSIDE REFER SERVICING TO QUALIFIED SERVICE PERSONNEL
The lightning flash with the arrowhead within a triangle is
intended to alert tell the user that parts inside the product
are
The exclamation point within a triangle is intended to alert
the user that important operating and servicing instructions
WARNING:
TO PREVENT FIRE OR ELECTRIC SHOCK HAZARD, DO NOT
OPEN
CAUTION:
1. This product is designed to operate with a 12 volt, negative ground
battery system.
2. Disconnect the ground wire from the battery terminal before connecting the electrical system. Refer to the electrical connection diagram to
avoid wrong connection of the electrical system.
Always use authorized service center for service assistance.
3. Do not operate the monitor at temperatures below 32°F (0°C) or above
104°F (40°C).
4. Keep the monitor clean and dry.
5. Never attempt your own repairs. This unit should be installed and repaired by qualified technicians or service personnel.
6. Do not drop the monitor or expose to strong impacts.
7. Do not expose to direct sunlight for extended periods of time.
8. Use proper insulation material to prevent short-circuiting of the supply
system.
2
128-6544
2 of 12
Page 3

IMPORTANT
An LCD panel and/or video monitor may be installed in a motor vehicle
and visible to the driver if the LCD panel or video monitor is used for
vehicle information, system control, rear or side observation or navigation. If the LCD panel or video monitor is used for television reception,
video or DVD play, the LCD panel or video monitor must be installed so
that these features will only function then the vehicle is in ‘park’ or when
the vehicle’s parking brake is applied.
An LCD panel or video monitor used for television reception, video or
DVD play that operates when the vehicle is in gear or when the parking
brake is not applied, must be installed to the rear of the driver’s seat
where it will not be visible, directly or indirectly, to the operator of the
motor vehicle.
A. Precaution:
1. Before installation, verify that it will not damage electrical wires, fuel
lines, brake lines, hoses, exhaust systemcomponents or any other
items that will impair the operation of the vehicle.
2. Ensure the cable has already been pulled through the supporting
pipe before installing the base into the headrest. Ensure there is no
foreign material trapped inside the enclosure before installing the
monitor into the base.
3. Tighten all screws/bolts/nuts securely for installation.
4. To avoid electrical hazards, do not disassemble the cabinet of the
monitor.
5. Use only the supplied DIN cable. Disconnect the cable from the
signal source before disconnecting it from the monitor, after turning
off the whole system.
6. Do not use gasoline, thinners or other thinning liquids to clean the
unit. Remove dust and stains with a damp cloth.
3
128-6544
3 of 12
Page 4
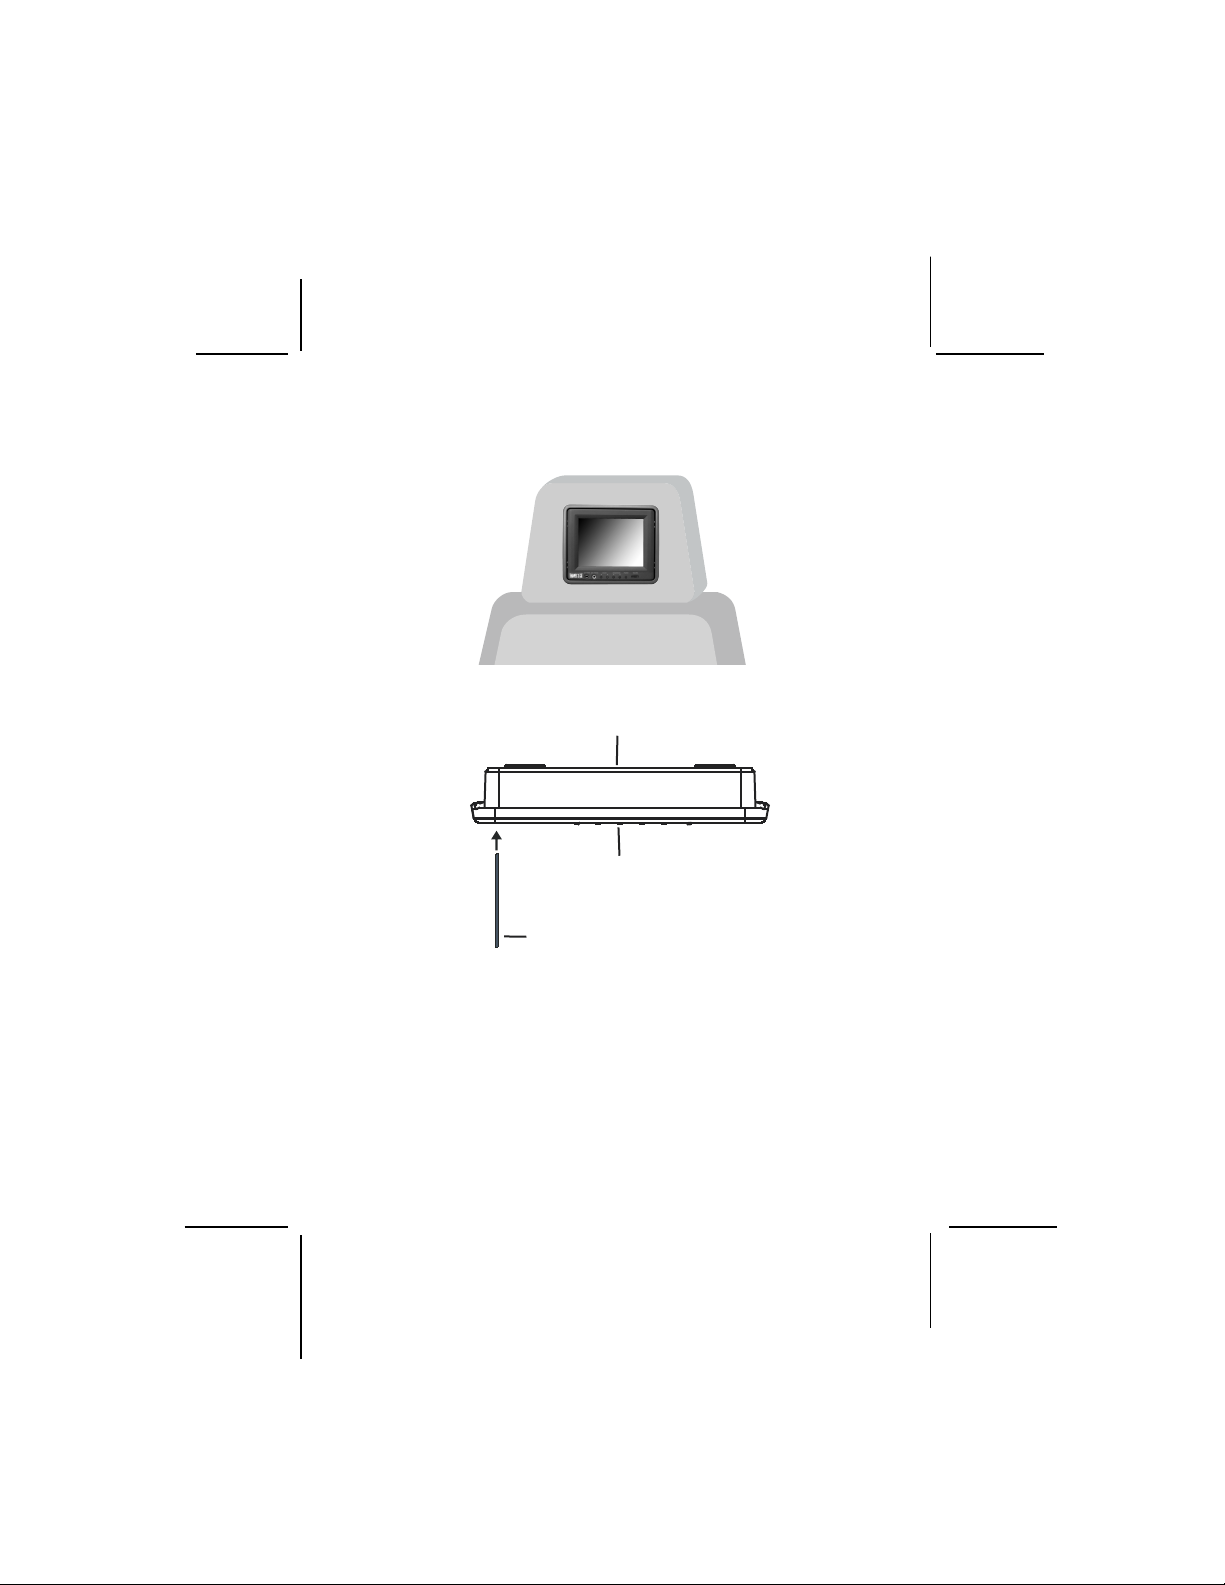
B. Installation:
Front View
Top View
Clamshell
Monitor
Key
1.Installation will vary from vehicle to vehicle, as headrests in vehicles
are not standard.
2. This unit is intended for installation by professional installers.
3. The kit consists of the screen assembly, a clam shell housing, a trim
ring, 1 key to remove the screen from the housing, and a wiring
harness.
4
128-6544
4 of 12
Page 5

Headrest Mounting:
1) Remove the headrest
from the vehicle for easiest installation.
2) Lay headrest on a flat surface.
3) Center trim collar on headrest as shown.
NOTE: Depending on the
angle of the headrest, the Trim
Ring and housing may be
mounted upside down.
4) Using a Permanent Marker,
mark headrest material
along the interior of the
Trim Ring.
5) Remove the Trim Ring
and mark an “X” from cor-
ner to corner as shown.
Monitor
Mounting
Tray
Trim
Ring
Headrest
5
128-6544
5 of 12
Page 6

6) Using the utility knife, cut the
headrest material along the
“X” lines. Do not cut the material along the other lines at this
time.
7) This will leave you with an “X”
cut as shown.
8) Pull the flaps up and cut the
foam beneath the material to
the proper depth. Cut all four
sides of the foam.
9) Using your fingers, tear the
foam out of the headrest leaving a recess where the shell will
be inserted.
NOTE: At this point you will need
to install the harness up through the
area into the recess. It may be helpful to follow one of the posts and tie
wrap it to the post for restraint.
6
128-6544
6 of 12
Page 7

10) Lay the flaps of the headrest material down into the recess and insert the Mounting Tray into the recess. Check for fit. If it does not
fit properly, you may need to remove some more foam.
NOTE: The Mounting Tray will need
to be secured to the headrest, either
by using tie straps, screws, etc...
11) Guide the cable through the side
opening of the Mounting Tray and
plug it into the Monitor. Make sure
the connector locks into place. Insert the Monitor into the Mounting Tray and secure the cable
using tie wraps or screws
12) Turn the Monitor around and insert it into the Mounting Tray
housing. Snap into place.
13) Connect the Monitor power input
plug to a DC power source (Red
plug +12 VDC, Yellow plug +12
VDC Constant and Black plug (-)
to ground).
14) Connect the external video
source output signal (from VCP/
DVD, TV Etc.) to the VIDEO IN
jack. Test the system to verify
proper installation.
7
128-6544
7 of 12
Page 8

C. Controls/Indicators/Connectors:
Front View
2
1
1. AUX. Input Jack
2. Earphone Jack
3. Color Adjust Up/Down Buttons
4. Brightness Adjust Up/Down Buttons
5. Power On/Off Button
6. Volume Increase/Decrease Thumbwheel Control
3 4
5
6
8
128-6544
8 of 12
Page 9

Exploded View
HEADREST
SHROUD
COLOR
MONITOR
HEADREST
TRIM
6
7
8
9
6. DIN Connectors
7. Signal Cable
8. Black Wire (Ground)
9. Red Wire (+12 Vdc Input)
10. White RCA Jack (Audio Input L)
11. Red RCA Jack (Audio Input R)
12. Yellow RCA Jack (Video Input)
9
10
11
12
128-6544
9 of 12
Page 10

D. Operation:
1. Connect the red monitor power input wire (9) to a DC power source
(Red = +12 VDC), and the Black wire (8) to ground.
2. Connect the external video source output signal (from VCP, DVD, TV
etc.) to the VIDEO IN jack (12).
3. Press power button (4) to turn the monitor on and off. The backlight
for the button will intensify.
4. Adjust the volume increase/decrease thumbwheel (5) to adjust the
volume level.
5. Press the Color (2) and Brightness (3) buttons to adjust the respec-
tive picture display characteristics.
10
128-6544
10 of 12
Page 11

THIS PAGE LEFT BLANK INTENTIONALLY
11
128-6544
11 of 12
Page 12

E. Specifications:
Display 5.6” Color TFT LCD
Resolution 960 (W) x 234 (H) Lines
Active Area 114.2 (W) x 83.5 (H) mm
Backlight CCFL
Input Signal NTSC/PAL(auto-switch)
Composite video signal 1Vp-p/75ohm
Lamp Life 10,000 Hours
Audio Specifications:
Input Impedance 10 K-Ohms
Audio Output 0.3 W Maximum
Earphone 16 Ohms/32 Ohms
Bandwidth 15 kHz
Input Level 1 Vp-p
Power Source +12 VDC +/-15% (Ripple=0.5 Vp-p Max)
Power Consumption 8 Watts Max
Brightness 300 Nit Typical
Viewing Angle
Top 30 Degrees
Bottom 10 Degrees
Left/Right 45 Degrees
Operating Temperature 32°F - 140°F (0°C - 60°C)
Storage Temperature -4°F - 140°F (-20°C - +60°C)
Operating Humidity 85% RH Max.
Storage Humidity 85% RH Max.
Overall Dimensions 156.0W x 126.0H x 34.5D mm
Weight
500 Grams(16.0 Ounces)
© 2004 AEC, Hauppauge, NY
12
128-6544
12 of 12
 Loading...