

Page 1

Model Number MM170R
17.1” Color LCD Monitor
Operation Manual
128-8367
Page 2
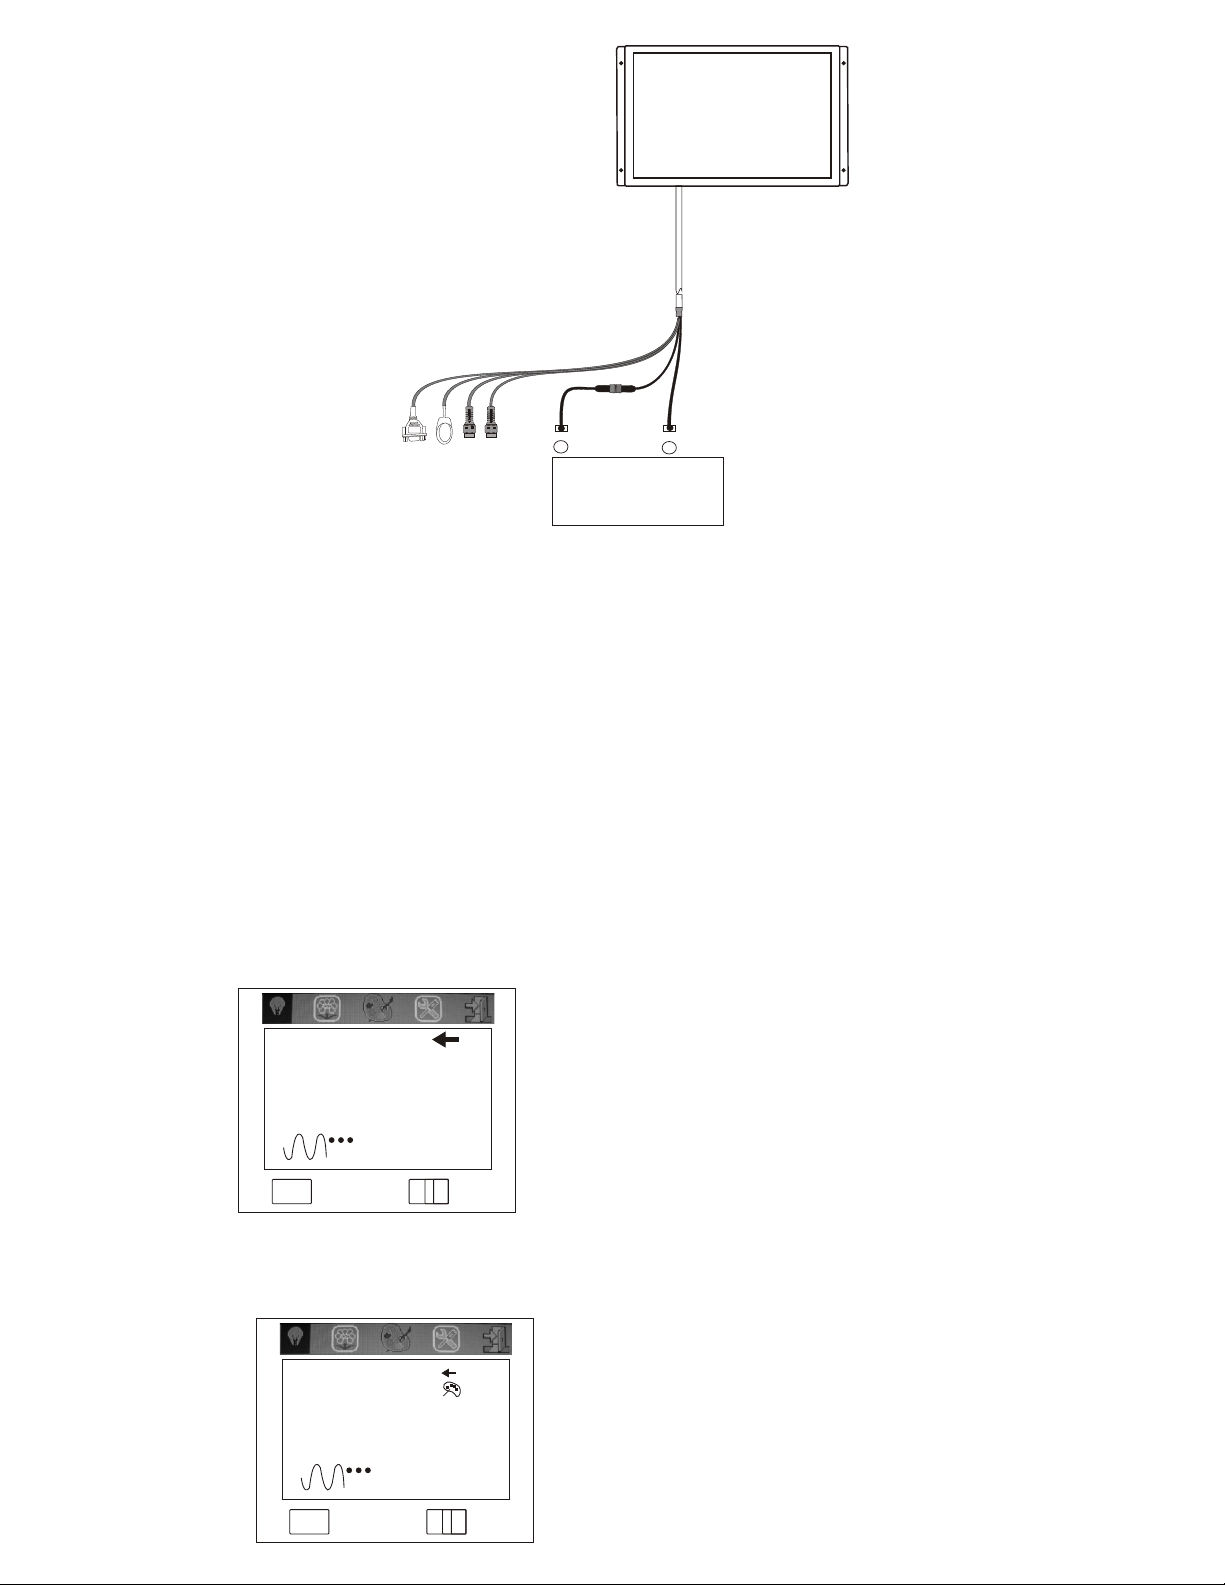
F SE
U 2
A
VGA
S-VIDEO
IR tra nsmit ter
Video input (yellow)
++
BATTERY
12V
--
Wiring Diagram
FEATURES:
High Resolution 17.1" Active Matrix 16:9 Display
Resolution: 1440 x 900
Source Of Signal: CVBS, SVIDEO VGA
Power Supply:DC0.8V~13.8V
Power Consumption:15W
Video System: NTSC/PAL
Dimensions: 17 x 10 x .79inch (431.8 X 254 X200.6mm)
On Screen Display (OSD) Functions:
Press the MENU button on the Remote Control. Brightness, Saturation, Contrast, Hue
and Reset will appear.
1. Press SETUP to enter the main menu ; press "v " or "w " to choose a submenu
Return
Brig htness 53
Contrast 50
Saturatio n 50
Hue 50
USER
Sele ct Mo ve
MENU
-
+
2. Press "w " to enter the desired submenu. Press "r " "s " to
access each of the adjustments Such as BRIGHTNESS, CONTRAST etc.
Return
Colo r
Red 50
Green 50
Blu e 50
USER
Sele ct Mo ve
MENU
-
+
2
Page 3

3. Press "w " to enter the desired submenu. Press "v " or "w " to access each of the
adjustments. Press to adjust, then press "w " again to exit. Then press SETUP to exit
main menu.
Return
Brig htness 53
Contrast 50
Saturatio n 50
Hue 50
USER
Sele ct Mo ve
MENU
-
+
Using the remote control press the arrow button on the right to increase the adjustment or
the arrow button on the left to decrease the adjustment. The brightness, contrast, saturation
and hue can be adjusted from -50 to +50. To access each of the adjustments, press the MENU
button. Once the desired adjustment is reached use the right or left arrow buttons. If RESET is
selected, pressing the right arrow button will reset the monitor to factory settings.
Remote Control
3
5
LCD R EMOTE
MONITOR MOBILE
INP UT
MEN U
ESC
1
2
4
6
1. POWER On/Off Button: Turns the monitor on or off.
NOTE: There is a short delay after pressing the power button until video appears on the
screen.
2. Input Video Switch Button : Selects the video source AV1*.
3. MENU Button: This button is used to display the OSD and access the video adjustments.
4. Right Arrow Button: This button is used to increase the video adjustment parameters.
5. Left Arrow Button: This button is used to decrease the video adjustment parameters.
6.ESC Button: Used to turn off the OSD.
*AV2 is not used on this model
Page 4
Troubleshooting
Symptom Cause
Unit does not
turn on
No picture
Picture a ppears
incorrect
Remote control
does not work
1.Check if the power cable is properly connected.
2.Use remote control to tur n the unit o n. Check i f the
battery i n the remo te contr ol is inst alled co rrectl y.
3. Make sur e the batt ery is not d ischar ged.
1. Check if the sourc e video is o perati onal.
2. Check th e input so urce set ting.
3. Check th at the Vert ical Sca nning Fr equency of the
VGA input is O K.
1. Check if the sourc e video is o perati onal.
2. Check th e video system of th e input si gnal to ve rify it
is compat ible wit h this uni t.
1. Check th e batter ies in the r emote co ntrol to e nsure th e
battery i s not disc harged .
2. Check th e batter ies are in stalle d correctly.
© Copyright 2008 AEC, 150 Marcus Blvd. Hauppauge, NY 11788 128-8367
 Loading...