

Page 1

LCM5N 5 Inch Navigation Monitor
LCM58N 5.8 Inch NavigationMonitor
with
1 Video Input Capability
Operation Manual
Page 2

Important Notice
It is unlawful in most jurisdictions for a person to
drive a motor vehicle which is equipped with
a television viewer or screen that is located in the
motor vehicle at any point or that is visible directly
or indirectly, to the driver while operating the
vehicle.
CAUTION
1. Do not operate the monitor at temperatures below -20oC or above
o
+70
C.
2. Keep the monitor clean and dry.
3. Always seek qualified personnel to perform repairs. Never attempt
your repairs.
4. Do not drop the monitor or expose to strong impacts.
5. Do not expose to direct sunlight for extended periods of time.
-2-
Page 3
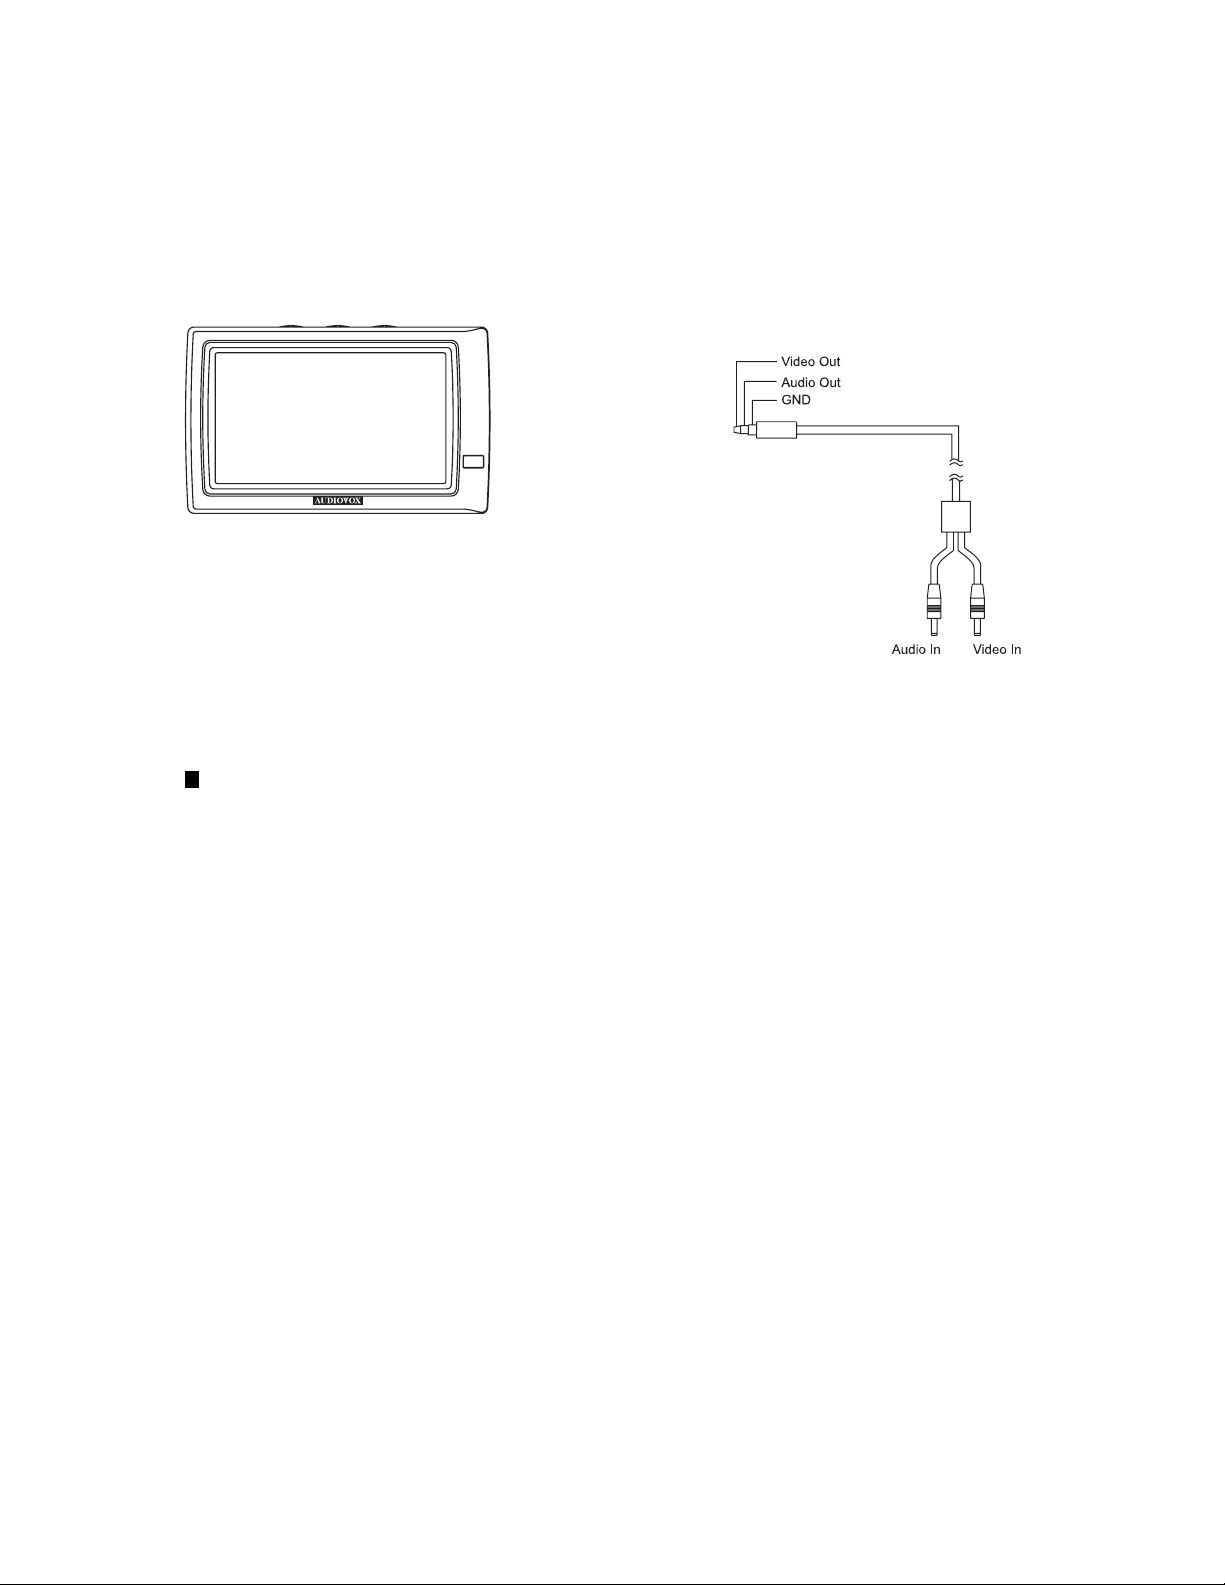
AUX Cable
(External VCR device connection wire)
1) Type of Cable : Two RCA to One Stereo Cable.
AUX Cable
-3-
Page 4
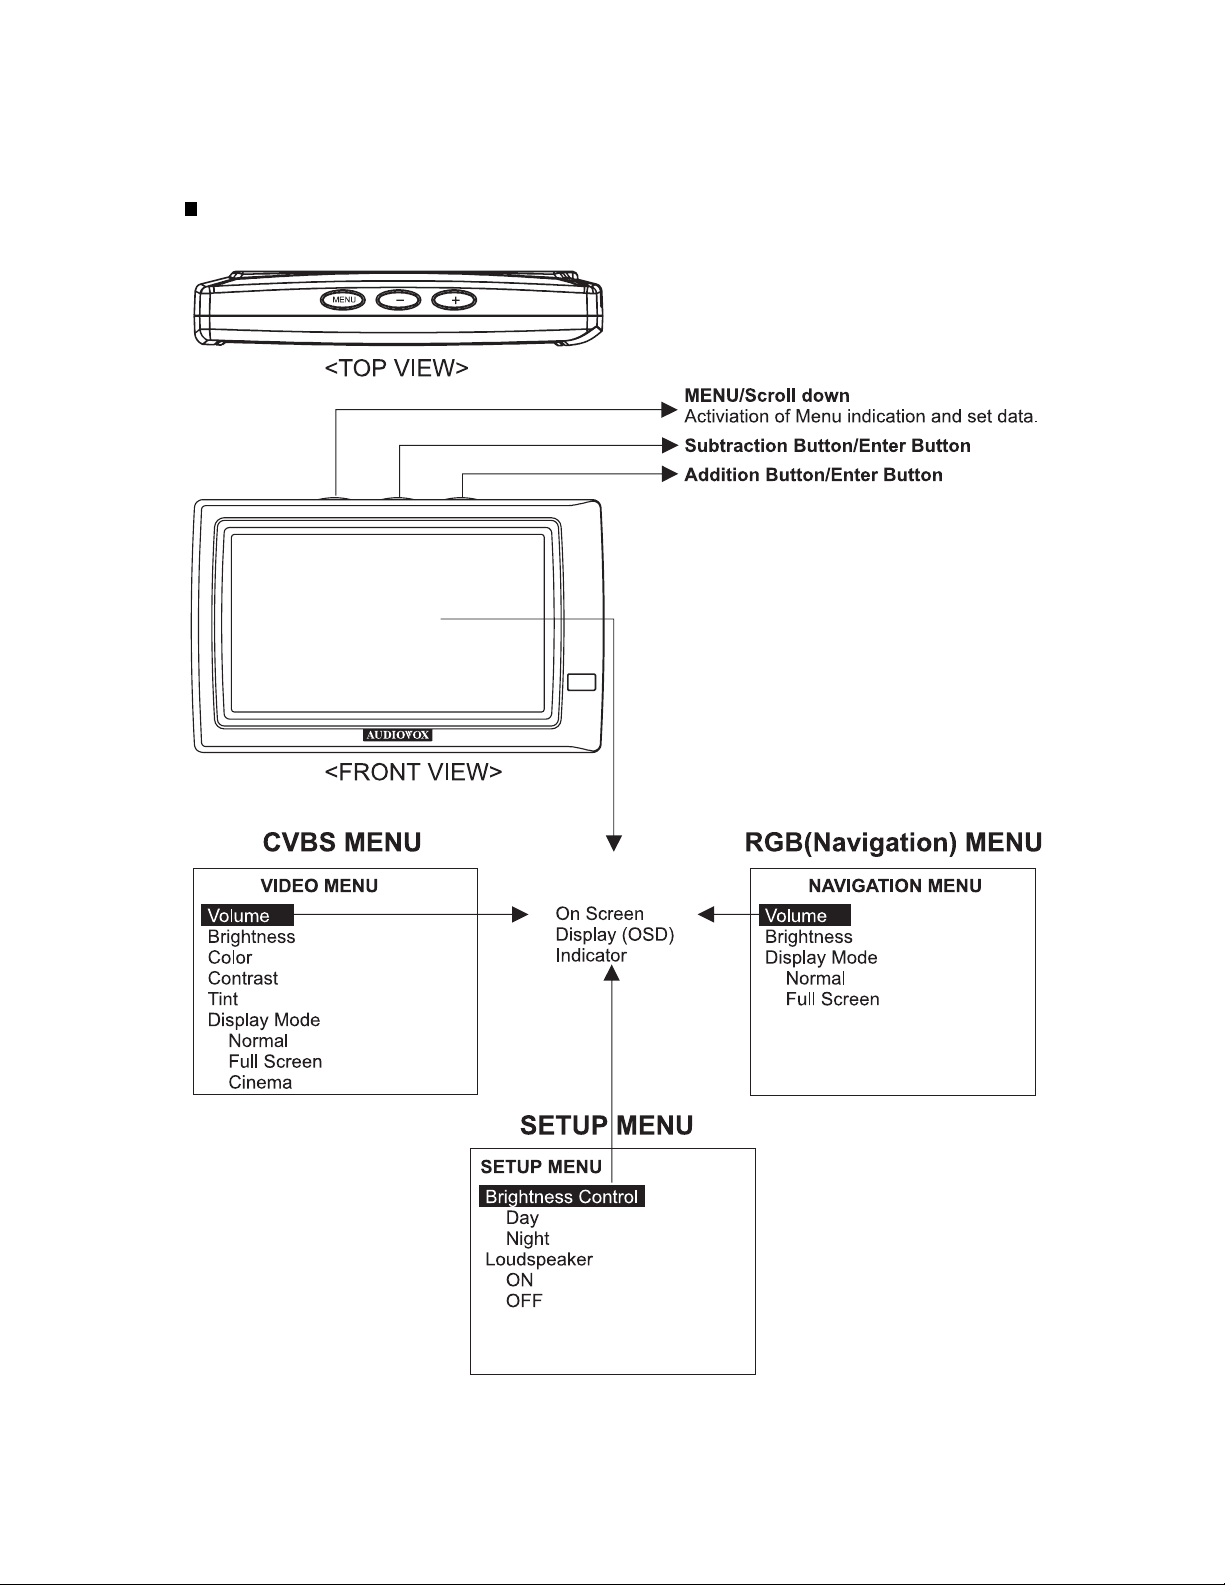
OSD Menu Structure
Monitor Panel Control
( - button )
( + button )
-4-
Page 5

On Screen Display
This page describes the function of the control keys and the OSD menu
structure.
The relevant menu (video or nav) will be detected automatically, depending on the input mode given by the display control line or by VCRconnector.
Monitor Settings
The color display is equipped with On-Screen Display (OSD)
prompting for the monitor settings.
There are 3 buttons on top of the monitor.
These will be used for the OSD control. They are as follows:
“Menu” = Menu
“ + “ = Plus
“ – “ = Minus
“Menu” button is used to select the desired function.
The desired function will be highlighted in red.
“+” And “-“ buttons are used to adjust the desired function.
Note: If a button has not been pressed for 5 seconds, then the
OSD menu is automatically hidden again.
-5-
Page 6

Invoking OSD menu
Briefly press the menu button on top of the monitor.
The OSD menu “ Navigation settings” is displayed and
Volume will be highlighted in Red.
In the OSD menu you can adjust the following settings:
* Volume: Adjust Volume level of the built-in
monitor loudspeaker
* Brightness: Adjust brightness of the display.
* Display mode: Screen display; the selected setting
is indicated in red.
Possible selections include:
“Full Screen “ (16:9)
“Normal” (4:3)
Adjusting settings
1 . Press the Menu button until the desired function appears
in red.
2 . Adjust the desired setting with the + or – buttons.
If necessary, invoke the next menu item by pressing the
Menu Button.
-6-
Page 7

* If you use the built-in monitor loudspeaker, leave
the volume level in the OSD menu on the middle
setting. Adjust the volume level for the audible
messages of the navigation system with the + or –
buttons on the remote control.
* The volume level of the built in monitor speaker can
also be set without invoking the OSD menu. Press the +
or – button on the monitor. The display automatically
changes to the menu for setting the volume. Set the
volume desired by pressing the + or – buttons.
Set up Menu
The monitor offers you the possibility of performing the following
settings in the Setup Menu:
* Brightness Control: Day/Night
* Loudspeaker: On/Off
-7-
Page 8

Invoking the Setup Menu
Press all three buttons at the top of the monitor at the same
time.
The Setup Menu appears
Brightness will be highlighted in red.
Press + or – to select Day or Night highlighted in red. Day
selection will be bright, Night will be dark.
Note: If brightness control is set for Night, It will return to Day
mode whenever the Ignition is turned off for more then 30
seconds.
1 . Press the menu button to highlight Loudspeaker in red
2. Press + or – button to select ON or Off.
- VIDEO MENU (AUX cable : Connection, Navigator cable : Connection)
* VOLUME : This function is used to control the audio volume.
* BRIGHTNESS : This function is used to control the overall
brightness of the picture displated on the monitor.
* COLOR : This function is used to increase or decrease the overall
color saturation of the picture displayed on the monitor.
* CONTRAST : This function is used to increase or decrease the
overall contrast of the picture displayed on the monitor.
* TINT : This function is used to increase or decrease the overall color
schme of the picture displayed on the monitor.
* DISPLAY MODE (NORMAL, FULL SCREEN, CINEMA) : Make
reference to 9 page. .
-8-
Page 9

Display Mode
1. Press MENU to get the On Screen Display (OSD).
2. Select Display Mode.
3. Press the + or the - to switch the screen aspect ratio.
FULL SCREEN: 16:9 picture is fully displayed.
CINEMA : Picture is displayed with uniform vertical enlargement.
NORMAL : When 4:3 pictured is displayed on a wide screen, black bands
appear on the right and left of the picture
-9-
Page 10

MONITOR SPECIFICATIONS
Type a-Si TFT Active Matrix LCD
Display Screen Size LCM5N : 110.4(W) x 62.244(H)(mm)
LCM58N : 127.2(W) x 71.838(H)(mm)
Resolution 1200(W) x 234(H)
Pixels LCM5N : 200(X), 117(Y) Center of display area
LCM58N : 200(X), 117(Y) Center of display area
Back Light CCFL with 3 ware-length spectrum
LCM5N : Straight Type
LCM58N : U Type
Power Source +12 Vdc
Power Consumption LCM5N : 500mA 6W
LCM58N : 600mA 7.2W
Connection 1-Navigator Connection Wire
1-AUX Connection Wire
Operating Temperature -20
Storage Temperature -30
o
C ~ +70oC
o
C ~ +80oC
Monitor Cabinet LCM5N : 148(W) x 90(H) x 30(D)(mm)
(without Packing) LCM58N : 164(W) x 103(H) x 30(D)(mm)
Weight LCM5N : 2.5K
LCM58N : 2.7K
Video Format NTSC (Only)
-10-
Page 11

For Customer Service
Visit Our Website At
www.audiovox.com
Product Information, Photos,
FAQ's Owner's Manuals
Copyright 2004 Audiovox Electronics Corp., 150 Marcus Blvd., Hauppauge, NY 11788
128-7099
-11-
 Loading...