

Page 1
JE2043
Important Notes :
1. Before operating the unit, please read these instructions carefully.
2. Retain this manual for future reference.
3. Do not remove any WARNING stickers on the unit.
4. You are advised to follow the instructions carefully when operating the unit.
5. Do not use any chemical solvent, cleaning agent or corrosive detergent to
clean away dirt on the surface of the screen. By doing so, you may cause
OPERATING MANUAL
20" 4:3 DIGITAL LCD-TV
irreversible damage to the surface of the TFT screen. To clean off dirt or
fingerprints, we recommend the use of a soft damp lens cleaning cloth.
6. Using spare parts from another manufacturer may caused permanent damage
to the unit.
7. Install unit in a dry location away from condensation.
8. Ensure no metal or foreign materials are dropped in between the display screen
and enclosure.
9. Do not use anything to block the cooling assemblies on the unit.
10. Ensure the plugs are properly plugged in before operating the unit.
11 Should the LCD panel be broken, do avoid all human contact with the broken
glass or fluid leaking out from the enclosure. If come into contact, do flush and
clean affected areas with plenty of water. Seek medical attention immediately.
12. When operating the display unit, do avoid touching or pressing on the LCD
glass panel. Excessive force may cause irreparable damage to the LCD
20
Please keep this operating manual for future references.
screen.
Pub.05-10
Page 2
Safety Precautions:
CONTENTS:
1. Ensure the plug is securely plugged into the main socket before operating
the unit.
2. Ensure the Voltage on the main socket is the same as specified on the unit.
3. Use parts only manufactured by the unit manufacturers.
4. Request a repair report from the technician/service personnel.
5. Ensure the battery is correctly installed before using the unit.
In case of the following emergencies, remove plug from the main socket
immediately:
1. Plug or cables are damaged.
2. Any form of foreign objects dropped inside the enclosure.
3. Unit is being exposed to rain and/or water.
4. Unit unable to operate under normal operation.
Notices:
1. The changes or modifications not expressly approved by the party
responsible for compliance could void the user's authority to operate the
equipment.
2. To comply with the FCC RF exposure compliance requirments , no change
to the antenna or the device is permitted. Any change to the antenna or
the device could result in the device exceeding the RF exposure
requirements and void user's authority to operate the device.
1. INTRODUCTION
Overview -------------------------------------------------------------------------
Product Specifications --------------------------------------------------------
Contents/Accessories --------------------------------------------------------
2. FRONT PANEL CONTROL
Panel Control -------------------------------------------------------------------
Input/Output --------------------------------------------------------------------
3. REMOTE CONTROL FUNCTION
Controls & Functions ---------------------------------------------------------
4. INSTALLATION GUIDE
When Connecting to a TV Cable ------------------------------------------
Connecting to Other Equipment -------------------------------------------
Input (RCA) from other Equipment ----------------------------------------
Output (RCA) to Other AV Equipment ------------------------------------
VGA Input ------------------------------------------------------------------------
Connect Power -----------------------------------------------------------------
5. BASIC FUNCTIONS
Power Signal -------------------------------------------------------------------
Mode(SOURCE) --------------------------------------------------------------
01
02
03
04
04
05
06
07
07
07
08
08
09
09
This device complies with part 15 of the FCC RULES. Operations is subject to
the following two conditions:
(1) This device may not cause harmful interference and
(2) This device must accept any interference received, including interference that
may cause undisried operation.
CAUTION
RISK OF ELECTRIC SHOCK
DO NOT OPEN
Volume Setting -----------------------------------------------------------------
Channel Search ---------------------------------------------------------------
OSD Setting --------------------------------------------------------------------
Mute Setting --------------------------------------------------------------------
6. OSD SETTINGS
Management Setting ----------------------------------------------------------
TV Setting ------------------------------------------------------------------------
Audio Adjust Setting -------------------------------------------------------------
Picture Adjust Setting -----------------------------------------------------------
10
10
10
11
12
13
14
15
Page 3
CONTENTS:
PC Adjust Setting -----------------------------------------------------------
7. ANNEX A
LCD Maintenance --------------------------------------------------------------
16
17
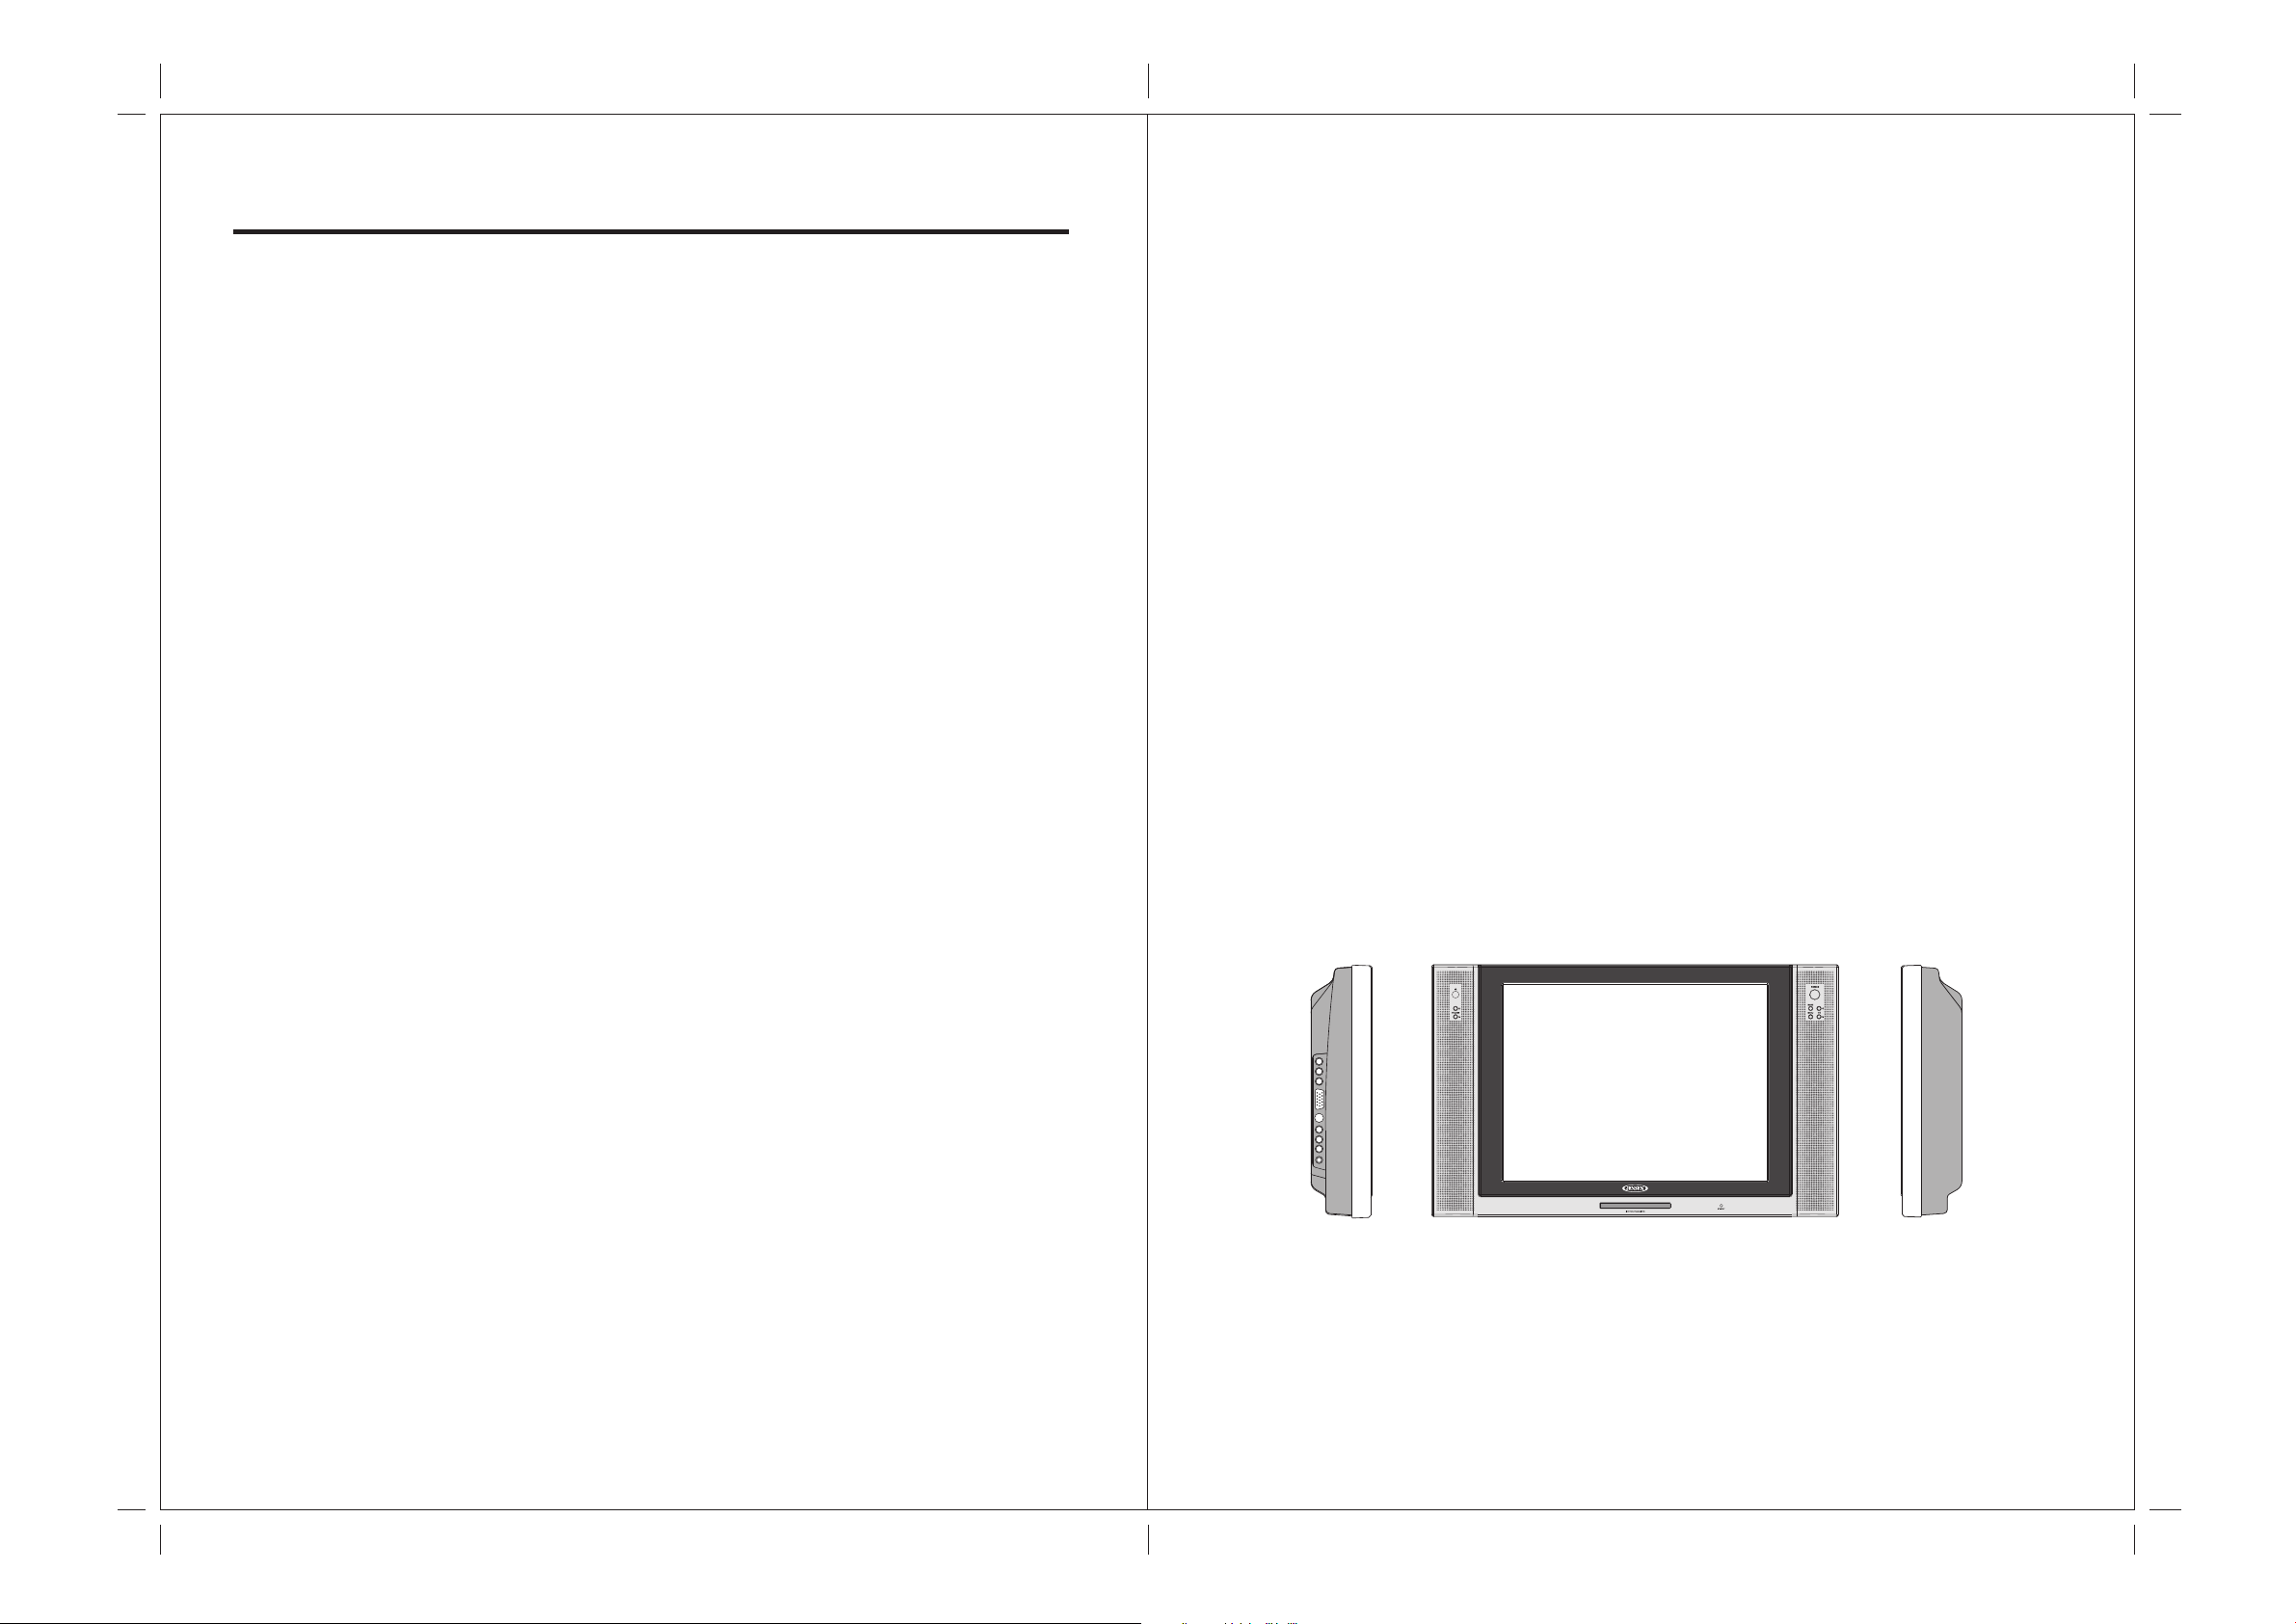
1. INTRODUCTION:
Overview :
New technology in LCD monitors allows the enjoyment of a higher quality picture
display and higher brightness; lighter in weight and slimmer body design, power
saving capabilities and low radiation, giving you a safe, relaxing and environmentalfriendly visual enjoyment.
8. ANNEX B
Troubleshooting ----------------------------------------------------------------
Common Problems -------------------------------------------------------------
9. SPECIFICATIONS ---------------------------------------------------------------
18
18
19
Our product uses high quality original imported 20 inches 4:3 colored
"Active Matrix TFT". The Active Matrix TFT high decoding capabilities enable
display of complicated or high quality images, presenting a vivid visual reproduction
and beautiful visual display. Incorporated with a user-friendly menu, allowing easy
customization to user preferences.
The unit comes with built-in screen display controls when used with the remote
control, allowing you to make changes to the settings. It even support the use of 2
channel wireless headphones, therefore you do not need to worry that the volume
coming out from the monitor will disturb other people. The Digital True Surround
Sound capabilities’ from the 3D Stereo Speaker brings you the ultimate enjoyment
of audiovisual effects. Digital output function, when connected to other audiovisual
devices, gives you the best enjoyment in entertainment relaxation.
01
Page 4
2. Product Specifications:
1. 20" Television / monitor for Mobile use
2. 12V DC Power
3. High Performance, 4:3 LCD Panel
4. High Brightness 500 nit
5. High contrast ratio 500:1
6. Ultra wide viewing angle 170 degrees
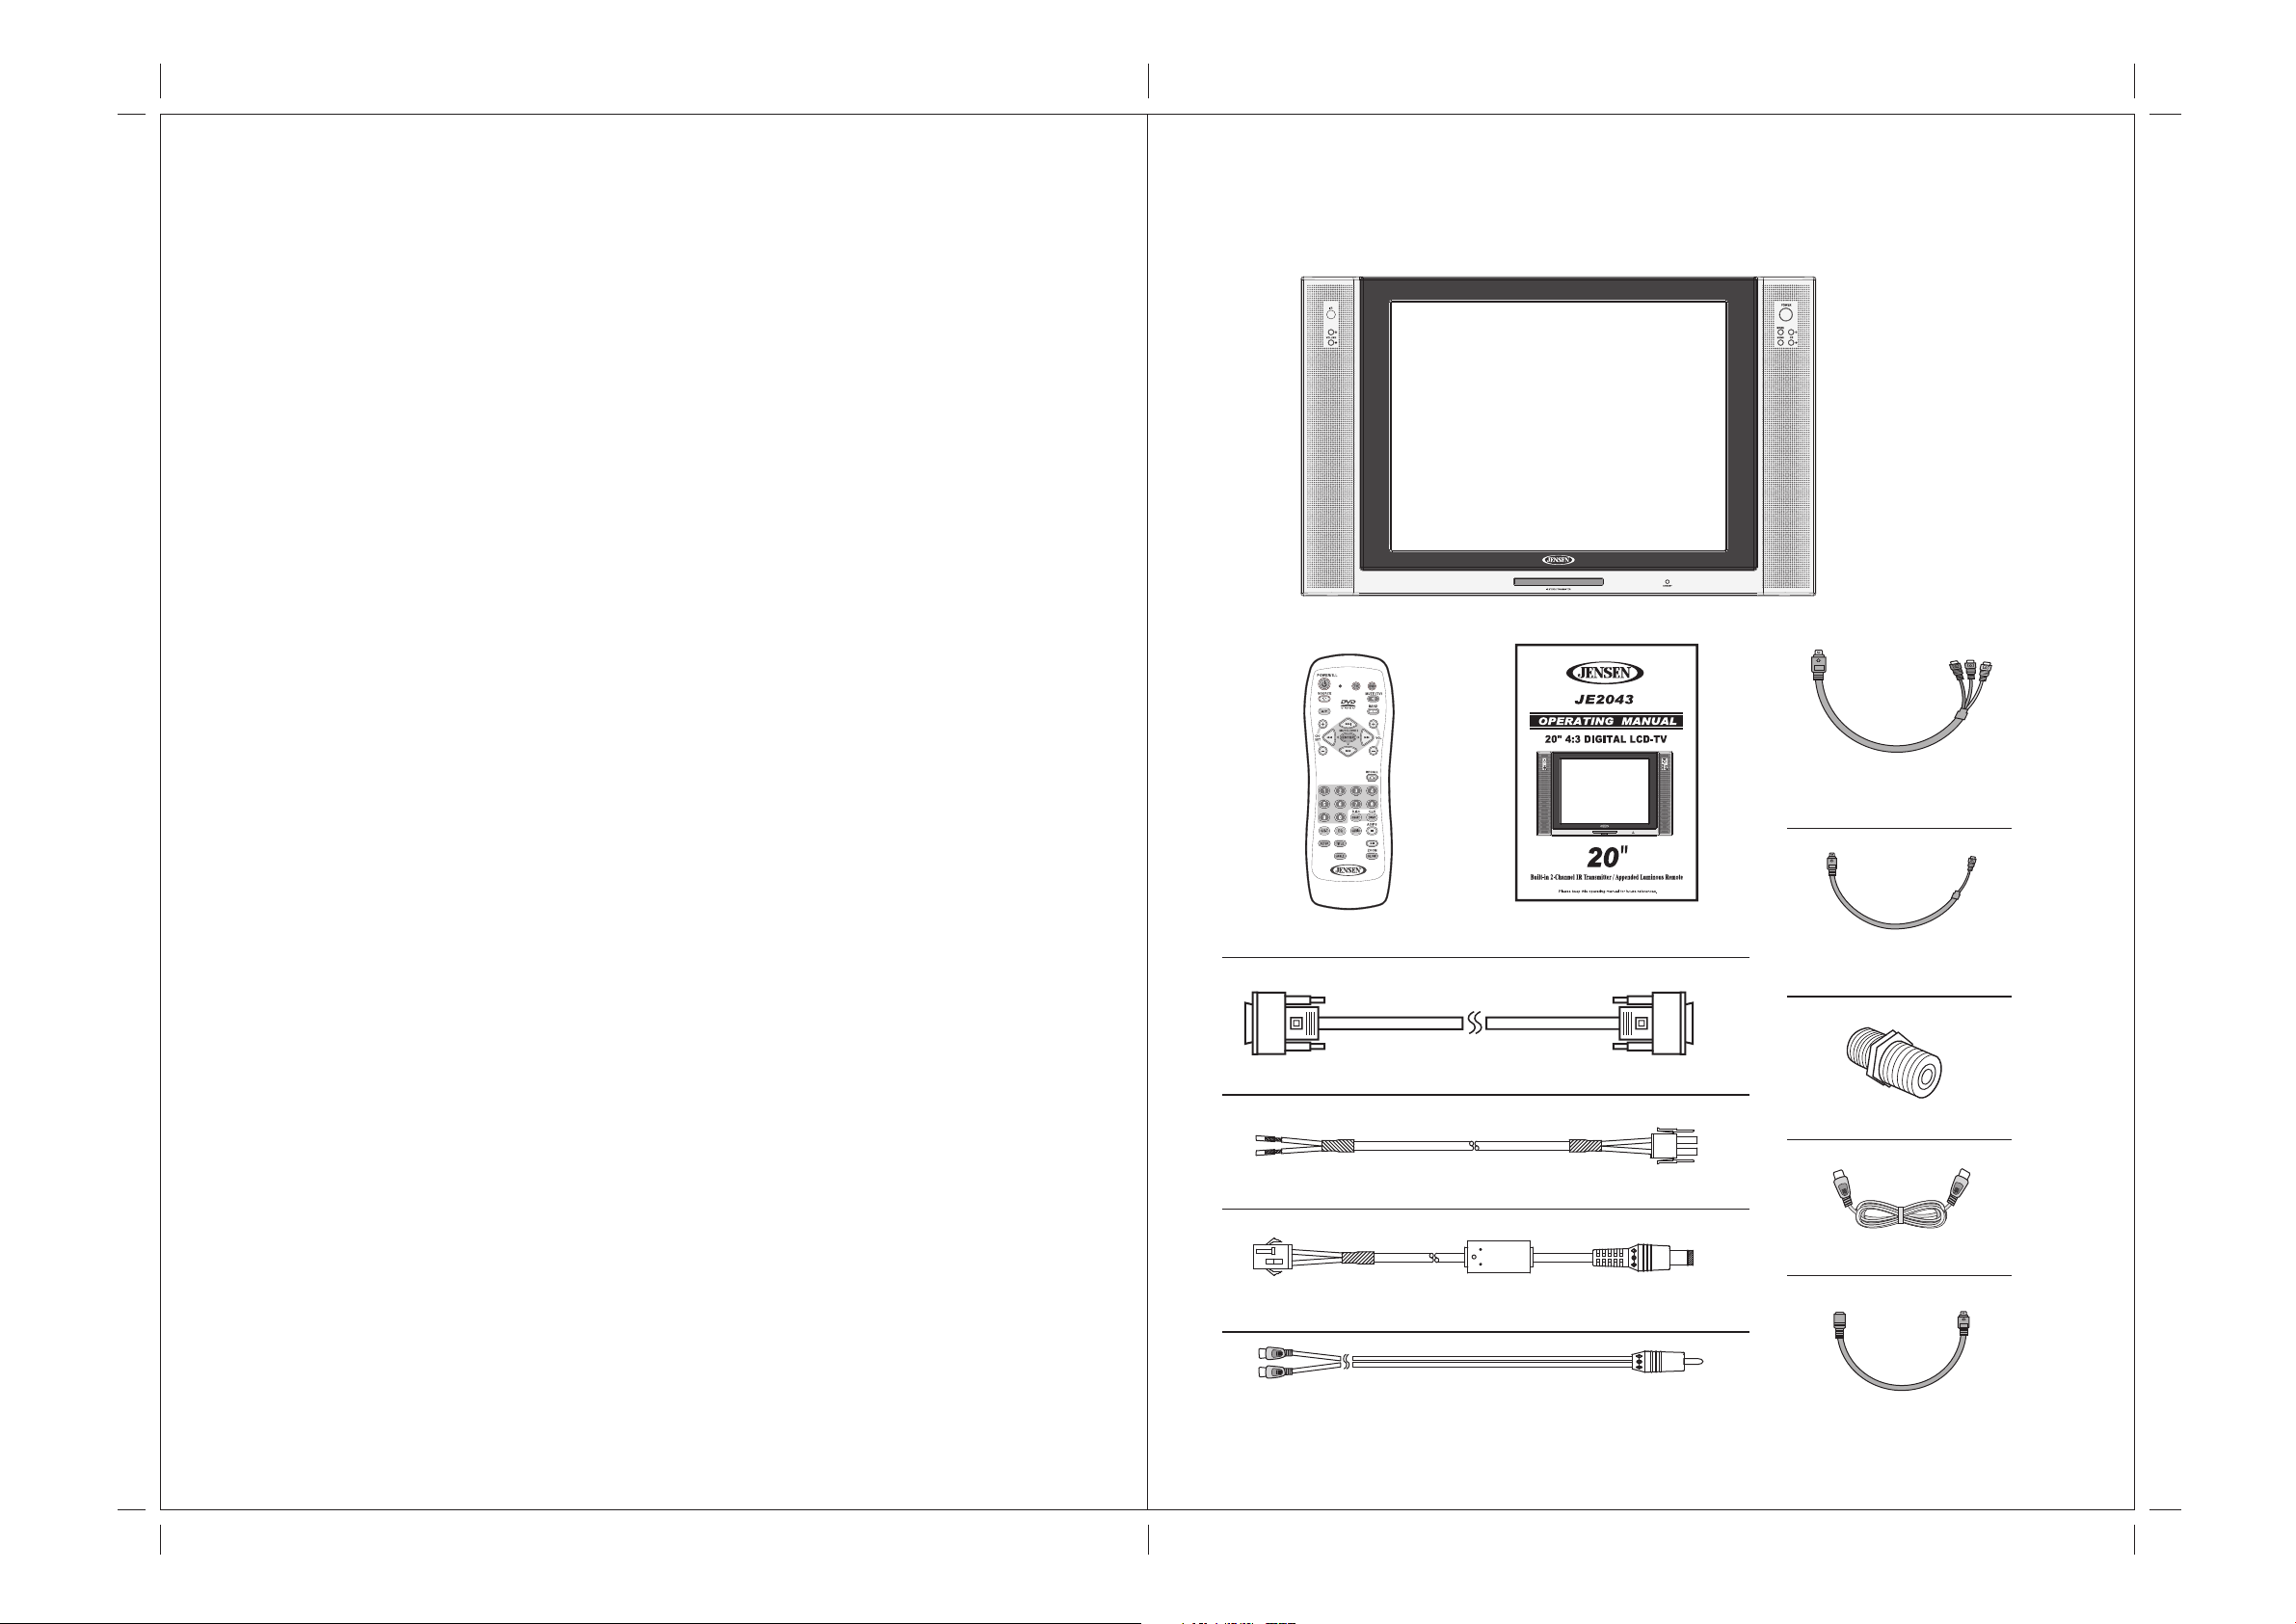
Contents/Accessories :
(Please check the content of the Package.)
7. Front controls
8. Cable ready TV tuner with Closed Caption and V-Chip
9. High output speakers
10. Built in 2 Channel IR transmitter for optional wireless headphones
11. Wireless Night time viewable remote control included
12. Mounting bracket optional
13. Two auxiliary monitor inputs: One fixed NTSC composite, one selectable
composite, S-Video or component ( HDTV )
14. HDTV ready
Remote Control Operation Manual
VGA Connect Cable
Monitor
Component Video
Conversion Cable
Composite Video
Conversion Cable
RF Connector
DC Power Harness 1
DC Power Harness 2
IR Transmitter Audio Input Harness
02 03
Antenna Cable
S-Video Cable
Page 5

2. Front Panel Controls:
3. Remote Control Function :
PANEL CONTROL :
1. POWER : Power On/Off
2. MODE : Mode Select
3. CHANNEL +/- : Channel Select
4. MENU : Menu Setting
6. VOLUME : Increase Volume
7. VOLUME : Decrease Volume
8. SPEAKER : Loud Speaker
9. STAND BY : Standby Mode Led
5. IR : IR Port for Remote Control
10. IR STEREO TRANSMITTER : For Wireless Headphone
5
6
7
11
13
15
17
19
12
14
16
18
8
(When using the remote control, point it towards the IR sensor.)
Battery Usage Caution:
8
1
2
3
4
5
6
1
2
3
4
8
7
9
10
11
12
13
14
15
16
17
18
To prevent battery leakage which may result
in bodily injury or damage to the remote :
1. Install all batteries correctly, and as
marked on the remote control.
2. Do not mix batteries: (OLD and NEW or
CARBON and ALKALINE, etc.).
3. Remove batteries when the remote is not
used for a long time.
INPUT/OUTPUT :
11. AV Out 1 : RCA Video Output
12. AV Out 1 : RCA Left Audio Output
13. AV Out 1 : RCA Right Audio Output
14. VGA : VGA Input (Computer)
15. S-Video (AV) In 1 : S-Video Input
/Component Input
16. AV In 2 : RCA Video Input
17. AV In 2 : RCA Left Audio Input
18. AV In 2 : RCA Right Audio Input
19. AV In 1 : AV 1 Audio Input
20. Antenna Input
21. Power Supply Socket
22. Second IR Transmitter Audio Input
Note: 1. Some buttons on remote have two functions (for TV & DVD mode). When press the TV button, the
910
remote will get into TV function mode, each time when press the TV function button, the LED will
flash "RED" light. When in DVD Mode, each time when press the DVD function button, the LED will
flash "GREEN" light.
2.Some of the buttons are designed for operate single disc DVD player, pls read the DVD manual to
operate the DVD player.
TV Mode: DVD Mode:
POWER : Power On/Off
1.
2.
SOURCE : Signal Button
3.
AUTO PROGRAM : Channel Scanning
/ / / :
4./5./14./16.
Up, Down, Left, Right Button for setting
CH (+/- ) : Channel Up/Channel Down
6.
7.
1/2/3/4/5/6/7/8/9/0 : Numbers Button
LED : TV Mode --- Red Flash
22
20
21
8.
: DVD Mode --- Green Flash
TV : TV Mode Selected
9.
MUTE(TV) : TV Mute Button
11.
13.
ENTER : Enter Button
VOLUME (+/- ) : Volume Up/Volume Down
15.
RECALL : Channel Return
17.
NEXT TRACK ( ): Select Next Title/Chapter
4.
5.
FR( ) : FAST Reverse Play
10.
DVD : DVD Mode Selected
FF( ) : FAST Forward Play
11.
MENU : DVD Root Menu
12.
PREVIOUS TRACK ( ): Select Previous
16.
Title/Chapter
DVD Button : Buttons only for DVD use
18.
04 05
Page 6

4. INSTALLATION GUIDE:
When Connecting to a TV Cable:
1. Remove Antenna Socket cover.
2. Plug the cable to the input socket on the unit.
3. Connect the cable that comes along with the unit to the one you are using when
needed.
TV AVTENNA
CATV CABLE
(photo.2)
Noted: When connect Component Video input, please set OSD (AV1 Select) to "CV" to
view Component-Video source.
Input (RCA) from other Equipment:
Connect to the TV AV IN 2 socket.
Connecting to Other Equipment :
1. This unit is able to support various input setting. You can connect your video recorder,
amplifier, game console etc, to the unit, to enjoy high quality, digital audio-visual effect.
2. Connect AV equipment using S-Video. (photo.1)
3. Using the S-Video cable, connect your equipment to the S-Video/Component socket
on the TV Side Input Panel.
4. Connect your AV cable to the equipment. (photo.2)
(photo.1)
Noted: When connect S-Video input, please set OSD (AV1 Select) to "SV" to view
S-VIDEO source.
Noted: When connect AV IN 2, please set OSD (AV1 Select) to "AV" to view AV IN 2
source.
Output (RCA) to other AV Equipment:
Output the AV Signal using the unit AV output socket.
Noted: When connect AV OUT 1, please set OSD (AV1 Select) to "AV" to view AV OUT 1
source.
06 07
Page 7

* VGA Input:
This unit provides VGA (Computer) input connector.
1. Connect computer VGA output to the monitor VGA input using VGA cable.
2. To connect audio source, using audio cable to connect from computer audio output to
VGA audio input.
Computrer Box
Noted: When connect VGA input, please set OSD (AV1 Select) to "PC" to view VGA
source.
5. Basic Functions :
* POWER SIGNAL:
1. When POWER indication LED on unit turns RED in color indicating power is connected.
2. Press the "Power" button on the remote control, the POWER indication LED on the TV
Front Panel will turn "GREEN in color".
PowerIndicationLED
Connect Power:
Connect to the power source using the power cable and adapter provided.
DC 12V
ATTENTION: Ensure the power supply is connected to the unit. When not using unit for
a long period of time, remove DC input socket from the main power point.
DC INPUT
SOCKET
* MODE:
1. Press the "Mode" button on the TV front panel or "SOURCE" button on remote control
to select from the various mode settings.
2. The mode setting status will change each time the "Mode" or "SOURCE" button is
pressed – "AV1/AV2/CH 00"
AV1
AV2
CHANNEL
** Please make sure video source is been connected properly.
08 09
Page 8

* Volume Setting:
1. Press "Volume +/- " ( / ) button on TV front control panel or remote control to
adjust volume level.
* Channel Select:
1. Press "Channel / " button on remote control or TV Front Control Panel to
change/select channels.
2. Press on Number buttons on remote control to change/select channel directly.
* Mute:
1. Press "MUTE" button on remote control to mute speakers. "MUTE" will display on
screen.
2. Press "MUTE" button again or "Volume +/-" button to return sound back to speakers.
MUTE
* OSD Menu Setting:
This monitor provide "OSD" setting, enable you to customize the setting for monitor.
Press "MENU" button on remote or front control panel to set OSD menu.
Noted: Before adjust settings, ensure all the video source is in correct mode.
10 11
Page 9

6. OSD Settings:
This monitor provide "OSD" setting, enable you to customize the setting for monitor.
Noted: Before adjust settings, ensure all the video source is in correct mode.
Management Setting :
Press "MENU" button, osd menu will display on screen, press "SET / " button to
select "TV setting", and press "ENTER" button to enter management setting,then press
"SET / / / select course settings. (Pls see chart as below)
TV Setting :
TV Setting :
Press "MENU" button, osd menu will display on screen, press "SET / " button to
select "TV setting", and press "ENTER" button to enter TV setting,then press
"SET / / / select course settings. (Pls see chart as below)
Picture Adjust
Brightness
Contrast
Sharpness
Saturation
Hue
TV
Volume
Bass
Treble
Balance
Surround
Speaker
TV
Main Display
Zoom
AV1 Select
TV
Main Display
Zoom
AV1 Select
Audio Adjust
Input Select
Input Select
OFF
ON
TV
Full
AV
AV1
Full
AV
50
50
50
50
50
50
50
50
50
Volume
Bass
Treble
Balance
Surround
Speaker
TV
Main Display
TV
Zoom
Audio Adjust
Input Select
Input Select
ON
OFF
AV1
AV2
TV
Full
Normal
14:9
Zoom
50
50
50
50
MTS
ANT/CATV
Auto Scan
Set Channel
Add/Erase
Fine Tune
TV
MTS
ANT/CATV
Auto Scan
Set Channel
Add/Erase
Fine Tune
TV
MTS
ANT/CATV
Auto Scan
Set Channel
Add/Erase
Fine Tune
TV
CAPTION
PARENT CONTROL
TV Setting
TV Setting
TV Setting
Parental Control
STEREO
ANT
NO
07
Add
STEREO
ANT
NO
07
Add
STEREO
ANT
NO
07
Add
OFF
50
50
50
MTS
TV
ANT/CATV
TV
Add/Erase
TV
CAPTION
TV Setting
TV Setting
TV Setting
Parental Control
STEREO
SAP
MONO
IRC
HRC
CATV
ANT
Add
Erase
OFF
C1~C4
T1~T4
TV
Main Display
Zoom
AV1 Select
TV
Input Select
AV1
Full
AV
TV
AV1 Select
TV
Input Select
TV
Language
TV
Menu Setting
AV
PC
CV
SV
TV
OSD H Position
OSD V Position
OSD Timeout
Language
Recall
OSD Exit
TV
Menu Setting
10
ENGLISH
NO
50
50
12 13
FRANCAIS
DEUTSCH
ITALIANO
ESPANOL
繁體中文
Page 10

6. OSD Settings:
This monitor provide "OSD" setting, enable you to customize the setting for monitor.
Noted: Before adjust settings, ensure all the video source is in correct mode.
7. OSD Settings:
This monitor provide "OSD" setting, enable you to customize the setting for monitor.
Noted: Before adjust settings, ensure all the video source is in correct mode.
Management Setting :
Press "MENU" button, osd menu will display on screen, press "SET / " button to
select "AV1 setting", and press "ENTER" button to enter management setting,
then press "SET / / / select course settings. (Pls see chart as below)
AV1 Settings:
Picture Adjust
Brightness
Contrast
Sharpness
Saturation
Hue
AV1 NTSC
Audio Adjust
Volume
Bass
Treble
Balance
Surround
Speaker
AV1
Main Display
Zoom
AV1 Select
AV1
NTSC NTSC
Input Select
NTSC NTSC
OFF
ON
AV1
Full
AV
50
50
50
50
50
Audio Adjust
50
50
50
50
Volume
Bass
Treble
Balance
Surround
Speaker
AV1
Input Select
Main Display
AV1
ON
OFF
AV1
AV2
TV
50
50
50
50
Management Setting :
Press "MENU" button, osd menu will display on screen, press "SET / " button to
select "AV1 setting", and press "ENTER" button to enter management setting,
then press "SET / / / select course settings. (Pls see chart as below)
AV2 Settings:
Picture Adjust
Brightness
Contrast
Sharpness
Saturation
Hue
AV2 NTSC
Audio Adjust
Volume
Bass
Treble
Balance
Surround
Speaker
AV2
Main Display
Zoom
AV2 Select
AV2
NTSC NTSC
Input Select
NTSC NTSC
OFF
ON
AV1
Full
AV
50
50
50
50
50
Audio Adjust
50
50
50
50
Volume
Bass
Treble
Balance
Surround
Speaker
AV2
Input Select
Main Display
AV2
ON
OFF
AV1
AV2
TV
50
50
50
50
Input Select
Main Display
Zoom
AV1 Select
AV1
Input Select
Main Display
Zoom
AV1 Select
AV1
Menu Setting
OSD H Position
OSD V Position
OSD Timeout
Language
Recall
OSD Exit
AV1
Menu Setting
OSD H Position
OSD V Position
OSD Timeout
Language
Recall
OSD Exit
AV1
AV1
Full
AV
NTSC NTSC
AV1
Full
AV
NTSC
50
50
10
ENGLISH
NO
NTSC NTSC
50
50
10
ENGLISH
NO
NTSC NTSC
Input Select
Zoom
AV1
Input Select
AV1 Select
AV1
Menu Setting
Language
AV1
Menu Setting
Recall
AV1
NTSC
FULL
NORMAL
14:9
ZOOM
AV
PC
CV
SV
FRANCAIS
~
DEUTSCH
ITALIANO
~
ESPANOL
繁體中文
Yes
Input Select
Main Display
Zoom
AV2 Select
AV2
Input Select
Main Display
Zoom
AV2 Select
AV2
Menu Setting
OSD H Position
OSD V Position
OSD Timeout
Language
Recall
OSD Exit
AV2
Menu Setting
OSD H Position
OSD V Position
OSD Timeout
Language
Recall
OSD Exit
AV2
AV1
Full
AV
NTSC NTSC
AV1
Full
AV
NTSC
50
50
10
ENGLISH
NO
NTSC NTSC
50
50
10
ENGLISH
NO
NTSC NTSC
Input Select
Zoom
AV2
Input Select
AV2 Select
AV2
Menu Setting
Language
AV2
Menu Setting
Recall
AV2
14 15
NORMAL
NTSC
FRANCAIS
DEUTSCH
ITALIANO
ESPANOL
FULL
14:9
ZOOM
AV
PC
CV
SV
~
繁體中文
Yes
~
Page 11

6. OSD Settings:
This monitor provide "OSD" setting, enable you to customize the setting for monitor.
Noted: Before adjust settings, ensure all the video source is in correct mode.
Management Setting :
Press "MENU" button, osd menu will display on screen, press "SET / " button to
select "Management setting", and press "ENTER" button to enter management setting,
then press "SET / / / select course settings. (Pls see chart as below)
PC Settings:
Picture Adjust
Brightness
Contrast
H-Position
V-Position
Clock
Phase
Auto Image
HF:48.3KHz VF:59.9Hz
AV1 1024x768 SEP
Color Temp.
Corlor
Cool
Neut.
Warm
NO
50
50
50
50
50
50
Color Temp.
Red
Green
Blue
Corlor
User
OSD Settings:
Management Setting :
Press "MENU" button, osd menu will display on screen, press "SET / " button to
select "Management setting", and press "ENTER" button to enter management setting,
then press "SET / / / select course settings. (Pls see chart as below)
PIP Setting
PIP Mode
PIP Audio
PIP Size
PIP H Position
PIP V Position
HF:48.3KHz VF:59.9Hz
AV1 1024x768 SEP
OSD H Position
OSD V Position
OSD Timeout
Language
Recall
OSD Exit
AV1 1024x768 SEP
Menu Setting
HF:48.3KHz VF:59.9Hz
PIP
MAIN
10
ENGLISH
NO
50
50
AV1 1024x768 SEP
AV1 1024x768 SEP
PIP Setting
PIP Audio
HF:48.3KHz VF:59.9Hz
Language
Menu Setting
HF:48.3KHz VF:59.9Hz
SUB
FRANCAIS
DEUTSCH
ITALIANO
ESPANOL
繁體中文
50
50
50
50
HF:48.3KHz VF:59.9Hz
AV1 1024x768 SEP
Audio Adjust
Volume
Bass
Treble
Balance
Surround
Speaker
HF:48.3KHz VF:59.9Hz
AV1 1024x768 SEP
Input Select
Main Display
Zoom
AV1 Select
HF:48.3KHz VF:59.9Hz
AV1 1024x768 SEP
PIP Setting
PIP Source
PIP Mode
HF:48.3KHz VF:59.9Hz
AV1 1024x768 SEP
PIP Setting
PIP Source
PIP Mode
HF:48.3KHz VF:59.9Hz
AV1 1024x768 SEP
OFF
ON
AV1
Full
PC
TV
ON
TV
OFF
50
50
50
50
HF:48.3KHz VF:59.9Hz
AV1 1024x768 SEP
Audio Adjust
Volume
Bass
Treble
Balance
Surround
Speaker
HF:48.3KHz VF:59.9Hz
AV1 1024x768 SEP
Input Select
Zoom
HF:48.3KHz VF:59.9Hz
AV1 1024x768 SEP
PIP Setting
PIP Source
HF:48.3KHz VF:59.9Hz
AV1 1024x768 SEP
PIP Setting
PIP Mode
HF:48.3KHz VF:59.9Hz
AV1 1024x768 SEP
ON
OFF
Full
Normal
14:9
Zoom
TV
AV2
ON
50
50
50
50
PIP Setting
PIP Mode
PIP Audio
PIP Size
PIP H Position
PIP V Position
HF:48.3KHz VF:59.9Hz
AV1 1024x768 SEP
PIP
MAIN
7. ANNEX A:
LCD Monitor Care & Cleaning Tips:
To avoid possible shock hazard, be sure the LCD TV is turn off and unplugged from the
main electrical outlet before cleaning.
Do not use any form of solvents on the LCD monitor.
Cleaning the LCD Monitor:
1. Use a soft, clean & dry cloth to gently wipe off the dust on the LCD monitor.
2. Use a clean cloth dampened with water to wipe off the dirt.
3. Do not exert force when cleaning the LCD monitor.
Cleaning the Enclosure:
1. Use a soft, clean & dry cloth to gently wipe off the dust on the LCD monitor.
2. Use a clean cloth dampened with water to wipe off the dirt.
3. Do not exert force when cleaning the LCD monitor.
16 17
Page 12

8. ANNEX B:
9. SPECIFICATIONS:
Troubleshooting:
If the unit fails to operate normally, try solving the problems using the guide below. If the
problem persists, switch off the unit and ask the dealer or customer services officer for
assistance. Do not attempt to repair the defective unit yourself. Do not endanger yourself
as high voltage is involved.
1. No Picture:
a. Check that the power cord is plugged into the main socket and the power
supply is turned on.
b. Check the contrast and brightness setting.
c. Check the Antenna connection to see if it is properly connected to the
LCD-TV Input Terminal.
d. Be sure you have selected the correct source mode.
2. Snowy Picture:
a. Check to see if the Antenna is correctly connected.
b. Check to see if the picture setting is correctly set.
3. Picture Flickers:
a. Check that the power coming from the main socket is sufficient.
b. Check that unit is not placed too near speakers or magnetic objects.
c. Check to see that the unit setting is correctly set.
Panel Type
Display Size
Aspect Ratio
Resolution
Display Colors
Luminance
Contrast Ratio
View Angle
TV-System
Speakers
Audio DAC
Inputs
Outputs
IR-Transmitter
Active Matrix LCD-TFT
20" (Diagonal)
4:3
307.200 Pixel (640x480)
16.7 M
500 cd/m
2
500 :1
H: 170 degrees, V: 170 degrees
NTSC
2 x 5W
96 kHz/24-Bit Audio-D/A-Converter
1x (S-Video/Component/CVBS Input <Mini-DIN>),
1x VGA Input, 1x AV-IN (RCA)
1x AV-OUT (RCA)
Channel 1: 2.3Mhz/2.8Mhz, Effective Angle:45°
Effective Range:12 Feet
4. No Sound:
a. Check that mute function is off.
b. Increase the volume.
5. Remote Control not Working:
a. Check batteries are installed correctly, replaced if necessary.
b. Aim the remote controller towards the unit remote sensor.
6. Unit will not power on w/ front Power button:
a. Check the power is connected.
b. Power indication LED on unit is red in color.
18 19
Channel 2: 3.2Mhz/3.8Mhz, Effective Angle:45°
REMOTE RANGE
OSD-Language
Accessories
Effective Range:12 Feet
English, Frangaic, Dectsch, Espanol, Chinese
NTSC: Antenna / Cable
Monitor,Operating Manual, Remote Control, Antenna Cable,
Component Video Conversion Cable, DC Power Harness,
Composite Video Conversion Cable, VGA Connector Cable,
RF Connector, IR Transmitter Audio Input Harness
Noted: All specifications are subjected to change without prior notification
Page 13

asaelectronics.com
 Loading...