

Audiovox GMRS7001 Owner's Manual
DRAFT
General Mobile Radio Service (GMRS)
Model : GMRS7001
Owner's Manual
Feb.04,2003(by TTI).
Draft :
1-800-290-6650
128-XXXX
1 of

CAUTIONS
NEVER A TTEMPT TO CHARGE ALKALINE OR DRY CELL BA TTERIES, AS BATTERIES MAY BURST CAUSING PERSONAL INJURY
AND DAMAGE TO THE PRODUCT .
MET AL HYDRIDE (Ni-MH) BATTERIES WITH THE AUDIOVOX
CHARGER, USE ONL Y AUDIOVOX APPROVED RECHARGEABLE BA
OTHER BRANDS OF BATTERIES IS NOT RECOMMENDED, AS
BATTERY CHARGING TIMES WILL VARY WITH
DIFFERENT BRANDS. REFER TO THE MANUFACTURER’S
INSTRUCTIONS FOR CHARGING OTHER BRANDS OF BA TTERIES.
A VOID PLACING THE GMRS7001-2 RADIO TRANSCEIVER
FOR PROLONGED PERIODS OF TIME IN DIRECT SUNLIGHT
OR TEMPERATURES BELOW -4° F (-20° C) OR ABOVE 140 ° F
(60° C).
KEEP THE ANTENNA AT 1 INCH (2.5 cm) AWAY FROM YOUR
HEAD AND BODY. DO NOT USE YOUR GMRS7001-2 RADIO
TRANSCEIVER WITH A DAMAGED ANTENNA.
PLACE THE RUBBER COVER ON JACKS WHEN NOT IN USE.
GMRS LICENSE:
USE OF THIS RADIO WITHIN THE UNITED ST A TES REQUIRES AN
FCC GMRS LICENSE. AN INDIVIDUAL18 YEARS OF AGE OR
OLDER, WHO IS NOT A REPRESENTATAIVE OF A FOREIGN
GOVERNMENT, IS ELIGIBLE TO APPLY FOR A GMRS SYSTEM
LICENSE. YOU WILL NEED TWO FORMS FROM THE FCC; FCC
FORM 159 AND FCC FORM 605 MAIN FORM AND SCHEDULE F.
YOU CAN FIND THE FORMS ONLINE A T : HTTP://WWW .FCC.GOV/
FORMP AGE.HTML, OR CALL 1-800-418-3676.
TTERIES. USE OF THE AUDIOVOX CHARGER WITH
WHEN RECHARGING NICKEL
2
128-XXXX
2 of
128-XXXX
3 of
DRAFT
3
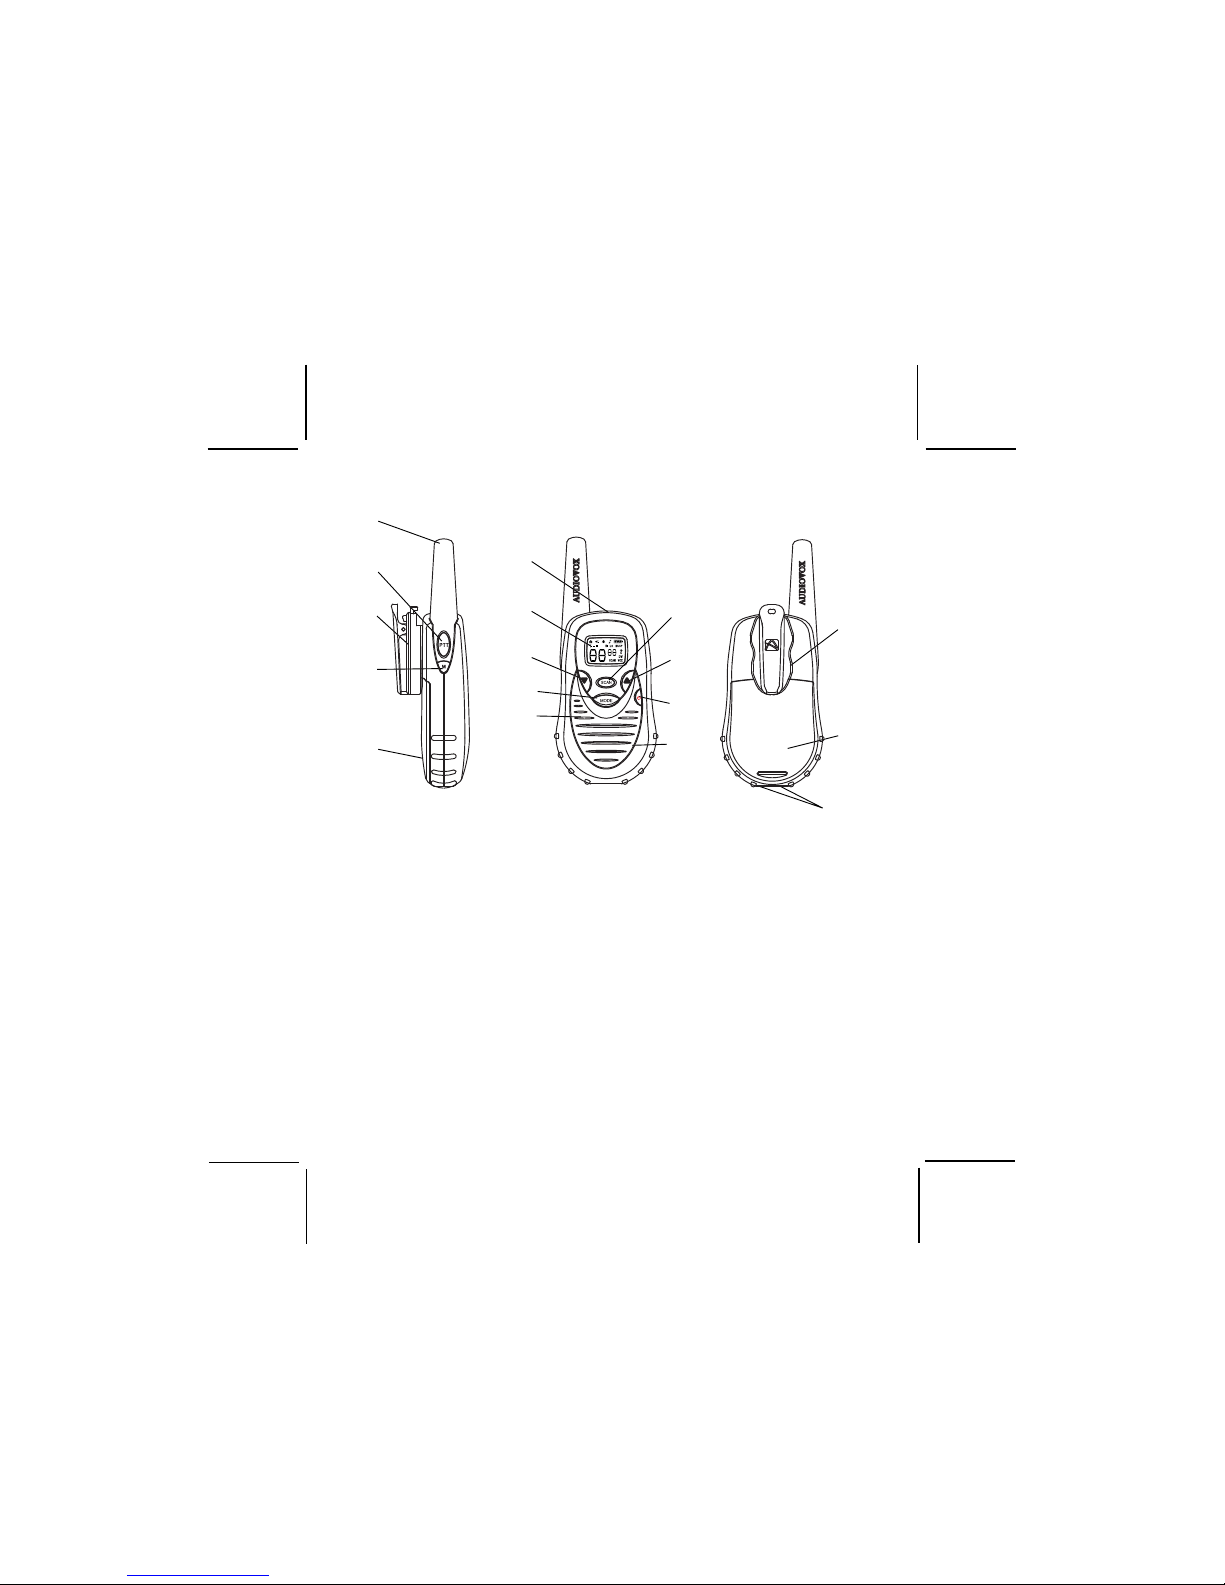
1. Battery Cover
2. Monitor/Function Confirmation
Button
3. Detachable Carry Clip
4. Push-To-Talk (PTT) and Func-
tion Confirmation Button
5. Antenna
6. External Speaker(SP .)/Micro-
phone (MIC) Jacks
7. Built-in Speaker
8. Liquid Crystal Display (LCD)
9. Built-in Microphone
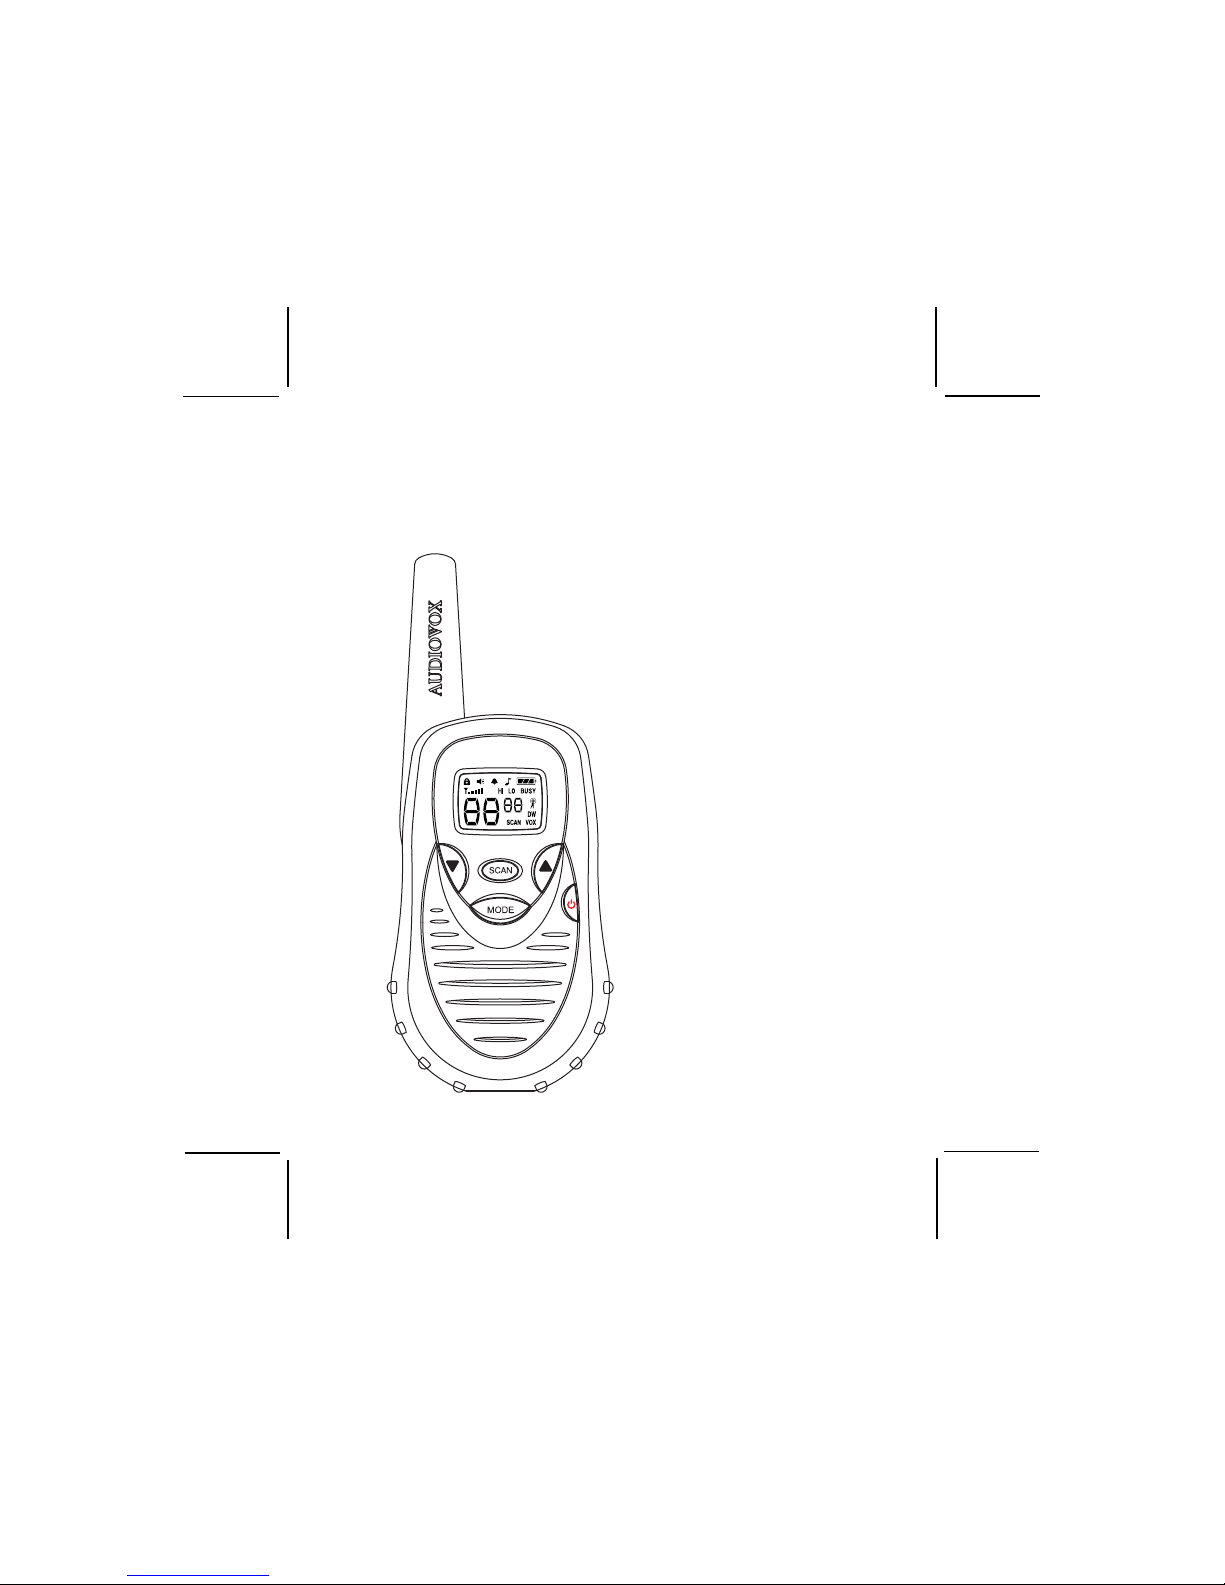
Model GMRS7001-2 (FCC License Required)
10. Up Channel/V olume Button
11. Down Channel/Volume
Button
12. MODE / WX Button
13. Power On/Off &
Key lock button
SCAN / VOX Button
14.
Battery Charging Contacts
15
3
5
4
1
2
9
13
11
8
10
12
7
3
(REF)
1
(REF)
6
15.
14
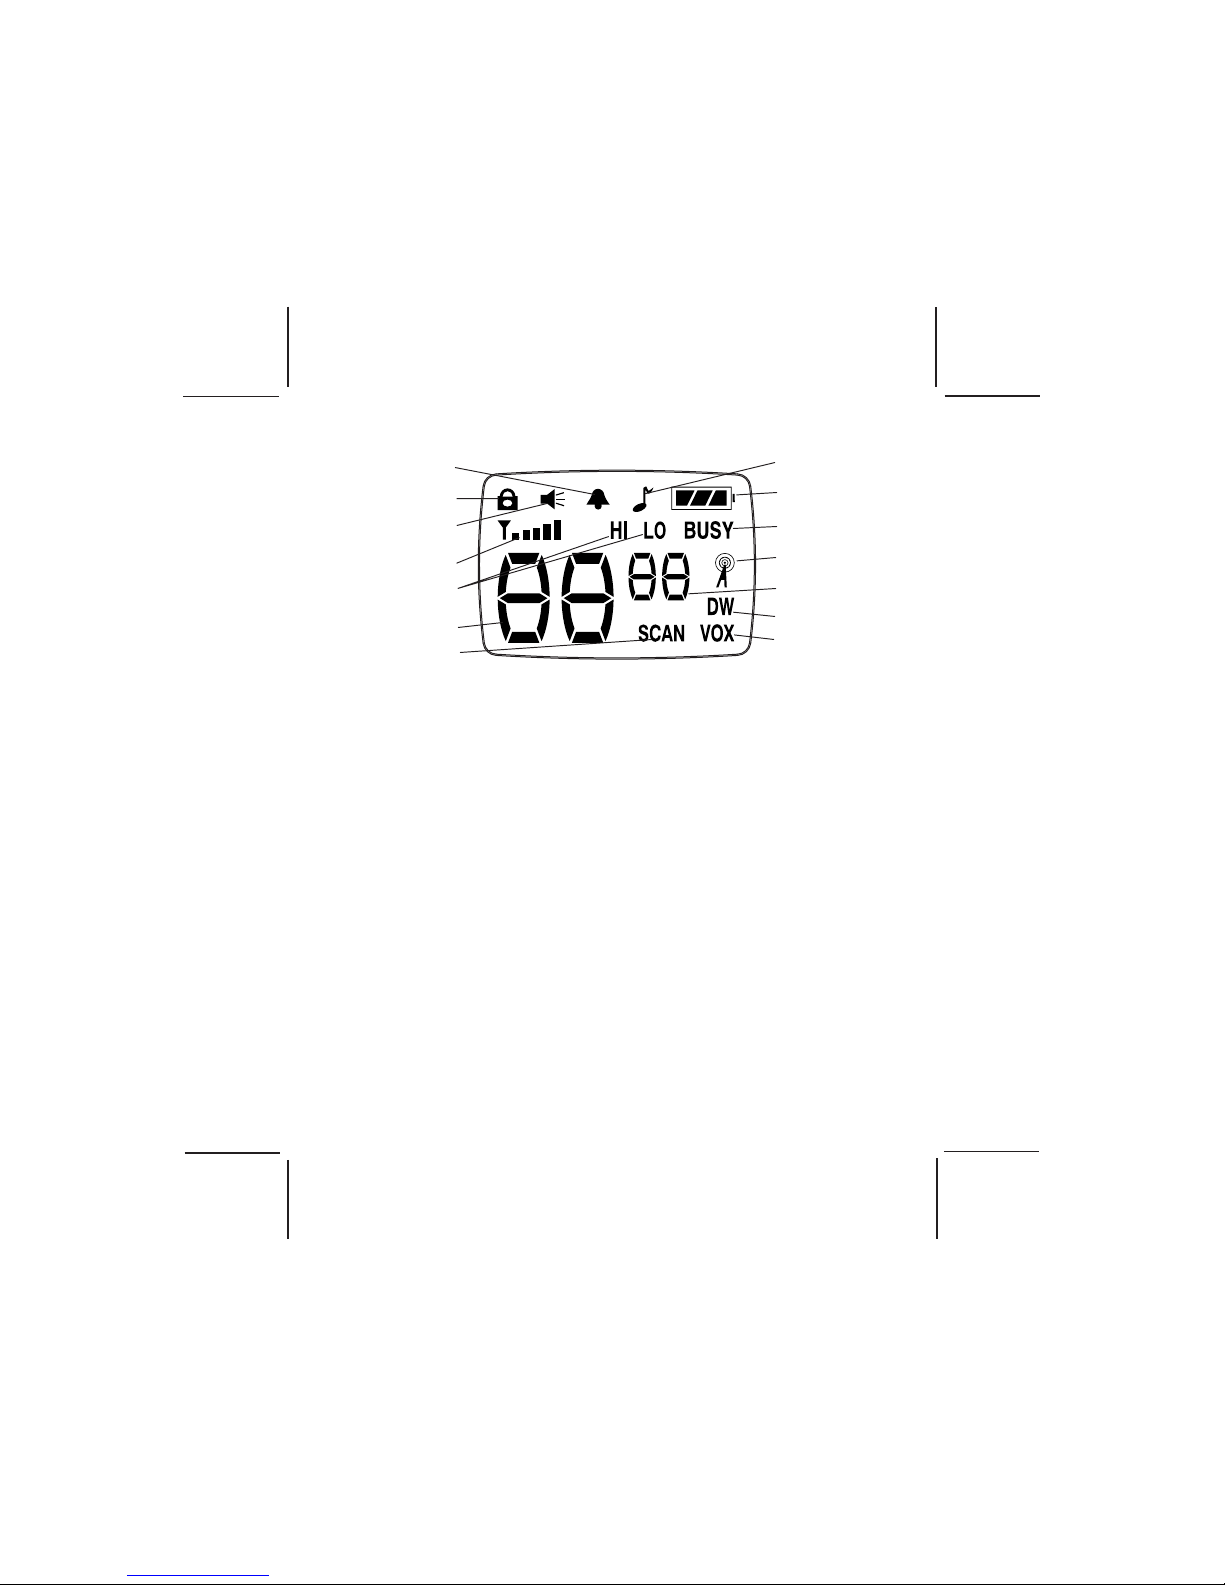
Model GMRS7001-2 DISPLAY
1
2
3
4
5
6
7
1. Beep Tone Indicator: Icon appears when beep button confirmation
tone is selected; icon disappears when tone is off.
2. Key Lock Indicator: Icon appears when the keypad is locked. This
function disables keys such as channel up/down and MODE.
3. Monitor Indicator: Icon appears when the Monitor (M) button is
pressed and the channel monitor function is activated.
4 . Signal Strength Indicator: Icon appears when a signal is being received.
The icon consists of five bars to indicate the received signal level. The
icon also represents transmit signal power during transmission.
5. Hi/LO Indicators: Appropriate icon appears when the transmit power
is set to desired output power.
6. Large Segment Display: Indicates the channel number in use.
7. Scan Indicator: This function allows the user to scan a channel and/or a
tone code every .5 second to search for a valid signal.
8. RogerBeep Tone On/Off Indicator: This icon appears when the
Roger Beep tone is on, and disappears when tone is not in use.
9. Battery Level Indicator: Icon indicates the battery charge level.
10.Signal Receiving Indicator: Icon appears when a signal is being
received.
4
8
9
10
11
12
13
14
128-xxxxx
4 of

11. Weather Mode Indicator: Icon will be on steady when in the weather
band mode. The icon will blink when in the GMRS mode with the alert
active.
12.Small Segment Display: Displays the CTCSS tone option in the
channel from (00-38).
13. Dual Watch Mode Indicator: Icon appears when dual watch mode is
active.
14.Voice Activated Transmission (VOX) Indicator: This function allows
hands free conversation. The icon appears when the VOX mode is
activated.
Equipment and Accessories Supplied
1. Radio (2) GMRS7001-2
2. Owner’s Manual (1) 128-xxxx
Powering the transceiver:
Your GMRS7001-2 radio transceiver operates on five AAA batteries.
Alkaline batteries will provide slightly better performance than rechargeable
batteries. Only the supplied Audiovox-approved rechargeable batteries
can be recharged in the radio transceiver using the suppiled desk-top
charger and associated wall adapter. This will ensure optimum
performance for the GMRS7001-2. Battery charging time is typically
13-15 hours. Use of the Audiovox charger with other brands of batteries is
not recommended as battery charging times will vary. Refer to the
manufacturer’s instructions for charging other brands of batteries.
Batteries
There are three methods of powering the GMRS7001-2:
1. Alkaline Batteries.
WARNING: Do not attempt to recharge Alkaline batteries.
2.Audiovox Rechargeable Ni-MH Batteries - (Rechargeable Ni-MH
batteries, Wall Adapter and Charging Stand are NOT included).
5
128-xxxx
5 of
DRAFT
Use only Audiovox-approved rechargeable batteries and charger
when charging batteries internal to the unit.
NOTE: To extend battery life, avoid overcharging the batteries.
3. Various Brands of Rechargeable Batteries - Use of the
Audiovox charger with other brands of rechargeable batteries is not
recommended, as battery charging times will vary with different
brands of batteries. Refer to the manufacturer’s instructions for
charging other brands of batteries.
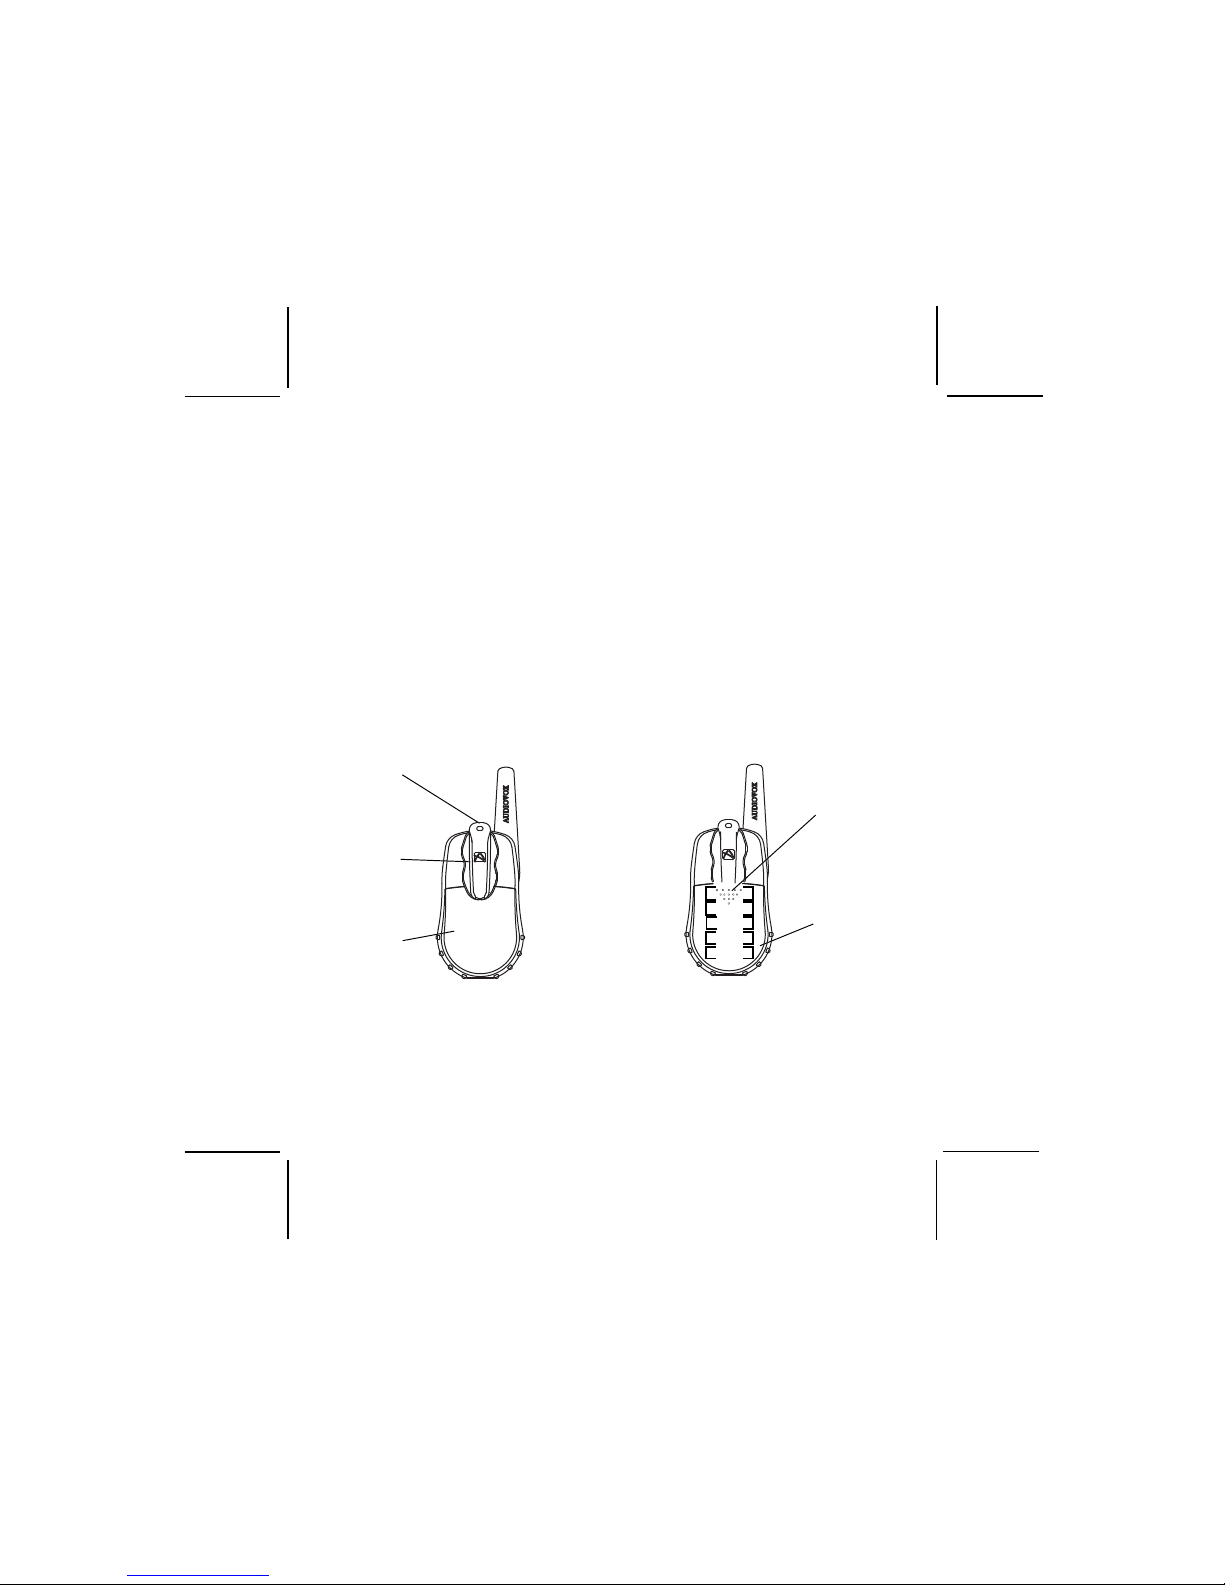
Installing the batteries:
Battery installation is made more convenient when the carry clip is removed.
To do this, release the spring clip securing the belt clip to radio and slide
the belt clip upward and away from the radio body. Next, press down with
the thumb at the embossed arrow, slide the battery cover down and lift off
the battery cover. Insert five AAA batteries (alternate positive ends (+) toward
the top of the transceiver, starting up-to-down.
RELEASE
BUTTON
BELT
CLIP
BATTER Y
COVER
+
+
+
+
+
COVER
ARROW
POSITIVE
TERMINALS
1. Using thumb,
press down on
battery cover at
arrow and slide
cover down to
open.
2. Slide the cover
down and then lift
cover at bottom to
open.Remove
cover.
6
3. Insert five AAA batteries
(positive (+) end toward
the right begining at top
side and alternating
positive terminals as
shown).
128-xxxx
6 of

DRAFT
The following guidelines will improve performance and provide longer
operating times for the GMRS7001-2:
1. Do not mix old and new batteries.
2. The use of alkaline-type batteries is recommended to provide the
longest operating time.
3. Do not mix alkaline, standard (carbon-zinc) or rechargeable
batteries.
4. If the unit is not to be used for an extended period of time, remove the
batteries. Old or leaking batteries can cause damage to the unit and
will void the warranty.
7
128-xxxx
7 of
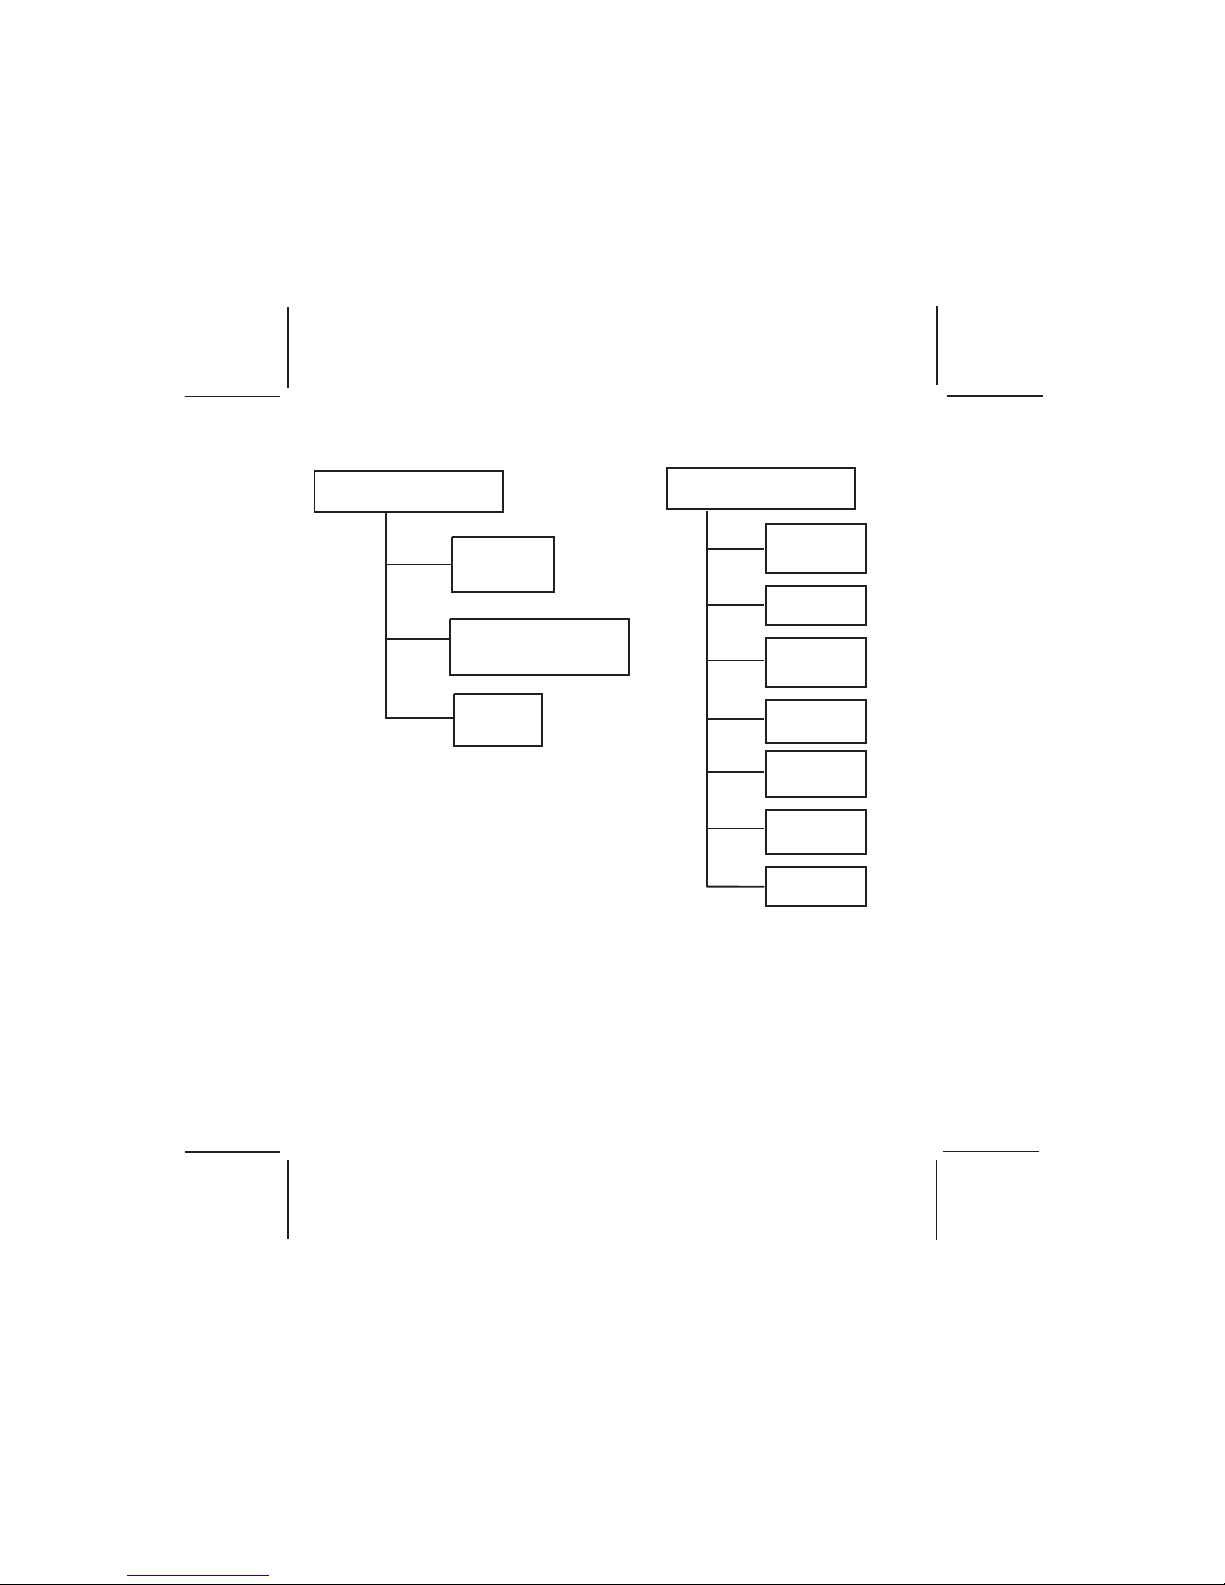
GMRS7001-2 OPERATIONAL MODES
WEATHER BAND
CHANNEL
GMRS / FRS BAND
CHANNEL
SELECT
SELECT
CTCSS
SELECT
WEA THER BAND
ALERT
BUTTON
BEEP
NOTE:
To switch between GMRS/FRS and Weather Band modes, press and hold
the Mode button for 2 seconds. Refer to the appropriate section of this
manual for detailed operating instruction for each mode.
POWER
SELECT
DUAL
WATCH
BUTTON
BEEP
ROGER
BEEP
CALL
SELECT
7
128-xxxxx
8 of
 Loading...