

Page 1
AUDIOVOX
ELECTRONICS CORP.
OWNER'S MANUAL
DVD-220
COMPACT
0
DIGITAL AUDIO
Page 2
Welcome to purchase AUDIOVOX DVD players. For perfect operation and security, read the manual carefully and keep it for future reference.
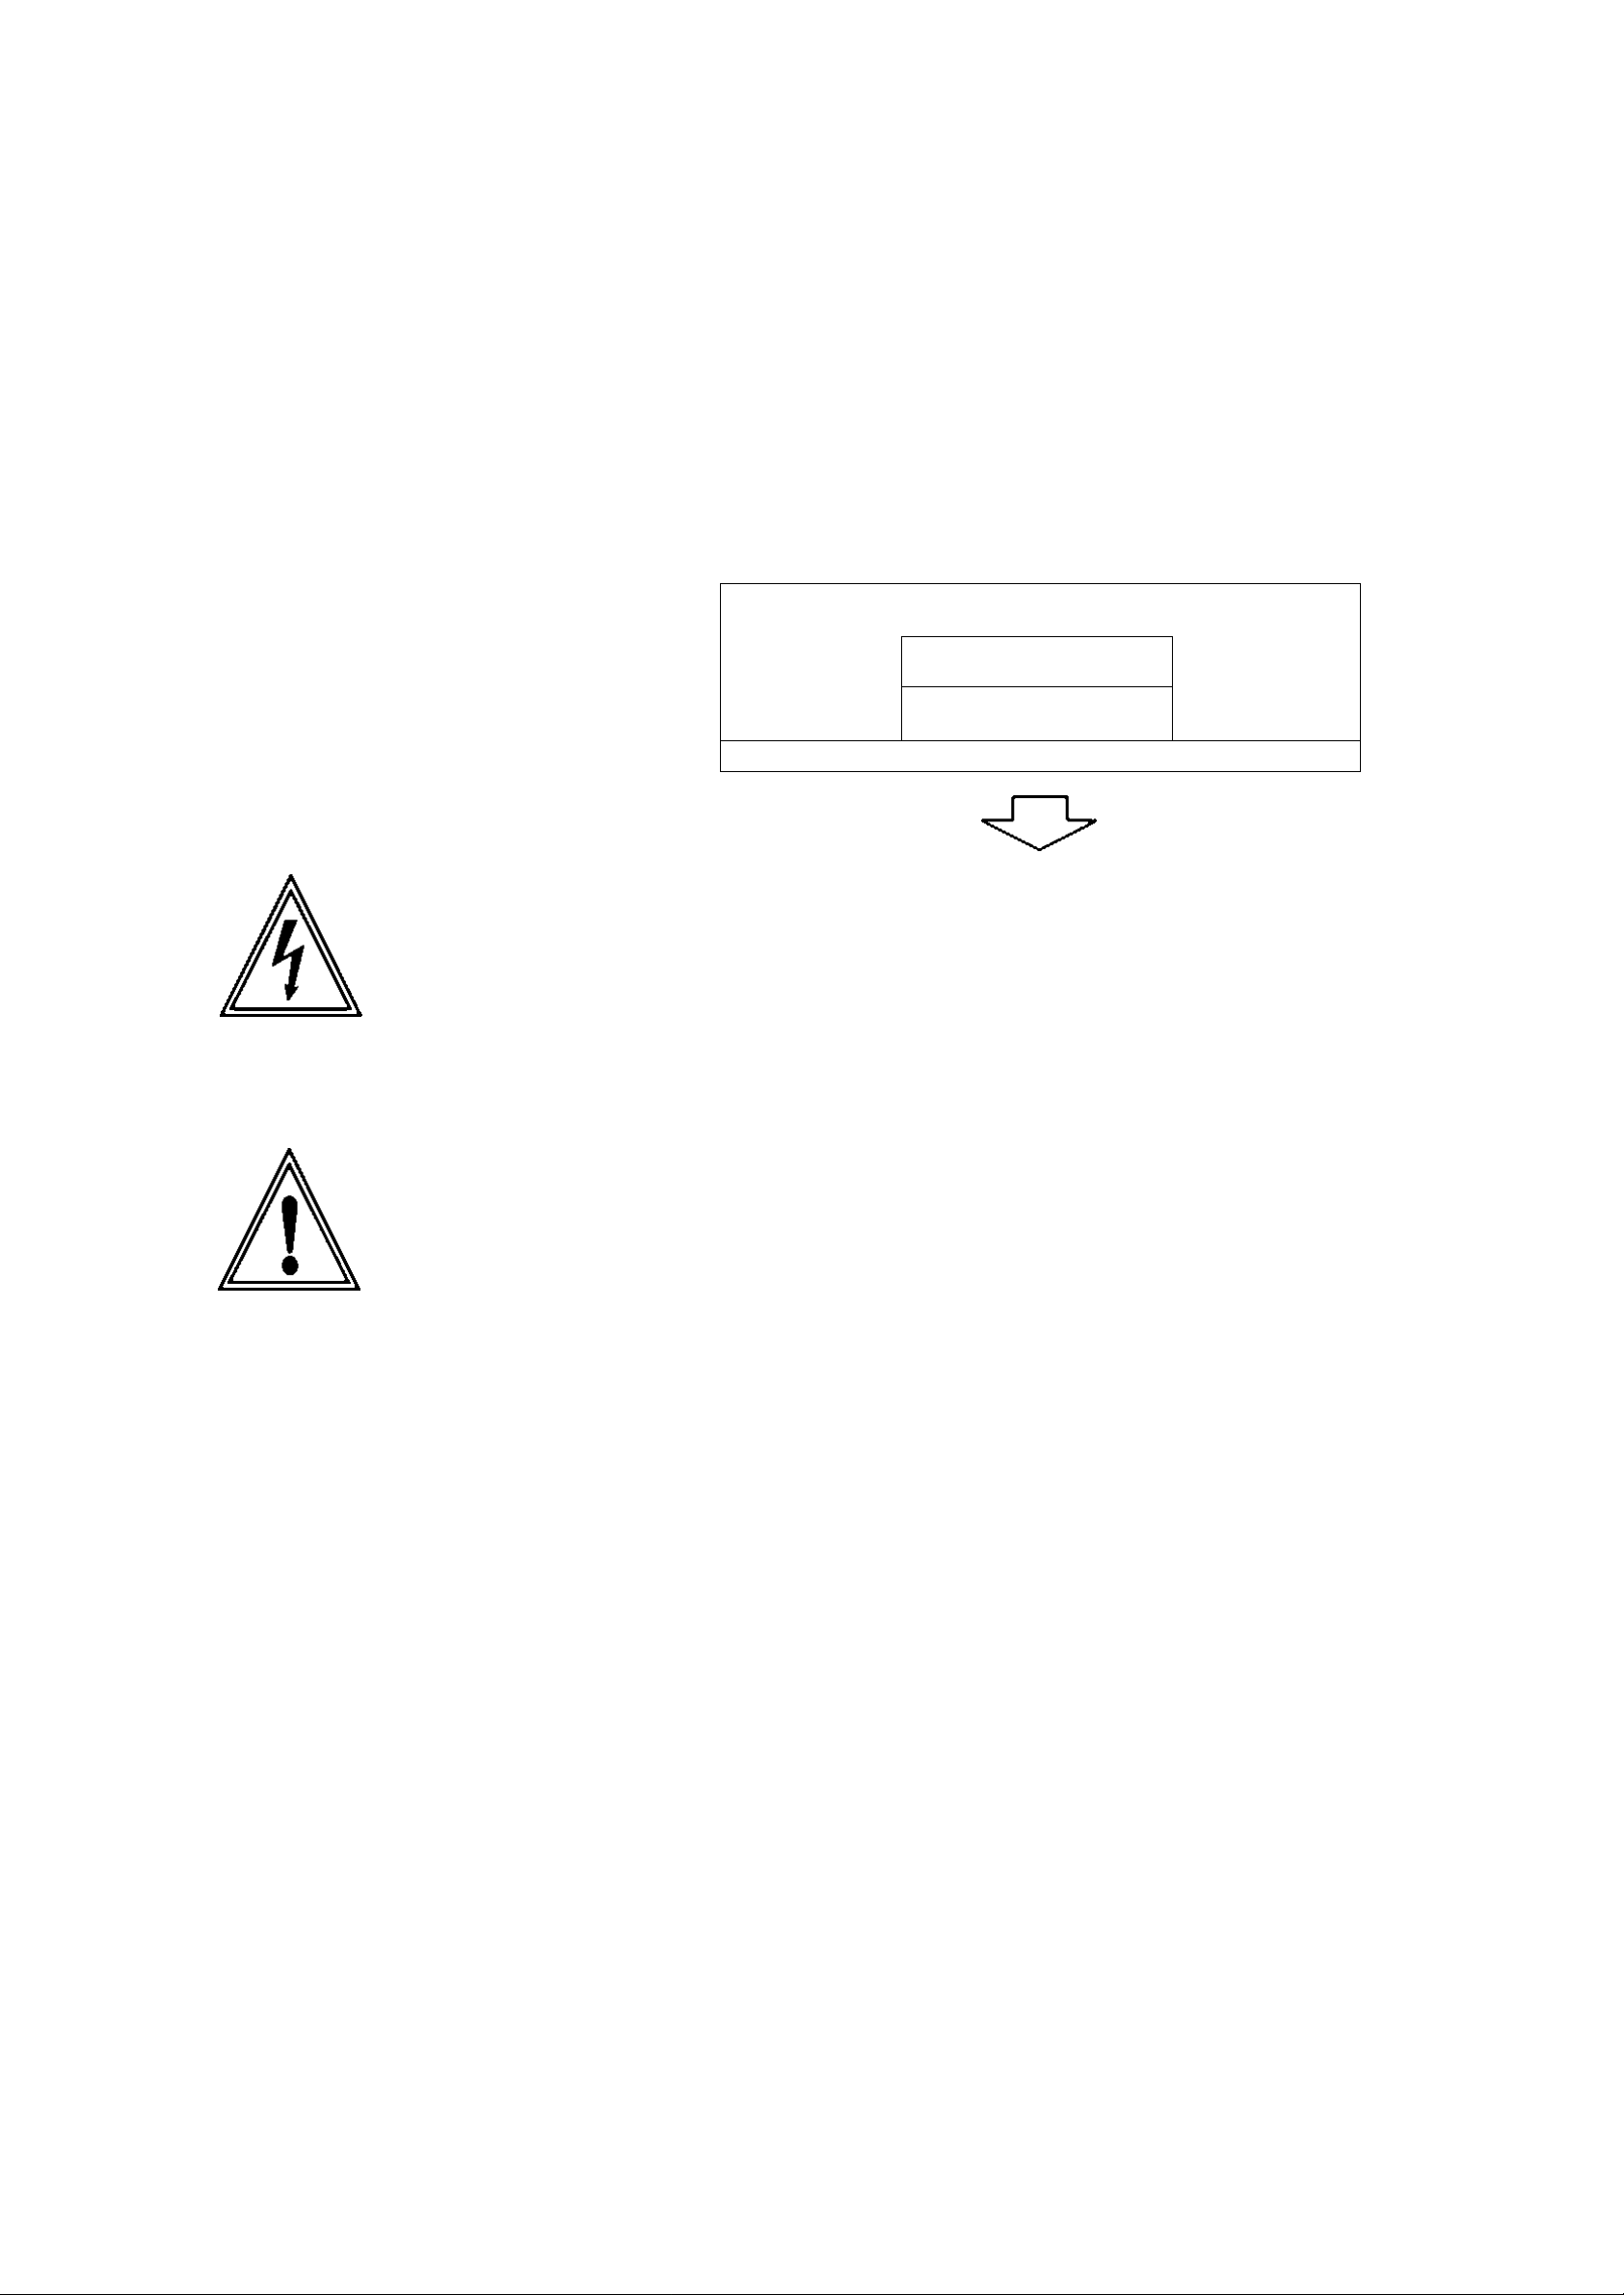
A. SAFETY PRECAUTIONS
CAUTION
RISK OF ELECTRIC SHOCK
A
DO NOT OPEN
A
The lightning flash with arrowhead symbol within an equilateral
triangle is Intended to alert the userto the presence of uninsulated ”
dangerous voltage" within the product's enclosure that may be of
sufficient magnitude to constitute a risk of electric shock to persons.
The exclamation point within an equilateral triangle is
intended to alert the user to the presence of important
operating and maintenance (servicing)instructions
in the literature accompanying the product.
WARNING: To reduce the risk of fire or electric shock, do not expose this appliance
to rain or moisture. Dangerous high voltages are present inside the
enclosure. Do not open the cabinet.
CAUTION: To prevent electric shock, match wide blade plug to wide slot, fully insert.
CAUTION: The unit employs a laser system.To ensure the proper use of the unit, read
this manual carefully and keep it for future reference. If the unit requires
servicing, contact the seller or our service center- see "troubleshooting ". To
prevent direct exposure to the laser radiation, do not open the cabinet. In
visible laser radiation when the cabinet is opened or the interlocks are
defeated. Do not stare into the laser beams.
Use of any controls, adjustments, or procedures other than those specified
herein may result in harzardous radiation exposure.
WARNING: Any change or modification to the unit, not expressly approved by
AUDIOVOX or its authorized parties, could void user's authority to operate
the unit.
^§1*§
Page 3

B. IMPORTANT SAFETY INSTRUCTIONS
1) Read these instructions.
2) Keep these instructions.
3) Heed all warnings.
4) Follow all instructions.
5) Do not use this apparatus near water.
6) Clean only with dry cloth.
7) Do not block any ventilation openings. Install in accordance with the manufacturer's
instructions.
8) Do not install near any heat sources such as radiators, heat registers, stoves, or other
apparatus (including amplifiers) that produce heat.
9) Do not defeat the safety purpose of the polarized or grounding-type plug. A Polarized plug
has two blades with one wider than the other. A grounding-type plug has two blades and a
third grounding prong. The wide blade or the third prong are provided for your safety. If the
provided plug does not fit into your outlet, consult an electrician for replacement of the
obsolete outlet.
10) Protect the power cord from being walked on or pinched particularly at plugs, convenience
receptacles, and the point where they exit from the apparatus.
11) Only use attachments/accessories specified by the manufacturer.
12) Unplug this apparatus during lightning storms or when unused for long periods of time.
13) Refer all servicing to qualified service personnel. Servicing is required when the apparatus
has been damaged in any way, such as power-supply cord or plug is damaged, liquid has
been spilled or objects have fallen into the apparatus, the apparatus has been exposed to
rain or moisture, does not operate normally, or has been dropped.
This product incorporates copyright protection technology that is protected by method claims
of certain U.S. patents and other intellectual property rights owned by Macrovision
Corporation and other rights owners. Use of this copyright protection technology must be
authorized by Macrovision Corporation, and is intended for home and other limited viewing
uses only unless otherwise authorized by Macrovision Corporation. Reverse engineering or
disassembly is prohibited.
^§2®§
Page 4

TABLE OF CONTENTS
A. SAFETY PRECAUTI0NS^^°;<^^V®7=o^1
B. IMPORTANT SAFETY
C. FEATURES®3
•® MUTE®5^®5S®9C®S«®5*®5^®5^®?^®S«®5*®^®S«18
D. ABOUT MANUAL°5C°5C°5C°5C°5C°5C°5C°5C‘i^
E. PLAYABLE
F. TERMS FOR DISCS®;<=®i^®^®?i®5e®;^®;^®5
G. BEFORE OPERATION
H. PRECAUTIONS FOR DISCS
I. PREPARATIONS BEFORE
OPERATION®
CHECK ACCESSORIES® ^ ^ ^ <7^
K. PLAY DISCS IN
VARIOUS WAYS®^®^®^®^®^®fi®S^®^®^18
AUDIO MODE®^®?i®^®^®ii®^®;i®^®^^ 18
FAST PLAY®^®5i®;i®?i®?i®?i®;ii®^®5i®^19
SLOW PLAY®?i®^®?i®;i®?i®^®^®;^^ 19
•* REPEAT PLAY®?i®^®?i®^®^®?i®!i®i>:®^®i^O
^ SELECT SUBTITLES®7iOpi‘>;i*9iVo^°7i21
SELECTANGLES®^®^®^®^®^®^21
^ TIME SEARCH
AND REMAINING TIME®^®^®^®5«22
•0 USE REMOTE CONTROL® =i®=i®#^ 7
■« FRONT PANEAL®^®5i'»5fi«?i<»!i'»5fi«;iOrf°;6
•“ DISPLAY®^®^®^®?i®?i®?i®sfi®^°^“i#i®7i9
*« REAR PANEL®7:®3i*ji®5e*7;*3!°5e®i3i°7;9
•« NAMES AND LAYOUT OF REMOTE
CONTROLS ®^®^°?i®ii®^®^®;^®i»i®S^ 10
CONNECTIONS
J. BASIC OPERATIONS®^®^®;«i®^®^®^®;^3
■* TV/AUDIOSELECTION®i^®i^®=i®^®i43
•« PLAY DISCS ®^®5fi®?i®?:®5i®^®?:®^®^?i 13
•0 PAUSE®5i®5i®*®5i<»jt®7;‘'7:®ji®;i®^7;
•a OSD®?»^®^®^®^®?^®^®?*®^®^®?^®^“^
•« VOLUME CONTROL®;«:®^®;^®^®^: 16
DVD MENU PLAY®^ ®^®?e®?e®?i®^®W
BOOK MARK®^®5i®?i®?i®?i®si®;i®5i®;ii'=a6
ZOOM PLAY®?i®;i®;i®?i®?i®^®^®?i®?i‘24
PROGRAM PLAY®^®p!®^®^^®^®^®p!24
SHUFFLE Pl_AY®7i°^°7i°7i®^°^7i°^°^25
DIGEST PLAY®5i®;i®7:®i^®5S®;i®^°;i26
L. FUNCTION SETTING ®rf®^=^=>i®^=^®^®^27
•« MENU SETTING®i^®;«=°i^®^®i^®‘5»=27-31
M. MP3 OPERATIONS®^®^®i^®^®^®^®^‘9e
PLAY DISCS ®?:®?i®^®9i®?:®?i®?:®?i®5^ 32
N. KODAK PICTURE CD PLAYBACK® ° «3
O. OTHERS®i^®ii®ii®ii®ii®ii®ii®ii®ii®ii®34;i
^ TROUBLESHOOTING
•^TECHNICAL SPECIFICATIONS®^®^35
’o SELECT WITH NUMBER
BUTTONS®?»*®*^®?^®?^®?»*®*«*®^®?^®?^®*«*®#?
Page 5

C.FEATURES
1. OUTSTANDING
SOUND QUALITY
Dolby Digital system developed by
Dolby Laboratories and DTS (5SI
developed by DTS Inc., features high
quality which can be played in DVD or CD
disc at home.
2. HIGH DEFINITION
The unit adopts MPEG2 coding format and
brings the horizontal resolution over
500 lines.
3. UNIQUE FUNCTIONS
7. 6-PICTURE DIGEST
It can look through the content of discs and
select to play.
8. MULTI-FUNCTIONS
Fast forward, fast reverse, slow play,
frame play, repeat play and program play.
9. TIME SEARCH
It can search a specific part on a disc,
especially good for watching fiction
movies.
Multi-angle and multi-language bring
unique trick functions.
Parental lock makes it easy to control the
content of discs.
4. SCREEN
Ordinary screen and wide screen (16:9)
are available.
5. COMPATIBILITY
The unit can play DVD, CD, MP3. CD-R
and CD-RW discs.
6. ZOOM
10. CONTENT DISPLAY
Colored fluorescent display and English
OSD, make the disc content clearer.
11. AUDIO OUTPUT
Analog audio output and coaxial digital audio
output, can be connected with any amplifier
to enjoy high quality sound effects.
It can enlarge pictures twice or three or four
times as large.
It can also shrink pictures 1/2,1/3, or 1/4 as
large.
^§3®§
Page 6

D. ABOUT MANUAL
PRINCIPLES FOR WRITING
This manual mainly introduces how to
use the buttons on the remote control.
You may operate the unit if the buttons
on the unit have the same or similar
MARK
INDICATION
names as to those on the remote
control.
The marks shown In the right chart are
used in the manual.
•*" ® *' may appear on the TV screen
during operation. This icon means the
function explained in the owner's
manual is not available on that disc.
E. PLAYABLE DISCS
^DV^
^ CD^
functions of DVD
functions of CD
TYPE MARK CONTENT SIZE PLAYING TIME
approx. 2hrs (single-side disc)
12cm
DVD
CD^C CD-R
CD-RW
MP3
Kodak
Picture CD
Am
DIGITAL AUDIO
Kodak
wture CD
i^coMPATieic J
audio+video
(motion pictures)
audio
audio
pictures
8cm
12cm
8cm
12cm
12cm
approx. 4hrs (double-side disc)
approx. SOmins (single-side disc)
approx. 160mins(double-side disc)
approx. 74mins
approx. 20mins
eOOmins
Note: 1. Region codes for DVD disc are printed on the rear panel, only the disc with same
code can be played.
2. This product complies with the Kodak Picture CD format and will display Kodak
Picture CDs. The "Kodak Picture CD COMPATIBLE" logo is a trademark of
Eastman Kodak Company and is used with permission.
*§4<>§
Page 7

F. TERMS FOR DISCS
- TITLE
The images or music of a DVD are divided
into some units, among which title is the
biggest one.
To a image in video software, title is movie;
to a piece of music in audio software, it is
music.
Each title has a indication number which
makes it easy to locate.
- CHAPTER
It is smaller than title among the units
of a DVD. A title is made up of several
chapters, and each chapter has a number
STRUCTURE OF DVD
STRUCTURE OF CD
DISK
for search. But some discs may not have
numbered chapters.
'TRACK
The music in a CD. Each track has a
number for search.
TRACK
Page 8
G. BEFORE OPERATION
SAFETY
Before operation, check if the voltage of
the unit is in tine with the local voltage.
Hold the plug to disconnect it from the
mains outlet. Do not pull the power cord.
When the plug of the unit is connected to
the mains outlet , the unit will be still
connected to AC even if the power is
turned off.
Disconnect the plug as soon as liquid or
objects enter the unit. The unit can not be
used until being checked by experts.
Do not open the cabinet for laser rays
employed by the unit may damage eyes.
Use the unit in a humid place. In these
cases, the unit can not work. Unload the
disc and leave the unit on for about
one hour to evaporate the water.
CLEANING
Use soft cloth with a little neutral
detergent to wipe the cabinet, panel and
controls. Never use abrasive paper,
polishing powder or solvent like alcohol
and gasoline.
H. PRECAUTIONS FOR DISC
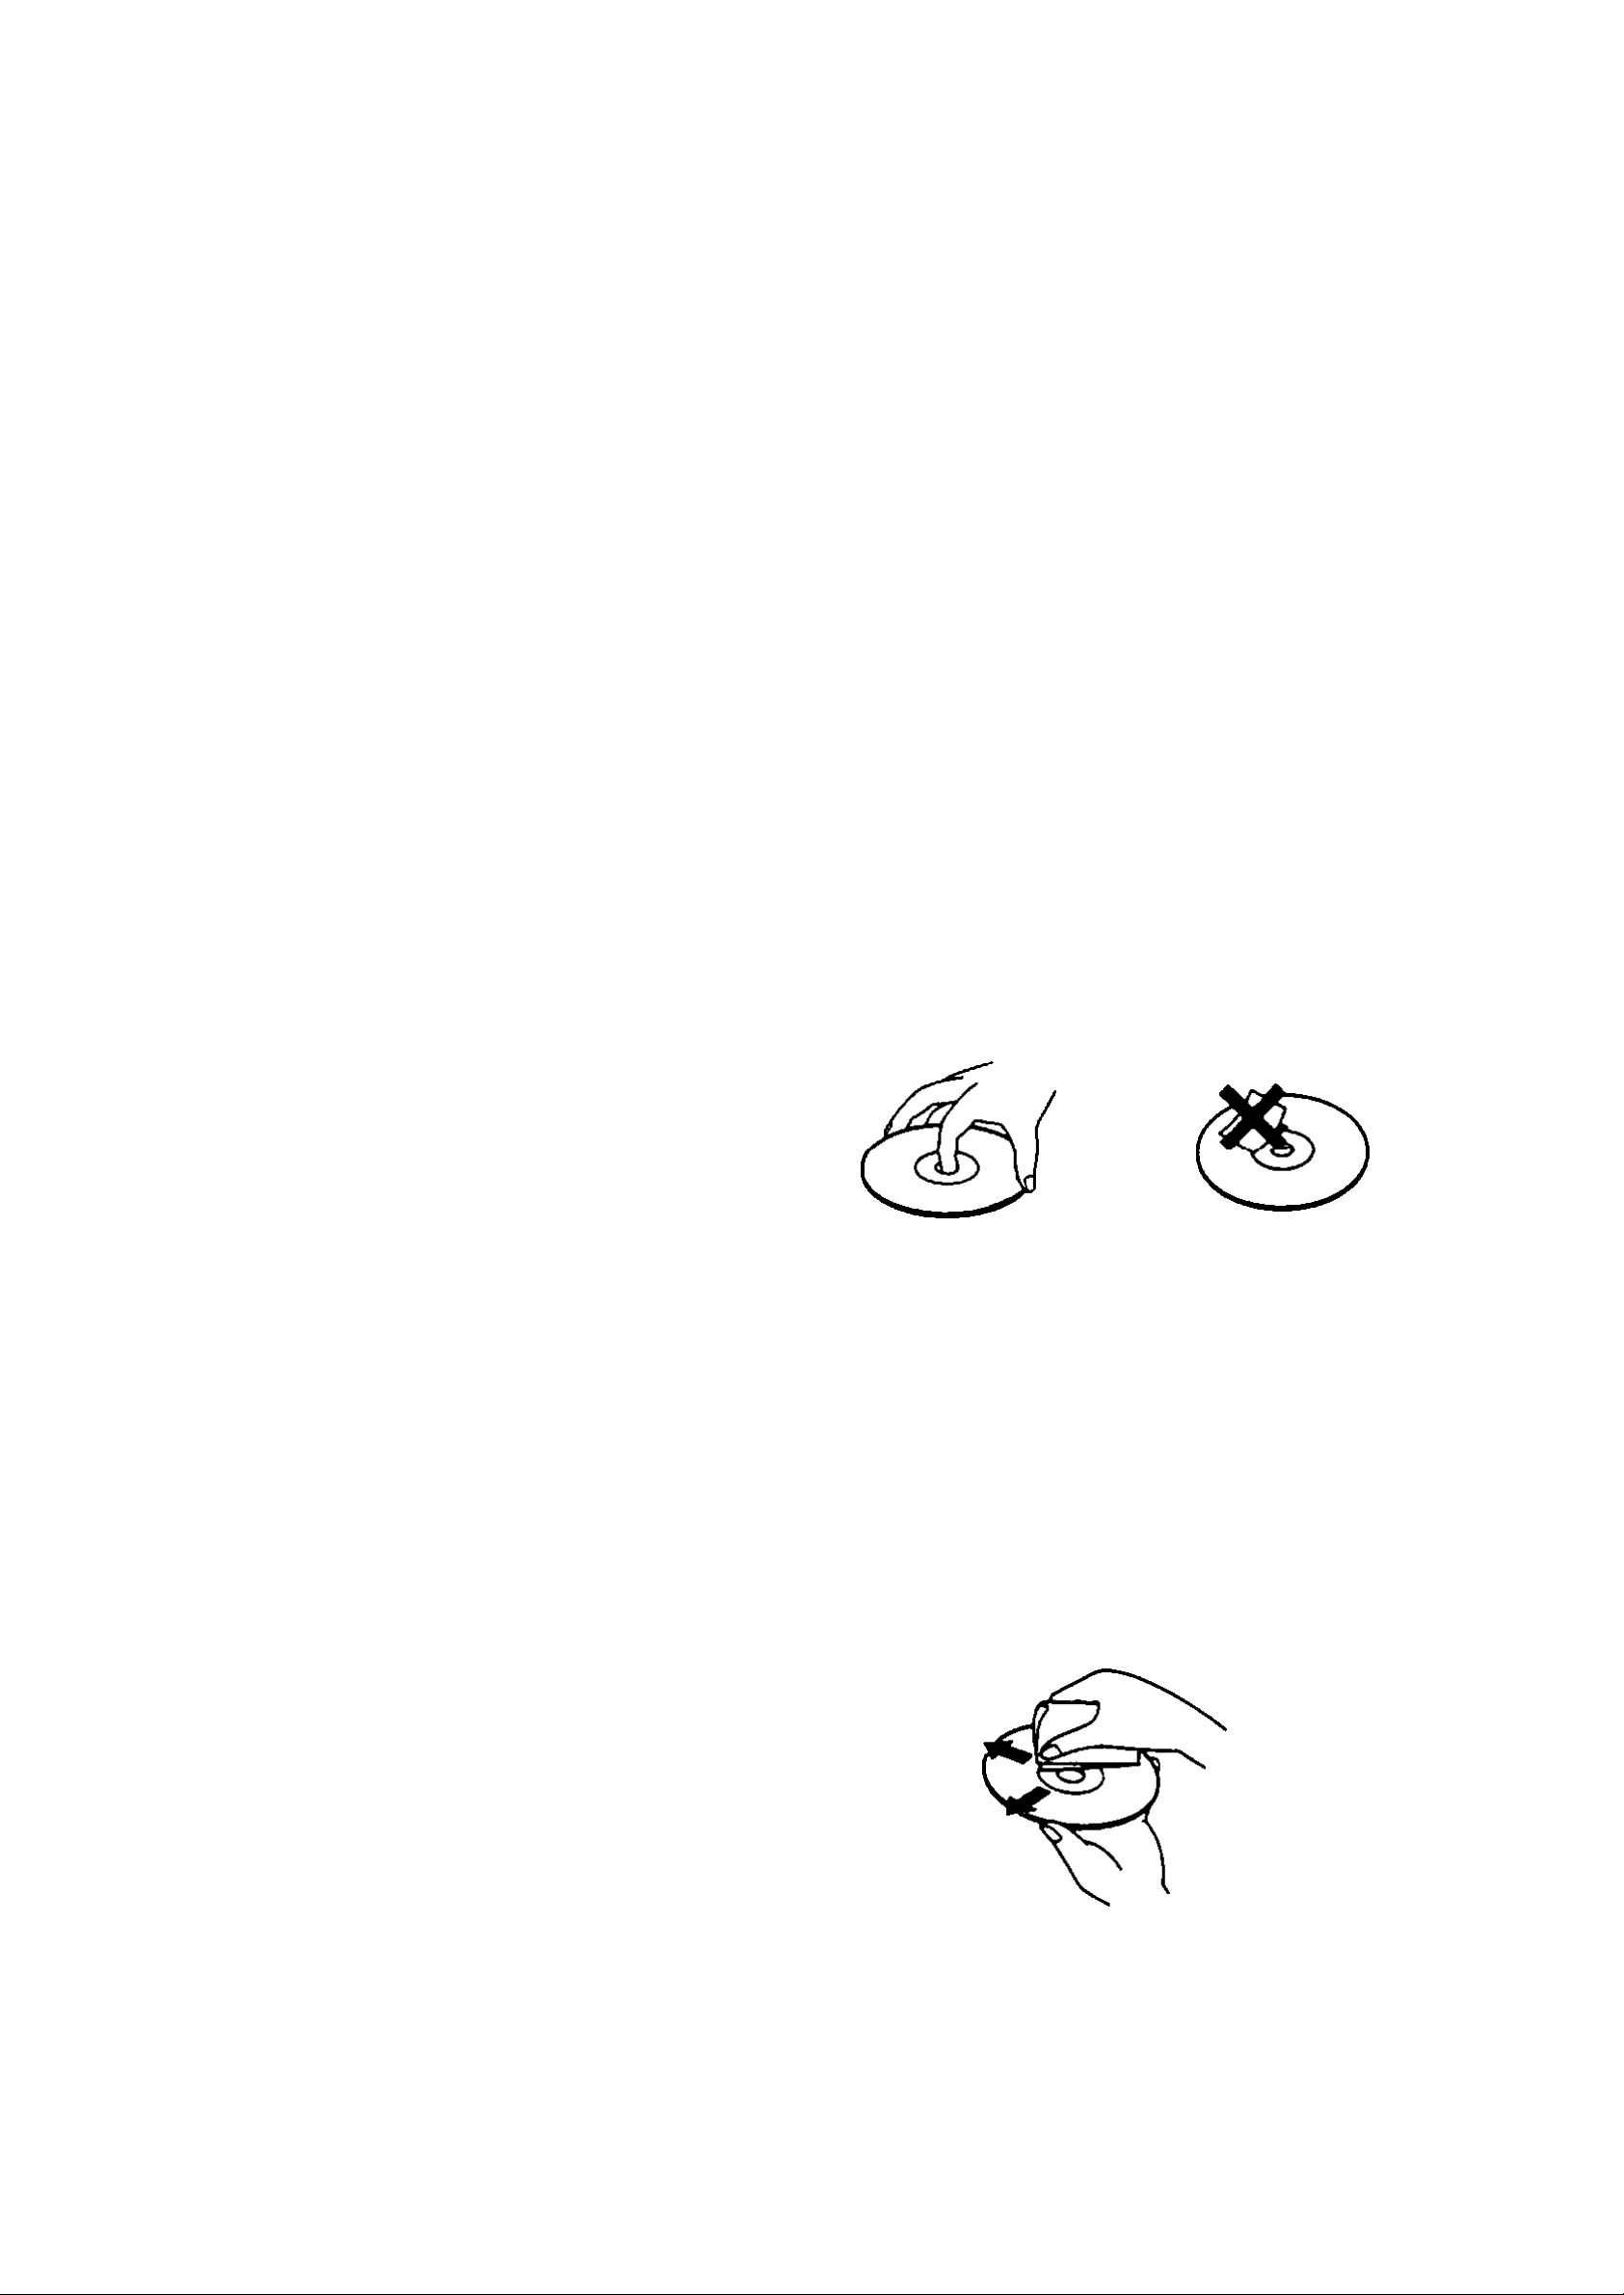
HANDLING DISC
To keep the disc clean, do not touch
Any servicing should be done by qualified
service personnel.
PLACEMENT
Product intended for table top or top
surface operation only.
Never put the unit in direct sunlight or near
heat sources.
Put the unit horizontally, never put any
heavy object on the unit.
To protect the laser, do not put the unit
where there is most dust. If there is dust
on the laser, use a cleaning disc to clean it.
Refer to the operation instructions of
the cleaning disc you bought.
the play sides of the disc.
^ Do not attach paper or tape to the disc.
Keep the disc away from direct sunlight
or heat sources.
Store the disc in a disc case after
playback.
CLEANING DISC
Before playback, wipe the disc outwards
CONDENSATION
Water will appear on the pickup lens in
the following cases:
The unit is suddenly moved a cold place to
a warm place.
The unit is put In a room with a heater, or
In the cold air from a air-conditioner.
from the center with clean cloth.
Do not use any type of solvent such as
thinner, benzine, commercially available
cleaners or antistatic spray.
^§6®§
Page 9

I. PREPARATIONS BEFORE OPERATION
This part introduces the work to be done before operating the unit.
CHECK ACCESSORIES
Check if you have all the accessories after
the carton is opened.
Audio cord 1 ( 4-terminal)
Video cord 1 (2-terminal)
Remote control 1
•* AAA batteries 2
•• Owner's manual 1
USE REMOTE CONTROL
3. Close the battery cover.
r
I
4. Point the remote control at the remote
sensor, operate in the range of 7 meters
and about 30* in each direction of the
1. Open the battery cover.
2. Insert two AAA batteries, make sure to
match "+" and on the batteries to
marks inside the battery compartment.
front of the remote sensor Make sure
there is no barrier between them.
Notes;
1. The batteries can last about 6 months
generally.
Change the batteries if the remote control
does not work.
2. If the remote control is not used for a long
time, remove the batteries to prevent
battery leakage.
Page 10

I. PREPARATIONS BEFORE OPERATION
FRONT PANEL
4 5
15 14 13 12
POWER
DISC TRAY
OPEN/CLOSE REMOTE SENSOR
DIRECTION BUTTONS DISPLAY
ENTER STANDBY INDICATOR
PREV/NEXT SKIP
®
11
PAUSE
®
PLAY
® PHONES LEVEL
10 9 8 7 6
MENU PHONES JACK
®
STOP
®
^§8®§
Page 11
I. PREPARATIONS BEFORE OPERATION
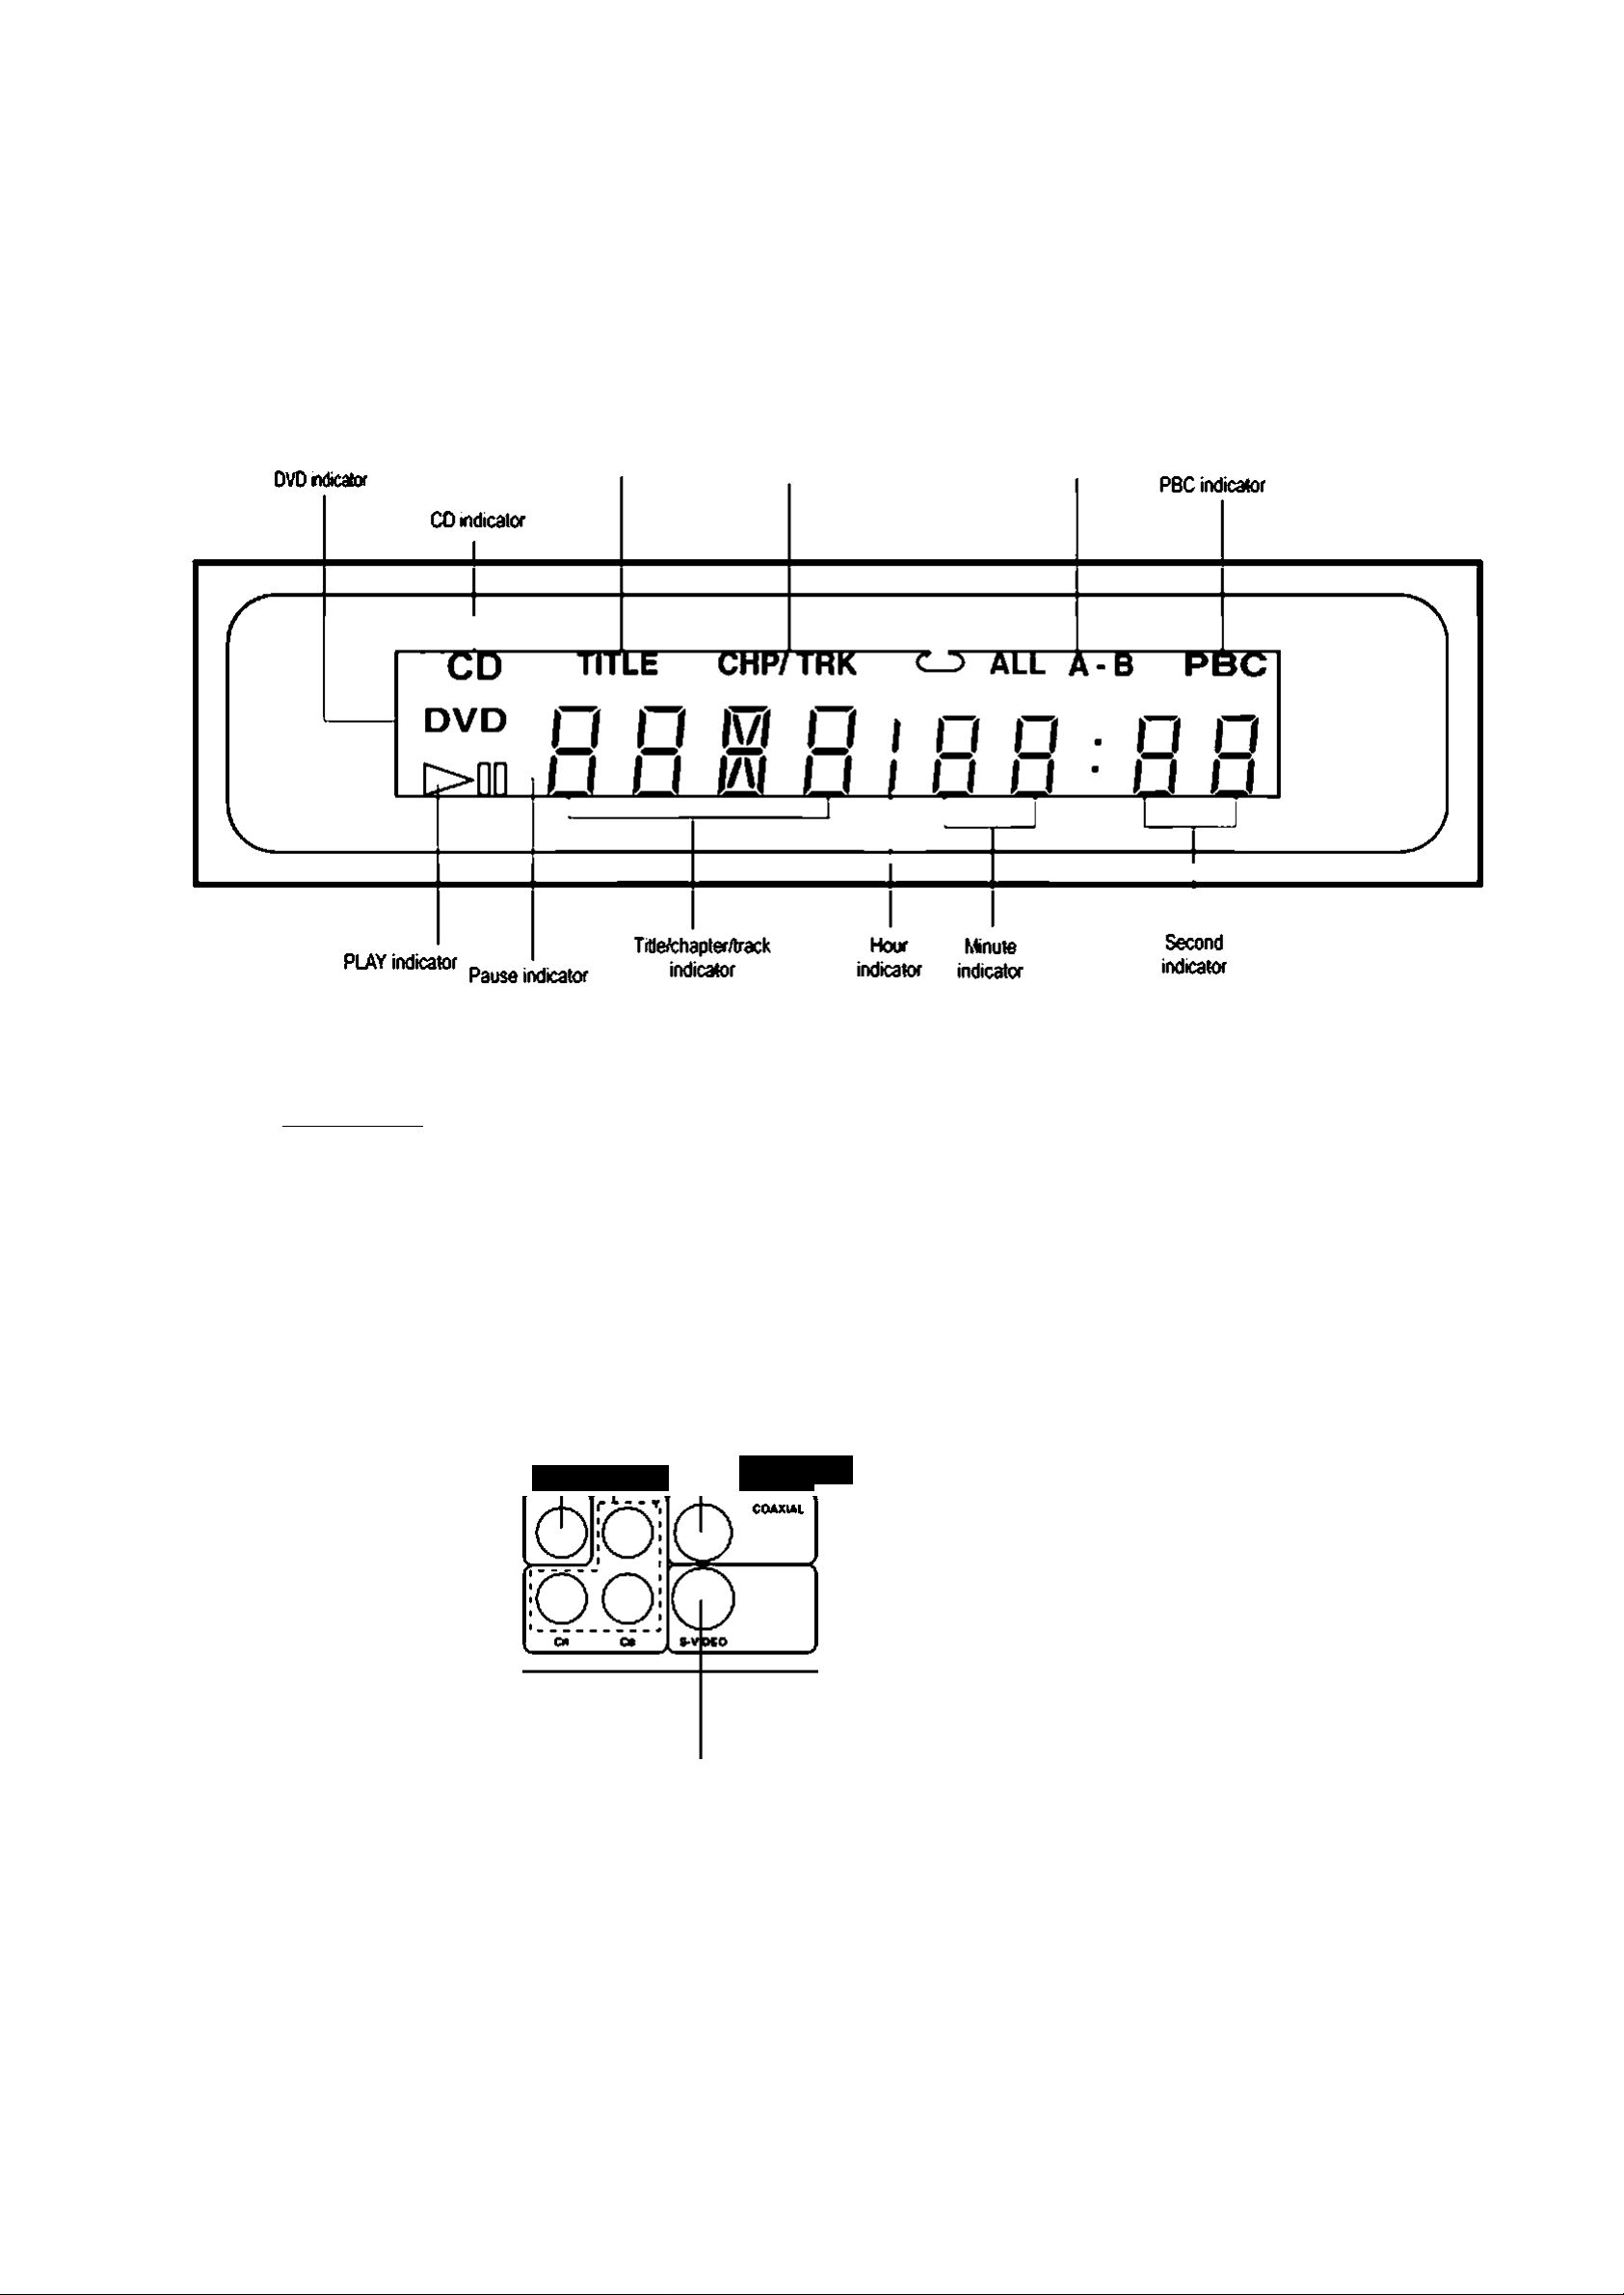
DISPLAY
Title indicator
Chapler/track indicator
Repeal play
indicator
Push DIMMER I , the brightness of the display is reduced by half, push it once more, the
display becomes dark. Push the button again, the display resumes brightness.
REAR PANEL
OiT WCOCUT
OOfUl
AUOIOOUT
OOi“
OOi°
® AUDIO OUT
® VIDEO OUT
® COMPONENT VIDEO OUT
® COAXIAL DIGITAL OUT
® S-VIDEO OUT
® POWER SUPPLY CORD
Page 12

I.PREPARATIONS BEFORE OPERATION
NAMES AND LAYOUT OF REMOTE CONTROLS
32
® OPEN/CLOSE
® OSD
® DIGEST
© SUBTITLE
OPEN/ POWER
CLOSE OSO ANGLE
1
2
DIGEST SUBTITLE MODE MUTE
PLAY
31
30
® NUMBER BUTTONS
® MENU
® DIRECTIONS
® ENTER
® ZOOM
® FR/FF SEARCH
® STOP
@ PLAY
® SLOW
@ REPEAT
@ REMAIN
® DIMMER
@ KEY CONTROL
@ VOLUME+. @ AUDIO MODE
@ LANGUAGE
@ A-B
@ BOOKMARK
@ PAUSE
@ PREVIOUS/NEXT
SETUP
TITLE
b KEY «
CONTROL
BSAUDIOTOX
VOLUME
TIME SEARCH
PLAY MODE
MUTE
ANGLE
@ POWER
REMOTE TRANSMITTER
Page 13

I. PREPARATIONS BEFORE OPERATION
CONNECTIONS
Turn off all the equipment before operation.
The unit has many kinds of output modes like A/V output, S-VIDEO output. Component Video
output, digital signal output (COAXIAL). You may select as you need.
CONNECTED TO A TV
1. If the TV has Component Video input, please connect the unit and the TV with Component Video
cord (not supplied). You do not have to connect it to S-VIDEO. Component Video will ensure
clearer image.
2. Set the unit. You have to set the unit according to the TV to be connected.
Connect the unit to a wide-screen TV.
Set the "TV DISPLAY" to" WIDE " in the function setting column.
** Connect the unit to an ordinary TV.
Set the "TV DISPLAY" to "NORMAL/PS" or "NORMAL/LB" in the function setting column.
‘slip's
Page 14

I. PREPARATIONS BEFORE OPERATION
CONNECT TO AN ORDINARY AMPLIFIER
ov:>
There is no sound output from the output terminal when a DTS disc is played.
CONNECT TO AN AMPLIFIER WITH DIGITAL SIGNAL INPUT
TV
Manufactured under license from Dolby
Laboratories. "Dolby" and the double-D
symbol are trademarks of DIoby
Laboratories. Confidential Unpublished
works. ©1992-1997 Dolby Laboratories, Inc.
All rights reserved.
"DTS" and "DTS Digital Out" are trademarks
of Digital Theater Systems, Inc.
If you have DTS decoder or processor, you can enjoy DVD disc or CD sound decoded by 5.1
channel DTS.
Ȥ12'Ȥ
Page 15

J. BASIC OPERATIONS
TV/AUDIO SELECTION
Press I POWER I on the TV and audio system.
1. Press "TVA/IDEO" on the TV. select
VIDEO mode (TV).
PLAY DISCS
DVD. CD
1. Press POWER I to turn on the unit.
PANEL
2. Press A on the front panel to open the
disc tray and load a disc with the label
side up.
OPEN/CLOSE
Select S-VIDEO mode to connect
to S-VIDEO. (if available)
2. Select the correct audio input on
the amplifier.
•* Each amplifier is different from another,
please refer to the manual of the amplifier,
(e.g.. connect the audio output of the DVD
player to the DVD audio input of an
amplifier.)
3. Press A again to close the disc tray. The
unit begins to read the disc.
FRONT PANEL
4. Press ► (PLAY) to play the disc.
AFTER STEP 4 IS FINISHED:
^ PLAY DVD
The TV screen shows DVD menu or
title menu.
Note: This step can be cancelled if you do
Ȥ13'Ȥ
•0 PLAY CD
Press ► (PLAY), the unit plays the
disc according to the track numbers.
5. Stop playback.
Press .
*— DVD/LD
not connect it to the amplifier.
6. Remove the disc and cut off the unit.
■0 You have to push "®‘" button twice to
stop playback of a DVD disc.
Page 16

J. BASIC OPERATIONS
PAUSE
Press [il]
WHEN PLAYING PICTURES
If the pictures of DVD are played,
press ITT] to make playback pause.
The unit enters step play status. Each time
you press SB , the picture advances one
frame.
•DVD. CD
PAUSE
Remember, you can only access the Display
when you’re playing a disc. Also, the Display
features are only available if the disc was
created with that particular feature (l.e., if
you select the Subtitle icon, you won't be
able to change the subtitle language unless
the author of the disc created the disc with
subtitles).
The invalid symbol" ®" appears on the
screen when you press a button that doesn't
have any function. If one of the icons is
"grayed out ".that Display feature isn't
available for the disc you're playing. To make
the Display disappear from the screen, press
OSD on the remote.
WHEN PLAYING MUSIC CD
Pressrm to make playback pause.
Press ► (PLAY)to resume playback.
DVD.
OSD
OSD
WHEN PLAYING DVD
DVD discs have the following playback
features:TitIe, Chapter, Audio, Subtitle, Angle
and Repeat.
** Select a Title
Some discs contain more than one title. For
example, there might be four movies on one
disc (each movie might be considered a title).
Each title is divided into chapters. To select a
title:
1. While the disc is playing, press OSD
the remote to bring up the Display.
2. If the Title icon on the Display isn't
highlighted, use the ^or ►buttons to
on
The On-Screen Display (OSD) contains
many playback features.To see the Display,
press the|OSD|button on the remote while a
disc is playing. The Display appears across
the top of the screen.Each feature is
illustrated with an icon. Use the^ or ► buttons
on the remote to move through the different
icons in the Display.
When an icon is highlighted, use the ▼ or a
butons on the remote to scroll through the
choices displayed in the text box under the
icons.
highlight it.
3. Press the a or ? buttons to go to the
previous or next title.
Note: Some discs only have one title.
Select a Chapter
Because DVD discs use digital technology, a
title can be divided into individual chapters
(similar to tracks on a CD). You can skip to a
specific chapter by using the Chapter feature
in the Display.
1. While the disc Is playing, press |OSD| on
the remote to bring up the Display.
»§14'>§
Page 17

J. BASIC OPERATIONS
2. Press the or ► buttons to highlight the
Chapter icon.
3. Press the A or ? buttons to go to the
previous or next chapter.
Notes: The chapter feature won't work if the
disc isn't formatted with separate chapters.
You can also advance to the next chapter by
pressing on the remote and go to the
preceding chapter by pressing \« on the
remote.
Changing the Audio Language
If the disc was created with different
language tracks (recorded in different
1. When the disc is playing, press OSD on
the remote to bring up the Display.
2. Press the or ► buttons to highlight the
Subtitle icon.
3. Press the a or t buttons to scroll through
the subtitle languages that are available
on the disc until the subtitle language you
want to use appears in the text box. The
subtitles will be shown in that language.
4. To make the Display disappear, press the
OSD button on the remote.
Notes:Changing the subtitle language with
the Display will only affect the disc currently
languages), you can use the Display to
temporarily change the DVD player's Audio
Language setting.
1. While the disc is playing, press |0$D| on
the remote to bring up the Display.
2. Press the or ► buttons to highlight the
Audio icon. The current audio language
appears In the text box below the row of
icons.
3. Press the A or? buttons to scroll through
the audio languages that are available on
the disc until the audio language you want
to use appears in the text box. Audio will
be played in that language.
being played. When the disc is removed or
the player is turned off, the subtitle language
will revert to the language setting specified
through the DVD player main menu.
The subtitle language can also be changed
through the DVD player menu.
Changing the Camera Angle
Some discs contain multiple angles of a
particular scene or sequence. If the disc only
has one angle, this feature won't work. When
multiple angles are available, to change the
camera angle;
1. When a disc is playing, press lOSDion the
remote to bring up the Display.
4. To make the Display disappear, press the
OSD button on the remote.
Note: The language feature only works if the
disc was created with multiple audio tracks.
When you choose an audio language from
the Display, you only override the audio
language setting in the DVD player's main
menu temporarily.
The audio language can also the changed
through the DVD player menu.
Selecting the Subtitle Language
If the disc was created with subtitles, you
can use the Display to change the Subtitle
2. The Angle icon will display the number of
angles available. For example, if there are
3different angles, the icon will read 1 of 3,
This means angle 1 is currently being
played.
3. Press the A or T buttons to scroll through
the angle choices. The angle number
displayed in the text window is
automatically shown.
4. To make the Display disappear, press the
OSD button on the remote.
Using the Repeat Feature
The default mode for the Repeat feature is
language.
»§15‘»§
off. There are three Repeat options:
Page 18

J. BASIC OPERATIONS
All-repeats the disc that is playing
Title-repeats the title that is playing
**§ Chapter-repeats the chapter that is playing
To Use Repeat:
1. While a disc is playing, press OSD on
the remote to bring up the Display.
2. Highlight the Repeat icon.
3. Press the A or t buttons to scroll through
the Repeat options until the Repeat option
you want is displayed in the text box.
4. The selected repeat option will loop
repeatedly until you turn Repeat off.
Howto Cancel Repeat:
Using the Repeat Feature
The default mode for the Repeat feature is
off. There are two Repeat options for CDs:
**§ All-repeats the disc that is playing
*■§ Track-repeats the track that is playing
To Use Repeat:
1. While a disc is playing, press lOSDion the
remote to bring up the Display.
2. Highlight the Repeat Icon.
3. Press the A or t buttons to scroll through
the Repeat options until the Repeat option
you want is displayed in the text box.
4. The selected repeat option will loop
There are three ways to cancel Repeat:
Press STOP twice.
®S Go to Repeat icon in the Display and
select Off.
Eject the disc.
WHEN PLAYING CD
CD discs have the following playback
features: Track. L/R, Audio (not available)
and Repeat.
Select a Specific Track
1. While the disc is playing, press |0$D| on
the remote to bring up the Display.
2. Highlight the Track icon.
repeatedly until you turn Repeat off.
VOLUME CONTROL
DVD.oa^ CD
** Press VOLUME on the TV or amplifier to
adjust the volume.
Press VOLUME on the remote control.
VOLUME+,-
3. Press the a or t buttons to scroll through
the track numbers.
Changing the Audio Channel Output
If you are playing a Stereo CD, you can
change the channel output from the player.
1. Press |0SD| on the remote to bring up
the Display.
2. Highlight the UR Icon on the Display.
3. The audio channel choices appear in the
text box. Press the A or t buttons to
scroll through the choices: LEFT MONO.
RIGHT MONO. MIXED MONO or STEREO.
Whatever choice is displayed becomes the
active choice.
1. Press 0 to raise the volume.
2. Press 0 to lower the volume.
Ȥ16'Ȥ
Page 19

J. BASIC OPERATIONS
DVD.
DVD MENU PLAY
SELECT WITH NUMBER
some DVDs have title menus and chapter
menus.
Press ►(PLAY), the screen shows the menu.
Press or to skip the next or
previous page, select with number buttons or
direction buttons.
1.*.
ROOT
2..
MENU
11.'
Example: select track 13.
BUTTONS ^ CD
Load a disc. Press number buttons to select
tracks after the unit finishes reading the disc.
1. If the track number isn't over 10, just
push buttons 1-10.
Example: push [s] to select track 8.
The screen shows:
1. Press to enter the next menu.
____
\
J
' ROOT
MENU
V
12.
lO.
14.
15.
....
..
.....
.....
2. Press number buttons to select direcltly.
You can also do as follows:
1. Press ▼ to select track 13.
/
TRACK08/20 00:00
N
J
2. If the track number is over 10. pressK 10l
once and a button among 1-10.
Example: if you select track 12, press
+10|once and button [^.
R00T''2
MENUES
14.
15.
2. Press ► (PLAY)to start playing track 13.
Press
Press
TITLE once to return to the title menu.
MENU once to return to the root
menu.
Ȥ17'Ȥ
The screen shows:
/
TRACK12/20 00:00
V J
Page 20

K. PLAY DISCS IN VARIOUS WAYS
AUDIO MODE ^DVD^ ^ CD
You may select a needed language from a
multi-language DVD .
You may select the right channel or left
channel or stereo from a multi-channel CD.
LANGUAGE
AUDIO MODE
WHEN PLAYING CD
AUDIO MODE
MONO LEFT
J
's.
MONO RIGHT
MIXED MONO
WHEN PLAYING DVD
** Press LANGUAGE, the screen shows
ordetiy:
AUDIO 1/2:AC-3 5.1 CH
AUDIO 2/2;AC-3 5.1CH
Different discs differ in languages.
AUDIO MODE
I \
You may select one mode.
Notes:
^ Different discs differ in languages.
STEREO
DVD^ ^ CD
MUTE
When playing a disc, this function can remove
*“ Press I AUDIO MODEl, the screen shows
orderly:
MONO LEFT
MONO RIGHT
MIXED MONO
STEREO
the sound.
1. REMOVE SOUND
Press MUTE , the screen shows "MUTE".
MUTE
2. RESUME SOUND
Press I MUTE I again, the screen shows
"MUTE OFF".
Page 21

K. PLAY DISCS IN VARIOUS WAYS
FAST PLAY
DVD.
SLOW PLAY
When playing a disc, you may play it fonward
fast or reverse it fast to find what you want.
WHEN PLAYING DVD OR CD
1. Press ►► to play forward fast. Each time
you press the button, the screen shows
orderly:
------
► 2X
4X
8X
16X
i>0
Enjoy slow motions by the following
steps.
OO
SLOW
WHEN PLAYING DVD
1. Press SLOW to play slowly.
2. Press « to reverse the disc fast. Each
time you press the button, the screen
shows orderly:
2X
4X
8X
i <1^
16X
i >E
3. Press ► (PLAY) to switch to normal play
while FF or FR playing.
The screen shows orderly;
I—
► 1/2—-[MM-
1/16l-»-kl1/8
2.Press ► (PLAY) to play normally.
^M/8—Ml»1/16—I
Ȥ19'Ȥ
Page 22

K, PLAY DISCS IN VARIOUS WAYS
REPEAT PLAY
•DVD. CD
This function can be used to repeatedly play
a title, chapter, track, disc, or some part on a
disc. EB93 A-B
REPEAT
PLAYING A DISC REPEATEDLY
DVD
You may repeat a title or chapter.
1. Repeat a chapter.
REPEAT
C_J> TRACK
2. Repeat a disc.
Press REPEAT , the screen shows
" ALL". The unit plays all the
tracks on the disc.
REPEAT
O ALL
V
3. Remove "REPEAT" function.
Press [REPEAT , the screen will show
REPEAT
o
CHAPTER
2. Repeat a title
Press I REPEAT I twice, the screen will
show
REPEAT
o
V J
TITLE
S.Repeat all.
Press REPEAT third time, the screen
PressiREPEATitill "O ALL"
\
disappears.
REPEAT SOME PARTS
)
You may press I A-B I to enjoy some parts
repeatedly when playing a disc.
N
PLAY DVD or CD.
1. Set a starting point A.
The screen shows:
A-B
______________
O A
shows" O ALL".
4. Remove "REPEAT” function.
Press iREPEATl until" O ALL"
disappears.
CD
-d You may repeat a track, a disc according to
the following steps.
1. Repeat a track.
Press IREPEATl, the screen shows
" O TRACK". The unit plays the
current track.
The screen shows:
A-B
O AB
Afterwards, the unit plays from A to B.
3. Press IA-BI again till " AB "
disappears.
^§20^S
Page 23

K. PLAY DISCS IN VARIOUS WAYS
^DVD
SELECT SUBTITLES C
This operation works only with discs on
which multiple subtitle language are
recorded.
SUBTITLE
PLAY DVD
______
DVD.
;
ANGLES SELECT
Some discs have images with different
viewing angles, you may select among them.
For example, when you watch a running
train, you may watch it from the front, the left
window or the right window without stopping
it.
ANGLE
1. Press [SUBTITLE | repeatedly until the
desired language is selected.
The screen shows:
SUBTITLE
2. Remove the subtitle.
Press SUBTITLE until the screen
shows "TURN OFF SUBTITLES".
Notes:
For some discs, subtitles can not be
_____________________
CJ fsUBTITLE01/03: ENGLISH
Example:
A DVD has four viewing angles at your
^
option.
1. Press ANGLE to select ANGLE1.
SCREEN
/
a 1/4
j
2. Press ANGLE to select other angles, the
removed.
** Different discs differ in the language
of subtitles.
* If the subtitles of discs can not be
selected, press [SUBTITLE |, the screen
shows "NO SUBTITLE".
screen shows respectively:
2/4 (select ANGLE2)
3/4 (select ANGLES)
4/4 (select ANGLE4)
3. To resume normal playback, press ANGLE
to select original angle.
»§2r§
Page 24

K. PLAY DISCS IN VARIOUS WAYS
TIME SEARCH AND 2 time search
Press [TIME SEARCH until the screen
REMAINING TIME
shows:
DVDx ^CD
•0 Press number buttons to enter hour, minute
TIME SEARCH
REMAIN
TIME SEARCH
You may directly enter a time, title or chapter
number to search fast on a disc, the unit
plays from that point.
PLAY DVD
and second.
Example: Enter [l],0,[2],[^,@
After setting, the unit will play the disc from
1:02:38.
PLAY CD
To jump to a specific time, use
TIME SEARCH to set the time for the
desired location.
Example: Play from 01:38 of track 6.
1. Press button[^to select track 6.
The screen shows:
*
TRACK06/20 00:01
1. Search a title or a chapter.
Example: Search chapter 2 in title 6.
Press TIME SEARCH , the screen shows:
TITLE03/30 CHAPTER 001 /004
•® Press the direction button and move
the cursor to illuminate the title number.
The screen shows:
TITLE 03 /30CHAPTER001/004
2. Press I TIME SEARCH until the screen
shows:
TRACK GO TO
3. Press button 0,|j].[l|.[8l enter the time.
The screen shows:
TRACK06/20 01:38
The unit plays from 01:38 of track 6 after
setting.
•* Press button 1_^ to select title 6, the screen
shows:
TITLE 06 /30 CHAPTER001/004
Repeat the steps above, select chapter 2
in title 6.
Press 110/01 to enter 0.
Note: CD discs have three options in time
search function:
You can enter the elasped time of a disc to
play.
You can enter the elasped time of a track to
play.
** You can go to a track you want play by entering
the track number.(Similar to title and chapter
search for DVD.)
'Ȥ22'Ȥ
Page 25

к. PLAY DISCS IN VARIOUS WAYS
REMAINING TIME
This function can be used to find
the remaining time of a title, chapter, track or
a disc,
o- DVD
1. Press REMAIN |, the screen shows the
elapsed time of the title
REMAIN
00:04:15
^^ TITLE ELAPSED
2. Press REMAINI again, the screen
shows the remaining time of the title.
REMAIN
00:56:45
CD
TITLE REMAIN
2. PressiREMAINl again,the screen shows
the remaining time of the track.
04:23
SINGLE REMAIN
3. Press REMAIN third time, the screen
shows the elapsed time of the disc.
23:23
TOTAL ELAPSED
4. PressiREMAINifourth time, the screen
shows the remaining time of the disc.
33:23
3. Press I REMAINI third time, the screen shows
time of the chapter.
REMAIN
00:01:02
CD
CHAPTER ELAPSED
4. Press REMAINI fourth time, the screen
shows the remaining time of the chapter.
REMAIN
00:05:58
CHAPTER REMAIN
TOTAL REMAIN
5. Press REMAIN once more, the screen
resumes to normal play mode.
DVD.
BOOKMARK
BOOKMARK
The bookmark feature lets you mak a point on
the disc that you can go to quickly. You can
5. Press REMAIN once more, the screen
resumes to normal play mode.
CD
Example: Check the remaining time
when playing track 2.
1. Press I REMAIN |, the screen shows the
elapsed time of the current track.
01:02
SINGLE ELAPSED
^§23'»§
store up to 12 bookmarks per disc. When you
turn the player off or remove the disc,
bookmarks are cleared.
Storing a Bookmark
1. While a disc is playing, press [BOOKMARK
on the remote.
2. The Bookmark Menu appears.
3. When you reach the scene you want to
mark, press I PLAY
4. If you want to mark another point, press
the direction ► button to move the cursor to
next spot. When you reach another scene
you want to mark, press I PLAY
5. PressI BOOKMARK I to make the Bookmark
Menu disappear from the screen and resume
to normal playback.
I.
Page 26

K. PLAY DISCS IN VARIOUS WAYS
Using a Bookmark
1. While a disc is playing, press [BOOKMARK
on the remote.
2. The Bookmark Menu appears.
3. Use the direction buttons to highlight the
bookmarked scene you want to activate.
Press [ENTER [to go to the place you
marked.
DVD.
ZOOM PLAY
This function can be used to watch a
motion or motionless picture.
PROGRAM PLAY
PLAY MODE
To use the program playback feature, you
must enter the order in which you want the
titles (and chapters) on the DVD or the
tracks on the CD to play by creating a
program.
WHEN PLAYING DVD
ZOOM
1. Press ZOOM during playback,
the screen shows:
f
2X
The picture is
2. Press ZOOM
enlarged twice the size,
again, the screen shows;
/
<\ 3X
1. Press PLAY MODE until the screen shows:
PROGRAM ; TT(20)/CH (
CH:
TT:__
TT:
M
[03| TT:__ CH:
m
___
TT;__
TT:
___
EXIT NEXT
___
CH;
___
___
CH:__ [o?l
CH:
___
—)
TT:_.
|07| TT:_. CH
TT:.. CH
1^
TT:_.
TT:_. CH
CH
CH
\
2. Use the number buttons on the remote to
enter the title (and chapter) you want to play
first. The title (and chapter) number you
entered appears in the box. For example:
J
Enter Chapter 1 In Title 8, the screen shows:
PROGRAM: TT(20)/CH (
log TT:0 8 CH 01 [gl TT:
—)
__
CH:
__
\
TT:
__
(on
TT:
[51
(CH TT:
TT:__
[51
CH 07 TT:
__
CH
__
CH
CH
[EXITJ STARTJ LNEXT_^HJ
08
— IW1
__ Ul
TT:
TT:
TT:
__
__
__
__
CH:
CH:
CH:
CH:
__
__
__
__
V
_____
J
The picture is enlarged three times the size.
Note; The unithas six zoom steps:
2X. 3X.Q^ 4X.Q^ 1/2 . 1/3 , and
<\VA .
3. Push , A , ▼ , ► to move the enlarged
picture.
4. To resume the picture, push ZOOM
until the picture is in normal size.
3. The cursor jumps to the next spot in the
program list section.
Make sure the box is highlighted and enter
your next track.
4. Continue adding titles (and chapters) until
your program is complete. You can play
your program by highlighting START and
press ENTER
Note: If the titles (and chapters) you want
®§24®s
Page 27

K. PLAY DISCS IN VARIOUS WAYS
to program are more than 10, you can
highlight NEXT and press ENTER | to go to
the next page.
6. To remove program playback, highlight
EXIT and press ENTER | to confirm.
WHEN PLAYING CD
1. Press PLAY MODE until the screen shows:
PROGRAM; TRACK (01-20)
|6i__
EH
03
04
05
LEXITJ
Ezl__
®8j__
Ei-0O|__
[NEXT
SHUFFLE OR RANDOM PLAY
■DVD^ ^ CD
The unit can play by random orders.
The order is different each time.
1. Press PLAY MODE to select shuffle or
randomplay mode while a disc is playing.
PLAY MODE
The screen shows:
2. Use the number buttons on the remote
to enter the track number you want to play
first. The track number entered appears in
the box. The screen shows:
PROGRAM:
08 (№]
EH
EH. EH..
E4l__
E^
TRACK (01-20)
07
EH__
[m
EXIT1 START 1 NEXT^^I
3. The cursor jumps to the next spot in the
/-----------------------------
"s
-----------------
\
/
SHUFFLE OR RANDOM
\
___________
)
__________
J
2. press ► (PLAY) to start shuffle or random play.
The unit selects a track to play.
3. Remove shuffle or random play.
When playing a DVD disc, press twice.
•« When playing a CD disc, press ®''.
program list section. Make sure the box is
highlighted and enter your next track.
4. Continue adding tracks until your
program is complete. You can play you
program by highlighting START and press
ENTER
Note: If the tracks you want to program are
more than 10, you can highlight NEXT and
press ENTER I to go to the next page.
5. To remove program playback, highlight
EXIT and press ENTER to confirm.
^§25'»§
Page 28

K. PLAY DISCS IN VARIOUS WAYS
DIGEST PLAY
This function can be used to look through the
content of the track or disc.
DIGEST
PLAYING DVD
1. Press DIGEST while a disc is playing.
DIGEST
3. To remove the digest feature, use the
direction buttons to select EXIT on the
screen and press [ENTER | to confirm.
Note: If you have stored bookmarks on a
DVD disc, there will be one more
digest option: BOOKMARK DIGEST
PLAYING CD
1. Press DIGEST after the unit stops.
DIGEST
The screen shows:
SELECT DIGEST TYPE:
TITLE DIGEST
CHAPTER DIGEST
TITLE INTERVAL
CHAPTER INTERVAL
_____________________
/
Use the t or a buttons to select "TITLE
DIGEST" and press[ENTE^to confirm.
The unit begins to look through the titles,
and shows the starting picture of each title
on the screen.
1
2
3
The screen shows:
TRACK 01/20
SCAN
The unit plays the first ten seconds of each
track one after another.
2. Remove digest play.
Press I STOP I, digest play is removed and
the unit stops.
4 5 6
TYPE:TITLE
SELECT (01-20): -
EXIT MENU NEXT
V
_______________________________
✓
Each page has six pictures, their location
may be different.
2. Use the direction buttons to select NEXT
on the screen, and press | ENTER | to go
to the next page.
Note: A CD disc only has "SCAN" function.
Ȥ26'Ȥ
Page 29

L FUNCTION SETTING
MENU SETTING
According to the recorded information and
external equipment.set the following
functions for the player to obtain the best
playing status.
SETUP
1.Press I SETUP I to set the main menu.
SETUP
The screen shows:
/—
\
AUDIO SETUP PAGE -
►
SPEAKER SETUP
►
CHANNEL EQUALIZER
►
DOLBY DIGITAL SETUP
►
SUPER EQUALIZER
►
MAIN PAGE
\
>
Press the ▼ button to select "DOLBY
DIGITAL SETUP" and ► (PLAY) to confirm.
The screen shows the submenu for your
selection.
The screen shows:
The screen shows:
SETUP MENU - MAIN PAGE
GENERAL SETUP
AUDIO SETUP
VIDEO SETUP
PASSWORD SETUP
PREFERENCES
EXIT SETUP
2. Press direction buttons ( ► , a ) to select
and press ► (PLAY) to confirm.
Example: Select"AUDIO SETUP"
Press direction button ? to select.
The screen shows:
~ DOLBY DIGITAL SETUP
STEREO
DUAL MONO
D.R.C
► AUDIO SETUP
»
LEFT MONO
RIGHT MONO
MIXED MONO
Press direction button ► £*? to select
"LEFT MONO"
The screen shows:
- DOLBY DIGITAL SETUP STEREO
DUAL MONO »
D.R.C
LEFT MONO
RIGHT MONO
MIXED MONO
Ȥ27'Ȥ
SETUP MENU - MAIN PAGE
GENERAL SETUP
►
►
AUDIO SETUP
VIDEO SETUP
►
PASSWORD SETUP
PREFERENCES
EXIT SETUP
Press ► (PLAY) to confirm and enter
"AUDIO SETUP". The screen shows
the submenu for you selection.
AUDIO SETUP
■«Press ► (PLAY) to confirm selection.
Set "DUAL MONO" in "DOLBY
DIGITAL SETUP" to "LEFT MONO".
Page 30

L. FUNCTION SETTING
3.Exit from menus.
Press direction buttons and ► (PLAY) to
select the relevant exit column.
Press the direction buttons a to exit
from "DUAL MONO".
Press the direction button t to select
"AUDIO SETUP", press ► (PLAY) to exit
from the current column and return to the
"AUDIO SETUP PAGE".
Press A , ? to select "MAIN PAGE", then
press ► (PLAY) to return to the main menu.
GENERAL SETUP
The setting structure is as follows:
-GENERAL PAGE-
r— TV DISPLAY »
NORMAUPS
NORMAL/LB
WIDE
2. NORMAL/LB
This is selected when the unit is connected
to a normal TV. Wide-screen images are
shown on the screen, with black belt on the
top and bottom.
3. WIDE
This is selected when the unit Is
connected to a wide-screen TV.
- TV OUTPUT »
- SPDIF »
— CAPTIONS » ON
SCREENSAVER »ON
MENU STYLE » TYPE 1
MAIN PAGE
YUV
S-VIDEO
OFF
SPDIF/RAW
SPDIF/PCM
TYPE 2
TV DISPLAY
OFF
OFF
TV OUTPUT
1. YUV
Some TVs or monitors are equipped with
component video inputs. Connecting to
these inputs allows you to enjoy higher
quality picture playback.
In some TVs or monitors, the color levels
of the playback picture may be reduced
slightly or the tint may change. In such a
1. NORMAUPS
This is selected when the unit is connected
to a normal TV.
Wide-screen images are shown on the
screen, but with some parts cut
automatically.
case, adjust the TV or monitor for optimum
performance.
2. S-VIDEO
When you select this, you should connect
with S-VIDEO.
Ȥ28'Ȥ
Page 31

L FUNCTION SETTING
SPDIF OUTPUT
■* SPDIF OFF: No signal is output from the
coaxial port.
SPDIF/RAW: Select this when the DVD
player is connected with a digital amplifier
through coaxial port. When a Dolby Digital
disc. DTS disc or MPEG disc are played,
the coaxial output will be optional. The
power amplifier to be connected must have
Dolby Digital. DTS and MPEG decoding.
SPDIF/PCM; Select this when the DVD
player is connected with a 2-channel digital
stereo amplifier. When a Dolby Digital or
MPEG disc is played, the coaxial port will
output in PCM 2-channel format.
SPEAKER SETUP
The setting structure is:
- SPEAKER SETUP PAGE -
I— DOWNMIX » LT/RT
STEREO
^ AUDIO SETUP
LT/RT
A disc recorded multi channel soundtrack,
the output signal will be incorported to left
and right channel.
STEREO
A disc recorded multi channel soundtrack,
the output signal will be incorported to
stereo.
CAPTIONS
ON
The hidden subtitle is shown.
OFF
The hidden subtitle is turned off.
SCREENSAVER
Start the screen saver, the screen saver
image appears when the unit stops or the
image is frozen for a few minutes. This
saver can keep the screen from being
damaged.
ON: Start the screen saver.
OFF: Remove the screen saver.
MENU STYLE
The menu has two types of styles (type 1
CHANNEL EQUALIZER
This option will help you to select graphic
equalizer patterns according to the genre of
the music being played.
The setting structure is:
- -CHANNEL EQUALIZER- -
I— PRESET » NONE
POCK
POP
LIVE
DANCE
TECHNO
and type 2 ).
You can select one type which you like.
AUDIO SETUP
The setting structure is:
- -AUDIO SETUP PAGE - -
I— SPEAKER SETUP
- CHANNEL EQUALIZER
- DOLBY DIGITAL SETUP
- SUPER EQUALIZER
-►MAIN PAGE
CLASSIC
SOFT
-►AUDIO SETUP
You can select music category by pressing
the direction buttons and confirm by pressing
the PLAY button.
Ȥ29'Ȥ
Page 32

L FUNCTION SETTING
DOLBY DIGITAL SETUP
The setting structure is:
- - DOLBY DIGITAL SETUP - -
i-DUALMONO »
— D.R.C »
-►AUDIO SETUP
DUAL MONO
This is the output mode of the L and R
signals of the set audio output. If it is set to
"MIXED MONO", the function only works
when the DVD being played is 5.1-channel.
D.R.C
This Is selected to adjust linear compression
rate to obtain the different compression
results of the signals.
SUPER EQUALIZER
This option will help you to adjust the bass
equalizer.
STEREO
LEFT MONO
RIGHT MONO
MIXED MONO
VIDEO SETUP
The setting structure is:
— -VIDEO SETUP PAGE- -
I— SHARPNESS » HIGH
MEDIUM
LOW
— BRIGHTNESS » 0
— CONTRAST » 0
■►MAIN PAGE
SHARPNESS
Uses to select the sharpness level.
HIGH
The sharpness level is highest.
MEDIUM
The sharpness level is medium.
LOW
The sharpness level is lowest.
BRIGHTNESS
You can use the a or t button to adjust the
brightness.
CONTRAST
The setting structure Is:
- -SUPER EQUALIZER PAGE- 1“ BASS BOOST » ON
OFF
I— SUPER BASS » ON
OFF
CLEAR BOOST » ON
OFF
•AUDIO SETUP
BASS BOOST
Uses to turn BASS BOOST on and off.
SUPER BASS
You can use the A or ▼ button to adjust the
contrast.
Uses to turn SUPER BASS on and off.
CLEAR BOOST
Uses to turn CLEAR BOOST on and off.
Ȥ30'Ȥ
Page 33

L FUNCTION SETTING
PASSWORD SETUP
The setting structure is ;
- - PASSWORD SETUP PAGE - pPASSWORD » CHANGE
LpwMODE » ON
OFF
PASSWORD MODE
ON: The password works, "PARENTAL" is
dim and can not be selected.
OFF:The password is locked,
"PARENTAL" can be selected.
PASSWORD CHANGE
Select this to adapt the code, the screen
shows:
I— DISC MENU» ENGLISH
CHINESE
FRENCH
SPANISH
JAPANESE
I— LOCALE » CHINA
FRANCE
HONG KONG
JAPAN
TAIWAN
GBR
USA
I— PARENTAL » 1.G
2.
3. PG
4. PG 13
5. PGR
- - PASSWORD CHANGE PAGE- -
OLD PASSWORD
NEW PASSWORD
CONFIRM PASSWORD
Enter a password according to the screen.
Note: The password is automatically
factory set to 99999.
PREFERENCES
The setting structure is :
I— AUDIO » ENGLISH
FRENCH
SPANISH
CHINESE
JAPANESE
6. R
7. NC-17
8. ADULT
I— DEFAULTS »RESET
LANGUAGE SELECTION
If a language mentioned above is recorded
on the disc, you can select sounds, subtitles
or disc menu languages. If not. the language
recorded on the disc is shown.
PARENTAL LOCK
When playing disc with parental lock
function, you may select an age control
grade according to grade of disc and your
desire.
Example: Select "PG", you cannot play DVD
video disc rated higher than the PG grade.
DEFAULT » RESET
Each function setting returns to the initial
status In the factory If you select this option.
»§3r§
— SUBTITLE »
ENGLISH
FRENCH
SPANISH
CHINESE
JAPANESE
OFF
Note:
•»"PREFERENCES" only can be selected
after the unit goes into stop mode.
Page 34

М. MP3 OPERATION
SELECT TRACKS WITH MENU OTHER FUNCTIONS
1. Insert a disc, the unit will search disc
information. The TV screen displays main
menu.
/
MENU
MP3-01 1
\
During playback MP3 discs, the unit features
mute, volume control, repeat play and etc.
Operations are the same as CD.
MP3-02
MP3-03 3 I
MP3-04
MP3-05
MP3-06 6
\
2.Press direction key ▼ to select song
folder. Press ► (PLAY) to confirm
selection. Example: Select MP3-02, the
TV screen displays.
^
---------------------^3 UP DIR 1
PLAY MODE: FOLDER
2
4
5
I
______
I
______
WAVE-11 1
I
/
Ч
WAVE-12
WAVE-13
WAVE-14 4
WAVE-15 5
PLAY MODE: FOLDER
V J
3. Press direction buttons to select a song.
Press ► (PLAY) button to start playback.
4. Press A or T button to select other tracks
in stop mode.
5. In stop mode, select the folder icon (UP
DIR 1) on the left side, then press ► (PLAY)
button to return to the main menu.
6. Press ►иог[^-< to play previous or next
2
3
songs.
^§32^>§
Page 35

N. KODAK PICTURE CD PLAYBACK
A Kodak Picture CD has the size and shape of a regular CD. You can order a KODAK Picture
CD simply by checking the box on the photofinishing envelope when you drop off a roll of film
(35 mm or Advanced Photo System (APS) color print film) at the time of processing in photo
processing outlet displaying "Kodak Picture CD"sign. When your order is returned, you receive
your prints, negatives, and your full roll of pictures safely stored on your KODAK Picture CD.
Each KODAK Picture CD brings you the tools to enhance, share and manage your pictures on
your computer.
Now, you can playback Kodak Picture CDs on XXX DVD players and view your pictures on
your TV in the comfort of your living room.
Playing back your Kodak Picture Cl)
The new feature enables the decoding of JPEG files from a Kodak Picture CD disk.
Playback modes
Normal
When a Kodak Picture CD is inserted on a player an automatic slide show is launched. Each picture in
the Kodak Picture CD will be displayed consecutively in a slide-show fashion and will be scaled to fit in
the TV screen. Twelve slideshow transition modes are provided, use "PLAY MODE" key to select.Select
transition mode prior to start of slideshow if one mode is desired for the entire show.
Mode 0: no special transition effect (by default) Mode 8: wipe from right bottom to left top
Mode 1: wipe from left to right
Mode 2: wipe from right to left
Mode 3: wipe from top to bottom
Mode 4: wipe from bottom to top
Mode 5: wipe from left top to right bottom
Mode 6: wipe from right lop to left bottom
Mode 7: wipe from left bottom to right lop
Mode 9: wipe from center to iopAx)tiom
Mode 10: wipe from center to ieft/righi
Mode 11: wipe from lop/botlom to center
Mode 12: wipe from Icft/righl to center
Mode 13: horizontal blinds
Mode 14: vertical blind
Mode 15: random
Customer can set transition effects for each picture in a slideshow by using the "PLAY MODE" functions
while viewing a slideshow.The last iransiiion mode selected will be used in any future slideshows.
To display an image indefinitely, press the PAUSE key. To view the Next or Previous picture press
NEXT or PREVIOUS keys. To resume the slideshow press the PLAY key.
Image Rotation
There are four modes to rotate a piclure:"lnvert". "Mirror". "Left", and "Right". These operations are
allowed only when a picture is being displayed normally and will be cancelled automatically when a new
picture is displayed.Tnc arrow key is used to select the diferent rotation modes:
Up A -Invert/Normal
Down ▼ -Mirror/Normal
Left -Turn left
Right ► -Tum right
Zoom
We provide both ZOOM in/out and Ztwm pan function for the pictures. The "ZOOM" key is used to tum
on or off this function. When this mode is on. any picture will be displayed at the last ratio selected by
the user. A message on the screen will indicate the current Zoom ratio.
If zoom mode is on. "FF" and "FR" keys are used to control the ratio of zoom in/out. With ZOOM mode
off. a picture is scaled to fit the TV screen.
Notes: During ZOOM function, slideshow transition and image rotation are disabled. TO cancel the
ZOOM function, press the ZCXDM key again and resume the slideshow.
Digest
The "MENU" or "STOP" key is used to display thumbnail size pictures. After it is enabled, up to 12
scaled-down thumbnail pictures will be displayed on the screen. The "NEXT" and "PREV" keys can be
used to display the next/prev nine pictures in the the Kodak Picture CD.
You can select any of the nine displayed thumbnails by using the Arrow Keys and pressing the "ENT ER"
key. The thumbnail will be enlarged to fit the TV screen and the slide show will statr. If you desire to
display an image indefinitely, press the PAUSE key. To view the Next or Previous picture press NEXT or
PREVIOUS keys. To resume the slideshow press the PLAY key.
IMPORTANT NOTE:
Quality of pictures displayed on the screen is highly dependent on the viewing device.
®§33®S
Page 36

O.OTHERS
TROUBLE SHOOTING
if you experience the following problems while using the unit, this troubleshooting guide can
help you.
No sound
** Check If the unit is connected securely.
Make sure you operate the TV or amplifier
correctly.
** Make sure the amplifier is set to receive
DVD signal output.
No image
Check if the unit is connected securely.
** Make sure you operate the TV correctly.
** Make sure you set the color system
correctly.
Bad sound quality
Make sure the audio output mode is set
correctly.
Make sure the audio connection between
the unit and amplifier is right.
Disc can not be played
There is no disc in the unit.
Put the disc on the disc tray properly with
the label side up.
Clean the disc.
Moisture has condensed in the unit.
Remove the disc and leave the unit on for
about one hour.
The unit doesn't operate normally
Disconnect the power plug and insert it
into the wall outlet again.
Remote control does network
•^Remove barriers between the remote
control and the unit.
** Point the remote control at the remote
control sensor of the unit.
Replace the batteries with new ones.
Ȥ34'Ȥ
Page 37

O.OTHERS
TECHNICAL SPECIFICATIONS
Laser
Video system
Frequency response
Signal/noise ratio
Audio distortion + noise O(-80dB(1KHz)
Channel separation S85dB(1KHz)
Dynamic range
Wavelength 650nm
NTSC
20Hz~20KHz®¿2.5dB
o»85dB
o»85dB(1KHz)
Output
Audio out
(analog audio)
Audio out
(digital audio)
Video out
S-video out
YUV out
output level: 2V®¿ 10%
Load Impedance: 10K |
output level: 0.5Vp-p‘’¿20%
Load impedance: 75 |
output level: 1Vp-p®e20%
Load impedance: 75 |, imbalance, negative polarity
output level: brightness (Y) 1Vp - p°c20%
chromaticity (C) 0.286Vp-p‘’¿20% Load impedance: 75 |
Y:700mv<»e20% Cb:535.5mv<>¿20% Cr:535mv®c20%
Power supply
Power Consumption
Dimensions
Weight
This manual is only for your reference, any change to the design and specifications will not be
advised.
^§35'»§
AC120V/60HZ
**.20W
430° 180° 1260mm
Around 3Kgs
Page 38

AU DI OTO X
90 DAY LIMITED WARRANTY
ELECTRONICS CORP.
AUDIOVOX ELECTRONICS CORP. (the Company) warrants to the original retail purchaser of this product that should this product
or any part thereof, under normal use and conditions, be proven defective in material or workmanship within 90 days from the
date of original purchase, such defect(s) will be repaired or replaced with reconditioned product (at the Company's option) without
charge for parts and repair labor.
To obtain repair or replacement within the terms of this Warranty, the product is to be delivered with proof of warranty coverage
(e.g. dated bill of sale), specification of defect(s), transportation prepaid, to the Company at the address shown below.
This Warranty does not extend to the elimination of externally generated static or noise, to correction of antenna problems, to
costs incurred for installation, removal or reinstallation of the product, or to damage to tapes, discs, speakers, accessories, or
electrical systems.
This Warranty does not apply to any product or part thereof which, in the opinion of the Company, has suffered or been damaged
through alteration, improper installation, mishandling, misuse, neglect, accident, or by removal or defacement of the factory serial
number/bar code label(s). THE EXTENT OF THE COMPANY'S LIABILITY UNDER THIS WARRANTY IS LIMITED TO THE
REPAIR OR REPLACEMENT PROVIDED ABOVE AND, IN NO EVENT, SHALL THE COMPANY'S LIABILITY EXCEED THE
PURCHASE PRICE PAID BY PURCHASER FOR THE PRODUCT.
This Warranty is in lieu of all other express warranties or liabilities. ANY IMPLIED WARRANTIES, INCLUDING ANY IMPLIED
WARRANTY OF MERCHANTABILITY, SHALL BE LIMITED TO THE DURATION OF THIS WRITTEN WARRANTY. ANY
ACTION FOR BREACH OF ANY WARRANTY HEREUNDER INCLUDING ANY IMPLIED WARRANTY OF MERCHANTABIL
ITY MUST BE BROUGHT WITHIN A PERIOD OF 30 MONTHS FROM DATE OF ORIGINAL PURCHASE. IN NO CASE SHALL
THE COMPANY BE LIABLE FOR ANY CONSEQUENTIAL OR INCIDENTAL DAMAGES FOR BREACH OF THIS OR ANY
OTHER WARRANTY, EXPRESS OR IMPLIED, WHATSOEVER. No person or representative is authorized to assume for the
Company any liability other than expressed herein in connection with the sale of this product.
Some states do not allow limitations on how long an implied warranty lasts or the exclusion or limitation of incidental or
consequential damage so the above limitations or exclusions may not apply to you. This Warranty gives you specific legal rights
and you may also have other rights which vary from state to state.
Applies to Audiovox Video Products
U.S.A. : AUDIOVOX ELECTRONICS CORPORATION, 150 MARCUS BLVD., HAUPPAUGE, NEW YORK 11788 • 1-800-645-4994
CANADA : CALL 1-800-645-4994 FOR LOCATION OF WARRANTY STATION SERVING YOUR AREA
 Loading...