

Page 1
DV 1680
128-6000
Page 2
Laser Warnings
This product is equipped with a laser device. Be sure to observe the following
precautions when operating. Failure to observe these precautions could result in fire,
bodily injury and damage to the equipment.
1. Do not operate the controls, make any adjustments, or perform any procedures other
than as specified in this manual or in the DVD Player installation guide.
2. Allow only authorized service technicians to repair the laser equipment.
All of the DVD Player's systems comply with the appropriate safety standards,including
IEC 825. The laser itself complies with laser product performance standards set by
government agencies for a Class 1 laser product. The DVD Player does not emit
hazardous light. The beam is totally enclosed at all time.
BEFORE USING THE DVD PLAYER
Important! Please read the following instructions before
attempting to operate the DVD Player
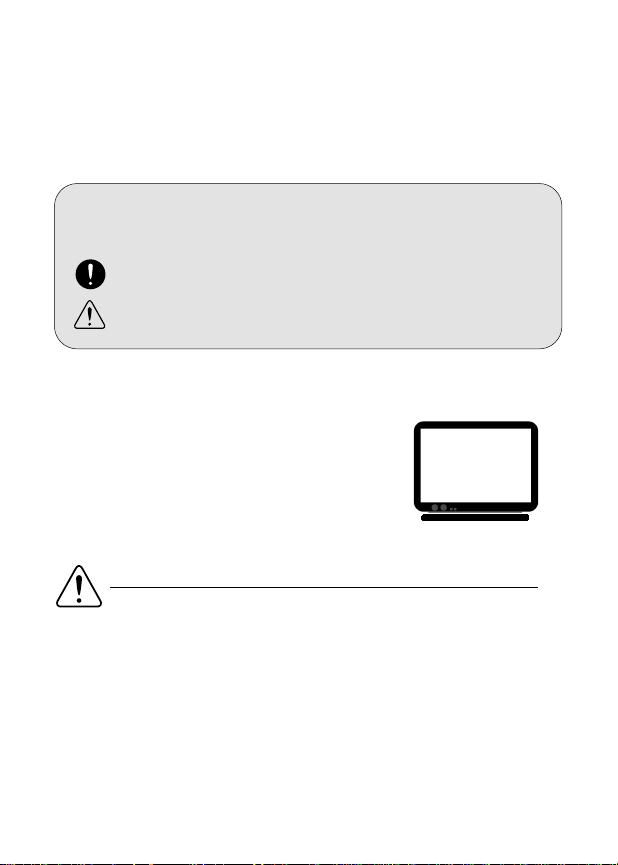
Types of Warning Signs
There are two types of warnings in this manual, indicated by the
following symbols:
Indicates a Warning or caution for operation.
Indicates a Warning or caution for safety.
Rain and Moisture Warning
To reduce the risk of fire or electric shock, do not expose this appliance to rain or moisture.
1
Page 3

Battery Warning
The DVD Player comes with a Li-ion battery pack. There is a risk of fire and burns if the
battery pack is handled improperly.
- Do not disassemble, crush, or puncture the battery pack.
- Do not short the battery pack's external contacts.
- Do not expose the battery pack to fire or water.
- Do not attempt to open or service the battery pack.
- Replace only with the battery pack designated for this product.
- Discard used batteries according to the manufacturer's instructions.
Power Cord Warnings
If operating the DVD Player from battery power, refer to Chapter 10 of this manual.
Use an approved power cord.
If the original power cord is missing or lost, purchase a power cord:
- That is approved for use in your country.
- That is rated for the product and for the voltage and current marked on the product's
electrical ratings label.
- That has a voltage and current rating greater than the voltage and current rating
marked on the product.
- With a minimum wire diameter of 0.75 mm2/18AWG.
- That is between 5 and 6.5 feet (1.5 and 2 meters) long.
If you have questions about the type of power cord to use, contact your authorized
service provider.
CAUTION
Visible Laser Radiation When Open. Do Not Stare Into Beam
or View Directly With Optical Instruments.
CAUTION
Use of controls, adjustments, and procedures other than those
specified herein may result in hazardous radiation exposure.
2
Page 4
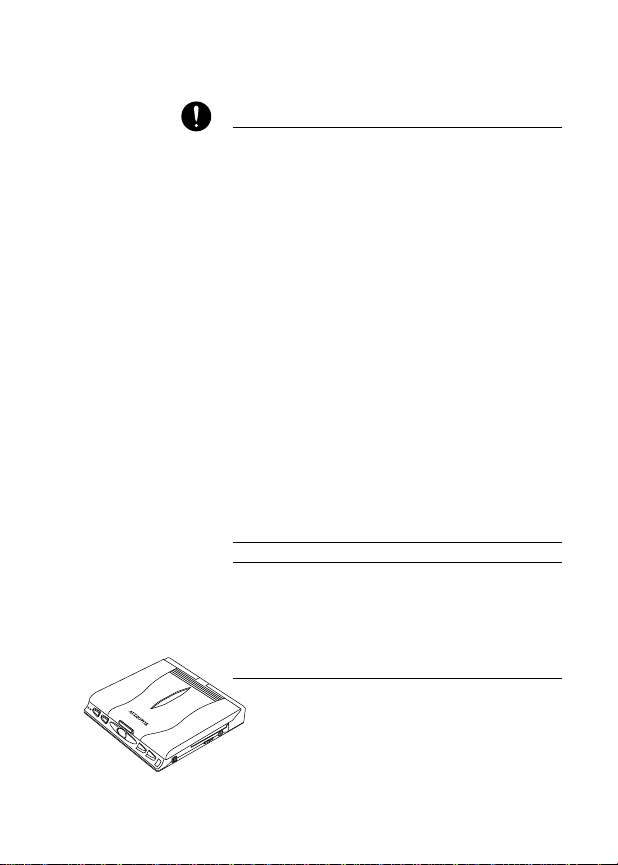
Selecting the Video System
The video system of the DVD Player can be set
automatically according to the contents of the DVD or
VCD titles.
In general, the NTSC system, used by the USA, is also
used in most Asian countries.
The PAL system, used by most European countries, is
used in China and Hong Kong.
The DVD Player is compatible with both the NTSC and
PAL systems.
Thank you for purchasing Audiovox's portable DVD
Player.
Before using the DVD Player, we strongly recommend that
you to read the instructions in this manual. They will help
you to operate and maintain the product. Please keep this
manual for future reference. To get started quickly using
the DVD Player, see Chapter 2, Quick User Guide.
D
V
D
P
L
A
Y
E
R
Note:
Copy Guard Protection:
When the DVD player audio/video output is plugged into
the A/V input jacks of a Video Cassette Recorder (VCR)
using the audio/video cables, (red, white and yellow RCA
jacks) poor picture quality may result (i.e. screen on TV
getting br ighter and dimmer) due to Macrovision copy
guard protection contained on some DVD discs.
3
Page 5

Table of Contents
1. Accessories List......................................
2. Quick User Guide....................................
3. Features of the DVD Player.......................
4. Parts of DVD Player....................................
5. Remote Control........................................
6. Initial Setup..............................................
7. Basic System Operation.........................
8. External Connection................................
9. Battery Installation and Use...................
10. Cautions and Maintenance...................
11. Warranty..................................................
12. Troubleshooting....................................
13. Product Specifications..........................
5
7
10
12
18
25
34
36
40
42
44
46
47
Page 6

1
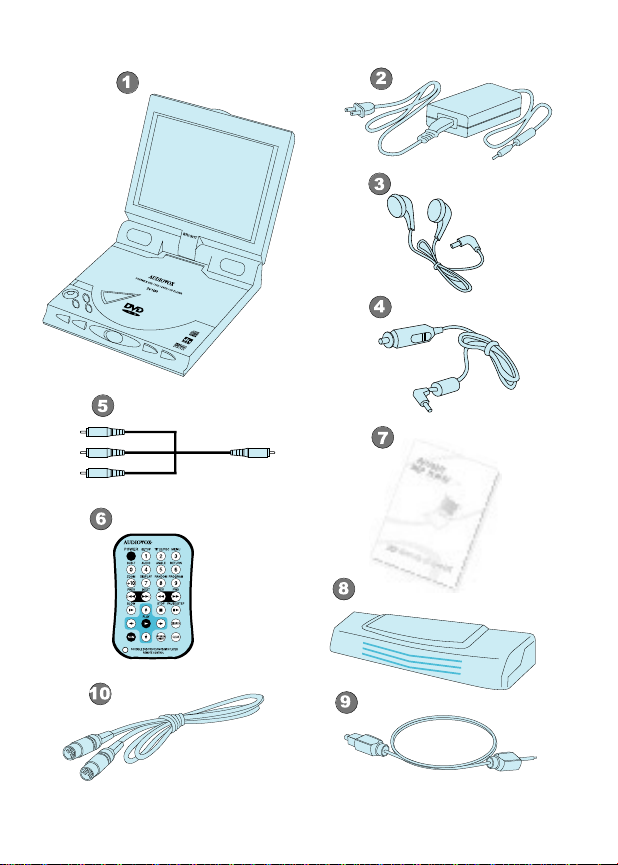
1. Accessories List/Option List
Check the contents of the package to make sure
nothing is missing or damaged. Some parts may be
optional. Contact your dealer with any questions.
1. DVD Player
2. AC Adapter
3. Stereo Headphone
4. Car Cigarette Lighter Adapter
5. Audiovisual Cable
6. Remote Control
7. One User's Manual
8. Li-ion Battery Pack
10. S-Video Signal Cable
9. Optical Cable
Accessories List
Option List
5
Page 7
6
Page 8
D
V
D
P
L
A
Y
E
R
2
2. Quick User Guide
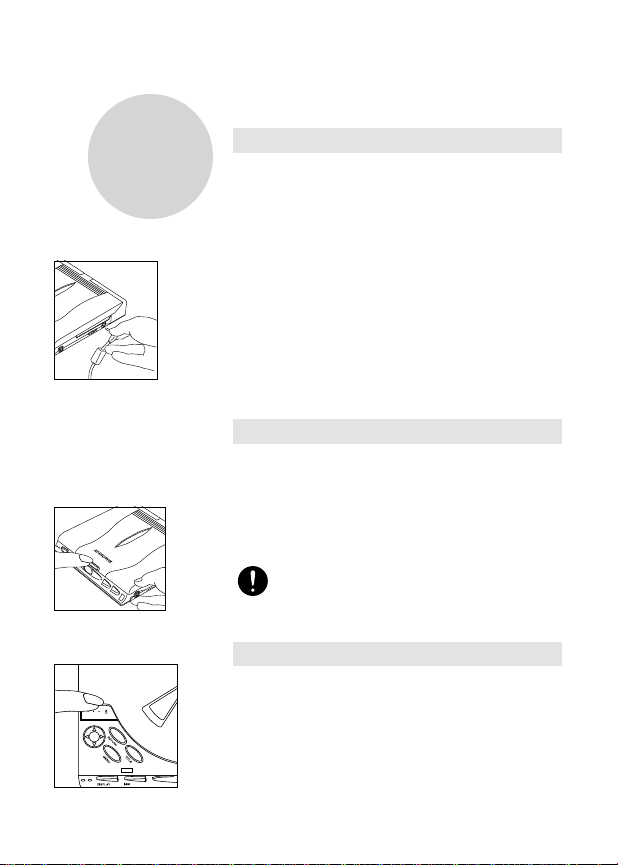
2.1 Connecting the Power
Refer to Chapter 10 for instructions on how to install
and use the battery pack.
1. Connect the power cord to the AC adapter.
2. Connect the power cord to a power source.
3. Connect the AC adapter to the DC IN 12V jack on
the right side of the DVD Player.
Use only the AC adapter that was shipped with the
DVD Player. Using substitutes may result in damage to
the DVD Player. Do not use the DVD Player's adapter
with other equipment.
It is normal for the AC adapter to feel warm when it is
connected to a power source. Please disconnect the AC
adapter from the source when the DVD Player is not in
use.
2.2 Opening the LCD screen
The LCD screen is on the inside of the cover.
To open the screen:
1. Slide the cover lock on the front of the screen cover
to the right.
2. GENTLY lift the cover to the position.
DO NOT TOUCH THE SCREEN WITH SHARP
OBJECTS. ALW
AYS CLOSE THE COVER WHEN THE
DVD PLAYER IS NOT IN USE.
2.3 Opening the Disc Cover
The disc cover inside the DVD Player protects the disc
while it is being played. The cover should be closed at all
times except when changing discs.
To open the disc cover, press the OPEN button at the
bottom left of the cover. The cover will be open.
7
Page 9
D
V
D
PLA
Y
E
R
Even though the laser beam will stop emitting
when the cover is opened, DO NOT LOOK AT THE
LASER HEAD. The laser beam could still damage your
eyes.
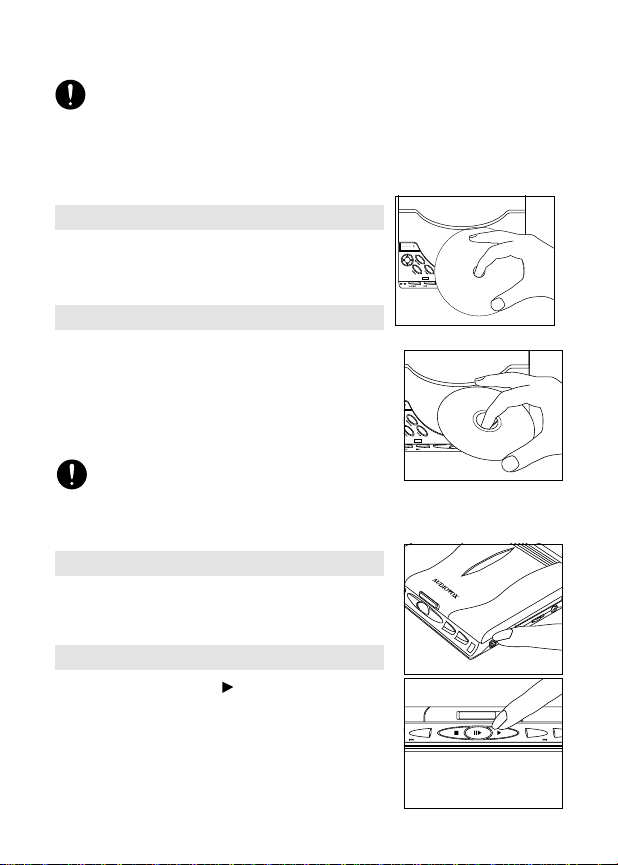
2.4 Removing the safety card
Before inserting a disc and turning on the power for
the first time, be sure to remove the cardboard safety
card.
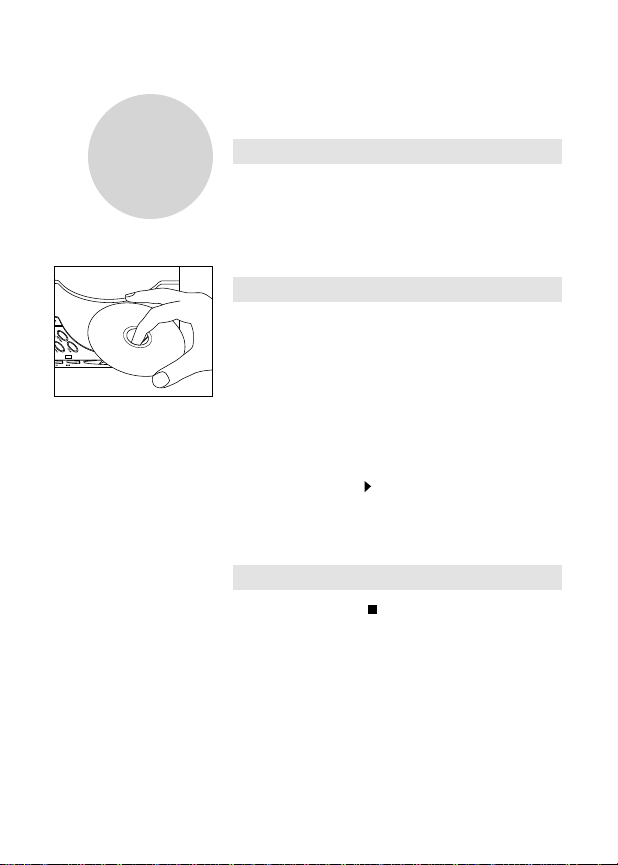
2.5 Placing a Disc in the DVD Player
To place a disc in the DVD Player:
1. Open the disc cover.
2. Align the disc on the DVD Player.
3. Gently press the disc into place.
4. Close the disc cover.
DO NOT TOUCH THE LASER HEAD AND AVOID
DUST OR DIRT ON THE LASER HEAD. Keep the disc
cover closed at all times to prevent dust or dir t from
collecting on the laser head.
2.6 Turning the power ON
To turn the power on, press the POWER ON/OFF
button on the right front side of the DVD Player.
2.7 Playing a Disc
T
o play a disc, press the button on the front of the
DVD Player.
8
Page 10

9
2.8 Stopping Disc Play
To stop the disc play, press the [ ] button on the
front of the DVD Player.
2.9 Turning the power off
To turn off the DVD Player, press the POWER ON/OFF
button on the right side of the DVD Player.
Page 11

3. Features of the DVD Player
3.1 Plays discs of various formats
The DVD Player can play:
°∑DVD Videos
°∑VCDs
°∑CDs
°∑SVCDs
°∑CVDs
°∑MP3 music recorded on a CD-ROM
The DVD Player will automatically identify the type of
disc and select the right format to play.
3.2 NTSC and PAL Compatible
The DVD Player is compatible with both the NTSC
and PAL systems. You can use the remote control to
select the desired system from the "system setup menu".
See Chapter 6 for more information about settings.
3.3 Big LCD Screen
The DVD Player's 6.8-inch LCD screen at 4:3
provides a sharper, higher quality image with no
radiation. In addition, it supports 16:9 display and is
compatible with advanced screen specifications. The
RGB true-color display brings every image to life.
3.4 Stereo Speakers and Headphone
The DVD Player is equipped with a pair of built-in
stereo speakers . It also comes with a standard 3.5mm
earphone jack and headphones so discs can be played
without disturbing others.
3
10
Page 12

3.5 Digital Output
The DVD Player is equipped with a digital output. You
can connect the signal to an AC3 and DTS decoder and
amplifier with an optical cable to enjoy the high-end
effect at 5.1 channels.
3.6 Signal Input and Output
The DVD Player can apply signals to a TV, amplifier,
VCR, video projector, or any other audiovisual
components.
The DVD Player can receive signals from a VCR,
video camera, or even an amplifier. The video/audio
signals can then be played back over the speakers,
earphones, and screen.
Note:
Copy Guard Protection:
When the DVD player audio/video output is plugged into
the A/V input jacks of a Video Cassette Recorder (VCR)
using the audio/video cables, (red, white and yellow RCA
jacks) poor picture quality may result (i.e. screen on TV
getting br ighter and dimmer) due to Macrovision copy
guard protection contained on some DVD discs.
11
Page 13
D
V
-1680
4
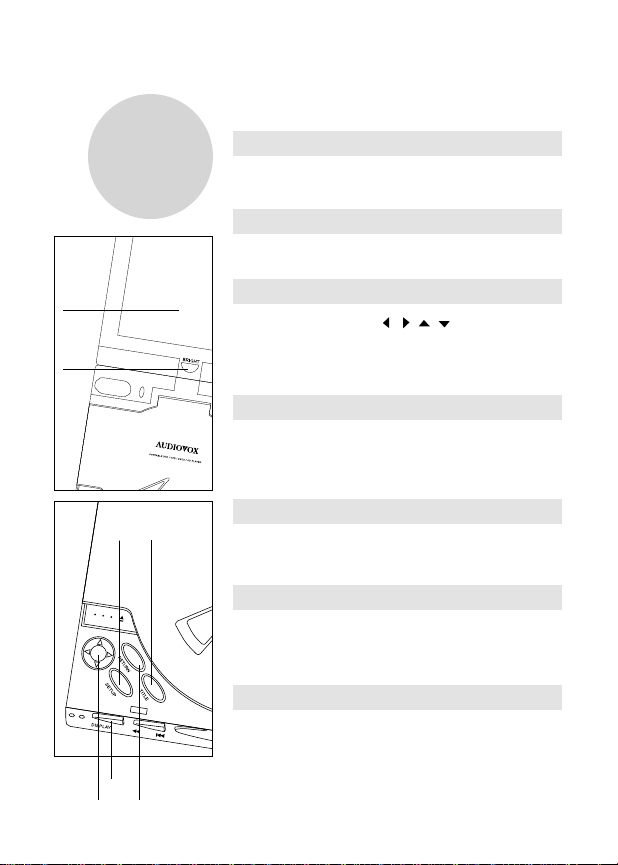
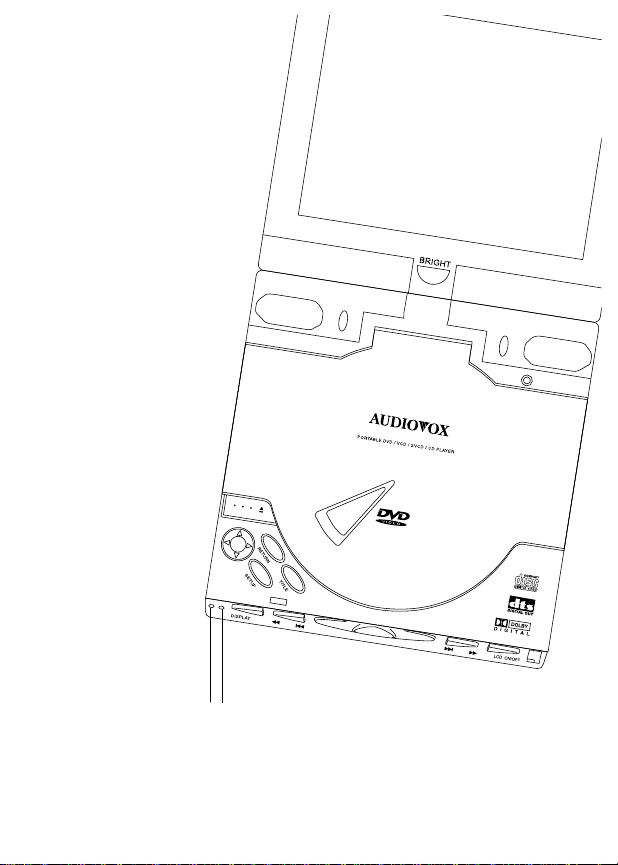
4. Parts of the DVD Player
4.1 LCD Screen
The DVD Player's 6.8-inch, 4:3, no radiation TFT LCD
screen provides a sharper, more colorful image.
4.2 Brightness Knob
Turning the knob adjusts the brightness of screen.
4.3 Select Button and Arrow Button
Use the arrow button ( , , , ) to navigate within
a menu.
Press the SELECT button to select a menu item.
4.4 RETURN Button
Press the RETURN button to return to the previous
menu.
4.5 SETUP Button
Press the SETUP button to display the screen from
which to set playback settings.
4.6 TITLE Button
Press the TITLE button to display a DVD disc main
menu.
4.7 DISPLAY Button
Press the DISPLAY button to display the status of the
disc playback.
D
V
-1680
4.1
4.3
4.4
4.5
4.6
4.2
4.7
12
Page 14
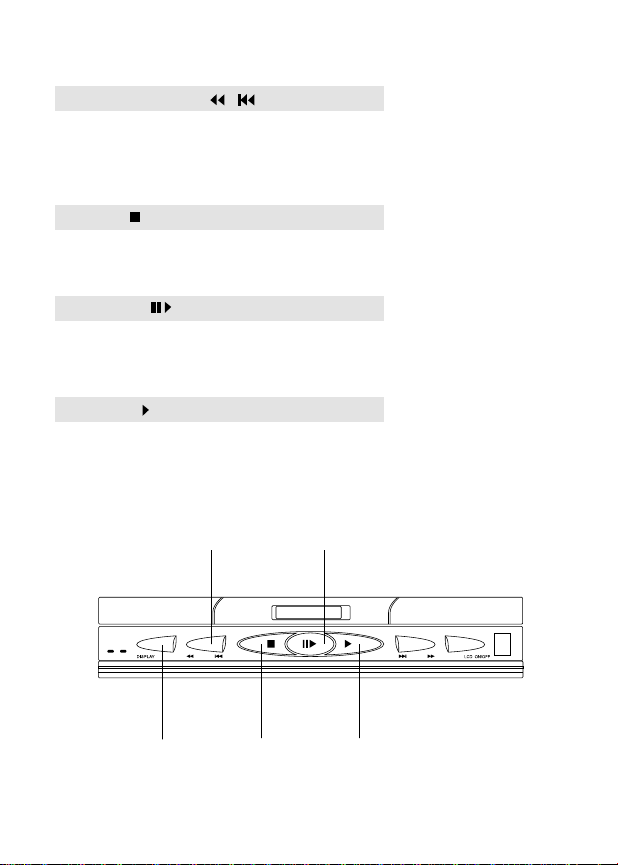
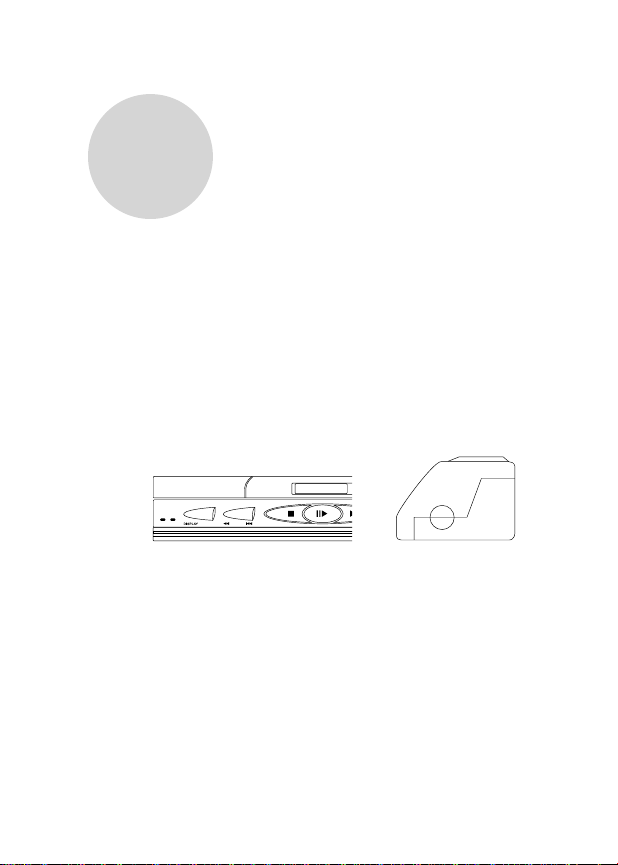
4.8 Previous/Rewind ( / ) Button
Press the button to return to the previous chapter.
Press and hold for a few seconds to rewind at 2X,
4X,8X, and 16X.
4.9 Stop ( ) Button
Press the Stop button to stop disc play.
4.10 PAUSE ( ) Button
Press the Pause button to pause disc play.
Press the PLAY button to resume play .
4.11 PLAY ( ) Button
Press the Play button to play the disc.
4.7
4.8
4.9 4.11
4.10
13
Page 15
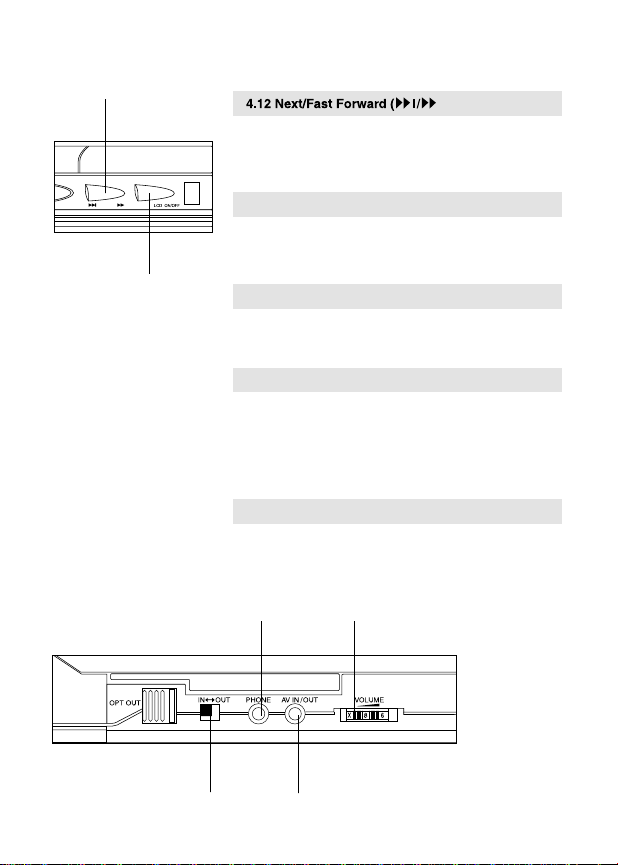
) Button
Press the button to go to the next chapter.
Press and hold for a few seconds to fast forward at
2X, 4X, 8X and 16X.
4.13 LCD On/Off
Press the LCD On/ Off Button to turn the LCD screen
on or off .
4.14 Volume Control
Turn the control to adjust the volume of the speakers
or earphones.
4.15 Earphone Jack
The jack is a standard 3.5mm earphone jack. You can
use the stereo earphones shipped with the DVD Player,
or use any other standard earphones.
When the ear phones are plugged in the phone jack,
the DVD Player speakers are muted .
4.16 A/V Terminals
Allows you to use the DVD Player's A/V cable (stereo
audio cable with 2 channels, and one for video signal) to
connect the DVD Player to audiovisual components.
4.16
4.14
4.15
4.17
4.13
4.12
14
Page 16
4.18
4.19
4.17 A/V Signal Input/Output Switch
Slide the switch to set the DVD Player to input or
output mode.
When the switch is in the IN position, all output
signals from the DVD Player are muted so the DVD
Player can receive input signals. MAKE SURE THE
INPUT/OUTPUT SWITCH IS IN THE OUT POSITION
BEFORE TRYING TO PLAY A DISC.
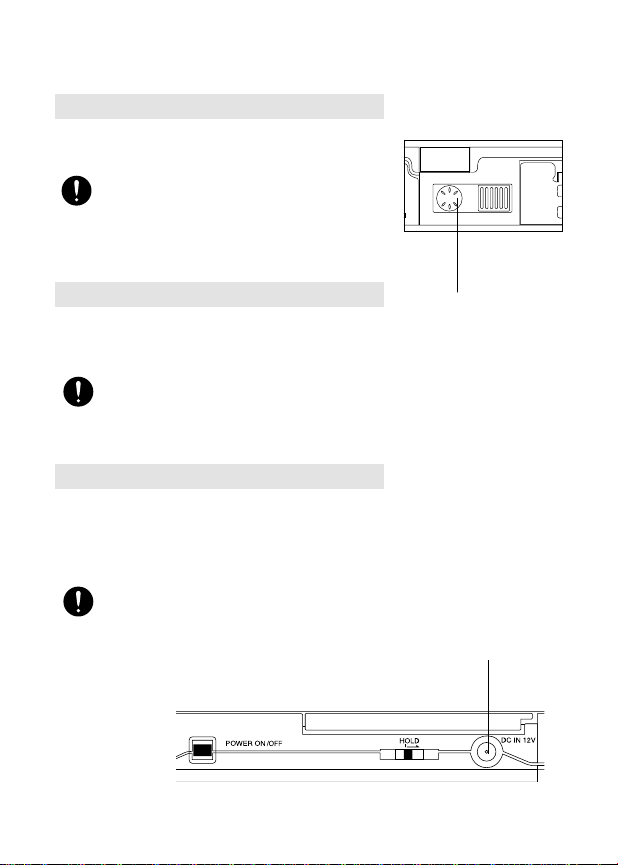
4.18 S-VHS Output
Using the S-VHS signal produces better picture
quality. Connect it with a S-VHS cable (optional) between
the DVD Player and your TV.
The S-VHS signal output cannot be used while
DVD Player is powered by the battery. The battery
connector is covered when the S-VHS signal is being
used.
4.19 DC In
The DVD Player comes with an AC adapter for indoor
or long-time playing use. Connect the adapter's power
cord to a household power source. Connect the other
end of the adapter to the DC IN connector on the DVD
Player.
Use only the AC adapter that is shipped with the
DVD
Player. Using a substitute adapter may result in
damage to the DVD Player.
15
Page 17

4.20 Power Switch
Turns the DVD Player on or off. Press once to turn the
power ON. Press again to turn the power OFF.
4.21 Power Indicator
Not lit when the power is off.
Red light indicates standby mode.
Green light indicates busy mode.
4.22 Battery Charge Indicator
Not lit when the battery is not being charged.
Yellow indicates that battery charging is in progress.
Blinking yellow light indicates that the battery is
finished charging.
4.23 HOLD Switch
Slide the switch to the right position to lock all of the
keys on the front panel.
If the DVD Player does not work, check if the keys
are locked. Slide button to the left to unlock the keys.
4.20
4.23
16
Page 18
D
V
-1680
4.22
4.21
17
Page 19

5
Cautions for Remote Control
Remove the battery from the remote control if it will
not be used for a long time.
Keep the remote control away from heat and
moisture.
Do not disassemble the remote control.
Aim the remote control at the DVD Player's IR
receiver.
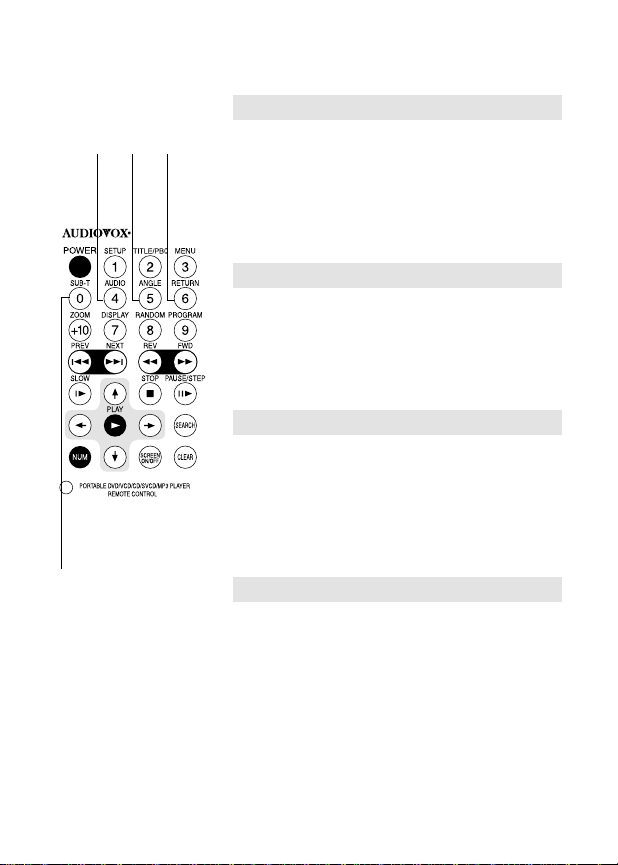
5. Remote Control
18
Page 20
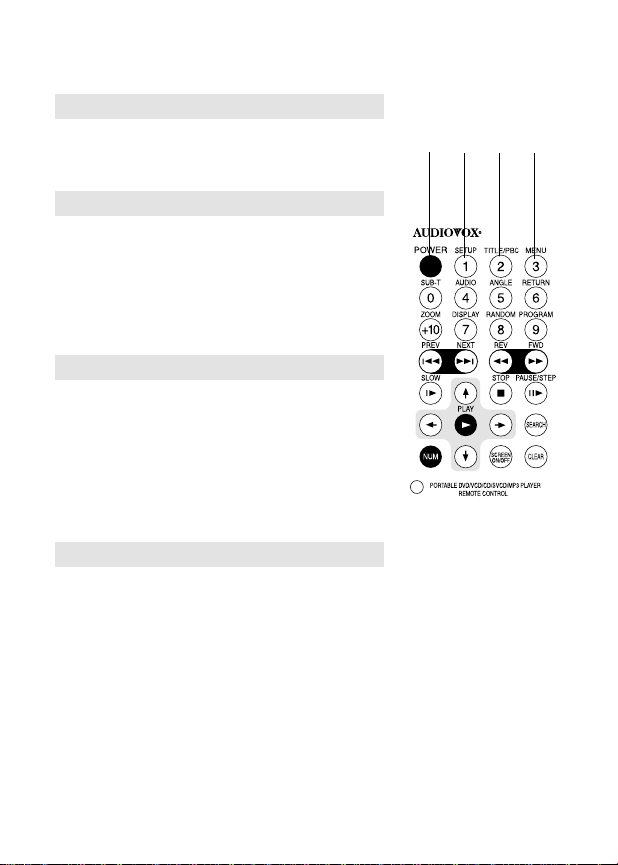
5.1 POWER
Turns the DVD Player on or off.
5.2 SETUP (or 1)
Normal mode: Display the system setup page, from
which you can set up some system
parameters.
Number mode: Represents the number 1.
See 5.25 for information about normal and number
modes.
5.3 TITLE/PBC (or 2 )
Normal mode: Display the title menu. Please note
that not all DVD titles have a title menu.
For VCDs, turns PBC on and off.
Number mode: Represents the number 2.
See 5.25 for information about normal and number
modes.
5.4 Menu (or 3)
Normal mode: Display the main menu of DVD video
titles from which you can select
options such as the language, subtitle,
and angle.
Number mode: Represents the number 3.
See 5.25 for information about normal and number
modes.
5.1
5.2 5.3 5.4
19
Page 21
5.6 5.7 5.8
5.5 SUB-T (or 0)
Normal mode: Changes the language of the subtitles.
Most DVD video titles contain hidden
subtitles.
Number mode: Represents the number 0.
See 5.25 for information about normal and number
modes.
5.6 AUDIO (or 4)
Normal mode: Selects an audio language.
Number mode: Represents the number 4.
See 5.25 for information about normal and number
modes.
5.7 ANGLE (or 5)
Normal mode: Changes the view angle for DVDs with
different view angles.
Number mode: Represents the number 5.
See 5.25 for information about normal and number
modes.
5.8 RETURN (or 6)
Normal mode: Returns to the previous menu page.
Number mode: Represents the number 6.
See 5.25 for information about normal and number
modes.
5.5
20
Page 22

5.9
5.10
5.11
5.12
5.9 ZOOM (or +10)
Normal mode: Zooms -in on the image on the screen.
The DVD Player supports magnification
in X2 and X4 modes.
Number mode: Used to enter a number greater than
10. For example, to enter 25, press the
+10 button twice, then the 5 button
once.
See 5.25 for information about normal and number
modes.
5.10 DISPLAY (or 7)
Normal mode: Displays the status bar on the top of
the screen, including title playback
time, title remaining time, chapter
playback time, and chapter remaining
time.
Number mode: Represents the number 7.
See 5.25 for information about normal and number
modes.
5.11 RANDOM (or 8)
Normal mode: Plays CD or VCD tracks at random.
Number mode: Represents the number 8.
See 5.25 for information about normal and number
modes.
5.12 PROGRAM (or 9)
Normal mode: Push to display a screen from which to
program the playback of a CD or VCD.
Number mode: Represents the number 9.
See 5.25 for information about normal and number
modes.
21
Page 23

5.13 PREV ( )
Plays the previous chapter of a DVD disc or the
previous track of a CD/VCD disc.
5.14 NEXT ( )
Plays the next chapter of a DVD disc or the next track
of a CD/VCD disc.
5.15 REV ( )
Plays the movie in reverse.
5.16 FWD ( )
Plays the movie in fast forward.
5.17 SLOW ( )
Plays the movie in slow motion.
5.18 Key
Moves the highlight bar upward in a menu.
5.19 STOP ( )
Stops play of the disc.
5.20 PAUSE/STEP ( )
Pauses play of a movie. Once paused, pressing the
button advances the movie one movie frame.
5.20
5.13 5.14
5.16
5.17
5.18 5.19
5.15
22
Page 24

5.21
5.22 5.23
5.24
5.21 Key
Move the highlight bar to the left.
5.22 PLAY ( )
Play the disc.
5.23 Key
Move the highlight bar to the right
5.24 SEARCH
Searches for a desired chapter, title or track.
The searching method of MP3 is slightly dif
DVD/VCD.
MP3: Search allows a 3-digit number for CD-R/CD-
RW containing more than100 songs.
For example: Search for No. 2 song, enter " 002"
Search for No. 12 song, enter " 012"
Search for No. 112 song, enter " 112"
DVD/VCD: Search allows 2-digit number for
DVD/VCD containing less than 100
chapters/titles/tracks.
For example: Search for chapter 4, enter "4" (a
"0" before "4" is not necessary.)
Search for chapter 14, enter "14"
23
Page 25

5.25 NUM
Switches between normal and number mode. Some
keys on the remote control are both number keys and
function keys. Press the NUM button to switch from
normal mode to number mode. Press the NUM key again
to switch back to normal mode.
When the remote is in number mode, the word 'NUM'
appears in the bottom right corner of the screen
5.26 Key
Moves the highlight bar downward in a menu.
5.27 SCREEN ON/OFF
Turns the LCD screen on and off.
5.28 CLEAR
Clears any program, repeat, or password.
5.27
5.28
5.26
5.25
24
Page 26

6
SETUP MENU--MAIN PAGE
>GENERAL SETUP<
>SPEAKER SETUP<
>DOLBY DIGITAL SETUP<
>VIDEO SETUP<
>PREFERENCES<
EXIT SETUP
GENERAL SETUP
GENERAL PAGE
TV DISPLAY >> NORMAL/PS
TV TYPE NORMAL/LB
PICTURE MODE WIDE
ANGLE MARK
OSD LANG
AUDIO OUTPUT
CAPTIONS
SCREEN SAVER
SET TV DISPLAY MODE
6. Initial Setup
To display the initial set up screen, press the SETUP
the remote control.
The initial setup includes five menu pages:
1. GENERAL SETUP: general function setup
2. SPEAKER SETUP: speaker output mode setup
3. DOLBY DIGITAL SETUP: digital sound output
setup
4. VIDEO SETUP: video quality setup
5. PREFERENCES: preferences setup
6.1 General Setup
Pan & Scan
6.1.1 TV DISPLAY
NORMAL/PS(Pan & Scan)
NORMAL/LB(Letter Box)
WIDE(16:9)
button on either the front panel of the DVD Player or on
25
Page 27
26
6.1.2 TV TYPE
MULTI
NTSC
PAL
6.1.3 PICTURE MODE
AUTO
HI-RES
NONFLICKER
6.1.4 ANGLE MARK
ON
OFF
GENERAL SETUP
TV DISPLAY
TV TYPE >> MULTI
PICTURE MODE NTSC
ANGLE MARK PAL
OSD LANG
AUDIO OUTPUT
CAPTIONS
SCREEN SAVER
SET TV STANDARD
GENERAL SETUP
TV DISPLAY
TV TYPE
PICTURE MODE
ANGLE MARK >> ON
OSD LANG OFF
AUDIO OUTPUT
CAPTIONS
SCREEN SAVER
ANGLE MARK ON/OFF
GENERAL SETUP
TV DISPLAY
TV TYPE
PICTURE MODE >> AUTO
ANGLE MARK
HIGH RESOLUTION
OSD LANG
NONFLICKER
AUDIO OUTPUT
CAPTIONS
SCREEN SAVER
Set Picture Mode
Page 28

6.1.5 OSD (On-Screen Display) LANGUAGE
ENGLISH
CHINESE
6.1.6 AUDIO OUTPUT
ANALOG
SPDIF/RAW
SPDIF/PCM
6.1.7 CAPTIONS
ON
OFF
GENERAL SETUP
TV DISPLAY
TV TYPE
PICTURE MODE
ANGLE MARK
OSD LANG
AUDIO OUTPUT
CAPTIONS >> ON
SCREEN SAVER OFF
CLOSED CAPTIONS
GENERAL SETUP
TV DISPLAY
TV TYPE
PICTURE MODE
ANGLE MARK
OSD LANG
AUDIO OUTPUT >>ANALOG
CAPTIONS SPDIF/RAW
SCREEN SAVER SPDIF/PCM
SELECT AUDIO OUTPUT
GENERAL SETUP
TV DISPLAY
TV TYPE
PICTURE MODE
ANGLE MARK
OSD LANG >> ENGLISH
AUDIO OUTPUT CHINESE
CAPTIONS
SCREEN SAVER
SET OSD LANGUAGE
27
Page 29
--SPEAKER SETUP PAGE--
SOUND >> LT/RT
>MAIN PAGE< STEREO
SET DOWNMIX MODE
--DOLBY DIGITAL SETUP PAGE--
OPERATIONAL >> LINE OUT
DUAL MONO RF REMOD
DYNAMIC RNG
>MAIN PAGE<
OPERATIONAL MODE SETUP
GENERAL SETUP
TV DISPLAY
TV TYPE
PICTURE MODE
ANGLE MARK
OSD LANG
AUDIO OUTPUT
CAPTIONS
SCREEN SAVER >> ON
OFF
SCREEN SAVER
6.1.8 SCREEN SAVER
ON
OFF
6.2 SPEAKER SETUP PAGE
6.2.1 DOWNMIX
LT/RT
STEREO
6.3 DOLBY DIGITAL SETUP
6.3.1
OPERATIONAL
LINE OUT
RF REMOD
28
Page 30

6.3.2 DUAL MONO
STEREO
LEFT MONO
RIGHT MONO
MIXED MONO
6.3.3 DYNAMIC RANGE
6.4 VIDEO SETUP
6.4.1 COLOR MODE
--DOLBY DIGITAL SETUP PAGE--
OPERATIONAL
DUAL MONO
DYNAMIC RNG >>
>MAIN PAGE<
DYNAMIC RANGE COMPRESSION
--DOLBY DIGITAL SETUP PAGE--
OPERATIONAL
DUAL MONO >> STEREO
DYNAMIC RNG LEFT MONO
>MAIN PAGE< RIGHT MONO
MIXED MONO
DUAL MONO(1+1) SETUP
--VIDEO PAGE--
COLOR MODE >>
CONTRAST MODE
BRIGHT MODE
>MAIN PAGE<
SETUP COLOR FEATURE
29
Page 31
--PREFERENCES PAGE--
AUDIO >> ENGLISH
SUBTITLE FRENCH
DISC MENU SPANISH
COUNTRY CHINESE
PARENTAL JAPANESE
PASSWORD
DEFAULTS
PREFERRED AUDIO LANGUAGE
6.4.2 CONTRAST MODE
6.5.1 AUDIO
--PREFERENCES PAGE--
AUDIO
SUBTITLE
>>ENGLISH
DISC MENU
FRENCH
COUNTRY
SPANISH
PARENTAL
CHINESE
PASSWORD
JAPANESE
DEFAULTS
OFF
PREFERRED SUBTITLE LANGUAGE
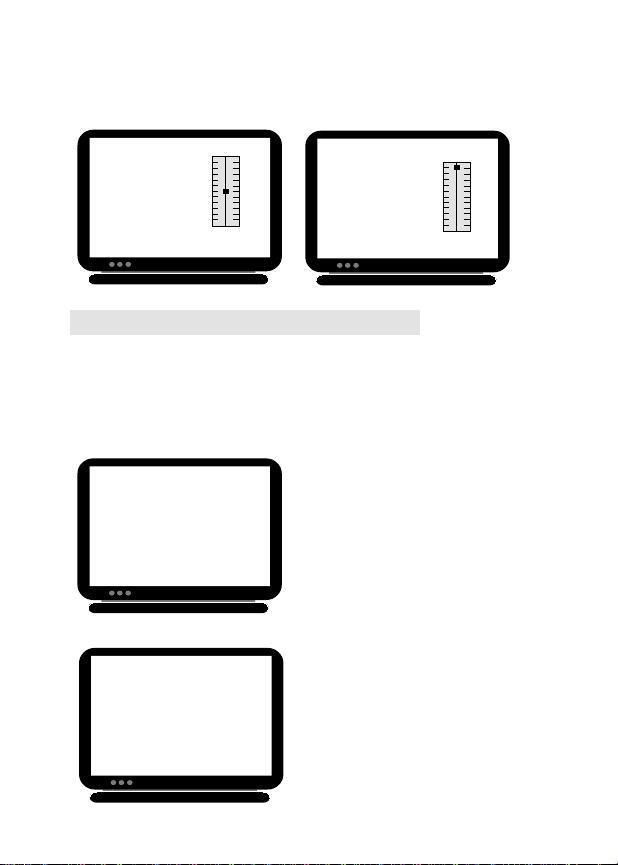
6.4.3 BRIGHT MODE
6.5 PREFERENCES PAGE
--VIDEO PAGE--
COLOR MODE
CONTRAST MODE >>
BRIGHT MODE
>MAIN PAGE<
SET CONRAST MODE
--VIDEO PAGE--
COLOR MODE
CONTRAST MODE
BRIGHT MODE >>
>MAIN PAGE<
SET BRIGHT MODE
6.5.2 SUBTITLE
This setting is used to select your preferred
audio language. If the preferred audio
language chosen is available on the DVD
disc title, the DVD Player will select it. The
DVD Player supports the audio languages
listed on the right side of the display. If you
do not wish to reset the audio language,
the default language is English.
This setting is used to select your preferred
subtitle language. If the preferred subtitle
language chosen is available on the DVD
disc title, the DVD Player will select it. The
DVD Player supports the subtitle languages
listed on the right side of the display. If you
default value is English.
This function allows the user to select DVD disc viewing preferences before playing
a movie. The selection must be performed with power applied to the DVD Player. In
addition, the DVD disc must be removed from the DVD Player or with the disc cover
open. The Preferences menu cannot be accessed while the DVD disc is playing.
do not wish to set the subtitle language, the
30
Page 32
--PREFERENCES PAGE--
AUDIO
SUBTITLE
DISC MENU
COUNTRY
>> CHINA
PARENTAL
FRANCE
PASSWORD
HONG KONG
DEFAULTS
JAPAN
TAIWAN
UK
USA
PREFERRED COUNTRY CODE
--PREFERENCES PAGE--
AUDIO
SUBTITLE
DISC MENU
>> ENGLISH
COUNTRY
CHINESE
PARENTAL
FRENCH
PASSWORD
SPANISH
DEFAULTS
JAPANESE
PREFERRED MENU LANGUAGE
--PREFERENCES PAGE--
AUDIO
SUBTITLE
DISC MENU
COUNTRY
PARENTAL
>>
PASSWORD
DEFAULTS
SET PARENTAL CONTROL
1 KID SAFE
2 G
3 PG
4 PG-13
5 LEVEL5
6 PG-R
7 NC-17
8 ADULT
9 N_PARENTAL
6.5.3 DISC MENU
6.5.4 COUNTRY
6.5.5 PARENTAL
This setting is used to select your
preferred disc menu (root and title
menus) language in the DVD titles. If
the preferred language chosen is
available on the DVD disc title, the
menu will be displayed in that
language. The DVD Player supports
the languages listed on the right side
of the display. If you do not wish to
reset the disc menu language, the
default language is English.
This setting is used to allow viewing
of DVD discs based on a DVD disc
rating system. Rating systems vary
from country to country. Therefore,
even though you choose PG-13, the
PG-13 rating is different for example
for the United States and the United
Kingdom. The website, DVD Forum,
provides information on the various
ratings systems.
This setting is used to control the
rating system of the DVD Player. If
the DVD disc title you are watching
has a higher rating class than the
setting of this DVD Player, you will be
requested to enter a password for
further playback. There are nine
settings for the parental control as
listed in the right side of the display.
NOTE: After selecting the country, please refer to paragraph 6.5.5 (Parental).
The DVD player default is USA - Adult. To prevent children from viewing
DVD's with a rating above PG-13, the player must be set to PG-13.
31
Page 33

6.5.6 PASSWORD(REMOTE CONTROL REQUIRED)
--PREFERENCES PAGE--
AUDIO
SUBTITLE
DISC MENU
COUNTRY
PARENTAL
PASSWORD
>> CHANGE
DEFAULTS
CHANGE PASSWORD
The password function is used to ensure
the DVD disc-viewing rating system is
utilized. When the user wishes to view a
DVD disc with rating that is above what is
selected in the PARENTAL menu, a
password must be entered. If you set the
country at USA and PG-13, but the DVD
disc is rated Adult, two possible situations
could occur:
A). When attempting to play the DVD disc, the DVD Player would ask for the system
password.
OR
B). The DVD disc could still play however, when the disc chapter plays the section
that is in excess of the PG-13 rating, the chapter won't be played and the DVD
Player will skip to next chapter.
The default password is 2000. To change the password perform the following
procedure using the remote control:
1. Press the SETUP key.
2. Use the key to scroll down to PREFERENCES.
3. Press the (play) key.
4. Use the key to scroll down to PASSWORD.
5. Press the key to access CHANGE.
6. Press the (play) key.
7. Press the NUM key.
8. Enter the password (2000).
9. Enter the new password (4 digits).
10. Confirm the new four-digit password by entering it again.
11. Write this number down in a safe place in case you forget it.
12. Press the NUM key.
13. Press the (play) key.
14. The password is now changed to the new value.
32
Page 34

--PREFERENCES PAGE--
AUDIO
SUBTITLE
DISC MENU
COUNTRY
PARENTAL
PASSWORD
DEFAULTS
>> RESET
LOAD FACTORY SETTINGS
Resets all settings to their default
values when you want to clear preferred
settings. This will not change the
password.
6.5.7 DEFAULTS
33
Page 35
7
7. Basic System Operation
7.1 Connecting the Power
1. Connect the power cord of the DVD Player's
AC adapter to a power source.
2. Connect the other end of the adapter to the
DVD Player's DC IN jack.
7.2 Playing a Disc
1. Slide the cover lock to the right, then GENTLY lift
the LCD screen into position.
2. Press the OPEN button to open the disc cover.
3. Align the disc in the DVD Player, then gently press
the disc into place.
4. Close the disc cover.
5. Press the POWER ON/OFF button on the right side
of the DVD Player.
6. Press the PLAY ( ) button on the DVD Player or
remote control.
7. The disc begins to play.
7.3 Stopping and Removing the Disc
1. Press the STOP ( ) button to stop the disc.
2. Press the POWER ON/OFF button again to turn the
power OFF.
3. Press the OPEN button to open the disc cover.
4. Gently remove the disc.
5. Close the disc cover.
6. Close the LCD screen.
34
Page 36

7.4 Selecting the Next or /Previous Chapter or /Track
Press the NEXT ( ) button to select the next chapter
or track.
Press the PREVIOUS ( ) button to select the previous
chapter or track.
7.5 Pausing and Stepping Through a Disc
1. Press the PAUSE/STEP ( ) button to pause the disc.
2. Once the disc is paused, press the PAUSE/STEP ( )
button again to move forward one frame at a time.
3. To resume normal play, press the PLAY ( ) button.
7.6 Fast Forward/Rewind
1. Press the Fast Forward ( ) or /Rewind ( ) button
to move quickly forward or backward through a
selection.
Each time you press the button, the speed is
accelerated from 2X, 4X, 8X and 16X.
2. To resume normal play, press the PLAY ( ) button.
7.7 Playing in Slow Motion
1. Press the Slow ( ) button to slow a selection's
playback speed.
Every time you press the button, the speed is reduced
from 2X, 4X, 8X.
-No sound will be reproduced in slow motion.
2. To resume normal play, press the PLAY ( ) button.
35
Page 37

8. External Connection
You can connect the DVD Player to any audiovisual
equipment from the DVD Player's output terminals of
DVD Player. You can also connect any audiovisual
equipment to the DVD Player's input terminals.
To switch the DVD Player's signal source between
input and output, adjust the Input/Output switch(IN
OUT).
Set the switch to the OUT position, to transmit signals
from the DVD Player to other equipment.
Set the switch to the IN position for the DVD Player to
receive signals from other equipment.
When the signal source of the DVD Player is in the IN
position, the LCD on the front panel will not illuminate
when no external signal is coming in.
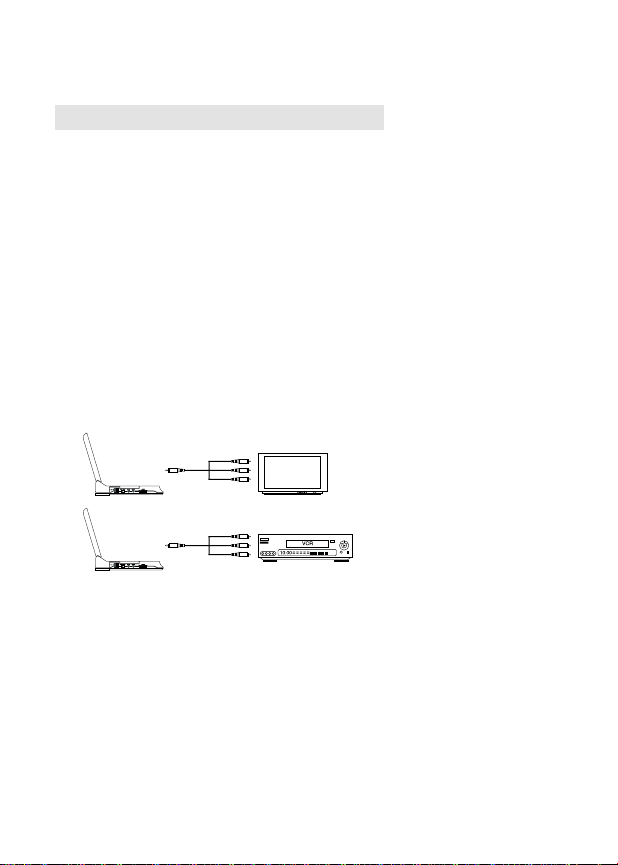
8.1 A/V Out
When the A/V IN/OUT switch is in the OUT position,
A/V signals will come out from the 3-in-1 A/V cable
during playback. Use the DVD Player's AV cable to
transmit signal to the following components:
1. TV with A/V IN terminals
2. VCR/Video Cassette DVD player
3. V8 or VHS video cameras
4. Projector
8
Attention! Please set the IN/OUT switch at
OUT position for default setting, otherwise
no sound/screen will be heard/seen on the
player during playback.
Note:
Copy Guard Protection:
When the DVD player audio/video output is plugged into
the A/V input jacks of a Video Cassette Recorder (VCR)
using the audio/video cables, (red, white and yellow RCA
jacks) poor picture quality may result (i.e. screen on TV
getting br ighter and dimmer) due to Macrovision copy
guard protection contained on some DVD discs.
36
Page 38

Attention! The DVD Player's A/V cable contains three
wires:
- White for audio left channel
- Red for audio right channel
- Yellow for video signal
If not connected correctly, there will be no response
from the external equipment.
Most audiovisual equipment has an IN/OUT switch.
Make sure that the switch on other components is set to
IN when receiving incoming signals.
8.2 S-VHS Out
Some equipment is equipped with a S-VHS terminal,
which you can use instead of the RCA video terminal.
The picture quality of a S-VHS signal is better than an
ordinary RCA signal.
When you use the S-VHS cable, you do not need to
connect the Yellow RCA video cable.
The RCA terminal will send out a signal at the same
time, and you may connect it to another TV set.
37
Page 39
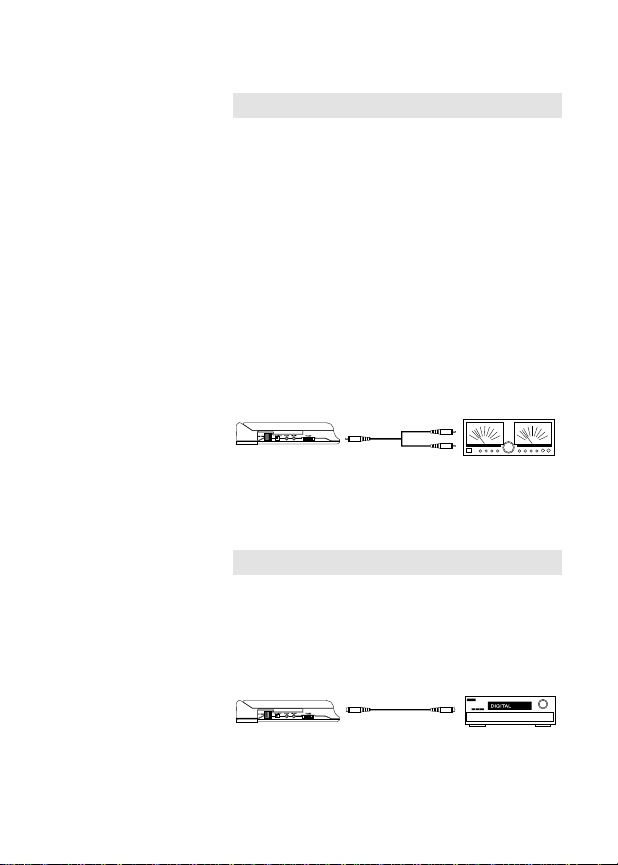
8.3 Stereo Audio Out
You can connect the stereo audio out of the DVD
Player to the following equipment:
(1) Stereo amplifier
(2) 2-channel cassette or open-reel tape deck
(3) DAT
(4) Mini Disc
To adjust the volume, adjust the volume control of the
playback component.
8.4 Digital Out
You can connect the DVD Player to audio equipment
with an AC-3 and/or DTS decoder with an optical cable
from the Digital Out on the side of the DVD Player.
38
Page 40
8.5 A/V Signal Input
When the A/V IN/OUT switch is in the IN position, the
DVD Player will receive incoming signals from the 3-in-1
A/V terminal. Use the DVD Player's AV cable to connect
to the following components:
(1) TV with A/V OUT terminals
(2) VCR/Video Cassette DVD player
(3) Cassette Recorder
(4) V8 or VHS video cameras
(5) Digital Camera
The DVD Player is the playback medium for these
components. You can hear the sound from the DVD
Player's speakers and see the pictures on the LCD
screen.
39
Page 41
9. Battery Installation and Use
The DVD Player comes with a rechargeable high
performance Li-ion battery. Apart from the high capacity,
Li-ion batteries does not have 'memory' effect, so you
do not need to discharge the excess energy before
recharging the battery.
Make sure to charge the battery before use.
Never short the battery. Keep battery out of metal
containers and away from moisture. Store the battery in
a dry place.
The batter y can be recharged up to 500 times. It
takes about 6 hours to fully charge the battery. A fully
charged battery provides 3.5 hours of continuous play.
The battery's energy consumption varies based on
factors such as brightness of the screen and the volume
of the sound.
To charge the battery, leave the battery in the DVD
Player and connect the AC adapter.
When the battery charge is in process, the indicator
illuminates.
When the charging is completed, the indicator blinks.
Once the battery is charged, remove the AC adapter.
The battery will feel warm while it is charging.
The capacity of the battery will decrease after the
battery has approached the approximate 500 recharge
life span. When the energy of the battery begins to run
out quickly, replace the battery
a new battery.
9
40
Page 42

Battery Use and Maintenance
(1) Use only the DVD Player's AC adapter to charge the
battery.
(2) Battery charge and discharge efficiency will be lower
when the ambient temperature is under 50 (10 ) or
over 95 (35 ).
(3) Avoid recharging a fully charged battery.
Installing the Battery
(1) Remove the power supply.
(2) Push the slide door on the back of the DVD Player to the
S-VHS position, to reveal the battery connector.
(3) Close the LCD screen.
(4) Align the battery connector with the pin on the back of
the battery.
(5) Push the battery pack against the DVD Player, then push
the battery to the left side of the DVD Player. You will
hear a click when the battery is in position.
(6) If the power indicator on the front panel turns red, the
battery has been successfully installed.
Removing the Battery
(1) If a disc is playing, press the Stop ( ) button and then
turn off the DVD Player.
(2) Slide the battery lock out from the DVD Player.
(3) While holding the lock in position, slide the battery pack
slightly to the right, then pull the pack from the DVD
Player.
Install Battery
Remove Battery
41
Page 43

10. Cautions and Maintenance
Please follow the following instructions to keep the DVD Player
in the best condition.
Avoid exposing the DVD Player to direct sunlight, high
temperatures, and moisture.
Keep the DVD Player out of the reach of children.
The base of DVD Player will feel warm after long periods of
use. Do not place the DVD Player on a hot surface.
Condensation will take place when the DVD Player is moved
from a cold environment to a warm and humid environment. After
such a move, do not operate the DVD Player for an hour.
Keep all metal contacts clean. Use cotton with contact cleaner
to clean contacts. Do not leave any cotton inside the contacts.
The DVD Player's surface may be scratched. Use soft cloth
with mild detergent to gently clean the DVD Player's surface. Do
not use alcohol, which may damage the paint on the DVD Player.
Unplug the power source when there is thunder in order to
avoid damage to the DVD Player.
Use an exposed finger to release the static on the surface of
the DVD Player before using it in an extremely dry environment.
Avoid using the DVD Player in a dusty environment, such as
the beach.
The laser head is extremely fragile. Do not touch it. Do not use
a laser head cleaning disc to clean laser head.
Do not disassemble the DVD Player for repair and
maintenance.
10
42
Page 44

Contact your dealer for help in locating a qualified service technician.
The DVD Player's AC adapter is specially designed for the DVD
Player. Do not use a substitute DC adapter.
Avoid scratching the LCD screen. Always close the cover when the
DVD Player is not in use.
Use a soft cloth to clean the screen. Do not use water or detergent to
clean the screen.
The remote control comes equipped with a Panasonic CR2052 button
battery. The power consumption of the remote control is very low. The
battery should last at least 6 months. Remove the battery from the remote
control when it will not be used for a long time. The battery liquid will
damage the circuitry of the remote control.
Always pull and unplug the power and signal cables from their heads.
Do not open the battery pack.
Do not expose the battery pack to heat or flame.
Battery pack should be recycled.
Do not short the battery pack's metal contact.
Avoid putting the battery pack in contact with metal objects.
43
Page 45

AUDIOVOX ELECTRONICS CORP. (the Company) warrants to the original retail
purchaser of this product that should this product or any part thereof, under
normal use and conditions, be proven defective in material or workmanship within
12 months from the date of original purchase, such defect(s) will be repaired or
replaced with reconditioned product (at the Company's option) without charge for
parts and repair labor.
To obtain repair or replacement within the terms of this Warranty, the product is to
be delivered with proof of warranty coverage (e.g. dated bill of sale), specification
of defect(s), transportation prepaid, to the Company at the address shown below.
This Warranty does not extend to the elimination of externally generated static or
noise, to correction of antenna problems, to costs incurred for installation,
removal or reinstallations of the product, or to damage to tapes, discs, speakers,
accessories, or vehicle electrical systems.
This Warranty does not apply to any product or part thereof which, in the opinion
of the Company, has suffered or been damaged through alteration, improper
installation, mishandling, misuse, neglect, accident, or by removal of defacement
of the factory serial number/bar code label(s). THE EXTENT OF THE
COMPANY'S LIABILITY UNDER THIS WARRANTY IS LIMITED TO THE
REPAIR OR REPLACEMETN PROVIDED ABOVE AND, IN ON EVENT
, SHALL
THE COMPOANY'S LIABILITY EXCEED THE PRUCHASE PRICE PAID BY
PURCHASER FOR THE PRODUCT.
11
11. Warranty
12 MONTH LIMITED WARRANTY
Applies to Audiovox Mobile Video Products
44
Page 46

This Warranty is in lieu of all other express warranties or liabilities. ANY IMPLIED
WARRANTIES, INCLUDING ANY IMPLIED WAARATY OF MERCHATABILITY,
SHALL BE LIMITED TO THE DURATION OF THIS WRITTEN WATTATNTY.
ANY ACTION FOR BRECH OF ANY WARRANTY HEREUNDER INCLUDING
ANY IMPLIED WARRANTABILITY MUST BE BROUGHT WITHIN A PERIOD OF
30 MONTHS FROM DATE OF ORIGINAL PURCHASE. IN NO CASE SHALL
THE COMPANY BE LIABLE FOR ANY CONSEQUENTIAL OR INCIDENTAL
DAMAGES FOR BREACH OF THIS OR ANY OTHER WARRANTY, EXPRESS
OR IMPLIED, WHATSOEVER. NO person or representative is authorized to
assume for the Company any liability other than expressed herein in connection
with the sale of this product.
Some states do not allow limitations on how long an implied warranty lasts or the
exclusion or limitation of incidental or consequential damage so the above
limitation of exclusions may not apply to you. This W
arranty gives you specific
legal rights and you may also have other rights which vary from state to state.
U.S.A. : AUDIOVOX ELECTRONICS CORPORATION, 150 MARCUS BLVD.,
HAUPPAGUE, NEW YORK 11788 1-800-645-4994
128-5495B
P/N:59.20209.003
CANADA: CALL 1-800-645-4994 FOR LOCTION OF WARRANTY STATION
SERVING YOUR AREA
45
Page 47

12. Troubleshooting
Whenever there is a problem with your DVD Player,
please check the following table before sending the DVD
Player for service.
If you are unable to solve the problems using this
table, contact your dealer for service.
12
Problems Causes Troubleshooting
No power Bad power source Check power cord and power source
Cover unable to close Disc placed incorrectly Replace the disc properly
Unable to play Power is OFF Turn the power ON
No disc inside Insert a disc
Disc placed up-side-down Put the disc in the correct position
Dirty disc Clean the disc
Disc deformed Replace the disc
Condensation on DVD Player Turn the power ON and wait 1-2 hours
before trying again
Blurred screen with mosaique Poor disc quality Replace the disc
No sound Playback speed changed Push Play to resume normal playback
Bad contact on audio cable Check the audio cable
TV volume is too low Adjust the TV volume
Audio output setup error Check audio output settings
No picture Video cable not connected Check video cable
Video component input setup error Check video component input setup
Signal IN/OUT setup error Check IN/OUT switch position
Remote Control Failure No battery in remote control Install new battery
Battery is discharged Replace new battery
Remote control does not aimed the Aim remote control at the sensor of the
sensor of the DVD Player DVD Player
Unable to playback a selected Classified by Parental level
Check level password or reset the parental
program level
Sound or subtitle and initial setup A selected language is not included Select other language with sound/subtitle
in the disc keys
Not the selected OSD language Screen language setup error
Check the OSD language setting in the system setup
Unable to change sound/subtitle Disc contains only one language Check disc contents
Front panel control failure Hold switch is in the locked position Move the hold switch to the unlocked
position
46
Page 48

13.Specifications
Power:Universal AC to DC switching power adapter. DC 12V/2A
AC to DC power adapter, approx 3.5 hours playing time with
battery.
Playing Discs: DVD,VCD(v2.0),CD,SVCD,MP3
Dimensions Inches (mm):6.62(168.3)W x 6.77(172)D x 1.38(35)H
Weight: Approx.2.2lb(1kg), without battery pack
Display: 6.8 4:3 TFT-LCD, Resolution 384 (RGB)
by 234
Video Terminal: Composite input/output x 1, S video output,
composite input RCAx1Audio Terminal
Analog out: Two channel downmix output, built-in two-
channel stereo speakers, headphone jack
Digital out: DTS/AC-3/PCM optical output
Analog in: Left and right channel input
DAC: Audio 24 bit/96KHz, video 10 bits
Remote Control: Card size wireless remote control unit
13
Region Management Information
This DVD Player is designed and manufactured to the Region Management Information
recorded on a DVD disc. If the region number described on the DVD disc does not
correspond to the region number of this DVD
Player. this DVD Player will not play the
disc, and the OSD message "WRONG REGION" will display on the screen.
Dolby License
Manufactured under license from Dolby Laboratories. "Dolby" and the double-D
symbol are trademarks of Dolby Laboratories.
Confidential unpublished works.©1992-1997 Dolby Laboratories. All rights reserved.
================================================================
Macrovosion License
This product incorporates copyright protection technology that is protected by method
claims of certain U.S. patents and other intellectual property rights owned by
Macrovision Corporation and other rights owners. Use of this copyright protection
technology must be authorized by Macrovision Corporation, and is intended for home
and other limited viewing uses only unless otherwise authorized by Macrovision
Corporation. Reverse engineering or disassembly is prohibited.
Note: There will not be a prior notice for any change in this menu.
47
 Loading...