

Page 1
AUDIOTOX™
COMMUNICATIONS GORP.
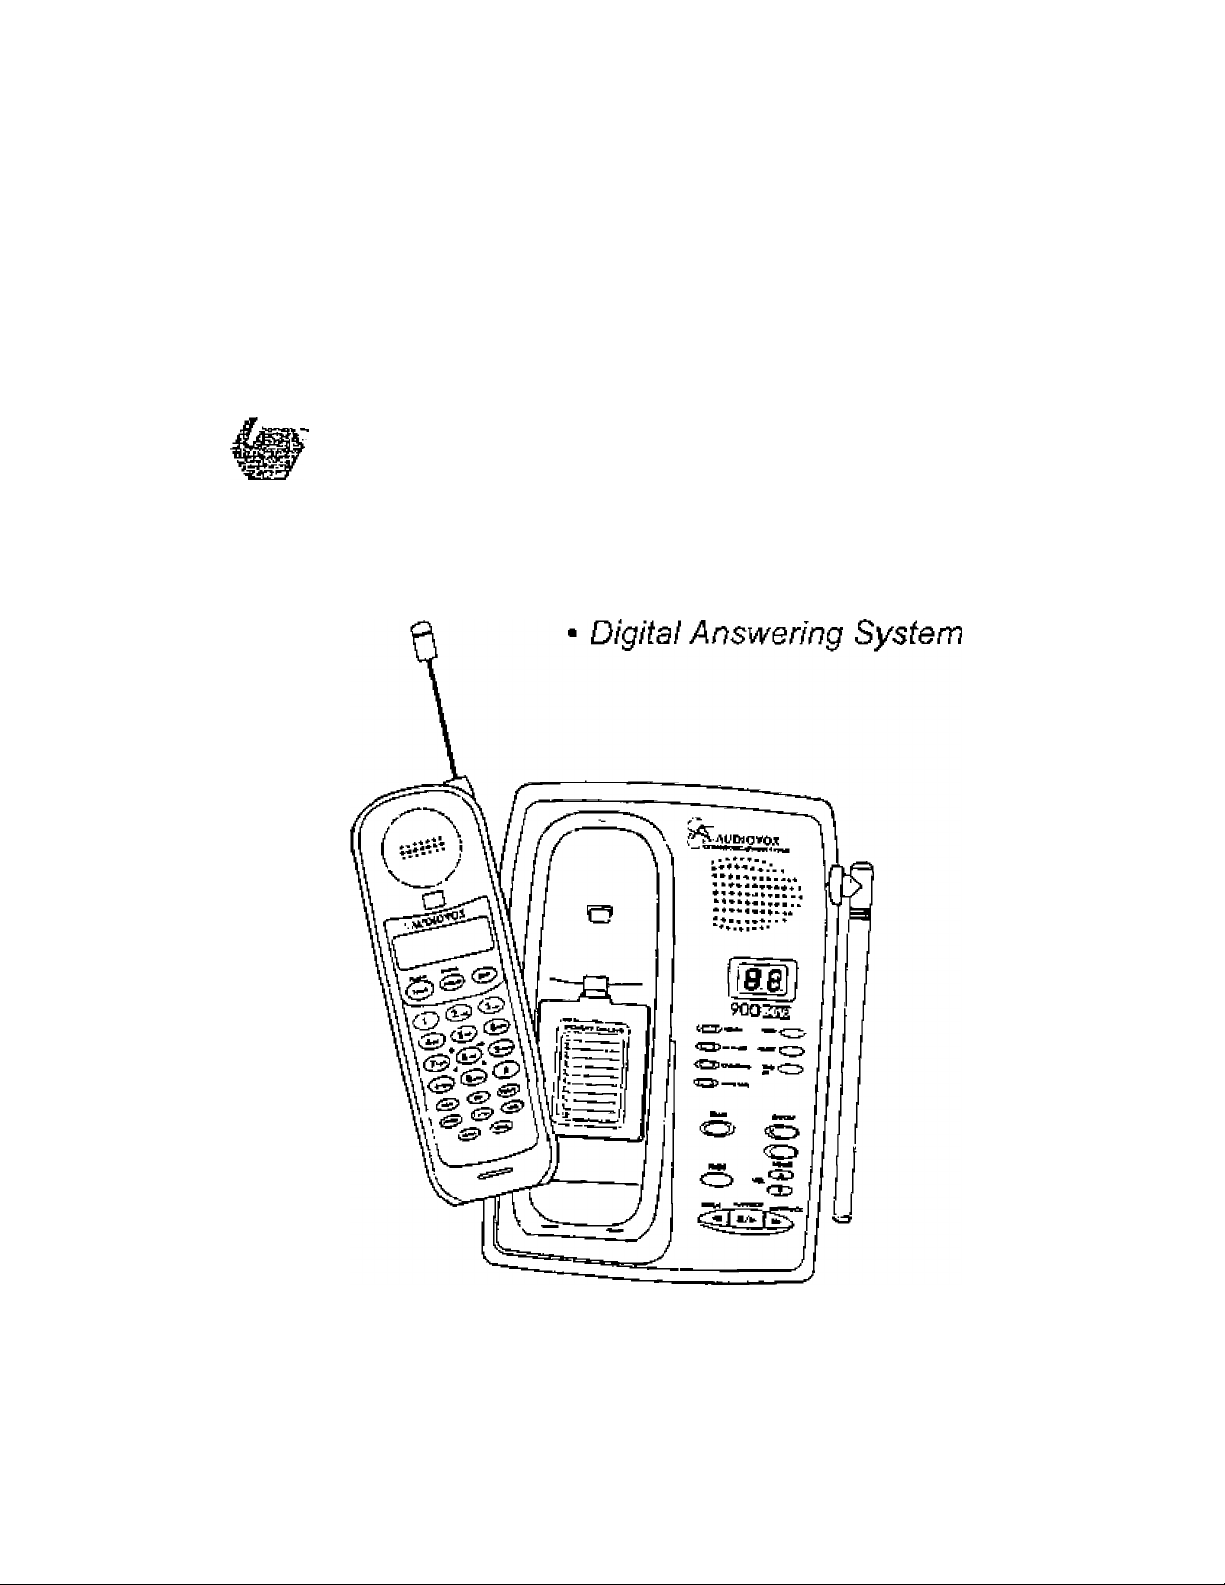
Cordfess Telephone
• 900MHz Digital
* Caller ID
DT 941 Cl
IWPORTANT : REVIEW [MSTRUCTIONS BEFORE OPERATION
Page 2

■ TABÍiÉ OF CONTENTS
ENTRO üUCnON,,,.*...........
Sgecial Feelunes
Parti Chick EJii....................
FCC ANO 1C REGULATIONS____________—
IMPORTANT $AfETV [HSTRLTCTJONS,.
REPLACING THE 0ATTERY PAC!i.„„,
GETTING STAHTEO-,
wall mounting
EXAMPLES OP THE HANOSrr DISPLaT
THE HANDSET LAVOUr—
THE SASE UNIT LAYOUT..„
BASE UNIT FEATURES ANSWERING be VICE™
QUICK REFERENCE GUIDE,.
BASIC OPERATION.,
AOVANCEO FUNCTIONS.-..
Call Ws'btmg
Switctling Callt Using Flash,,,
TftmtKMATf Tone
PfogiirtVT'Ing fling sf.............................
Changing Hingei- турн
Mej&ag« Waiting.
Tuffling 0(1 The Ringer,
Cheeking The fiingar Type
Cl««r/Deltte (CUUuEL) кеу^....
Advanced Dialing
MEMORY GIALING—
Slonng Mermjfy Speei Dial Numlfgra,,,,,,
Dialing Fjpm Memory.........................................................................................
Changing Stortd Nuinbere
Deleting Sinned NumtHrs
Stoning Special Codas,.,.,................................................................................
□uick Memary Oisllng{MEMitMEM2 keys),..-.-...................................................
CALLER IQ iCiD)..........................................
Haceiving And Sibling calls.,„
Diasng Ffom Caller ID (СШ) Memory........................................................
Out 0( Area Celia..............................................-...............................................
■Privale" Caila.
Transmlisisn Emor,......................................................
Oeieling Number^
SETTINQ UP YOUR DT SAI Cl DIGITAL ANSWERING DEVICE..
Answering Device Pragrammirij
Set Aflflouncs Only,
Set Ouigomg Message
Sat Security Code
Sal Day and Т1тв„„„„
Set Audible Meuagt Alen.
'i -»brtAfllí"®'» -I
^ 2 An WA RH A NT Y-,,.
DT ■ gatcí' AÁsWiÉítiNG ■Ьёу1СЕ.,11_:Г™
OM/OFF Key,
Memo Key,
Erase Key.
Repeat KsyPlaylSlop Key.
Skip^uick Key...................................................................
Vbhjme UtVOdwn Keys
Menu, Sereci. Time/Sel Keys
REMOTE OPERATION OF THE DT 941CL..„.
Base Unit Mcssaga Window (LEDJ..................................................................
fleview Of Remete CoFTunarids............................................-.........................
ADDtTIOHAL OPEflATlNG TIPS
MAiJ4TENACE.„,
, IN CASE OF DIFFICULTY---------------------—
TECHNICAL SPECtPICATlONS..,-
......................—.............
___________
.......................................
.................................
....................
..................................................................
..........................................................................
...........................-.................................
_____-..................................
....................................................................
...............................................................
..
.........................
...............................................
....................
________________
.................................
........................
.................................
....................
...................
................................................................................
...............................................................................
...........................................................................
.....
............................
_______
_____
.................................
...................................
.............................
....................
............................
........................
................................. .....................
...............................................
...
.
........................
.....................................
—
_
___________
.
.
.
.
...............................
.....................—.....
....
................................
____—...............................
.
-
....
..............................
.....................................
.....................
.............................
....
..
......................
.....................................
....
..
.
....
.....
..
...............
.
..........
..........
.
..
..........
..
.....
..
....
.......................
Page
■t
' г
3
‘ 4
7
В
■ 12
14
■IS
ie
' 17
■ IS
„ ig
■■ 21
■ St
72
гг
- 22
' 22
■ 23
- 3
' г*
.. 24
■г*
- 24
■25
■ is
■ se
.
.
■ 216
ss
. 27
--------
-за
-28
■ 28
' 29
' 29
rtlJ^íl UN,
■ £Э
■ эз
31
■ 31
32^ '
■зг
■ за
■ 33
■ 3*
3
'»■3V
- 36
■36
■37
■ 37
■ 37
■37
■37
37
■ 3«
33
.
■ 39
, 40
41
42
44
46
DTÍiinZ.pei
5Я*Я9. 11:2в PU
Page 3

iEQ
______МШ ^WSSisiK, ^..
1ШВ00ШЩ10М<:^
! i ■' ■? ‘.Ai?
-®-
Thanli you tor purchiasirg this
AUDIOVOX itlephona. Your
AUOIOVOX OT &41CI integrated
Telephone Answering Device ( ITAO)
combines the teaiures ol a digital
condleas phone with a digital [tapeioss]
answering device.
Unlike most other cordless phones, the
AUDiOVOX DT 941Ci digUrzea your
voice using advancgJ^OPC^digital
voice ddding !o"'^vide noise and
distortion Iree periormance. In most
conditions, you wilt not be able ic tell
you are using a cordless phone. Gone
are the annoyances of static, interfer*
ence and having to listen to other
people's conversations on your cord
less phone.
The AUDIOVOX DT 34'lCt scrambles
your voice before it transmits It. This
allows you the security o! krtowing that
no one can tune in and eavesdrop on
your conversations.
The AUDIOVOX OT 941 Cl decodes
and displays name and/or number
Caller ID (CIO) intormaiion where
available and when subscribed to. The
alpha-numeric display can show both
the name and number of the catling
party. Up to 24 name characters or
11 phone number digits can be
displayed.
With the AUDIOVOX DT 94101, the
user can easily answer a call by
pressing any key other than the OFF,
MUTE or VOLUME Keys. In addition,
the handset keypad and display
illuminate while the handset n'ngs to
signal an incoming call* This Is very
useful in a dark environment.
The AUDIOVOX DT Э41С1 also
provides a one-way Page/Rrd.
Pressing the base PAGE key will
cause Ihe handset to ring in a manner
which distinguishes it from non-net
incoming ringing. This can be used to
alert the handset user, or to simply
locate the handsel in Ihe event that it
I.S misplaced.
The AUDIOVOX 0ТЭ41 Cl uses Special
memory In both the base and handset
which is not susceptible to power
lailures. This provides permanent
storage cf all flipmory dial numbers.
Caller ID information as well as the
base and handset security codes.
When an optional battery pack is
installed In the base unit, the
AUDIOVOX OT 941 Cl uses this battery
pack to provide operational backup In
case of power failure. In this way ycu
have access to all normal phone
functions during a total power outage.
Calls can stiff be placed and received
without Interruption. More Ihan 6 hours
backup wifi bie possible wrih a fully
charged battery pack In the base unit.
The AUDiOVOX DT Э41 Of informs you when another extension is currently
in use on the same phone line. The
phone will also alert you when you are
Out of Range, even when you're not
using the phone!
A
Page 4

5Cü
■ -1- í ^''í) ’:■’ ■ -"'■''' ■'
-é-
SPECIAL FHATUneS - PHONE
■ 900 MHz Operation.
• Fully Digital Link between Handsel
and Base.
• Oigitally-Scramtoled Voice Cortimunlcation.
• Afphanumeric Catl Waiting Caller
ID /
• 2 row by 12 character Sx7 dot
matrix alphanumeric display,
^ SO CaJler 10 memory locations.
■ Backlit display on the handsel.
• Backlit handset keypad.
• 20 location Programmable Memory
tor 20 Digit Phone Number,
■ Special one-tou'ch memory keys
[MEM1 andMEM2] for emergency
or treguently daPed numbers,
’ 10 Channel Operation with auto
channel selection.
' Oul-oFRange indication while the
handset Is in use or in standby
mode.
• RemovabJe handset battery pack.
• Spare battery charger In the base
unit '
• Complete battery back-up in case
of power failure {with optional spare
battery pack installed in base).
■ Face up or Face down Handset
charging.
• Easy answer - When the phone
rings, aimpfy press any key other
than OFF, MUTE, or the Volume
Keys on the handset to answer.
» Auto hang up when returning the
handset to the base cradle.
• Extension in use Indicator,
• 24 Bit Digital Security Code.
• Tone and Pulse Dialing.
• Low Battery Detect and Warning
indicator.
• Up to 7 hours continuous talk time
or 7 days standby time.
• Volume Adjust on Handset,
- REDIAL. HOLD, PAGE and MUTE,
■ Hearing-Aid Compatible Receiver.
■ Detachable power supply.
' Non-volatile storage of security
code and memory dial records.
■ Programmable Ringer Types,
This manual Is designed to make you
familiar with the AUDIO VOX DT941 Cl.
We strongly recommend you read the
manual before using your phone.
■é-
SPECIAL FEATURES-ANSWERING
DEVICE
* Digital (tapeless) answering device
provides up to IS minutes of
message storage.
• Base courrtar provides data such
as the number of messages,
volume level, and answering mode.
' You can record separate qu(going
messages for both answer and
announce only modes.
' Messages are retained In the event
of a power failure; no battery
required.
' Messages are tagged with a
OT«i oi.es J 41^4-
spoken tlme/day stamp.
Messages can be erased
individually or collectively.
The OT 941 Cl ar^swering device
can be accessed remotely for
retrieval of messages and other
functions.
Voice prompts for easy setup.
Audible message aJerL
Programmable to answer after 2,
4, e rings; or toll saver option.
Quick feature provides faster
playback of messages.
Memo feature.
Page 5
■|^'3ó
*LÌ;^'.'.Tt
'JJRC
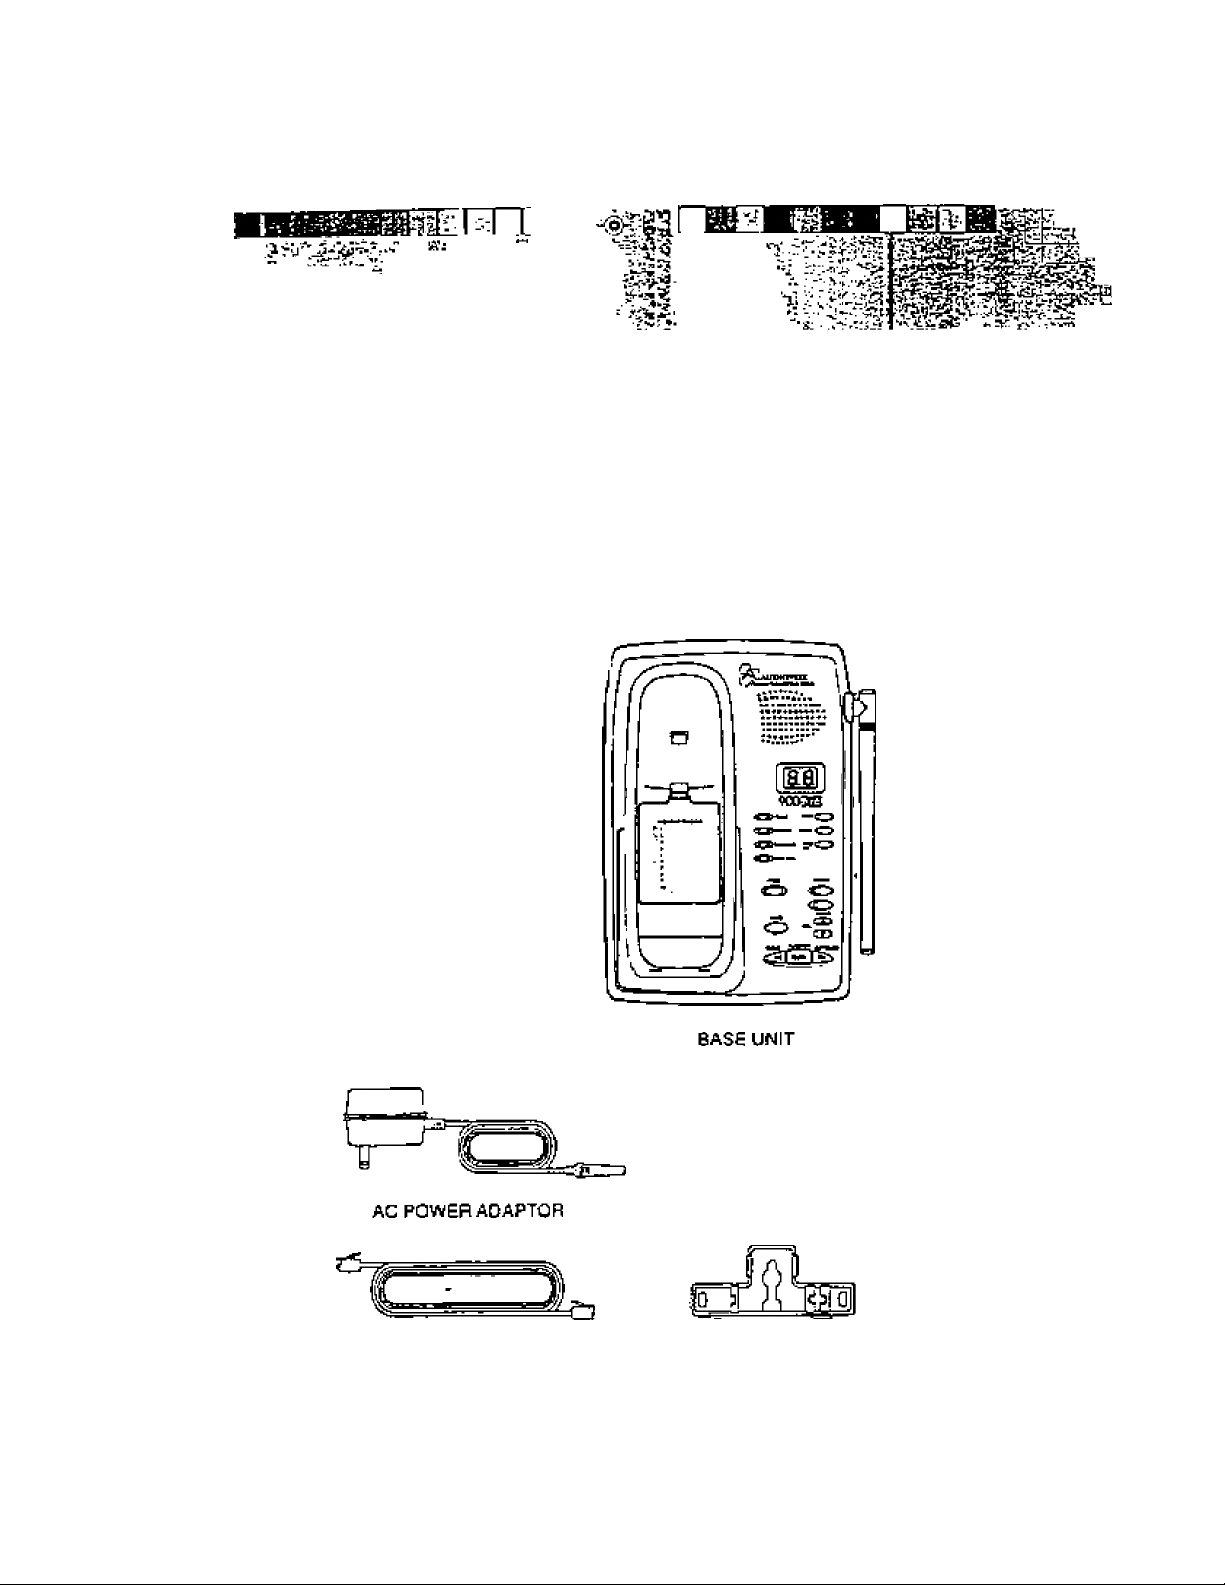
Parts Check List
Hardset
Z- Base Unit
Z. Wall Mounting bracket
4. AC power adapter
5. Battery pack
e. Telephone line cord
''r\
f tiiiiil I
■iJDcD
©jiCi©
etfStSi
oo «3
oo o
o ffl
To purchase replaceinent battery
packs, call AjDfOVOX
COMMUNICATIONS at tBOO) 229-
V
HANDSET
TELEPHONE UNE CORO
* He
Q h
BATTERY PACK
WALL MOUNTING BRACKET
»V», l£i4l^
Page 6

:S.r V ití'! FCGí^andilGiRegüIations
- • ■ 1 . - . -kj .ji • ■ ■ .^ - I ^ ■ -Ir-r*. T-.S- .. -=ii ^ ^ -I
~<Sr
This equipmenl complies with Parts 1S
and ea ci the Federal Communications
Commission (FCCJ rules for the Untied
States. It also complies with regular
tioris RSS210 and CS-03 of industry
and Science Canada. Operation is
subject to the following two conditions:
{1} this device may not cause interfer
ence. and fa) this device must accept
any interference, inciudrng interfer
ence thal may cause undesired opera*
tion at the device,
A label is located on the underside of
the base unit containing either the FCC
registration number and Ringer
ËqtitvaJence Number (R£N) or the
Industry Canada fIC) registration
number and Load Number. You must,
upon request, provide this information
to your local telephone company.
This equipment is compatible with
Inductively coupied hearing aids.
Should you axperienca trouble with
this telephone equipment, please
contact:
AUDIO VOX COMMUNICATIONS
SERVICE DEPT, at (800) 229-1235.
For reparr/warranty information. The
teiephone company may ask you to
disconnect this equipment from the
line networkuntf! the problem has been
corrected.
FCC Part 15
Warning: Changes or modifications to
this unil not expressly approved by the
party responsible lor compliances couJd
void the user's authority to operate the
equipment.
The equipmenl has been tested and
found to comply with part 15 of the FCC
rutes. These limits are designed to
provide reasonable protection against
harm tul interference in a residential
installation. This equipment gener
ates, uses and can radiate radio
frequency energy end, if not installed
and used in accordance with the
instructions, may cause harmfuf inter
ference to radio communications.
However, there rs no guarantee that
interference will not occur in a particu
lar InslaJIaticn. If this equipment doss
cause harmlul interference to radio or
television reception, which can be
determined by turning the equipment
off and on, the user is encouraged to
try arid correct the interference by one
or more of the following measures:
- Reorient or relocate the receiving
antenna.
- increase the separation between-
the equiprnent and receiver,
- Connect the equipment into an
outlet or on a circuit different from
that to which the receiver is con
nected,
- Consult the dealer or an experi
enced radio/TV technician for help.
0TH1Q].p»
««M, 1î;i9 PM
Page 7

- «..b—
v^ïïS#;ii:riH^.
^ b ' fi^ï' -■ ^ **■
^^.:k.^.-,-,-; 'i,
• W - .- ;..■»■ iJrLÎîiË^*
FCC Part SB
The PCC requires Dial you connect
youf cordless teleptione to the nation
wide telephone network through a
modular telephone jack (USÛC flJ11C,
RJ11W or RJ14).
Your telephone company may cfiscon-
tinue your service if your equipment
causes harm to the telephone network.
They will notify you in advance o(
disconnection, if possible. During
notification, you will be informed of
your right to file a complaint with the
FCC. ^
Occastonaify, your telephone com
pany may make changes in its lad II-
ties, equipment, operation, or proce
dures that could affect the operation
of your equipment. If so, you wifi be
given advance noUce of the change to
give you an opportunity to maintain
uninterrupted service.
The base unit contains no user serv
iceable parts. The handsel contains
a user replaceable battery pack.
If it Is determined that your telephone
equipment is malfunctioning, the FCC
requires that It not be used and that
it be unplugged from the modular jack
until the problem has been corrected.
Repairs to this telephone equipment
can only be made by the m^ulacturer
or ftg authorized agents or by others
who may be authorized by the FCC,
For repair procedures, foilow the
instructions outlined under ihe
AU DIO VOX Limited Warranty.
This equipment may not be used on
colrr service provided by the phone
company or Party Lines.
The REN is useful in deterrnining the
number of devices you may connect
to your telephone line and still enable
the devices to ring when you receive
a call. The general rule is that the REN
value should not exceed S.OA total;
however, contact your local telephone
company tor the specific number In
your area. '
1C (Industry Canada]
This telephone is registered for use in
Canada.
NotioeiThe REN assigned lo this
device denotes the number ol
devices you may connect to
the telephone loop, which is
used by the device to prevent
overloading. The termination
on a loop may consist of any
combination of devices
subjected only to the
requirement that the sum of
the REN does not exceed five
(5-0) '
Notice;The Industry Canada label
identifies certified equipment.
This certification means that
the equipmeni meets certain
telecommunications network
prolective, operational and
safety requirements. The
Department does not
guarantee the equipment will
operate to the user's
satisfaction.
□T»*faa.(iei
srsiran. 11:20 PM
Page 8

Bsiore installing this egui^Jmertl, ussfs
should ensure that H is pEfnnisstbls to
be connected to the tadlities ol the
local télécommunications company.
The equipment must also be installed
using an acceptable method ol
connection. The customer should be
aware that compliance with the a^ve
conditions may not prevent degradation
of services in some situations.
Repairs to certified equipment should
be made by arr authorized Canadian
maintenance facility idesignated by the
supplier. Any repairs or alterations
made by the user'to this equipment,
or equipmani mallunctiors. may give
the teiecommimications company
cause to request the user to disconnect
the equipment.
Users should ensure for Iheir own
protection that the electrical ground
connections of the power utility,
telephor^a lines and internal metallic
water pipe system, if present, are
connecfed together. This precaution
may be particuiarty important in rural
areas.
Caution: Users should not attempt to
maKe such connections
themselves, but should
contact the appropriate
electrical inspection
authority, or electrician, as
appropriate,
YourAUDlOVOXDT9<i1Cl1s designed
to operate at the maximum power
allowed by the FCC and 1C, This
means your handset and base unit can
communicate only over a certain
distance ' which witi depend on the
location of Ihe base unit and handset,
weather, and the construction and
layout of your home or office.
CrT94lûÎ.ffii
lf=
Page 9

When using your telephone equipfnent.
basic satety precautions should always
be followed to reduce the risk ol fire,
electric shock and ln|ury to persons,
including the following;
Read and understand aJi
infitfvicttons,
Z. Follow all warnings and instructions
marked on the product-
7, This product should be operated
only Irom ihe type of power source
Indicated on the marking label. If
you are not sure of the type of
power supply to your home, consult
your dealer or local power company.
a. Do rtoi allow anything to rest on the
power cord. Do not locate this
product where the cord will be
abused by persons walking on iL
3, Unplug this product from the wall
outlet before cleaning. Do not use
tiguld cleaners pr aerosol cleaners.
Use a damp cloth for cleaning.
4. Do not use this product near water
[for example, near a bath tub,
kitchen sink, or swimming pod).
5. Do not place this product on an
unstable carl sland, cr table. The
product may fall, causing serious
damage to the product
6, Slots and openings in (he cabinet
and the back or bottom are prodded
for ventilation. To protect It from
overheating, these openings must
not be blocked by pfacing the
product on the bed, sofa, rug, or
other similar surface. This product
should never be placed near or
over a radiator or heat register.
This product should not be placed
in 3 built-in irrstallaiian where proper
ventilation Is not provided.
9, Never push objects of any kind into
this product through cabinet slots
as they may touch dangerous
voltage points or short out parts
that could result in a risk of fire or
electric shock. Never spill liquid of
any kind on the product.
10, To reduce ihe risk of electric
shock, do nof disassemble this
product, but take it to a AUDiOVOX
authorized service facdity. Opening
or removing cabinet parts other
than specified access doors may
expose you to dangerous voltages
or other risks. incorrect
reassembling car cause electric
shock when the appliance is
subsequently used. —
11, Do not overload wail outlets and
extanslon cords as this can result
in the risk of fire or electric shock.
OTwioi.pes
Page 10

-rт^■
Ог^- С'’ '
iQi."
:ì IM ВО RTANBSAFETiYiINSTR U©3il®]
12>Unp[ug this produci fram Ihe wall
outlet and feier servicing to a
AU010V0X authorized service
laciiity under the fallowing
conditions;
A. When Ihe power supply cord or
plug is damaged or frayed«
Б. If tlpuid has been spilled into
the product.
C- lithe product has been exposed
to rain or wafer.
D. it the product does not operate
погтлаНу by to!towing the
operating instructions. Adfust
only those Controls that are
covered by the operating
instructions, because improper
adjustment of other controls
may result in damage and win
often require extensive work by
a AUD10V0X authorized
lech n icien to f Mfd f & the p roducf
to norma! operation.
13-A void using a telephone (other
than a cordless type] during an
electrical storm. There rnay be a
remote risk of electric shock from
lighting.
14, Do not use the telephone to report
a gas leak in the vicinity of Ihe
leak.
AUDIO VOX COMMUNICATIONS
SERVICE DEPT, at (300) 229-1235.
E. If the product has been dropped
F. If the prodLtct exhibits a distinct
от»*1ог.рв!
and the cabinet has been
damaged.
change in performance.
SAVE THESE INSTRUCTIONS
1i;» PM
Page 11

■ж ---г
Ч. h*-^ '
^i'^1
ii■;; * I?■ ■ ■ ’ V>?i-‘i'ri 'l '^z'i^^rc'-y.- -. r-r -zz
0 N s i.te^sïiREPC^AGING TH E BATTERY- PAGKt |
Charging The Handset Battery Раек
The handset of your AUDfOVOX
DT Э41С1 is powered by a recharge
able battery pack. It charges aulomattcaNy whenever the handsel is in
the base. You should charge the
battery pack for 1S hours when you
first receive your phone. You'll kriow
the battery pack needs charging
when;
' The phone emits a warring tone
when you press theCTALK)key,
The low battery message is
displayed:
LOU BPTTERV
The handsel seems completely
dead, the display is dear and the
handset does not beep when you
press the keys.
To Charge The Battery Pack
To charge the battery pack, place
the handset in Ihe base unit. The
CHARGING indicator wilt tight to show
the handset is seated property and
the battery pack is charging, ft Is
recommended that the battery pack
be charged for at least IS hours
initially and S hours for maintenance
charging. Youcanuseyourtelephone
before that with diminished capacity,
but It is best to charge the battery pack
fulty, ft will take several recharge
cycles to maximize the charge capacity
of your battery pack. The maximum
battery life between charges is 7
hours of continuous talk time or 7 days
of stand-by.
Alternatively, if you have purchased a
spare battery pack and it has been
charging in the base unit, simply
exchange the drained handset battery
pack with the Iu1ly charged replace
ment battery pack from the base
charger. Place the drained handset
battery pack into the base charger to
recharge.
The base spare battery charger does
NOT charge a battery pack as quickly
as the handsel battery charger, A full
charge requires
the spare battery charger.
It's Impossible To Overcharge The
Battery Pack . i '
The battery pack can be recharged
many Lmes, but if you geta fow-battery
signal even after t6 hours cf charging
in The base cradle (or
base spare battery charger), the bat
tery packfs) should be replaced.
To purchase replacement battery
packs, call AUDtOVOX
COMMUNICATIONS AT (SCO) 229
133S-
A Word About Rechargeabte
Batteries . j
Vour Nicad battery pack recharges
whenever Ihe Handsel is returned to
the Base Unit cradle. You may return
Ihe Handset to its cradle whenever
youTe not using the phone.
However, to maximize the life of your
battery pack, do not return your
A UO10VOX OT 941 Cl Handset to the
Base Unit cradle for recharging until
the LOW BATTERY message is
displayed.
24 hour when using
24 hours in the
0Tï4iaz.p«i
Hull. I}»PM
Page 12
To Replace The Hendaet BaUery
Pack
Follow ihe steps below:
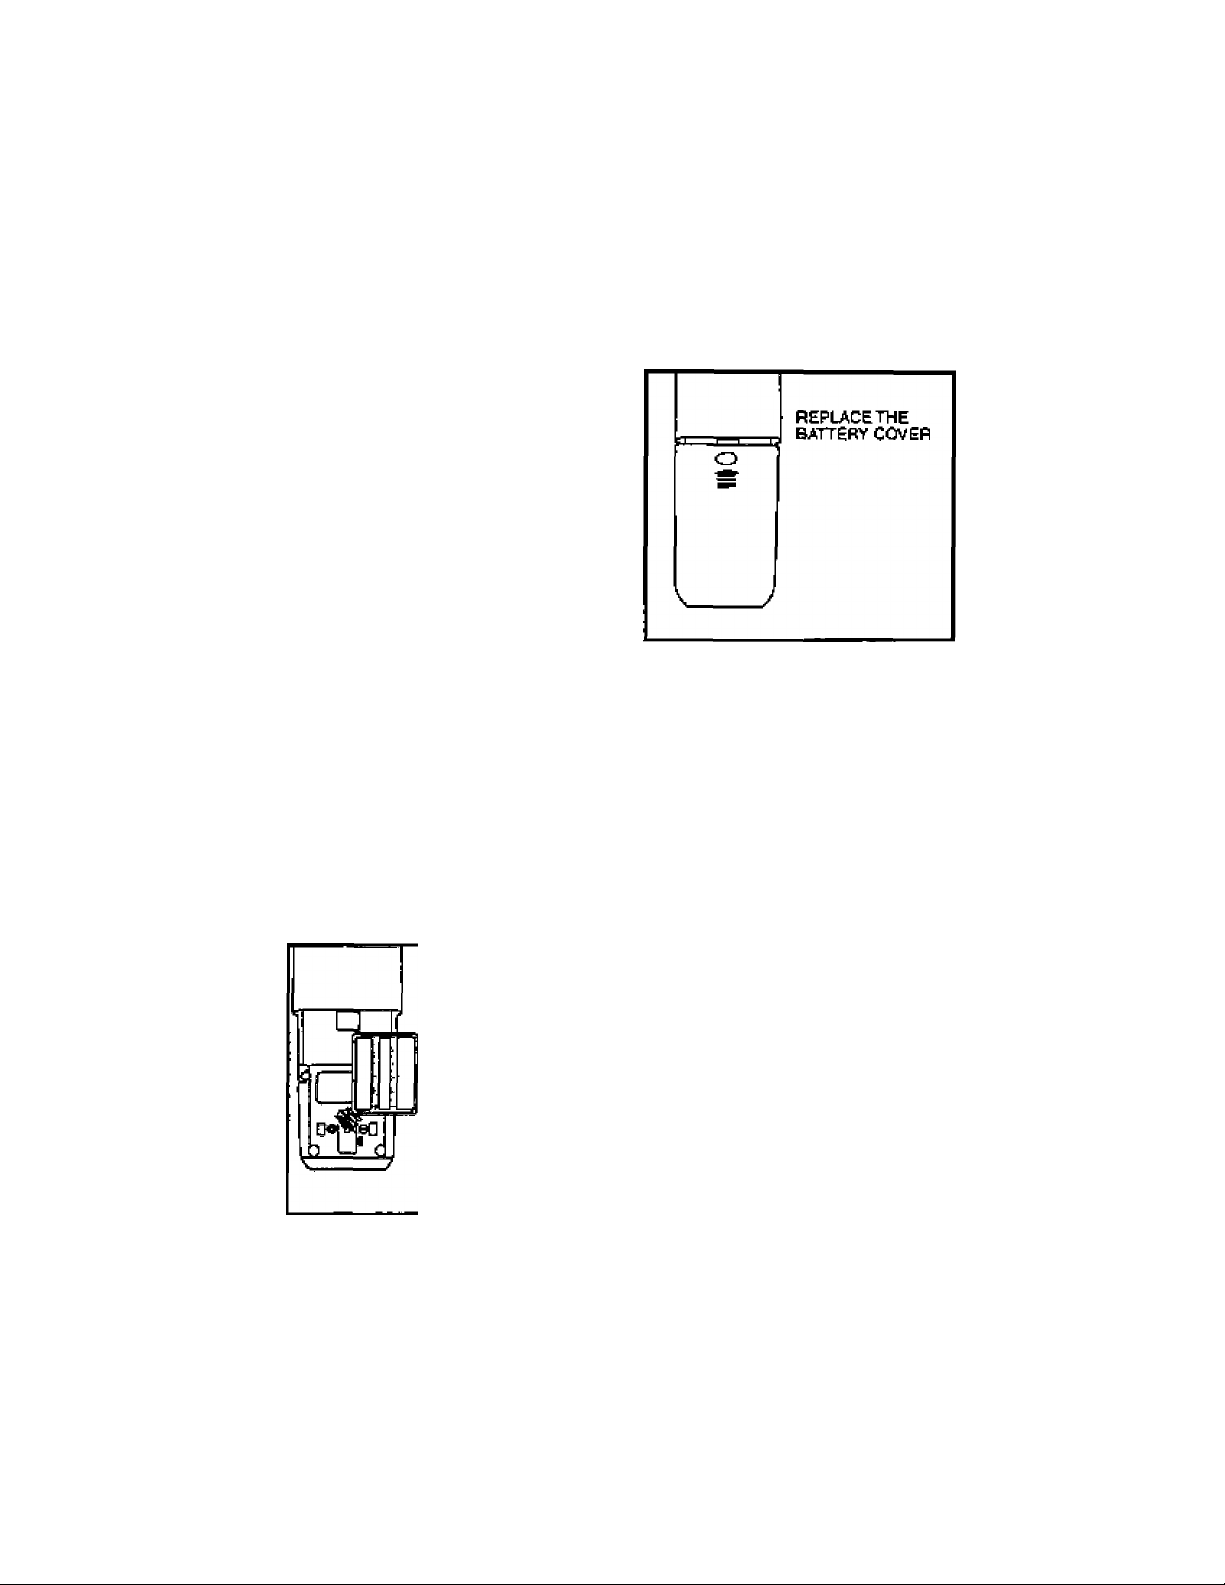
T. Remove the battery case cover by
pressing on the ridged lines and
sliding downward-
PRess and suoe
DOWNWARD
j
5, tf the new battery pack is not
already charged, place the hand
set in Ihe cradle of the base unit
to allow it to charge for IQ hours.
2. Discard the old battery pack. Don't
pot the old battery pack in a trash
compactor or a lire it could burst.
3. Place the new battery pack in its
housing with the me tat contacts
facing down.
PLACE THE NEW
BATTERY PACK
tMTD THE
BATTERY
COMPARTMENT
P1.EASE NOTi THE
CORRECT POSITION
OF THe BATTERY
PACK WHEN
CHANOINO BATTERY
4. Replace the battery case cover by
sliding Ihe cover upwards-
CAUTION: ^
To reduce the risk of fira or frijuiy to
persons, read and follow Ihe |istruc-
[ions ' j
1- Use oniy AUOIOVOX rKharg sable
battery pack BT 911.
2. Do not dispose of the battery in a
fire. The cell may explode.
IMPORTANT: Do not dispose of this
battery into household garbage. Forinformation on recycling or proper
disposal, consult your local solid
waste coNection or disposal
organlzaiion.
3. Do not open or mutilate the battery.
Released electrolyte, is corrosive
and may causa damage to the
eyes or skin. It may be toxic If
swallowed.
“I DTiilÜí.píí
la
10 Mint, li'io PH
Page 13
Exenciss cafe in handling batterrea
in order not ro short the battery
with conducting maté rials such as
rings. braceietSi and keys. The
battery Of conductor may overheat
and cause burns.
To purchase replacement battery
packs, call AUDtOVbx
COM MU Kl CATIONS at {SOO) 229
1235.
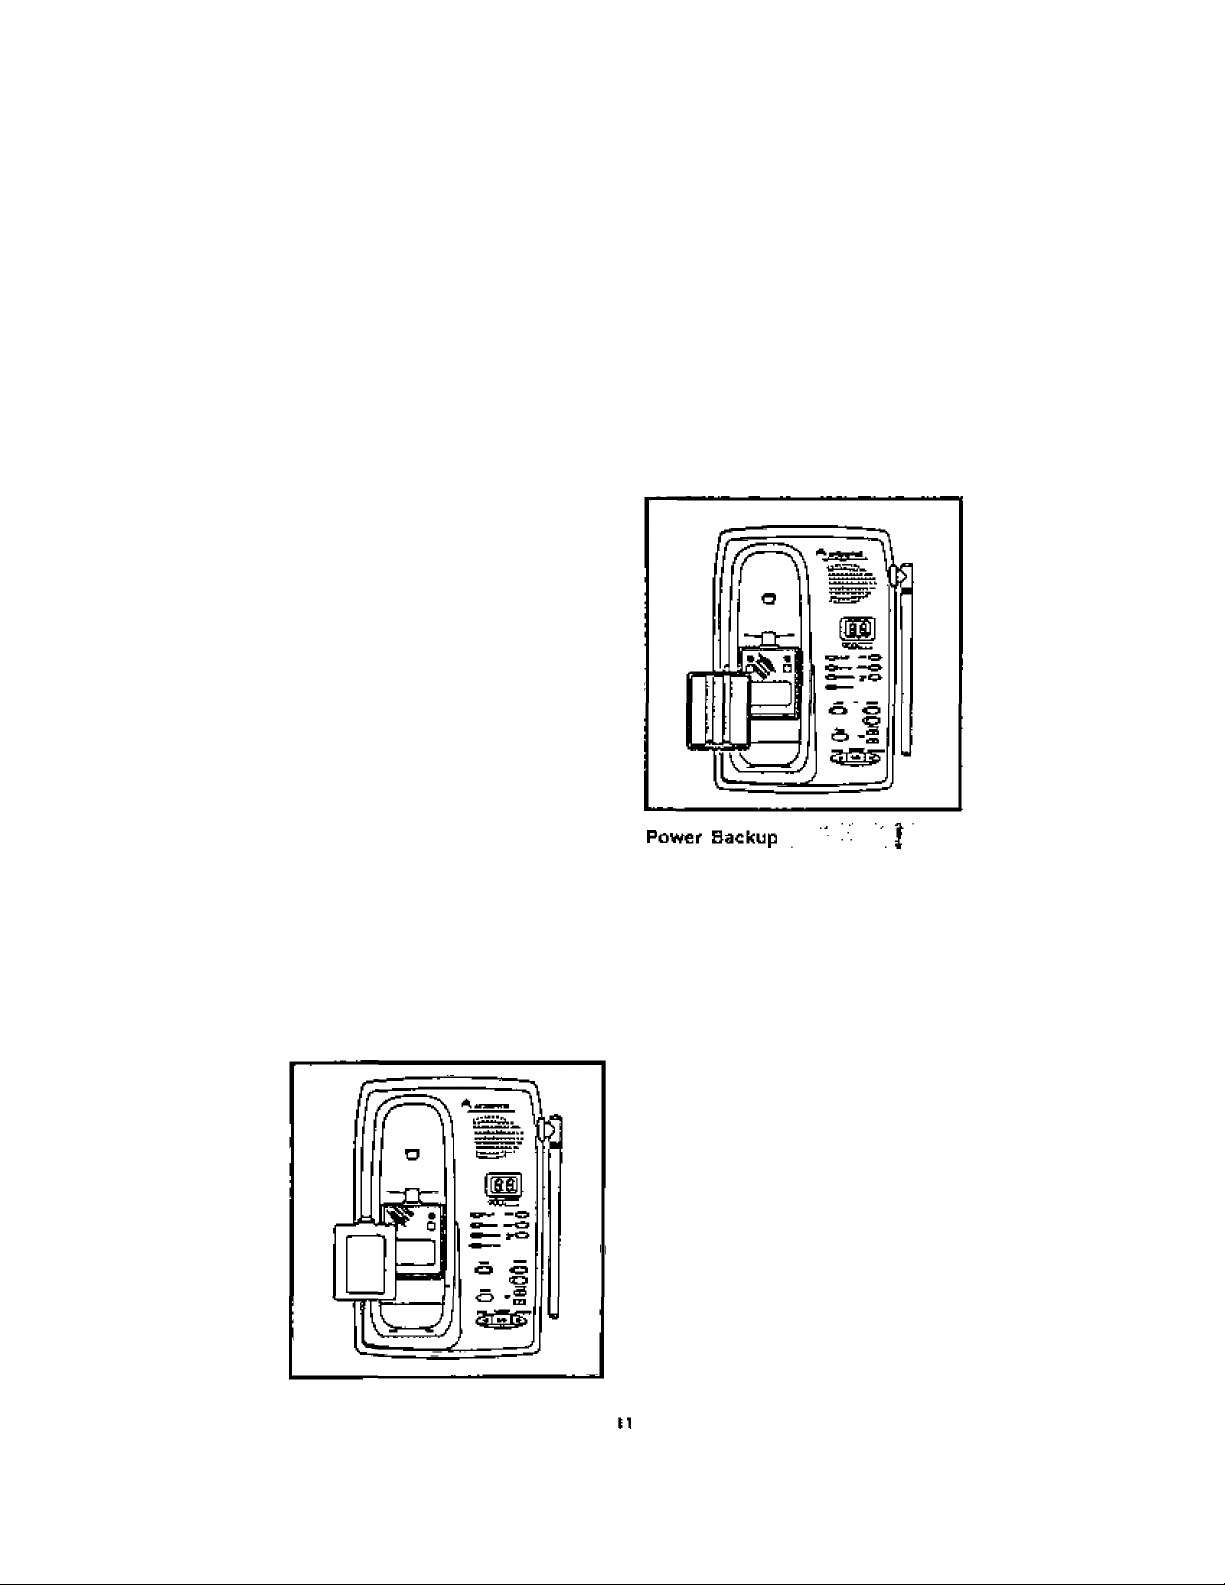
SPARE BATTERY CHARGER
The AUDIOVOX DT 941 Cl has a builtin spare Battery Charger, which is
located in the cfadle of the Base Unit.
NOTE:
In order to benefit from this feature, you
must obtain an optional Spare Battery
from an authorized AUDIO VOX dealer,
or by - contacting AUDIOVOX
COMMUNtCATTONS at (800) £29^
1235.
Installation
Remove the Spare Battery charger
cover by pressirtg the release tab and
lifting up.
Place a battery pack in the Spare
Battery charger. Make sure the metal
charging contacts on the underside of
the battery pack are aligned with the
charging contacts in the Spare Battery
charger.
When a Spare Battery pack is installed
in the Base Unft. the AUDIOVOX
DT 94lCt uses this battery pack to
provide operational backup in case ef
a power Failure. If you .have a fully
charged battery pack In the Spare
Battery pack charger and there is a
power Outage, you will still be able to
place and receive calls tor up to tive_
hours.
OTwiozp«
Re placing a Drained Handset battery
The Spare battery pack can also be
used to replace a drained Handset
battery pack to ensure uniriterrupted
use. Be sure to put the drained battery
pack in the Spare Battery charger for
recharging.
please note that the Spare Battery
compartment charges at a slower rate
than a battery pack charging in the
Handset. It Fakes 24 hours to Fully
charge a battery pack in the Spare
Battery charger.
13ГИ PH
Page 14
Selling Up Your AUOIOVOX DT
941 Cl
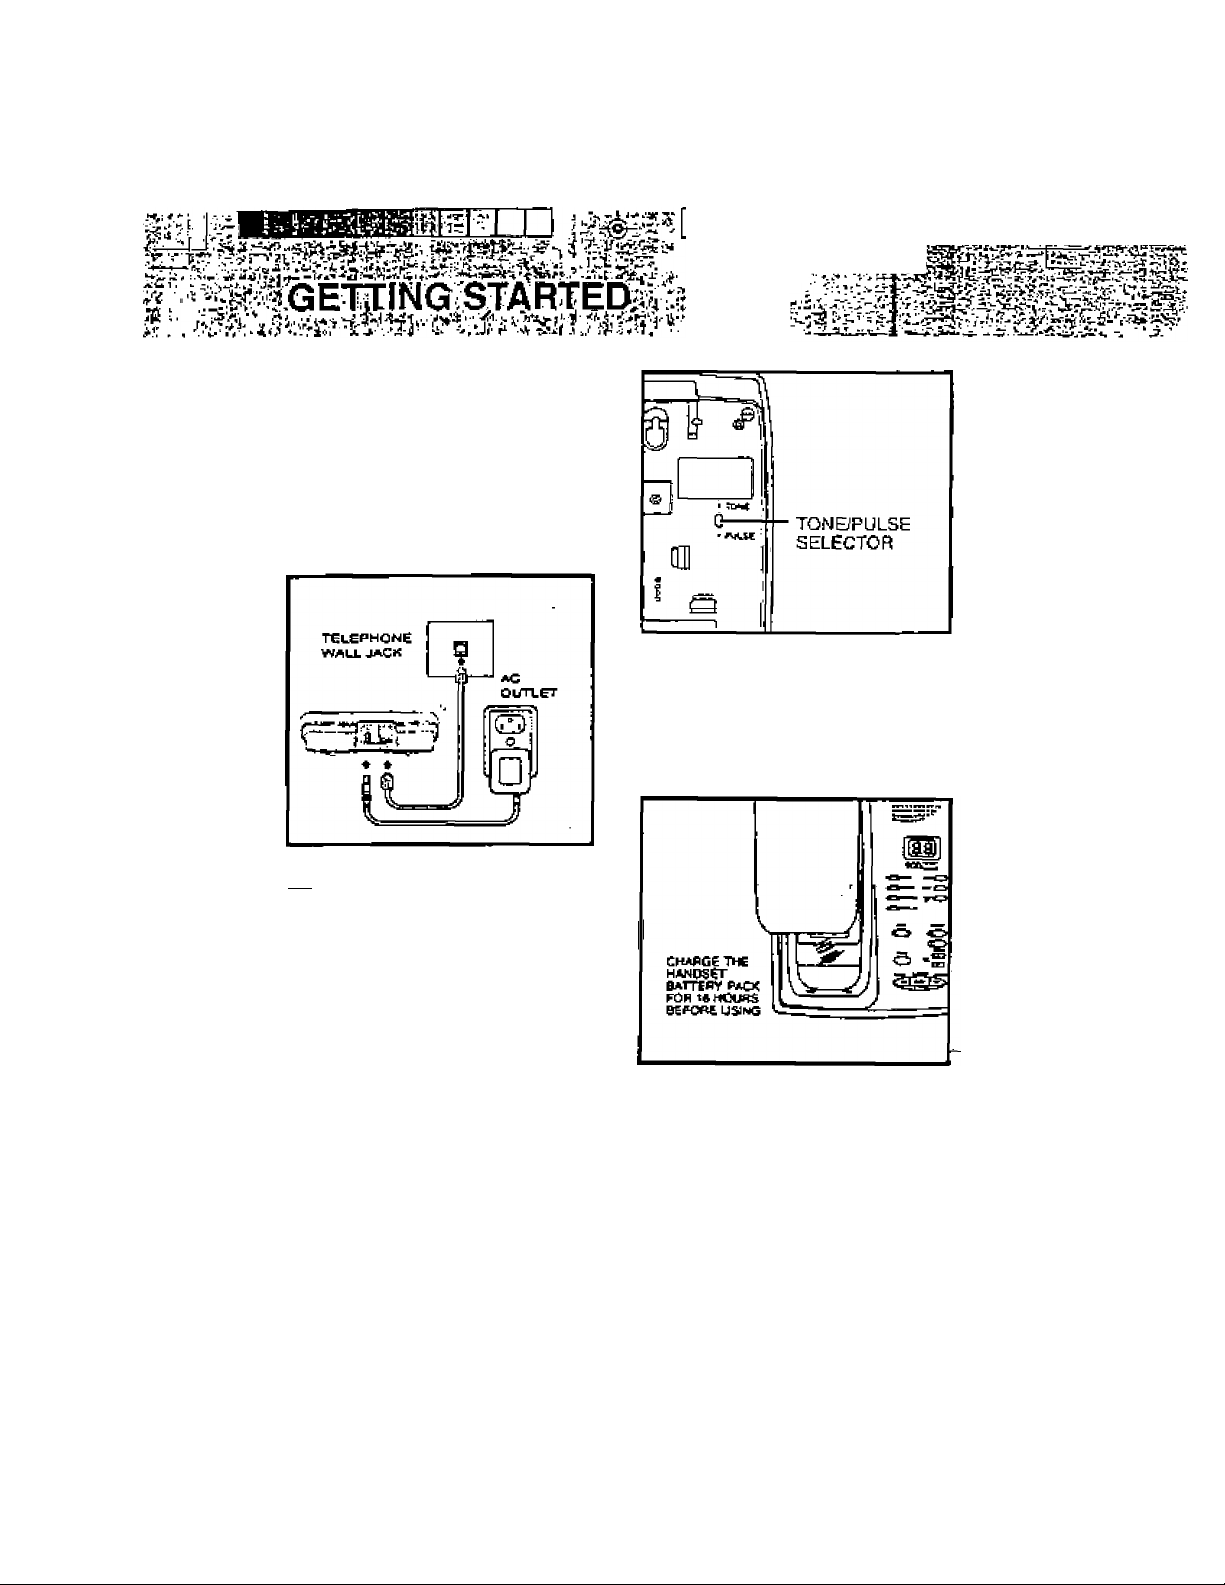
Choose an area near an electrical
outlet and a telephone wail jack.
AC Power Adapter .
Plug the AC power adapter into an
electrical outlet and the OC conn^ter
lo the back of the base unit.
A
CAUTION:
Use only CLASS 2 11V OC POWER
SUPPLY inciuded with your phone.
Charge the handset battery pack
before use. Thebattery pack recharges
automatically whenever the handsel is
in the base unit. The batteries must
be charged for 16 hours before using
your phone for the first time.
i1
Handset Ringer ■
The handset ringer is programmedON
as the factory default setting. Refer
to PROGRAMMING THE RINGER for
more information.
Setting the Tone/Pulse Switch
The TONEfPULSE switch is located
on the bottom of the base unit and is
factorysettoTONE. t/youhavetouch
tana service, do not change the switch
setting. If you have rotary (Pulse)
service, set the switch to PULSE,
OT94i«364
Connect Telephone Line Cord :
Plug one end of the telephone cord into
a wait ;ack and the other end into the
back of the Base UntL
ia
MUM. 17!» pu
r
Page 15
Check for a dial torte. AHer Ihe beUery
pack Ls charged, rotata ttio Urtit
antenna to an upright position. Picit up
the Handsel and press fTALlO.
"PHONE ON" will appear on iie
display, and you will hear a dial tone.
If not, see IN CASE OP DIFFICULTY'.
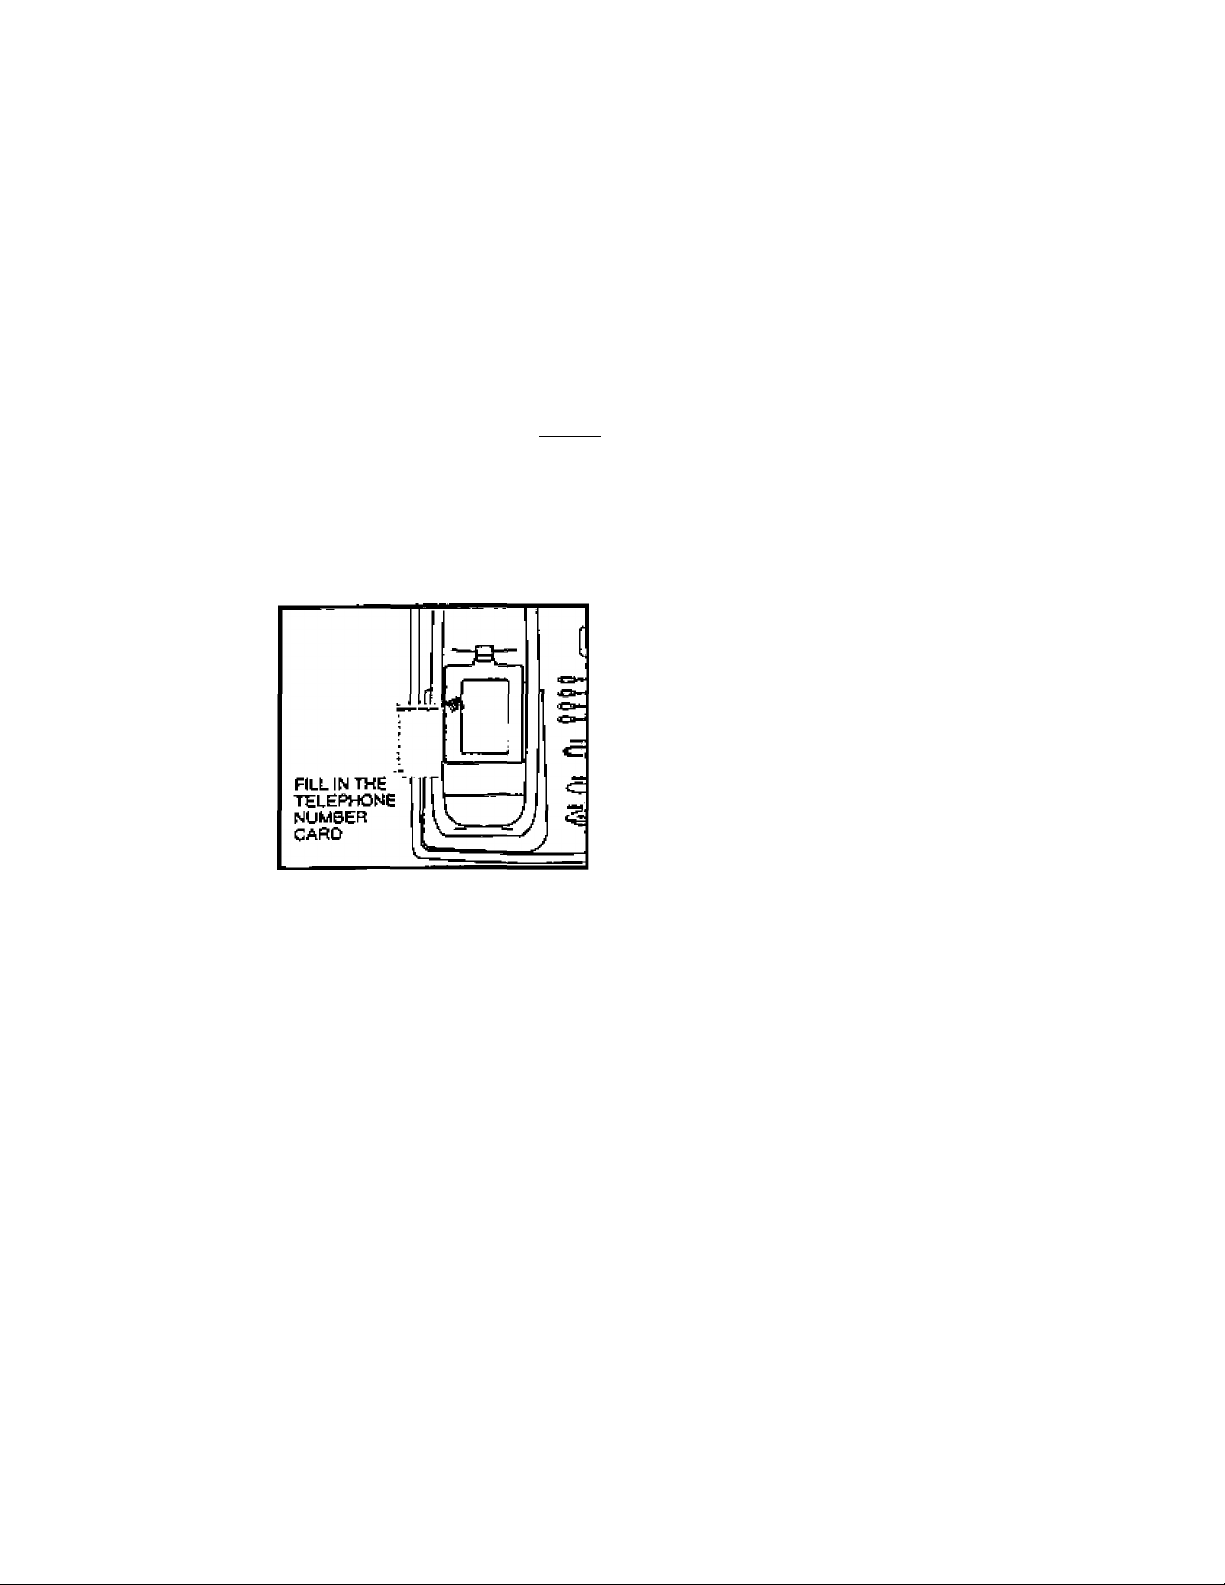
Fill in the telephone number card on
the base unit.
CAUTION:
1. Never install telephone wiring
dunng a iightnirg storm.
2. Never install telephone jacks in
wet locations unless the jack is
speciNcaity designed for wet
locations-
3. Never touch uninsulated telephone
wires or terminals unless the
telephone line has bean
disconnected at the network
interface.
4. Use caution when installing or
modifying telephone lines.
OTitios pii
13
Page 16

The Wall Mount bracket la designed
(O fît on standard Wall Mounting
plates,
______________
__
Choose a spot near an electrical
outlet and a telephone jack.
Your phone rec|uifes a modular
telephone jack and a standard
electrical oullet (120v AC). The
power cord is six feet long; make
sure there is an electrical outlet
within reach ol the base.Ths ouliet
should rrot be controlled by a wall
switch. If the switch Is ever turned
off, the phone wll not operate.
2. Position the wall mounting
bracket on the base.
Line up the tabs on the wall
mounting bracket with the holes
on the bottom of the base (Figure
1). Snap rhe wall mounting bracket
firmly in place.
Mount the base on the wall.
Position the base so the mounting
studs will fit into the holes on the
bottom of the base. PosiUon the
power cord to extend down the
wall the phone is to be mounted
on. Slide the base down on the
mounting studs until it locks into
place.
located on the back of the Base
Unît . [Figure 2)
■4^
4, Connectihetelephonelinecord,
5. Plug the AC adapter into an
1 OTSiiOS.pSJ
The telephone line oord has a
snap*in plug ¿t each end. Insert
one of the plugs into the jack on
the back of the base, frsed the
other end of the plug into the wall
jack.
electrical outlet and the DC
connecter into the power Jack
14
0/2*iW, rïSOPU
ff
Page 17

neCDEFGHIJKL
123456789i-f
Hândsel Display №5sages
This message is displayed when the
handset mhcrophnne has been muted.
-é>-
PHONE OH
PHONE ON Is displayed when The
phone is in use.
UOLUME i=si
Alter oressino a volume kev. this
displays the curnent volume setting.
LOU BflTTERV
This display warns of a low battery
condition. The handset typically
operates for at teasit 6 minutes after the
low battery indication lirst appears.
BfiSE PhGING
RIH8ER OFF SELECTED
This message is displayed when the
handsel ringer has been programmed
CHHNNEL
SEHRCHING
- . This display warns that the handsel
has lost communication with the base
unit and is attempting to reestablish a
link by scanning all channels.
FOUND CHRNNEL X
This display confirms that a
communicaton link has been
esiabiished with the base.
HANDSET
This message is displayed when the
Base Unit pages Ihe handset.
This message is displayed when Ihe
handsel is on hold.
DT94in.p«i
EXTENSION
IN USE
This message is dsplayed while in
OFFmode.itanotherpfiofíeíscurrentíV
using the same line.
1»
II:ia PM
Page 18

I
г
■-P
■ Л Г-;'; >v ■■■ í tí-:í i ■ - jf-f: f"-Tf -, í -
" STHEtHANDSE^LiAYOUT
, ■ ' “^í. I Ч Ч.-''-' - . ^ 7- * V—
•máJ- • J. . -tJ? k-^ ■. ■ ■
jal - i
a
MTCnna
OT4<101.í6í
íT>vQi Cg
í©
VCLUUC UPA
OAL1N5 KEifS fO^St
^ TDNE fftflpMry T[Jn*J
¡ неиояг
^ ЗАТТЕЯТ
^ ^ BEOUl cOMPARTWbhT
■. CAI LEB 10
- MLIÏÎ
cleíbídelíts
pbügham
MEMORV j
WËHÜBY1
^й
tn*m. [»Q Pv
Page 19

hCMOHY DlAUNC CARD
АЛТЕ1Ч1ЧА
POWgii rhlOiCATOB
И5 ifHJse indicatior
CHa№IM} INDICATUn
SPARE SATT iNOlCATiJR
MEI4U KEV
SELECT K£T
TlMQSffrXEY
6ЙАЗЕ KEY
ONiOfF K£Y
MEMO KEY
VOLUME UP KEY
VOLUME DOWN KEV
RAGE KEY
SKtP^UlCK KEY
PLAY/STOP кет
repeat K£V
ckahgimo cohyacts
17
"tl
dy}4 m.ties
17
vttJie. itioPv
f
Page 20

|ÍpBAgE^NrTFE|TOF|S^WE|ñ||^
ANSWER ON/OFF Key
Tuna Hie answering device ON and
OFF.
MEMO Key
For recording outgoing messages and
memos.
ERASE Key '
For erasing individual or all previously
heard messages.
REPEAT Key
To return to the begirining of a
message during playback.
PLAY/STOP Key
To begin and stop message playback;
to exit programming mode; to stop
outgoing message recording/^iayback.
SKIPmiCKKey
To skip to the next message during
pJayback; hold ibis key down to speed
up message playback.
VOLUME UP/DOWN Keys ^
To increase or decrease Base Unit
speaker ptayback volume.
To Increase, decrease or turn oH Base
Unit Cafl-Screening Volume.
MENU, SELECT, TIMÉ/SET Keys
Use these keys lor answering device
set-up; once the dock is set, press
TtMEtSET tor the curenl day and
time.
BASH UNIT MESSAGE WNDOW
........
(LEO)
Provides various hetpluJ data about
your answering device.
OTHiQi.pai
1«
MENU KEY
SELECT KEY
TIMBSET KEY
ERASE KEY
ON/CFF KEY
MEMO KEY
VOLUME UP KEY
VOLUME OOWN KEY
PAGE KEY
SKIP/OUICK KEY
PLAY/STOP KEY
REPEAT KEY
H*/». liio nu
Page 21

Sat'Up
• Plug AG adapter Into a siancterd
electncal outlet and Base Unit.
To MUTE A.Cali
- Press
handset microphone.
(mute) to disable
the
SetTOKE/PULSEawilichtaPULSE
Of TONE. The unit is (actory set to
TONE.
j>
Let the handset batre/y pack charge
for 16 hours before first use.
Connect telephone line cord to
base unit and tetephona jack.
Making CaJIs
• Press the CTALK ) key. When
"PHONE ON* is displayed and
you hear a dial tone, dial the
nuinber.
. Of
Enter the r^umber to be dialed on
the display and then press trie
rfALK)kev.
Answering Gails
- To artswer: a call, press any key
other IhanCOPf^ . or the
Volume Keys, The handset wiN
NOT auto-answer when lifted oft
the base cradle.
Hangfng Up
• Press (OF§ or place the handsel
in the cradle to Kang up a call.
Press CmUTE) again to return to
normal two way conversation.
TO PAGE The Handset i
• To page from the base,
press
rPAGE).
To cancel the page either press
CpAGE]) again on the base or press
toFFJon the handset.
Storing Memory [speed)
Numbers: : ^ t
• The phone should be OFF.
Enter the number you wish to store
on the display, up to a maximum of
20 digits.
STOfUNC ■
tME PMOWE SHOUUt BE
Off
emTEh phone NUHeen
O©©
o es
® OQ
® -55
V.— J)
pnessc^i
«3U WHiSEE
PftOSftííM
LOCRTIOH
ertreHMEMOfiv
LOCATION rui-joj
dial
To Place A Cali On HOLD
• Press ChoLD^ on the handset to
place an active call on hoid. Press
(HOLD) again to return to the ceill.
0T3*iin.(i«
1S
Press CPROG). The handset win
display -PROGRAM LOCATION
Enter a two digit mertiory location
(01 .. 20). The unit wBI store the
number, emit a happy tone to
confriTi successful programming
and exit program mode.
19
sa*ra*, reso pm
4-
Page 22

Memory dialing (speed Dialing)
, niSit J
—s—-
c
0®<£j
® ¡EH©
<Ei"C^
o oo
<3 O
o ^
Press the fTAUt] key.
■ Press (MEM) ,
Enter the fnemory focation of the
phone number you wish to dial
[0‘1„.20), The number displayed
will be dialed.
Caller 10 (CIO)
» To view Informal Ion siored In CIO
memory, press (CiD) on ihe
handset.
memoav Oialini;
PflES3(5J
PfiESSiBi
Tou wasee
SPEED DIAL
LOCATION „
6NTEP fciEUOBV
LOCAtlON 401-20)
To view the time and date of Ihe
call press and hold the 7 Q key.
The time and date will be showr^
along with the phone number.
5ti3”6438981
i“t m T”7n
7fi fiUG31
To view other calls, scroll
backwards and forwards by using
Ihe ■< (iV) and J> (#) keys.
To view additional name characters
r^ot shown on the display, press
and hold the (9) key
To flJiit press (off).
Using REDIAL
Press the fTALK ^ key, then
(redial) to automatically redial
Ihe last number you dlaJed.
Or
• Press (rEDIaOso that the number
Is shown on the display and then
press the (TALK ] key.
i
<D<E><D
©iiSK©
V:
The display will show the most
oruiasnes
OtLCfl ID (CID)
PS6SS
VOU Wiu. SEE
®<^0;
^ ^
iSO ■&
recent call received.
CALL #01
^ec COMPAHY-^
HOLD ^^ ]
* Press (hold) toputacaiio'nhold.
To return to the call, press ChO^)
again
20
»
-{§)"
11.» PM
Page 23

NOTE:
Thor« oro tvvo different ways to dial
a number:
Press the CTALK 1 key and wait
lor dial tone, Then dial tha number
you want.
FLASH
You can use your AUDJOVCX
DT 941 Cl cordless phone with services
such as Call Waiting. Simply press
thef TALK ^ key to FLASH the iine.
REDIAL . I
To REDIAL the last rubber you
dialed, press the CtalkI key, then
press (R^PIaQ. The phone will
automatically dial the number. The
number wrl be shown on the display.
Or
2. Enter the numbiar* then press the
CTALKJ key. This will dial (he
number that is displayed on the
handset alter 2 seconds. See
AE3VANCEO DIALING.
If you make a mistake when dialing,
press TOFFI to hang up, then press
CTALK] key to get the dial tone
again.
Disconnecting To end a call, either place the haryJset
back in the base, or press (jOF^
on the handset.
Answering Calls
When the Handset rings, press any
key other than COFFJL or tha
VOLUME keys to answer your call.
Volume Controls
The volume controls for the handset
are Jocated on the side of the unit.
Press the A (upj or y (down) keys
to increase or decrease the volLime.
Holding either key down will
conljnuously change the volume
setting. The earpiece volume level
indlcaiar on ihe dispaly will change
accordingly. There are four volume
levels.
Clearing The Display ^
The display can be cleared by pressing
and holding the (CLR/DEtJ key down
until the display dears.
MUTE ■ I
• Press IjwUT^ during a conversalinn
to disable the handset microphorw.
• Press [MUTEj again to return to
normal operation.
Ringer MUTE
Press \jn\ji While ptione Is
(MUTE)
■ ■
while phone
ringing to disable the ringer for the
duration of the cail.
HOLD ^^ ^
Ì
■ Press [HOLP^ to place an active-
call on hold,
' The Handset will display CALL ON
HOLD.
' Press {Hold) againtoretumtoiha
caiJ,
PAGE Handset Locator j
* Jo- page fram the Base Unit press
npAGE) .
• The Handsel wiJ display BASE
RAGING HANDSET,
‘ To cancel the page, either press
CPAGE)again on the Base Unit, or
press fOPF) on the Handset.
0T4*!«p«
2^
tfiifn. iT.»pu
Page 24

.йчЙрЙОУАМ СЕШРи ISGlil© NS Ш Щ|
_r; -■;1 ^ Lir’t. i-i ■ :.. .l’Si ,.■ V-LaViiv^bg_■.
Can Waiting
CALL WAITING is a subscription
service. avaUabie from most local
telephone servica provider^. Contact
^ur provider for details. While you are
on a call, you witi hear an alert signal,
warning that a second catier is trying
to reach you. '
If you subscribe to this service linked
with CALLER ID [CIDJ, the name and;
or phone number of the second caller
can be displayed on the Handset
immediately alter hearing the CALL
WAITING alert. For more detars, see
CALLER ID (CIO).
Switching calls using FLASK
• To switch over to the new call,
press iheCTALK )key: the first call
is put on hold.
» To switch back to the first call,
press the CtalK^ key again.
1
3W1TCHNG CALI-3
0<S>(£>
€)®<a
(S>®CD
^ ГЭО
(£> &
СП5 ^
TO SWTTCH OV№ TO
1>«N£WCiiLL
PRESS @
TO SWITCH SACK TO
TV« RRST CALL
РЯЕЗЗ *OJUN
Rrst, dial the call normally. Then
activate the Temporary Tone feature
by pressing TONE (the * key). You
car then press the numbers or symbols
you need, and your phone wHI send
the proper signals.
To end the call, press CoFFl or place
[he handsel back in the base. The
phone wilt automatically go back to
rotary (PULSE) service.
<Э<Е>©
® <©CD
4^^ ГГй^
О
TEH PORAnr TONE
DUIYCOH 14имв£н
PBESS (Z^
PRESS THE NUMBERS
OR SYMSOLS
PRESS
<8)
Programming Ringer ' |
The handset ringer Is capable of four
different types of ringer tones. The
following sections detail how to select
different ringer types and how to turn
off the handset ringer. .
L-^lJ
Temporary Tone
If you have rotary (PULSE) telephone
service (TONEiPULSE switch is set to
PULSE), rhts feature allows you to
temporarily switch to TONE dialing tor
such purposes as remote access Ic
answering machines, bank-by-phone
services, use of calling cards and other
special services.
ornioi.pis
22
ч£-го PM
Page 25

SS—
.. .
^iÌ(ìì:;ìSÌv*
Changing Ringar Types
To progfam, the handset musl ha OFF,
To select a different ringer type do the
following;
OCQcS)
C£)CD©
& <S> CD
о I® Ö
■fSi cSS"
& ^
>4,
____
CHANSINO HIHGER
TWES
PflESB
ppessCTj
PflESSC^ iS> (S>
■■ ®
J
Pfl£Sà(^
vv - /
Press
Press
Press
The handset LCD will show the ringer
type setected, tor example
1 for ringer type t
2 lor linger type 2
3 tor ringer type 3
4 for ringer type 4
a VisuaJ Massage Waiting Indication
generated by rnany phone service
providers. If you subscribe to Voicemail
service from your local telephone
company, and Visual Message Waiting
indication is provided, the DT 941CI
will display the lollcwing data to alert
you to new. unplayed messages;
И NEI.I.I CALLS riSi3.UlflITIN6
Orice you have reviewed your new
messages, the MSG.WAITING
indication will be cleared from the
display.
You can temporarily clear the Message
Waiting screen. With the Handaet in the
OFF mode.
Press and Hold fCLR/DEQ until the
LCD DISPLAYS;
ULERR Г1УЗ
RIHGER 1 SELECTED
Press CpROGÌ Of (OF^ lo exit,
Message Waiting
MOTS:
This feature Is not related 10 the
function of the OT 941 Cl answering
device.. Refer to iho SETTING UP
YOUR DT 941 Ct DIGITAL ANSWER
ING DEVICE and OPERATING YOUR
OT 941CI ANSWERING DEVICE
secliorks for more information.
Your OT 941 Cl is capable of detecting
OT»nncU
n
DEL TO ALLOW
PnessjjCLRftJEÌ^ confirm уourdedsion.
Pressing any key other than jCLR/DElj
will cancel ihe operalion.
The MSG. WAITING aJert may reappear,
as long as unplayed messages remain
in your Voicemail box.
NOTE; L ; _
Message Waiting works in obt^unction
wfth Voicemail service from m^iy local
phone companies. This is an optional
service. You are not reguiredito sub
scribe to it. 3
23
>1;Я PM
4=
Page 26

Turning Off The Ringer
To lum off [he ringer do ihe foffowing;
Checking The Ringer Type
To test [he present ringer type, do ihe
following:
.ooo.
OCD<D
<DOO
o:cio
OOO
<3i iS> ®
________
Я.1 0
TYPES
ntts
mzss
wtM
OOD
™iKS
J
Clear/Delete {CLR/DEL) Key^'. .
The CLEAR and DELETE functiorks
can be accessed separately depencfing
on how long the key is held down. For
enample, to dear the fast didt entered
on ihe display, press the CCLR/DEO
key for Ithan 1 second. Press and
hold [he CCLfl/DEL) key for more than
1 second to completely ctear the
disptay.
The delete function is also used to
delete Caller 10 [ClD] records, memory
dial records, and Message Wafting
indicalicn. See DELETING STORED
NUMBERS, DELETING NUMBERS
and MESSAGE WAITING.
Advanced Dialing |
There are two different ways to dial a
nurnber ^^
L Press theCTALK) key and wait for
a dial tone. Then dial [he number
you want either manually, using
MEMORY {MEM) dialing, Caller
ID (CID) dialing or REDIAL,
2. Enler the number уш wish lo dial
on the dsplav first. Then press
[hsi TALK J key. This will dial the
number which is displayed after £-
seconds.
-é-
Press fPROG] or COFFÌ (0 exii.
omiQipes
NOTE: : j
The phone will dial any numbef which
la shown on the display. If you do not
want to dial the number she wry on the
display, it can be changed'by:
Preaa and hold CCLR^EL) until
the display Is cleared, then dial
normally.
Or
Press COFF} and start over.
24
erjlTH, 1^»f
Page 27

storing Memory (Speed) Dfai
numbers
To program a speed dial tocatlon^ do
the following:
PRuGRAMMING
IHCOriPLETE
With Ihe phone OFF, enter the
telephone nymber you wish to
store (20 Digits Maximum).
Enter propram mode by pressing
(PROGJ. The display wilt show the
fpl towing:
PROGRAM
LOCATI0N__
Enter (he memory location (01 „20)
you wish to store the number in.
As soon as the second memory
focation digit is entered, the unit
will emit a warbled tone (a short
series of beeps) to confirm
successfui programming and exit
program rrvode.
SrOHIHC
THEPtWNE 9iOIJ(.0 9£
d 3 CD
do
r® 49
iEf
If programming is unsuccessful the
unit will display: .
OFF
fimen FHCwe Mvuecf)
wes5 location (01 -Ml
Unsuccessful programming can result
from not corneclly completing the
programming sequence. If (hts
message appears, simply repeal ths
programming sequence.
Quick Memory Dialing . ^ j
The MEM1/ MEMi keys give you one
button access to the MEMORY DIAL
number stored in memory location Ol
/ 02 respeclivefy. This 'may be a
frequently dialed friend, business, or
emergency number.
There are two ways to dial using
the MEMI / MEJV12 KEY
• Press PHONE .
• Press MEMI ! MEM2 .
• The phone number' stored in
memory location 01 / 02 will be
automaticaily dialed.
on
• With Ihe Handset OFF , press
MEMI / MEM2 . .
• The phone number stored in
memory location 01./ 02 witt be
automalJcalty dialed after a 2
second delay.
Quick Rei:
MEMt
MEM2
Memory Iccaiion 01
Memory localion 02
25
Or«4i01.tiiS ti;ia PM
Page 28

Dialing From Memory
■ Press ( TALK 1 tû gel a line.
Press youVe pfofnpled to
enter a speed dial location
number
SPEED DIfiL
LOCfiTI0H__
Enter a 2 digit location number
i0l-20).
The number stored in that location
win be displayed end immedisiely
dlaJed.
Or
Note that if digits were on the
display prier to entering memory
dIaJ mode, the contents ol the
speed dial memory will be
appended to those digits. For
example, if 1S03 was on the
display and the contents of the
memory location is S42E3S1. then
the display would show the
following upon exiting memory
dial mode:
Press iTAiK) , the number on the
display will be dialed after a 2
second pause.
Beginning frem the OFP frode.
press CMEWQ lollowed by a 2 digit
location number f0l„20).
Press (Mem] again to e?(it memory
dial mcKte and leave tne number
on the display.
NOTE: v ’ i
The ability to tempofarily 'atfd'memo^^
contents to digits aJrea^'entered on'
the display operates lrvli«^s^B-™y
for Caller ID (CIO) and spaed tfai
memones.
In this way, long distança an d area
codes (for example," 1503);'can be;
entered on the :dt$play'^ :and can-
prefaoe numbers recall^ frb^ Caller
10 (CIO) memory befdr^diajih^.' This
is important because only'th^ last 7
digits of any number are- displayed
when dialing Irom Caller ici (CiD)
memory. ' ■■■■-
Changing Stored Numiiers j
To change or replace a stored number
simply enter the new number on the
display and store it in the memory
location you wish to change.
-i'v-
Ti
S(
2«
tviirsi. it wiPu
Page 29

: w^^"^i^MEMORYí:PÍAlfíNGeS'
Deleting Stored Numbers
• Press iMEM\ The display will
change to "SPEED DIAL
LOCATION^ _-.
» Enter fnemory location number
{01„2aj.
Press (CLFVOEL) key. The display
will change to 'LOCATION XX
DELETED",
LOCfiTIOH XX DELETED
Press (off} Io eKil,
NOTE;
Stored numbers are retained in
memory even it the base loses its
power or the handsel battery is
removed.
Storing Special Codes
To insert a pause in a phone number,
press Cholo} at the app гор ríate point
when entering tbe number. This inserts
a 2 second pause, A " P * appears
in the display to show №e patse. For
longer pauses, press [hiOLP} two or
more times. Each press makes the
pause 2 seconds longer and is
treated as a stored égíL
If your phone is connected to a PBX,
you can store the PSX access
riumber and a pause before tha
phone number. For example, to
store 9-PAUSE'5SS-l£34 in memory
location Oa, do the following:
1, Press ^ á } -
2. Press CHOLO}
3- Dial S55f334
A, Press [PROG]
Ё. Enter OS
"! oTwiose«
27
■<Sh
Ь7«Я, 1Z.20PM
Page 30

СаПег\0 (CID)
Your AUDIOVOX DT Э41С( ccjrdiess
phone i$ capable ol displaying the
name and/or phone number oí the
person calling, before you answer the
phone.SubscnptianloCaJleflD service
thnou9h your local phono company is
required to utilize this feature. :
If you subscribe to alphanumeric
(name and number) Caller lO service,
the calling party's name and phone
number (when available} will be
displayed on the handset screen while
the phone is ringing.
If you subscribe to rtumeric (number
only) Caller ID service, the calling
party's phone number (when available)
will be displayed on the handset
screen while the phone Is ringirkg.
Cail Waiting Caller ID (Type II CID)
Your AUDIOVOX DT 941 Cl cordless
phone IS also capable of displaying
Caller ID infarrriation in connection
with a Call Waiting signal. If you are
on a call, and receive a Call Watting
alert signal, the LCD will display the
name and/or number (when available)
of the party trying to reach you. As
above, subscription to CaJi Waiting ID
service through your Jocaf phone
company is required in order to utitize
this feature.
A Word About Caller ID • CID
Due to regional fncoimpalibilities. Caller
ID information may not be available for
every call you receive, in addition, the
calling party may intentionally block
Iheir name and phone number from
being sent.
NOTE: ■- '. i
You must be in an area where Caiier
ID (CIO) service is available: you
must sub EC ribs to it to use this galore.
If you do not subscribe to Ih^ Galier
ID (CID) service, the phone i/iU still
operate normally except that the Caller
j
6 (CiD) information is not wil|not be
received or displayed. , ^
Receiving and Storing Catl^
This unit receives and displays all
Caller ID (CID) information, thecallerOs
telephone number, the caller's name
and the exact date and time of the call.
Thephonesequenliallv numbers these
call records and retains them in the
unit's memory for later review. These
call record numbers are displayed as
the first two digits in the display. The
unit can store up to 50 numbers in Its
memory.
Once the Caller ID [CIDJ memory is
full, any new call forces a deletion of
the oldest call record.
Dialing From CID Memory.
NOTE: ^
Only the last 7 digits of any numter are
displayed when dialing from <&l1er ID
(CIO) memory. { i
For example, whenyoup ness and hold
the 7(t)kBV to view the phone number,
you would see the following:
..4
Í
-ф-
OTeírm D«i
гв
n
Page 31

Howevef, wtien you di^ directly (rom
Caller 10 (CIO} memory, only the ia&t
7 dfgits oi the raceivecj telephone
nuimber vviff be used. Consequently,
you would actually dial this:
lü ¿ITOOQ 1
С* ^ J X
The AUDIOVOX от 941 Ct was
destined to accommodate this
situation. If you need to temporarily
add a long distance prefix and /or area
code (such as 1503) before the Caller
ID (CÍO) number, do the folio wing:
* Beginning from the standby mode,
Icey in the neosssary digits. Your
display wNl look like this;
Special Message Indicators!.
Out of Area Calls . /1
If for any reason the telephone number
of the caller Is unavailable, or if the
caller is outside the Caller ID (CIO]
service area, the message LiNAVAlLA6LB is displayed.
"Private" Calls i
If the caller has exercised the option
to block his or her nurnber from being
sent, then the display will show
PRIVATE. ‘
FRIUfiTE
-4-
Then, to temporarily add the last
7 digits only from a Caller ID
(CIO) memory, ¿resii CIO .
Using the -^ (*) and p> {#) keys,
scroli through the received calls to
locale the number you wish to dial.
Once you have located the number
you wish to dial, simply press
C^LK J, The fast seven digits wit!
be added to the numbers already
In the display, and |he whole
number shown below will he au
tomatically dialed.
1 51J 3 6 Q '5'Z' 1
D№ID?.í4S
Transmission Error . :
If an error is detected, the Caller 10
(CIO] Information is Incempfela and
wlllnolbadfsplayed. 'TRANSMIBSION
ERROR* will be displayed-
TRANSMISSION
ERROR
The occasional appearance of
THANSMISSION ERROR' on your
display does not indicate a problem
with your unit or your telephone line.
However, if this appears frequenüy,
you may want to notify your telephone
company.
Я ll:JQ PM
Page 32

Deleting Numbers
Pressing the [CLR/P&L] Key deletes
I ha CID number displayed.
* While the phone is In Caller 10
(CID) mode, press the (CLft/DEO
Icey once to delete the current cal)
and the display will show;
DELETIH6
SINGLE CRLL
The older Calier 10 (CID) records
wilt be moved (orward by one
location ,
Press and hold t&e CLRijPEL
key for more than 2 seconds to
delete trie entire contents of Caller
ID [CID) memory- The display will
show the foildwing, for a final
conlirmation, before the entire
Caller ID (CID) memory is erased:
DELETE ALL?
DEL TO fiLLOW
Pressing any key other than
(CLH/DEL) will cancel the opera
tion. Pressing [CLR/DEL) will
confirm the operation and the
display wiif then show:
DELETING
HLL CALLS
The message will remain on the
display for 2 seconds.
“ 0T»*I«(I43
30
trjvn. 12;» PU
Page 33

Normal Answering Made. After
your personas greeting (or the
factory preset greeting, if you
choose), the OT941CI will record
youf Caller's message./.For
e!carnple:
Upon power-up, the Base Unit
Message Window will attemale
between CU (indicating that the
Cay and Time must be set) and a
digit representing the number of
recorded messages yet to be
played
Answering Device Programming
' - *
"You have reached 555-1234, We
are unable to answer your cal) at
this time. Please leave a message
after the tone,*
If you prefer fo use the factory
preset greeting, the caller will
hear:
'Hello, I’m unable to answer your
call right now. Please leave your
name, number and a message
after the tone.'
Announce-Onlv Mode. After your
personal greeting (or the factory
preset greeting, il you choose), the
□T 941 Cl will hang up. For
example;
'Sorry we cannot take your call.
Please call bad< tomorrow between
9am arrd Spm'.
If you prefer to use the factory
preset greeting, the caller will
hear;
NOTE: ‘ j During programming, the Base Unit
Message Window displays *-i -'.You
may press PUtY/STOP'.fo exit
programming mode at. any tlme.The
DT 941 Ct will automaticalV^ittt
programming mode affo|i;ap|jro»mate^^^
20 seconds of inactivityL iri'i
The MENU key guides you through
the 7 programming functions:
I.Sel Outgoing Message
i
2. Set Security Code
3,Set Day and Time
4.Set Audible Message Alert
5.Set Announce Orily
£.Set Base Ringer
7,Set Number of Rings
"Hello, I'm unable to answer your
call right now. Please call again.
Thank you."
0t94tQ3.f«3
31
11
Page 34

Set Annaufica Onty
» press the ClVlENlii Iwy 6 limes unlil
you heart “SfT" ANNOUNCE
ONLY"
Now press [select) . TTia swlce
prompt will either OFF or ON,
Repeated presses of SELECTiwtB
aflemate between ON and OFF
The Base Unit will display either
ON Of OF (ofO to retlect your
choice.
Choose OFF if you want your DT
$41 Cl to record your callers'
messages [Normal Answering
Mode).
Choose ON if you only want your
callers to hear your greeting with
out atfowing them to leave you a
message (Announca-Only Mode),
Once you've selected OFF (or
ON), press [TIME/SET) to conffm
your selection. The voice prompt
wilt say: "ANNOUNCe ONLY IS
OFF (or ON)'.
Set Outgoing Message i
• Press [menu) until you hear "Set
Outgoing Message",
' Press [MEMO^, The voice prompt
will say 'Now Recording', foffowed
by a tone,
■ Begin spealting after the tone,
towards the front edge of ihs Base
Unit. The Base Unit display be
comes a timer as you record your
outgoing message.
■ Your outgoing message must be
longer than 2 seconds.
functions,
0TT*i« 1Я1
NOTE: ^ j ■
Your outgoing message can t^ up to
90 seconds. ^
When dona, press [PLAV/STO^,
Ydur outgoing message will aulomatrcally be played bade
32
1ГМРЧ
Page 35

tf you woyld like to re-fecoftl your
outgoing meisage, simply report
the above steps,
U you would like to return to the
tactofy-aet oulgoing message:
press The voice prompt
will say 'Set Outgoing Message".
pressfrLAYjTSTQFj. The outgoing
message will begin playing.
PressC^RASEjwhile your outgoing
message is playing. The voice
prompt will say 'Outgoing Message
has been erased'.
Press (MENlQ to go to the next
prop ramming function, or press
fpLAY/STOP) to exit pfograrnming
mode.
Press the fMENU) key unlit you
hear "Sel Security Cede“,
Press (SELECT) to hear the
current security code. Every lime
ytsu press (SELECTJ, the code
increases by 1. HoldmofSELECT*1
increases the security гш1в in
increments of tO. The Base Unit
will display the security code as
you
program it.
Press [triMEfSET^ to confirm your
choice. The voice prompt wilt say;
‘Security Code is XX'^
Press fMENtJ^ to go to the next
Dfoaramminq luncb'on, or press
CplaY/STOPJ to exit programmlrig
mode.
Set Security Code
• When you call your DT 341 Cl from
a remote location, a two-digit
security code must be entered to
gairi access to functions such as
message playback. The factory
preset security code is 13, Ybu can
designate any two digit security
code you wish, from 00 to 99.
OrwiApU
When you first power-up your DT
341 Cl (or after the Base Unit
experiences a temporary loss of
powerl, the Message Window witf
(lash Cl, uhtJI the Day and Time
is programmed.
PressCMEKUj until you hear "Set
Day and Time",
33
а/г^и. It» PM
Г
Page 36

Press C SELECy untii ywj hear
the correct day of the week.
Press CTIME/SET^ to confirm your
selecdon. The voice prompt will
announce the hour.
Press fselect) urttii you healths
correct hour.
Press CHME/SET) to confirm your
selection. The voice prompt will
announce the minuie.
Press (Select} to adjust the
minute setting. ■ Holding CSELECT)
increases the mlrhute setting rn
increments of 10.
Set Audible Message Afert ^
• This leature provides a beep every
10 seconds at the Base Unit,
alerting you to new, unplayed
messages. .
Press CMÉÑÜ) untit you hear 'Set
Audible Message Alert*.
Press CsELECT). The voice
prompt will say either ON or OFF.
Select ON if you want your OT
941 Ci to beep every 10 seconds to
aJert you to any new messaigesj
select OFF if you don't The Base
Unit will display ON or OF {of() as
you mahie your selection.
Press (TIME/SET) to confiim. The
voice prompt will repeat the current
Day and Time, as programmed by
you,
press Cmenu) to advartce to the
next proofamminc function, or
press (PLAY/stop) to exit
programming mode.
Press TtIMÉ/ÍSET) to confirm your
selection. The voice prompt will
say: 'Audible Message is ON (or
OFF)'.
Press Cmenu) to advance to the
riext prog ramming function or press
rpLAY/STOI^ to exit programming
mode.
DT»4nO1.0<»
34
V74/9Í. ir-H PW
Page 37

I
.■ ■; '"'v ^-¡T^rvi^- ■/¿.i,". -'^^X‘ii'' -'3'?*Ji V -•■ ' ' V^'l= i'".'r;'.T^J
- ,^г-гх,ил , invnnn г^тг^чгм ГЛ1Л1ГЛI *''^'VERiyGj£yiGi®lSf^$
-ф-
Set Вазе Ringer
■ Press CMENU) ипШ you heai "Set
Base Ringer'*
Press (SELECT^ (0 loggie between
ON and OFF, The Base Unit wiEI
display ON or OF (off) ^ y'JU make
your seiectior^. /.
Press (riME/SETi lo confirm your
choice. The voice prompt wrfl say:
'Base Ringer is ON (or OFF)*,
Press CMENU] to advance to the
next programming lunction, or
press(PUAY/STOP]tQ exit program
ming mode.
NOTE;
The Base Rlngar setting does not
affect the Handset ringer.
Bet Number of Rings
• Your DT 94lCl can answer cails
after 2 rings, 4 rings; 6 ringS; or Toll
Sever. In Toil Saver mode, your DT
941 Cl will answer cafls alter 2
rings only if there are new, unplayed
messages In its memory.
Otherwise, it wiil answer after 4
rings. This leatura heips you avoid
long distance charges when
checking for messages from a
remote location. There to re, using
Toil Sauer, if you cal! your DT
941CU and it doesn't pick up by
the third ring, hang up. There
aren't any rrew messages for you
at this time.
To Set the Number of Rings:
» Press (menu) until you hear "Set
Number of Rings".
Press (SELECT) urtlii you hear Ihe
desired setting [ 2,4, S,Toil Saver).
Press CtIME/SET) to conFim your
Choice. The voice prompt will say;
“Number of Rings Selected lis
Press (menu) to advance to the
next programming Junction, or
press PLAY/STOP to exit
programming mode.
__
_
ds
0T94tlK.(l6£ sijtm. It» ev
ГГ
Page 38

ON/OFF Key
This key [urns tha answefifiç device
ON and OFF.
* As you press this key, the voice
prompt wNI confirm your choice;
"Answering Machine ON {or OFF)"
The ON/OFF indicator glows wlien
the answering device is set lo ON.
It is recommended that you leave
your DT 941 Ct answering device in
the ON mode, unless you do not
want it to answer incoming calls.
This key has no effect on the
cordless phone portion of your DT
941 Cl,
MEMO Key I
• This key is used to;
* Record your outgoing message.
See SETTING UP YOUR OT 941 Cl
DIGITAL ANSWERING DEVICE ■
Set Outgoing Message.
‘ Record a MEMO at the Base Unit.
To record a MEMO:
Press fMEMO^, The voice prompi
wili say "Now Recording',
toliewed by a beep.
Begin speaking. Your MEMO can
ba up to 4 minutes.
If the answering device is OFF, it
can be turned on remoteiy by
calling in and allowing the line to
ring apprcximaialy 10 limes. See
REMOTE OPERATION OF TJHË
OT 341 Cl.
Press fPLAY/STOPl when fin
ished,
A memo must be longer than 2
seconds.
■4-
35
QT^ámefii IZIHPM
Page 39

ERASE Koy ^^
• Pres5 (hs (erase} key during
playback or a message to delete
that message.
SKIP/QUICK Key ►► .
* Durfrrg message playback, press
this key to advance to the next
message.
When Ihe answering device is
inactive, press and hold the
CERASE j key lar mere than, a
seconds to delete all old (previPusly heard) messages.
REPEAT Key -*i
• Press this key durfnif message
playback to return to the beginning
of the message.
PLAYßTOP Key
• Press this key to begin message
playback. When pressed, the
voice prompt will tell ycu the
number of new ar»d old messages
stored in memory. If there are any
new (unplayed) messages, the DT
941 Ci will play thern and STOP.
You can then press (PLAYfSTOP ]
again to review old messages.
Press this key to STOP message
playback.
press this key to exit answering
device programming mode.
* Holdthiskeydownduringmessage
playback to increase playback
speed.
VOLUME UP/DOWN Keys A ▼
' These keys control the loudness of
the Base Unit speaker. At the
lowest setting fij, you wiJI not hear
incoming messages. To screen
calls as they come in, raise the
volume level from the minimum
setting (1), 7 IS the loudest setting.
MENU, SELECT. TIMEreElV^s
* These keys are Tised tor
answering device setup. See
"Setting Up Your DT 941 Cl Digital
Answering Device*.
A
EIT»i1D2.í»
37
jr
iriit) PIM
Page 40

BASÉ UNÎT MES3AGÉ WINDOW
(LED)
' The large Base Unit display pro vides useful data or ihs status of your DT
Э41С1 apswaring device. Below зга eJtaroplea of the data:
The Base displays: What it means;
Flashing number Ybu have lhat amount of new messages
0
CU Dashing
A
F flashing Memory is tell
99 flashing ' Records ng time has exceeded ^3 seconds
1-7
— Answering device is answering a call or in
- Hashing
Froro a remote iocation, you can
access талу of the ОТ Э41С1
answering device functions, such
as listening to messages, recording
a merriQ, or changing your outgoing
message.
To access your ОТ Э41С1 ramctely, you need to call from a
different phone lire, using a touch*
tone phone.
Oial ycur phone number and wait
ter the DT Э41С1 lo answer.
While the DT 94tCI is playing the
yrng the
You have no new messages
The dock needs to be set
Answering device is in announce-only mode
Volume level, as you’re setting it
remote mode
Answering device is In programming mode
(tl the DT 941С1 is OF^F when you
call, let the phone ring at least 10
limes. The answering device wilt
turn itself ON, and prompt you to
enter your security cade,)
The factory-set security code is
19. To program a different code.-^
see SETTING UP YOUR DT Э41 Cl
ANSWERING DEVICE - SET
SECURITY CODE.
Once the security has been
entered, you will hear a beep,
confirming that the DT 941 Cl has
entered remote operation.
QD.
2'digrt security
then enter
code.
your
You will ihen hear the voice
prompt announce the number of
new (unplayed) messages,
folEowed by the playback of the
new messages (if any).
DTÏtiOlf«}
за
U
A
Page 41

■p: U
-iib
Approximately 10 $econd$ after
new messages are played (or after
the voice prompt says you have
“NO now messages' ), you will
hear the fotfowing rnenu:
“Press №2 to play ail the
messages''
"Press #5 to stop"
"Presstf4torepeatthemessags*
“Press #6 to skip the message*
"Press 49 to erase the message*
“Press Jfíí for ether functions"
Upon pressing #1. you wilt hear the
advanced menu:
"Press №7 ta 're vie иг outgoing
message’*
"Press "7 to record outgoing
message"
"Press 'S to record memo*
"Press *4 twice to repeat
previous message*
"press 40 to turn the system ON
or OFF"
"Press #1 for other functions"
Pressing #1 at this point will return you
to the frst menu,
* NOTE; Press '0 to exit remote
operation mode, in addition, the
DT 941 Cl wifi exit remote opera*
tion mode if there is approximately
15 Seconds of inectivitv.
“Presa 05 tc stop“ Press 45
during review of messages Id slop
playback,
"Press 0 4 to repeaf the
message“ During message
review, press #4 to return to the
beginning of the message being
piayed. Press 44 twice to return
to the previous message.
"Press 06 to skip the message“
During message review, press #6
to skip to the next message.
"Press 0S to erase the message "
During message review, press #9
to erase the message being played.
"Press 07 to revletv outgolrjg
message“ To listen to your
outgoing message, press #7.
“Press "7 fo racofp oufgo/jig
mflîsflga'(ÎTû record a new
outgoing massage ( replacing the
previous outgoing message ), press
“7. When your outgoing message
is cornpieted, hang up.
"Press *6 to record memo" To ^
record a memo, press 'S. When
done, hang up.
Review Of Remote Commands
' "Press 03 to play all the
messages" The system will
announce how талу new and old
messages are in memory. If there
are any new messages, the DT
941CÍ will piay the new messages
only. Once all new messages are
played, you can press 42 again to
REPLAY all [oid) messageS-
OThitij Biij
"Press 0Û to (urf7 system an or
off" As you press 40, the voice
prompt will toggle Ooiween
"Answering Machine ON* and
"Answerirtg Machine OFF",
OS
W7V4. i?:iQ PM
f
Page 42

Noi$e Or Interference
Your AUDiOVOJi OT 941 Cl cordless
telephone has auto-channel scan
circuitry which will detect excess noise
and change the channel of the phone
to reduced, Thisisdoneautomaiically.
Since the AUDIOVOX DT 941 CUs a
fully digital phone, it does not suffer
from noise associated with regular
cordless phones, At times you may
experience occasionai 'drop outs',
especially at the extreme edges of the
phone's range. Simply move closer lo
the base unil and this will disappear.
Automatic Security Coding
Your AUDIO VOX DT 941CI phone is
factory set with l&.fl million possible
secunty codes. This unique securily
code allows your handset and base to
recognrie each other, and minimizes
the possibility of another cordless
phone using your telephone line.
Out Of Range Indfcation
if the handset is moved lo a point
where the base and handset can no
longer communicate, the handset will
display CHANNEL SEARCHING, and
scan all channels in an attempt to re
link with ihe base.
CHFINHEL
SEhRCHIHG
Out Of Range When Phone is On
If you are presently engaged in a
phone conversation move closer to the
base. If the base unit does not
ccmmunicale with the handset within
25 seoorids of losing contact, it will
automatically hang up.
Out Of Range When Phone^Is Off
When the phone Is OEF. the handset
and bass still monitor each other to
make sure that they can communicate.
If the handset is moved out of range,
the handset will display 'CHANNEL
SEARCHING', The handset wilt scan
all channels in an attempt to reestablish
oommunrcation with the base. This
process does not require user
interventlcn; the handset will re-Rnk
with the base automatically once It is
brought back within range. The unit
will then be able to receive and place
calls.
When the base unit is unplugged,
from the power supply, the handset
will display ‘CHANNEL SEARCH
ING". Plug the base in again and this
will stop.
OT3<1CZ.0«5
40
SfS«M. li:B) PM
rF
Page 43

■4)-
Taking Саге Of You Telephone
Youf AUDIO VOX DT a^ilCI cordless
telephone contains sophisticated
electronic parts, so it must be treated
with care.
Avoid rough ti'eaiment
Place the handsel down gently. Save
the origin at packing matertals to protect
your telephone it you ever need
to ship it.
Avoid water
Your telephone can be damaged if it
gets wet. Do not use the handset
outdoors in the rain, or handle it with
wet hands. Do not install your base
unit near a sink, bathtub or shower.
El«ctrical storms
EfectricaJ storms can somelirries cause
power surges harmful lo electronic
equipment.
For your own safety, use caution when
using electric appliances during storms.
Cleaning your telephone {
Your telephone has a durable plastic
casing that should retain its luster for
many years. Clean it only with a soft
doth slightly dampened with water or
a mild soap. Do not use excess water
or cleaning soivsnts of any kind.
Flemember that electrical appliances
can cause serious injury if used when
you are wet or standing in water. If
your base unit should fall into water,
DO NOT RETRIEVE FT UNTIL YOU
UNPLUG THE POWER CORD AND
TELEPHONE LINE CORDS FROM
THE WALL. Then pull the unit out by
the unplugged cords.
. ■ • + ^ • 4 Ip
OTjiioipiJ
4\
»wK 1гя
Page 44

г;:?»
i" ;
-®-
v^iiriiCASE^FiDIFFIGULTY
H yau hava difficulty operating your
phone, the suggo^Ucns below should
solve the problem, if you still have
difficulty after trying these
suggestions, call AUDIOVOX
COMMUNICATIONS at [SOO) 229
1235.
THE PHONE DOESN'T WORK AT
ALL
* Make sure tha Power Cord is
pugged
■ Make sure the telephone line
cord is plugged liimly into the
base unit and the telephone waif
jack.
* Make sure the batteries are
properly charged. If the "LOW
BATTERY" message is shown, the
bahery pack needs charging.
NO DIAL TONE.
' First check all the suggestions
above.
* It you still don't hear a dial tone,
disconnect the base unit from the
telephone jack and connect a
different phone, tf there is no dial
tone on that phone either, the
problem Is in your wiring or lcx:al
service. Call your focal telephone
company.
YOU GET NOISE, STATIC, OR A
WEAK SIGNAL EVEN WHEN YOU'RE
NEAR THE BASE UNtT.
> Household appliances plugged
into the same circuit as the base
unit can sometimes cause
interference. Try moving the
appliance or the base unit to
another outlet.
YOU GET NOISE, STATIC,|oR A
WEAK SIGNAL WHEN'^YQUORE
AWAY FROM THE BASE^ USITk . . i
* You may he out of range. Either
move close to the base, or relocate
the base unit.
• The layout of youf home may be
limiting Ihe range. Try moving the
base unit to another position.
THE HANDSET DOES NOT^ RING
WHEN YOU RECEIVE A CAUL
• Make sure you have the handset
ringer activated. To set the finger,
see 'PROGRAMMING THE
RINGER'. ’
' Make sure the telephone line
cord is plugged firmly into the
base unit and the telephone jack.
Make sure Ihe power cord is
plugged in.
■ You may be too far from the base
uriiL
- You may have too mahy sidension
phones on your telephone line to
allow all of them to ring. Try
unplugging sorna of the other
phones,
YOU HEAR OTHER CALLS WHILE
USING YOUR PHONE,': J , L_
* Disconnect your base unit from
the telephone jack, and plug In a
regular telephone. If you still hear
ether calls, the problem is probably
in your wiring or local service. Call
your focal telephone company.
YOUHEARNOISEINTHE H Af^ DSET,
AND NONE OF 'THE; KEYS OR
BUTTONS WORK. i r!
Make sure the power cord is plugged
in.
dt»4i« p«i
Л2
WIWM.
Page 45

COMMON CURE FOR ELECTRONIC
EQUIPMENT
Elecironics, like people, can sometimes
get confused. If the unit does not seem
to be responding normally, then try
putting the handset in the cradle. If
it does not seem la respond after trying
this a tew times, do the folloiwing [In
the order listed}: '
1. Disconnect the power to the base.
2. Disconnect the handset battery.
3. Wait a few minutes.
4. Connect power to the base,
5. Connect the handset battery.
S. Put the handset In the base.
*3
43
vavH. 1TVI ^
Page 46

î
щ
I LiT'r :
^Í^^OÑTK LÍMITED^
- ■í'S-'í*
'г ...-■î's.i*'■.' ■■ ■ ■■ ’ .-=ríí ■ ’ ■’'■i.'fKsS-
í: íf
AUDIOVOX CORPORATION (líie Company), wa/ranis lo ihe original retail pun:haser of
ttiis Audk)vO)t Telephone, itiat should iriis product or any pari iheraof (except 1Гн Items
listed below), under normal use and conditions, be proveri defective In material or
worKrriansliip within the first twelve (12) month period frorn the date cl purchase, such
defeci](a) wi1i-t>a repaired Or replaced (witii new cr rabulli parts) at the Company's option,
without charge for parts or labor directly raEaied to the defect(s).
Tba accessories consisting ol the atuanna and adapter a<e similarly warranted fof twelve
(12) months from ariginal purchase,
//
This Warranty does not apply to batteries, or costs Incurred for testing or checking,
or to any product or part hereof whkri has suffered through alteration, serial number
defacement, improper instaliatloo. »Hcesslve temperature or humidity, anvlronmenial
conditions, mishandling, misuse, neglect or accldeni. This Warranty is not asslgnabla or
transferable.
To obtain repairs or replacement within the terms of this Warranty, the product should
be delivered with proof of purchase. spedUcatkin of defeci(i), transportation prepaid, to
the Company si iha address shown bsicw. ,
Call toll free to {0OO| (in N.y.State. (SiS) 2СЭ'Э410) far reference to an
Aulturiied Warranty Slaton In your area.
THE EXTENT OE THE COMPANY'S LfABlLlTY UNGER THIS WARflANTV PROVIOED
ABOVE AND, IN NO EVENT. SHALL THE COMRANYS ÜABILITY EXCEED THE
PURCHASE PRICE PAID BY PURCHASER FOR THE PRODUCT
ош’ои pu
44
«tilde. I Ilio PM
Page 47

FREQUENCY CONTROL
Cfystaj Conlrojled Dual PLL
Synthesiiar
WBGHT
Handset: 250 grams
Base : 415 grams
TRANSMIT FREQUENCY
Handset; 92S,0SWH£to927,75MHz
(AJI (en channels within this
range) ^
Sasa 902,3 MHz to 905,0 MHz
(All ten channels within this
range)
RECEIVE FRgOUENCY
Handset: 902,3 MHi to 90S,0 MHz
(All len channels within I his
range)
925.05 MHi 10 927.75MHz
^ Ati ten channels within this
range)
NOMINAL EFFECTIVE RANGE
Maxirnum power allowed by FCC and
1C, Actual operating range may vary
aocordirt^ to environmentaJ conditions
at the lime ol use.
SIZE
Handset; 19 x 6 x 3.Scm (L x W xT)
Maximum (Antenna ex<
eluded)
POWER REQUIREMENTS' \
Handset; Self-contained nicket-
cadmium rechargeable
battery supply, 3.6V
nominal, 60OmAh capacity.
Base; 11V DC a 300mA
MEMORY
Speed Dial
Catler to
SPECIFICATIONS ARE TY^PJCAL
AND MAY CHANGE. WITHOUT
NOTICE. , L I
ao Memofy ktcations,
20 digits per location.
: Alphanumeric Display
50 Memory locations
OTumuti
21.5 X 14,5 X Sem (L x W
X T) Maximum (Antenna
excluded)
-5
•i
Page 48

AUDIOTOX™
COMMUNICATIONS CORP.
AUDIOVOX COMMUNICATIONS CORP.
555 Wifeless Blvd., Hauppauge, New York 11788, 516-233-3300
16808 Marquardt Avenue, Cerritos, California 90701, 562-802-5100
4050 Britannia Rd, East, Ste 101, Mississauga Ontario, Canada L4Z3E6, 905-712-9299
110 Rocky Point Road. Kogarati, NSW 2217, Australia. 02-9587-0011
* Audiovox Singapore Pte. Ltd.
268 Orchard Road. 107-07, Singapore. 238856,65-733-5902
httpY//
Audiovox Canada
Audiovox Pacific Pty Ltd.
www.audiovox.com. LTCLL43S
91-XXXX-XX-OO
ISSUE 0
■t
OT94t02.065
6/24/38. î2:20 PM
 Loading...