

Page 1
DPF7407BK
DPF7407WH
It is important to read this user manual prior to using your new product for the first time.
Nous vous recommandons de lire ce manuel d’instructions avant d’utiliser votre nouveau produit pour la
première fois.
Es importante leer este manual antes de usar por vez primera su equipo.
user manual
guide de l’utilisateur
manual de usuario
Page 2
1
Important safety instructions
Some of the following information may not apply
to your particular product; however, as with
any electronic product, precautions should be
observed during handling and use.
• Read these instructions.
• Keep these instructions.
• Heed all warnings.
• Follow all instructions.
• Do not use this apparatus near water.
• Clean only with dry cloth.
• Do not block any ventilation openings. Install
in accordance with the manufacturer’s
instructions.
• Do not install near any heat sources such as
radiators, heat registers, stoves, or other
apparatus (including amplifiers) that produce
heat.
• Protect the power cord from being walked on
or pinched particularly at plugs, convenience
receptacles, and the point where they exit
from the apparatus.
• Only use attachments/accessories specified
by the manufacturer.
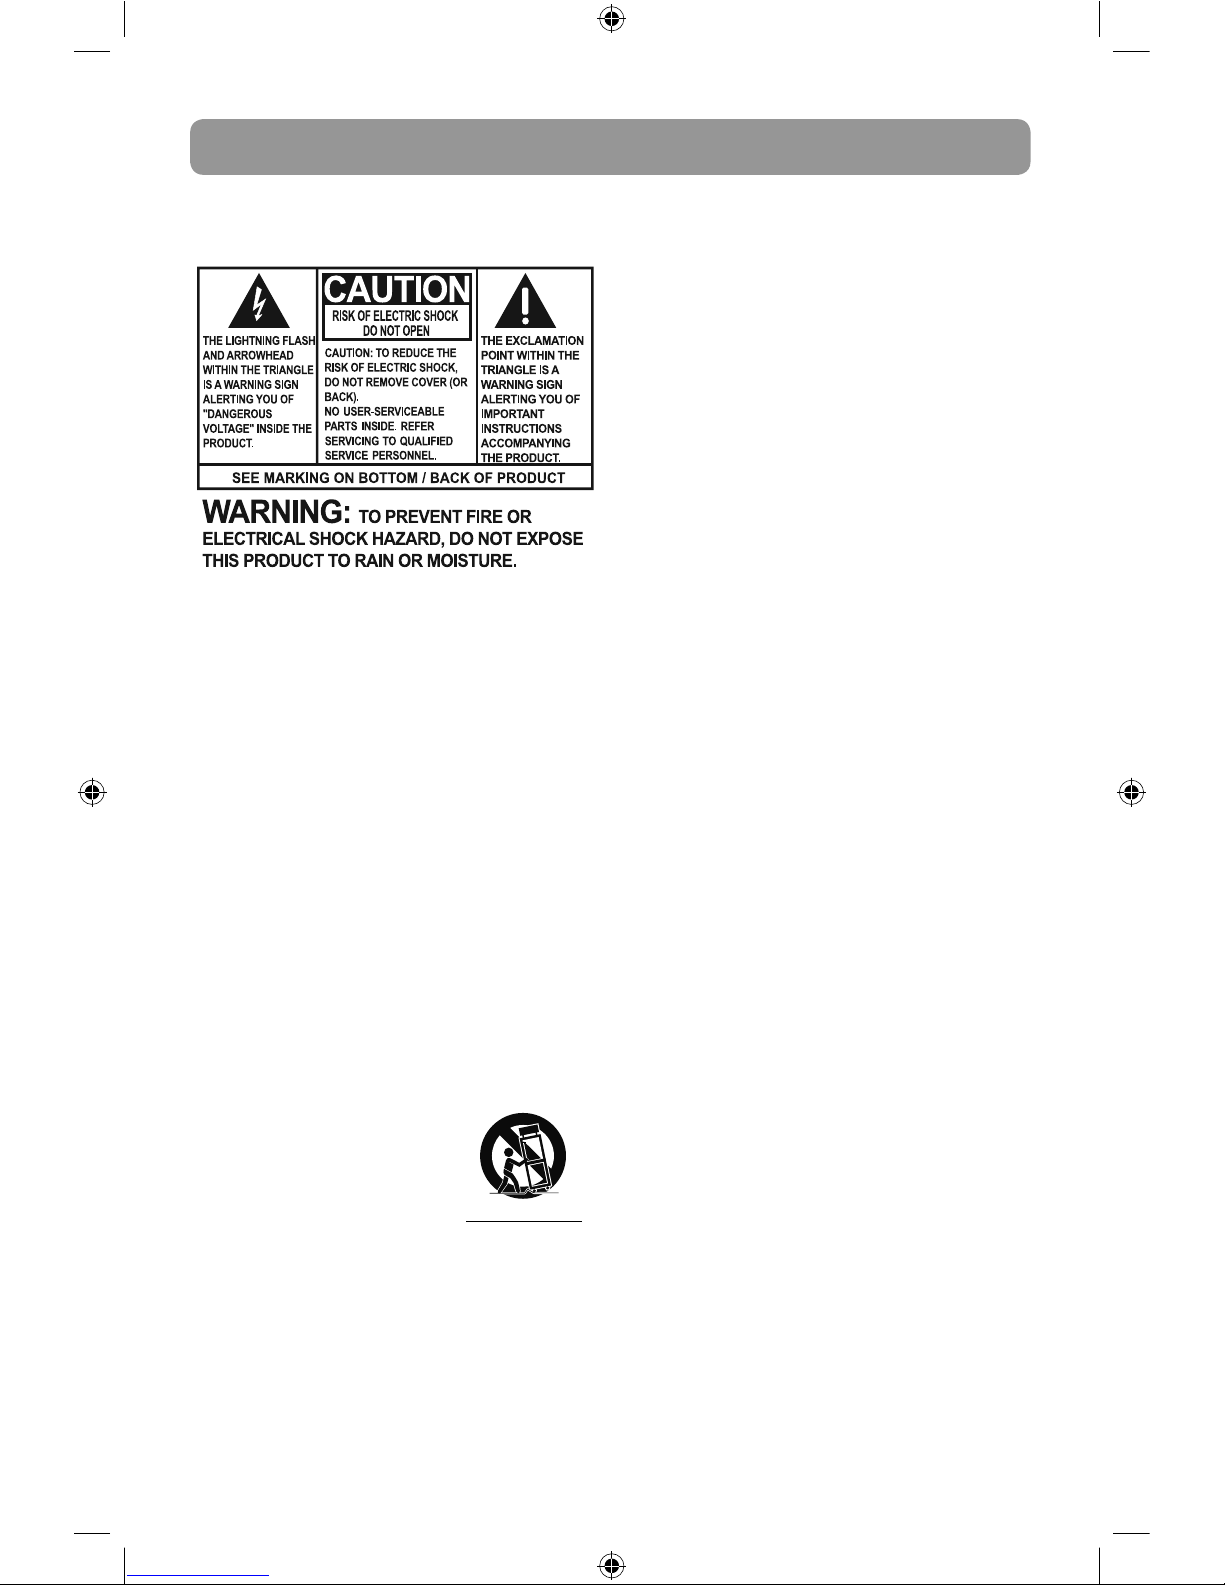
• Use only with the cart,
stand, tripod, bracket, or
table specified by the
manufacturer, or sold with
the apparatus. When a cart
is used, use caution when
moving the cart/apparatus combination to
avoid injury from tip-over.
• Unplug this apparatus during lightning
storms or when unused for long periods of
time.
• Refer all servicing to qualified service
personnel. Servicing is required when the
apparatus has been damaged in any way,
such as power-supply cord or plug is
damaged, liquid has been spilled or objects
have fallen into the apparatus, the apparatus
has been exposed to rain or moisture, does
not operate normally, or has been dropped.
ADDITIONAL SAFETY INFORMATION
• The AC/DC adapter supplied with this
product is intended to be correctly oriented
in a vertical or floor mount position.
• Do not use unauthorized chargers or power
adapters. Use only chargers or power
adapters that came with your product or that
is listed in the user’s guide.
• Apparatus shall not be exposed to dripping
or splashing and no objects filled with
liquids, such as vases, shall be placed on the
apparatus.
• Always leave sufficient space around the
product for ventilation. Do not place product
in or on a bed, rug, in a bookcase or cabinet
that may prevent air flow through vent
openings.
• Do not place lighted candles, cigarettes,
cigars, etc. on the product.
• Care should be taken so that objects do not
fall into the product.
• Do not attempt to disassemble the cabinet.
This product does not contain customer
serviceable components.
• The marking information is located at the
bottom of apparatus.
• To be completely disconnect the power
input, the AC/DC adaptor of apparatus shall
be disconnected from the mains.
• AC/DC adaptor is a disconnect device. The
AC/DC adaptor should not be obstructed OR
should be easily accessed during intended
use.
• The ventilation should not be impeded by
covering the ventilation openings with items
such as newspaper, table-cloths, curtains etc.
• No naked flame sources, such as lighted
candled, should be placed on the apparatus.
• Attention should be drawn to the
environmental aspects of battery disposal.
• The use of apparatus in moderate climates.
PLEASE READ AND SAVE FOR FUTURE REFERENCE
IMPORTANT SAFETY INSTRUCTIONS
]
Portable Cart Warning
Page 3
2
EN
inserted correctly. Mixing types or inserting
incorrectly may cause them to leak.
• Discard any leaky or deformed battery
immediately. They may cause skin burns or
other personal injury.
• Please help to protect the environment by
recycling or disposing of batteries according
to federal, state, and local regulations.
WARNING: The battery (battery or batteries or
battery pack) shall not be exposed to excessive
heat such as sunshine, fire or the like.
Ecology
Help protect the environment - we recommend
that you dispose of used batteries by putting
them into specially designed receptacles.
Electrical power information
External Power adapter:
AC INPUT: 100 - 240 V ~ 50/60 Hz
DC OUTPUT: 5 V 1.5 A
Important battery precautions
• Any battery may present a risk of fire,
explosion, or chemical burn if abused. Do not
try to charge a battery that is not intended to
be recharged, do not incinerate, and do not
puncture.
• Non-rechargeable batteries, such as alkaline
batteries, may leak if left in your product for a
long period of time. Remove the batteries
from the product if you are not going to use it
for a month or more.
• If your product uses more than one battery,
do not mix types and make sure they are
• Consult the dealer or an experienced radio/
TV technician for help.
Changes or modifications not expressly
approved by Audiovox could void the user’s
authority to operate the equipment.
Manufacturer/Responsible Party
Audiovox Accessories Corporation
111 Congressional Blvd., Suite 350
Carmel, IN 46032
1-317-810-4880 ( No technical /product support
is available via this number. This phone number
is for regulatory matters only.)
Visit www.audiovox.com for
technical support
FCC Information
This device complies with Part 15 of the FCC
Rules. Operation is subject to the following two
conditions: (1) this device may not cause harmful
interference, and (2) this device must accept any
interference received, including interference that
may cause undesired operation.
Note: This equipment has been tested and
found to comply with the limits for a Class B
digital device, pursuant to Part 15 of FCC Rules.
These limits are designed to provide reasonable
protection against harmful interference in a
residential installation. This equipment
generates, uses, and can radiate radio frequency
energy and, if not installed and used in
accordance with the instructions, may cause
harmful interference to radio communications.
However, there is no guarantee that interference
will not occur in a particular installation. If this
equipment does cause harmful interference to
radio or television reception, which can be
determined by turning the equipment off and
on, the user is encouraged to try to correct the
interference by one or more of the following
measures:
• Reorient or relocate the receiving antenna.
• Increase the separation between the
equipment and receiver.
• Connect the equipment into an outlet on a
circuit different from that to which the
receiver is connected.
FCC information
This Class B digital apparatus complies with
Canadian ICES-003.
Cet appareil numérique de la classe B est
conforme à la norme NMB-003 du Canada.
Audiovox
DPF7407BK
Audiovox
DPF7407WH
Page 4

3
Contents
Important safety instructions .......................1
IMPORTANT SAFETY INSTRUCTIONS ...................................1
Electrical power information ................................................2
Important battery precautions .............................................2
Ecology ...........................................................................................2
FCC information ................................................. 2
Contents ............................................................... 3
Before you begin ............................................... 4
Package Contents ......................................................................4
Getting Started ...........................................................................4
Photo frame controls ....................................... 5
Changing settings ............................................. 6
Main menu .................................................................................... 6
Setting menu ...............................................................................6
Viewing photos .................................................. 7
Selecting media ..........................................................................7
Starting a slideshow .................................................................. 7
Photo setting ...............................................................................7
Video playback ................................................... 8
Selecting media ..........................................................................8
Playing muvee file ...................................................................... 8
muvee setting .............................................................................. 8
Calendar and clock ........................................... 9
Tips for cleaning and care .............................. 9
Photo Manager .................................................. 10
Connecting to the computer ................................................. 10
Managing files with Photo Manager ................................... 10
Specifications ...................................................... 11
Troubleshooting ................................................ 12
Service Information ...................................................................12
For your records ......................................................................... 12
Warranty information ...................................... 13
12 Month Limited Warranty ................................................... 13
Page 5
4
EN
Package Contents
• Digital photo frame (DPF7407BK for black
color and DPF7407WH for white color)
• Case
• AC/DC power adaptor (AC input:
100 - 240 V ~ 50/60 Hz, DC output 5 V 1.5 A)
• USB cable
• CD-ROM
• User manual
• Drop-in for muvee Reveal
• eMusic card
• Product registration card
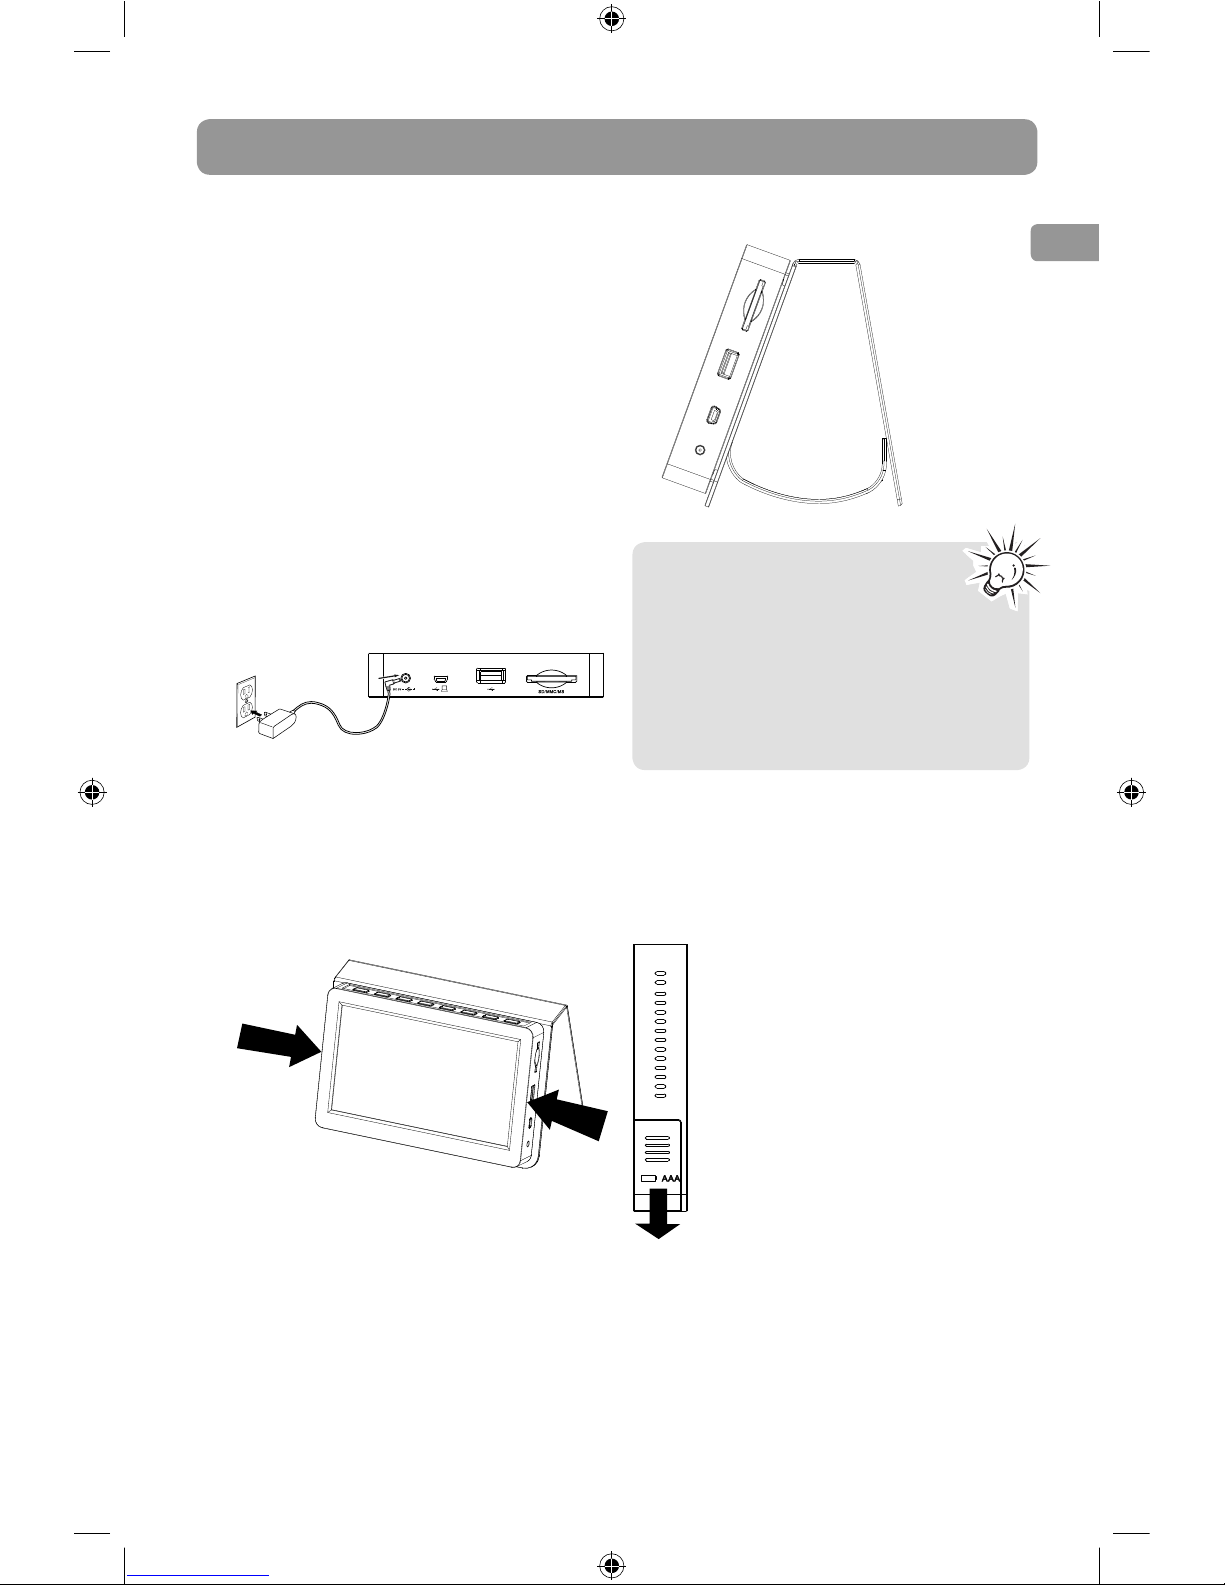
Getting Started
1. Open the case and connect the AC power
adapter into the digital photo frame and plug
it into a power outlet. The unit is
automatically turned on when it is plugged
into the outlet.
2. Insert your memory card with photos or
muvee video files into the memory slot
(MultiMediaCard
TM
/ Secure Digital
TM
/
Memory StickTM) or USB storage device into
the USB port.
3. Open the case and flap the cover to the back.
Place the digital photo frame on a flat surface
with the buttons on the top.
Detach
Attach
4. Follow the directions indicated above to
detach the photo frame from or attach the
photo frame to the case.
5. You can also buckle the button at the back.
Install the battery
Your digital photo frame can be powered by four
AAA batteries. Install the batteries into the
battery compartment, then the unit can be
operated without AC power.
1. Slide downward and open the
battery compartment cover.
2. Install four AAA batteries into the
compartment. Follow the polarities
signs correctly.
3. Slide upward and close the
compartment cover.
Before you begin
• If no memory card is available,
there are some demo images
preloaded in the internal memory.
To delete preloaded images,
please refer to the "Photo setting"
section for details.
• The picture on the frame would not
rotate according to the position of the
frame.
Open
Page 6
5
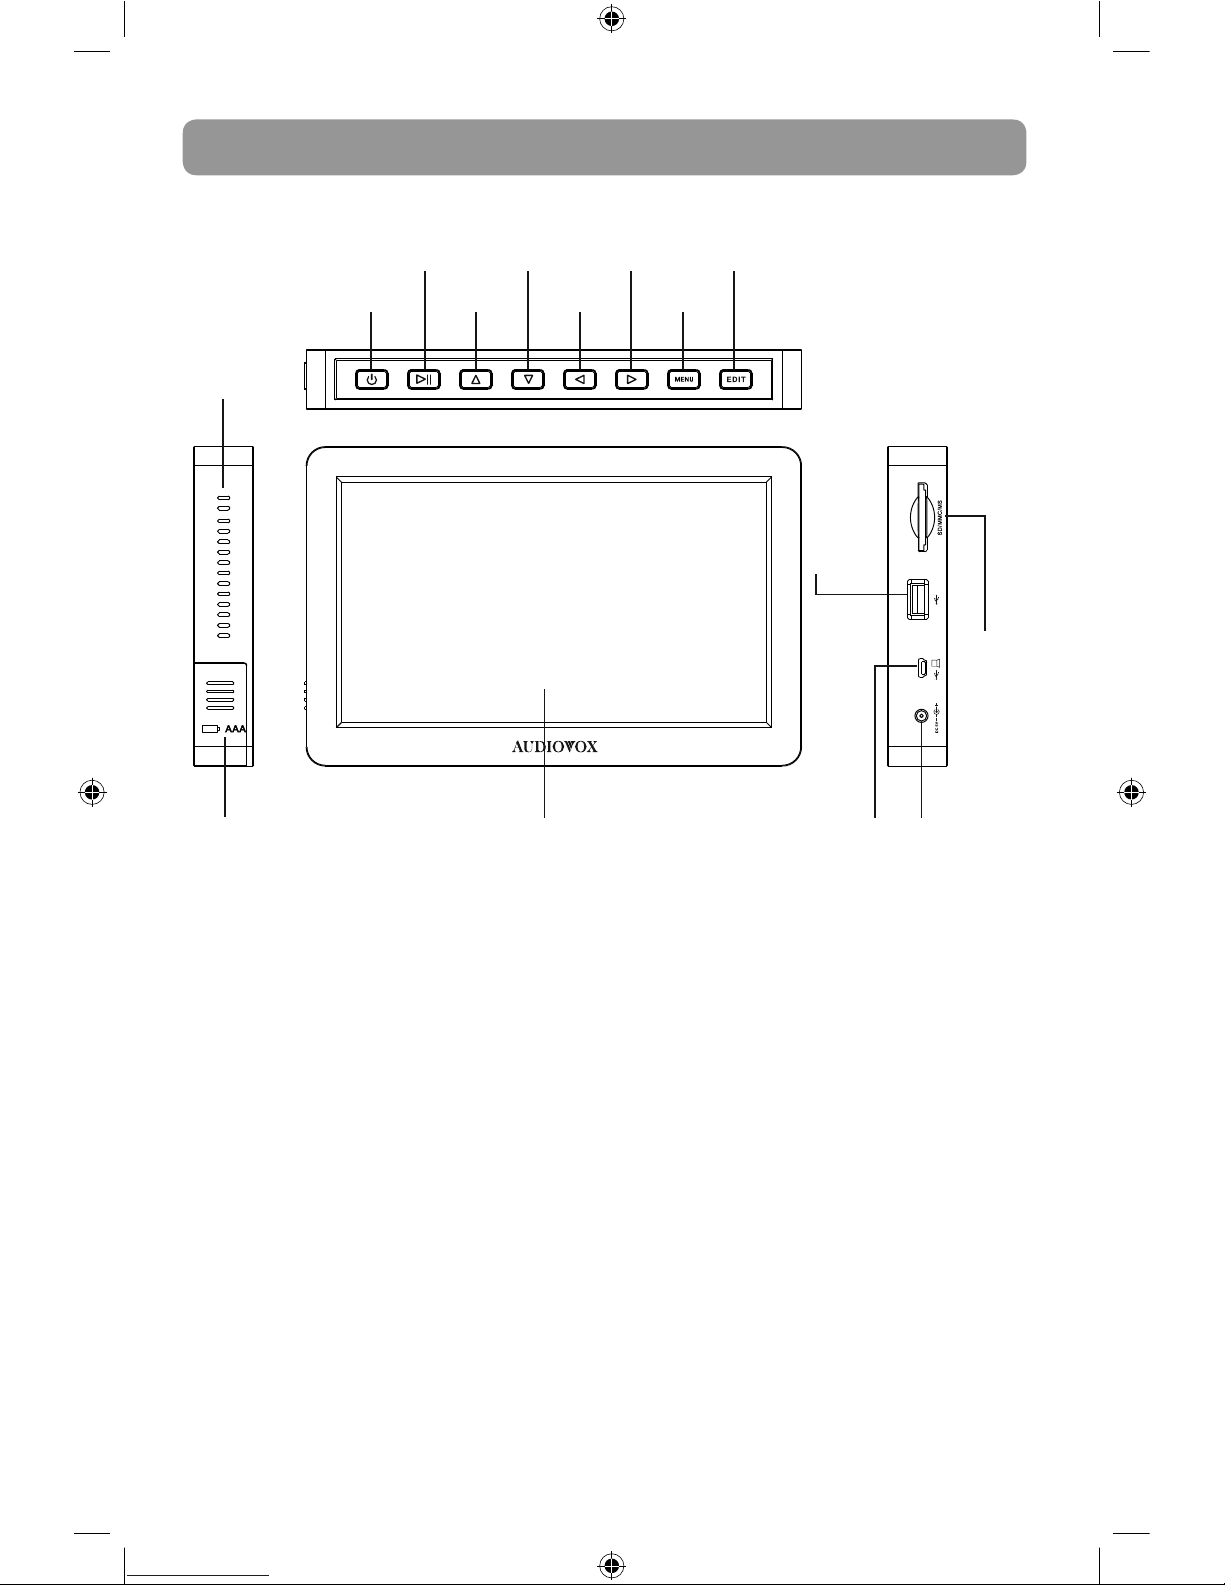
Photo frame controls
Battery
compartment
Display
Speaker
On/Standy by*
Up/
Vol+
Down/
Vol-
Left
Right
Menu
Edit
Play/
pause/
select
USB
connector
USB connector
(Mini B)/
Connector to PC
Power
input
SD/MMC/
MS card
slot
*To turn on the photo frame or enter the stand
by mode, press and hold the On/Standy by
button for three seconds.
Page 7
6
EN
Changing settings
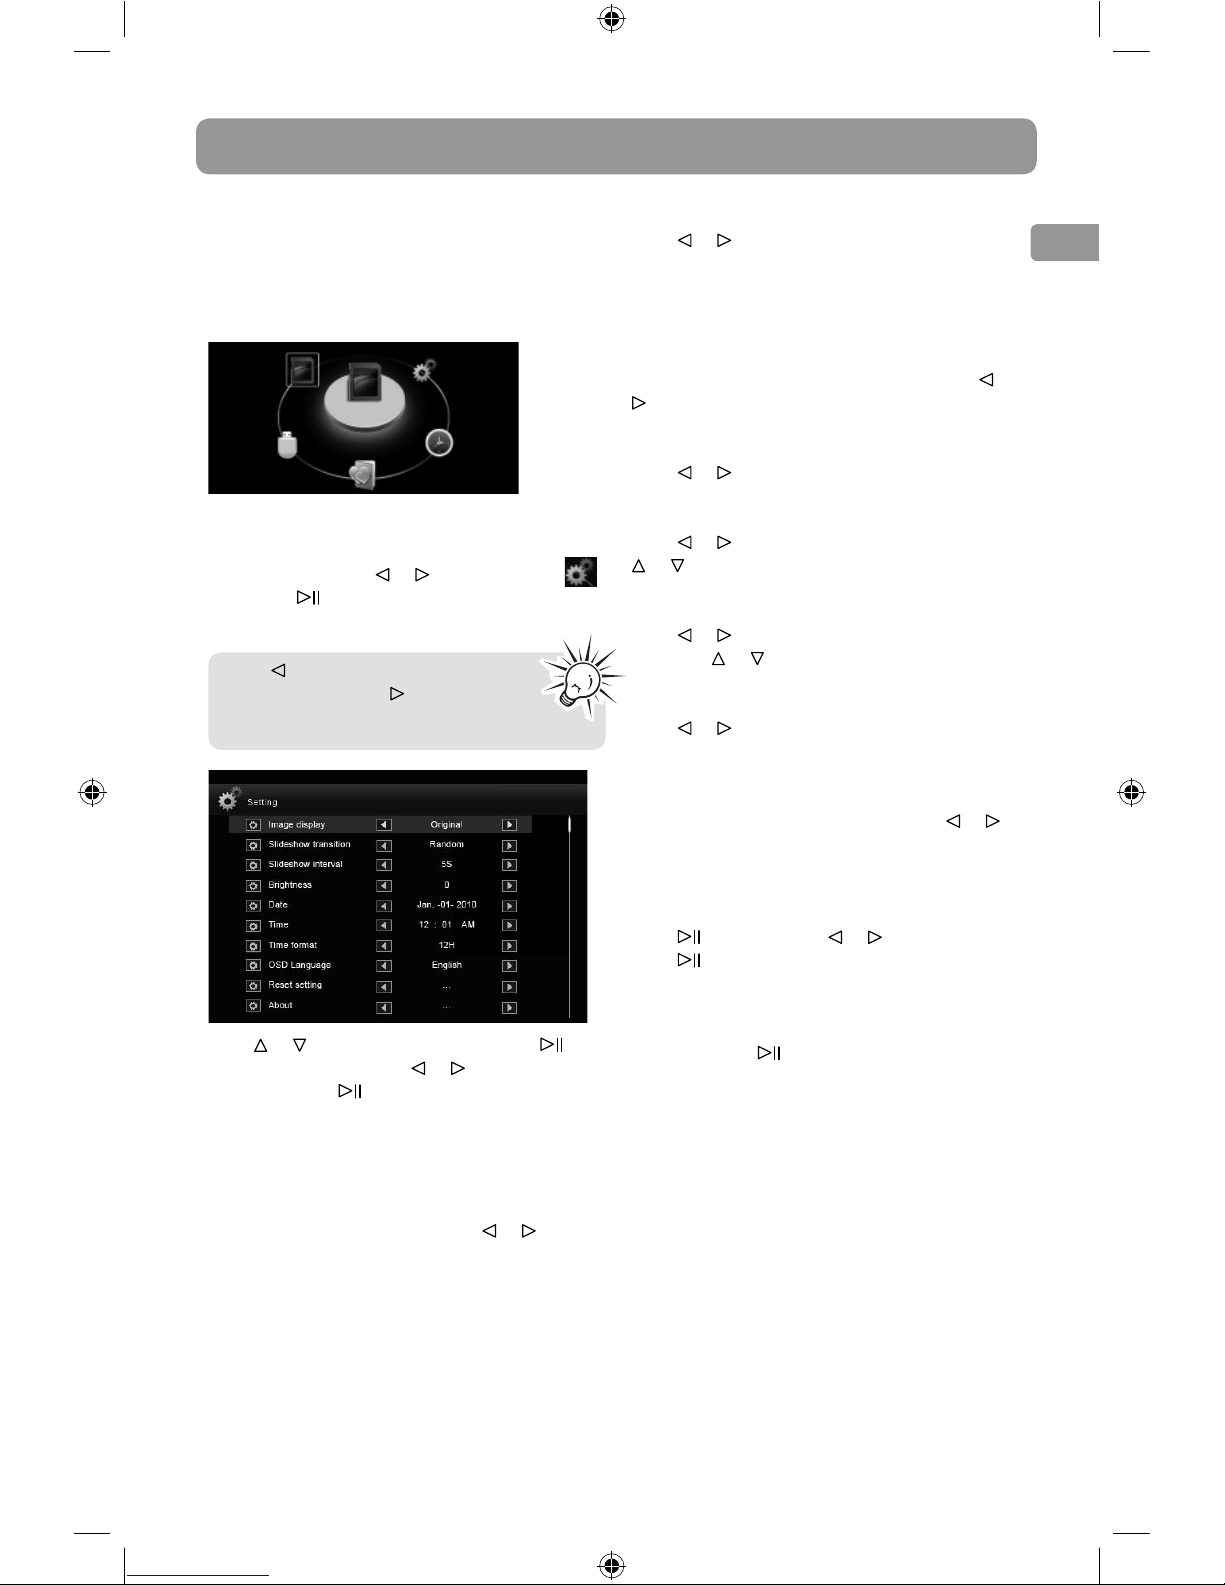
Main menu
When the unit is turned on, the main menu
screen will shown as below. You can also press
MENU to access the main menu when in other
modes.
Setting menu
In Main menu, press or to highlight the
icon. Press
to access the Setting menu shown
below.
Press to move the highlight choice
clockwise and press
to move the
highlight choice counter-clockwise.
Press or to select a setting and press to
access the options. Press
or to adjust the
value and press again to confirm the setting.
To exit the setting menu, press MENU.
Image display
This option allows you to display photo in its
native format or crop a portion of the photo to
allow it to fit the full screen. Press or to
select from Crop and Original.
Slideshow transition
Press
or to select among Random, Snake,
Partition, Erase, Blinds, Random lines, Grid, Cross,
Spiral, Rect and Close.
Slideshow interval
This option allows you to select how long a
photo will be displayed in slideshow. Press
or
to select among 5s, 10s, 30s and 60s.
Brightness
Press or to select among -2, -1, 0, 1 and 2.
Date
Press or to select month, day and year. Press
or to adjust the value.
Time
Press or to select hour and minute and AM/
PM. Press
or to adjust the value.
Time Format
Press or to select from 12H and 24H.
OSD Language
This option allows you to select the language in
which the OSD will be displayed. Press or to
select among English, French and Spanish.
Reset Setting
This option allows you to restore factory defaults.
Press and then press or to select Yes.
Press to confirm.
About
This option displays the version number of the
firmware. Press
and a pop-up window with
the firmware's version number will be displayed.
Page 8
7
Viewing photos
Selecting media
1. Insert an SD, MMC or MS card into the SD/
MMC/MS card slot or insert a USB flash drive
into the USB connector.
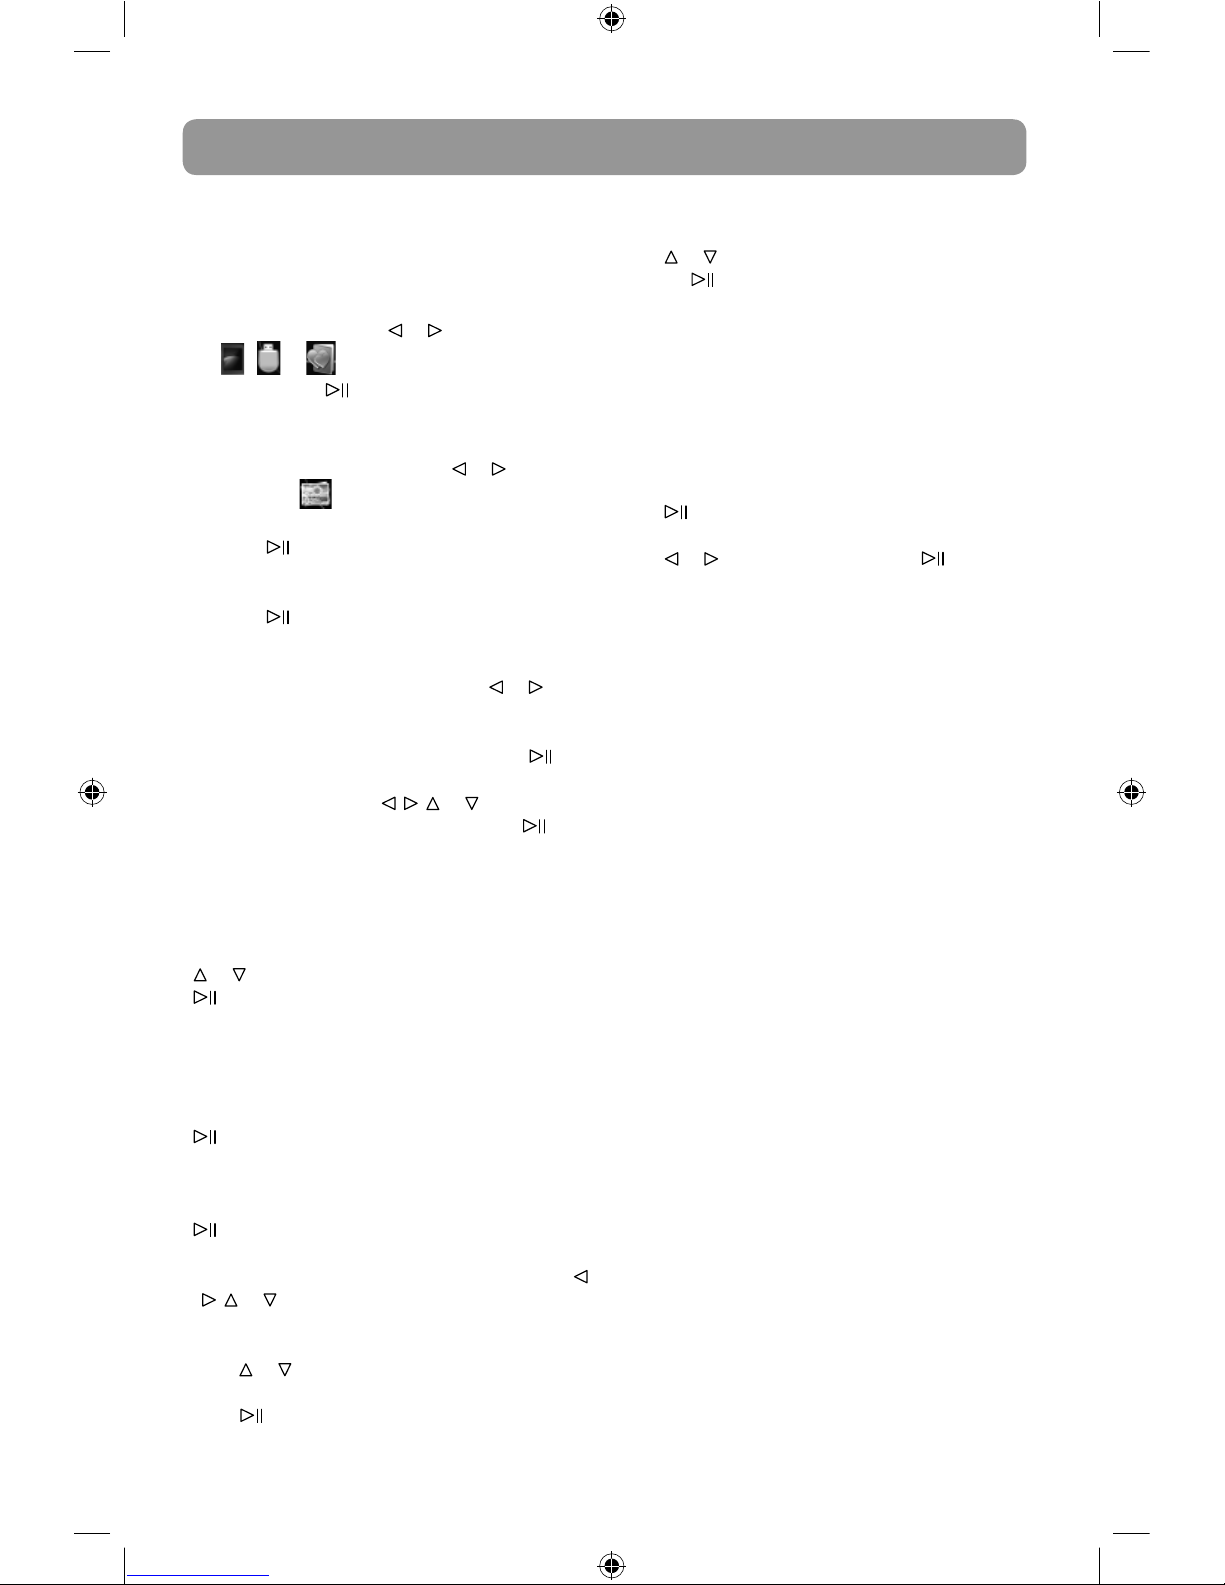
2. In Main menu, press
or to highlight the
, or icon to select the desired
media. Press
to confirm your selection.
Starting a slideshow
1. To select photo mode, press or to
highlight
.
2. Press
to start slideshow from the first
photo.
3. Press
to pause the slideshow and press
again to resume.
4. When slideshow is paused, press or to
view the previous or next photo.
5. During the slideshow, press and hold
to
stop slideshow and go to the thumbnail
photo screen. Press
, , or to highlight
the picture you desired to play, press to
start slideshow from the selected picture.
Photo setting
During slideshow, press EDIT to pause the
slideshow and display Edit menu. Press
or to select a setting shown below and press
to enter sub-menu or adjust the selected
setting. To exit the Edit menu, select Exit or press
EDIT again.
Rotate
Rotates the photo by 90o to the right each time
is pressed.
Zoom
Zoom in by 150%, 200% and 250% by pressing
repeatedly. The photo will return to normal
size when it is enlarged by 250%. To view the
hidden part when the image is enlarged, press
, , or .
Effect
Press
or to select among Color
enhancement, Black and white and Normal. Then
press
to confirm.
Copy
Press
or to select from Copy one and Copy
all. Press
to confirm your selection.
"Please wait..." will be displayed when copying all
files to the internal memory and "Copy
successfully!" will be displayed when copying
finishes. If the internal memory does not have
enough space, "Not enough memory!" will be
displayed.
Delete
Press
and the message "Are you sure you
want to delete the selected file?" will pop up.
Press
or to select "Yes" and press to
confirm deleting.
Page 9
8
EN
Video playback
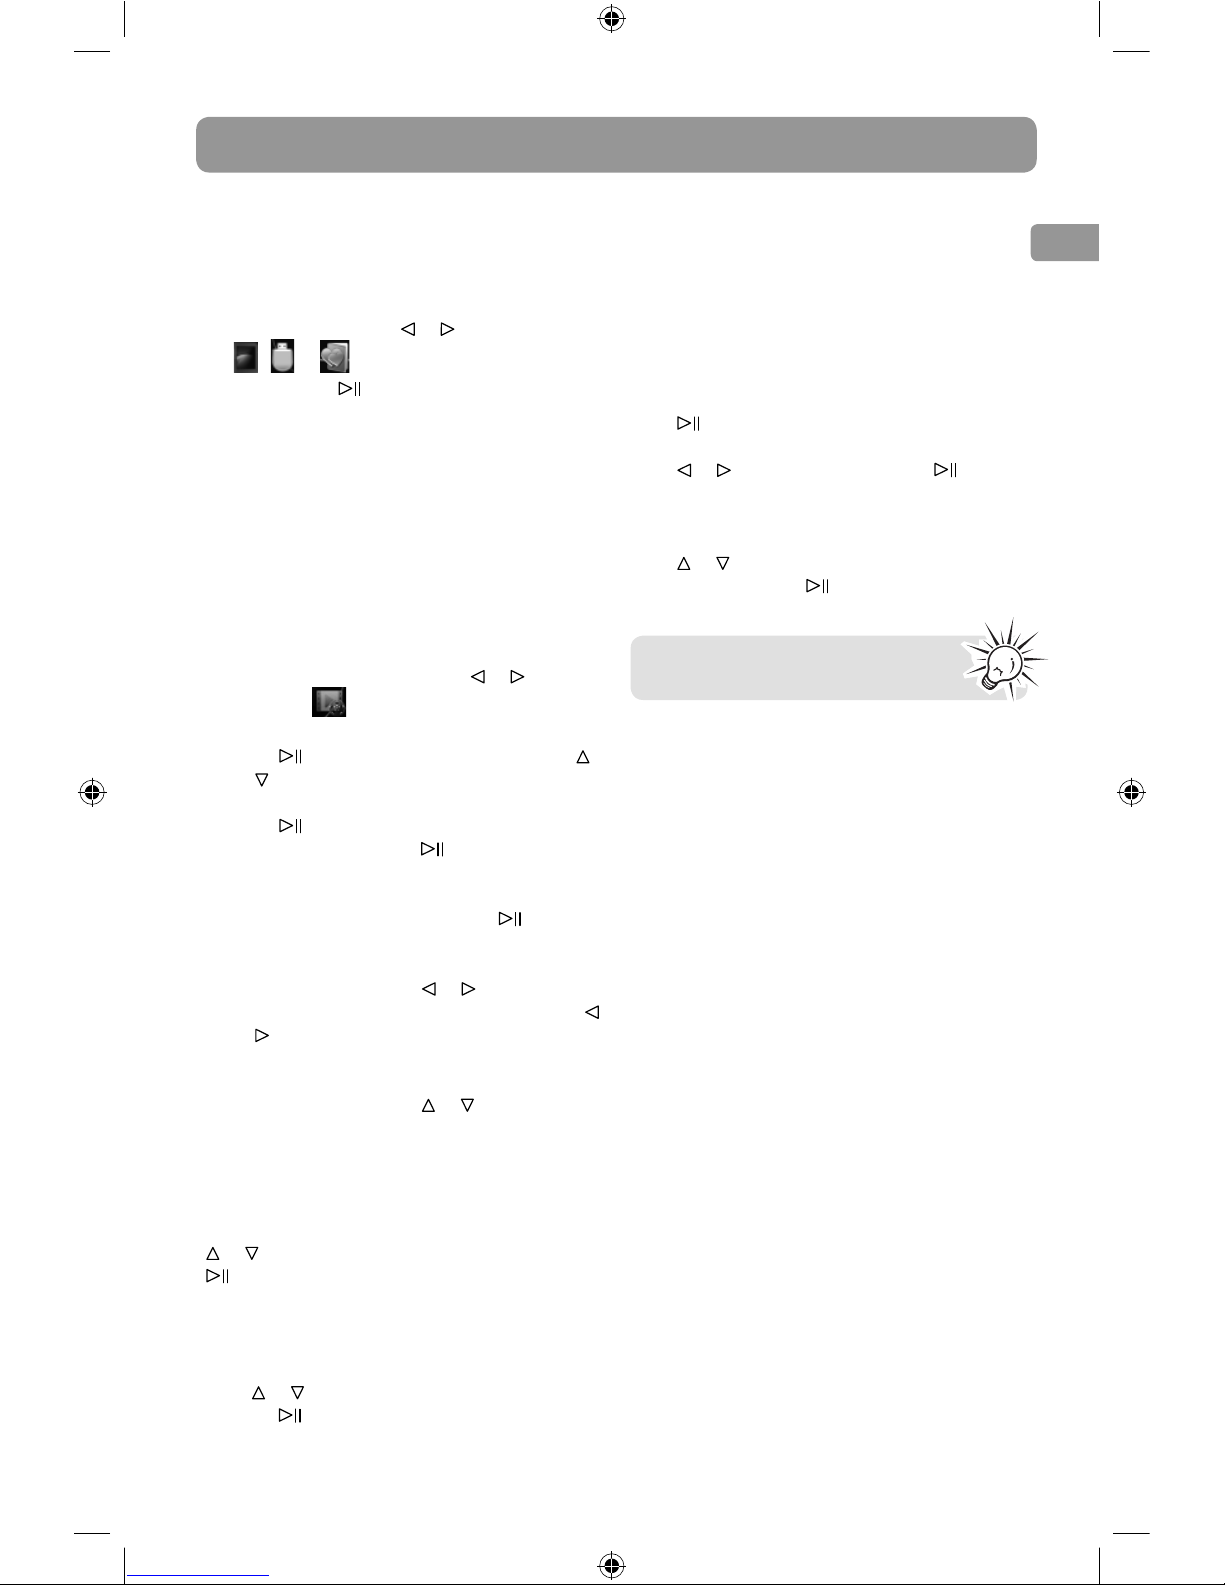
Selecting media
1. Insert an SD, MMC or MS card into the SD/
MMC/MS card slot or insert a USB flash drive
into the USB connector.
2. In Main menu, press
or to highlight the
, or icon to select the desired
media. Press
to confirm your selection.
Playing muvee file
This digital photo frame only plays motion JPEG
generated by muvee Reveal. Refer to the user
manual in the CD-ROM, which is included in the
package. This manual provides instructions for
how to install the included muvee Reveal
software and instructions about how to create a
muvee file and save it to the memory card or
USB flash drive.
1. To select muvee mode, press or to
highlight
.
2. Press
to enter the muvee file list. Press
or to select muvee file.
3. Press
to start muvee playback. During
muvee playback, press to pause playback
and press again to resume.
4. During playback, press and hold
to stop
playback and return to the muvee file list.
5. During playback, press
or to play the
previous or next muvee file. Press and hold
or
to rewind or fast forward the current
muvee file.
6. During playback, press
or to adjust the
volume.
muvee setting
During muvee playback, press EDIT to pause the
playback and display the Edit menu. Press
or to select a setting shown below and press
to enter sub-menu or adjust the selected
setting. To exit the Edit menu, select Exit or press
EDIT again.
Copy
Press or to select from Copy one and Copy
all. Press
to confirm your selection.
Please wait..." will be displayed when copying all
the file(s) to the internal memory and "Copy
successfully!" will be displayed when copying
finishes. If the internal memory does not have
enough space, "Not enough memory!" will be
displayed.
Delete
Press
and the message "Are you sure you
want to delete the selected file?" will pop up.
Press
or to select "Yes" and press to
confirm deleting.
Repeat
Press
or to select among Repeat One, Repeat
All and Normal. Press
to confirm your
selection.
Rotate, Zoom and Effect functions are
disabled in muvee mode.
Page 10
9
Calendar and clock
Tips for cleaning and care
In Main menu, press or to highlight the
icon and then press to enter the calendar and
clock screen.
Press
or to select previous or next month
calendar and press
or to view previous or
next image.
• Power off the digital photo frame before
cleaning.
• Do not spray or pour liquid cleaning agents
directly on the screen or frame.
• Do not use ammonia, alcohol, or abrasive
detergent cleaning agents.
• Cleaning the screen:
1. Wipe screen with a clean, soft, lint-free
cloth to remove dust and loose particles.
2. If further cleaning is required, apply an
appropriate cleaning agent (approved for
LCD displays) to a clean, soft, lint-free
cloth and wipe the screen.
• Do not apply too much pressure on the
screen to avoid damaging it.
Go to the Setting menu to set the
date and time.
Page 11
10
EN
Connecting to the computer
• Turn on the photo frame.
• Connect the photo frame to your computer
with the USB cable provided. A "Connecting
PC..." screen will appear on the photo frame
display.
• The player will be connected in MSC (Mass
Storage Class) mode. It will appear as a drive
letter on your computer and behave as a
detachable drive for file transfer in one or
both directions.
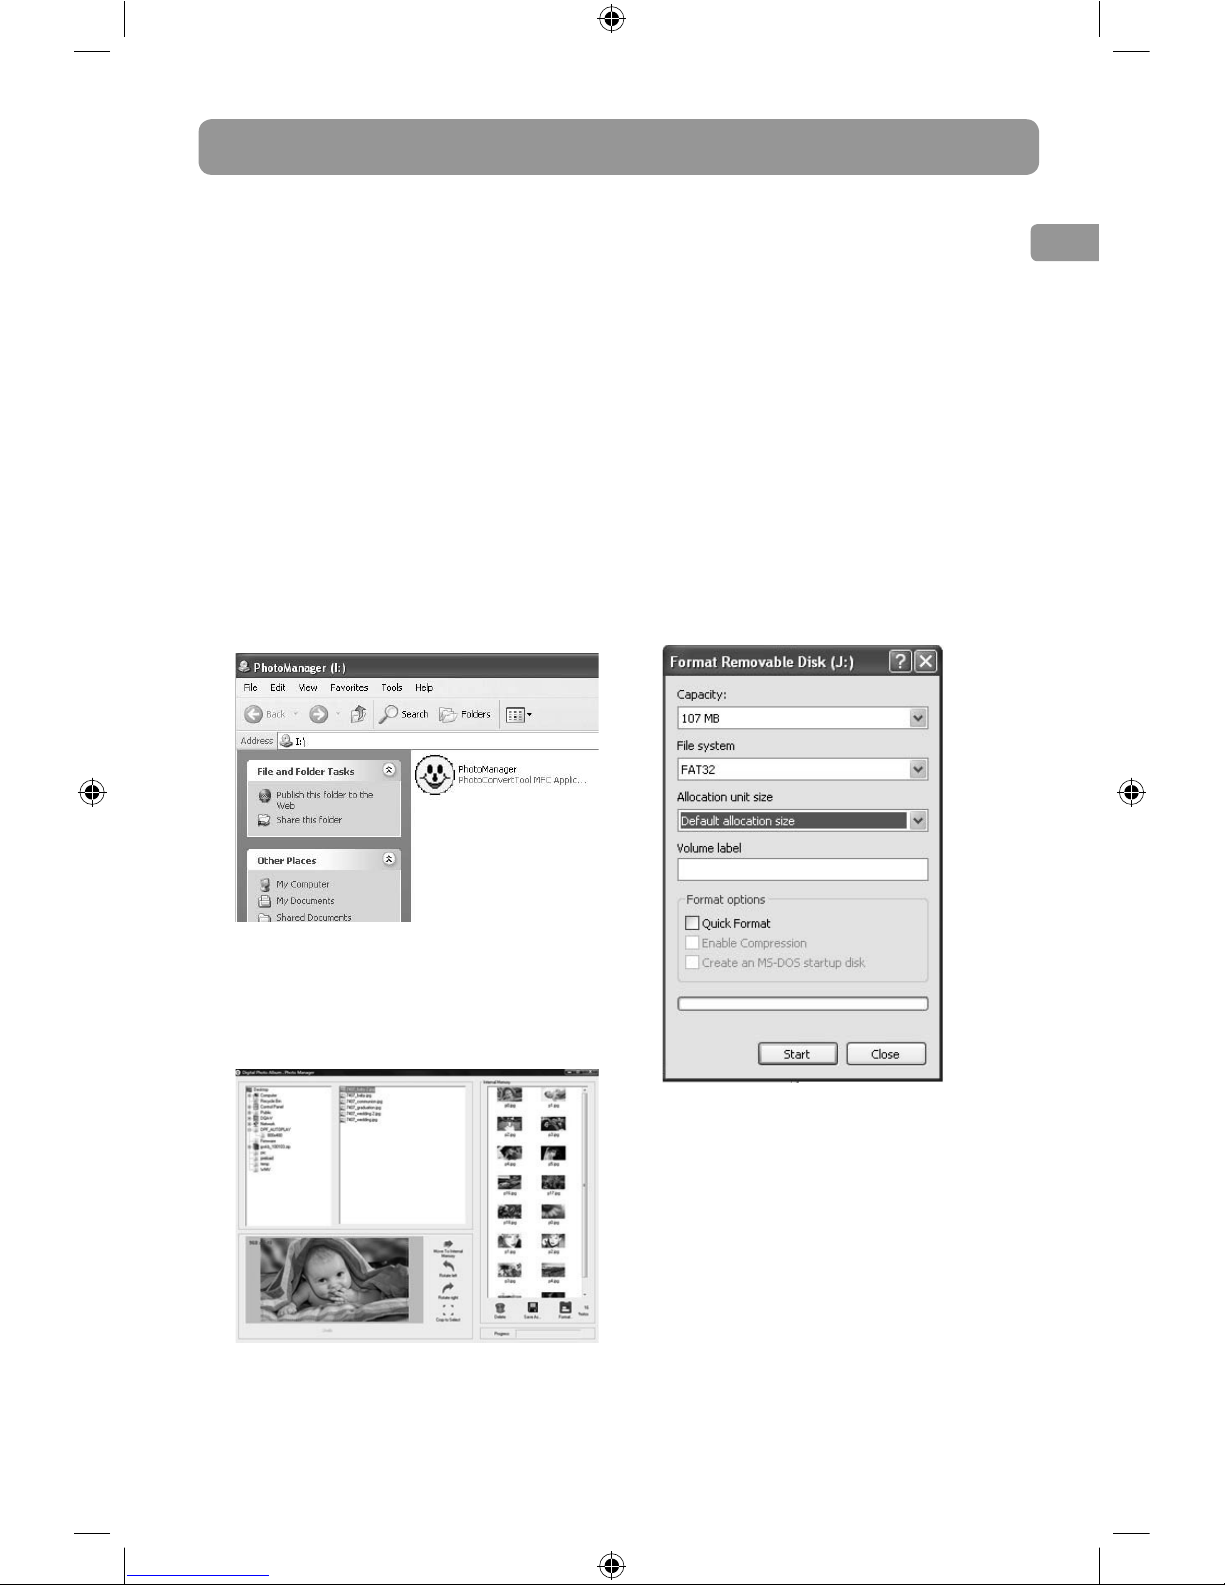
Managing files with Photo Manager
• A window of a drive letter associated with the
Photo Manager label will pop up. If it does
not pop up, open My Computer and doubleclick the drive labeled Photo Manager.
Double click the Photo Manager icon to start
the program.
• Locate the folder directory where you stored
your photos in the left column, then all the
photos inside this folder will be displayed in
the middle column. Select the photo(s) you
want to transfer to the digital photo frame.
• Press Move To Internal Memory to transfer
selected photo to the digital photo frame.
• Press Rotate left, Rotate right and Crop to
Select to edit the photo before transferring.
• The right column shows the photos in your
digital photo frame. Press Delete to delete
selected file. Select Ye s when the
confirmation window pops-up.
• Press Save As... to save the selected photo to
a new file.
• Press Format.. to format the data in the
internal memory of the digital photo frame.
Select the setting you desired in the pop-up
window and press Start.
• If the internal memory does not have enough
space, "Internal Memory is full" will be
displayed.
Photo Manager
Page 12
11
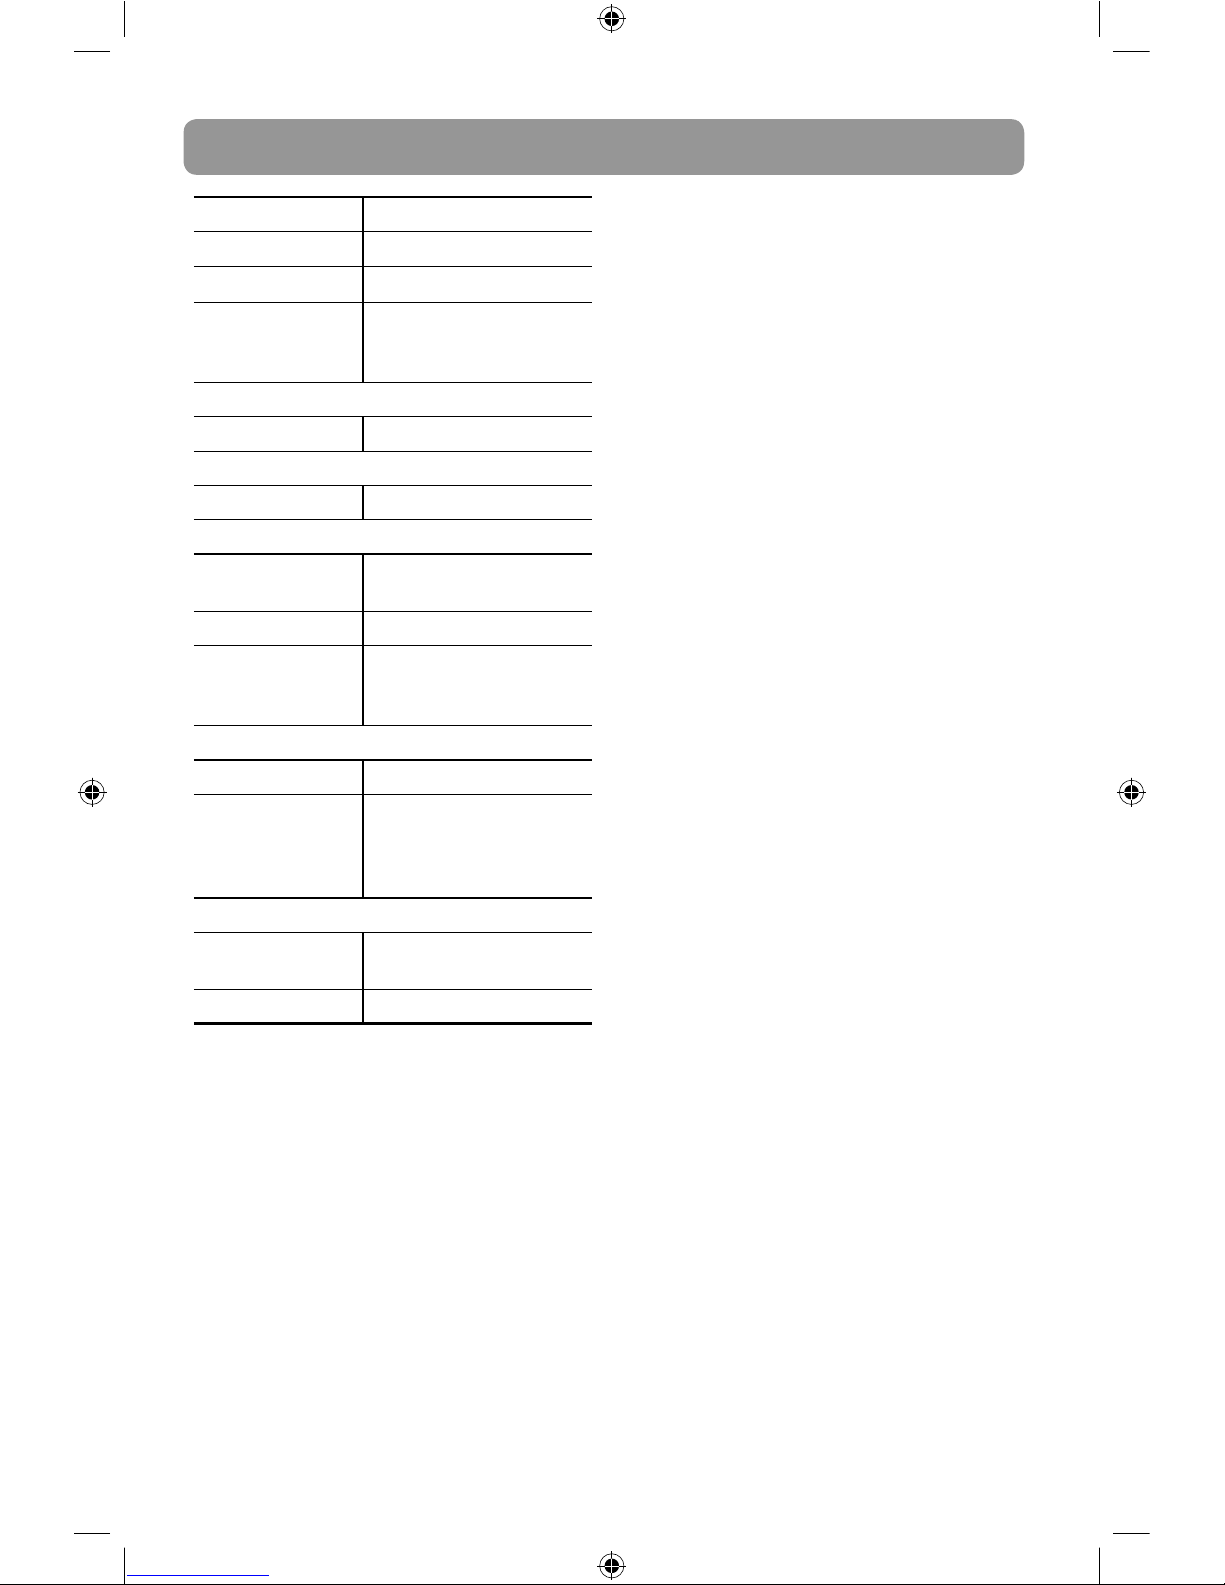
Specifications
Display size 7 inch
Aspect ratio 16:9
Resolution 480x234 pixels
External Power
Adapter
AC input: 100-240V ~
50/60Hz, DC output 5V
1.5A
Audio
Output power 1W
Storage
Internal memory 128MB NAND flash
Memory device supported
Memory cards slot SD/SDHC/MMC/MS/MS
Pro card
USB Port Standard USB 2.0 Host x 1
Maximum flash
device size
supported
4GB
Media Files Supported
Photo file formats JPEG
Video file formats Motion JPEG (video) with
ADPCM (audio)
(generated by muvee
Reveal program only)
User Interface/Control
Buttons at the Top
of the unit
Ye s
Calendar & Clock Yes
Page 13

12
EN
Troubleshooting
Your digital photo frame won’t turn on.
• The adapter is not securely connected to your
digital photo frame, four AAA batteries are
not installed or emptied or the power switch
is not on.
The unit displays some pictures slower and
some pictures faster.
• Higher resolution pictures load more slowly.
Try using lower resolution pictures or down
sampling your images. See your camera’s
operating manual for details on down
sampling your photos.
A memory card is inserted in your digital
photo frame but you cannot view your photos
or muvee video les.
• Make sure that the memory card contains
JPEG (Progressive JPEG are not supported) or
muvee video files.
• Turn your digital photo frame off and make
sure that the memory card is inserted all the
way into the card slot and is inserted
correctly. Then turn the unit on again.
• The unit may not support flash devices larger
than 4GB. muvee files may not be played
smoothly if the files are stored in a flash
device with more than 4GB capacity.
• Some digital cameras save images in formats
other than JPEG. Refer to your camera’s
manual if your photos are not JPEG files.
• If a card can not be read, you can try to
format it first. Many digital cameras and video
cameras use an SD card to hold images and
movies. If you find that you can't access the
full capacity of the card, or data on the card
randomly becomes deleted or only some of
the pictures can be read, you will need to
reformat it. SD cards can be reformatted
either with a computer that has an SD card
reader or directly from the menu of most
digital cameras. See below procedures for
formatting SD card.
Formatting procedures for the SD card
Using SD Card Reader
1. Turn on your computer and put the SD card
into the card reader slot on the front of your
computer or the external card reader
attached to a USB port. Wait to see if your
operating system automatically opens a
window prompting you for information. Click
on the option to "Open a folder to view files"
if the window pops up.
2. Click on the "Start" button if your operating
system does not automatically prompt you to
open a folder. Choose the "My Computer"
option to bring up a new window.
3. Right-click on the drive bay for your card
reader, and then choose the option that says
"Reformat" from the pop-up menu. Click on
the option to set the formatting to "FAT16" if
you receive a separate pop up window asking
you which file system to set the card to.
Using Digital Camera
1. Put the SD card into your digital camera and
then turn the power on. Press the button on
your camera to bring up your recently shot
photographs.
2. Press the "Menu" or "OK" button on the
camera to bring up the photograph options.
Choose the option that says either "Setup" or
"Options."
3. Scroll over to the "Format" option and hit
"OK." Choose the option to set the file format
to "FAT16."
Note: Some digital cameras procedures may vary
slightly from the procedure above. Always refer
to the camera's owner manual first
Service Information
This product should be serviced only by those
specially trained in appropriate servicing
techniques. For instructions on how to obtain
service, refer to the warranty included in this
user manual.
For your records
Keep your sales receipt for proof of purchase to
obtain warranty parts and service.
In the event that service should be required, you
may need both the model number and the serial
number. In the space below, record the date and
place of purchase, and the serial number:
Model No.
Date of Purchase
Place of Purchase
Serial No.
Page 14

13
Warranty information
12 Month Limited Warranty
Applies to Audiovox Digital Photo Frames
AUDIOVOX ACCESSORIES CORP. (the Company)
warrants to the original retail purchaser of this
product that should this product or any part
thereof, under normal use and conditions, be
proven defective in material or workmanship
within 12 months from the date of original
purchase, such defect(s) will be repaired or
replaced with reconditioned product (at the
Company’s option) without charge for parts and
repair labor.
To obtain repair or replacement within the terms
of this Warranty, the product is to be delivered
with proof of warranty coverage (e.g. dated bill
of sale), specification of defect(s), transportation
prepaid, to the Company at the address shown
below.
This Warranty does not extend to the elimination
of externally generated static or noise, to
correction of antenna problems, loss/
interruptions of broadcast or internet service, to
costs incurred for installation, removal or
reinstallation of product, to corruptions caused
by computer viruses, spyware or other malware,
to loss of media, files, data or content, or to
damage to tapes, discs, removable memory
devices or cards, speakers, accessories,
computers, computer peripherals, other media
players, home networks or vehicle electrical
systems.
This Warranty does not apply to any product or
part thereof which, in the opinion of the
Company, has suffered or been damaged
through alteration, improper installation,
mishandling, misuse, neglect, accident, or by
removal or defacement of the factory serial
number/bar code label(s). THE EXTENT OF THE
COMPANY’S LIABILITY UNDER THIS WARRANTY IS
LIMITED TO THE REPAIR OR REPLACEMENT
PROVIDED ABOVE AND, IN NO EVENT, SHALL THE
COMPANY’S LIABILITY EXCEED THE PURCHASE
PRICE PAID BY PURCHASER FOR THE PRODUCT.
This Warranty is in lieu of all other express
warranties or liabilities. ANY IMPLIED
WARRANTIES, INCLUDING ANY IMPLIED
WARRANTY OF MERCHANTABILITY, SHALL BE
LIMITED TO THE DURATION OF THIS WRITTEN
WARRANTY. ANY ACTION FOR BREACH OF ANY
WARRANTY HEREUNDER INCLUDING ANY
IMPLIED WARRANTY OF MERCHANTABILITY
MUST BE BROUGHT WITHIN A PERIOD OF 24
MONTHS FROM DATE OF ORIGINAL PURCHASE.
IN NO CASE SHALL THE COMPANY BE LIABLE FOR
ANY CONSEQUENTIAL OR INCIDENTAL DAMAGES
FOR BREACH OF THIS OR ANY OTHER WARRANTY.
No person or representative is authorized to
assume for the Company any liability other than
expressed herein in connection with the sale of
this product.
Some states do not allow limitations on how
long an implied warranty lasts or the exclusion
or limitation of incidental or consequential
damage so the above limitations or exclusions
may not apply to you. This Warranty gives you
specific legal rights and you may also have other
rights which vary from state to state.
Recommendations before returning your
product for a warranty claim:
• If your product is capable of storing content
(such as an mp3 player, voice recorder,
camcorder, digital photo frame, etc), it is
recommended to make periodic backup
copies of content stored on the product. If
applicable, before shipping a product, make a
back up copy of content or data stored on
the device. Also, it is advisable to remove any
personal content which you would not want
exposed to others. IT IS LIKELY THAT
CONTENTS AND DATA ON THE DEVICE WILL
BE LOST DURING SERVICE AND
REFORMATTING. AUDIOVOX ACCEPTS NO
LIABILITY FOR LOST CONTENT OR DATA, OR
FOR THE SECURITY OF ANY PERSONAL
CONTENT OR DATA ON THE RETURNED
DEVICE. Product will be returned with factory
default settings, and without any pre-loaded
content which may have been installed in the
originally purchased products. Consumer will
be responsible for reloading data and
content. Consumer will be responsible to
restore any personal preference settings.
• Properly pack your unit. Include any remotes,
memory cards, cables, etc. which were
originally provided with the product.
However DO NOT return any removable
batteries, even if batteries were included with
the original purchase. We recommend using
the original carton and packing materials.
Ship to
Page 15

14
EN
Audiovox Electronics Corp.
Attn: Service Department.
150 Marcus Blvd.
Hauppauge N.Y. 11788
1-800-645-4994
For Canada Customers, please ship to:
Audiovox Return Centre
c/o Genco
6685 Kennedy Road,
Unit#3, Door 16,
Mississuaga, Ontario
L5T 3A5
Page 16

1
Information de sécurité
BIEN LIRE ET CONSERVER POUR RÉFÉRENCE ULTÉRIEURE
IMPORTANTES INSTRUCTIONS DE SECURITE
Il est possible que certains des articles ci-dessous
ne s’appliquent pas à votre appareil. Cependant,
il faut prendre certaines précautions quand on
manipule et utilise tout appareil électronique.
• Lisez ces instructions.
• Conservez ces instructions.
• Portez attention à tous les avertissements.
• Observez toutes les instructions.
• N’utilisez pas cet appareil près de l’eau.
• Nettoyez avec un chiffon sec seulement.
• N’obstruez pas les ouvertures de ventilation.
Exécutez l’installation selon les instructions
du fabricant.
• N’installez pas près d’une source de chaleur
tel que radiateur, grille de chauffage, poêle
ou autres appareils (incluant les
amplificateurs) qui produisent de la chaleur.
• Assurez-vous que personne ne marche sur le
cordon d’alimentation ou qu’il n’est pas
coincé près des fiches, des prises et à la sortie
des appareils.
• N’utilisez que les accessoires spécifiés par le
fabricant.
• N’utilisez qu’avec le
chariot, support, trépied,
crochet ou table spécifiée
par le fabricant ou vendue
avec l’appareil. Lorsque
vous utilisez un chariot,
portez attention lorsque
vous déplacer le chariot et l’appareil pour
éviter les blessures dues au renversement.
• Débranchez l’appareil pendant les orages ou
si vous ne l’utilisez pas pendant de longues
périodes.
• Confiez l’entretien à du personnel compétent.
Les réparations sont nécessaires si l’appareil a
été endommagé de quelque façon que ce
soit, comme un cordon d’alimentation ou
une fiche en mauvais état, si un liquide a été
renversé sur l’appareil, si des objets sont
tombés sur l’appareil, si l’appareil a été
exposé à l’eau ou à l’humidité, si l’appareil ne
fonctionne pas normalement ou s’il est
tombé.
INFORMATIONS DE SECURITES
SUPPLEMENTAIRES
• L’adaptateur CA/CC fourni avec cet appareil
est conçu pour être orienté correctement à la
verticale ou dans une position de support sur
le plancher.
• N’utilisez pas de chargeurs ou d’adaptateurs
non autorisés. N’utilisez que les chargeurs ou
adaptateurs fournis avec cet appareil ou
indiqués dans la liste du guide de l’utilisateur.
• L’appareil ne doit pas être exposé à des
infiltrations ou éclaboussures d’eau et aucun
objet rempli de liquide – tel qu’un vase – ne
doit jamais être placé sur l’appareil.
• Toujours laisser suffisamment d’espace
autour de l’appareil pour assurer la
ventilation. Ne pas placer l’appareil sur un lit,
un tapis ou sur un étagère ou dans un
meuble qui pourrait bioquer les ouvertures
de ventilation.
• Ne pas placer de chandelles, de cigarettes, de
cigares, etc, sur l’appareil.
• Prendre garde que des objets ne tombent
pas dans l’appareil.
• Ne pas tenter de démonter l’appareil. Celui-ci
ne contient pas de composants pouvant être
réparés par l’utilisateur.
• Les renseignements sur les caractéristiques
sont situés sur le dessous de l’appareil.
• Pour couper complètement l’alimentation
électrique, l’adaptateur CA/CC doit être
débranché de la prise.
• L’adaptateur CA/CC sert de dispositif de
débranchement. L’adaptateur CA/CC ne doit
pas être obstrué ET doit demeurer accessible
pendant l’utilisation.
• La ventilation ne doit pas être limitée en
recouvrant les orifices de ventilation avec des
objets comme un journal, une nappe, des
rideaux, etc.
• Aucune source de flamme nue, comme une
chandelle allumée, ne doit être déposée sur
l’appareil.
• Soyez conscients des conséquences
environnementales lorsque vous vous
débarrassez des piles.
• L’appareil doit être utilisé dans des conditions
climatiques normales.
]
Avertissement pour
transport par chariot
Page 17

2
F
Caractéristiques électriques
Adaptateur CA/CC :
ENTRÉE CA : 100 — 240 V~ CA 50/60 Hz
SORTIE CC : 5 V CC 1.5 A
Précautions importantes
concernant la pile
• Toute pile peut présenter un risque
d’incendie, d’explosion ou de brûlure
chimique si elle n’est pas manipulée avec
soin. N’essayez pas de recharger une pile qui
n’est pas conçue pour être rechargée;
n’essayez pas de l’incinérer ou de la percer.
• Les piles non rechargeables, comme les piles
alcalines, peuvent couler si elles sont laissées
dans votre appareil pendant une longue
période. Retirez les piles de l’appareil si vous
ne l’utilisez pas pendant plus d’un mois.
• Si votre appareil utilise plus d’une pile, ne
mélangez pas les types de pile et assurezvous qu’elles sont installées correctement. Si
différents types de piles sont mélangés ou si
elles sont installées incorrectement, elles
pourraient couler.
• Jetez immédiatement les piles déformées ou
qui coulent. Les piles qui coulent peuvent
causer des brûlures et d’autres blessures.
• Aidez à protéger l’environnement en
recyclant ou en disposant des piles selon les
réglementations fédérales, provinciales et
locales.
AVERTISSEMENT : La pile (pile, piles ou bloc-piles)
ne doit pas être exposée à une chaleur intense,
telle que la lumière du soleil, un feu, etc.
Environnement
Aidez à protéger l’environnement : nous vous
recommandons de disposer des piles en les
déposant dans les endroits prévus pour les
recevoir.
Page 18

3
Information FCC
Cet appareil ne contrevient pas aux dispositions
de la section 15 du Règlement sur les
perturbations radioélectriques de la Federal
Communications Commission (FCC) des ÉtatsUnis. Son fonctionnement est assujetti aux deux
conditions suivantes : (1) cet appareil ne cause
pas d’interférence nuisible, et (2) cet appareil
peut capter toute interférence, y compris une
interférence qui pourrait causer un
fonctionnement imprévu.
Note: Cet appareil a été testé et fonctionne à
l’intérieur des limites déterminées pour les
appareils numériques de Classe B, en vertu de la
section 15 des règlements de la FCC. Ces
normes sont conçues pour fournir une
protection raisonnable contre l’interférence
nuisible dans les installations domestiques. Cet
appareil génère, utilise et peut émettre de
l’énergie sous forme de fréquences radio et, s’il
n’est pas installé conformément aux instructions,
peut causer de l’interférence nuisible pour les
communications radio. Cependant, il n’est pas
assuré que de l’interférence ne se produira pas
dans une installation spécifique.
Si cet appareil cause de l’interférence nuisible à
la réception de signaux de radio ou de
télévision, ce qui peut être validé en fermant et
en allumant l’appareil, l’utilisateur est invité à
corriger cette interférence par une ou plusieurs
des mesures suivantes :
• Réorienter ou déplacer de l’antenne de
réception.
• Augmenter de la distance entre l’appareil et
le récepteur.
• Brancher de l’appareil dans une prise murale
faisant partie d’un circuit d’alimentation
électrique autre que celui du récepteur.
• Consultez votre revendeur ou un technicien
radio/télévision compétent pour obtenir de
l’aide.
Les changements ou modifications non
expressément approuvés par Audiovox peuvent
annuler le droit de l’utilisateur d’utiliser cet
appareil.
Fabricant/Partie responsable
Audiovox Accessories Corporation
111 Congressional Blvd., Suite 350
Carmel, IN 46032
1-317-810-4880 (Sachez que ce numéro de
téléphone est utilisé pour les affaires
réglementaires seulement. Ce numéro n’offre
aucun soutien technique ou aide pour cet
appareil.)
Visitez www.audiovox.com pour
soutien technique
Information FCC
This Class B digital apparatus complies with
Canadian ICES-003.
Cet appareil numérique de la classe B est
conforme à la norme NMB-003 du Canada.
Audiovox
DPF7407BK
Audiovox
DPF7407WH
Page 19

4
F
Information de sécurité .................................. 1
IMPORTANTES INSTRUCTIONS DE SECURITE ................... 1
Caractéristiques électriques ................................................... 2
Environnement ...........................................................................2
Information FCC ..............................................3
Information FCC .......................................................................3
Table des matières ............................................ 4
Avant de commencer ...................................... 5
Contenus de l’emballage ......................................................... 5
Pour commencer ........................................................................ 5
Commandes du cadre photo ........................ 6
Modification des réglages .............................. 7
Menu principal ............................................................................7
Menu Configuration .................................................................. 7
Visionnement de photos ................................ 8
Sélection d’un média ................................................................ 8
Démarrage d’un diaporama ................................................... 8
Configuration des photos ....................................................... 8
Lecture vidéo ...................................................... 9
Sélection d’un média ................................................................ 9
Lecture d’un fichier muvee ..................................................... 9
Configuration muvee ................................................................ 9
Calendrier et horloge ....................................... 10
Conseils pour le nettoyage et l’entretien . 10
Gestionnaire de photos ..................................11
Branchement à l'ordinateur....................................................11
Gestion des fichiers avec le gestionnaire de photos ....11
Caractéristiques techniques .......................... 12
Dépannage .......................................................... 13
Renseignements sur les réparations ................................... 14
Pour vos dossiers ........................................................................14
Garantie limitée .................................................15
Garantie limitée de 12 mois ...................................................15
Table des matières
Page 20

5
Contenus de l’emballage
• Cadre photo numérique (DPF7407BK pour le
modèle noir et DPF7407WH pour le modèle
blanc)
• Étui
• Adaptateur d’alimentation CA/CC (entrée CA :
100 – 240 V ~ 50/60 Hz; sortie CC : 5 V 1,5 A)
• Câble USB
• CD-ROM
• Guide de l’utilisateur
• Feuillet pour muvee Reveal
• 1 carte eMusic
• 1 carte d’enregistrement de l’appareil
Pour commencer
1. Ouvrez l’étui et branchez l’adaptateur
d’alimentation CA dans le cadre photo
numérique et dans une prise électrique.
L’appareil démarre automatiquement lorsqu’il
est branché à une prise électrique.
2. Insérez votre carte-mémoire contenant des
photos ou des fichiers vidéo muvee dans la
fente pour carte-mémoire
(MultiMediaCard
MC
/Secure DigitalMC/Memory
StickMC) ou votre dispositif de stockage USB
dans le port USB.
3. Ouvrez l’étui et repliez le couvercle à l’arrière.
Déposez le cadre photo numérique sur une
surface plane avec les touches sur le dessus.
Détacher
Attacher
4. Suivez les instructions ci-dessus pour
détacher ou attacher le cadre photo
numérique à l’étui.
5. Vous pouvez aussi accrocher le bouton à
l’arrière.
Installation des piles
Votre cadre photo numérique peut être alimenté
par quatre piles AAA. Installez les piles dans le
compartiment des piles pour permettre à
l’appareil d’être alimenté sans alimentation CA.
1. Glissez le couvercle du
compartiment des piles vers le bas
puis ouvrez-le.
2. Installez quatre piles AAA dans le
compartiment. Respectez les
polarités.
3. Glissez le couvercle du
compartiment vers le haut et
fermez-le.
Avant de commencer
• Si aucune carte-mémoire n’est
disponible, des images de
démonstration sont
préenregistrées dans la mémoire
interne. Pour supprimer les images
préenregistrées, veuillez consulter la
rubrique « Configuration des photos »
pour plus de renseignements.
• L’image dans le cadre ne pivote pas
selon l'orientation du cadre.
Ouverture
Page 21

6
F
Commandes du cadre photo
Compartiment
des piles
Affichage
Hautparleur
Démarrage/En
attente*
Haut/
Vol +
Bas/
Vol -
Gauche
Droite
Menu
Edit
Lecture/
Pause/
Sélection
Connecteur
USB
Connecteur USB
(Mini B)/
Connecteur pour
l’ordinateur
Prise pour
l’alimentation
Fente pour
carte SD/
MMC/MS
*Pour démarrer le cadre photo ou passer en
mode d’attente, appuyez et gardez enfoncé le
bouton Démarrage/En attente pendant trois
secondes.
Page 22

7
Modification des réglages
Menu principal
Lorsque l’appareil démarre, le menu principal
s’affiche, comme illustré ci-dessous. Vous pouvez
aussi appuyer sur MENU pour ouvrir le menu
principal à partir des autres modes.
Menu Configuration
Dans le menu principal, appuyez sur ou
pour mettre en surbrillance l’icône . Appuyez
sur
pour ouvrir le menu Configuration, tel
qu’illustré ci-dessous.
Appuyez sur pour déplacer la
sélection en surbrillance dans le sens
horaire et appuyez sur
pour
déplacer la sélection en surbrillance
dans le sens antihoraire.
Appuyez sur ou pour sélectionner un
réglage puis appuyez sur pour accéder aux
options. Appuyez sur ou pour modifier la
valeur puis appuyez à nouveau sur
pour
confirmer le réglage. Pour quitter le menu
Configuration, appuyez sur MENU.
Affichage image
Cette option vous permet d'afficher les photos
dans leur format original ou de cadrer une partie
des photos pour les afficher sur tout l'écran.
Appuyez sur
ou pour sélectionner « Cadrer
» ou « Original ».
Transition diaporama
Appuyez sur
ou pour sélectionner parmi «
Aléatoire », « Serpent », « Partition », « Effacement
», « Toiles », « Lignes aléatoires », « Grille », « Croix
», « Spirale », « Rect » ou « Fermer ».
Intervalle diaporama
Cette option vous permet de sélectionner la
durée de l’affichage d’une photo pendant le
diaporama. Appuyez sur
ou pour
sélectionner entre « 5 s », « 10 s », « 30 s » et « 60
s ».
Luminosité
Appuyez sur ou pour sélectionner entre « -2
», « -1 », « 0 », « 1 » et « 2 ».
Date
Appuyez sur
ou pour sélectionner « Mois », «
Jour » ou « Année ». Appuyez sur
ou pour
modifier la valeur.
Heure
Appuyez sur ou pour sélectionner les
heures, les minutes ou AM/PM. Appuyez sur
ou
pour modifier la valeur.
Format heure
Appuyez sur ou pour sélectionner entre «
12H » et « 24H ».
Langue à l’écran
Cette option vous permet de sélectionner la
langue affichée à l'écran. Appuyez sur ou
pour sélectionner entre « Anglais », « Français »
et « Espagnol ».
Réglages par défaut
Cette option vous permet de rétablir les réglages
par défaut. Appuyez sur
puis sur ou pour
sélectionner « Oui ». Appuyez sur pour
confirmer.
À propos
Cette option affiche le numéro de version du
micrologiciel. Appuyez sur
et une fenêtre
apparaît pour afficher le numéro de version du
micrologiciel.
Page 23

8
F
Visionnement de photos
Sélection d’un média
1. Insérez une carte SD, MMC ou MS dans la
fente pour carte SD/MMC/MS ou insérez une
clé USB dans le connecteur USB.
2. Dans le menu principal, appuyez sur
ou
pour mettre en surbrillance l’icône
, ou
pour sélectionner le média désiré.
Appuyez sur pour confirmer votre
sélection.
Démarrage d’un diaporama
1. Pour sélectionner le mode photo, appuyez
sur
ou pour mettre en surbrillance .
2. Appuyez sur
pour démarrer le diaporama
à partir de la première photo.
3. Appuyez sur
pour suspendre le
diaporama et appuyez à nouveau pour
reprendre.
4. Lorsque le diaporama est suspendu, appuyez
sur ou pour visionner la photo
précédente ou suivante.
5. Pendant le diaporama, appuyez et gardez
enfoncé pour arrêter le diaporama et
passer à l’affichage des vignettes des photos.
Appuyez sur
, , ou pour mettre en
surbrillance l'image que vous désirez
visionner puis appuyez sur
pour démarrer
le diaporama à partir de l'image sélectionnée.
Configuration des photos
Pendant le diaporama, appuyez sur EDIT pour
suspendre le diaporama et ouvrir le menu
Édition. Appuyez sur
ou pour sélectionner
un des réglages affichés ci-dessous puis appuyez
sur pour ouvrir le sous-menu ou modifier le
réglage sélectionné. Pour quitter le menu
Édition, sélectionnez « Quitter » ou appuyez à
nouveau sur EDIT.
Pivoter
Fait pivoter la photo de 90 ° vers la droite chaque
fois que vous appuyez sur
.
Zoom
Zoom avant de 150 %, 200 % et 250 % en
appuyant à plusieurs reprises sur
. La photo
retourne à sa taille normale lorsqu'elle est
agrandie à 250 %. Pour afficher la partie non
visible de l’image lorsqu’elle est agrandie,
appuyez sur
, , ou .
Effet
Appuyez sur
ou pour sélectionner entre «
Accent. couleurs », « Noir et blanc » et « Normal ».
Puis, appuyez sur
pour confirmer.
Copier
Appuyez sur
ou pour sélectionner entre «
Copier un » et « Copier tous ». Appuyez sur
pour confirmer votre sélection.
« Patientez… » s’affiche lorsque vous copiez tous
les fichiers vers la mémoire interne; « Copie
réussie! » s’affiche lorsque la copie est terminée.
Si la mémoire interne n’a pas assez d’espace, «
Mémoire insuffisante » s’affiche.
Supprimer
Appuyez sur ; le message « Êtes-vous certains
de vouloir supprimer le fichier? » s’affiche.
Appuyez sur
ou pour sélectionner « Oui »
puis appuyez sur pour confirmer.
Page 24

9
Lecture vidéo
Sélection d’un média
1. Insérez une carte SD, MMC ou MS dans la
fente pour carte SD/MMC/MS ou insérez une
clé USB dans le connecteur USB.
2. Dans le menu principal, appuyez sur
ou
pour mettre en surbrillance l’icône
, ou
pour sélectionner le média désiré.
Appuyez sur
pour confirmer votre
sélection.
Lecture d’un fichier muvee
Ce cadre photo numérique ne lit que les fichiers
Motion JPEG créés avec muvee Reveal. Consultez
le guide de l’utilisateur sur le CD-ROM inclus
dans l’emballage. Ce guide fournit des
instructions sur l'installation du logiciel muvee
Reveal inclus et des instructions sur la création
d'un fichier muvee et sa sauvegarde sur une
carte-mémoire ou une clé USB.
1. Pour sélectionner le mode muvee, appuyez
sur
ou pour mettre en surbrillance .
2. Appuyez sur pour ouvrir la liste des
fichiers muvee. Appuyez sur
ou pour
sélectionner un fichier muvee.
3. Appuyez sur
pour démarrer la lecture du
fichier muvee. Pendant la lecture d'un fichier
muvee, appuyez sur pour suspendre la
lecture et appuyez à nouveau pour la
reprendre.
4. Pendant la lecture, appuyez et gardez
enfoncé pour arrêter la lecture et
retourner à la liste des fichiers muvee.
5. Pendant la lecture, appuyez sur
ou pour
lire le fichier muvee précédent ou suivant.
Appuyez et gardez enfoncé ou pour
balayer vers l'arrière ou vers l'avant le fichier
muvee courant.
6. Pendant la lecture, appuyez sur ou pour
régler le volume.
Configuration muvee
Pendant la lecture muvee, appuyez sur EDIT
pour suspendre la lecture et ouvrir le menu
Édition. Appuyez sur
ou pour sélectionner
un des réglages affichés ci-dessous puis appuyez
sur pour ouvrir le sous-menu ou modifier le
réglage sélectionné. Pour quitter le menu
Édition, sélectionnez « Quitter » ou appuyez à
nouveau sur EDIT.
Copier
Appuyez sur
ou pour sélectionner entre «
Copier un » et « Copier tous ». Appuyez sur
pour confirmer votre sélection.
« Patientez… » s’affiche lorsque vous copiez tous
les fichiers vers la mémoire interne; « Copie
réussie! » s’affiche lorsque la copie est terminée.
Si la mémoire interne n’a pas assez d’espace, «
Mémoire insuffisante » s’affiche.
Supprimer
Appuyez sur
; le message « Êtes-vous certains
de vouloir supprimer le fichier? » s’affiche.
Appuyez sur
ou pour sélectionner « Oui »
puis appuyez sur pour confirmer.
Répétition
Appuyez sur
ou pour sélectionner entre «
Répétition un », « Répétition tous » et « Normal ».
Appuyez sur
pour confirmer votre sélection.
Les fonctions « Pivoter », « Zoom » et «
Effet » sont désactivées en mode
muvee.
Page 25

10
F
Dans le menu principal, appuyez sur ou
pour mettre en surbrillance l’icône
puis
appuyez sur
pour ouvrir l’écran du calendrier
et de l’horloge.
Appuyez sur
ou pour sélectionner le mois
précédent ou suivant du calendrier et appuyez
sur
ou pour afficher l’image précédente ou
suivante.
Calendrier et horloge
Conseils pour le nettoyage et l’entretien
• Fermez le cadre photo numérique avant de le
nettoyer.
• N’aspergez pas et ne versez pas d’agents
nettoyants liquides directement sur l’écran ou
sur le cadre.
• N’utilisez pas d’ammoniaque, d’alcool ou des
agents nettoyants contenant des détergents
abrasifs.
• Nettoyage de l’écran :
1. Essuyez l’écran avec un tissu propre, doux
et sans peluche pour enlever la poussière
et les particules mobiles.
2. Si un nettoyage supplémentaire est
nécessaire, appliquez un agent nettoyant
approprié (approuvé pour les écrans ACL)
sur un tissu propre, doux et sans peluche
puis essuyez l’écran.
• N’appuyez pas trop fortement sur l’écran
pour éviter de l’endommager.
Ouvrez le menu Configuration pour
régler la date et l’heure.
Page 26

11
Branchement à l'ordinateur
• Démarrez le cadre numérique.
• Branchez le cadre photo à votre ordinateur à
l’aide du câble USB fourni. Un écran «
Connexion à l’ordinateur… » apparaît sur
l’affichage du cadre photo.
• Le lecteur est connecté en mode MSC (classe
de stockage de masse). Il apparaît comme
une lettre de lecteur sur votre ordinateur et
se comporte comme un disque amovible
pour les transferts de fichiers dans l'une ou
les deux directions.
Gestion des fichiers avec le
gestionnaire de photos
• La fenêtre d’une lettre de lecteur associée
avec le titre « Gestionnaire de photos »
s’affiche. Si elle ne s’affiche pas, ouvrez « Mon
Ordinateur » et double-cliquez sur le lecteur
nommé « Gestionnaire de photos ».
Double-cliquez sur l’icône « Gestionnaire de
photos » pour démarrer le logiciel.
• Trouvez le répertoire dans lequel vous avez
enregistré vos photos dans la colonne de
gauche; toutes les photos contenues dans ce
répertoire s’affichent dans la colonne du
milieu. Sélectionnez la ou les photos que
vous désirez transférer vers le cadre photo
numérique.
• Appuyez sur « Vers la mémoire interne »
pour transférer la ou les photos sélectionnées
vers le cadre photo numérique.
• Appuyez sur « Rotation à gauche », «
Rotation à droite » et « Rogner pour choisir
» pour éditer la photo avant de la transférer.
• La colonne de droite affiche les photos
enregistrées sur votre cadre photo
numérique. Appuyez sur « Supprimer » pour
supprimer le fichier sélectionné. Sélectionnez
« Oui » lorsque la fenêtre de confirmation
apparaît.
• Appuyez sur « Sauvegarder » pour
sauvegarder la photo sélectionnée comme
nouveau fichier.
• Appuyez sur « Format.. » pour formater les
données dans la mémoire interne du cadre
photo numérique.
Sélectionnez le réglage que vous désirez
dans la fenêtre qui apparaît puis appuyez sur
« Démarrer ».
• Si la mémoire interne n’a pas assez d’espace, «
Mémoire interne remplie » s’affiche.
Gestionnaire de photos
Page 27

12
F
Caractéristiques techniques
Taille de
l’affichage
7 pouces
Format 16:9
Résolution 480x234 pixels
Adaptateur
d’alimentation
externe
entrée CA : 100-240 V
~50/60 Hz; sortie CC 5 V
1,5 A
Audio
Puissance de
sortie
1 W
Espace
Mémoire interne 128 Mo flash NAND
Dispositifs de stockage supportés
Fente pour cartesmémoire
carte SD/SDHC/MMC/MS/
MS Pro
Port USB 1 hôte USB 2.0 standard
Taille maximale
supportée des
dispositifs flash
4 Go
Fichiers multimédias supportés
Formats de
fichiers photo
JPEG
Formats de
fichiers vidéo
Motion JPEG (vidéo) avec
ADPCM (audio) (créés
avec le logiciel muvee
Reveal seulement)
Interface utilisateur/commande
Boutons situés sur
le dessus de
l’appareil
Oui
Calendrier et
horloge
Oui
Page 28

13
Dépannage
Votre cadre photo numérique ne démarre pas.
• L’adaptateur n’est pas branché correctement
à votre cadre photo numérique, les quatre
piles AAA ne sont pas installées ou sont
déchargées ou l’interrupteur d’alimentation
n’est pas à la position « On ».
L’appareil affiche certaines images plus
lentement et d’autres plus rapidement.
• Les images avec une résolution plus élevée
sont affichées plus lentement. Essayez
d’utiliser des images avec une résolution plus
faible ou de sous-échantillonner vos images.
Consultez le guide d'utilisation de votre
appareil-photo pour plus de renseignements
sur le sous-échantillonnage de vos photos.
Une carte-mémoire est insérée dans le cadre
photo numérique, mais vous ne pouvez pas
visionner vos photos ou fichiers vidéo muvee.
• Assurez-vous que la carte-mémoire contient
des fichiers JPEG (les fichiers JPEG progressifs
ne sont pas supportés) ou des fichiers vidéo
muvee.
• Fermez votre cadre photo numérique et
assurez-vous que la carte-mémoire est
insérée complètement et correctement dans
la fente. Puis, redémarrez l’appareil.
• L’appareil ne supporte pas les dispositifs flash
d’une capacité supérieure à 4 Go. Les fichiers
muvee peuvent ne pas être lus correctement
s’ils sont enregistrés sur un dispositif flash
d’une capacité supérieure à 4 Go.
• Certains appareils-photo numériques
sauvegardent les images en format autre que
JPEG. Consultez le guide de votre appareilphoto si vos photos ne sont pas sauvegardées
comme fichiers JPEG.
• Si une carte ne peut pas être lue, vous pouvez
essayer de la formater d’abord. Plusieurs
appareils-photo numériques et caméscopes
utilisent une carte SD pour enregistrer les
images et les films. Si vous ne parvenez pas à
accéder à l'entière capacité de la carte, ou si
les données enregistrées sur la carte
disparaissent de manière aléatoire, ou si
seulement certaines des images peuvent être
visionnées, vous devez la reformater. Les
cartes SD peuvent être reformatées soit avec
un ordinateur possédant un lecteur de cartes
SD ou directement à partir du menu de la
plupart des appareils-photo numériques.
Suivez les instructions ci-dessous pour
formater une carte SD.
Instructions de formatage d’une carte SD
À l’aide d’un lecteur de cartes SD
1. Démarrez votre ordinateur et insérez la carte
SD dans la fente du lecteur de cartes située à
l’avant de votre ordinateur ou dans un lecteur
de cartes externe branché par un port USB.
Attendez de voir si votre système
d’exploitation ouvre automatiquement une
fenêtre vous demandant des informations. Si
la fenêtre apparaît, cliquez sur l’option pour «
Ouvrir un répertoire pour afficher
les fichiers ».
2. Si votre système d’exploitation ne vous
demande pas automatiquement d'ouvrir un
répertoire, cliquez sur le bouton « Démarrer ».
Sélectionnez l’option « Mon Ordinateur »
pour ouvrir une nouvelle fenêtre.
3. Cliquez avec le bouton de droite sur la lettre
de lecteur de votre lecteur de cartes puis
sélectionnez l'option « Reformater » dans le
menu qui apparaît. Si une autre fenêtre
apparaît vous demandant le système de
fichiers désiré, cliquez sur l’option pour régler
le formatage à la norme « FAT16 ».
À l’aide d’un appareil-photo numérique
1. Insérez la carte SD dans votre appareil-photo
numérique puis démarrez l’appareil-photo.
Appuyez sur le bouton de votre appareilphoto pour afficher vos plus récentes
photographies.
2. Appuyez sur le bouton « Menu » ou « OK » de
l’appareil-photo pour afficher les options de
photographie. Sélectionnez l’option «
Configuration » ou « Options ».
3. Défilez jusqu’à l’option « Formatage » puis
appuyez sur « OK ». Sélectionnez l’option
pour régler le format de fichiers à la norme «
FAT16 ».
Remarque : Certaines procédures pour les
appareils-photo numériques peuvent différer de
la procédure ci-dessus. Consultez toujours le
guide de l’appareil-photo d’abord.
Page 29

14
F
Renseignements sur les réparations
Cet appareil ne devrait être réparé que par des
personnes spécialement formées aux techniques
appropriées de réparation. Pour des instructions
sur la marche à suivre pour obtenir des
réparations, consultez la garantie incluse dans ce
guide de l’utilisateur.
Pour vos dossiers
Gardez votre facture comme preuve d’achat pour
obtenir des pièces ou des réparations sous
garantie.
Si des réparations sont nécessaires, vous pourriez
avoir besoin du numéro de modèle et du
numéro de série. Dans l’espace ci-dessous, notez
la date et l’endroit de l’achat, ainsi que le numéro
de série :
No de modèle
Date de l’achat
Endroit de l’achat
No de série
Page 30

15
Garantie limitée
Garantie limitée de 12 mois
S’applique aux cadres photos numériques de
Audiovox
AUDIOVOX ACCESSORIES CORP. (la Compagnie)
garantie au premier acheteur au détail de ce
produit que si ce produit ou toute pièce de ce
dernier, pour une utilisation et dans des
conditions normales, révèle un défaut matériel
ou de main d’oeuvre dans les douze (12) mois
suivants la date du premier achat, un tel défaut
sera réparé ou remplacé par un produit remis en
état (au choix de la Compagnie) sans frais pour
les pièces et la main d’œuvre.
Pour obtenir une réparation ou un
remplacement selon les conditions de cette
Garantie, le produit doit être envoyé avec une
preuve de garantie (p. ex., une facture datée de
l’achat), des renseignements sur le(s) défaut(s) et
le port prépayé à la Compagnie à l’adresse
indiquée ci-dessous.
Cette Garantie ne couvre pas l’élimination des
bruits ou parasites externes, la solution de
problèmes d’antenne, la perte/l’interruption de
transmissions ou de l’accès à Internet, les coûts
de l’installation, du retrait ou de la réinstallation
du produit, les altérations causées par un virus
informatique, un logiciel espion ou autre
programme malveillant, la perte de médias, de
fichiers, de données ou de contenus, les
dommages à des cassettes, des disques, des
dispositifs ou des cartes-mémoire amovibles, des
haut-parleurs, des accessoires, des ordinateurs,
des périphériques d’ordinateurs, d’autres
lecteurs multimédias, des réseaux résidentiels ou
des systèmes électriques de véhicule.
Cette Garantie ne s’applique pas au produit ou à
toute pièce de ce dernier qui, selon la
Compagnie, a été endommagé par ou a souffert
d’une modification, d’une installation incorrecte,
d’une manutention incorrecte, d’un abus, de
négligence, d’un accident ou dont l’étiquette
portant le numéro de série/le code à barres
usiné a été retirée ou dégradée. L’ÉTENDUE DE
L’OBLIGATION DE LA COMPAGNIE SOUS CETTE
GARANTIE SE LIMITE À LA RÉPARATION OU AU
REMPLACEMENT INDIQUÉ CI-DESSUS;
L’OBLIGATION DE LA COMPAGNIE NE DOIT EN
AUCUN CAS DÉPASSER LE PRIX D’ACHAT PAYÉ
PAR L’ACHETEUR POUR CE PRODUIT.
Cette Garantie remplace toutes les autres
garanties ou obligations explicites. TOUTE
GARANTIE IMPLICITE, INCLUANT LA GARANTIE
IMPLICITE DE QUALITÉ MARCHANDE, DOIT ÊTRE
LIMITÉE À LA DURÉE DE LA PRÉSENTE GARANTIE
ÉCRITE. TOUTE ACTION POUR UNE
CONTRAVENTION AUX TERMES DE LA PRÉSENTE
GARANTIE, INCLUANT LA GARANTIE IMPLICITE
DE QUALITÉ MARCHANDE, DOIT ÊTRE
ENTREPRISE DANS UNE PÉRIODE DE VINGTQUATRE (24) MOIS À PARTIR DE LA DATE
ORIGINALE DE L’ACHAT. LA COMPAGNIE NE
DEVRA EN AUCUN CAS ÊTRE TENUE
RESPONSABLE DES DOMMAGES INDIRECTS OU
ACCESSOIRES SUITE À LA VIOLATION DE CETTE
OU DE TOUTE AUTRE GARANTIE. Aucune
personne et aucun représentant n’est autorisé à
assumer au nom de la Compagnie toute
obligation autre que celles indiquées dans la
présente en lien avec la vente de ce produit.
Certaines provinces ne permettent pas les limites
à la durée des garanties implicites ou l’exclusion
des dommages indirects ou accessoires, alors
certaines limites ou exclusions ci-dessus
pourraient ne pas s’appliquer à vous. Cette
Garantie vous donne certains droits spécifiques
et vous pourriez avoir d’autres droits, qui varient
selon la province.
Recommandations avant de retourner votre
produit pour une réclamation sous garantie :
• Si votre appareil est en mesure d’enregistrer
des contenus (comme un lecteur mp3, un
enregistreur vocal, un caméscope, un cadre
photo numérique, etc.), nous vous
recommandons de faire des copies de
sauvegarde des contenus enregistrés sur
l’appareil régulièrement. Si possible, avant
d’envoyer l’appareil, faites une copie de
sauvegarde des contenus ou des données
enregistrés sur l’appareil. De plus, il est
recommandé de supprimer tout contenu
personnel que vous ne voudriez pas rendre
accessible à d’autres. IL EST PROBABLE QUE
LES CONTENUS ET DONNÉES ENREGISTRÉS
SUR L’APPAREIL SERONT PERDUS LORS DE LA
RÉPARATION ET DU REFORMATAGE.
AUDIOVOX N’ACCEPTE AUCUNE
RESPONSABILITÉ POUR LES DONNÉES OU
CONTENUS PERDUS OU POUR LA SÉCURITÉ
DES DONNÉES OU CONTENUS PERSONNELS
Page 31

16
F
ENREGISTRÉS SUR L’APPAREIL RETOURNÉ.
L’appareil sera renvoyé avec les réglages par
défaut et sans contenus préenregistrés qui
auraient pu être déjà installés lors de l’achat
original. Le consommateur sera responsable
de télécharger à nouveau des données et des
contenus. Le consommateur sera responsable
du rétablissement des réglages personnalisés.
• Emballez correctement votre appareil. Incluez
toute télécommande, carte-mémoire, câble,
etc. qui étaient fournis avec l’appareil. Par
contre, NE retournez PAS les piles amovibles,
même si les piles étaient fournies lors de
l’achat original. Nous vous recommandons
d’utiliser la boîte et le matériel d’emballage
originaux. Envoyez à :
Audiovox Electronics Corp.
Attn : Service Department.
150 Marcus Blvd.
Hauppauge N.Y. 11788
1-800-645-4994
Pour les consommateurs canadiens, veuillez
envoyer votre appareil à :
Audiovox Return Centre
c/o Genco
6685 Kennedy Road,
Unit#3, Door 16,
Mississauga, Ontario
L5T 3A5
Page 32

1
Información de seguridad
FAVOR DE GUARDAR ESTO PARA UNA REFERENCIA FUTURA
IMPORTANTE INSTRUCCIONES DE SEGRUIDAD
Alguna de la siguiente información quizá no se
aplique a su producto en particular. Sin
embargo, como con cualquier producto
electrónico, se deben tomar precauciones
durante su manejo y uso.
• Lea estas instrucciones.
• Conserve estas instrucciones.
• Tome en cuenta todas las advertencias.
• Siga todas las instrucciones.
• No use este aparato cerca del agua.
• Limpie solamente con un paño seco.
• No bloquee ninguna de las aperturas de
ventilación. Instale de acuerdo con las
instrucciones del fabricante.
• No instale cerca de fuentes de calor tales
como radiadores, registros de calor, estufas, u
otros aparatos (incluyendo amplificadores)
que produzcan calor.
• Proteja el cable de corriente de pisotones o
machucones particularmente en las clavijas,
receptáculos de conveniencia, y en punto
donde salen del aparato.
• Use solamente accesorios/aditamentos
especificados por el fabricante.
• Use solamente con el carro,
soporte, trípode, consola, o
mesa especificados por el
fabricante, o vendidos con
el aparato. Cuando se
utiliza un carro, tenga
precaución al mover la
combinación de carro/aparato para evitar
lesión ocasionada por volcadura.
• Desconecte este aparato durante tormentas
eléctricas o cuando no sea utilizado por
largos períodos de tiempo.
• Refiera todo el servicio a personal de servicio
calificado. El servicio es requerido cuando el
aparato ha sido dañado de alguna forma, tal
como daño a la clavija o al cable de corriente,
cuando se ha derramado líquido o han caído
objetos dentro del aparato, el aparato ha sido
expuesto a lluvia o humedad, no funciona
normalmente, o ha sido tirado.
INFORMACION ADICIONAL DE SEGURIDAD
• El adaptador CA/CD suministrado con este
producto está diseñado para estar orientado
correctamente en una posición de montaje
vertical o en el piso.
• No use cargadores o adaptadores de
corriente no autorizados. Sólo utilice
cargadores o adaptadores de corriente que
vengan con su producto o que estén listados
en la guía del usuario.
• El aparato no debe quedar expuesto a goteos
o salpicaduras de líquidos, y, por lo tanto, no
se deben colocar sobre el aparato objetos
que contengan líquidos, como por ejemplo
vasos.
• Siempre deje suficiente espacio para
ventilación alreadedor del producto. No
ponga el producto en la cama, alfombra,
librero o gabinete que pueda obstruir la
corriente de aire a través de apeturas de
ventilación.
• No pongan velas, cigarillos o cigarros
encendidos encima de producto.
• Tome precauciones para evitar que caigan
objetos dentro del producto.
• No intente desensamblar el gabinete. Este
producto no contiene componentes que
requieran servicio por parte del cliente.
• La información de señalamiento está ubicada
en la parte inferior del aparato.
• Para desconectar completamente la entrada
de corriente, el adaptador CA/CD del aparato
deberá desconectarse de la toma de
corriente.
• El adaptador CA/CD es un dispositivo de
desconexión. El adaptador CA/CD no deberá
ser bloqueado O deberá ser fácilmente
accesible durante el uso para el cual está
diseñado.
• No se deberá obstruir la ventilación
cubriendo las aperturas de ventilación con
elementos tales como periódicos, paños,
cortinas, etcétera.
• Ninguna fuente de flama abierta, tal como
velas encendidas, deberá colocarse sobre el
aparato.
• Se deberá poner atención a los aspectos
ambientales al eliminar las baterías.
• El uso del aparato en climas moderados.
]
Advertencia sobre el
Carro Portátil
Page 33

2
E
• Conecte el equipo a un toma corriente
diferente al que conecta el receptor
• Consulte al distribuidor o a un técnico
especializado en radio / TV para solicitar
ayuda
Los cambios o modificaciones que no sean
expresamente aprobados por Audiovox podrían
invalidar la autoridad del usuario para hacer
funcionar el aparato.
Fabricante / Parte responsable
Audiovox Accessories Corporation
111 Congressional Blvd., Suite 350
Carmel, IN 46032
1-317-810-4880
(Por favor tome nota que este número de teléfono es sólo para asuntos regulatorios. En este
número no hay disponibilidad de soporte de
producto o técnico.)
Visite www.audiovox.com para
soporte de técnico
insertadas correctamente. Mezclar tipos de
baterías o insertarlas incorrectamente puede
causar que tengan fugas.
• Deseche inmediatamente cualquier batería
con fugas o deformada. Ellas pueden causar
quemaduras de la piel u otra lesión personal.
• Por favor ayude a proteger el ambiente
reciclando o eliminando las baterías de
conformidad con las regulaciones federales,
estatales y locales.
ADVERTENCIA: La batería (batería o baterías o
paquete de baterías) no deberá ser expuesta a
calor excesivo tal como el sol, fuego o similares.
Medio ambiente
Ayude a cuidar el medio ambiente. Le
recomendamos que deseche las baterías
gastadas en los contenedores especialmente
diseñados para ello.
Información de corriente eléctrica
Adaptador CA/CD:
ENTRADA CA: 100 - 240 V ~ CA 50/60 Hz
SALIDA CD OUTPUT: 5 V 1.5 A
Precauciones importantes para la
batería
• Cualquier batería puede presentar un riesgo
de fuego, explosión o quemadura química si
es mal tratada. No trate de cargar una batería
que no esté diseñada para ser recargada, no
incinere y no perfore.
• Baterías no recargables, tales como las
baterías alcalinas, pueden tener fugas si son
dejadas en su producto por un largo periodo
de tiempo. Retire las baterías del producto si
usted no lo va a usar por un mes o más.
• Si su producto usa más de una batería, no
mezcle tipos y asegúrese de que estén
Información FCC
Este aparato obedece las especificaciones de la
Parte 15 de las regulaciones FCC. Las funciones
están sujetas a las siguientes condiciones: 1) Este
aparato no puede causar interferencias dañinas,
y 2) este aparato puede recibir cualquiera
interferencia, incluyendo aquellas que puedan
causar funciones no deseadas.
Nota: Se probó este equipo y podemos afirmar
que cumple con las restricciones establecidas
para un dispositivo digital Clase B, de acuerdo
con la Sección 15 de la Reglamentación de FCC.
Estas restricciones fueron designadas para
brindar una protección razonable frente a la
interferencia perjudicial en una instalación
residencial. Este equipo genera, usa y puede
irradiar energía de radiofrecuencia y, si no está
instalado o no se lo utiliza de acuerdo con las
instrucciones, puede ocasionar interferencias
perjudiciales para las comunicaciones de radio.
Sin embargo, no existe ninguna garantía de que
no se vaya a producir una interferencia en una
instalación particular. Si este equipo produce
una interferencia perjudicial con la recepción de
la radio o la televisión, lo cual podría
determinarse apagando y encendiendo el
equipo, se le pide al usuario que intente corregir
la interferencia siguiendo una o varias de las
siguientes medidas.
• Reoriente o reubique la antena receptora
• Aumente la separación entre el equipo y el
receptor
Información FCC
Audiovox
DPF7407BK
Audiovox
DPF7407WH
Page 34

3
Contenido
Información de seguridad .............................1
IMPORTANTE INSTRUCCIONES DE SEGRUIDAD ..............1
Información de corriente eléctrica ......................................2
Precauciones importantes para la batería ........................2
Medio ambiente .........................................................................2
Información FCC ................................................ 2
Información FCC ......................................................................... 2
Contenido ............................................................ 3
Antes de comenzar ........................................... 4
Contenido del paquete ............................................................ 4
Para comenzar ............................................................................ 4
Controles del marco para fotos ....................5
Cambios de configuraciones ........................6
Menú principal ............................................................................6
Menú de Configuración ........................................................... 6
Para ver fotos ...................................................... 7
Selección de medios .................................................................7
Para comenzar una presentación de diapositivas .........7
Configuración de fotos.............................................................7
Reproducción de video ................................... 8
Selección de medios .................................................................8
Reproducción del archivo muvee ........................................ 8
Configuración de muvee ......................................................... 8
Calendario y reloj ..............................................9
Tips para limpieza y cuidado ........................9
Administrador de fotos ................................... 10
Conexión a la computadora ...................................................10
Gestión de archivos con el Administrador de Fotos ..... 10
Especificaciones ................................................. 11
Solución de problemas ................................... 12
Información de servicio ...........................................................12
Para sus registros ........................................................................ 13
Garantía limitada ............................................... 14
Garantía Limitada de 12 Meses ............................................. 14
Page 35

4
E
Contenido del paquete
• Marco para fotos digitales(DPF7407BK para
color negro y DPF7407WH para color blanco)
• Estuche
• Adaptador de corriente CA/CD (entrada CA:
100 - 240 V ~ 50/60 Hz, salida CD 5 V 1.5 A)
• Cable USB
• CD-ROM
• Manual del usuario
• Reemplazo para muvee Reveal
• Tarjeta eMusic
• Tarjeta de registro de producto
Para comenzar
1. Abra el estuche y conecte el adaptador de
corriente CA en el marco de fotos digitales y
conéctelo a una toma de corriente. La unidad
enciende automáticamente cuando es
conectada a la toma de corriente.
2. Inserte su tarjeta de memoria con fotos o
archivos de video en la ranura de memorias
(Tarjeta MultiMedia™/ Secure Digital™ /
Dispositivo de Memoria Flash™) o en el
dispositivo de almacenamiento USB en el
puerto USB.
3. Abra el estuche y voltee la cubierta para
atrás. Coloque el marco de fotos digitales en
una superficie plana con los botones en la
parte superior.
Separar
Unir
4. Siga las instrucciones indicadas arriba para
separar el marco de fotos o unir el marco de
fotos con el estuche.
5. También puede abrochar el botón en la parte
posterior.
Instale las baterías
Su marco para fotos digitales puede recibir
energía de cuatro baterías AAA. Instale las
baterías en el compartimiento para baterías,
luego la unidad puede empezar a funcionar sin
corriente.
1. Deslice hacia abajo y abra la
cubierta del compartimiento de
baterías.
2. Instale cuatro baterías AAA en el
compartimiento. Siga los signos de
polaridad según corresponda.
3. Deslice hacia arriba y cierre la
cubierta del compartimiento.
Antes de comenzar
• Si no hay tarjeta de memoria
disponible, hay algunas imágenes
demo precargadas en la memoria
interna. Para eliminar imágenes
previamente cargadas, por favor
consulte la sección “Configuración de
fotos” para detalles.
• La imagen en el marco no giraría de
acuerdo a la posición del mismo.
Abrir
Page 36

5
Controles del marco para fotos
Compartimiento de
baterías
Pantalla
Bocina
On/En espera*
Arriba/
Vol+
Abajo/
Vol-
Izquierda
Derecha
Menú
Editar
Reproducir/
pausa/
seleccionar
Conector
USB
Conector USB
(Mini B)/Conector
a PC
Entrada
para
corriente
Ranura
para
tarjeta SD/
MMC/MS
* Para encender el marco para fotos o ingresar al
modo en espera, presione y sostenga el botón
On/En espera by por tres segundos.
Page 37

6
E
Cambios de configuraciones
Menú principal
Cuando la unidad es activada, la pantalla del
menú principal se mostrará en la forma
siguiente. Usted también puede presionar
MENU para tener acceso al menú principal
cuando está en otros modos.
Menú de Configuración
En el menú principal, presione ó resalte el
icono
. Presione para tener acceso al
menú de Configuración como se muestra a
continuación.
Presione para mover la opción
resaltada en el sentido de las
manecillas del reloj y presione
para
mover la opción resaltada en el
sentido inverso al de las manecillas del
reloj.
Presione ó para seleccionar una opción y
presione para tener acceso a las opciones.
Presione
ó para ajustar el valor y presione
otra vez para confirmar la selección. Para salir
del menú de configuración, presione MENU.
Ver imagen
Esta opción le permite visualizar la foto en su
formato nativo o recortar una parte de la misma
para permitirle adaptarla a la pantalla completa.
Presione ó para seleccionar desde Cortar y
Original.
Transición de diapositivas
Presione
ó para seleccionar entre Aleatoria,
Víbora, Partición, Borrar, Cortinas, Líneas
Aleatorias, Reja, Cruz, Espiral, Recta y Cerrar.
Intervalo diapositivas
Esta opción le permite seleccionar la duración en
que una foto será visualizada en la presentación.
Presione
ó para seleccionar entre 5s, 10s,
30s y 60s.
Brillo
Presione ó para seleccionar entre -2, -1, 0, 1
y 2.
Fecha
Presione ó para seleccionar mes, día y año.
Presione ó para ajustar el valor.
Hora
Presione ó para seleccionar hora y minuto y
AM/PM. Presione ó para ajustar el valor.
Formato tiempo
Presione
ó para seleccionar de 12H y 24H.
Idioma en pantalla - OSD
Esta opción le permite seleccionar el idioma en
el cual el texto en pantalla se visualizará.
Presione ó para seleccionar entre inglés,
francés y español.
Restaurar Configuración
Esta opción le permite restaurar los valores
predeterminados de fábrica.
Presione y luego presione ó para
seleccionar Sí.
Presione
para confirmar.
Acerca de
Esta opción muestra el número de versión del
firmware. Presione
y una ventana emergente
con el número de versión del firmware se
visualizará.
Page 38

7
Para ver fotos
Selección de medios
1. Inserte una tarjeta SD, MMC o MS en la ranura
para tarjetas SD/MMC/MS o inserte una
unidad flash USB en el conector USB.
2. En el menú Principal, presione
ó para
resaltar el icono
, ó para
seleccionar el medio deseado. Presione
para confirmar su selección.
Para comenzar una presentación de
diapositivas
1. Para seleccionar el modo de foto, presione
ó
para resaltar .
2. Presione
para comenzar la presentación
desde la primera foto.
3. Presione para hacer una pausa en la
presentación y presione otra vez para
reanudar.
4. Cuando la presentación esté en pausa,
presione ó para ver la foto previa o
siguiente.
5. Durante la presentación, presione y sostenga
para detener la presentación e ir a la
pantalla de fotos miniatura. Presione
, ,
ó para resaltar la imagen que usted desea
reproducir, presione para iniciar la
presentación desde la imagen seleccionada.
Configuración de fotos
Durante la presentación de diapositivas, presione
EDIT para pausar la presentación y visualizar el
menú Editar. Presione
ó para seleccionar una
opción mostrada a continuación y presione
para entrar al submenú o ajustar la opción
seleccionada. Para salir del menú Editar,
seleccione Salir o presione EDIT nuevamente.
Girar
Gira la foto en 90o a la derecha cada vez que
es presionado.
Zoom
La amplificación en 150%, 200% y 250% la puede
efectuar presionando
repetidamente. La foto
regresará al tamaño normal cuando esté
agrandada al 250%. Para ver la parte oculta
cuando la imagen esté agrandada, presione
, ,
ó .
Efecto
Presione
ó para seleccionar entre realce de
color, negro y blanco y normal. Luego presione
para confirmar
Copiar
Presione
ó para seleccionar entre Copiar uno
y Copiar todo. Presione
para confirmar su
selección.
"Espere por favor..." se visualizará cuando esté
copiando todos los archivos a la memoria interna
y el mensaje "¡Éxito al copiar!" se mostrará
cuando el proceso de copia termine. Si la
memoria interna no tiene suficiente espacio, el
mensaje "¡Memoria insuficiente!" se visualizará.
Eliminar
Presione y el mensaje "¿Está seguro que
quiere eliminar el archivo seleccionado?" surgirá.
Presione
ó para seleccionar "Sí" y presione
para confirmar la eliminación.
Page 39

8
E
Reproducción de video
Selección de medios
1. Inserte una tarjeta SD, MMC o MS en la ranura
para tarjetas SD/MMC/MS o inserte una
unidad flash USB en el conector USB.
2. En el menú Principal, presione
ó para
resaltar el icono
, ó para
seleccionar el medio deseado. Presione
para confirmar su selección.
Reproducción del archivo muvee
Este marco para fotos digitales sólo reproduce
movimiento JPEG generado por muvee Reveal.
Consulte el manual del usuario en el CD-ROM, el
cual viene incluido en este paquete. Este manual
proporciona instrucciones sobre cómo instalar el
software muvee Reveal que viene incluido, y
sobre cómo crear un archivo muvee y guardarlo
en la tarjeta de memoria o en la unidad flash
USB.
1. Para seleccionar el modo muvee, presione
ó
para resaltar .
2. Presione para entrar a la lista de archivos
muvee. Presione
ó para seleccionar el
archivo muvee.
3. Presione
para comenzar la reproducción
muvee. Durante la reproducción muvee,
presione
para pausar la reproducción y
presione otra vez para reanudar.
4. Durante la reproducción, presione y sostenga
para detener la reproducción y regresar a
la lista de archivos muvee.
5. Durante la reproducción, presione
ó para
reproducir el archivo muvee previo o
siguiente. Presione y sostenga ó para
regresar o avanzar rápido en el archivo
muvee actual.
6. Durante la reproducción, presione
ó para
ajustar el volumen.
Configuración de muvee
Durante la reproducción de muvee, presione
EDIT para pausar la reproducción y visualizar el
menú Editar. Presione
ó para seleccionar una
opción que se muestre a continuación y presione
para entrar al submenú o ajustar la opción
seleccionada. Para salir del menú Editar,
seleccione Salir o presione EDIT nuevamente.
Copiar
Presione ó para seleccionar entre Copiar uno
y Copiar todo. Presione
para confirmar su
selección.
"Por favor espere..." se visualizará cuando esté
copiando todos los archivos a la memoria interna
y el mensaje "¡Éxito al copiar!" se mostrará
cuando el proceso de copia termine. Si la
memoria interna no tiene suficiente espacio, el
mensaje "¡Memoria insuficiente!" se visualizará.
Para eliminar
Presione
y el mensaje "¿Está seguro que
quiere eliminar el archivo seleccionado?" surgirá.
Presione ó para seleccionar "Sí" y presione
para confirmar la eliminación.
Repetir
Presione
ó para seleccionar entre Repetir
uno, Repetir todo y Normal. Presione para
confirmar su selección.
Las funciones Girar, Zoom y Efecto
están inhabilitadas en el modo
muvee.
Page 40

9
Calendario y reloj
Tips para limpieza y cuidado
En el menú Principal, presione ó para
resaltar el icono
y luego presione
para
entrar a la pantalla de calendario y reloj.
Presione
ó para seleccionar el mes
calendario previo o siguiente y presione
ó
para ver la imagen anterior o siguiente.
• Apague el marco para votos digitales antes
de limpiarlo.
• No rocíe o vierta agentes de limpieza líquidos
directamente en la pantalla o en el marco.
• No use amoniaco, alcohol o agentes de
limpieza con detergentes abrasivos.
• Para limpiar la pantalla:
1. Limpien la pantalla con un paño limpio,
suave, sin pelusa para remover el polvo y
partículas sueltas.
2. Si se requiere limpieza adicional, aplique
un agente de limpieza adecuado (y
aprobado para pantallas LCD) a un paño
limpio, suave y sin pelusa y limpie la
pantalla.
• No aplique demasiada presión sobre la
pantalla para evitar dañarla.
Vaya al menú de Configuración para
establecer la fecha y hora.
Page 41

10
E
Conexión a la computadora
• Encienda el marco para fotos.
• Conecte el marco para fotos a su
computadora con el cable USB suministrado.
Una pantalla "Conectando PC..." aparecerá en
la pantalla del marco para fotos.
• El reproductor será conectado en el modo
MSC (Clase de Almacenamiento Masivo). Éste
aparecerá como una letra de unidad en su
computadora y se comportará como una
unidad extraíble para transferencia de
archivos en una o ambas direcciones.
Gestión de archivos con el
Administrador de Fotos
• Una ventana de una letra de unidad asociada
con la etiqueta Photo Manager
(Administrador de Fotos) surgirá. Si ésta no
emerge, abra Mi PC y haga doble clic en la
unidad etiquetada Administrador de Fotos.
Haga doble clic en el icono Administrador de
Fotos para iniciar el programa.
• Ubique el directorio de carpetas donde usted
almacenó sus fotos en la columna izquierda,
luego todas las fotos dentro de esta carpeta
serán visualizadas en la columna de en
medio. Seleccione foto(s) que usted quiera
transferir al marco para fotos digitales.
• Presione Hacia la memoria interna para
transferir la foto seleccionada al marco para
fotos digitales.
• Presione Rotación a la izquierda, Rotación
a la derecha y Recortar para seleccionar
para editar la foto antes de transferir.
• La columna derecha muestra las fotos en su
marco para fotos digitales. Presione Borrar
para eliminar el archivo seleccionado.
Seleccione Sí cuando la ventana de
confirmación surja.
• Presione Guardar.. para guardar la foto
seleccionada en un nuevo archivo.
• Presione Format.. para formatear los datos
en la memoria interna del marco para fotos
digitales. Seleccione la configuración que
usted desee en la ventana emergente y
presione Iniciar.
• Si la memoria interna no tiene suficiente
espacio, el mensaje “Memoria interna llena”
se visualizará.
Administrador de fotos
Page 42

11
Especificaciones
Tamaño de
pantalla
7 pulgadas
Relación del alto
al ancho del
cuadro
16:9
Resolución 480x234 pixeles
Adaptador para
corriente externo
CA entrada: 100-240 V ~
50/60 Hz, CD salida 5 V
1.5 A
Audio
Potencia de salida 1 W
Almacenamiento
Memoria interna 128 MB NAND flash
Dispositivo de memoria soportado
Ranura para
tarjetas de
memoria
SD/SDHC/MMC/MS/MS
Pro card
Puerto USB estándar USB 2.0 Host x 1
Máximo tamaño
de dispositivo
flash soportado
4 GB
Archivos de medios soportados
Formato de
archivos de foto
JPEG
Formatos de
archivo de vídeo
Movimiento JPEG (video)
con ADPCM (audio)
(generado solamente por
el programa muvee
Reveal)
Interfaz de Usuario//Control
Botones en la
parte superior de
la unidad
Sí
Calendario y reloj Sí
Page 43

12
E
Solución de problemas
Su marco para fotos digitales no enciende.
• El adaptador no está bien conectado a su
marco para fotos digitales, cuatro baterías
AAA no están instaladas o están vacías o el
interruptor de encendido no está activado.
La unidad muestra algunas imágenes más
lentamente y algunas otras más rápidamente.
• Las imágenes de más alta resolución se
cargan más lentamente. Trate de usar
imágenes de menor resolución o efectúe el
re-muestreo de comprensión de sus
imágenes. Para detalles sobre cómo
comprimir sus fotos vea el manual de
operación de su cámara.
Una tarjeta de memoria está insertada en su
marco para fotos digitales pero usted no
puede ver sus fotos o los archivos de vídeo
muvee.
• Asegúrese de que su tarjeta de memoria
contenga archivos JPEG (Los JPEG progresivos
no están soportados) o de vídeo muvee.
• Apague su marco para fotos digitales y
asegúrese de que la tarjeta de memoria esté
insertada completamente en la ranura para
tarjetas y en la forma correcta. Luego vuelva a
encender la unidad.
• La unidad puede no soportar dispositivos
flash mayores a 4 GB. Los archivos muvee
pueden no reproducirse correctamente si
estos están almacenados en un dispositivo
flash con más de 4 GB de capacidad.
• Algunas cámaras digitales guardan imágenes
en formatos distintos que JPEG. Consulte el
manual de su cámara si sus fotos no son
archivos JPEG.
• Si una tarjeta no puede ser leída, usted puede
intentar formatearla primero. Muchas
cámaras de video y cámaras digitales usan
una tarjeta SD para guardar imágenes y
películas. Si usted encuentra que no puede
accesar toda la capacidad de la tarjeta, o que
los datos en la tarjeta aleatoriamente se
borran o sólo algunas de las imágenes
pueden ser leídas, usted necesitará volver a
formatearla. Las tarjetas SD pueden volverse
a formatear ya sea con una computadora que
tenga un lector para tarjetas SD o
directamente desde el menú de la mayoría de
las cámaras digitales. Vea los procedimientos
a continuación para formatear una tarjeta SD.
Procedimientos para formatear la tarjeta SD
Usando el lector de tarjetas SD
1. Encienda su computadora y coloque la tarjeta
SD en la ranura para lector de tarjetas al
frente de su computadora o en el lector para
tarjetas externo conectado a un puerto USB.
Espere para ver si su sistema operativo abre
automáticamente una ventana solicitándole
información. Haga clic en la opción “Abrir una
carpeta para ver archivos” si la ventana se
visualiza.
2. Haga clic en el botón”Iniciar” si su sistema
operativo no le pide automáticamente abrir
una carpeta. Elija la opción “Mi PC” para
llamar una nueva ventana.
3. Haga clic con el botón derecho del ratón en
la bahía de la unidad para su lector de
tarjetas, y luego elija la opción que diga
“Re-formatear” del menú emergente. Haga
clic en la opción para establecer en formateo
a “FAT16” si usted recibe una ventana
emergente por separado preguntándole cuál
sistema de archivos utilizar para la tarjeta.
Usando la cámara digital
1. Coloque la tarjeta SD en su cámara digital y
luego enciéndala. Presione el botón en su
cámara para ver sus fotografías más recientes.
2. Presione el botón "Menu" u "OK" en la cámara
para ver las opciones de fotografía. Elija la
opción que diga “Configuración” u ”Opciones”.
3. Desplácese sobre la opción “Formatear” y
haga clic en "OK." Elija la opción para
establecer el formato de archivo como
"FAT16."
Nota: algunos procedimientos de cámaras
digitales pueden variar ligeramente del
procedimiento indicado anteriormente. Consulte
siempre primero el manual del propietario de la
cámara.
Información de servicio
Este producto deberá recibir servicio
exclusivamente por aquel personal
específicamente capacitado en las técnicas de
servicio apropiadas. Para instrucciones sobre
cómo obtener servicio, consulte la garantía
incluida en este manual del usuario.
Page 44

13
Para sus registros
Conserve su recibo de venta como prueba de la
compra para obtener garantía en partes y
servicio.
En el caso de que requiriera servicio, puede ser
que usted necesite tanto el número de modelo
como el número de serie. En el espacio a
continuación, anote la fecha y lugar de compra,
así como el número de serie.
Modelo número.
Fecha de compra
Lugar de compra
Número de serie
Page 45

14
E
Garantía limitada
Garantía Limitada de 12 Meses
Aplica a Marcos para Fotos Digitales
Audiovox
AUDIOVOX ACCESSORIES CORP. (la Compañía)
garantiza al comprador al menudeo original de
este producto que en el caso de que se
compruebe que este producto o alguna parte
del mismo, bajo condiciones y uso normales, sea
defectuoso en material o mano de obra en un
plazo de doce meses desde la fecha de compra
original, tal(es) defecto(s) será(n) reparado(s) o
reemplazado(s) con producto reacondicionado
(a opción de la Compañía) sin cargo por las
partes y la labor de reparación.
Para obtener el reemplazo o reparación dentro
de los términos de esta Garantía, el producto
debe ser entregado con prueba de cobertura de
la garantía (por ejemplo, la nota de venta
fechada), especificación de defecto(s), flete
prepagado, a la Compañía en la dirección que se
muestra más adelante.
Esta Garantía no se extiende a la eliminación de
ruido o estática generados externamente, a la
corrección de problemas de antenas,
interrupciones/pérdida de transmisión o de
servicio de internet, a costos incurridos por
instalación, remoción o reinstalación de
producto, a corrupciones causadas por virus de
computadoras, spyware u otro malware, a
pérdida de medios, archivos, datos o contenido,
o a daño a cintas, discos, tarjetas o dispositivos
de memoria removibles, bocinas, accesorios,
computadoras, periféricos de computadora,
otros reproductores de medios, redes en el
hogar o sistemas eléctricos en vehículos.
Esta Garantía no aplica a algún producto o parte
del mismo que, en opinión de la Compañía, haya
sufrido o haya sido dañado mediante alteración,
instalación inadecuada, mal manejo, mal uso,
negligencia, accidente, o por la remoción o
eliminación de etiqueta(s) con el número de
serie de fábrica/código de barras. LA EXTENSIÓN
DE LA RESPONSABILIDAD DE LA COMPAÑÍA
BAJO ESTA GARANTÍA ESTÁ LIMITADA A LA
REPARACIÓN O REEMPLAZO PROVISTOS
ANTERIORMENTE Y, EN NINGÚN CASO, LA
RESPONSABILIDAD DE LA COMPAÑÍA EXCEDERÁ
EL PRECIO DE COMPRA PAGADO POR EL
COMPRADOR POR EL PRODUCTO.
Esta Garantía substituye todas las otras garantías
o responsabilidades específicas. CUALQUIER
GARANTÍA IMPLÍCITA, INCLUYENDO CUALQUIER
GARANTÍA IMPLÍCITA DE APTITUD PARA
COMERCIALIZACIÓN, ESTARÁ LIMITADA A LA
DURACIÓN DE ESTA GARANTÍA ESCRITA.
CUALQUIER ACCIÓN POR VIOLACIÓN DE ALGUNA
GARANTÍA BAJO LA PRESENTE, INCLUYENDO
CUALQUIER GARANTÍA IMPLÍCITA DE APTITUD
PARA COMERCIALIZACIÓN DEBE SER
PRESENTADA DENTRO DE UN PERIODO DE 24
MESES DESDE LA FECHA DE COMPRA ORIGINAL.
EN NINGÚN CASO LA COMPAÑÍA SERÁ
RESPONSABLE POR ALGÚN DAÑO
CONSECUENCIAL O INCIDENTAL POR LA
VIOLACIÓN DE ESTA O DE CUALQUIER OTRA
GARANTÍA. Ninguna persona o representante
está autorizado para asumir por parte de la
Compañía alguna responsabilidad distinta que lo
expresado en este documento en relación con la
venta de este producto.
Algunos estados no permiten limitaciones en
cuanto a la duración de una garantía implícita o
la exclusión o limitación de daño consecuencial
o incidental, por lo tanto las limitaciones o
exclusiones anteriores pueden no ser aplicables
a usted. Esta Garantía le otorga derechos legales
específicos y puede ser que usted tenga también
otros derechos que varíen de estado a estado.
Recomendaciones antes de enviar su
producto para una reclamación en garantía:
• Si su producto puede almacenar contenido
(tal como un reproductor mp3, grabadora de
voz, cámara de vídeo, marco para fotos
digitales, etc.), se recomienda efectuar copias
de respaldo periódicas del contenido
almacenado en el producto. Si es aplicable,
antes de enviar un producto, haga una copia
de respaldo del contenido o datos
almacenados en el dispositivo. También, es
aconsejable remover cualquier contenido
personal que usted no quisiera exponer a
otros. ES PROBABLE QUE LOS CONTENIDOS Y
DATOS EN EL DISPOSITIVO SE PIERDAN
DURANTE EL SERVICIO Y REFORMATEO.
AUDIOVOX NO ACEPTA RESPONSABILIDAD
POR LA PÉRDIDA DE CONTENIDO O DATOS, O
POR LA SEGURIDAD DE ALGÚN DATO O
CONTENIDO PERSONAL EN EL DISPOSITIVO
DEVUELTO. El producto será retornado con las
Page 46

15
configuraciones establecidas de fábrica, y sin
contenido alguno precargado que pudiera
haber sido instalado en el producto
comprado originalmente. El consumidor será
responsable de volver a cargar datos y
contenido. El consumidor será responsable
de restaurar cualquier configuración de su
preferencia personal.
• Empaque apropiadamente su unidad. Incluya
cualquier control remoto, tarjetas de
memoria, cables, etc. que fueron
originalmente suministrados con el producto.
Sin embargo NO regrese baterías removibles,
incluso si las baterías fueron incluidas con la
compra original. Recomendamos usar los
materiales de empaque y la caja originales.
Envíe a
Audiovox Electronics Corp.
Atn: Departamento de Servicio.
150 Marcus Blvd.
Hauppauge N.Y. 11788
1-800-645-4994
Para clientes en Canad·, favor de enviar a:
Audiovox Return Centre
c/o Genco
6685 Kennedy Road,
Unit#3, Door 16,
Mississuaga, Ontario
L5T 3A5
 Loading...