

Audiovox D1909 Owner's Manual
D1909
9" LCD MONITOR WITH DVD PLAYER
ÉCRAN ACL DE 9 PO AVEC LECTEUR DVD
MONITOR LCD DE 9” CON REPRODUCTOR DVD

2
Table of Contents
A.Introduction ................................................................................................. 7
B. DVD and Disc Information ........................................................................... 7
C.Contents ..................................................................................................... 8
D.Powering and installation ........................................................................... 8
E. Controls, Indicators, and Connectors......................................................... 9
F. Loading and Playing a Disc ....................................................................... 10
G.Basic Operation........................................................................................... 11
H.Menu .......................................................................................................... 12
I. Display......................................................................................................... 12
J. Playing Audio CDs........................................................................................ 18
K. Playing JPEG Files....................................................................................... 19
L. Connecting to Other Equipment................................................................... 20
M.Setup ......................................................................................................... 21
N.Specifications ............................................................................................ 29
O.Rechargeable Built-in Battery use.............................................................. 29
P. Troubleshooting .......................................................................................... 31
Table des matičres
A.Introduction ................................................................................................... 38
B. Renseignements sur les DVD et disques...................................................... 38
C.Contenus........................................................................................................39
D.Alimentation et installation.............................................................................. 39
E. Commandes, témoins et branchements...........................................................40
F. Chargement et lecture d’un disque...............................................................41
G.Fonctionnement de base...............................................................................42
H.Menu ............................................................................................................. 43
I. Affichage....................................................................................................... 43
J. Lecture de CD audio.......................................................................................49
K. Visionnement de fichiers JPEG...................................................................... 50
L. Branchement ŕ d’autres appareils..................................................................51
M.Configuration....................................................................................................52
N.Caractéristiques techniques...........................................................................60
O.Pile rechargeable intégrée...............................................................................60
P. Dépannage ………..........................................................................................62
Contenido
A.Introducción ........................................................................................................69
B. Información sobre DVD y Disco........................................................................... 69
C.Contenido .............................................................................................................70
D.Suministro de energía e instalación ................................................................... 70
E. Controles, Indicadores y Conectores ..................................................................71
F. Carga y reproducción de un isco........................................................................72
G.Operación básica ...............................................................................................73
H.Menú .................................................................................................................74
I. Visualización.....................................................................................................74
J. Reproducción de CDs de Audio...........................................................................80
K. Reproducción de archivos JPEG........................................................................ 81
L. Conexión a otro equipo........................................................................................82
M.Configuración.....................................................................................................83
N.Especificaciones .................................................................................................91
O.Batería integrada recargable ..............................................................................91
P. Solución de Problemas .........................................................................................93

3
Important Safety Instructions
Some of the following information may not apply to your particular product;
however, as with any electronic product, precautions should be observed
during handling and use.
l Read these instructions.
l Keep these instructions.
l Heed all warnings.
l Follow all instructions.
l Do not use this apparatus near water.
l Clean only with dry cloth.
l Do not block any ventilation openings. Install in accordance with the
manufacturer’s instructions.
l Do not install near any heat sources such as radiators, heat
registers, stoves, or other apparatus (including amplifiers) that produce heat.
l Do not defeat the safety purpose of the polarized or grounding-type
plug. A polarized plug has two blades with one wider than the other.
A grounding type plug has two blades and a third grounding prong.
The wide blade or the third prong is provided for your safety. If the
provided plug does not fit into your outlet, consult an electrician for
replacement of the obsolete outlet.
l Protect the power cord from being walked on or pinched particu-
larly at plugs, convenience receptacles, and the point where they
exit from the apparatus.
l Only use attachments/accessories specified by the manufacturer.
l Use only with the cart, stand, tripod,
bracket, or table specified by the
manufacturer, or sold with the apparatus.
When a cart is used, use caution when
moving the cart/apparatus combination to
avoid injury from tip-over.
l Unplug this apparatus during lightning storms or when unused for
long periods of time.
l Refer all servicing to qualified service personnel. Servicing is re-
quired when the apparatus has been damaged in any way, such as
power-supply cord or plug is damaged, liquid has been spilled or
objects have fallen into the apparatus, the apparatus has been exposed to rain or moisture, does not operate normally, or has been
dropped.

4
Additional Safety Information
l Apparatus shall not be exposed to dripping or splashing and no
objects filled with liquids, such as vases, shall be placed on the
apparatus.
l Always leave sufficient space around the product for ventilation. Do
not place product in or on a bed, rug, in a bookcase or cabinet that
may prevent air flow through vent openings.
l Do not place lighted candles, cigarettes, cigars, etc. on the product.
l Connect power cord only to AC power source as marked on the
product.
l Care should be taken so that objects do not fall into the product.
l Do not attempt to disassemble the cabinet. This product does not
contain customer serviceable components.
l Do not use the unit immediately after transportation from a cold
place to a warm place; condensation problems may result. Wait
for about one hour till the moisture evaporates before operating
the unit.
l When using your portable DVD player, do not sit or stand too
close to the screen.
l To use a headset safely, please keep the following in mind:
- Do not play your headset at a high volume. Hearing experts
advise against continuous extended play.
- If you experience ringing in your ears, turn down the volume or
stop using the headset.
- Do not use a headset while driving a motorized vehicle or riding
a bike. It may cause a traffic hazard and is illegal in many areas.
- Even if your headset is an open-air type designed to let you hear
outside sounds, don’t turn up the volume so high that can’t hear
sounds around you.
l CAUTION! CD and DVD products utilize a laser. Do not try to
open the product. Refer all servicing to qualified service
personnel.
l CAUTION! Danger of explosion if battery is incorrectly replaced.
Replace only with the same or equivalent type.
l Warning: Your DVD player contains a battery and charging sys-
tem which is designed to work in temperatures that do not exceed 50oC (122oF). Leaving this product in a closed automobile
or in the trunk of an automobile where temperature may exceed
50oC may result in permanent battery damage, fire, or explosion.
Please remove your product from the automobile when you exit,
do not place your product in the trunk of your automobile, and do
not leave your product in any location where temperature may
exceed 50oC.

5
WARNING: TO PREVENT FIREOR ELECTRICAL SHOCK HAZARD,DO NOT
EXPOSE THIS PRODUCT TO RAIN OR MOISTURE.
FCC Information
This device complies with part 15 of the FCC rules. Operation is subject
to the following two conditions: (1) This device may not cause harmful
interference, and (2) This device must accept any interference received,
including interference which may cause undesired operation.
This equipment has been tested and found to comply with the limits for a
Class B digital device, pursuant to Part 15 of the FCC Rules. These
limits are designed to provide reasonable protection against harmful
interference in a residential installation. This equipment generates, uses
and can radiate radio frequency energy and, if not installed and used in
accordance with the instructions, may cause harmful interference to radio
communications. However, there is no guarantee that interference will
not occur in a particular installation.
If this equipment does cause harmful interference to radio or television
reception, which can be determined by turning the equipment off and on,
the user is encouraged to try to correct the interference by one or more
of the following measures:
- Reorient or relocate the receiving antenna.
- Increase the separation between the equipment and receiver.
6
Service Information
This product should be serviced only by those specially trained in appropriate servicing techniques. For instructions on how to obtain service,
refer to the warranty included in this user manual.
Manufacturer/Responsible Party
Audiovox Electronics Corp.,
150 Marcus Blvd., Hauppauge, NY 11788
For Your Records
Keep your sales receipt for proof of purchase to obtain warranty parts
and service.
In the event that service should be required, you may need both the model
number and the serial number. In the space below, record the date and
place of purchase, and the serial number:
Model No.
Date of Purchase
Place of Purchase
Serial No.
- Connect the equipment into an outlet on a circuit different from that to
which the receiver is connected.
- Consult the dealer or an experienced radio / TV technician for help.
In accordance with FCC requirements, changes or modifications not
expressly approved by manufacturer could void the user’s authority to
operate this product.
This class B digital apparatus complies with Canadian ICES-003.

7
A. Introduction
Thank you for choosing the D1909 portable DVD player. The main
features include a 9" wide Screen (16:9 Aspect Ratio) Liquid Crystal
Display (LCD) monitor and a DVD player. The unit applies the latest
state of the art electronics and is designed for use in hotels, offices
or your home. The unit is constructed to provide years of reliable,
trouble-free service and is compact so that you can take it with you
anywhere and is designed for quick and easy installation. Please read
the entire instruction manual supplied with this product prior to using.
The documentation will assist you in using the system properly to
obtain the best equipment performance. Please save this manual for
later use.
B. DVD and Disc Information
DVD Copy Protection - This Product incorporates copyright
protection technology that is protected by method claims of certain
U.S. Patents and other intellectual property rights owned by
Macrovision Corporation and other rights owners. Use of this
copyright protection technology must be authorized by Macrovision
Corporation, and is intended for home and other limited viewing
uses only unless otherwise authorized by Macrovision Corporation.
Reverse engineering or disassembly is prohibited.
DVD Regional Code - Your DVD player
has been designed to process regional
management information that is stored
on DVD discs. The regional code for your player is 1 (The U.S.,U.S.
Territories and Canada). Only DVD discs that have regional codes of
1 or ALL (for all regions) can be played by your player.
Disc - Do not use irregularly shaped discs such as heart or star-
shaped discs as they may cause the unit to malfunction. Do not stick
paper, tape or glue on the disc. Do not expose the disc to direct sunlight or heat sources such as hot air ducts. Do not touch the surface
of disc. Handle the disc by its edge. Clean the disc by wiping the disc
from the center out with a cleaning cloth. Remove the disc from the
unit and store it in its case after playing. Some playback operations of
discs may be intentionally fixed by software producers. Since this
unit plays discs according to the disc contents the software producers designed, some playback features may not be available. Also
refer to the instructions supplied with the discs.
8
C. Contents
1. 1 x9’’ LCD Monitor and DVD Player
2. 1 xRemote Control with Battery (CR2025)
3. 1 xAudio/Video Cable
4. 1 xAC to DC Adapter
5. 1 xDC Power Adapter
6. 1 xInstruction Manual
7. 1 x Product Registration Card
8. 1 x eMusic Card
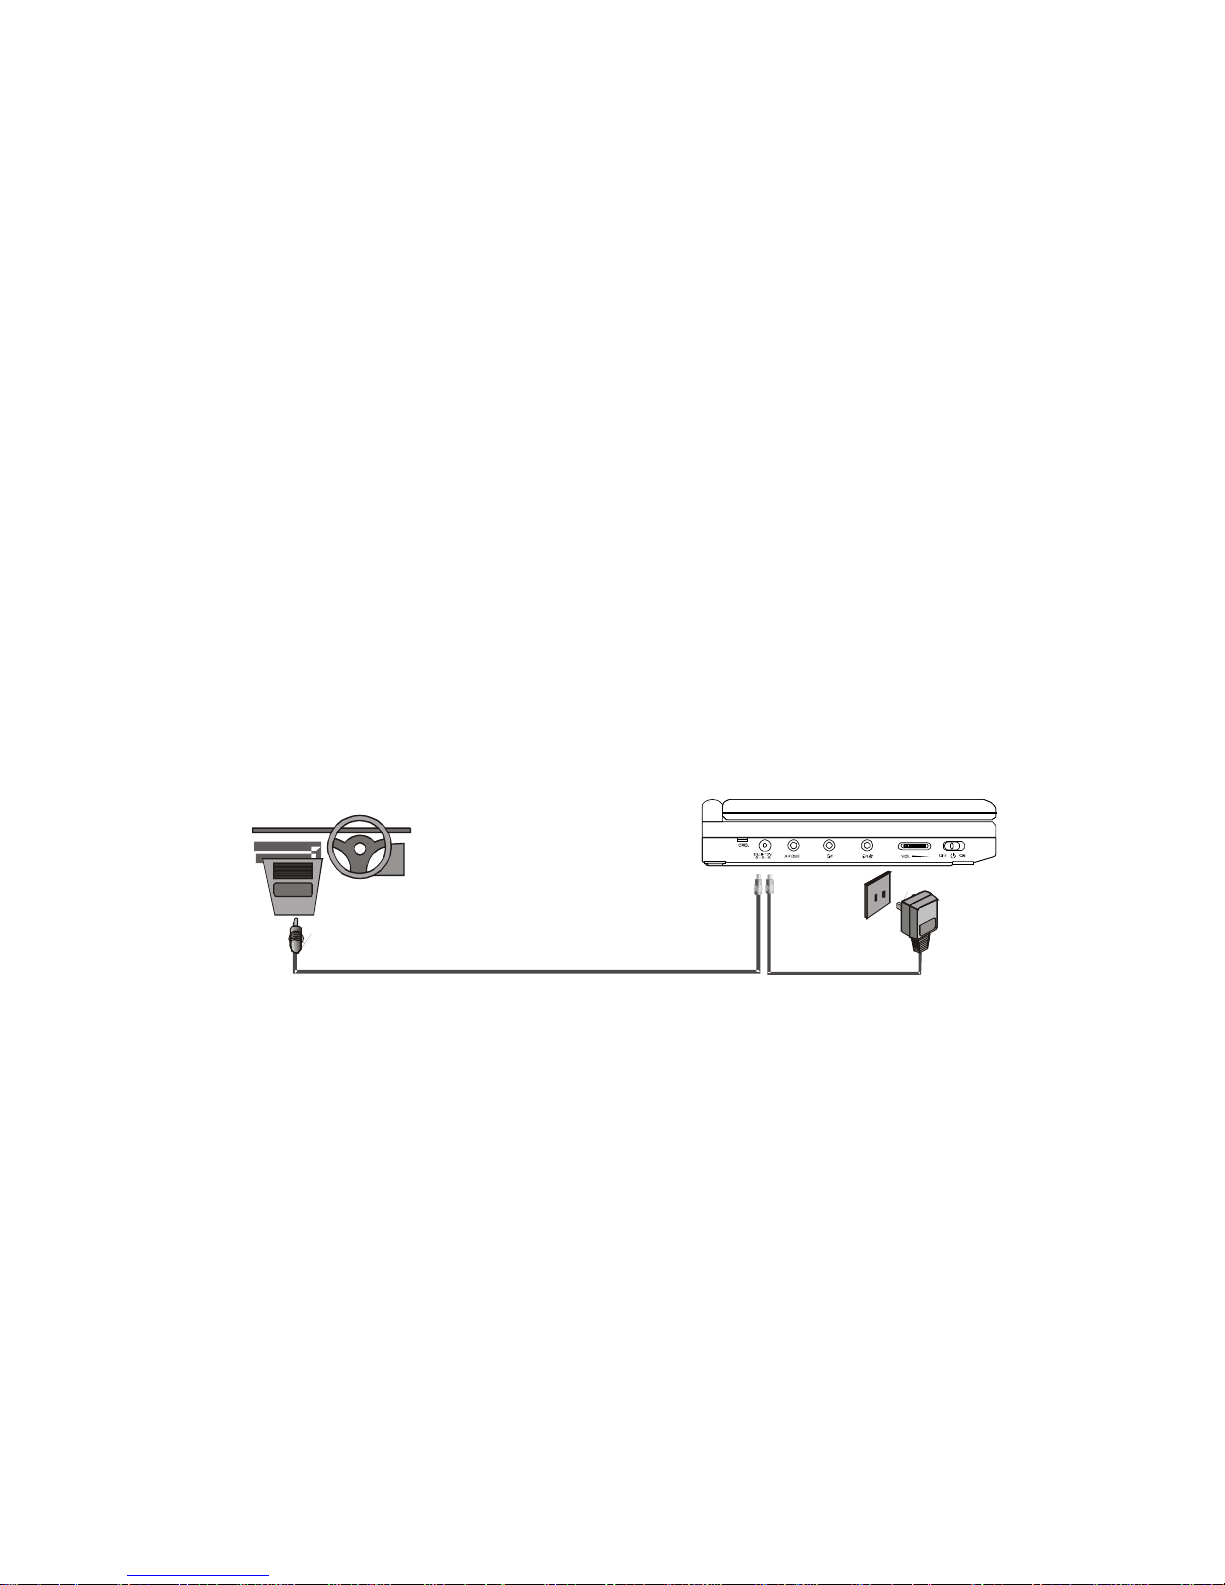
D. Powering and Installation
1. Powering the System Indoors (Refer to Figure 1)
Plug one end of the AC to DC adapter into the DC input jack on the
left side of the main unit, then plug the other end into the 100~240V
AC power receptacle.
2. Powering the System in a Car
Plug one end of the DC Power adapter into the DC input jack on
the unit, then plug the other end into the vehicle power outlet.
Figure 1
3. To Charge the Built-in Battery
Plug one end of the AC to DC adapter into the DC jack on the side
of the player, as shown in Figure 1, then plug the other end into the
100~240V AC power outlet. Make sure that the player’s power slide
switch is in the “OFF/CHG.” position, the charge indicator will be
red. Once fully charged, the Chg. LED indicator will turn off. Once
the indicator is off, remove the AC to DC adapter wall plug.
NOTE: Your new battery must be charged a minimum of 8 hours
before the first usage. Each full recharge takes approximately five hours and one full charge can provide power to
the player for approximately 2 hours.
9
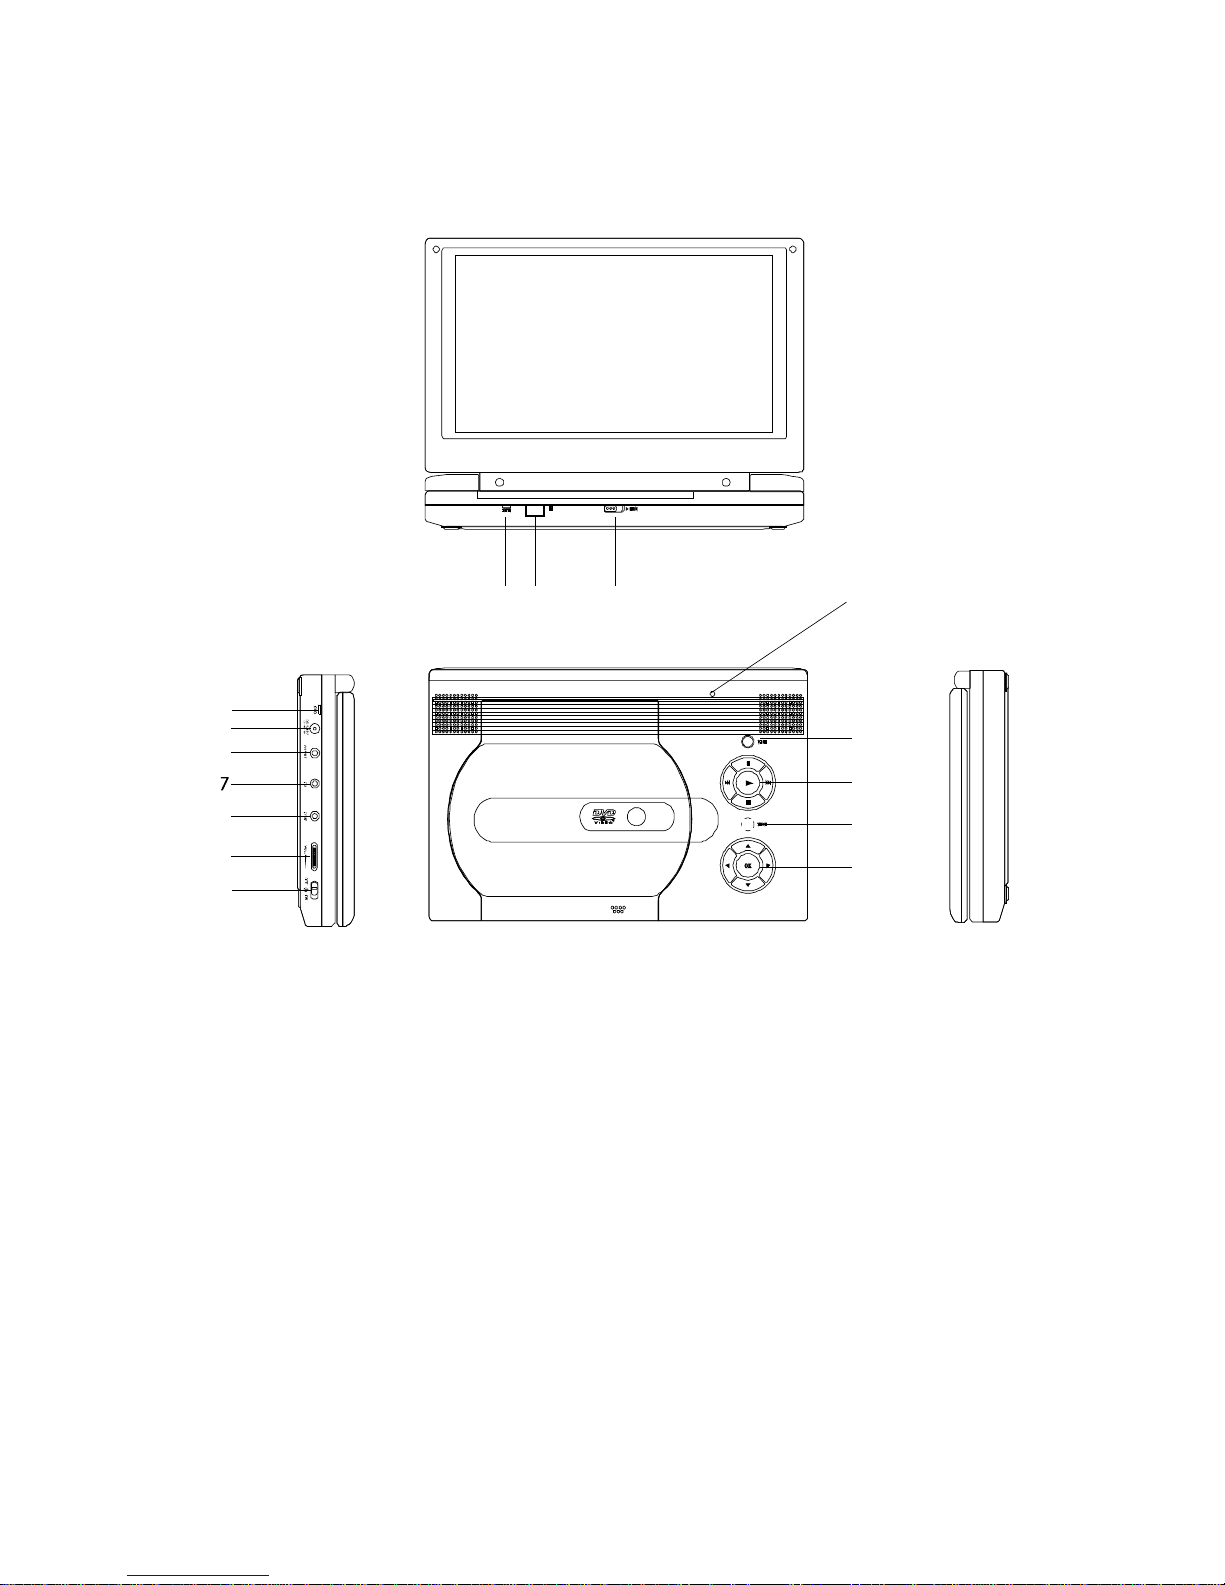
* Connecting to this headphone jack will disable the internal
speakers.
9) Volume Control
10) Power On/Off(CHG.) Switch
11) LCD Panel Shut Off Switch
12) Wide Screen Button
13) Previous/Next/Pause
/Stop/Play Button
14) Menu Button
15) Up/Down/Left/Right/OK Button
1) Power LED
2) Remote Control Sensor
3) Cover Open Switch
4) Charge Indicator
5) DC 9-12V Input Jack
6) A/V Out Jack
7) Headphone Jack 2
8) Headphone Jack 1*
E. Controls, Indicators, and Connectors
1. Unit View (Refer to Figure 2)
Figure 2
1 2
3
4
10
111213
14
5
6
8
9
15
10
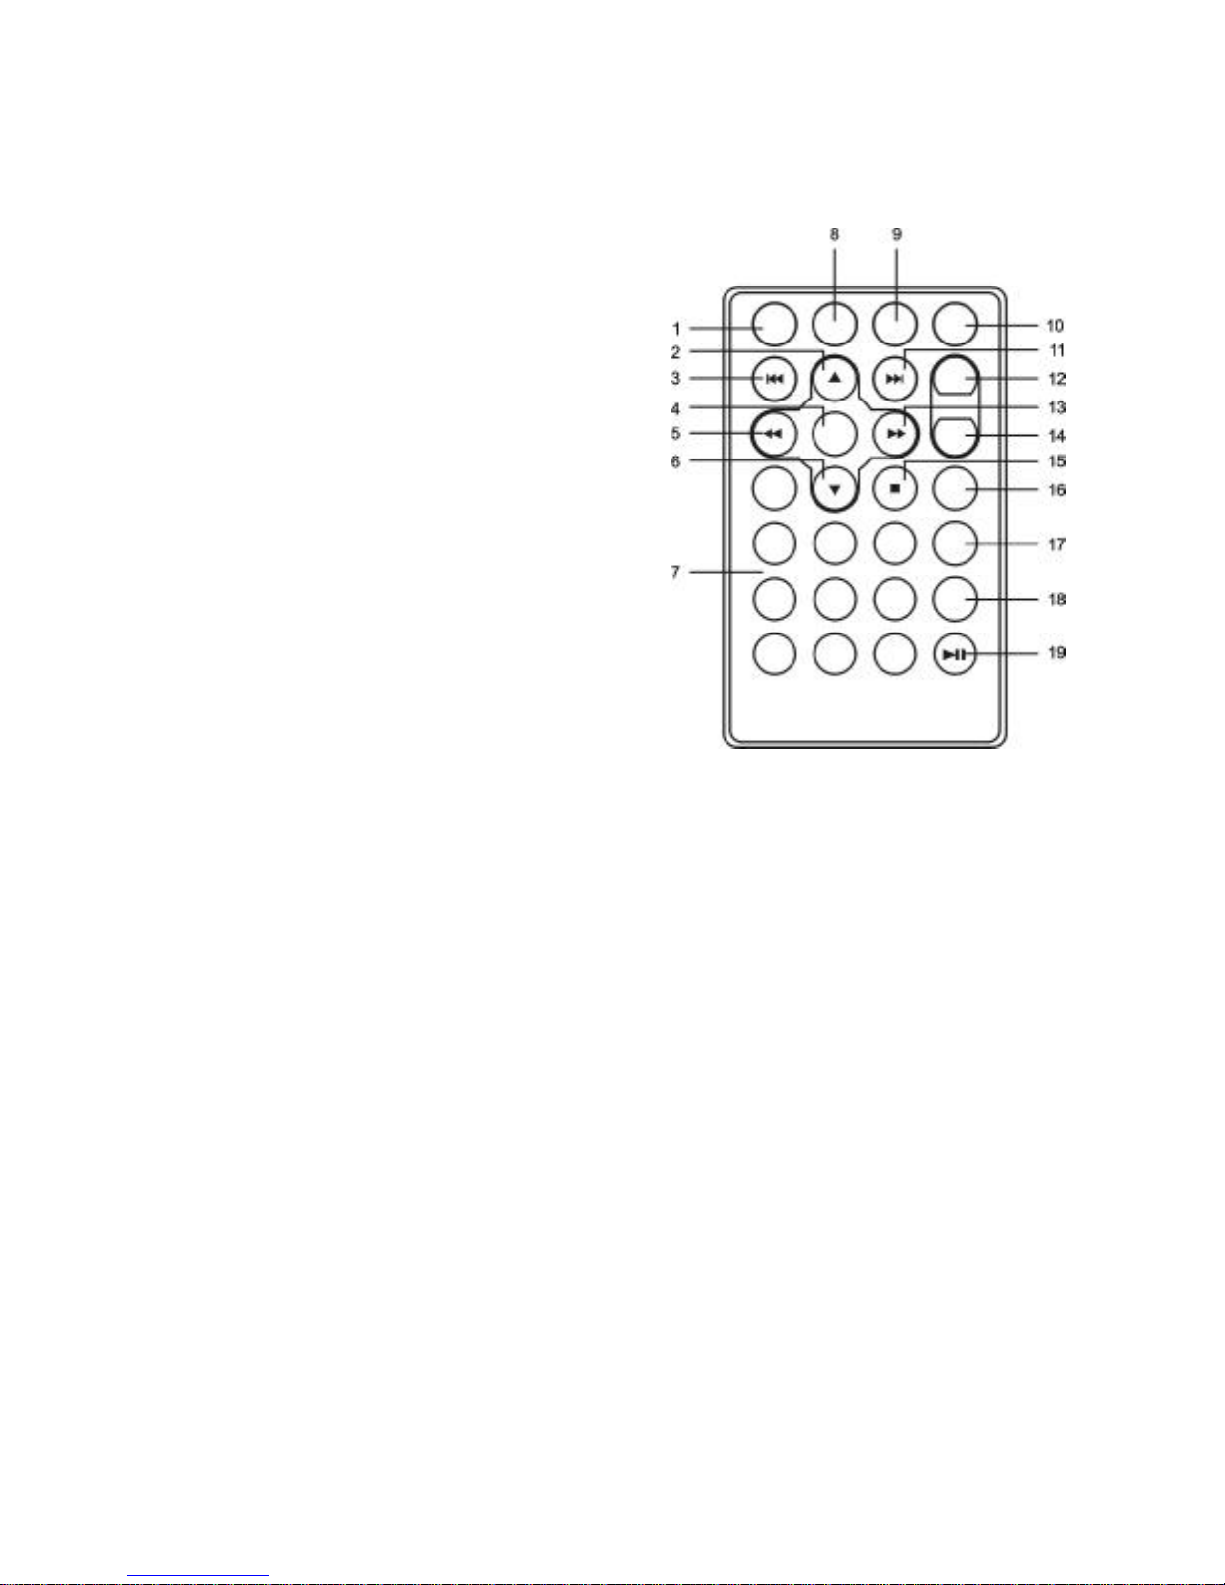
2. Remote Control (Refer to Figure 3)
F. Loading and Playing a Disc
a.After connecting power to the unit, apply power to the DVD player
by sliding the POWER ON/OFF switch to ON. The power indicator will be green.
b.Open the disc tray by sliding cover OPEN switch and place a disc
onto the tray with the label side facing up.
c. Close the tray by pressing the area marked “PUSH TO CLOSE”.
The unit will load the disc and start playing.
d. Rotate VOLUME control to adjust the DVD player’s volume.
e. To stop playing a disc, press the STOP button.
f. To turn off the DVD player, slide the POWER ON/OFF switch to
OFF.
Figure 3
1) SETUP Button
2) UP Button
3) PREVIOUS Button
4) ENTER Button
5) REVERSE/LEFT Button
6) DOWN Button
7) NUMERIC Buttons
8) DISPLAY Button
9) ZOOM Button
10) SUB Button
11) NEXT Button
12) A-B REPEAT Button
13) FORWARD/RIGHT Button
14) 1/All REPEAT Button
15) STOP Button
16) MENU Button
17) AUDIO Button
18) ANGLE Button
19) PLAY/PAUSE Button

11
G. Basic Operation
POWER
OPEN
PLAY
PAUSE
STOP
NEXT
PREVIOUS
FORWARD
REVERSE
LEFT/RIGHT/UP/DOWN
ENTER
NUMBERS
MENU
REPEAT
A-B
DISPLAY
ANGLE
SUBTITLE
AUDIO
ZOOM
SETUP
Turn the unit on/off
Remove/load the disc
Start Play/Execute item or setting
Still Picture
(1 time) Stop at the present playing point /
(2 times) Stop playback of the DVD/CD
Go to the next chapter, track or scene during playback
Go back to the previous chapter, track or
scene during playback
Scan forward at 2, 4, 8,16 or 32x times
speed
Scan backward at 2, 4, 8, 16 or 32x times
speed
Used for Menu Navigation
Execute item or confirm setting
Select item or setting
Display the main menu of the disc
Repeat playing title, chapter, or track
Repeat a specific portion from point A to
point B of the disc
Display information (title, chapter, track,
time, etc.)
Change the viewing angles on the scene
Select the subtitle language and turn it on/
off
Select the audio language
Enlarge an image to 2, 3, or 4 times the
original size during DVD playback.
Display the setup menu to select and set
items, and exit the setup menu.
12
H. Menu
A DVD is divided into sections called titles and chapters. When you
play a DVD, a root menu of the disc will appear on the screen of your
TV or Monitor. The contents of the menu vary from disc to disc. Press
MENU during playback to display the menu. Some DVDs only allow
you to select disc playback options using the DVD root menu.
I. Display (Display contents vary from disc to disc.)
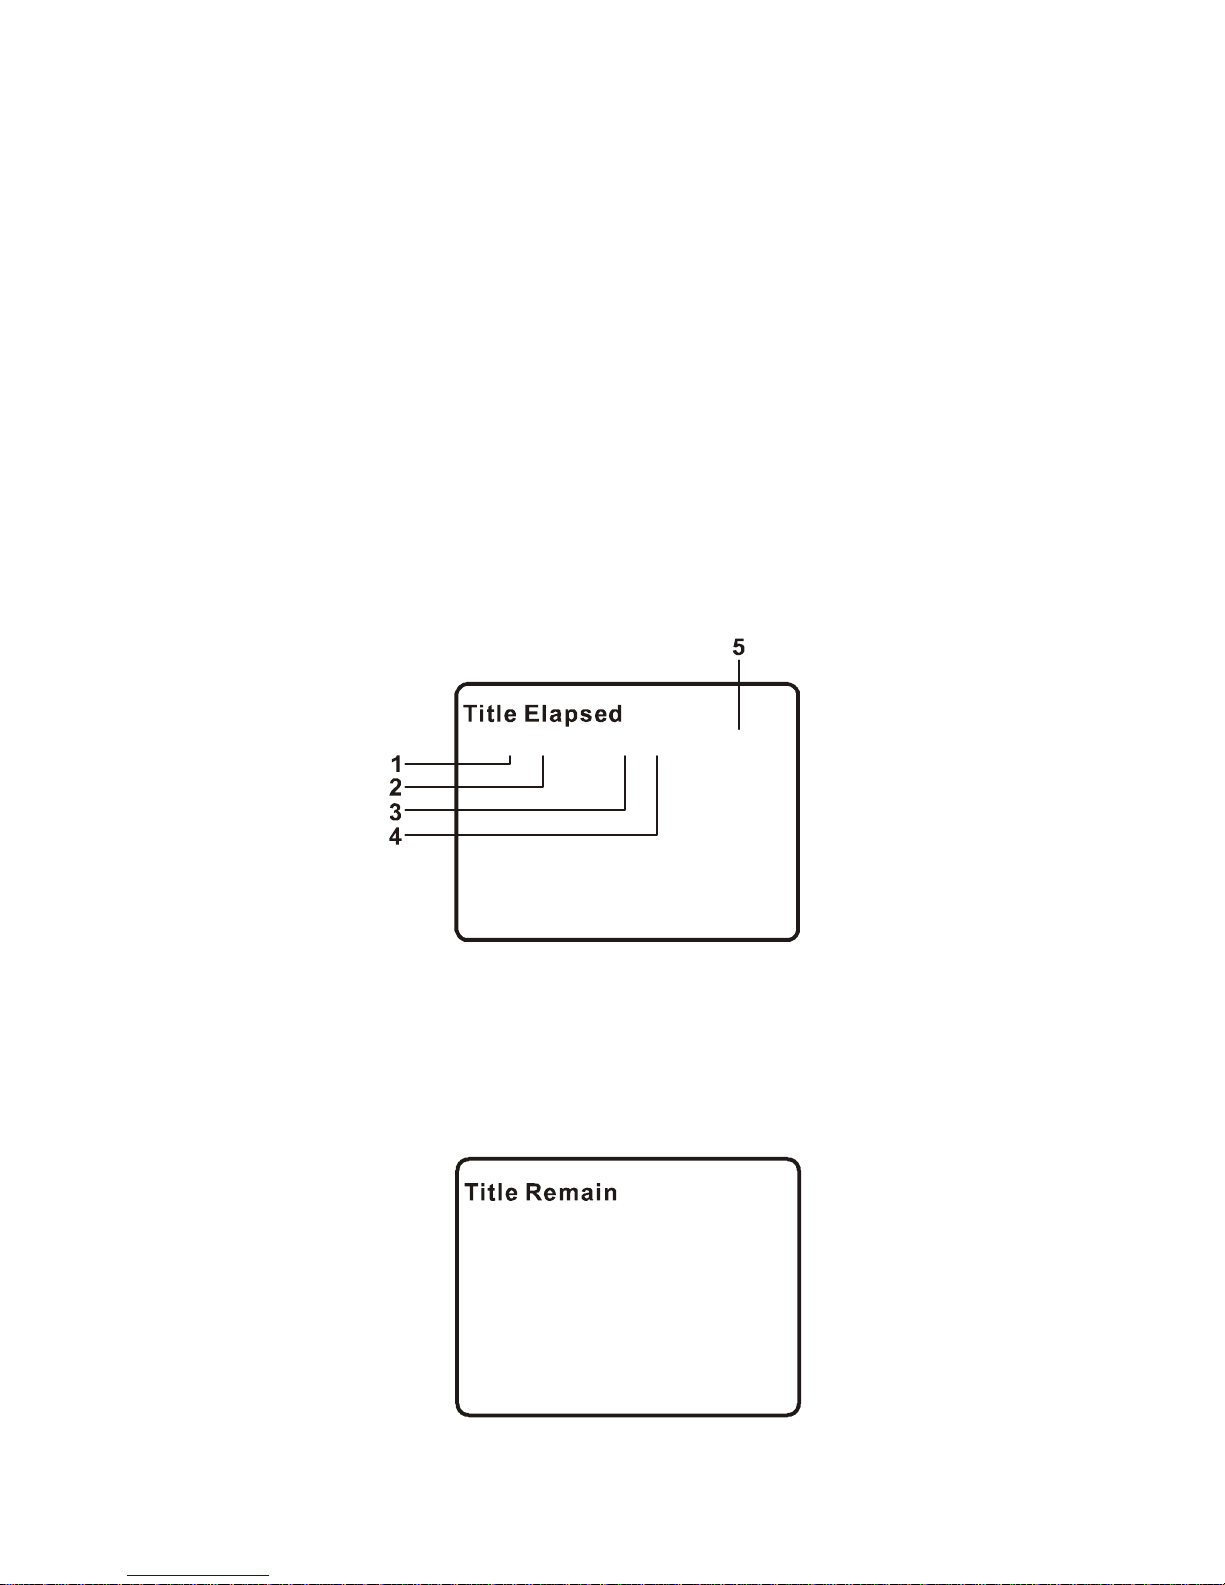
1. Playing Time and Remaining Time
a. During playback press the DISPLAY button to display the current
Title Number (1), the total Number of Titles (2), the current Chapter Number (3), the total Number of Chapters (4), and the elapsed
playing Time for the title (5). The heading will disappear automatically after 3 seconds if no buttons are pressed.
b. Press DISPLAY button again to display the Remaining Time of
the title. The heading will disappear automatically in 3 seconds.
Title Remaining Time Screen Display
Title, Chapter Number and Time Screen Display
Tt0101Ch021700000
/ / ::
Tt0101Ch021700000 / / ::
13
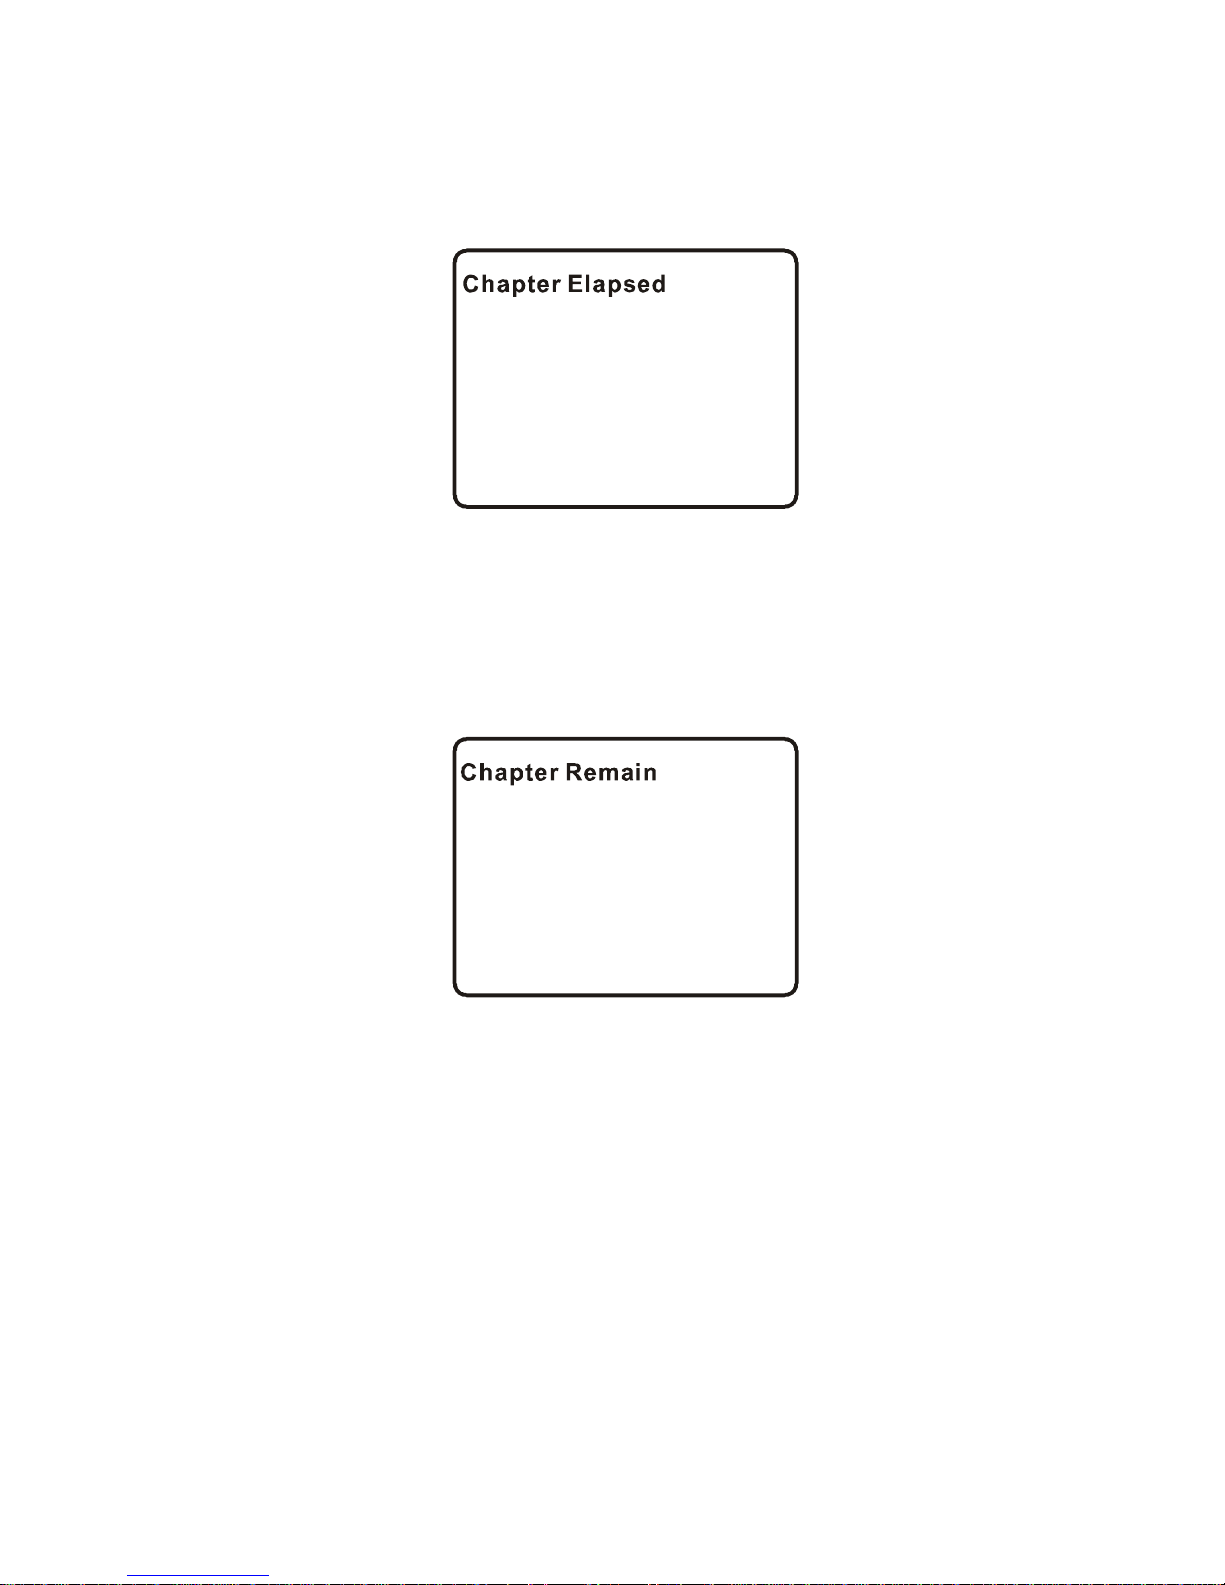
c. Press DISPLAY button a third time to display the Elapsed Time
for the chapter. The heading will disappear automatically in 3
seconds.
d. Press DISPLAY button a fourth time to display the Remaining
Time for the chapter. The heading will disappear automatically in
3 seconds.
e. Press DISPLAY button a fifth time to exit, ‘DISPLAY OFF’ will be
displayed and will disappear automatically in 3 seconds.
NOTE: To select the Chapter you want, enter the number of the
Chapter you want on the remote while in any display mode.
The information for Chapter and Title will be displayed and
the number of the Chapter you selected will be highlighted.
Press ENTER button to confirm the selection.
Chapter Elapsed Time Screen Display
Chapter Remaining Time Screen Display
Tt0101Ch021700000
/ / ::
Tt0101Ch021700000
/ / ::
14
* Some DVDs only allow access to this function through the DVD
menu.
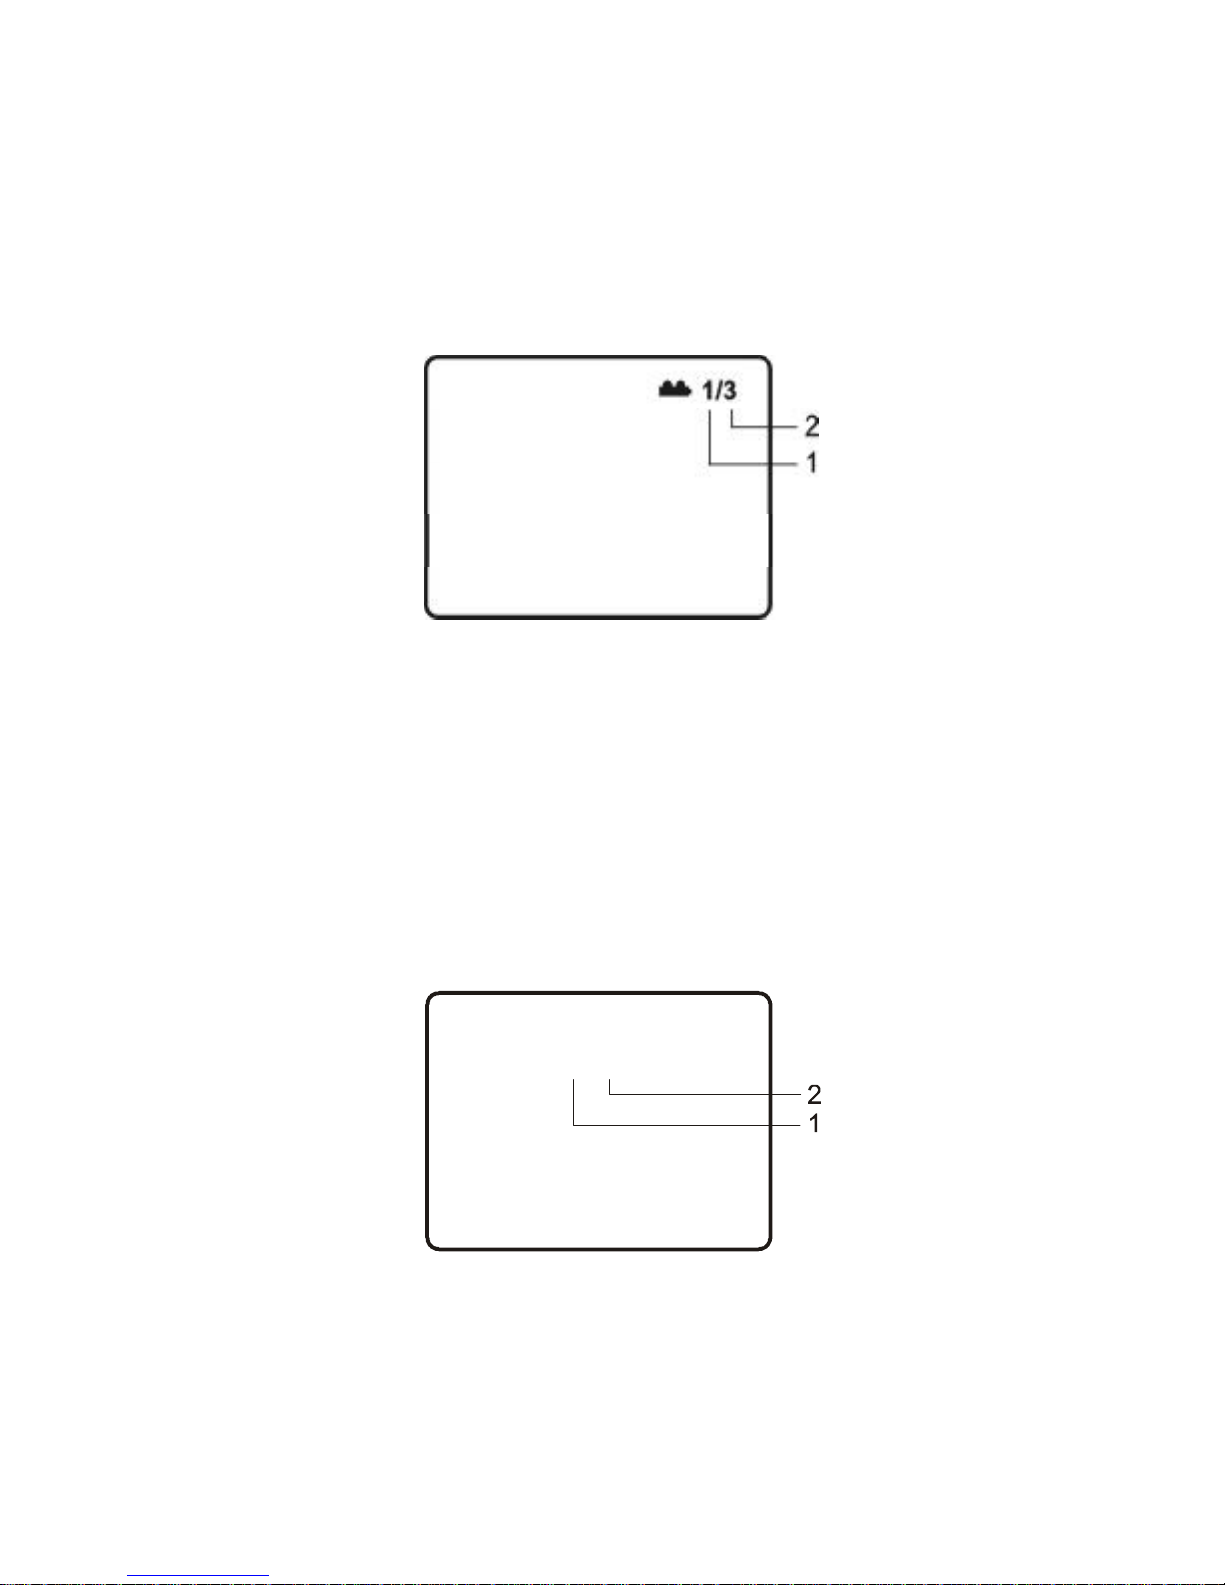
3. Subtitle
During disc playback press SUB button to select the subtitle
language you desire*, with the current Subtitle Language Number
(1) and the total Number of Subtitle Languages (2) displayed. If
there are multiple languages press SUB button again to select
another subtitle language. To turn subtitles OFF, press the SUB
button until ‘SUBTITLE OFF’ is displayed. The Subtitle display will
disappear automatically if the SUB button is not pressed again within
3 seconds.
Angle Screen Display
Subtitle0102 /
Subtitle Screen Display
2. Angle
During playback of a disc, press ANGLE button to display the available angles for discs containing multi-angles*, with the current angle
number (1) and the total number of angles (2) displaying. Press
ANGLE button to select other angles.
*NOTE: Not all discs contain this feature.
15
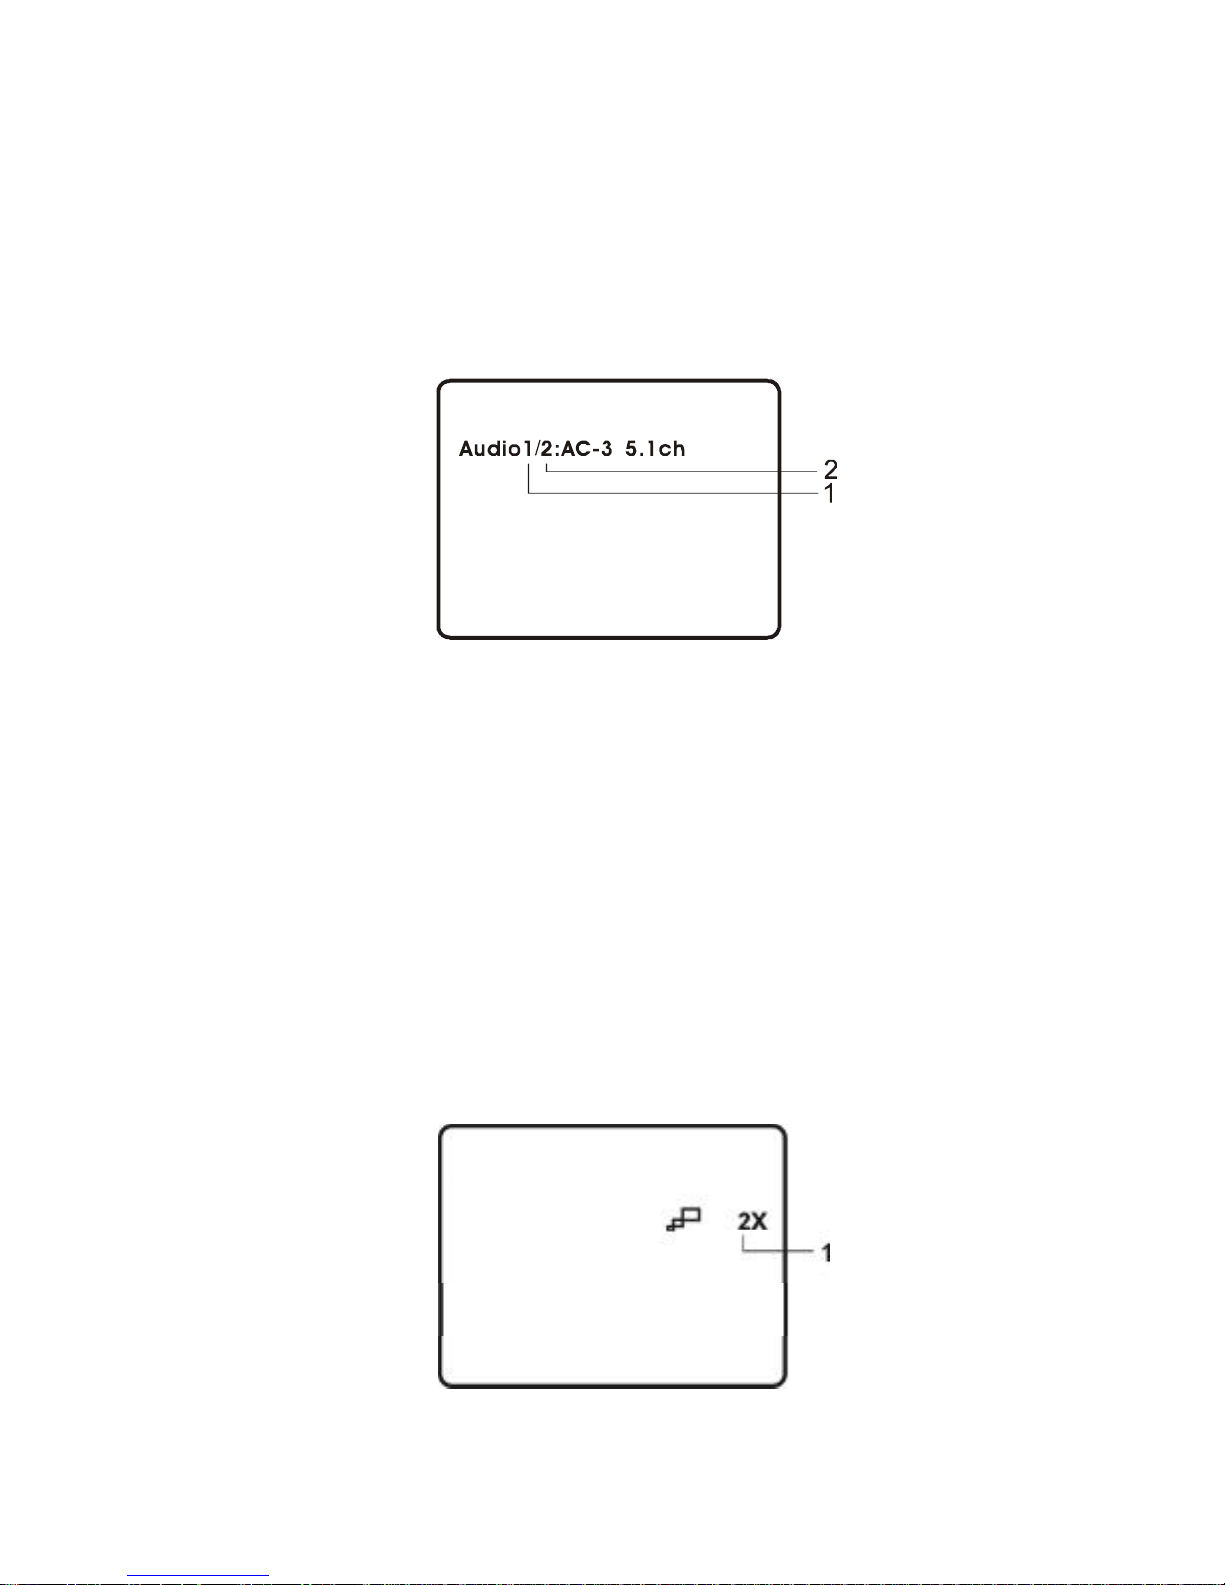
4. Audio
During playback press AUDIO button to select the audio language
you desire*, with the current Audio Channel Number (1) and the
total number of Audio Channels (2) displayed. Press AUDIO again
to select another audio language. The audio display will disappear
automatically if the AUDIO button is not pressed within 3 seconds.
Audio Language Screen Display
* Some DVDs only allow access to this function through the DVD
menu.
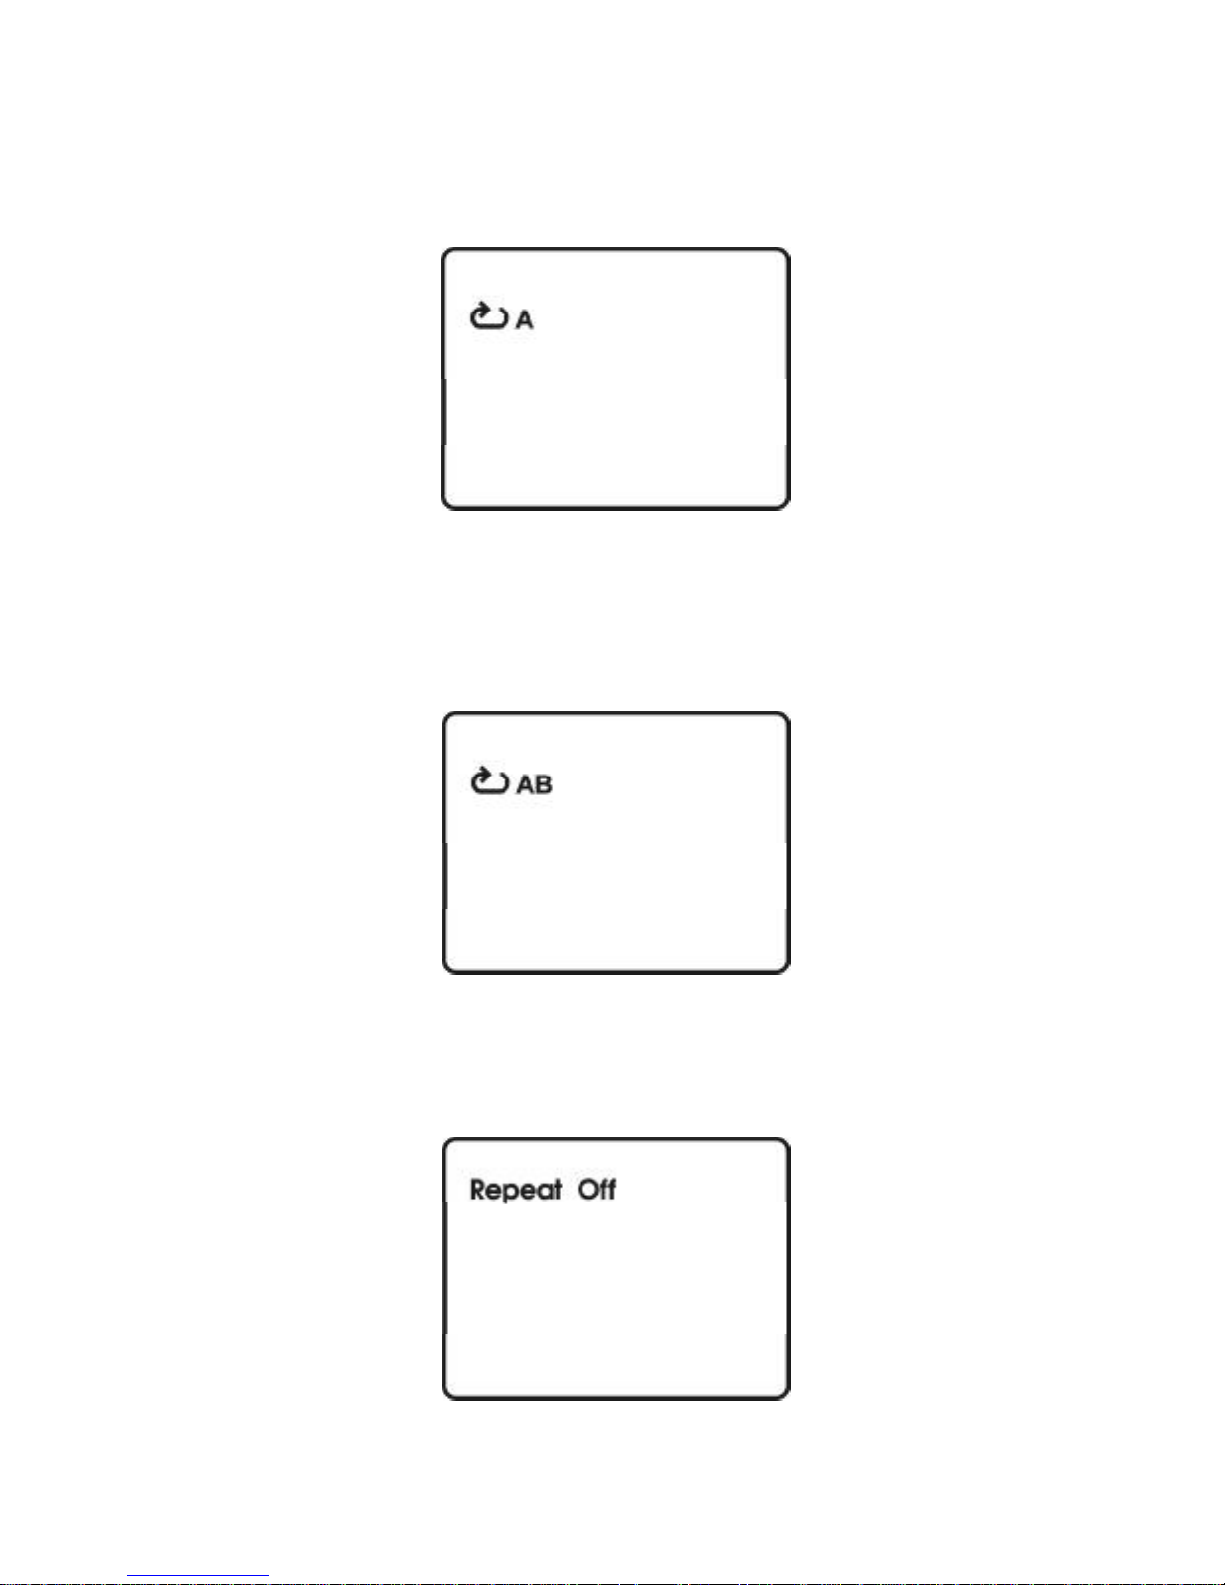
5. Zoom
During playback press ZOOM button to enlarge the picture by 2x,
3x or 4X with the current zoom multiple. Press ZOOM button one
time, the picture will be enlarged 2X. Press ZOOM button a second
time, the picture will be enlarged 3X. Press ZOOM button a third
time, the picture will be enlarged 4X. Press ZOOM button a fourth
time, the picture will return to normal size.
ZOOM Screen Display
16
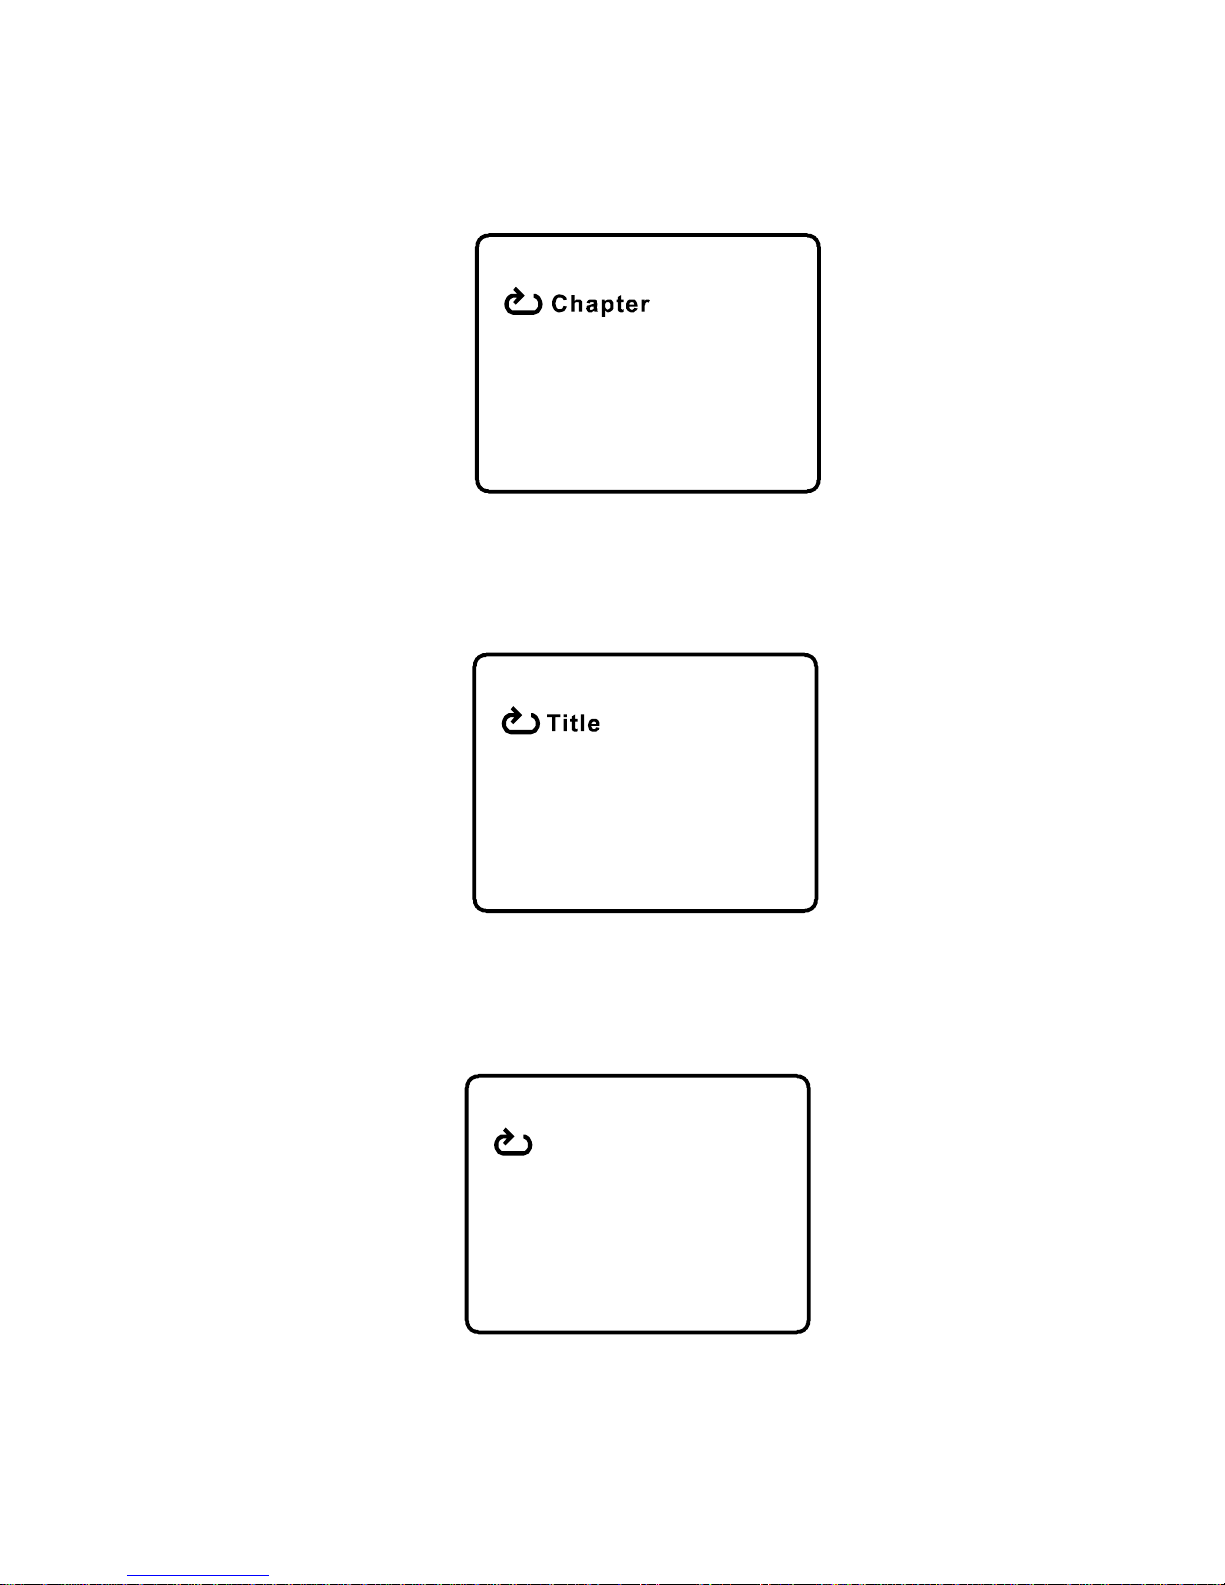
6. A-B Repeat
a. During playback press A-B button to set the Starting Point A.
A-B Repeat Starting Point Screen Display
b. Press A-B button a second time to set the Ending Point B and
the player will repeatedly play the part between Point A and
Point B.
A-B Repeat Cancelled Screen Display
A-B Repeat Ending Point Screen Display
c. Press A-B button a third time to cancel A-B repeat and resume
normal playback.
17
All
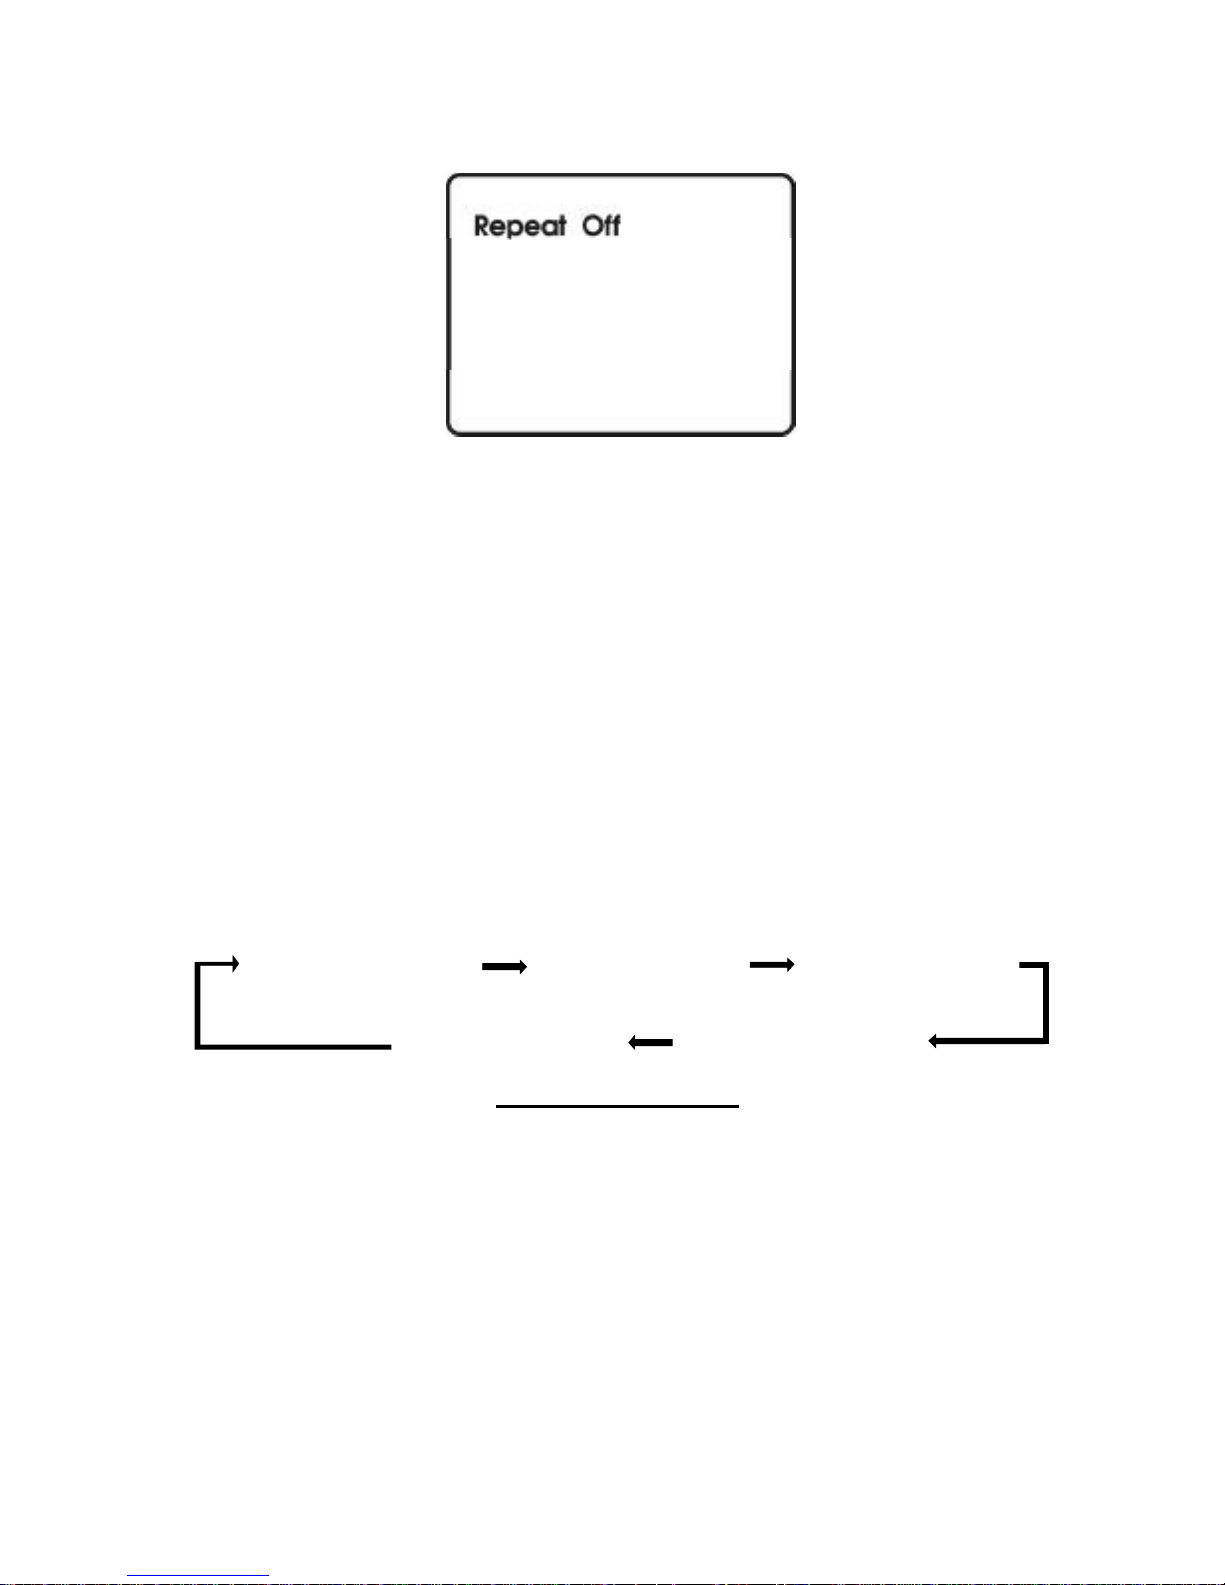
7. Repeat
a. During playback press 1/ALL button once to repeatedly play the
current chapter.
Chapter Repeat ON Screen Display
b.During playback press 1/ALL button again to repeatedly play the
current title.
Title Repeat ON Screen Display
c. During playback press 1/ALL button a third time to repeat all
chapters and titles.
All Repeat ON Screen Display
18
d. Press 1/ALL button a fourth time, to resume normal playback.
Repeat Off Screen Display
8. Forward/Reverse Scan
a. During playback press uu to scan forward at 2x, 4x, 8x,16x,
32x and normal speed.
b. During playback press tt to scan backward at 2x, 4x, 8x,16x,
32x and normal speed.
J. Playing Audio CDs
To play an audio CD, simply load it onto the disc tray and the CD
will start playback automatically. Press the DISPLAY button repeat-
edly on the remote control to view disc time information. The time
information is displayed in the the following sequence:
CD Display Mode
Single Elapsed: The current track playing and the elapsed time on
that track appears on the screen.
Single Remain: The current track playing and the amount of time
remaining on that track appears on the screen.
Total Elapsed: The current track playing and the total elapsed
time on the CD appears on the screen.
Total Remain: The current track playing and the amount of time
remaining on the CD appears on the screen.
SingleElapsedSingleRemainTotalElapsed
DisplayOffTotalRemain

19
1. Using the Repeat Feature
The default mode for the Repeat feature is OFF. Pressing 1/ALL button
consecutively changes the repeat options:
• Repeat Track- repeats the track that is playing.
• Repeat All - repeats the disc that is playing.
• Repeat Off
As you toggle through the options, the repeat option changes. The
selected repeat option loops repeatedly until you turn it off.
2. A-B Repeat
a. During playback press A-B to set the Starting Point A.
b. Press A-B a second time to set the Ending Point B and the
player will repeatedly play the part between Point A and Point B.
c. Press A-B a third time to cancel A-B repeat and resume the
normal playback.
3. Forward/Reverse Scan
a. During playback press uu to scan foward at 2x, 4x, 8x,16x, 32x
and normal speed.
b. During playback press tt to scan backward at 2x, 4x, 8x,16x,
32x and normal speed.
K. Playing JPEG Files
1) Load a JPEG disc onto the disc tray.
2) A screen showing folders or picture files contained on the disc
will be displayed automatically after loading.
3) Press UP, DOWN and ENTER button to select a folder or a
picture. If a picture is selected, photo slideshow will start with the
selected picture.
4) Press the DOWN button to rotate the picture clockwise.
5) Press the ZOOM button to enlarge the picture size by 125%,
150%, 200% or zoom out by 75%,50% and then return to the
original size. When the image is enlarged, you can use the
navigation buttons to view blocked parts of the picture.
6) Press UP button to return to the screen showing folders or
picture files.
7) During slideshow, press STOP button to enter Thumbnail mode.
Press navigation buttons and ENTER button to select a picture
you want to start the slideshow with.
8) Press PLAY/PAUSE button then the slideshow will pause. Press
the button again to resume the slideshow playback.
20
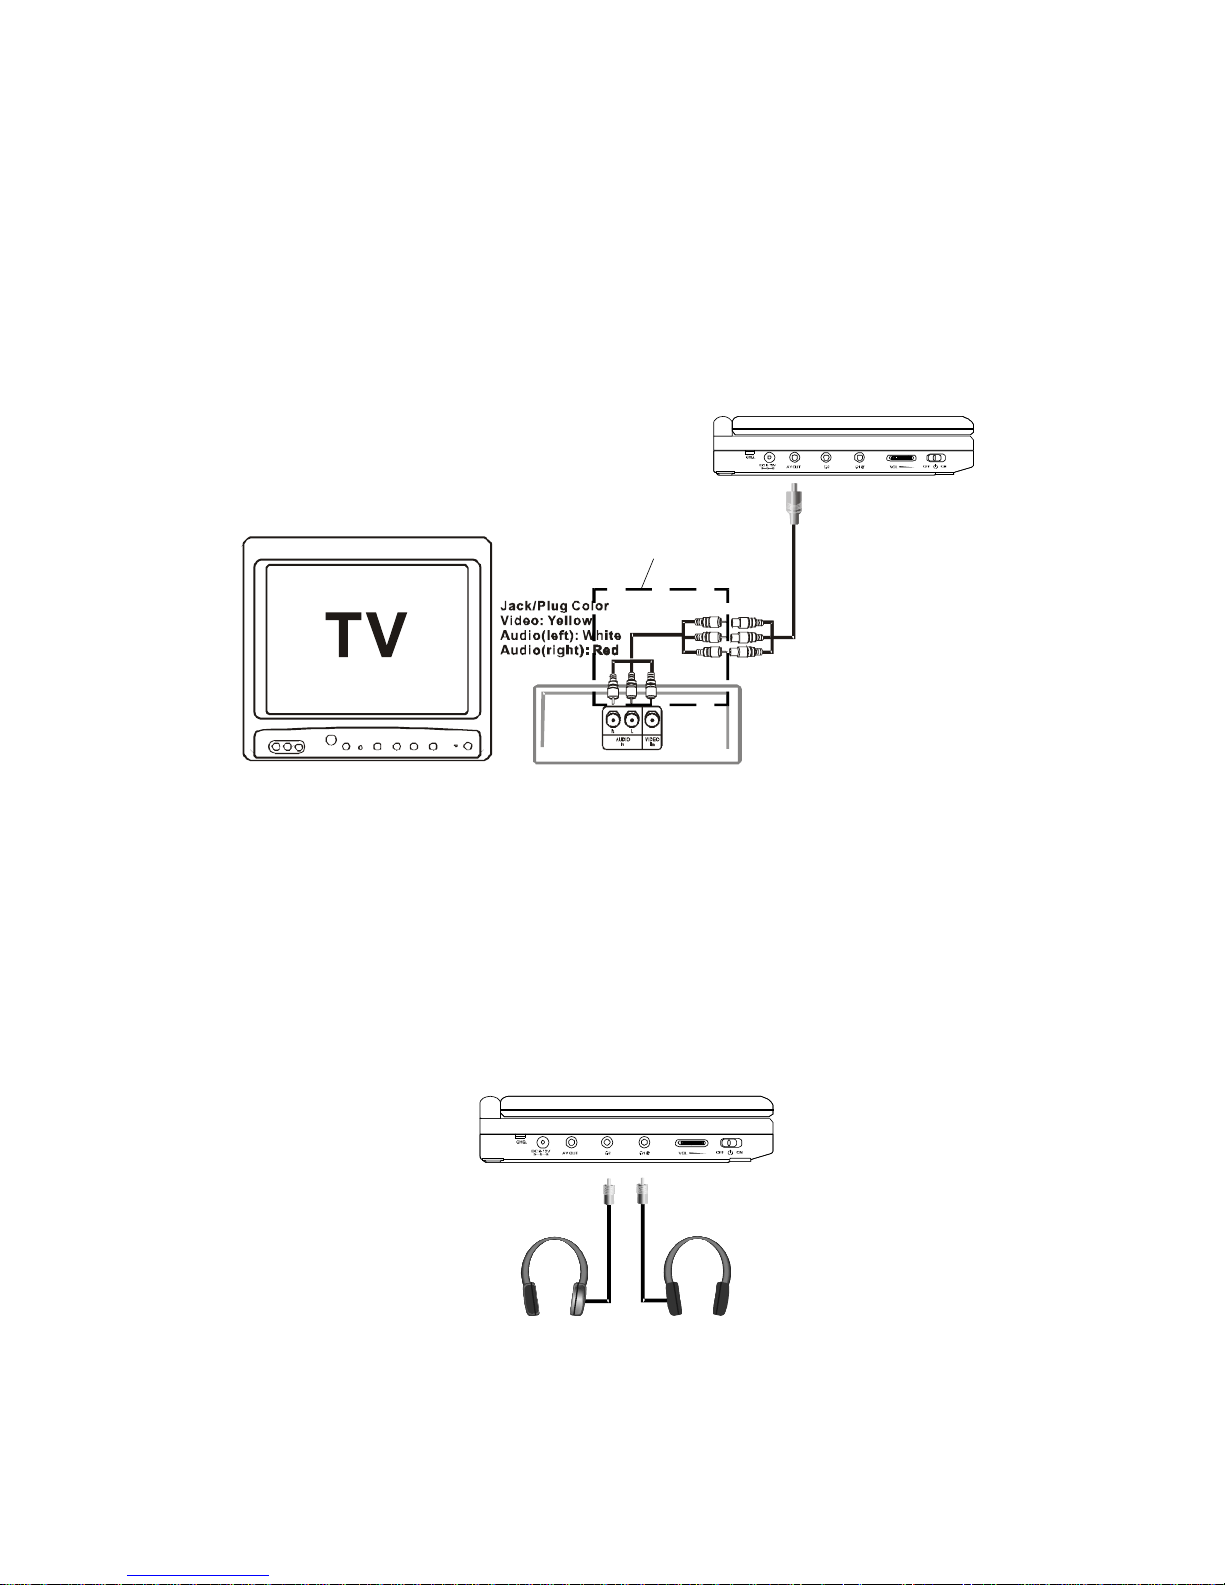
L. Connecting to Other Equipment
1. AV Out
Connecting to a TV or Another Monitor ( Refer to Figure 4)
Connect the black end (1/8” plug) of the audio/video cable into the
unit’s DVD’s A/V OUT jack, and connect the other end to the
AUDIO INPUT jacks on your TV or Monitor using an additional set of
AV cable (not included) (white = left audio channel, red = right audio
channel, yellow = video).
Figure 4
2. Connecting Headphones (Not included)
Simply plug the headphones into either Headphone jack 1 or
Headphone jack 2 on the left side of the DVD Player.
(Refer to Figure 5)
Figure 5
Plugging into Headphone jack 1 will disable the internal speakers.
NOT INCLUDED

21
M. Setup
Press SETUP button to display the Main screen of the SETUP Menu
on the screen. Press SETUP button again to exit the SETUP Menu.
1) Press SETUP, the ‘GENERAL SETUP PAGE’ will display on the
screen.
a) Select ‘TV DISPLAY’ using the DOWN button, and then press
RIGHT to enter the submenu. Select the TV display mode on the
screen using UP/DOWN, and press ENTER to confirm the
setting. Press the LEFT button to exit the TV DISPLAY menu.
* NORMAL/PS: When the player is connected to a normal TV,
and a wide picture is shown on the full screen.
* NORMAL/LB: When the player is connected to a normal TV,
and a wide picture is shown on the screen with a black strip
at both the top and bottom of the screen.
* WIDE: When the player is connected to a wide screen TV, a
wide picture is shown on the full screen.
Main SETUP Menu Screen Display
TV Display Screen Display
.. ..GeneralSetupPage
TVDisplay Wide
AngleMark
Off
ScreenSaver
On
LastMemory On
GoToGeneralSetupPage
OSDLang
ENG
.. ..GeneralSetupPage
SetTVDisplayMode
NormalPS/
NormalLB/
Wide
TVDisplay
Wide
AngleMark
Off
ScreenSaver
On
LastMemory
On
OSDLang
ENG

22
b) Select ‘ANGLE MARK’ using the DOWN buttton, and then press
the RIGHT button to enter the submenu. Choose Angle Mark on
or off using the UP/DOWN button and then press ENTER button
to confirm the setting. Press the LEFT button to return.
Angle Mark Screen Display
* ON: The screen will show the angle mark icon. (*If an angle
option is available).
* OFF: The screen will not display the Angle Mark icon.
NOTE: Not all discs contain above features.
c) Select ‘OSD LANG’ using the DOWN button, and then press the
RIGHT button to enter the submenu. Choose the language you
desire as the display language. Press the LEFT button to return.
.. ..GeneralSetupPage
SetAngleMark
On
Off
TVDisplay
Wide
AngleMark
Off
ScreenSaver
On
LastMemory On
OSDLang
ENG
.. ..GeneralSetupPage
SetOSDLanguage
TVDisplay
Wide
AngleMark
Off
ScreenSaver
On
LastMemory On
OSDLang
ENG
English
French
Spanish
OSD Language Screen Display

23
d)Select ‘SCREEN SAVER’ using the DOWN button. and then
press the RIGHT button to enter the submenu. Choose Screen
saver on or off using the UP/DOWN buttons and then press
ENTER button to confirm the setting. Press the LEFT button to
return.
Screen Saver Screen Display
*ON: Enables screen saver.
*OFF: Disables screen saver.
NOTE: The DVD player will enter the Screen Saver mode after
approximately five minutes if the same image remains
on the screen.
e) Select ‘LAST MEMORY’ by using the DOWN button. and then
press the RIGHT button to enter the submenu. Choose Last
Memory on or off using the UP/DOWN buttons and then press
ENTER button to confirm the setting. Press the LEFT button to
return.
Last Memory Screen Display
*ON: The unit will return to the last position on the disc.
*OFF: The unit will not return to the last position on the disc.
.. ..GeneralSetupPage
SetScreenSaver
TVDisplay
Wide
AngleMark
Off
ScreenSaver On
LastMemory On
OSDLang
ENG
On
Off
.. ..GeneralSetupPage
SetLastMemory
On
Off
TVDisplay
Wide
AngleMark
Off
ScreenSaver
On
LastMemory
On
OSDLang
ENG

24
a) Select ‘BRIGHTNESS’ by using the UP or DOWN button, then
press ENTER button. Adjust the Brightness by pressing the
LEFT or RIGHT button. To exit Brightness Setting, press
ENTER button again.
b) Use the same way as setting BRIGHTNESS to set the other
items on this menu. Press LEFT button to exit the VIDEO
QUALITY SETUP menu.
2) Select ‘VIDEO QUALITY SETUP’ by using the LEFT/RIGHT buttons,
press ENTER button to enter the VIDEO QUALITY SETUP PAGE.
Video Quality Setup Screen Display
Brightness Screen Display
GoToVideoSetupPage
Contrast
Brightness
Hue
Saturation
.. ..VideoQualitySetup
00
00
00
00
Brightness
Contrast
Hue
Saturation
.. ..
VideoQualitySetup
00
00
00
Brightness
00
25
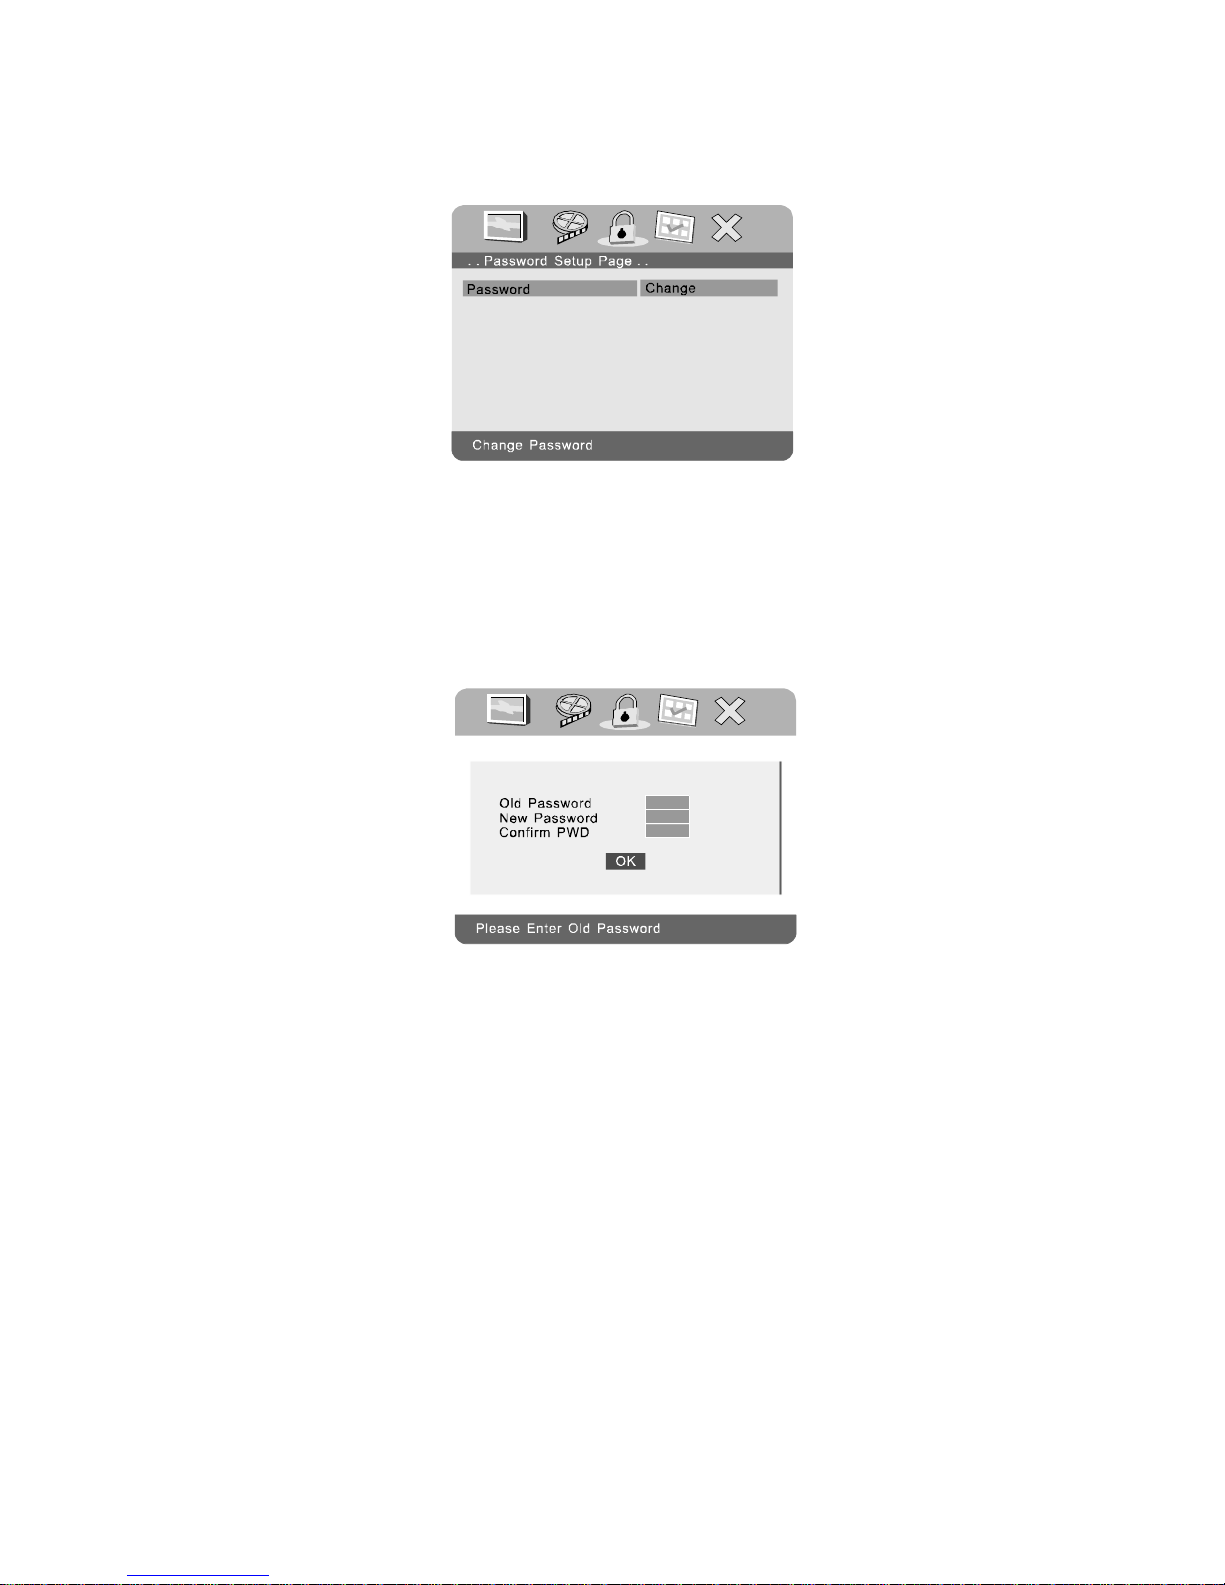
3) Select ‘PASSWORD’ using the LEFT or RIGHT buttons, then press
the ENTER button to enter the submenu.
Press ENTER button twice to enter the PASSWORD CHANGE
PAGE. Input the Old Password or the Default Password, the New
Password, and the Confirmed New Password. Press ENTER
button to confirm the change.
NOTE: The Default Password is 3308. This password is always
effective even after you have selected your own password and changed it. To avoid the possibility of others
using the default password to set the parental level and
change the password, you can record this default password in another area and delete it from this manual.
Some discs can be limited depending on the age of users
while some discs cannot.
Password Change Page Screen Display
Password Setup Page Screen Display

26
4) With no disc inside the player select ‘PREFERENCE’ using the
LEFT or RIGHT button, then press ENTER button to enter the
‘PREFERENCE PAGE’.
a) Select ‘AUDIO’ using the DOWN button, then press ENTER
button to enter the submenu. Select the audio language you
desire using the UP or DOWN buttons, then press ENTER
button to confirm the setting. Press LEFT button to return.
Preferred Audio Language Screen Display
Preference Page Screen Display
PreferredAudioLanguage
Default
.. ..PreferencePage
Parental
DiscMenu ENG
ENGAudio
French
Spanish
English
Italian
Subtitle Off
GoToPreferencePage
.. ..PreferencePage
Default
Parental
DiscMenu ENG
ENGAudio
Subtitle Off

27
Preferred Disc Menu Language Screen Display
NOTE: Language and subtitle selection is only available for discs
that are recorded in the above listed languages. If the
selected language is not available, the player will play
and display on the screen the original recorded language
contained in the disc.
c) Select ‘DISC MENU’ using the DOWN button, then press
ENTER button to enter the submenu. Select the Disc Menu Language you desire using the UP or DOWN buttons, then press
ENTER button to confirm the setting. Press LEFT to return.
b) Select ‘SUBTITLE’ using the DOWN button, then press
ENTER button to enter the submenu. Select the desired subtitle
language or OFF using the UP or DOWN buttons, then press
ENTER to confirm the setting. Press LEFT to return.
Preferred Subtitle Language
PreferredSubtitleLanguage
Default
.. ..PreferencePage
Parental
DiscMenu ENG
ENGAudio
French
Spanish
English
Italian
Subtitle Off
Off
PreferredMenuLanguage
.. ..PreferencePage
Default
Parental
DiscMenu
ENG
ENG
Audio
Subtitle Off
French
Spanish
English
Italian

28
Parental Preference Screen Display
e) Select ‘DEFAULT’ using the DOWN button, then press ENTER
button to enter the submenu. Press ENTER button to make the
setting return to the factory-set mode.
NOTE: The parental setting is not affected by the default reset
function.
Select the parental level you desire using the UP or DOWN
button for discs with lock-out function or multiple rating levels.
These are listed from the lowest level (1 KID SAFE) to the
highest level (8 ADULT). Enter a 4 digit password, then press
ENTER button to confirm the parental level setting.
NOTE: The level of 8 ADULT is the factory default.
d) Select ‘PARENTAL’ using the DOWN button, then press
ENTER button to enter the submenu.
Load Factory Setting Screen Display
LoadFactorySetting
.. ..PreferencePage
Reset
DiscMenu ENG
ENGAudio
Subtitle Off
Parental
Default
SetParentalControl
.. ..PreferencePage
2G 3PG 4PG
6R
7NC17
-
8ADULT
- 13
5PGR
1KIDSAFE
Default
DiscMenu ENG
ENGAudio
Subtitle Off
Parental

29
N. Specifications
Compatible DISC: DVD, CD, CD-R, CD-RW, DVD+/-R, DVD+/-RW
Signal system: NTSC
Panel size: 9 inch
Frequency response: 20 Hz to 20 kHz
Video output: 1 Vp-p/75 Ohm, unbalanced
Audio output: 1.4Vrms/10kOhm
Audio S/N: Better than 60 dB
Dynamic range : Better than 85 dB
Laser: Semiconductor Laser, Wave Length: 650 nm/795 nm
Power source: DC 9-12V
Power consumption: 7W
Operating temperature: 41~95°F (5~35°C)
Weight : 1.94 lb (0.884 kg)
Dimensions (W x D x H): 9.37 X 6.22 X1.38 inches
(238 x 158 x 35 mm)
Battery spec
Type: Li-polymer
Model no.: 6532100(30)
Rating: 1800mAh 7.4V
Manufacturer: Great Power Battery (Zhuhai) Co., Ltd
O. Rechargeable Built-in Battery Use
The DVD player utilizes a long-life Li-Polymer battery for portability.
Li-Polymer batteries feature high storage capacity and low level of
degradation. This means the Li-Polymer batteries do not have “Memory
Effect” and thus can be recharged regardless of whether the battery
is fully or only partially discharged. The battery must be charged at
least 8 hours prior to first use.
NOTE: If you plan not to use the battery for an extended period of time
(one week or longer), we recommend that you fully charge the battery.
For longer periods of storage, please recharge the battery at least
once every two months to maintain the battery in optimum condition.
 Loading...