

Page 1
12" LCD TV with DVD Player
O per ating Ins tr uctions
Model No.
D1210
For assistance, please call: 1-800-645-4994
Or visit us at
Before connecting, operating or adjusting this product, please read these instructions completely .
Please keep this manual for future reference
128-6935A
10" LCD TV with DVD Player
Model No.D1020
Operating Instructions
Page 2

Notice:
An LCD panel and/or video monitor may be installed in a motor vehicle and visible to the driver if
the LCD panel or video monitor is used for vehicle information, system control, rear or side observation or navigation. If the LCD panel or video monitor is used for television reception, video or DVD
play, the LCD panel or video monitor must be installed so that these features will only function when
the vehicle is in “park” or when the vehicle’s parking brake is applied.
An LCD panel or video monitor used for television reception, video or DVD play that operates when
the vehicle is in gear or when the parking brake is not applied must be installed to the rear of the
driver’s seat where it will not be visible, directly or indirectly, to the operator of the motor vehicle.
Page 3

2
TABLE OF CONTENTS
A. Introduction .................................................................. 3
B. Cautions and Warnings ............................................... 3
C. Contents ..................................................................... 10
D. Indoor Installation ......................................................... 10
E. Car Installation............................................................. 11
F. Controls/Indicators/Connectors .................................... 13
G. Remote Controls ......................................................... 14
H. DVD Player ................................................................. 15
I. System Operation ....................................................... 28
J. Watching TV ................................................................ 25
K. Playing a Video Game ................................................ 29
L. Use Headphones ........................................................ 29
M. Support Home TV ....................................................... 30
N. Support External Speaker ........................................... 30
O. Specifications ............................................................. 30
Page 4

A. Introduction
Congratulation for selecting this multi-media system, which
features a 10” LCD TV/Monitor and DVD/MP3/CD Player . It
utilizes the latest state of the art electronics and is designed for
use in home, offices, hotels and vehicles. The unit is compact
so that you can take it with you anywhere and is designed for
easy installation. Please read all the instructions in this manual
to assure proper installation and best equipment performance.
B. Cautions and Warnings
1. Read Instructions — All the safety and operating instruc-
tions should be read before the product is operated.
2. Retain Instructions – The safety and operating instructions
should be retained for future reference.
3. Heed Warnings – All W arnings on the product and in the
operation instructions should be adhered to.
4. Follow Instructions – All Operating and user instructions
should be followed.
5. Cleaning – Unplug this product from the wall outlet before
cleaning. DO NOT use liquid cleaners or aerosol cleaners.
Use damp cloth for cleaning.
6. Attachments – DO NOT use attachments not recommended
by the product manufacturer they may cause hazards.
7. Mounting – DO NOT place this product on an unstable cart,
stand, tripod, bracket, or table. The product may fall, causing
serious injury to a child or adult, and serious damage to the
product. Use only with a cart, stand, tripod, bracket, or table
recommended by the manufacturer or sold with the product.
Any mounting of this product should follow the manufacture’s
instructions, and should use a mounting accessory recommended by the manufacturer .
8. Heat – The Product should be situated away from any
source, such as radiators, heat registers, stoves or other
products (including amplifiers) that produce heat.
3
Page 5

9. Water – DO NOT use this product near water . For example,
avoid placing it near a bathtub, washbowl, kitchen sink, or
laundry tub, in a wet basement, or near a swimming pool,
etc…
10. Cabinet Slots – NEVER push objects or any kind into the
unit through the cabinet slots as they may touch dangerous
voltage points or short out parts that could result in a fire or
electric shock. NEVER spill liquid of any kind on the product.
11. Ventilation – DO NOT block any ventilation openings.
Install in accordance with manufacturer’s instructions. Slots
and openings in the cabinet and the back and bottom are
provided for ventilation, and to ensure reliable operation of
the product and to protect it from overheating. These openings must NOT be blocked or covered. There should be at
least 10cm of space from these openings. The openings
should never be blocked by placing the unit on a bed, rug or
other similar surface. This product should NOT be placed in
a built-in installation such as a bookcase unless proper
ventilation is provided.
12. Grounding or Polarization – This product may be
equipped with a polarized alternating current line plug (a
plug having one blade wider then the other). This plug will fit
the power outlet only one way . This is a safety feature. If
you are unable to insert the plug fully into the outlet, try reversing the plug. If the plug should still fail to fit, contact your
electrician to replace your obsolete outlet. DO NOT defeat
the safety purpose of the polarized plug.
13. Power – Cord Protection – Power supply cords should
be routed so that they are not likely to be walked on or
pinched by items placed upon or against them. Pay particular attention to cords at plugs, convenience receptacles, and
the point where they exit from the product.
4
Page 6

14. Power Sources – This product should be operated only
from the type of power source indicated on the rear panel. If
you are not sure of the type of power supply to your home
consult your product dealer or local power company .
15. Lightning – For added protection for this product during a
lightning storm, or when it is left unattended and unused for
a long period of time, unplug it from the outlet and disconnect the antenna or cable system. This will prevent damage
to the product due to lightning and power-line surges.
16. Power Lines – An outside antenna system should not be
located in the vicinity of overhead power lines or other
electric light or power circuits, or where it can fall into such
power lines or circuits. When installing an outside antenna
system, extreme care should be taken to keep from touching such power lines or circuits as contact with them might
be fatal.
17. Overload – DO NOT overload wall outlets, extension cords
or integral convenience receptacles as this can result in a
risk of fire or electric shock.
18. Damages Requiring Service – Unplug this product from
the wall outlet and refer servicing to qualified service personnel under the following conditions.
a. When the power-supply cord or plug is damaged.
b. If liquid has been spilled, or objects have fallen into the
product.
c. If the product has been exposed to rain or water .
d. If the product does not operate normally after following the
operating instructions. Adjust only those controls that are
covered by the operating instructions as an improper
adjustment of other controls may result in damage and will
often require extensive work by a qualified technician to
restore the product to its normal operation.
e. If the product has been dropped or damaged in any way .
f. When the product exhibits a distinct change in perfor-
mance – this indicates a need for service.
5
Page 7

19. Replacement parts – When replacement parts are
required, be sure the service technician has used replacement parts specified by the manufacturer or have the same
characteristics as the original part. UNAUTHORIZED
substitution may result in fire, electric shock or other hazards.
20. Safety Check – Upon completion of any service or repair
to this product, ask the service technician to perform safety
checks to determine that the product is in proper operating
condition.
21. CAUTION – There is a danger of explosion if the battery is
incorrectly replaced. Replace only with the same or equivalent type.
22. Important Information Regarding Use of Video Games,
Computer , Captions or other Fixed Image Displays.
The extended use of a fixed image program material can
cause permanent “Shadow Image” on the LCD Panel. The
Background image is viewable on normal programs in the
form of a stationary fixed image. This type of irreversible
LCD panel deterioration can be limited by observing the
following steps:
a. Reduce the brightness/contrast setting to a minimum
viewing level.
b. DO NOT display the fixed image for extended periods of
time.
c. Turn the power of f when not in actual use.
23. Recycling – This product utilizes tin-lead solder, and
has a fluorescent lamp containing a small amount of mercury . Disposal of these materials may be regulated in your
community due to environmental considerations. For disposal or recycling information please contact your local
authorities, or the Electronics Industries Alliance: http://
www.eiae.org/
6
Page 8
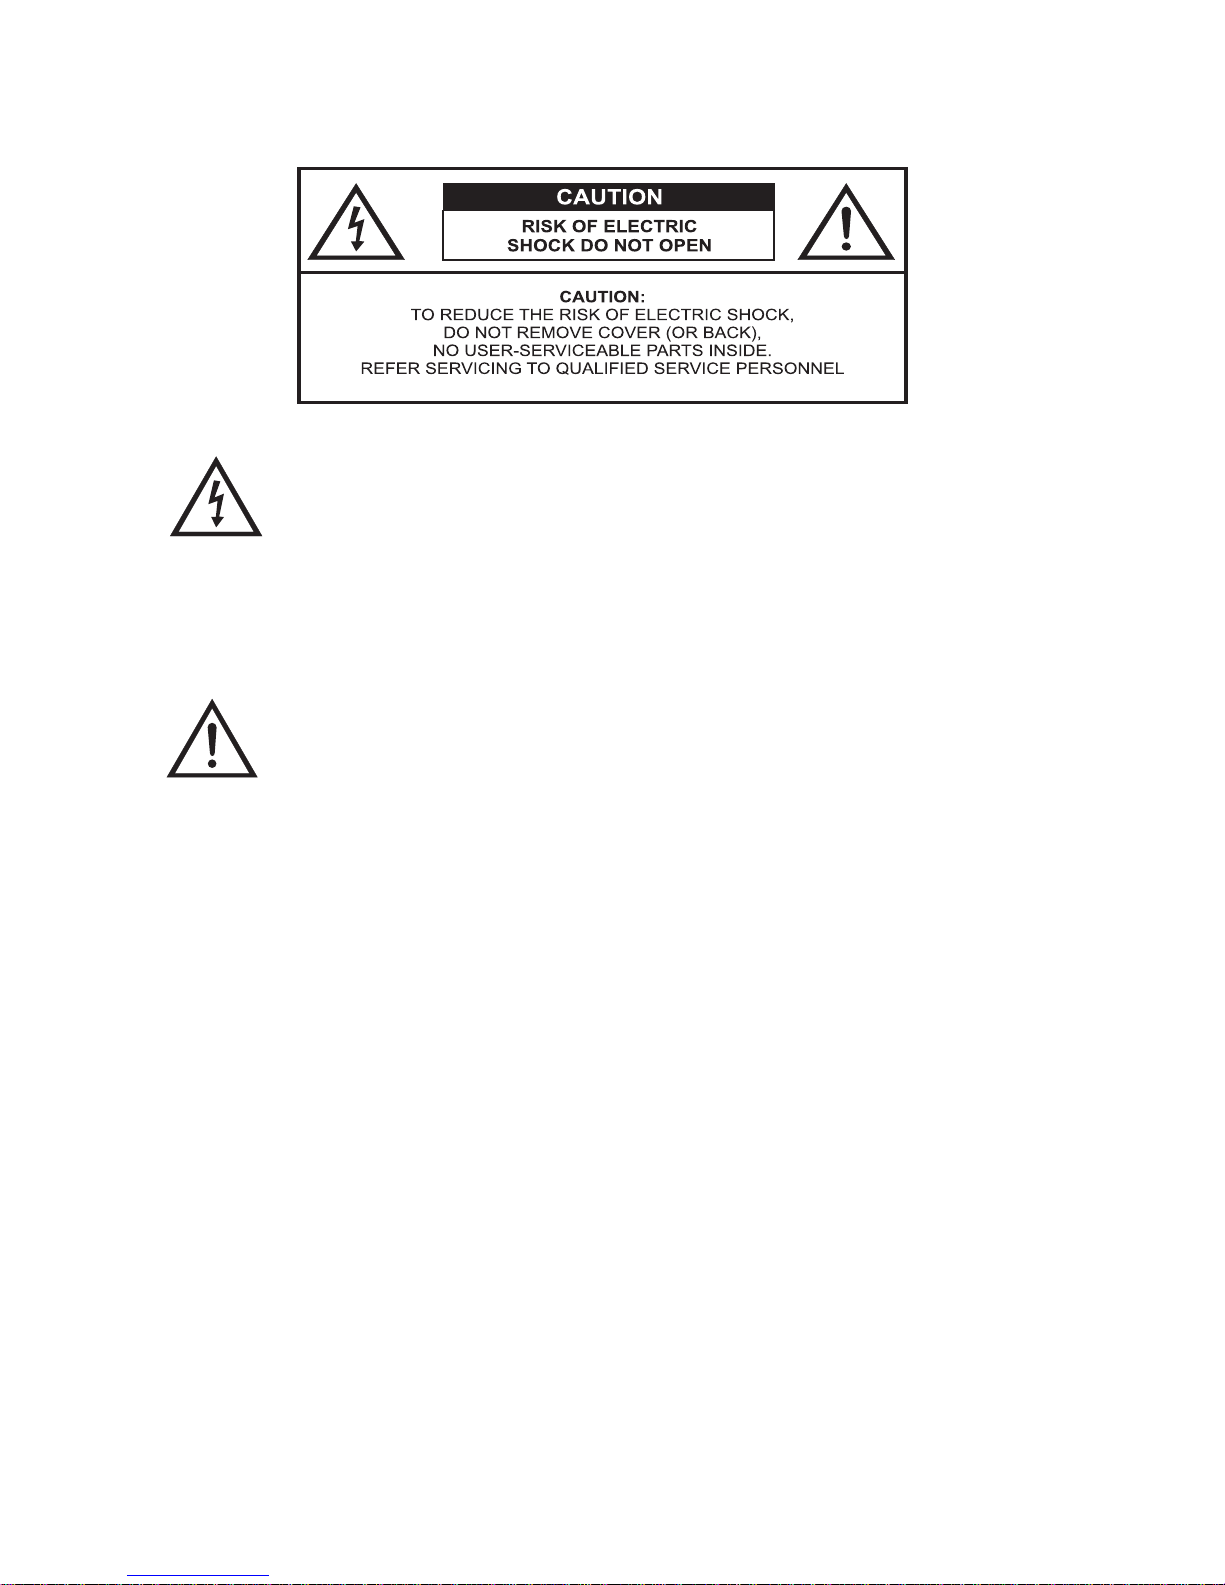
24. Safety Caution
The Lightning flash with the arrowhead symbol within an
equilateral triangle is intended to alert the user to the presence of uninsulated “DANGEROUS VOL T AGE” within the
product’s enclosure that may be of sufficient magnitude to
constitute a risk or electric shock to persons.
The Exclamation point within an equilateral triangle is
intended to alert the user to the presence of important
operating and maintenance (servicing instructions in the
literature accompanying the product).
25. Federal Communication Commission Information
(FCC)
This Equipment has been tested and found to comply with
the limits for a TV Broadcast Receiver , pursuant to Part
15 of the FCC Rules. These limits are designed to provide
reasonable protection against harmful interference in a
residential installation. This equipment generates, uses and
can radiate radio frequency energy and, if not installed and
used in accordance with the instructions, may cause harmful
interference to radio communications. If this equipment
does cause or receive interference, which can be deter
mined by turning equipment off and on, the user is encouraged to try to correct the interference by one of the following
measures:
7
Page 9

1. Reorient or relocate the TV antenna
2. Increase the separation between TV and other
equipment.
3. Connect TV into separate outlet from equipment.
4. Consult the dealer or an experienced radio/TV
technician for help
FCC Caution: Any changes or modifications not expressly approved by the party responsible for compliance could void the
user’s authority to operate this equipment
26. INSTALLATION
a. Receiver Location – Locate for comfortable viewing.
Avoid placing where sunlight or other bright light will fall
on the screen. Use of some types of florescent lighting
can reduce remote control transmitter range.
Adequate ventilation is essential to prevent internal component failure. Keep away from areas of excessive heat.
T o ensure optimum picture quality do not position magnetic equipment nearby .
b. Cable Equipment – The Video/Audio connection be-
tween components can be made with shielded video and
audio cable. For best performance, antenna cables
should utilize 75 Ohm coaxial shielded wire. Cables are
available from your dealer or electronic supply store.
Before you purchase any cables, be sure you know what
type of output and input connectors your various components require. Also determine the length of cable you’ll
need.
c. Optimum Quality picture – Turn off florescent lamps
near the LCD and place in a location not exposed to
outdoor light.
8
Page 10
27. DVD CAUTION: This unit employs a laser system. To
ensure the proper use of the unit, read this manual carefully
and keep it for future reference. T o prevent direct exposure
to the laser radiation, do not open the cabinet. Invisible
laser radiation could be present when the cabinet is opened
or the interlocks are defeated. DO NOT stare into the laser
beams. Use of any controls, adjustments, or procedures
other than those specified herein may result in hazardous
radiation exposure!
Region Management Information – This Player is designed to respond to the Region Management Information
recorded on DVDs, The region number of this player is
“1”. If the region number described on the DVD does not
correspond to the region number of this player , this player
cannot play this disc.
9
Page 11
C. Contents
1. TV /DVD Combination Unit with Speakers
2. Coaxial Connector
3. Remote Control
4. AC to DC Adapter
5. Wireless FM Modulator with DC Adapter
6. Wireless IR Headphones(2 pcs)
7. Storage Bag and Mounting Bag w/Mounting Straps
8. Owner ’s Manual
9. RCA AV Cable
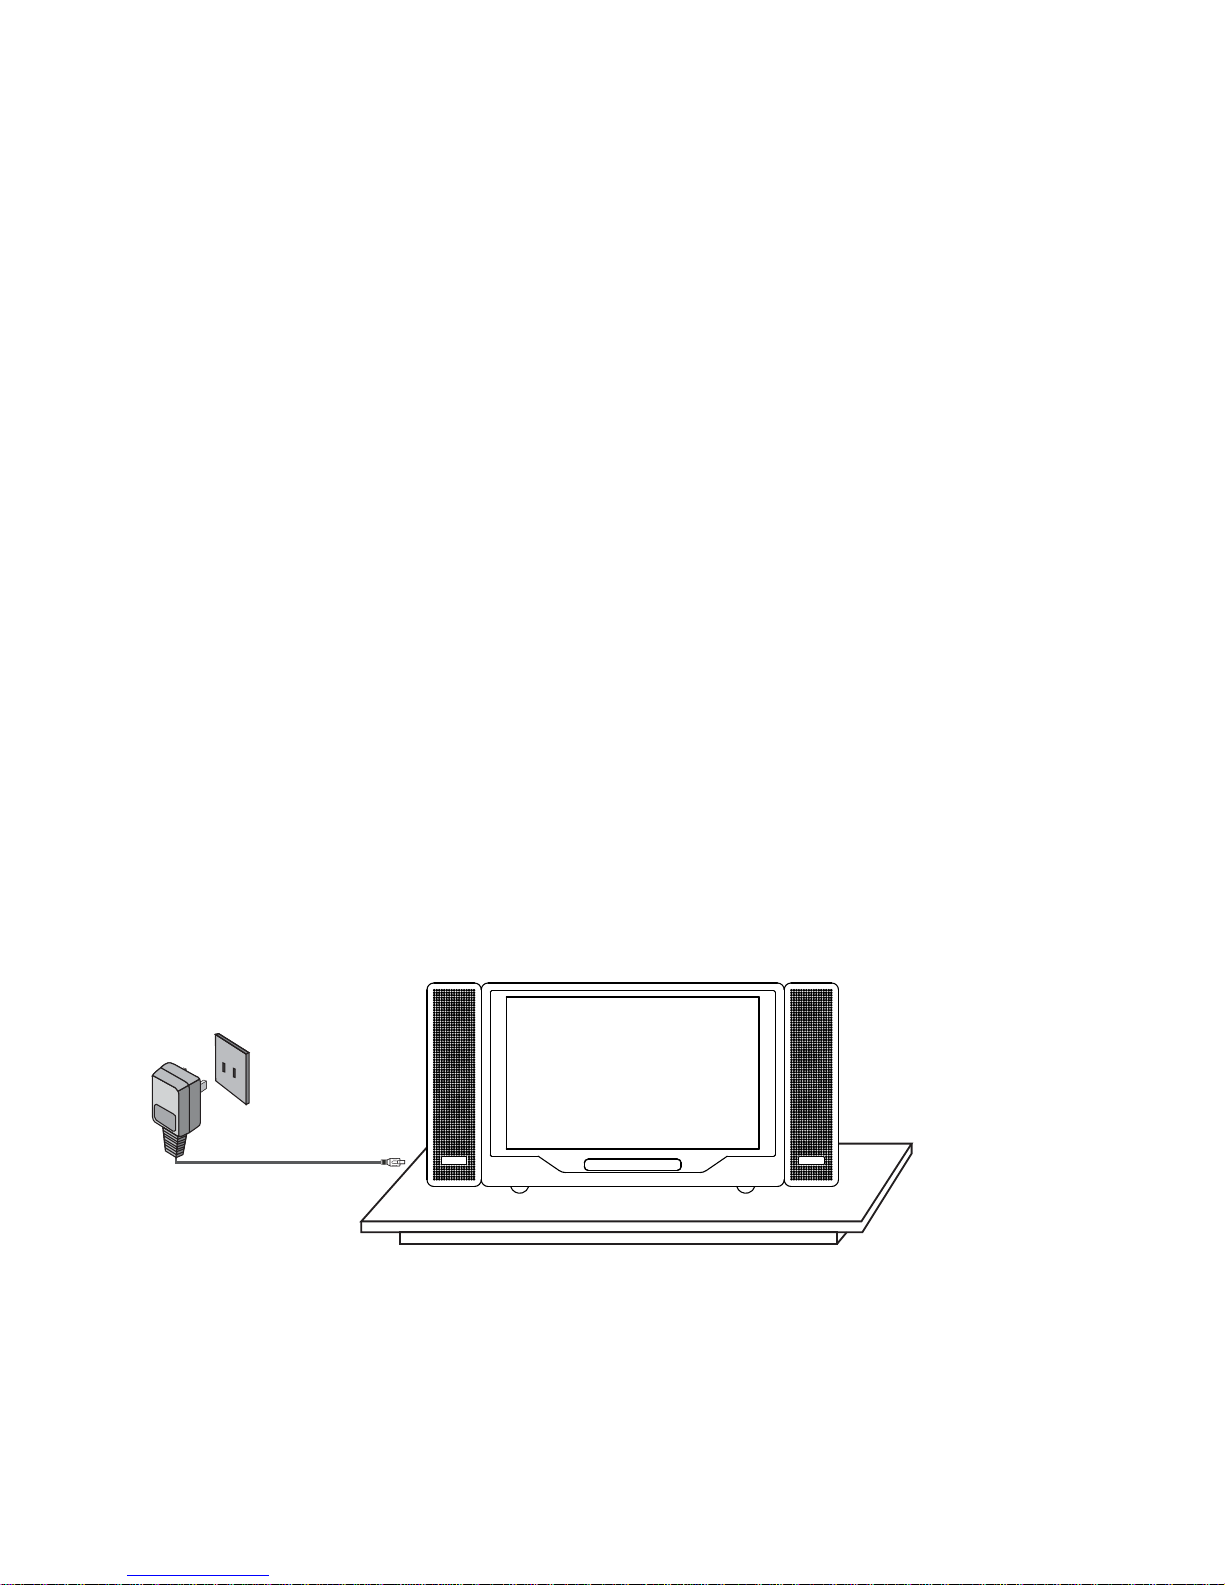
D. Indoor Installation (Refer to Figure 1)
Swing up the rear metal stand and place the unit on a table or
other level surface. Plug one end of the AC to DC adapter into
the DC 12V input on the right side of the main unit, then plug the
other end into the
110V AC power receptacle.
Figure 1
10
Page 12

E. Car Installation
Between two seats (Refer to Figure 2)
Figure 2
1. Take one of the supplied straps from the storage bag and
connect the latch to the top metal ring on the mounting bag.
Wrap the strap around the base of one the headrests. Attach
the “S” hook to the same top metal ring. Repeat this process
for the other side (Passenger Seat).
2. T ake another strap and connect the latch to the lower metal
ring on the back of the bag. Attach the “S” hook to the same
ring after looping the strap around the rail located beneath
the seat track. Avoid moving parts of the seat mechanism.
Repeat this process for the other side. In some vehicles, it
may be necessary to attach the “S” connector to the rail
directly , as it may not be long enough to reach back to the
ring.
3. Adjust all the straps tightly so that the bag is secure.
4. Plug one end of the cigarette lighter adapter into the DC 12V
input; then plug the other end into the cigarette lighter socket.
11
Page 13

Wiring Diagram
(Power Adapter With Built-in Wireless FM Modulator)
This power adapter has a built-in wireless FM Modulator. The FM modulator is designed to transmit the audio from your DVD player to your
vehicle radio.
The channel select switch is used to select the modulator frequency
(88.1MHz, 88.3MHZ, 88.5MHz and 88.7MHz). The vehicle radio must
be tuned to the same frequency that is selected on the wireless FM
modulator.
Installation:
1) Plug the Power Adapter into the 12 VDC outlet in the vehicle.
2) Connect the 3.5mm audio jack to the audio output jack on the rear of
the DVD player.
3) Connect the DC jack to the 9 VDC input on the side of the DVD
player.
4) Tune the vehicle radio to the same frequency that is selected on the
modulator.
NOTE: For best performance, use a radio frequency that is not
in use in your local area.
AUDIO L/R INPUT
12
Page 14

1. Power On/Off
2. TV Auto Program
3. TV Channel Down
4. TV Channel Up
5. Volume Down
6. Volume Up
7. Picture Select
8. DVD/TV/AV Switch
9. Wide Select
10. DVD Previous
11. DVD Play
12. DVD Next
13. DVD Stop
14. DVD Eject
15. IR Headphone Sensor
/Remote Sensor
16. Left Speaker
17. Right Speaker
18. Headphone Input
19. Video Output/Input
20. Left Audio Output/Input
21. Right Audio Output/Input
22. AV Input/Output Select
23. DC 12V Input
24. TV Antenna Input
F. Controls/Indicators/Connectors (Refer to Figure 3)
PREW STOPPLAY NEXT EJECT
POWER
PROG.
CHANNEL PICTUREVOLUME TV/AV WIDE
10
1 2
11 12 13 14
1516
18
23
19
17
3 4 5 6
7
8 9
20
21
22
24
13
Page 15

G. Remote Controls (Refer to Figure 4)
1. TV/DVD/AUX Select
2. DVD Number Control Select
3. Numbers 0-9
4. TV/CATV Select
5. Mute
6. Picture Select
7. Volume Up/Down (+/-)
8. DVD Eject Button
9. Up/Down-Left/Right/Enter
10. DVD Menu
11. DVD Display
12. DVD Stop
13. DVD Reverse
14. DVD Forward
15. DVD Audio Select
16. DVD Subtitle Select
17. Power On/Off
18. TV Number Control Select
19. TV Channel Auto Memory
20. TV Channel Skip Search
21. TV Channel Erase Write
22. Channel Up/Down (+/-)
23. DVD Setup
24. DVD Play
25. DVD Pause
26. DVD Next
27. DVD Previous
28. DVD Repeat
29. DVD Slow Play
Figure 4
14
Page 16

14
H. DVD Player
1. Basic Operation
POWER
EJECT
PLAY
PAUSE
STOP
NEXT
PREVIOUS
FORWARD SCAN
REVERSE SCAN
SLOW
UP/DOWN/LEFT/RIGHT
ENTER
NUMBERS
MENU
SUBTITLE
AUDIO
DISPLAY
SETUP
Turn the unit ON or OFF
Eject and withdraw the disc
Resume play mode
Go into the standby mode
(1 time) Stops at the present playing
point / (2 times) Stops playing
Go to the next chapter , track or scene
during playback
Go back to the preceding chapter ,
track or scene during playback
Scan forward at 2, 4, 6, or 8 times normal
speed
Scan backward at 2, 4, 6, or 8 times normal
speed
Play at 1/2, 1/4, or 1/8 times speed
For Navigating the Setup Menu
Execute item or setting
For entering a password
Display the root menu of the DISC
Select the subtitle language and turn it on/off
Select the audio language
Display information about the DISC
Display the setup menu
Page 17

2. Menu
A DVD is divided into sections called title and chapter . When you
play a DVD, a root menu of the disc will appear on the screen of
your TV or Monitor. The contents of the menu vary from disc to
disc. Press MENU during playing to display the menu, and press
ENTER or PLA Y to start playing. Some DVDs allow you to select
disc playback options using the DVD menu.
3. Display
(The contents vary from disc to disc.)
1) Playing time and remaining time
a. During playback press DISPLA Y to display the current title
number (1), the total number of titles (2), the current chapter
number (3), the total number of chapters (4), and the playing
time for the title (5). The heading will disappear automatically
in about 3 seconds.
b. Press DISPLA Y again to display the remaining time for the
title. The heading will disappear automatically in about 3
seconds.
15
Page 18

c. Press DISPLA Y the 3rd time to display the elapsed time for
the chapter . The heading will disappear automatically in
about 3 seconds.
d. Press DISPLA Y the 4th time to display the remaining time for
the chapter . The heading will disappear automatically in about
3 seconds.
Press DISPLA Y the 5th time to exit.
2) Subtitle
During play press SUBTITLE to select the subtitle language you
desire, with the current subtitle language number (1) and the
total number of subtitle languages (2) displayed. If there are
multiple languages press SUBTITLE again to select another subtitle language. T o turn subtitles off, press the subtitle button until
SUBTITLE OFF is displayed. The subtitle display will disappear
automatically if the SUBTITLE button isn’t pressed again for 3
seconds.
16
Page 19

3) Audio
During playback, press AUDIO to select the audio language you
desire, with the current audio channel number (1) and the total
number of audio channels (2) displayed. Press AUDIO again to
select another audio language. The audio display will disappear
automatically if the AUDIO button isn’t pressed again for 3 seconds.
4) Repeat
a. During playback, press REPEA T to repeatedly play the cur-
rent chapter .
17
Page 20

b. During playback, press REPEA T again to repeatedly play the
current title.
c. During playback, press REPEA T again to repeat ALL chap-
ters and titles.
d. During playback, press REPEA T a 4th time to cancel the re-
peated playing (REPEA T OFF) and resume normal playback.
The repeat display will disappear automatically if the REPEA T button isn’t pressed again for 3 seconds.
18
Page 21

19
4. Playing Audio CDs
When playing an audio CD press the DISPLA Y button on the remote
to view time information. The options below show you what
information is available using this function.
a. The current track and playing time of that track will be displayed
on the screen.
b. Press
‘DISPLA Y’ one time and SINGLE REMAIN
appears along
with the current track playing and the amount of time left.
c. Press ‘DISPLA Y’ two times and T OTAL ELAPSED appears along
with the current track playing and the total time that the CD has
been playing.
Page 22

5. Setup
Press SETUP to display the main page of the setup menu on the
screen. Press SETUP again to exit the SETUP menu and the unit
will resume ayback or stop mode.
1) Press ENTER to enter the general setup page.
d. Press ‘DISPLA Y’ three times and TOT AL REMAIN appears along
with the current track playing and the amount of time remaining on
the CD.
e. P
ress ‘DISPLAY’ four times and “ DISPLA Y OFF
”
will appear
momentarily then disappear . The CD time Information will not be
displayed.
1)
Using the Repeat Feature
The default mode for the Repeat Feature is OFF. Pressing
REPEAT consecutively changes the repeat options:
• TRACK - repeats the track that is playing.
• ALL - repeats the disc that is playing.
• OFF
As you toggle through the options, the repeat option changes.
The selected repeat option loops repeatedly until you turn it off.
20
Page 23

a. Select TV DISPLA Y using UP/DOWN, and then press RIGHT
to enter the submenu. Select the TV display mode on the
screen using UP/DOWN, and press ENTER to confirm the
setting. Press LEFT to return.
* NORMAL/PS: When the player is connected to a normal
TV , and a wide picture is shown on the full screen, with a
portion that may be cut off automatically .
* NORMAL/LB: When the player is connected to a normal TV ,
and a wide picture is shown on the screen, with black strip
at both top and bottom of the screen.
* WIDE: When the player is connected to a wide screen TV , a
wide picture is shown on the full screen.
b. Select TV TYPE using UP/DOWN, and then press RIGHT to
enter the submenu. Select the TV TYPE mode on the screen
using UP/DOWN, and press ENTER to confirm the setting. Press
LEFT to RETURN.
*NTSC: Select this option when the DVD player is connected to
an NTSC TV .
*P AL: Select this option when tne DVD player is connected to a
P AL TV.
Note: This selection is for DVD Output and not the TV Tuner .
Please note the USA uses NTSC Only. Do not change
unless you know what you are doing.
21
Page 24

c. Select ANGLE MARK using UP/DOWN, and then press
RIGHT to enter the submenu. Choose to show an angle mark
on the screen using UP/DOWN and then press ENTER to
confirm the setting. Press LEFT to return.
* ON: The screen will show an angle mark. (If angle option is
available)
* OFF: the screen won’t show an angle mark.
d. Select ‘SCREEN SA VER’ using the UP/DOWN buttons,
*ON: enables screen saver
*OFF: disables screen saver (off)
*Note: The DVD player will enter the Screen Saver mode after
approximately 5 minutes if the same image remains
on the screen.
Note: MP3 playback contains a counter that prevents the screen
saver from activating.
e. Select General Setup Page by pressing the LEFT button.
Press the LEFT button again to Exit Setup Menu; then press
ENTER.
f. T o change the password, Select P ASSWORD using LEFT/
RIGHT and then press ENTER to enter the Password Setup
Page.
Input the old password/ default password, the new password,
and the confirmed new password. Press ENTER (OK) to con firm the change.
22
Page 25

Note: The default password is 3308 and this password is
always effective whether you’ve changed it to another new
one or not, in case that you forget the new password. T o
avoid others using it to set the parental level and change
the password, you may note this default password by
other means and delete it from this manual. Some discs
can be limited depending on the age of users while some
discs can not.
2) When there’s no disc inside the player , press SETUP to enter
the General Setup Page; then press the LEFT button twice to select the Preference Page. Then press ENTER to enter the preference page.
a. Select AUDIO using UP/DOWN, and then press RIGHT to en-
ter the submenu. Select the audio language you desire using
UP/DOWN and then press ENTER to confirm the setting.
Press LEFT to return.
b. Select SUBTITLE using UP/DOWN, and then press RIGHT
to enter the submenu. Select the subtitle language or SUB TITLE OFF you desire using UP/DOWN and then press EN TER to confirm the setting. Press LEFT to return.
23
Page 26

c. Select DISC MENU using UP/DOWN and then press RIGHT
to enter the submenu. Select the disc menu language you desire using UP/DOWN and then press ENTER to confirm the
setting. Press LEFT to return.
Note: Language selection is only available for discs re
corded in the languages listed in the submenus above.
If not, the player will play and display on the screen the
original recorded language contained in the disc.
d. Select P ARENT AL using UP/DOWN and then press
RIGHT to enter the submenu.
Select the parental level you desired using UP/DOWN for
discs with lock-out function or multiple rating levels. It’s listed
from the lowest level (1 Child) to the highest level (8 Adult).
24
Page 27

Press ENTER. If you have changed the parental level, the
P ASSWORD page will be displayed; otherwise it will not.
Input the password in 4 digits, and then press ENTER to
confirm the parental level setting.
Note: After inserting the disc in the player , if the paren al setting does not agree with the rating con tained on the disc, the disc will not play when
selected on the main menu.
Select YES using LEFT/RIGHT and press ENTER. Then input
your password in 4 digits or the default password.
25
Page 28

e. Select DEF AUL TS using UP/DOWN and then press RIGHT to
enter the submenu. Press ENTER to make the setting return
to the factory-set mode.
Note: Default Reset will not effect the Parental Control.
f. Select General Setup Page using LEFT/RIGHT ; then press
LEFT again to enter theExit Setup Menu. Press ENTER to
return to the DVD logo page.
6. PLAYING MP3 DISCS
MP3 is a format for storing digital audio. An audio CD-quality song is
compressed into the MP3 format with very little loss of audio quality
while taking up much less disc space. CD-R /RW discs that have
been encoded in MP3 format are compatible with this system.
Playback modes:
FOLDER (normal playback)
SINGLE
REPEAT ONE (repeat playback of a song)
REPEAT FOLDER (repeat playback of a specific folder)
Insert an MP3 CD, the DVD player will initialize the disc and the directory
(folder) will be shown on the TV screen.
When an MP3 disc is inserted into the unit, the menu screen appears
automatically. You can use the menu screen to change folders and
songs. The system plays the songs in the order they were burned
onto the disc.
26
Page 29

27
MENU Screen Display
1. Press the
or button to choose a folder from the folder list
on the left side of the screen.
2. Press ENTER to select the highlighted folder . The songs available under the folder will be listed.
3. Press STOP First, use
or button to choose a song from
the list. Press ENTER to select and begin playback of the highlighted song.
Use the ( NEXT ) button to move to the next song. Press the
(PREVIOUS) button to move to the beginning of the previous song.
USING THE REPEAT FEATURE
The default mode for the Repeat feature is OFF. Pressing REPEAT
consecutively changes the repeat options:
• SINGLE
• REPEAT ONE
• REPEAT FOLDER
• FOLDER
Pressing REPEA T the 5TH time will resume normal playback. As you
toggle through the options, the repeat option changes. The selected
repeat option loops repeatedly until you turn it off.
NOTICE
“ “ icon in front of a file name indicates that this is a folder, not an
MP3 file.
“MP3” icon in front of a file name indicates that this is a MP3 file.
Page 30

28
I. System Operation
1. Press POWER to switch the unit on or off. The switch indicato r will light red and the unit will go to the mode last used and
stored in memory .
2. Press DVD/TV/A V to select your desired mode. When switching the mode, the DVD player can memorize the present play
- ing point.
3. Press VOLUME UP/DOWN to raise or lower the sound level
Also used to make picture adjustments in the picture select
mode.
4. Each time PICture is pressed, the on screen picture adjustment display cycles through “adjustment bars for VOLUME,
CONTRAST , BRIGHTNESS, COLOR and TINT. Then
use VOLUME UP/DOWN to raise or lower the level. This display will automatically turn off if no adjustments are made within
about 6 seconds, or if any other button is pressed.
5. Press MUTE to cut off all sound; pressing this button again
restores sound to the previously set level. MUTE may also be
released by pressing the VOLUME UP/DOWN.
6. Press SRS 3D to activate surround sound with the indicator
on.
J. Watching TV
1. Connect the coax cable line to the supplied Right angle adapter .
Insert the supplied Right angle adapter into the coax input lo cated on the bottom left side of the unit. (Refer to Page 12, Item
#7.)
2. With power applied to the system and the TV mode selected,
press TV/CA TV on the remote control to select the regular 69channel Broadcast TV and the 125-Channel Cable TV (Standard Cable, HRC Cable, and IRC Cable) with on-screen display.
Note: Please contact your local cable provider to verify what
cable standard you are on.
Page 31

29
3. Press AUTO MEMORY ; all channels in TV or
CATV mode are searched and tuned and the channels with
signals detected are automatically stored.
4. SKIP/SEARCH selects between SKIP and SEARCH mode.
In SKIP mode, the TV only stops on channels that are pro-
grammed into memory when the CHANNEL UP/DOWN
buttons are used. When SKIP mode is off, the TV will stop
on all active channels.
5. T o erase a TV channel, press ERASE/WRITE until MANUAL
MEMORY has “erase” displayed on the screen. To store a
TV channel, press this button until MANUAL MEMORY has
“add” displayed on the screen. The stored channel numbers
are displayed in green on the screen while the non-stored
channel numbers are in red.
K. Playing a Video Game
Plug the AV output from your game system into the AV IN jack
on the front of the unit. You can use the attached AV cable to
convert the 3.5mm AV jack on the unit to RCA type AV jacks,
and match the color-coded jacks to the appropriate plugs:
Yellow (VIDEO) to Yellow, white (AUDIO L) to White, and Red
(AUDIO R) to Red. Select the AV mode and adjust the volume/
picture control to individual preference.
L. Use Headphones
1. Wireless IR Hi-Fi headphones may be used with the system.
Simply place batteries in the wireless headphones and
power them up. Make sure there is a clear line of site to the
IR Headphone Sensor.
2. Optional wired Hi-Fi headphones may be used with the
system. Simply plug in the headphone to either headphone
jack on the front of the unit. When using the right headphone
jack both internal speakers will be turned off.
Page 32

30
M. Support Home TV
Match the color-coded plugs to the appropriate DVD outputs in
the rear of the unit: Yellow (VIDEO) to Yellow, White (AUDIO L) to
White, and Red (AUDIO R) to Red.
N. Support External Speaker
Connect the EXT. SPEAKER output to an external speaker.
O. Specifications
Display Specs:
Resolution 800 x 480
Viewing Angle Hor: 60 deg., Vert: Top 50 deg.
Bottom 60 deg.
Contrast Ratio 300:1 (Max)
Brightness 300 Cd/m
2
(Max)
Backlight Life 10,000 Hrs (Min)
Disc Format
Color System
Screen type
Screen size
Remote Control
Antenna
Channels
Audio output
Frequency response SP
Power Input
AC Power Source
Operating Humidity
Operating Temperature
Storage temperature
Dimensions (W x H x D)
w x h x d (w/Speakers)
w x h x d (w/o Speakers)
Weight
DVD/CD/MP3
NTSC
LCD
10 inches
Infrared rays
Ext antenna
2-6 (VHF low), 7-13 (VHF high),
14-69 (UHF), 1-125 (CATV)
3 W
DVD (PCM 96 kHz/24 bits ):
20 Hz to 44 kHz
DVD (PCM 48 kHz):
20 Hz to 22 kHz
CD: 20 Hz to 20 kHz
DC 12 V, 1.7 A
AC 110V-240V @ 50/60 Hz
10 ~ 75%
41 ~ 104 degrees Fahrenheit
4 ~ 140 degrees Fahrenheit
14.33” x 7.08” x 2.36”
10.55” x 70.8” x 2.36”
4.4 pounds
Page 33

CANADA : CALL 1-800-645-4994 FOR LOCATION OF WARRANTY STATION SERVING
YOUR AREA
AUDIOVOX ELECTRONICS CORP. (the Company) warrants to the original retail purchaser of
this product that should this product or any part thereof, under normal use and conditions, be
proven defective in material or workmanship within 90 days from the date of original
purchase, such defect(s) will be repaired or replaced with reconditioned product (at the
Company's option) without charge for parts and repair labor.
To obtain repair or replacement within the terms of this Warranty, the product is to be delivered
with proof of warranty coverage (e.g. dated bill of sale), specification of defect(s),
transportation prepaid, to the Company at the address shown below.
This Warranty does not extend to the elimination of externally generated static or noise, to
correction of antenna problems, to costs incurred for installation, removal or reinstallation of
the product, or to damage to tapes, discs, speakers, accessories, or vehicle electrical systems.
This Warranty does not apply to any product or part thereof which, in the opinion of the Company,
has suffered or been damaged through alteration, improper installation, mishandling, misuse,
neglect, accident, or by removal or defacement of the factory serial number/bar code label(s).
THE EXTENT OF THE COMPANY'S LIABILITY UNDER THIS WARRANTY IS LIMITED TO THE
REPAIR OR REPLACEMENT PROVIDED ABOVE AND, IN NO EVENT, SHALL THE COMPANY'S
LIABILITY EXCEED THE PURCHASE PRICE PAID BY PURCHASER FOR THE PRODUCT.
This Warranty is in lieu of all other express warranties or liabilities. ANY IMPLIED WARRANTIES,
INCLUDING ANY IMPLIED WARRANTY OF MERCHANTABILITY, SHALL BE LIMITED TO THE
DURATION OF THIS WRITTEN WARRANTY. ANY ACTION FOR BREACH OF ANY WARRANTY
HEREUNDER INCLUDING ANY IMPLIED WARRANTY OF MERCHANTABILITY MUST BE BROUGHT
WITHIN A PERIOD OF 30 MONTHS FROM DATE OF ORIGINAL PURCHASE. IN NO CASE SHALL
THE COMPANY BE LIABLE FOR ANY CONSEQUENTIAL OR INCIDENTAL DAMAGES FOR
BREACH OF THIS OR ANY OTHER WARRANTY, EXPRESS OR IMPLIED, WHATSOEVER. No
person or representative is authorized to assume for the Company any liability other than
expressed herein in connection with the sale of this product.
Some states do not allow limitations on how long an implied warranty lasts or the exclusion or
limitation of incidental or consequential damage so the above limitations or exclusions may not
apply to you. This Warranty gives you specific legal rights and you may also have other rights
which vary from state to state.
90 DAY LIMITED WARRANTY
Applies to Audiovox Mobile Video Products
128-5556C
U.S.A. : AEC 150 MARCUS BLVD., HAUPPAUGE, NEW YORK 11788 l 1-800-645-4994
31
Page 34

© 2004 Audiovox Electronics Corp., 150 Marcus Blvd., Hauppauge, N.Y. 11788
128-6935A
Note:
________________________________
________________________________
________________________________
________________________________
Customer Record:
This Model number and Serial number of this product can be found on its rear panel. You
should note this serial number in the space provided below and retain this book, plus your
purchase receipt, as a permanent record of your purchase to aid in identification in the
event of theft or loss, Repair and Warranty Service purpose.
Model Number: D1020
Serial Number: _________________________
_____________
For assistance, please call: 1-800-645-4994For assistance, please call: 1-800-645-4994
 Loading...