

Audiovox CNPKEN1 Installation Manual

Interface CableInterface Cable
Interface CableInterface Cable
Interface Cable
Installation GuideInstallation Guide
Installation GuideInstallation Guide
Installation Guide
2
Step 1:
Remove the head unit from your dashboard.
Important: Depending on how your head unit was installed you may have to remove
part or all of your dash board before the head unit can be pulled out. You may also have
to remove screws to complete this step.
Note: Before proceeding, make sure that the PIA Adapter has been pro-
grammed. Refer to the PIA Installation Manual. Professional installation
is recommended.
Step 2:
Connect the 34-pin cable connector to the Programmable Interface Adapter (PIA) mating
connector as shown in Figure 1. Slide the rubber strain relief onto the PIA case. Attach the
Car Dock USB connector into the USB receptacle on the PIA. Make sure the connectors are
secure, and slide the top cover onto the bottom housing. (Refer to Figure 2.)
InstallationInstallation
InstallationInstallation
Installation
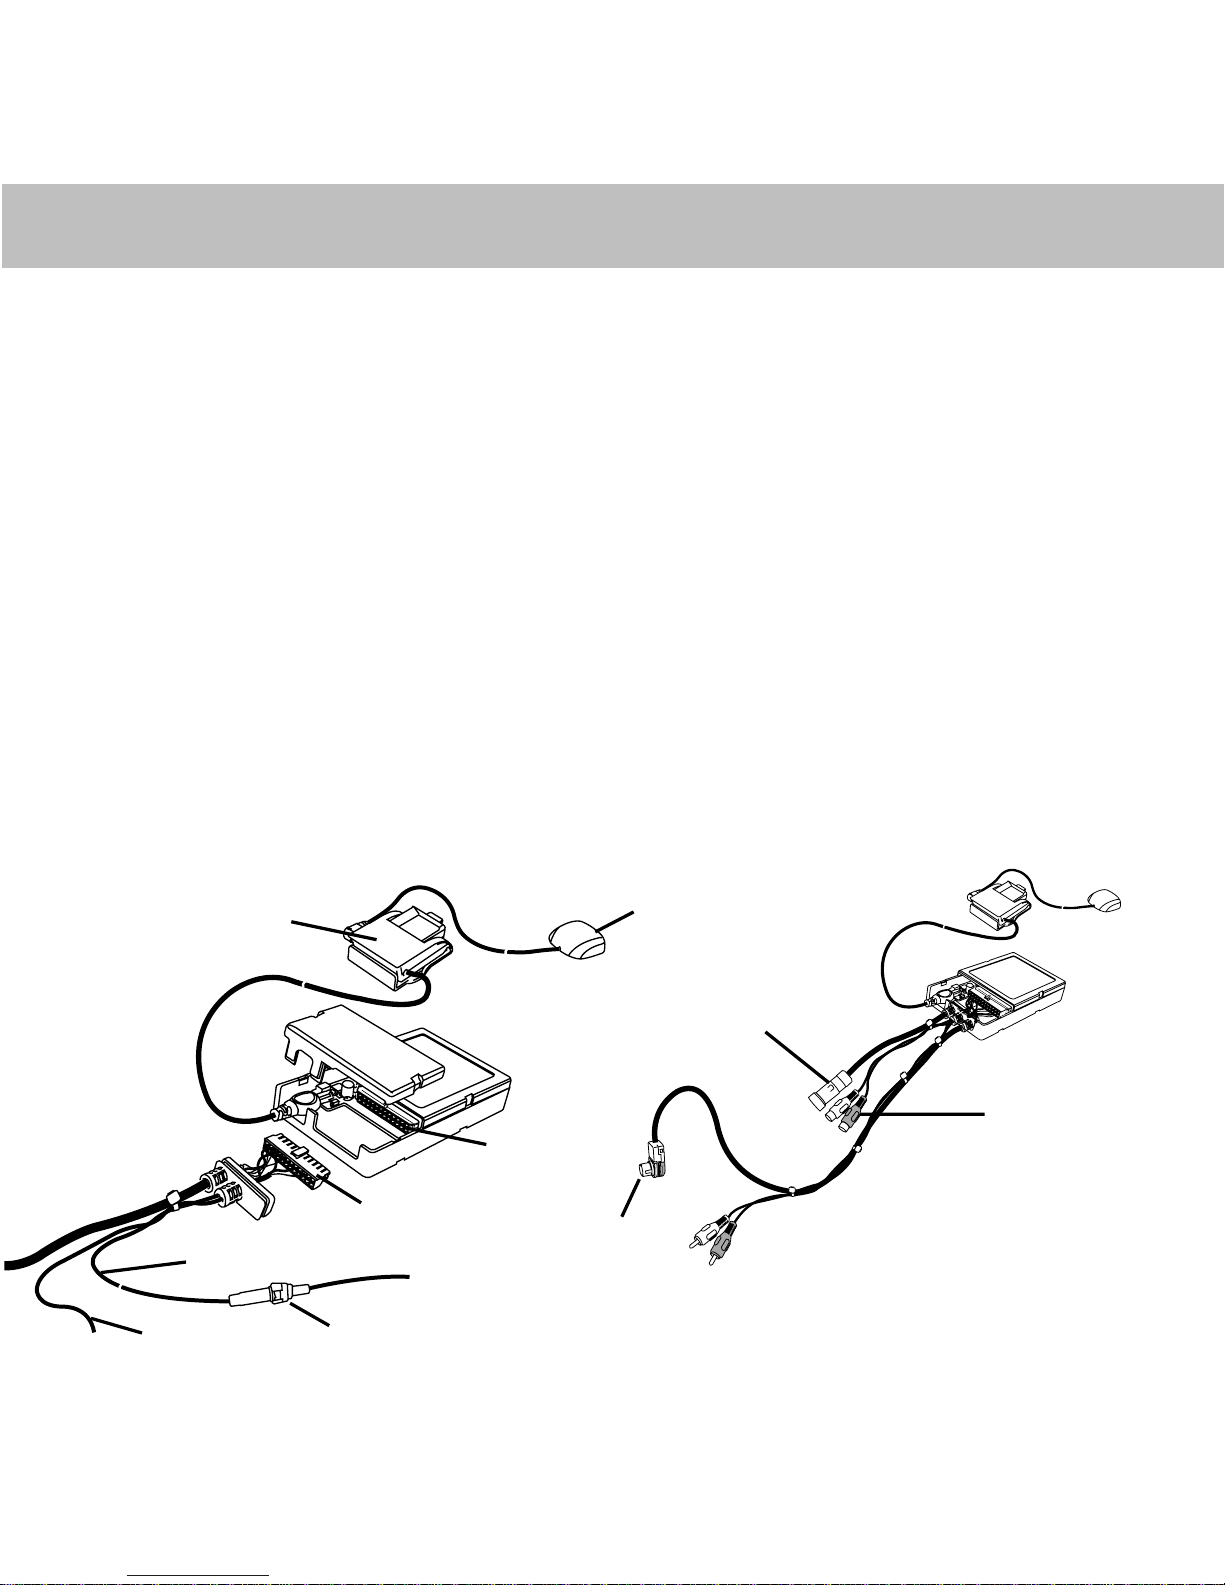
Figure 1. PIA Cable Interface
Antenna
Pass-Through
Connector
Note: Make sure all cables
are securely connected.
Mating
Connector
Connector
To Head Unit
Mini-Tuner and
Car Dock
Ground Wire
Yellow Wire, 12V Battery
Yellow and
black wire are
optional based
on model.
Left/Right
Audio Cable
Fuse
Left/Right Audio
Cables (Model Specific)
Connector
Installation (Continued)Installation (Continued)
Installation (Continued)Installation (Continued)
Installation (Continued)
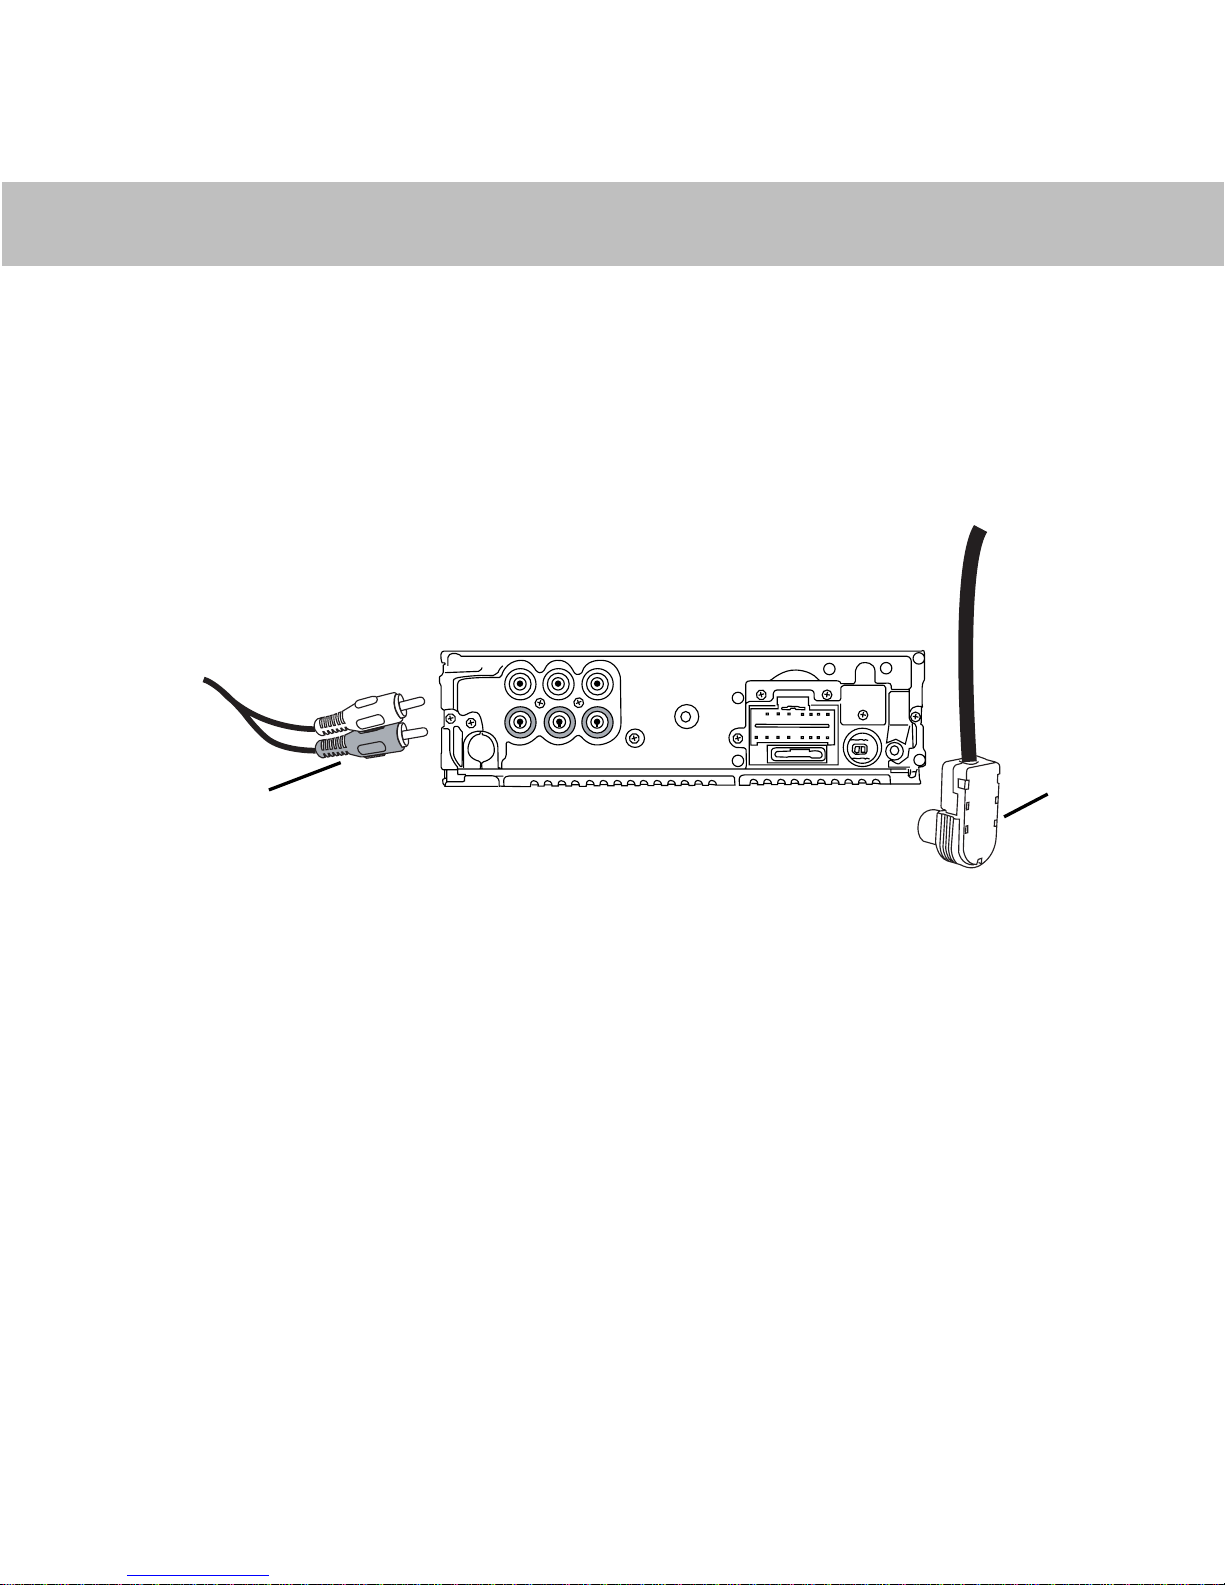
Figure 2. Typical Head Unit, Rear View
Note: The location of the connections on the head unit may vary depending on the
model.
Step 4:
Start your car and turn on your head unit to confirm that the XM Direct system is
properly connected. Please refer to your stereo owners manual on how to access XM
mode. When you tune to XM channel 1, you should see “XM Preview” on your head unit
LCD, and hear that channel through your car speakers. If not, check to make sure all
connections are correct or refer to the troubleshooting section of this installation guide.
Step 5:
Mount and secure the interface cable in a suitable location that will not interfere with
the radio and will not vibrate or rattle after installation.
Step 3:
Connect the end of the cable with the right angle DIN connector and audio cables to
the back of the head unit as shown in Figure 2. The shorter end of the cable coming
from the PIA is a pass-through cable that can be used to connect other products to your
head unit, i.e., CD changer.
3
 Loading...