

Page 1
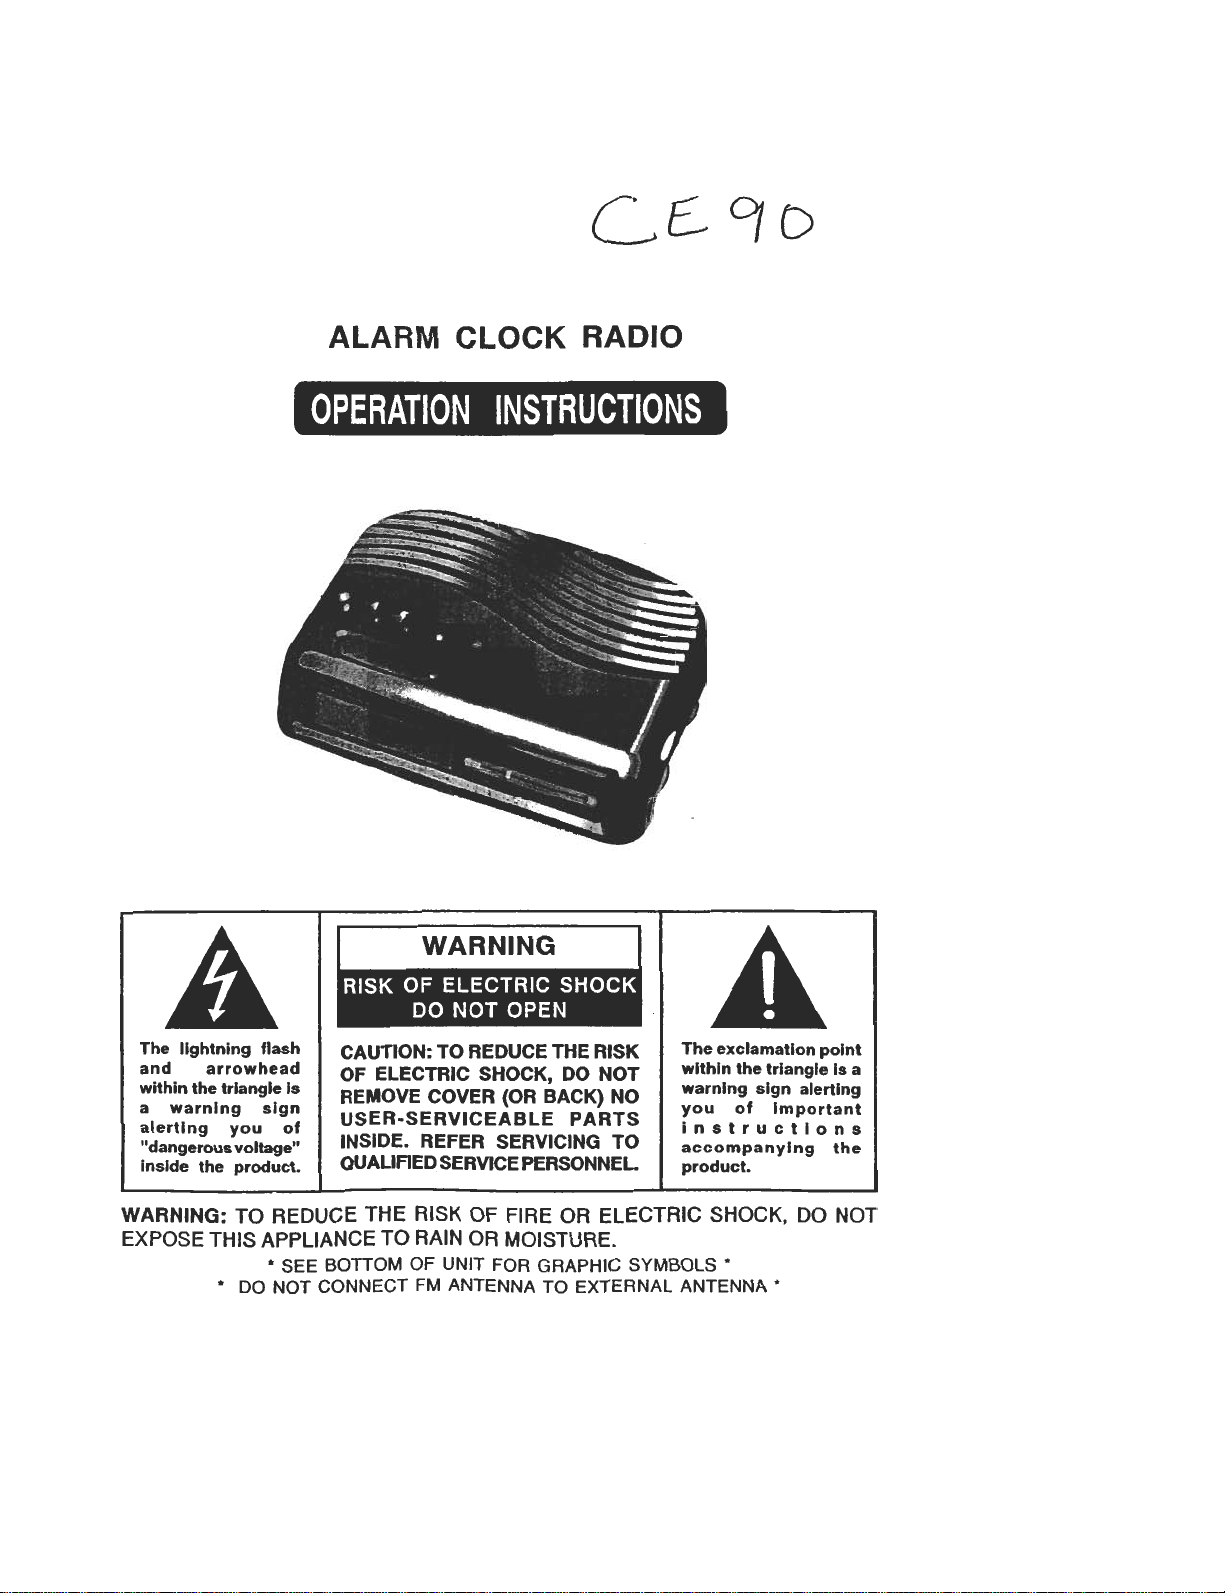
CE-
ALARM CLOCK RADIO
WARNING: TO REDUCE THE RISK OF FIRE OR ELECTRIC SHOCK, DO NOT
EXPOSE THIS APPLIANCE TO RAIN OR MOISTURE.
* SEE BOTTOM OF UNIT FOR GRAPHIC SYMBOLS *
* DO NOT CONNECT FM ANTENNA TO EXTERNAL ANTENNA *
Page 2
To prevent fire or shock hazard do not
expose the unit to rain or moisture.
.To avoid electrical shock, do not open the
cabinet. Refer servicing to qualified personnet only.
.Electronic digital alarm clock and sleep
timer are combined.
.Two wake-up modes available: radio or
buzzer alarm.
.To disconnect the cord, pull it out by the
plug, not by the cord.
.Avoid exposure to temperature extremes;
direct sunlight, moisture, sand, dust or
mechanical shock.
Allow adequate air circulation to prevent
internal heat build-up. Do not place the unit
on surfaces (rugs, blankets, etc.) or near
materials (curtains, draperies) that may
.Power back-up function to keep the clock
operating during a power interruption, using an optional 6F22 battery.
.Should any solid object or liquid fall into the
unit, unplug the unit and have it checked by
qualified personnel before operating it any
further .
.When cleaning the casing, use a soft cloth
dampened with a mild detergent solution.
Never use abrasive cleansers or chemical
solvents.
block the ventilation hores.
This device complies with Part 15 of FCC Rules. Operations is subject 10 the following two
conditions: (1) this device may not cause harm~1 interference, and (2) this device must accept
any Interference received, including interference that may cause undesirable operation.
2
Page 3

1. Function selector [ON/OFF/
RADIO BUZZER]
2. CLOCK set button
3. HOUR set button [HR]
4. MINUTE set button [MIN]
5. ALARM set button
6. SLEEP set button
7. SNOOZE/SLEEP OFF button
11. TUNING control
12. BAND selector
13. VOLUME control
14. AC power cord
15. Antenna wire
TIME DISPLAY INDICATOR
8. Time display
10. Radio dial scale
PM indicator-
3
ALARM -
indicator
I-O.JR
digits
MINUTE
digits
Page 4

Be sure to install an optional9V battery for the
power back-up function. If the AC power
supply is interrupted, the battery supplies
power to keep the clock operating and holding
the alarm time setting.
.During power interruption, the clock func-
tion is maintained although illumination of
the indicator goes off, but the alarm sound
does not come on.
.After a power interruption, the displayed
time may not be always correct (it may
gain or lose less than ten minutes per
hour).
This battery is only for clock operation and
alarm memory during power interruption.
You cannot listen to the radio with the
battery.
When to replace the battery
T o check the battery condition, unplug the AC
power cord from the wall outlet and plug it in
again after a few minutes. If the displayed
time is incorrect, replace the battery with a
new one.
Caution
.Be sure to install the battery before discon-
necting the AC power cord.
.When the unit is left unplugged for a long
time, remove the battery to avoid undue
battery discharge and unit damage from
battery leakage.
4
Page 5

1. While pressing the CLOCK set button, press the HA button to the desired hour.
@00@5.~
bb
2. While pressing the CLOCK set button, press the MIN button to the desired minute.
b t
.PM 12:00 = NOON time, and PM indicator will light up.
Page 6

1. While pressing the ALARM button, press the HR button to the desired hour.
Cl«K "0 SLEEP
@ (JJ).((J) @ 0 .I:Q2;::o::aI
b b
2. While pressing the ALARM button, press the MIN button to the desired minute.
a.oc. SLEEP
@) @ 0 .l:CR1:a:aJ
b
3. For radio alarm
First tune in the desired station and adjust
the volume.
Set to RADIO RADK> ~ '5" OFF
BUZZER [I::J ON
~
I 4. The AL [Alarm] indicator will lights up
.Set to RADIO or BUZZER will come on at the preset time, and shut off automatically after
119 minutes.
1 1.11 you want to snooze a few more
Press the SNOOZE button will deactivate
the sound for 9 minute. You can repeat
this function as many times as you like
within 119 minutes from the preset alarm
time. SIM)OZE
C~
~
-.I
For buzzer alarm
Set to BUZZER
RADIO ~ r-s- OFF
BUZZER II=:] ON
~
[ : CE:a:BJ
2. To complete cancel the alarm mode.
Press the ALARM button, and it will
Iminute.
resume after 24 hours.
CLOCK HR ~ MlN ALARM SI.EEP
@(iJ).((J)(Q)O
b
6
1-011
Page 7

1.While listening to the radio,
Set to OFF .
RADIO ~ ' , ~OFF
BUZZER [=:I] ON
2.Press SLEEP .
The radio turns on, and will turn off
after 59 minutes.
3. Turn off the SLEEP before 59 minutes
Press the SNOOZE button.
maximum to 119 minutes.
Press SlEEP and HOUR
OR
@00@5.1:~
b b
maximum to 119 minutes.
Press SLEEP and MINUTE button, will
be counted down automatically.
~
~
b
Frequency range
Antennas
Speaker
Power output
Power requirements
Dimensions
Weight
Design and specifications subject to change without notice.
FM: 88-108 MHz
AM: 530-1700 kHz
FM: 1 meter antenna wire
AM: Built-in ferrite bar antenna
80hm
240mW [at 10% total harmonic distortion]
120V AC, 60 Hz
For the power backup function: 9V DC, one 6F22 battery
Approx. 179x132.2x54.8mm [W/D/H]
Approx. 5609 [not inculed battery]
7
Page 8

1. Read Instructions -All the safety and operating instructions should be read before the
appliance is operated.
2. Retain Instructions -The safety and operating instructions should be retained for future
reference.
3. Heed Warnings -All warnings on the appliance and in the operating instructions should
be adhered to.
4. Follow Instructions -All operating and use instructions should be followed.
5 Water and Moisture -The appliance should not be used near water -for example, near
a bathtUb, washbowl, kitchen sink, laundry tub, in a wet basement, or near a swimming
pool, and the like.
6. Carts and Stands -The appliance
should be used only with a cart or
stand that is recommended by the
manufacturer .
6A. An appliance and cart combination
should be moved with care. Quick
stops, excessive force, and uneven
surfaces may cause the appliance
and cart combination to overturn.
7. Wall or Ceiling Mounting -The
appliance should be mounted to a
wall or ceiling only as recommended
by the manufacturer .
8. Ventilation -The appliance should be situated so that its location or position does not
interfere with its proper ventilation. For example, the appliance should not be situated on
a bed, sofa, rug, or similar surface that may block the ventilation openings: or, placed in
a built-in installation, such as a book case or cabinet that may impede the flow of air
through the ventilation openings. ,
9. Heat- The appliance should be situated away from heat sources such as radiators, heat
registers, stoves, or other appliances (including amplifiers) that produce heat.
10. Power Sources -The appliance should be connected to a power supply only of the type
described in the operating instructions or as marked on the appliance.
11. Grounding or Polarization -Precautions should be taken so that the grounding or
polarization means of an appliance is not defeated.
12. Power-Cord Protection -Power-supply cords should be routed so that they are not likely
to be walked on or pinched by items placed upon or against them, paying particular
attention to cords at plugs, convenience receptacles, and the point where they exit from
the appliance.
13. Cleaning -The appliance should be cleaned only as recommended by the manufacturer .
14. Power Lines -An outdoor antenna should be located away from power lines.
Page 9

15. Outdoor Antenna Grounding -If an outside antenna is connected to the receiver, be sure
the antenna system is grounded so as to provide some protection against voltage surges
and built up static charges. Section 810 of the National Electrical Code, ANSII NFPA No.
70, provides information with respect to proper grounding of the mast and supporting
structure, grounding of the lead-in wire to an antenna discharge unit, size of grounding
conductors, location of antenna-discharge unit, connection to grounding electrodes, and
requirements for the grounding electrode. See Figure 1.
FIGURE 1
EXAMPLE OF ANTENNA GROUNOING
AS PER NATIONAL
ELECTRICAL COOE
~
~
ANTENNA
LEAO IN
WIRE
~.~~
DISCHARGE UNIT
~
~
iii
~
';I
~
~
"'
ill
1
~
(
i
S2898A NEC- NATIONAL ELECTRICAL CODE
16. Nonuse Periods -The power cord of the appliance should be unplugged from the outlet
!--- POWER SERVICE GROUNDING
.ELECTRODE SYSTEM
(NEC ART 250. PART HI
(NECSECTION 810-201
GROUNDING CONDUCTORS
(NEC SECTION 810-21 )
when left unused for a long period of time.
i
:)
~
'(
'!i
17. Object and Liquid Entry -Care should be taken so that objects do not fall and liquids are
not spilled into the enclosure through openings.
18. Damage Requiring Service -The appliance should be serviced by qualified service
personnel when:
A. The power-supply cord or the plug has been damaged; or
B. Objects have fallen, or liquid has been spilled into the appliance; or
C. The appliance has been exposed to rain; or
D. The appliance does not appear to operate normally or exhibits a marked change in
performance. or
E. The appliance has been dropped, or the enclosure damaged.
19. Servicing -The user should not attempt to service the appliance beyond that described
in the operating instructions. All other servicing should be referred to qualified service
personnel.
 Loading...