

Page 1
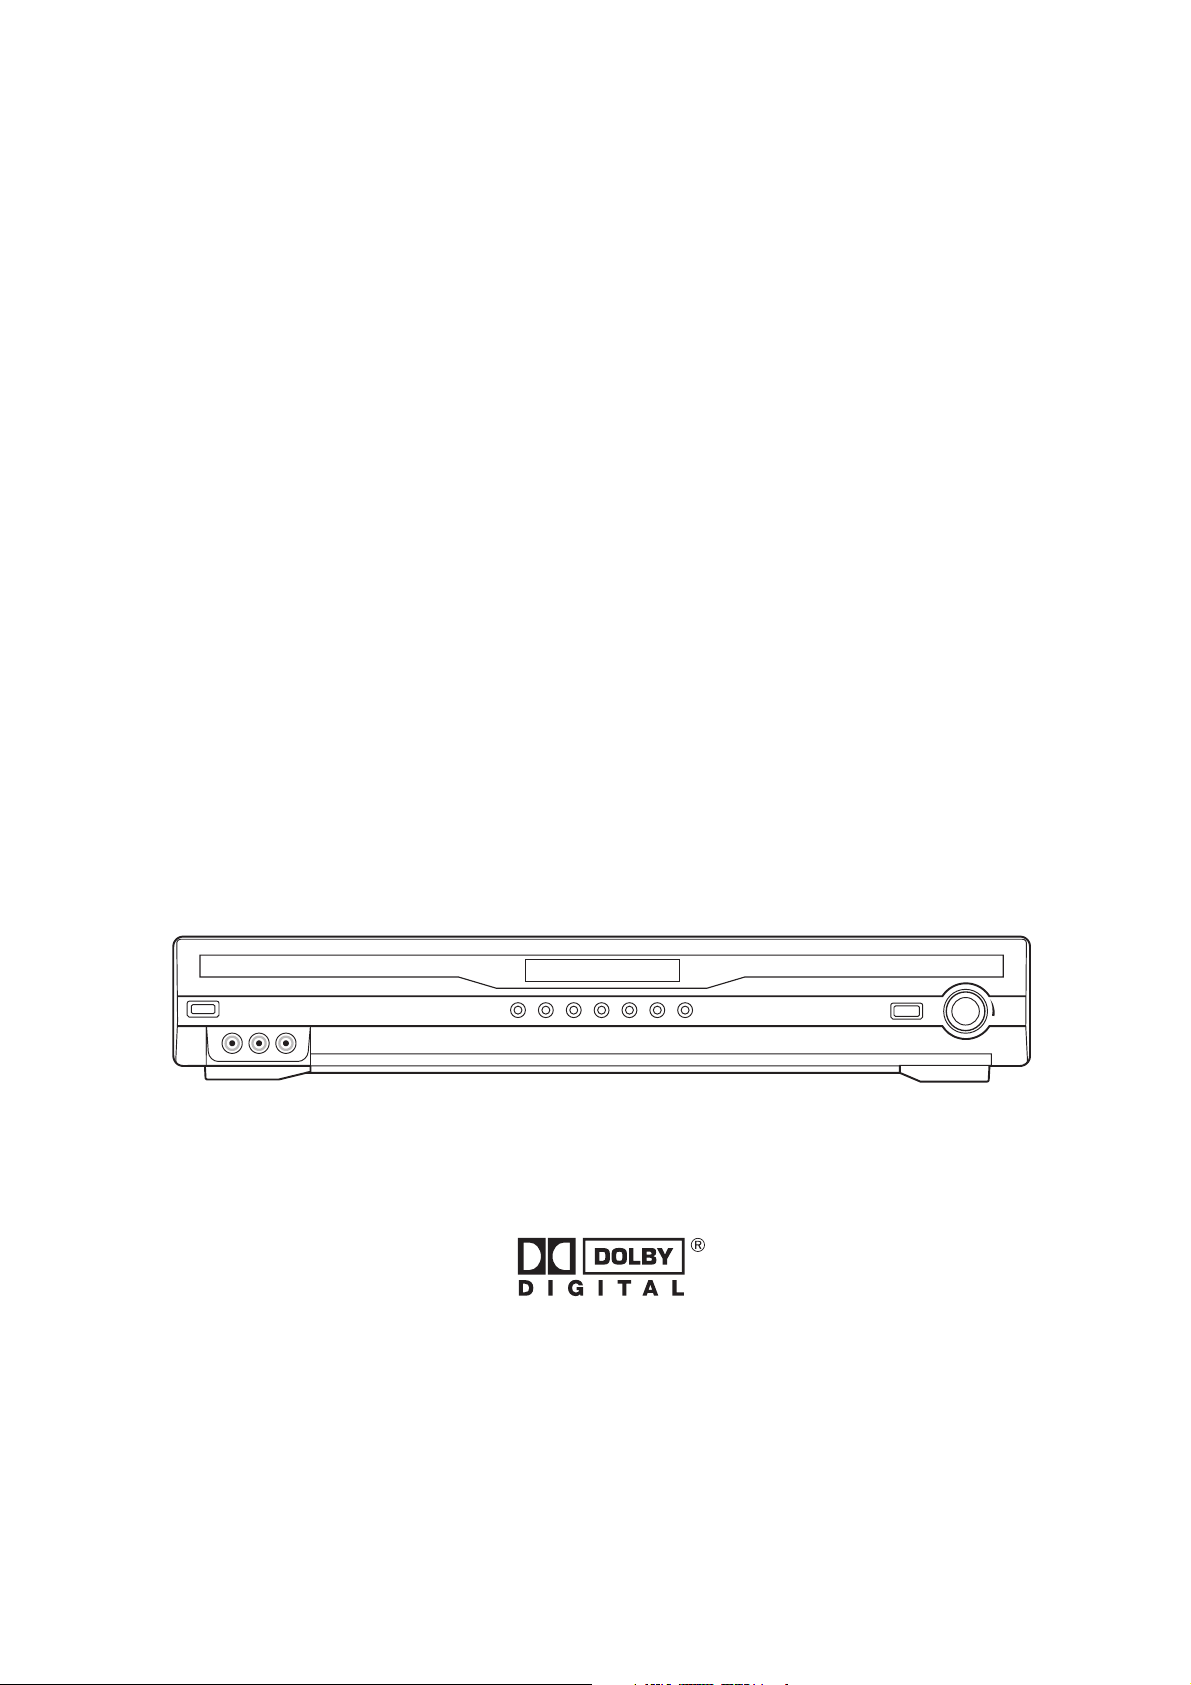
HOME THEATER SYSTEM
INSTRUCTION MANUAL
Please read the instruction manual carefully before using your unit.
Page 2

GENERAL
Table Of Contents
Introduction
Supplied Accessories
Maintenance
Placement
IMPORTANT SAFETY INSTRUCTIONS ...........1
FUNCTION CONTROL .......................................2
Front Panel .........................................................2
Rear Panel .........................................................2
Remote Control ..................................................3
Using The Remote Control Correctly .....................3
Battery Replacement ..........................................3
SETUP ..............................................................4
Introduction
Thank you for purchasing this production.
For best performance, please read this manual
carefully.
It will guide you in operating your product.
Manufactured under license from Dolby
Laboratories.‘Dolby’,‘Dolby Digital’,‘Pro Logic’
and the double -D symbol are trademarks of
Dolby Laboratories.
Supplied Accessories
Remote control unit ..............................................X1
Home Theater Speaker .........................................X6
Main unit .............................................................X1
AM LOOP antenna ..............................................X1
FM antenna .........................................................X1
Manual guide book ..............................................X1
Audio/Video cable ................................................X1
Power Connection ...............................................4
Connecting The Speakers & Subwoofer ................4
Mounting The Rear Surround Speakers .................4
Positioning The Speakers & Subwoofer .................5
Setting The Listening Channels ............................5
Connecting The Radio Antenna ............................6
Video & Audio Input/Output Setting ......................6
SOUND ADJUSTMANT ......................................8
To Adjust The Channel Level ...............................8
To Adjust The Delay Effect ...................................8
RADIO OPERATION ..........................................9
Tuning Into A Station Manually .............................9
To Search For A Station Automatically ..................9
Presetting Stations .............................................9
Tuning Into A Presetted Station ............................9
TROUBLE SHOOTING GUIDE..........................10
Page 3
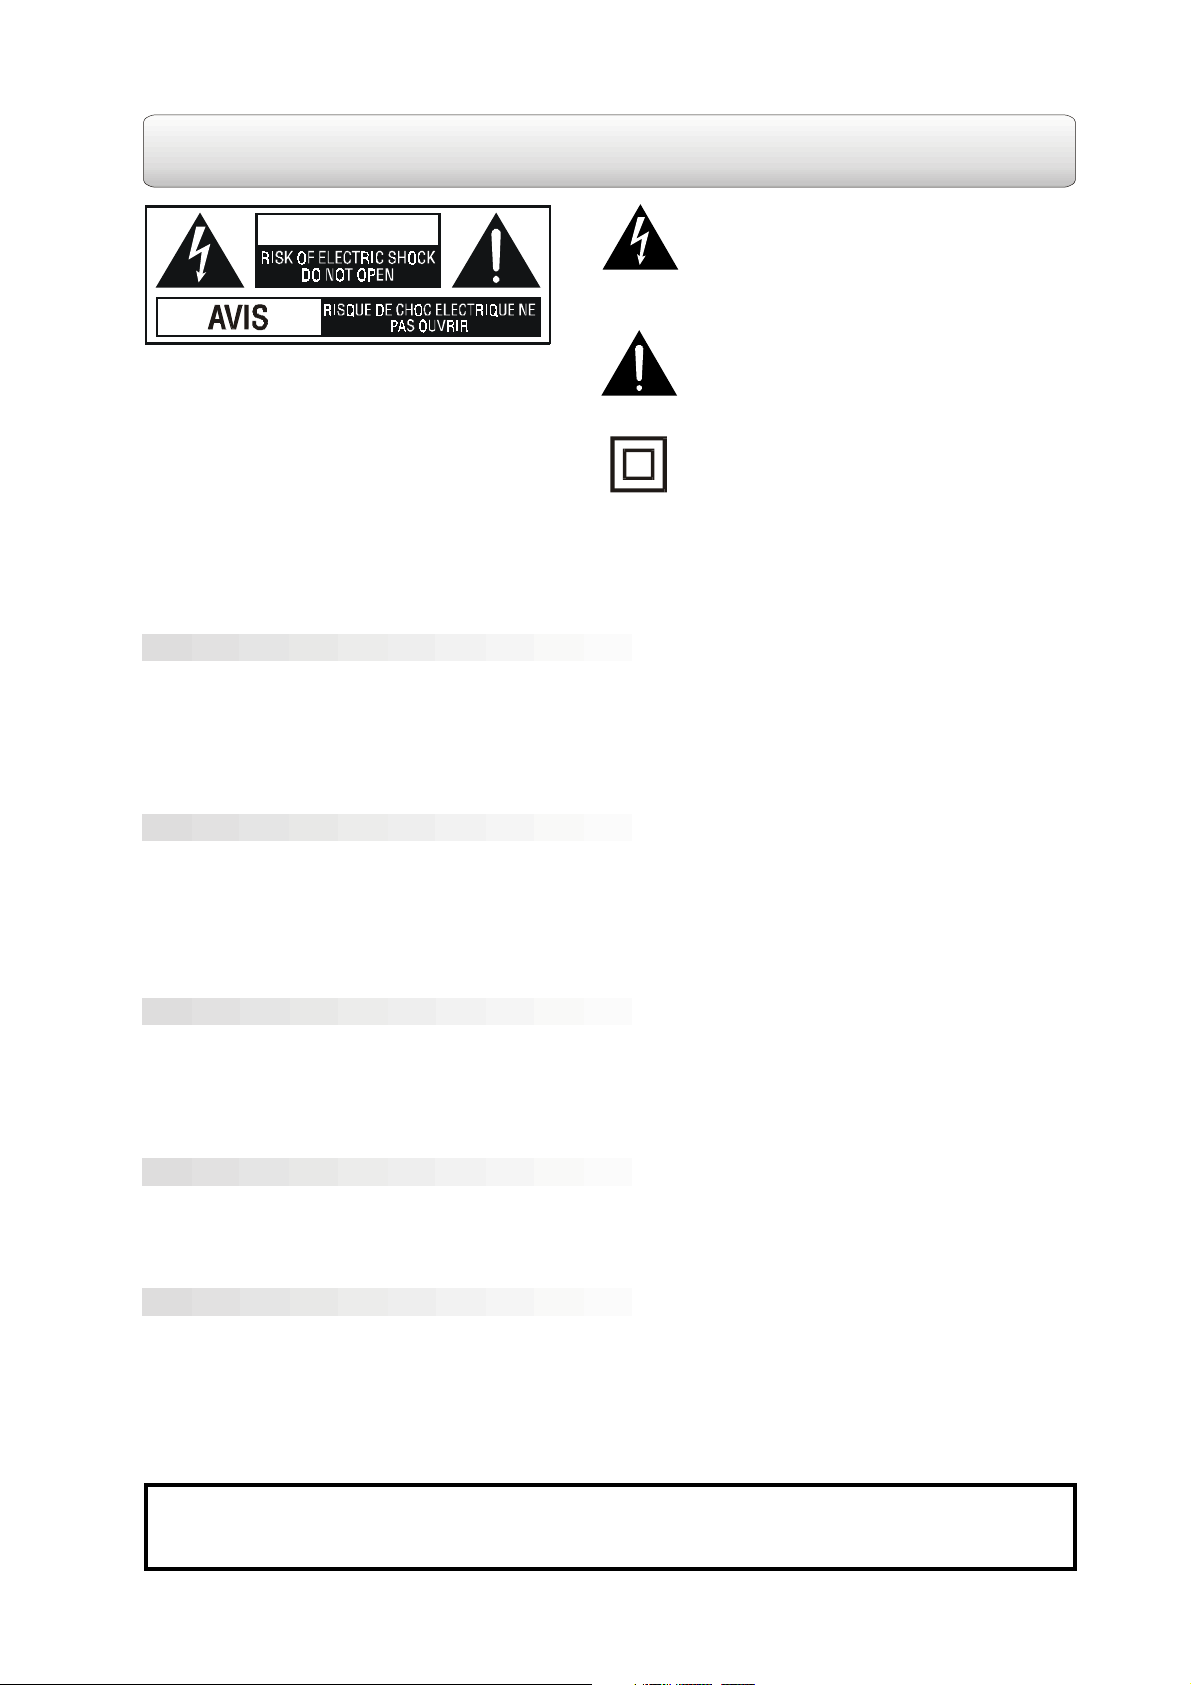
IMPORTANT SAFETY INSTRUCTIONS
The lightning flash with an arrowhead symbol, within
WARNING
WARNING: TO REDUCE THE RISK OF ELECTRIC
SHOCK, DO NOT REMOVE COVER (OR BACK).
NO USER-SERVICEABLE PARTS INSIDE.
REFER SERVICING TO QUALIFIED SERVICE
PERSONNEL.
the equilateral triangle, is intended to alert the user to
the presence of uninsulated "dangerous voltage" within
the product's enclosure that may be of sufficient
magnitude to cause an electric shock.
The exclamation point within the equilateral triangle is
intended to alert the user to the presence of important
operating and maintenance (servicing) instructions in
this owner manual.
The symbol for Class II (Double lnsulation)
WARNING:
CAUTION: TO PREVENT ELECTRIC SHOCK, MATCH WIDE BLADE OF PLUG TO WIDE SLOT, FULLY
TO PREVENT FIRE OR SHOCK HAZARD, DO NOT EXPOSE THIS APPLIANCE TO RAIN OR
MOISTURE.
INSERT.
FCC Information
This device complies with Part 15 of FCC Rules.
Operation is subject to the following two conditions:
(1) This device may not cause harmful interference, and
(2) This device must accept any interference received, including interference that may cause undesirable
operation.
Notes On Placement
• Do not use the unit in places which are extremely hot, cold, dusty, or humid.
• Place the unit on a flat and even surface.
• In a cabinet, allow about 2.5cm (1 inch) of free space all around the unit for adequate ventilation.
• Do not restrict the air flow of the unit by placing it in a place with poor air flow, by covering it with a cloth,
or by placing it on carpeting.
Notes On Safety
• When connecting or disconnecting the AC cord, grip the plug and not the cord itself. Pulling the cord may
damage it and create a hazard.
• Unplug the unit during lightning storms or when unused for long periods of time.
• Check that the rated voltage of your unit matches your local voltage before use.
Note On Condensation
• When left in a heated room where it is warm and damp, water droplets or condensation may form inside
the unit. When there is condensation inside the unit, the unit may not function normally. Let the unit stand
for 1 to 2 hours before turning the power on, or gradually heat the room up and dry the unit before use.
Notes On Maintenance
• Do not use volatile chemicals on this unit. Clean by lightly wiping with a soft cloth.
• Do not place a heavy object on or step on the unit. The object may fall, causing serious personal injury
and serious damage to the unit.
• Protect the power cord from being walked on or pinched particularly at plugs, convenience receptacles,
and the point where they exit from the unit.
WARNING:
• Should any trouble occur, disconnect the AC power cord and refer servicing to a qualified technician.
• Do not place anything directly on the top of the unit or it may cause damage.
1
Page 4
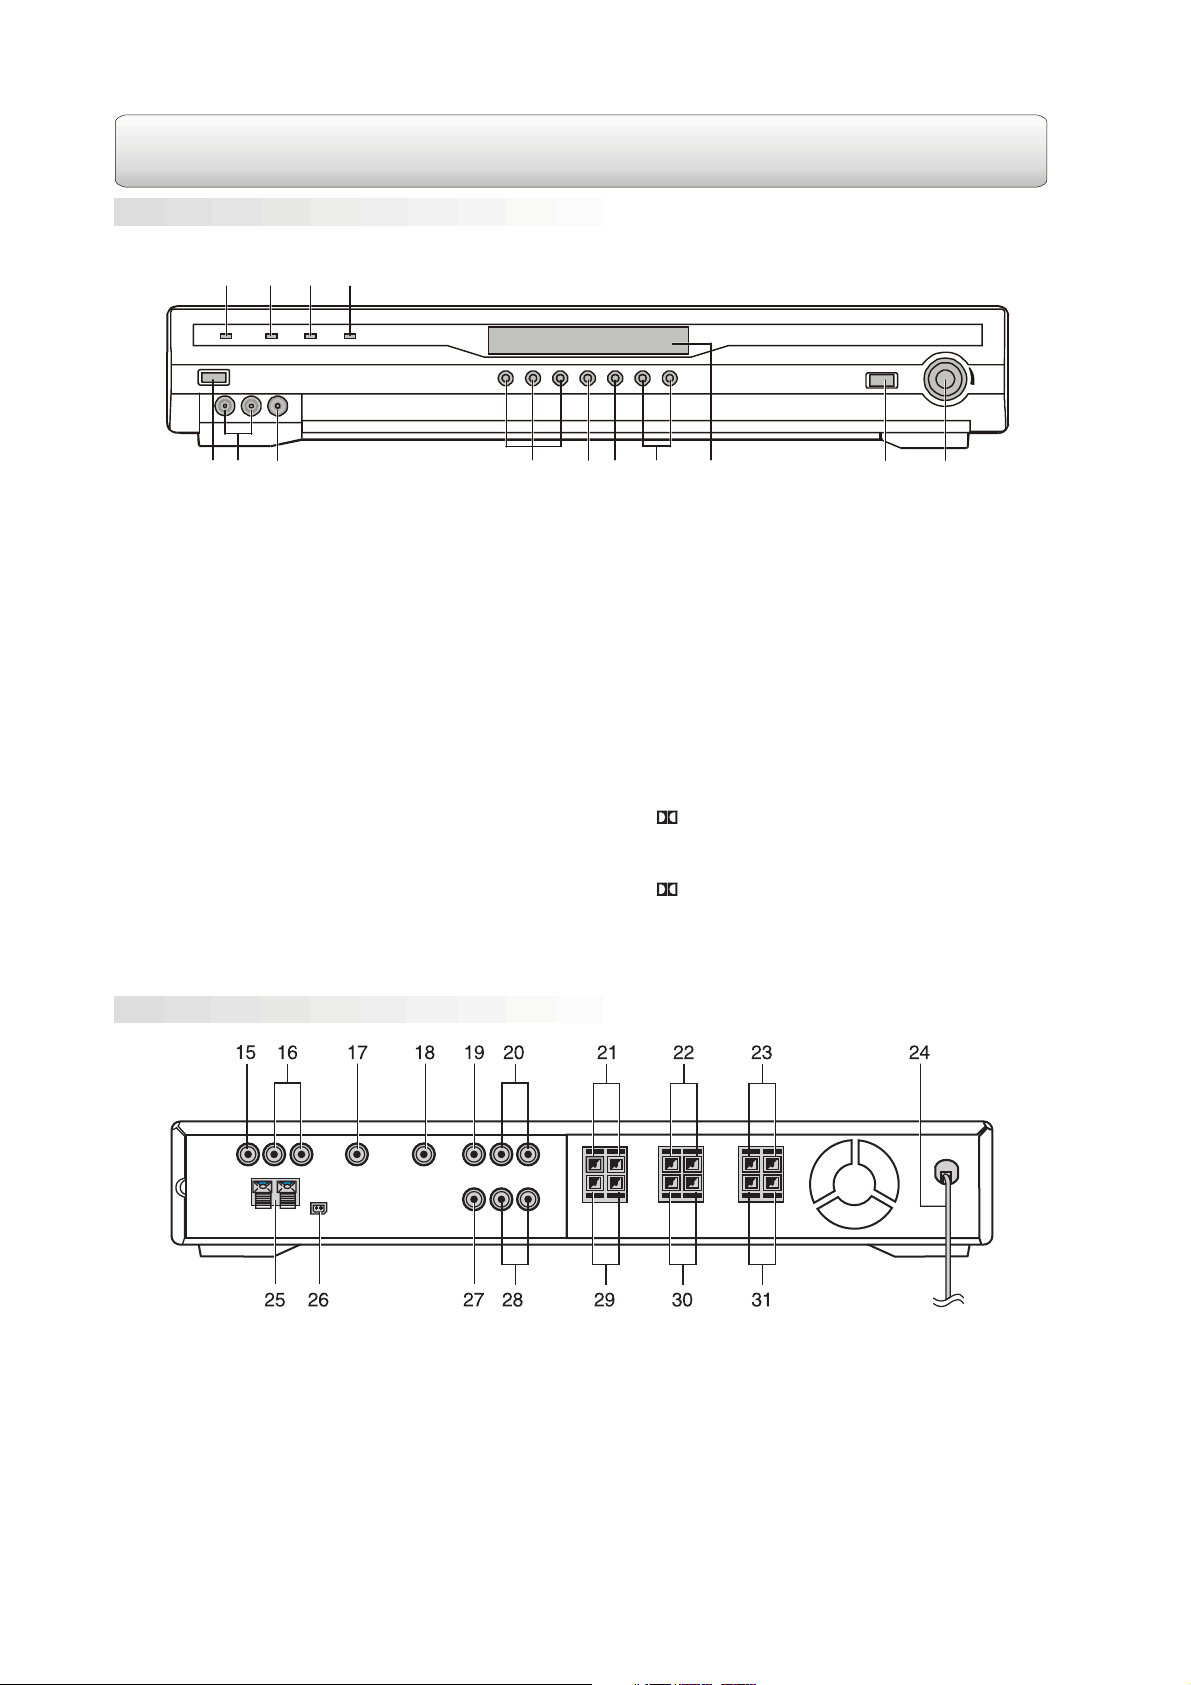
FUNCTION CONTROL
Front Panel
12 13 14
11
12 3 4
1. POWER button
Turn the power on or off.
2. AV3 AUDIO IN (L&R) jacks
Connect to audio outputs.
3. AV3 VIDEO IN jack
Connect to video outputs.
4. AV1/2/3 buttons
Press AV1 or AV2 to enter auto-detected/autoswitching mode, press again to switch to
“forced analog mode”. Press AV3 button to
select the AV3 input.
5. TUNER / BAND button
Select the radio mode and press again to select
between FM and AM band.
6. PRESET button
Select the memorized radio station.
7. TUNING -/+ butons
Search a radio station.
Rear Panel
5
67 8 9 10
8. Display window
Show the status of the unit.
9. Remote sensor
Accept the remote control signals.
10. VOLUME knob
Adjust the volume.
11. STANDBY indicator
When the unit is turned into standby mode by
the remote control, the light will illuminate.
12. 3 STEREO indicator
The light illuminates when 3 STEREO is
selected in AV IN mode.
13. PRO LOGIC indicator
The light illuminates when Dolby Pro Logic is
active in AV IN mode.
14. DIGITAL indicator
The light illuminates when Dolby Digital signal
is input in AV IN mode.
15. AV2 VIDEO IN Jack
16. AV2 AUDIO IN (L & R) Jacks
17. AV2 DIGITAL AUDIO IN Jack
18. AV1 DIGITAL AUDIO IN Jack
19. AV1 VIDEO IN Jack
20. AV1 AUDIO IN (L & R) Jacks
21. Right Front Speaker terminals
22. Center Speaker terminals
23. Left Front Speaker terminals
24. Power Cord
25. FM ANTENNA terminals
26. AM LOOP ANTENNA jack
27. TV VIDEO OUT jack
28. TV AUDIO OUT (L & R) jacks
29. Right Rear Speaker terminals
30. Subwoofer terminals
31. Left Rear Speaker terminals
2
Page 5

FUNCTION CONTROL
Remote Control
(Continued)
1
2
3
4
5
6
1. POWER button
Turn the unit on from standby mode or turn the
unit into standby mode.
2. BAND button
Switch the radio band between FM and AM.
3. TUNING button
Search a radio station.
4. MEMORY button
Memorize a radio station.
5. SURROUND button
Change the output channels or the output
sound mode in AV IN mode.
6. VOL +/- buttons
Increase or decrease the volume.
7. FUNCTION button
Select the tuner mode and AV inputs. Every
time the button is pressed, the mode will
change cyclically as: AV1->AV2->AV3->Tuner
POWER
A
B
M
E
M
FUNCTION
7
8
NEXT
D
I
D
N
S
P
L
A
Y
9
10
/
O
N
O
O
R
Y
PREV
M
O
E
R
E
T
S
11
12
13
TEST
14
8. NEXT button
Select the presetted stations or adjust the level
in Sound Adjustment.
9. DISPLAY button
Show the current sound channel or status.
10. TUNING button
Search a radio station.
11. SOUND button
Select sound balance and tone control for
adjustment with the NEXT/PREV buttons.
12. MONO/STEREO button
Press to select FM STEREO or FM MONO
mode.
13. PREV button
Select to the presetted stations or adjust the
level in Sound Adjustment.
14. TEST button
Test the volume of each speaker.
Using The Remote Control Correctly
1. Point the remote control at the remote sensor located on the unit.
2. When there is a strong ambient light source, the performance of the infrared remote sensor may be
degraded, causing unreliable operation.
3. The recommended effective distance for remote operation is about 4 meters (13 feet).
Battery Replacement
When battery becomes weak, the operating distance of the remote control is greatly reduced and you will need
to replace the battery.
1.Open the battery door. 2.Insert one CR2025
(3V) size battery.
Note:
If the remote control is not to be used for a long time, remove the battery to avoid damage caused by battery
leakage corrosion.
Attention:Take out the PVC sheet before operating
the remote control.
3
Page 6

SETUP
Power Connection
CAUTION:
• Before making connection, check that the rated voltage of your unit matches your local voltage.
• Keep your hands dry when you are connecting the power cord to the wall outlet in case of electric shock.
• When you are not going to use the unit for a long period of time, disconnect the power cord.
Connecting The Speakers & Subwoofer
1. The speaker cords have been color-cord to simplify connection. Just plug the POSITIVE (+) and NEGATIVE
(-) ends of each speaker wire into the corresponding jacks on the rear of the main unit, matching the color
tube on the end of the speaker wire to the color-cord connector.
2. Connect each of the speaker wires to the satellite speakers. The front left/right and rear left/right speakers
are all the same. However, make sure you connect the center speaker (color) to the speaker which is
slightly longer than the rest.
3. Do not connect the other speakers to the subwoofer internals, it may damage the speakers.
CAUTION:
To prevent damage to the unit, be sure to turn off the unit before making any connection.
Mounting The Rear Surround Speakers
1. Mark the correct mounting position on the wall.
2. Insert a fixing screw(s) at the marked position on the wall.
3. Align the slot hole(s) of the speaker over the screw and pull the speaker downward until it is firmly hooked.
Need More Help?
DO NOT RETURN THIS TO THE STORE
Please call Customer Service at 1-800-252-6123
or visit online help at http://www.18002526123.com
4
Page 7

SETUP
(Continued)
Positioning The Speakers & Subwoofer
CENTER
Place on the top of or below the TV.
FRONT SPEAKERS
Place both sides of the TV,
equal distances apart.
SUBWOOFER
Can be placed anywhere.
REAR SPEAKERS
Place right beside or slightly behind your
listening position, and a little higher than
your ears.
Setting The Listening Channels
In AV1 and AV2 input mode, the unit can auto-detect the sound source mode (analog or digital), and autoswitch to this mode, to enter forced analog input mode, press the corresponding button on the front panel
again. In force analog input mode, it will input the signal from the analog input and will not auto-switch to digital
input. This allows you force to use the analog input.
You can press the SURROUND button repeatedly on the remote control to change the sound output status.
Please see the table below.
The following table shows which speakers are working in various modes.
REMARKS:
1. "O" The speaker is active." X " The speaker is inactive.
2. Generally, only Front Left, Right speakers and Subwoofer are active in TUNER mode.
3. 3 STEREO mode creates a surround sound effect without using the rear speakers. In this mode, no sound
comes from the rear speakers.
Dolby Pro Logic is a sound system that was developed to get a better sense of presence from sources
encoded with Dolby Surround. The feeling of position has been improved by the addition of a separate center
speaker channel. Look for this logo on the display of your unit.
Dolby Digital is a sound system developed by Dolby Laboratories Inc. which gives movie theatre ambience
to audio output when the unit is connected to a Dolby Digital 5.1 channel processor or amplifier.This unit
automatically recognizes DVDs that have been recorded with Dolby Digital.Not all Dolby Digital sources are
recorded with 6 channel.Some sources marked Dolby Digital may be recorded in Dolby Surround, a 2 channel
system. Look for this logo on your DVD unit.
5
Page 8
SETUP
(Continued)
Connecting The Radio Antenna
FM: Connect the FM antenna (included) to the FM ANTENNA terminals. Fully unwind the wire antenna. Then
extend the wire antenna and place it in the position that sounds best.
AM: Connect the loop antenna (included) to the AM LOOP ANTENNA jack. Rotate the antenna to get the best
receiving position.
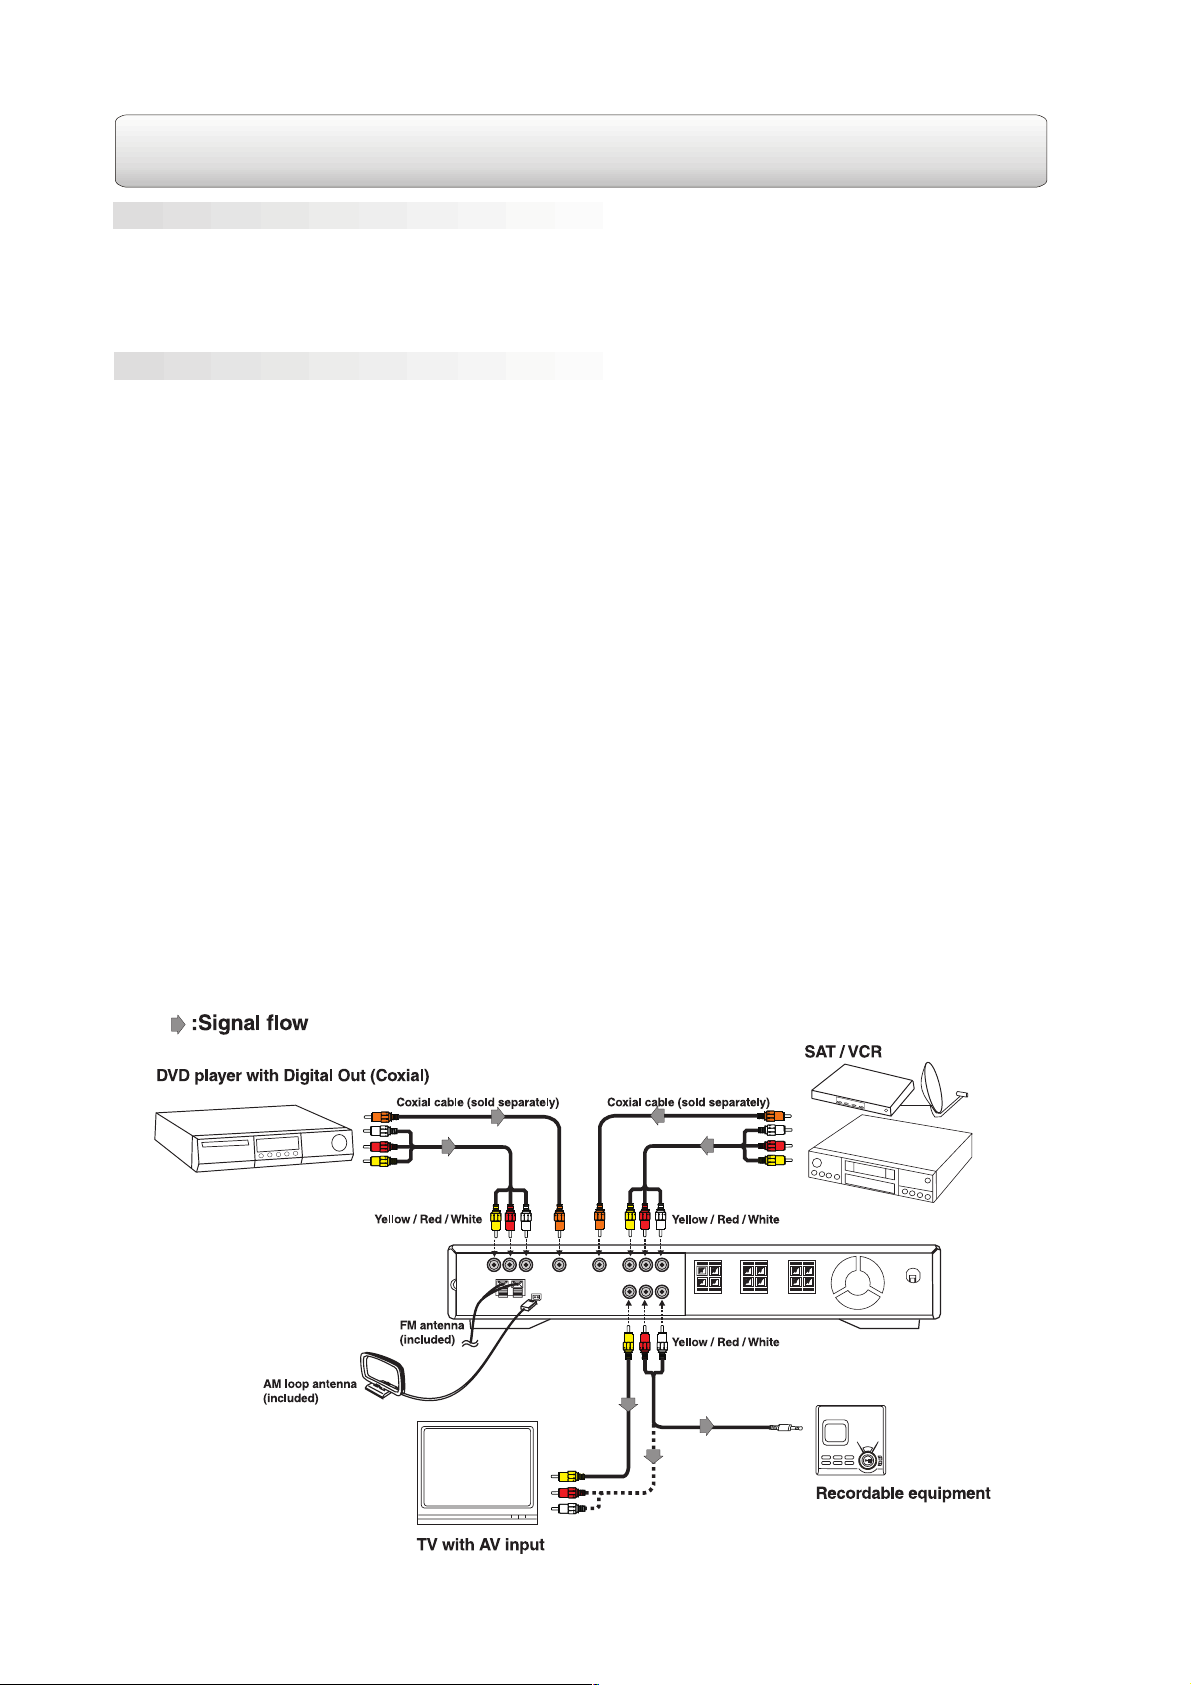
Video & Audio Input/Output Setting
AV1 (SAT/VCR)
Connect the audio and video output jacks of the AV equipment (VCR, Satellite receiver, etc.) to the audio and
video input jacks on the unit with an Audio/Video cable (included).
If the AV equipment has bitstream/PCM coxial audio out jack, Connect the equipment to the unit by using a
coaxial cable.
AV2 (DVD)
Connect the audio and video output jacks of the DVD player to the audio and video input jacks on the unit with
an Audio/Video cable (included).
Connect the coxial digital audio output jack of the DVD player to the DIGITAL AUDIO IN on the unit by using
a coaxial cable.
TV
The unit can be connected to your TV by connecting the audio and video ouput jacks of the unit to the audio
and video input jacks on your TV.
To record the playing signal, connect AUDIO OUT to the recordable equipment (Recordable cassette player,
Recordable MD player, etc.).
Watching a DVD
1. Connect the unit to the TV and the DVD player.
2. Turn on the unit and press the FUNCTION button on the remote control to select AV2 auto-detected mode,
or press the AV2 button on the front panel directly, If no sound in digital input mode, press the AV2 button
of the front panel to AV2 ANALOG mode. Force analog mode is activated by pressing the front panel AV2
button only.
3. Turn on your TV and follow the instructions included with it to select the corresponding VIDEO input that
you connected to the unit.
4. Turn on your DVD player to start playing.
6
Page 9
SETUP
Video & Audio Input/Output Setting(Continued)
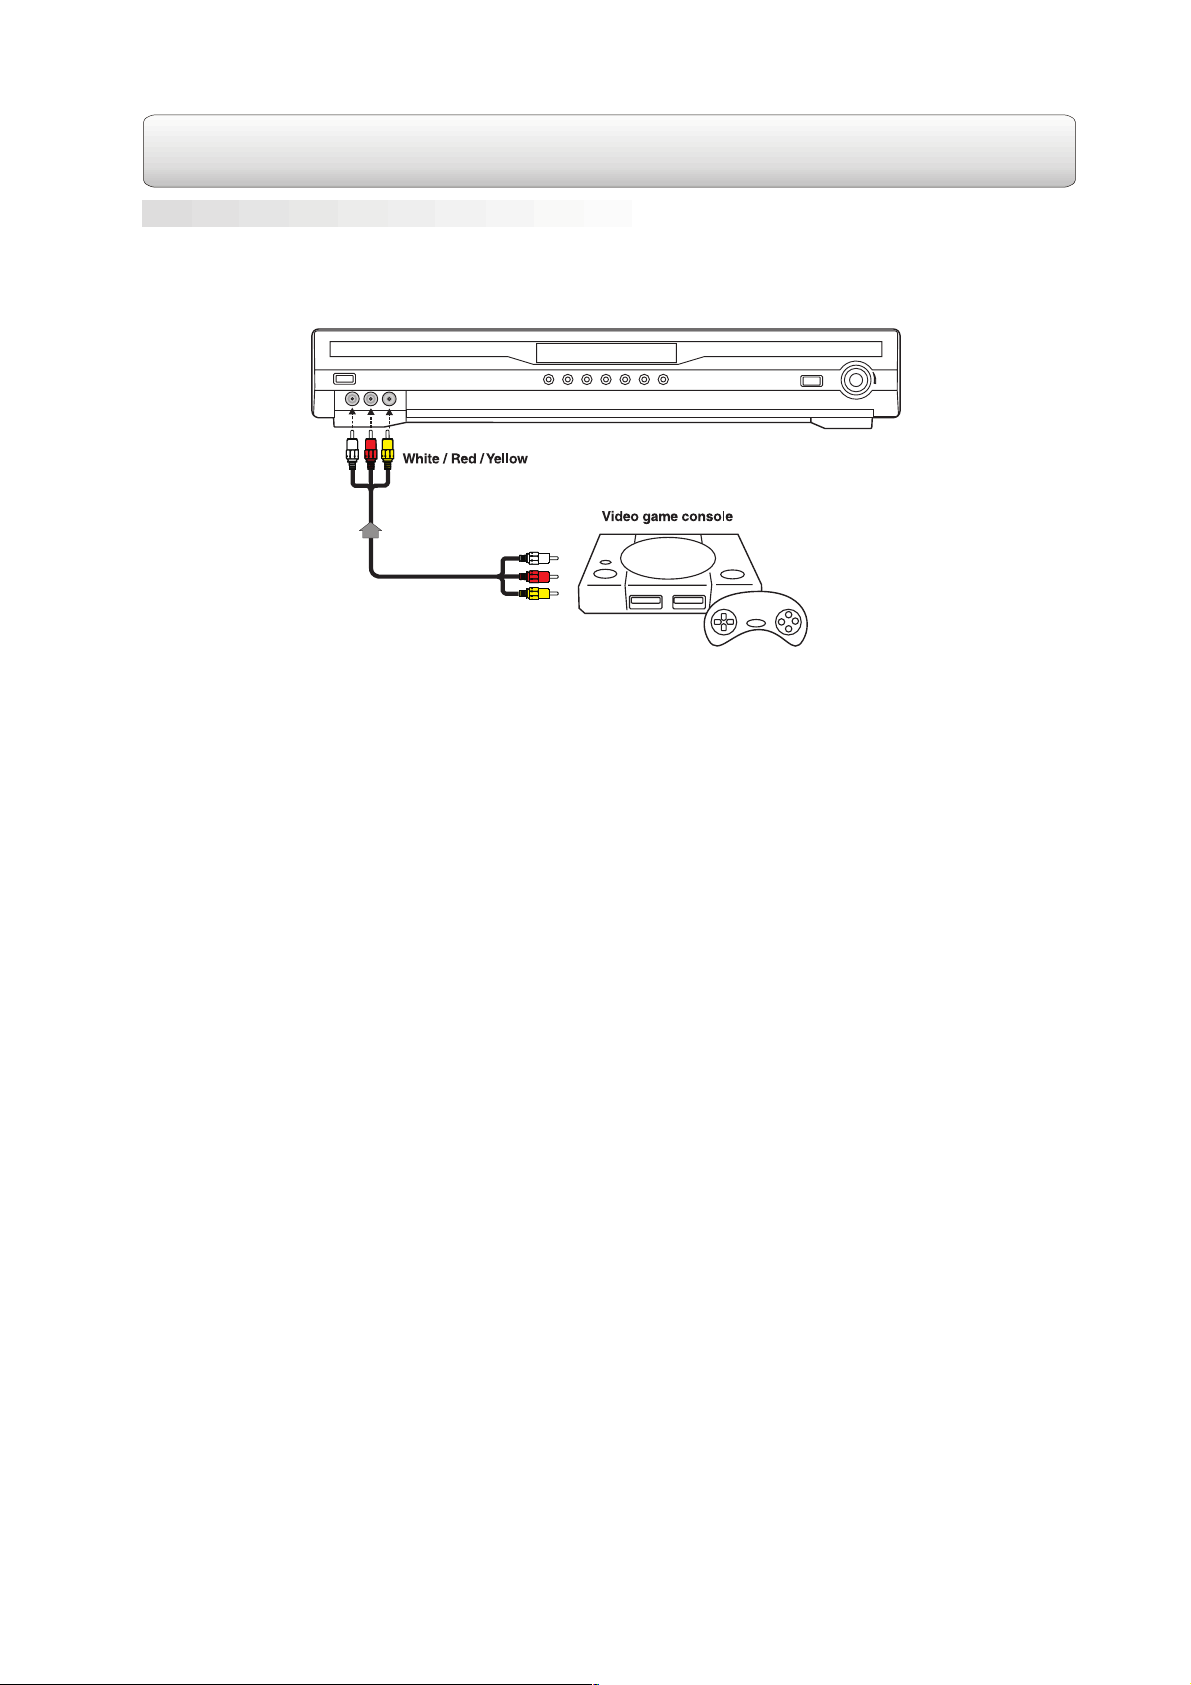
AV3
To play with a portable AV equipment (Video game console, etc.), use the AV3 on the front panel of the unit.
Connect the audio and video following the instructions of AV1 and AV2.
(Continued)
7
Page 10

SOUND ADJUSTMENT
To Adjust The Channel Level
Use the remote control to make the following changes to speaker balance. Press the SOUND button to select
the desired speaker and press NEXT or PREV button to adjust the channel level.
Notes :
1. If you do not press any button within a few seconds, the display will return to normal.
2. Every press on the SOUND button will change the menu cyclically as below:
To Adjust The Sound Quality
Press the SOUND button repeatedly to select an equalization mode (BASS, MIDDLE, TREBLE). Press the
NEXT or PREV button to adjust the level.
• BASS: Adjust the low range of sounds.
• MIDDLE: Adjust the middle range of sounds.
• TREBLE: Adjust the high range of sounds.
Press the SOUND button until the menu “ MODE LINE ” appears. Press the NEXT or PREV button to switch
between “ MODE LINE ” and “ MODE RF ”. The “ MODE LINE” and “ MODE RF ” are only effective when Dolby
Digital signal is input in AV IN mode.
• MODE LINE: Enables dialogue normalization without compression scaling.
• MODE RF: Causes dialogue to reproduce at a level that compares well with quality television broadcasts
and premium movie channels with fully compression scaling.
NOTE:
• Bass, middle and treble control the sound from the front left and right speakers.
To Adjust The Delay Effect
Press the SOUND button repeatedly to select the delay time of the center speaker and the rear speakers.
Press the NEXT or PREV button to adjust the delay time (millisecond).
• P DELAY: Set the delay time of the rear speakers for Dolby Pro Logic mode.
• D DELAY: Set the delay time of the rear speakers for Dolby Digital mode.
• C DELAY: Set the delay time of the center speaker.
Notes:
1. This unit supports three digital input modes:
• Dolby Digital 5.1ch. In this mode, press the SURROUND button on the remote control to select between
Dolby D (5 CH.) and Downmix (2 CH.).
• Dolby Digital 2.0ch. In this mode, press the SURROUND button to select among Dolby D (2 CH.), 3
STEREO (3 CH.) and DOLBY PRO LOGIC (4 CH.).
• PCM. In this mode, press the SURROUND button to select among Dolby D (2 CH.), 3 STEREO (3 CH.)
and DOLBY PRO LOGIC (4 CH.).
2. When analog signal is input, Press the SURROUND button to select among STEREO, 3 STEREO and
DOLBY PRO LOGIC.
The table below shows which indicator will illuminate in various input modes.
8
Page 11

RADIO OPERATION
Tuning Into A Station Manually
1. Press the TUNER/BAND button on the unit or the FUNCTION button on the remote control until the
frequency band appears on the display.
2. Press the TUNER/BAND button again or the BAND button on the remote control to select the desired
band.
3. Press the TUNING +/- buttons to tune into a station.
FM Stereo
Press the MONO/STEREO button on the remote control until “STEREO” appears on the display. When the
radio signal is weak, the “ ((ST)) ” indicator will flash.
Weak FM Stations
Press the MONO/STEREO button until “MONO” appears on the display. Background noise will be reduced but
the signal reproduced will be mono. To restore stereo reception, press the MONO/STEREO button again.
To Search For A Station Automatically
• Hold down the TUNING buttons on the remote control or the front panel for 1 to 2 seconds, and a station
is searched automatically. After tuning in a station, the search stops.
• The search may not stop at a station with a very weak signal.
• When the search is in progress, press the TUNING buttons again to stop searching.
Presetting Stations
You can tune into a stored station directly by pressing the PRESET button.
20 stations on FM band can be preset.
20 stations on AM band can be preset.
1. Press the TUNER/BAND button on the unit or the FUNCTION button on the remote control until the
frequency band appears on the display.
2. Press the TUNER/BAND button on the unit again or the BAND button on the remote control to select the
desired band.
3. Use the TUNING button to find your desired station.
4. Press the MEMORY button on the remote.
5. Press the NEXT or PREV button to select the preset number and press the MEMORY button on the
remote to store the station.
6. Repeat steps 2-5 to store other stations.
7. To change the presetted station. Repeat steps 2-5.
Tuning Into A Presetted Station
1. Press the TUNER/BAND button on the unit or the FUNCTION button on the remote control until the
frequency band appears on the display.
2. Press the TUNER/BAND button again or the BAND button on the remote control to select the desired
band.
3. Press the PRESET button on the unit repeatedly or the NEXT or PREV button to select the presetted
station.
4. To check the presetted stations. Press the PRESET button repeatedly.
Notes:
• Only the two front speakers and the subwoofer are active in tuner mode.
• The SURROUND and TEST buttons on the remote control are unavailable in tuner mode.
9
Page 12

TROUBLE SHOOTING GUIDE
The following checks will assist in the correction of most problems which you may encounter with your
system.
SYMPTOM
No Power.
No sound.
No sound from one channel or
unbalanced left and right volume.
Reversed left and right sound.
The centre speaker or the surround
speakers give no sound
The remote control does not function.
RADIO RECEPTION
The FM STEREO indicator flashes.
CAUSE (AND REMEDY)
• Check that the AC power cord is connected.
• Rotate the VOLUME clockwise to increase volume.
• Select the correct AV input and the correct input mode
(Digital or analogy sound).
• Check the speaker connections of the inoperative channel.
• Check the speaker cord connection and speaker location.
• Check the speaker connection for proper phasing.
• Check that the speaker connections are correct.
• The current mode does not support surround sound.
• Remove any obstacles between the remote control and
the unit.
• Use the remote control near the unit.
• Point the remote control at the remote sensor on the unit.
• Replace the battery in the remote control with new one.
• Unwind the antenna.
Severe hum or noise.
• Unwind the antenna.
• Switch to MONO sound in FM Radio mode.
Specifications and external appearance are subject to change without advance notice
due to continuous product improvement.
10
PRINTED IN CHINA
811-AVR291-011
 Loading...