

Page 1
~AUDIOTOX~
~CORPORATION
Model
ADDP1 & ADDSS
Install & Transmitter
Programming Guide
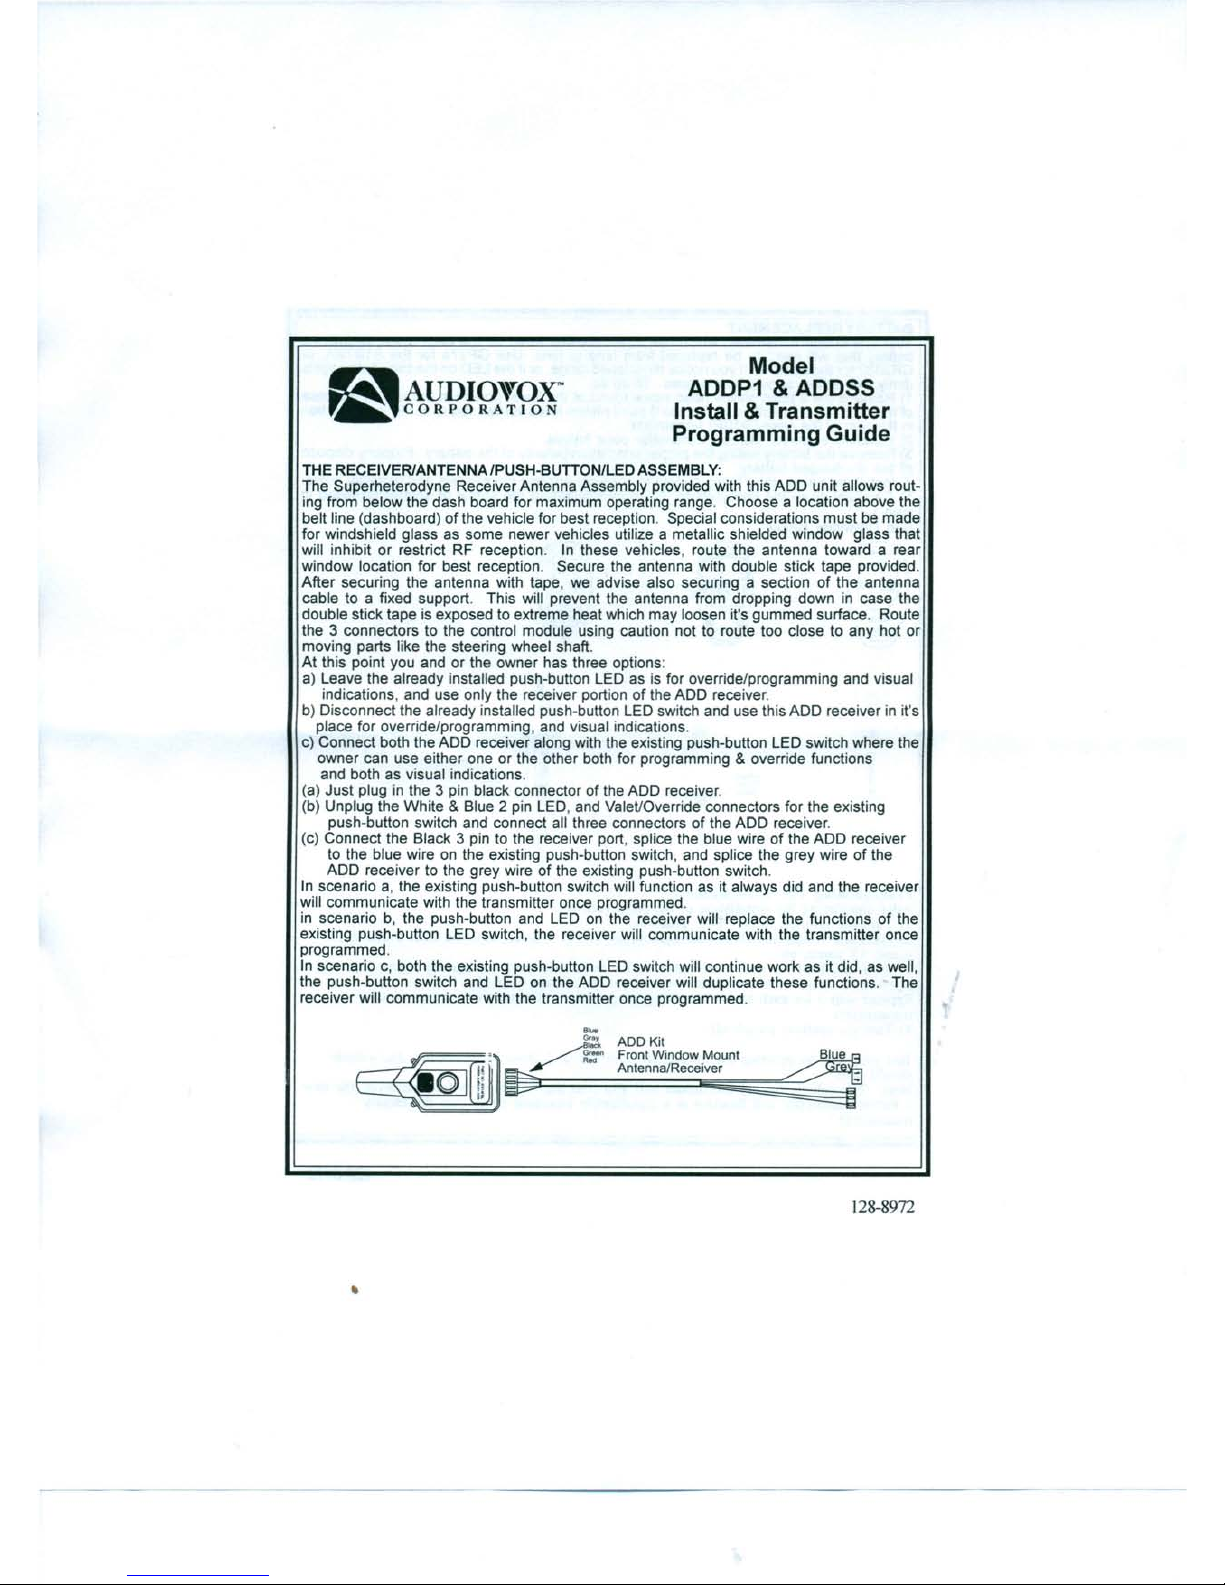
THE RECEIVER/ANTENNA /PUSH-BUTTON/LED ASSEMBLY:
The Superheterodyne Receiver Antenna Assembly provided with this ADD unit allows rout-
ing from below the dash board for maximum operating range. Choose a location above the
belt line (dashboard) of the vehicle for best reception. Special considerations must be made
for windshield glass as some newer vehicles utilize a metallic shielded window glass that
will inhibit or restrict RF reception. In these vehicles, route the antenna toward a rear
window location for best reception. Secure the antenna with double stick tape provided.
After securing the antenna with tape, we advise also securing a section of the antenna
cable to a fixed support. This will prevent the antenna from dropping down in case the
double stick tape is exposed to extreme heat which may loosen it's gummed surface. Route
the 3 connectors to the control module using caution not to route too close to any hot or
moving parts like the steering wheel shaft.
At this point you and or the owner has three options:
a) Leave the already installed push-button LED as is for override/programming and visual
indications, and use only the receiver portion of the ADD receiver.
b) Disconnect the already installed push-button LED switch and use this ADD receiver in it's
place for override/programming, and visual indications.
c) Connect both the ADD receiver along with the existing push-button LED switch where the
owner can use either one or the other both for programming&override functions
and both as visual indications.
(a) Just plug in the 3 pin black connector of the ADD receiver.
(b) Unplug the White&Blue 2 pin LED, and ValeVOverride connectors for the existing
push-button switch and connect all three connectors of the ADD receiver.
(c) Connect the Black 3 pin to the receiver port, splice the blue wire of the ADD receiver
to the blue wire on the existing push-button switch, and splice the grey wire of the
ADD receiver to the grey wire of the existing push-button switch.
In scenario a, the existing push-button switch will function as it always did and the receiver
will communicate with the transmitter once programmed.
in scenario b, the push-button and LED on the receiver will replace the functions of the
existing push-button LED switch, the receiver will communicate with the transmitter once
programmed.
In scenario c, both the existing push-button LED switch will continue work as it did, as well,
the push-button switch and LED on the ADD receiver will duplicate these functions. The
receiver will communicate with the transmitter once programmed .
•....
"'!l. ADD Kit
--~~~~1i: ~:
Front Window Mount
f"
7 /, A Iiil ~
R,
Antenna/Receiver
'- ~".0
!i~~
128-8972
•
Page 2
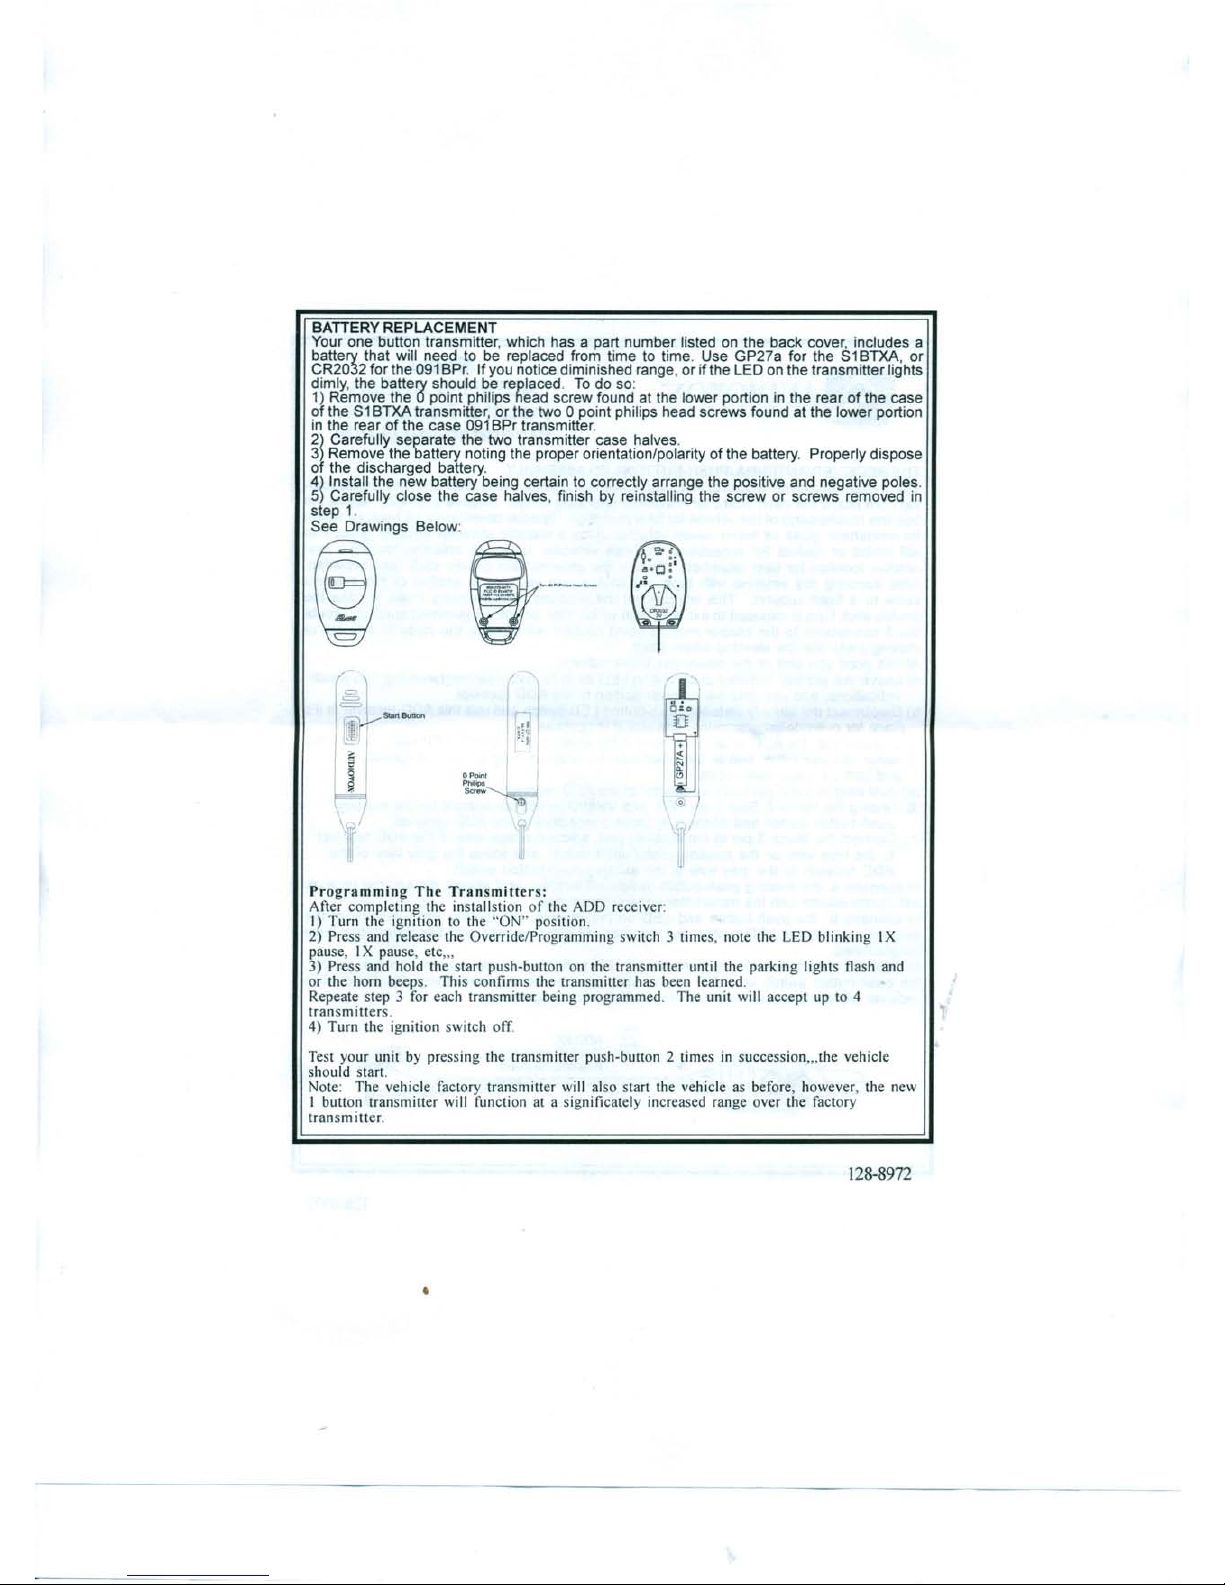
BATIERY REPLACEMENT
Your one button transmitter, which has a part number listed on the back cover, includes a
battery that will need to be replaced from time to time. Use GP27a for the S1 BTXA, or
CR2032 for the 091 BPr. If you notice diminished range, or if the LED on the transmitter lights
dimly, the battery should be replaced. To do so:
1) Remove the 0 point philips head screw found at the lower portion in the rear of the case
of the S1 BTXA transmitter, or the two 0 point philips head screws found at the lower portion
in the rear of the case 091 BPr transmitter.
2) Carefully separate the two transmitter case halves.
3) Remove the battery noting the proper orientation/polarity of the battery. Properly dispose
of the discharged battery.
4) Install the new battery being certain to correctly arrange the positive and negative poles.
5) Carefully close the case halves, finish by reinstalling the screw or screws removed in
step 1.
See Drawings Below:
~
=
(
=
=
Start Button
11
I
I ;~11
.
:~
E
I
I
§
OPoinl
~
Philips
screw
~
\I~
r
'-Ii
Programming The Transmitters:
After completing the installstion of the ADD receiver:
I) Turn the ignition to the "ON" position.
2) Press and release the Override/Programming switch 3 times, note the LED blinking IX
pause, I X pause, etc.;
3) Press and hold the start push-button on the transmitter until the parking lights flash and
or the horn beeps. This confirms the transmitter has been learned.
Repeate step 3 for each transmitter being programmed. The unit will accept up to 4
transmitters.
4) Turn the ignition switch off.
Test your unit by pressing the transmitter push-button 2 times in succession.i.the vehicle
should start.
Note: The vehicle factory transmitter will also start the vehicle as before, however, the new
I button transmitter will function at a significately increased range over the factory
transmitter.
128-8972
•
 Loading...