

Page 1
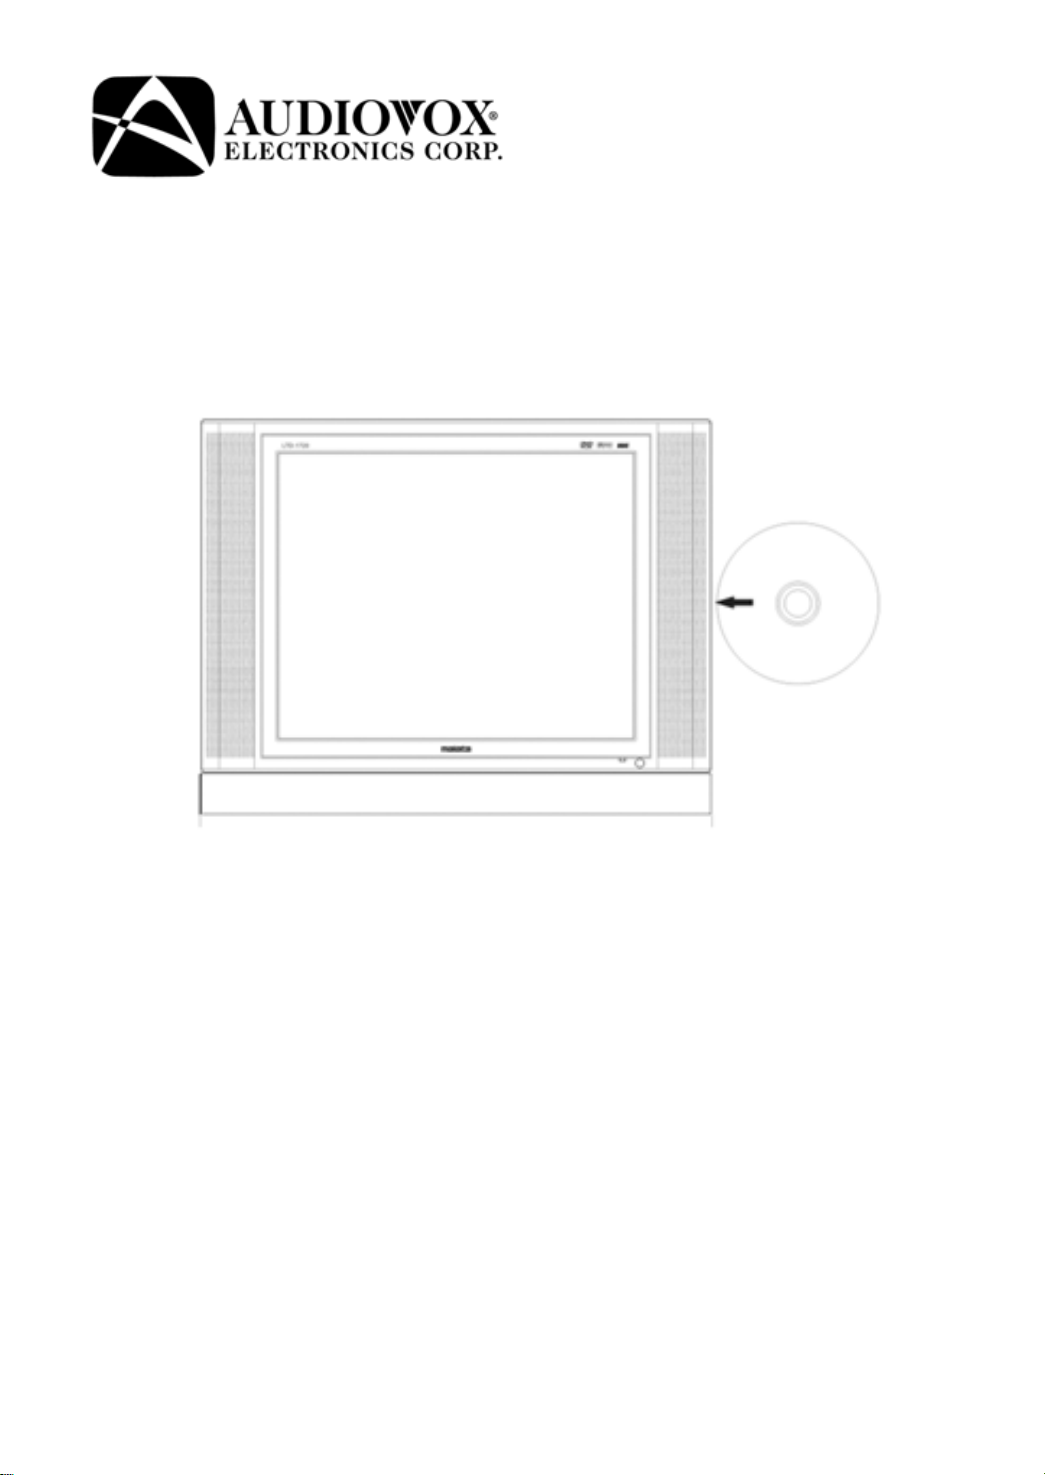
LCD TV
A
Operating Manual
FPE1505DV
Before connecting, operating or adjusting this product, please read the manual thoroughly
FOR ASSISTANCE CALL 1-800-645-4994
OR VISIT US AT WWW.AUDIOVOX.COM
1287387
0
Page 2

Table Of Contents
Table of Contents -------------------------------------------------------------------------
1
Important Safety Instruction -------------------------------------------------------
Characteristic Features ---------------------------------------------------------------
Disc Information ---------------------------------------------------------------------------
Front Panel -----------------------------------------------------------------------------------
Top and Right Panel---------------------------------------------------------------------Rear Panel
--------------------------------------------------------------------------------------
Remote Control --------------------------------------------------------------------------
Remote Control Drawing --------------------------------------------------------------------
Preparation Of Remote Control -----------------------------------------------------------
Using Of Remote Control -------------------------------------------------------------------
System Connections --------------------------------------------------------------------
Connecting To AV Signal Source -----------------------------------------------------------
Connecting To A Personal Computer -----------------------------------------------------------
Connecting To TV-Signal Input -------------------------------------------------------------
Connecting To Power Adapter --------------------------------------------------------------------
2
4
5
6
7
8
9
9
11
1
1
12
12
13
14
15
Connecting To Headphone ------------------------------------------------------------------------
TV Function
--------------------------------------------------------------------------------------
AUX Function ------------------------------------------------------------------------------------
S-VIDEO Function----------------------------------------------------------------------------Computer Screen Function
------------------------------------------------------------
Play Operation ---------------------------------------------------------------------------------
DVD Playback ---------------------------------------------------------------------------------------
CD Playback -----------------------------------------------------------------------------------------
JPEG Playback ------------------------------------------------------------------------------------
Playback Functions ------------------------------------------------------------------------
System Setup ----------------------------------------------------------------------------------
Troubleshooting -----------------------------------------------------------------------------
Specifications --------------------------------------------------------------------------------
15
16
22
23
24
2
25
26
27
28
31
35
36
5
- -
1
Page 3
Important Safety Instruction
WARNING: TO REDUCE THE RISK OF FIRE OR ELECTRIC SHOCK, DO
NOT EXPOSE THIS APPLIANCE TO RAIN OF MOISTURE.
IMPORTANT FOR LASER PRODUCTS
CLASS 1 LASER PRODUCT
DANGER: Laser radiation may escape when the unit is opened and interlock fails or is defeated.
Avoid direct exposure to beam.
CAUTION:
These service instructions are for use by qualified service personnel only. To reduce the risk of
electric shock, do not perform any servicing other than those contained in the operating
instructions unless you are qualified to do so.
POWER SUPPLY:
Connect the supplied adapter to the rear of the unit in the jack marked “DC12V IN”. Plug the
two-prong end of the power cord to an AC100-240V outlet. If the unit will not be used for a long
time, remove the plug from the outlet.
NOTE:
Before plugging the power cord into an AC outlet, make sure that all of the other connections for
the features you plan to use have been made. (VGA and AUDIO PC input, AV input, Headphones
and Antenna)
The lightning flash with arrowhead symbol, within an equilateral triangle, is intended
to alert the user to the presence of uninsulated “dangerous voltage” within the
product’s enclosure that may be of sufficient magnitude to constitute a risk of electric
shock.
The exclamation point within an equilateral triangle is intended to alert the user to the
presence of important operating and maintenance (servicing) instructions in the
literature accompanying the appliance.
2
Page 4

Important Safety Instructions
Note:
1. Read these instructions.
2. Keep these instructions.
3. Heed all warnings.
4. Follow all instructions.
5. Do not use the unit near water.
6. Clean only with dry cloth.
7. Do not block any ventilation openings. Maintain well-ventilated conditions around the unit. Do
not place on anything that blocks ventilation. Install in accordance with the manufacturer’s
instructions.
8. Do not install near any heat sources such as radiators, heat registers, stoves, or other devices
(including amplifiers) that produce heat.
9. Do not defeat the safety purpose of the polarized or grounding-type plug. A polarized plug has
two blades with one wider than the other. If the provided plug does not fit into your outlet,
consult an electrician for replacement of the obsolete outlet.
10. Protect the power cord from being walked on or pinched particularly at plugs, convenience
receptacles, and the point where they exit from the apparatus.
11. Only use attachments/accessories specified by the manufacturer.
12. Use only with the cart, stand, tripod, bracket, or table specified by the
manufacturer, or sold with the unit. When a cart is used, use
caution when moving the cart/unit combination to avoid injury
in the event of a tip-over.
13. Unplug this unit during lightning storms or when unused for long periods of time.
14. Refer all servicing to qualified service personnel. Servicing is required when the unit has been
damaged in any way, such as power-supply cord or plug damage, liquid has been spilled or
objects have fallen into the unit, the unit has been exposed to rain or moisture, does not
operate normally, or has been dropped.
15. Apparatus shall not be exposed to dripping or splashing water or other. No objects filled with
liquids, such as vases, shall be placed on the apparatus.
Copyright Protection
This product incorporates copyright protection technology that is protected by U.S. patents and
other intellectual property rights. Use of this copyright protection technology must be authorized
by Audiovox, and is intended for home and other limited viewing uses only unless otherwise
authorized by Audiovox. Reverse engineering or disassembly is prohibited.
- -
3
Page 5

Characteristic Features
This product consists of a DVD player, LCD display and TV receiver integrated and
conveniently packaged in to one system.
Operating Modes
DVD mode
TV mode
AUX mode
S-VIDEO mode
PC mode
High Quality Audio and Video
High Resolution
Adopted MPEG2 decoding format to achieve
horizontal resolution greater than 500 lines.
Superior audio
Built-in Dolby Digital decoder to output high
quality sound effects.
Screen Aspect Ratio
Supports the picture size of a normal screen
(4:3).
Special playback.
Support multi-angle, multi-language and
multi-subtitle playback.
Liquid Crystal Display (LCD)
Designed with color TFT liquid crystal display
clearly shows the data.
Stereo amplifier
Built-in 2x3w speakers and BBE sound
processor.
Advanced Playing Features
Compatibility
DVD, CD, CD-R, CD-RW, JPEG discs
compatible.
Zoom Function
Enlarge the picture to enhance your
enjoyment.
All Playback Functions
Fast forward and reverse, repeat playback,
program playback.
Search By Time
Ability to search disc contents via time code.
Last Memory Playback
Continue to play from where you stopped
previously while still in POWER ON status
under DVD mode.
NOTE: It is normal for a LCD screen to
experience the appearance of light or dark
spots appearing on the screen.
- 4 -
Page 6
Disc Information
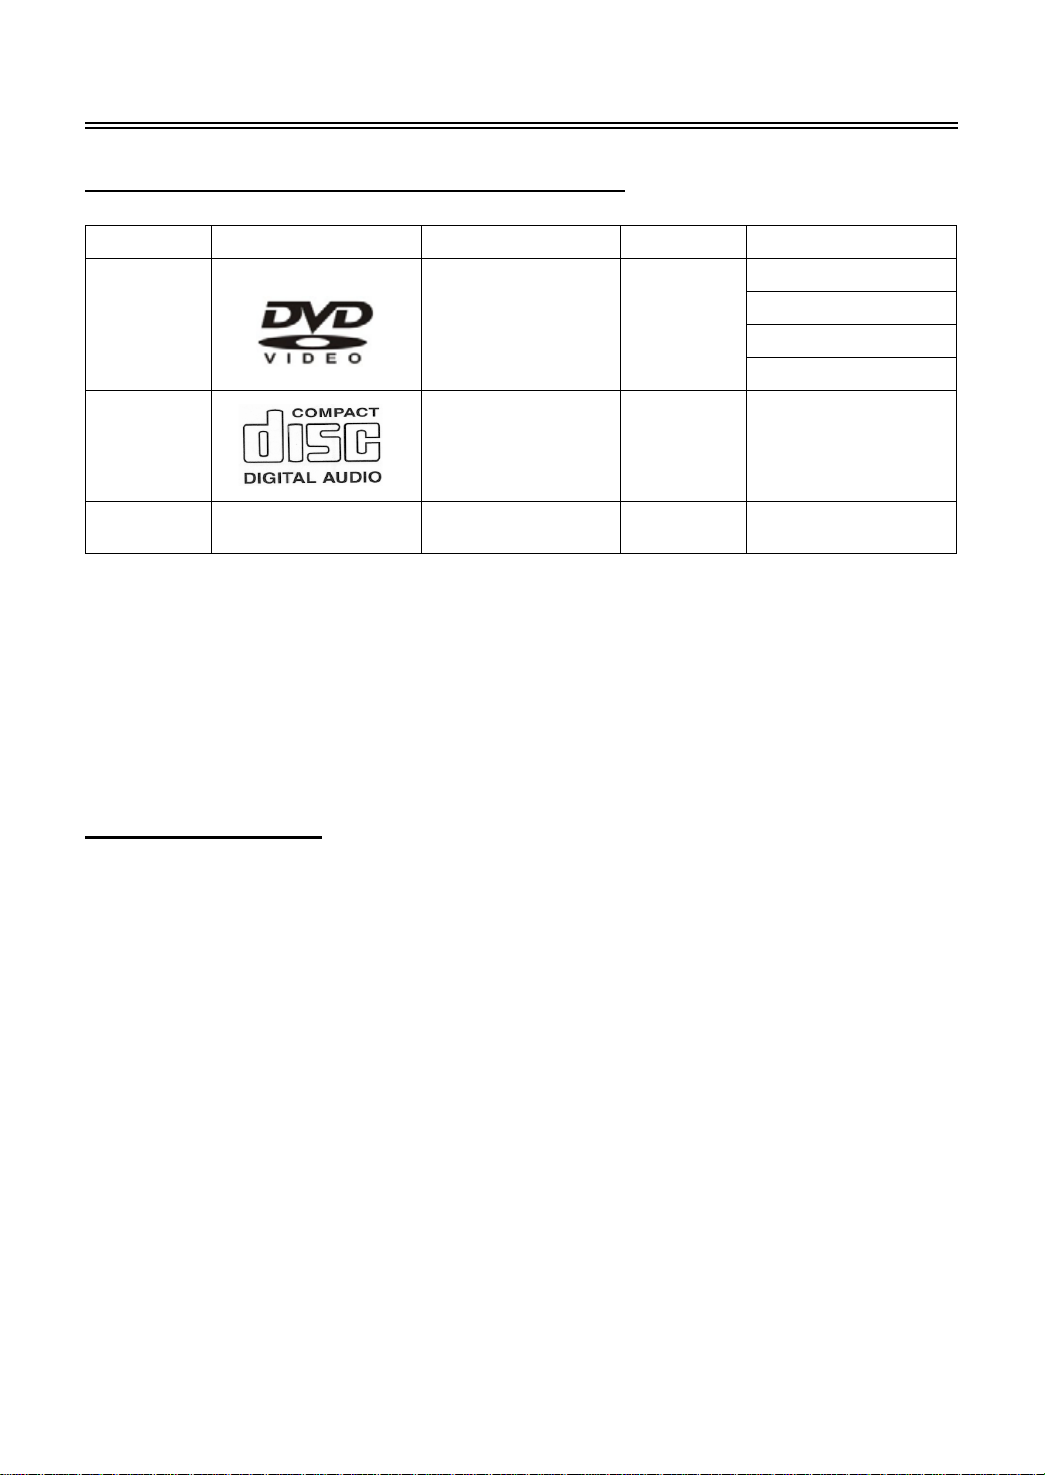
Discs Formats Supported By This Player
DISC LOGO CONTENTS SIZE MAXIMUM TIME
DVD
CD Audio 12cm 74min
JPEG Still high resolution 12cm
The operating mode of some DVD discs is specified by the disc maker’s software. Refer to the
instructions with the disc.
The DVD Player will play most recordable (CD-R) or erasable (CD-RW) CDs, but playback of
CD-R or CD-RW discs created on a computer requires proper formatting and finalization of the
disc for audio playback. Some computers and/or software programs may not be capable of
creating compatible discs.
Audio+Video
(active picture)
12cm
About Disc Terms
Title
Generally, pictures or music compressed on a DVD are divided into several sections, “title”.
Chapter
The smaller section unit of picture or music in a DVD under the title, usually one title is comprised of
one or more chapters and each of them is numbered for easy searching. Some discs may not have
chapters.
Track
A segment of picture or music on a CD. Each track is numbered for searching.
133min(SS-SL)
242min(SS-DL)
266min(DS-SL)
484min(DS-DL)
- 5 -
Page 7
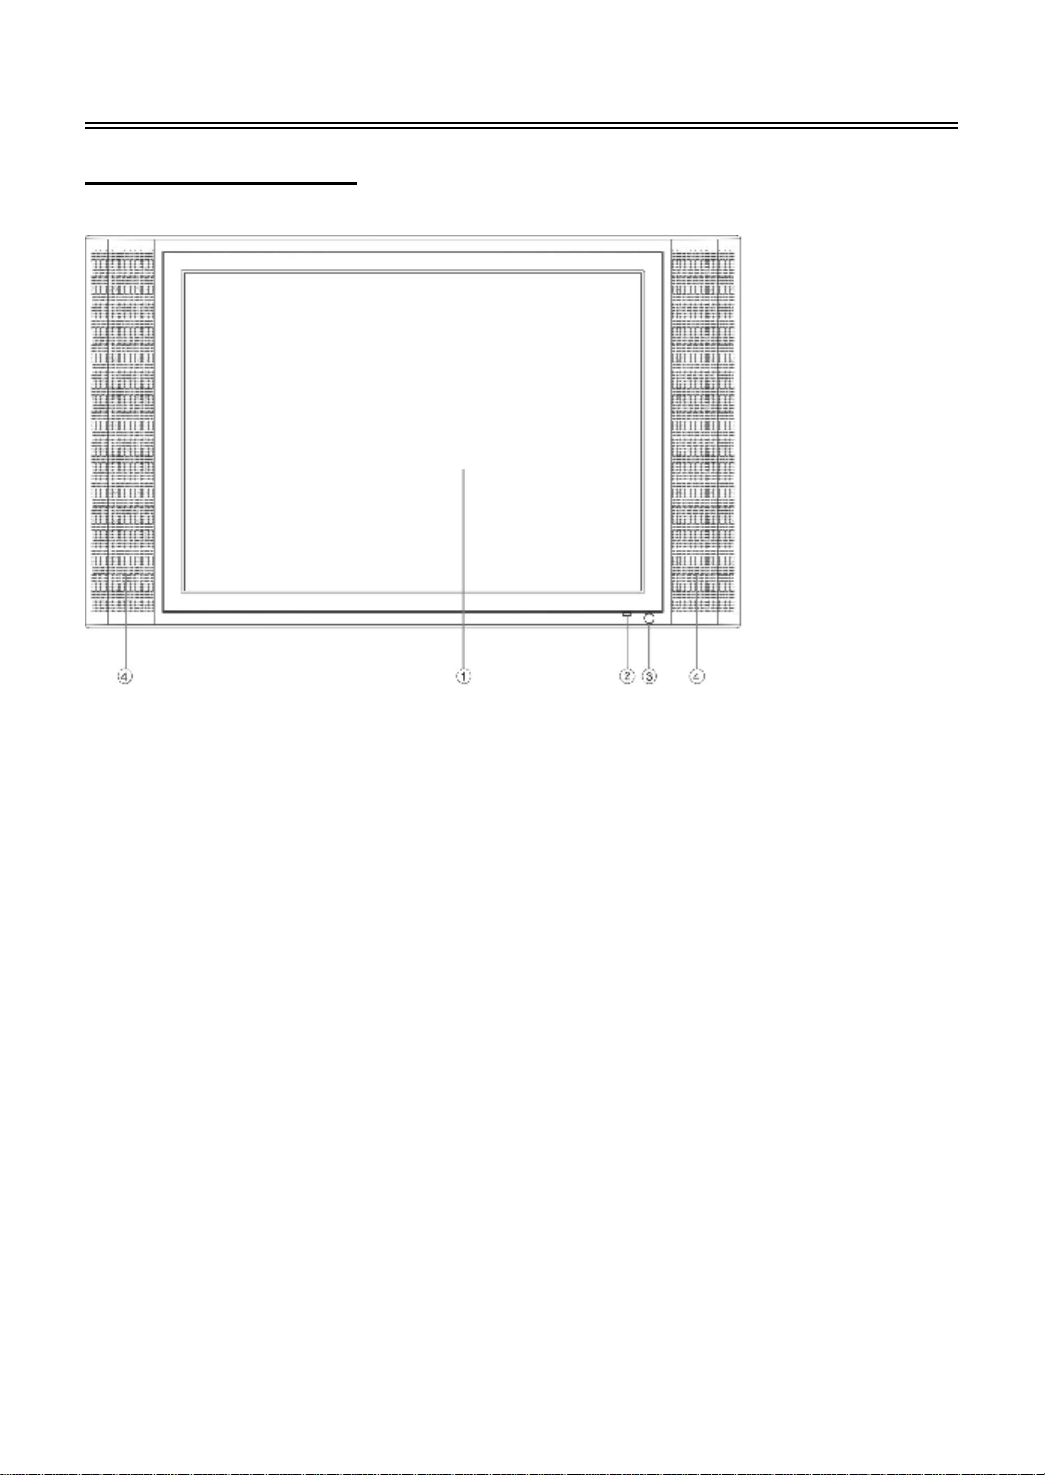
Front Panel
Front Panel Drawing
1. LCD Screen
Displays high-resolution pictures.
2. Power Indicator
In normal playback mode, the indicator lights green, the indicator lights red when in standby.
3. Remote sensor
Receives the signal from the remote control.
4. Speakers
Two speakers for the production of stereo audio.
- 6 -
Page 8
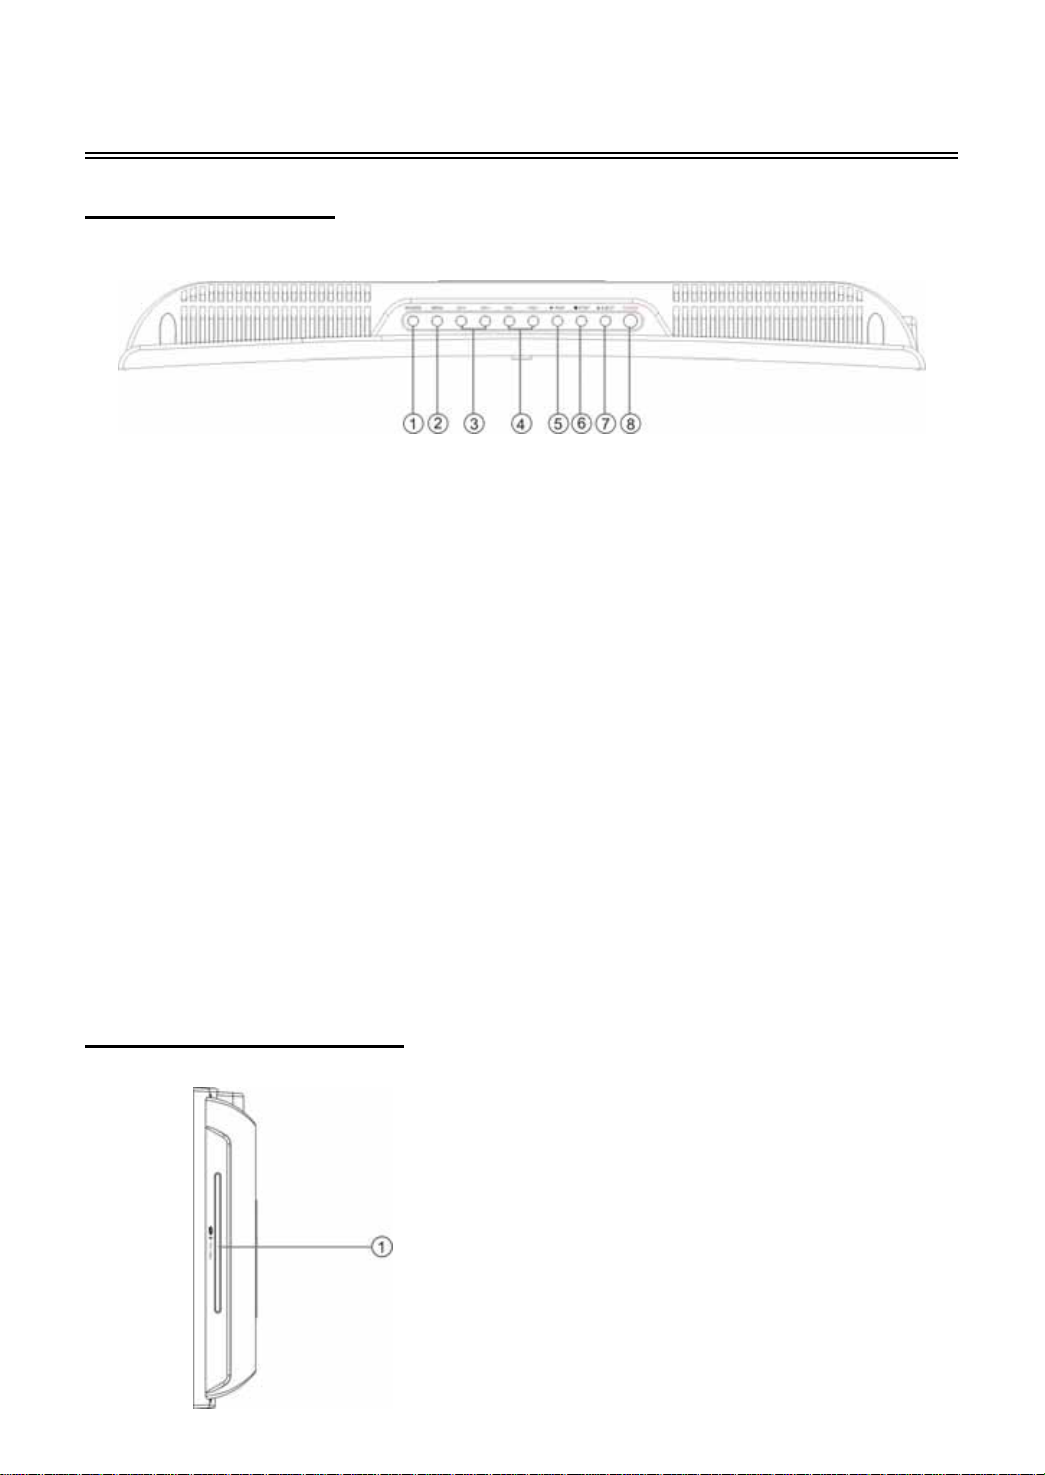
Top and Right Panel
Top Panel Drawing
1. SOURCE button
Press to select different modes of operation
DVD, TV, AUX S-VIDEO and PC.
2. MENU button
Press to access the units set up screen. The
same function as the
on the remote control.
3. CH / button
Press to select channels. The
moves the channel selection forward and
button moves the channel selection
the
backward.
4. VOL
Press to decrease or increase the volume.
5. PLAY button
-/+ button
SCREEN SETUP button
button
Unit Right Side Drawing
Press to begin playback of the inserted disc
under DVD mode.
6. Stop
Press once to stop playback of a disc when in
DVD mode. When PLAY button is pressed,
playback will resume from where the disc
stopped.
Press the STOP button twice to stop playback
completely. When PLAY button is pressed,
playback will resume from the beginning of the
disc.
7. EJECT button
Press to eject the disc, while in the DVD mode.
8. POWER button
Press to activate or to place the unit in
STANDBY mode.
1. Disc tray: Used for loading disc.
- 7 -
Page 9
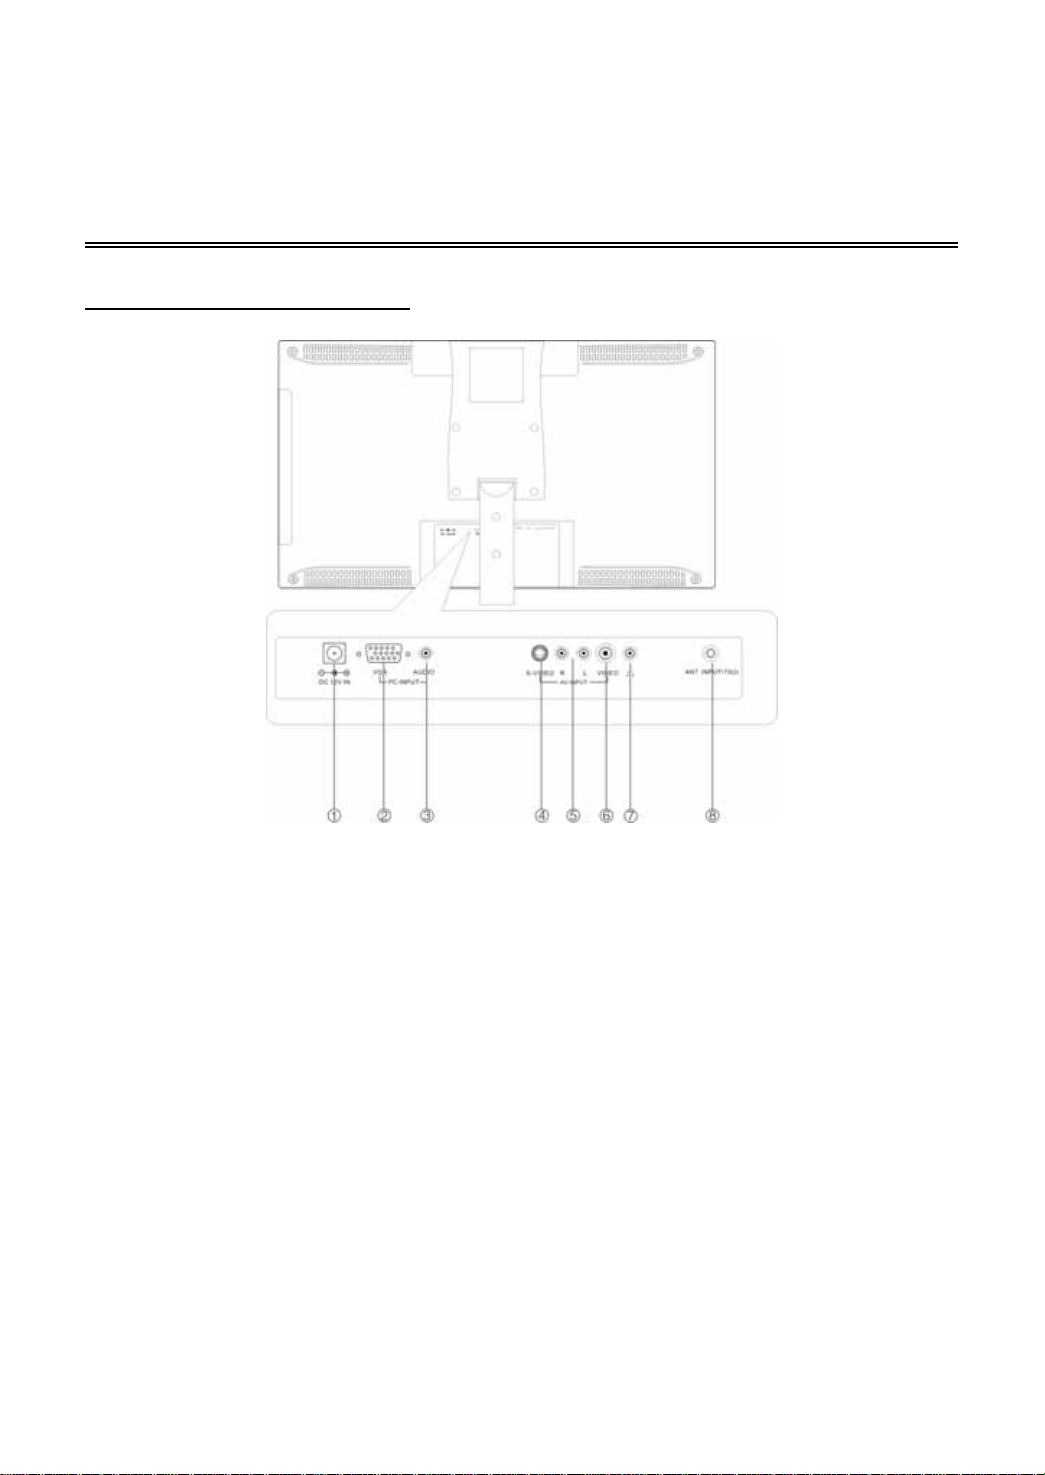
Rear Panel
Unit Rear Panel Drawing
1. DC 12V IN
Connection for applying to the power to unit using the power cord.
2. VGA Input jack
Connection to the VGA output jack on a personal computer.
3. PC Audio Input jack
Connection to the audio output jack on a personal computer.
4. S-Video input jack
Connection for S-Video input.
5. L/R audio input jacks
Connection for external audio input under S-VIDEO or AUX mode.
6. Video input jack
Connection for external video input.
7. Headphone jack
For headphone connection, when headphones are plugged in, the built-in speaker will automatically
be deactivated.
8. Antenna in jack
Connected to external antenna for TV reception.
- 8 -
Page 10

Remote Control
Remote Control Drawing
1. POWER button
Press to access to or exit the STANDBY
mode.
2. SOURCE button
Press to select modes (DVD, TV, S-VIDEO,
VIDEO and PC). The unit can memorize the
last mode when exit from the standby mode.
3. P. STD button
Press to change the picture mode to four
factory presets.
4. BBE button
Press to shift between BBE 1, BBE 2, and
BBE OFF. BBE is available for activating
high quality sound effects.
5. VOLUME
Press to increase the volume level.
6. VOLUME
Press to decrease the volume level.
7. SCREEN SETUP button
Press to access the selected device setup
screen.
8. OK button
Press to confirm the selection.
Press to exit from the LCD setup menu.
9.
Press to select menu items or settings.
Under TV mode, use the , buttons to
go to the next channel or the previous
channel. Use the , buttons to select
items in the setup menu.
10. MENU button
Press to access the disc menu during DVD
playback.
11. Play
Press to play the disc under DVD mode.
Press to choose audio stereo, mono or SAP
while in the TV mode.
12. Stop
In DVD mode, press to stop playback, then
press the PLAY button to resume normal
playback. Press the STOP button twice to
stop completely.
On TV mode, press to return to the channel
last viewed.
13. SUBTITLE button
When a DVD is playing, press to select a
subtitle language (if the DVD disc contains
multiple subtitles).
14. CLEAR button
Press to clear incorrect input while in DVD
mode.
+
-
/ MTS button
■
- 9 -
Page 11

Remote Control
15. REPEAT button
Press to repeat a chapter, track, title, or all
content under DVD mode.
16. A-B Repeat
Press to mark a segment to repeat between
A and B.
17. Previous Skip
Press once to skip to the beginning of the
current chapter/track.
Press twice repeatedly to skip to the previous
chapter/track for some discs under DVD
mode.
18. Next Skip
Press to skip to the next chapter/track for
some discs under DVD mode.
19. Eject
Press to open or close the disc tray.
20. MUTE button
Press to turn on/off the speaker output.
21. 0-9 number buttons
Select numbers by pressing these buttons.
22. -/--
Under TV mode, press to choose the channel.
For example: If you want to select channel 52,
you can press the button twice repeatedly
until OSD display --, and then input number
buttons 5, 2.
23. +10 button
Select track number greater than 9, in DVD
mode.
24. SCAN button
Press to scan the channels under TV mode.
25. DVD SETUP button
Press to access the DVD setup menu under
DVD mode.
26. DVD OSD button
Press to display the current playback status
of DVD disc
27. AUDIO button
Press to access various audio languages (if
the DVD disc contains multiple audio
languages).
s.
28. TITLE button
When a DVD disc is playing, press to go to
title menu if the disc contains.
29. GO TO button
Press to access or exit from the search menu
under DVD mode.
30. Pause button
Under DVD mode, Press to pause the
playback. Press the PLAY button to resume
normal playback.
Under TV mode, press to select the sleep
time. When the sleep time comes to the end,
the unit will enter the standby mode
automatically.
31. PROGRAM button
Allows the user to play the contents in a
programmed sequence under DVD mode.
32. ZOOM button
When a DVD is playing, press this button to
activate zoom function.
33. ANGLE button
Press to access various camera angles (if
the DVD disc contains multiple camera
angles).
3
4. SLOW button
Press to a
under
3
5.
Press
3
6.
Press to search backward under DVD mode.
While in DVD mode, if LCD setup menu is
used, the buttons for DVD opera
remote control is not available.
ctivate slow forward playback
DVD mode.
to search forward under DVD mode.
tion on the
- 10 -
Page 12
Remote Control
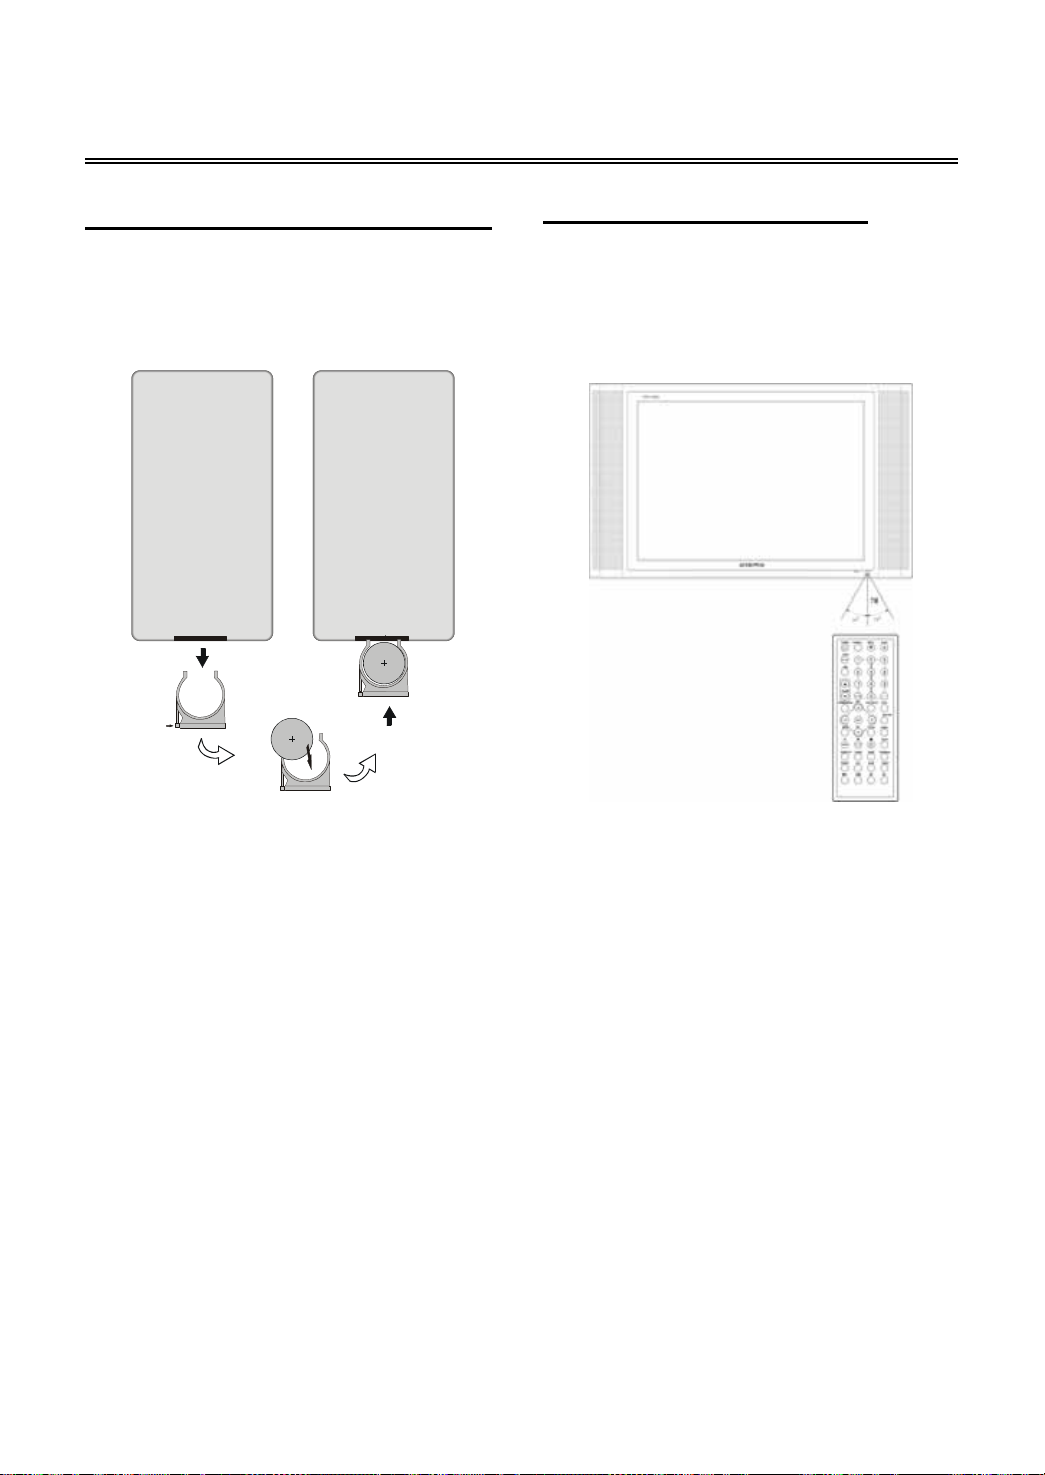
Preparation of Remote Control
Insert the batteries with the positive (+) polarity
facing up when looking at the back of the
remote..
1. Remove the empty battery receptacle.
2. Remove the film from the battery.
3. Insert the battery into the receptacle and
insert the receptacle into the remote.
4. Under normal use the battery will last for six
months.
5. Remove the battery when the remote is not
going to be used for a long period of time.
Using of Remote control
Use of the remote control must be at a distance
less than or equal 7m and within a 60 degree
angle of the sensor located on the front of the
unit.
The operating distance may vary depending
n the surrounding brightness. o
Notes:
Do not point bright lights directly at the
remote control sensor.
Do not place objects in front of the unit’s
remote sensor and the remote control
Do not use the remote control to
simultaneously operate other equipment.
- 11 -
Page 13

System Connections
Connecting To AV Signal Source
Use the supplied audio/video cable to connect the unit to an external AV output source.
Use the S-video cable to connect the unit to an external AV source with S-video output. Connections
should be made as follows:
When connecting to an external AV source insure that the source, cable and unit color coding all
match.
After connecting press the SOURCE button to select AUX or S-VIDEO mode to view the external
devices via the unit’s AV input jacks.
- 12 -
Page 14

System Connections
Connecting To a Personal Computer
The unit can be used as a PC display screen, by connecting the unit to the computer via the VGA
connector. Also connect the Audio In jack on the rear panel of the unit to the audio output jack of
the computer. See the below figure:
After connecting, press the SOURCE button on the remote control to PC mode.
And set the PC Display resolution: 1024×768@60Hz.
- 13 -
Page 15

System Connections
Connect To TV-Signal Input
Attach the coax cable to the jack marked ANT INPUT on the rear panel of the unit. Once this
connection has been made you can enjoy TV programs.
After connecting, press the SOURCE button on the remote control on top of the unit to select TV mode.
- 14 -
Page 16

System Connections
Connecting To Power Adapter
Power is supplied to the unit through the power adapter. One end of the power adapter connects to
the DC12V IN jack on the rear panel and the other and the other to a outlet rated at AC100-240V.
(See to the picture below).
Connecting To a Headphone
Plug the headphone into the jack on the rear panel of the unit. When the headphone is plugged in,
the unit’s internal speakers will be displayed.
- 15 -
Page 17

TV Function
Basic Operation
Connect the antenna to the antenna jack on the unit’s rear panel.
Connect the power supply cord to the +12VDC input power jack and 120VAC power outlet. If the
player is in standby mode, press the POWER button to turn on the unit’s power.
Press the unit’s SOURCE button to select TV mode.
Press the unit’s remote control ▼, ▲ (direction buttons) or use the number buttons directly, to select
the channel that you wish to view.
It is recommended that you perform the following steps when the device is powered up for the first
time.
Picture Parameter setup
Press the remote control SCREEN SETUP button once to enter the picture setup menu. The
following menu will be displayed:
Use the ▼, ▲ buttons to move cursor to the item you want to set (Bright, Contrast, Saturation, Hue
and Sharpness).
Use the ►, ◄ buttons to select the desired values.
Press the OK button on the remote control to exit the setup menu.
TV System Setup
Press the SCREEN SETUP button twice repeatedly on the remote control to enter the tuning setup
menu, the following menu will be displayed:
PICTURE
►BRIGHT 050
CONTRAST 060
SATURATION 070
HUE 050
SHARPNESS 002
TUNING
►CHANNEL 002
AFC OFF
SKIP ON
TV MODE
FINE TUNING
AUTO MEMORY
VHF-L 7%
CABLE
►►►
- 16 -
Page 18

TV Function
When the TV System Setup menu is active, use the▼, ▲ buttons to select items you want to set,
press the ►, ◄ buttons to set the selected item to the desired setting and press the OK button to exit
from the menu.
Channel
Use the▼, ▲ buttons to select CHANNEL, use the ►, ◄ buttons to change the number.
AFC (Auto Frequency Control)
Use the▼, ▲ buttons to select AFC, press the ►, ◄ buttons to select ON or OFF. When ON, the
player will automatically fine-tune the frequency.
Skip
Use the▼, ▲ buttons to select SKIP, press the ►, ◄ buttons to select ON or OFF.
When “ON” is selected the current channel will be added to the unit’s skip list and will be skipped
when you scroll through channels.
When “OFF” is selected the current channel will be removed from the unit’s skip list and will be
played when you scroll through the channels.
TV MODE
Use the ▼ or▲ button to select TV MODE, press the ►, ◄ buttons to select AIR or CABLE. There
are 68 channels (2 to 69) for AIR and 124 channels for CABLE (2 to 125).
The unit supports HRC and IRC cable TV signal systems.
Fine Tuning
Press the ▼, ▲ button to move cursor to FINE TUNING.
Press the ►, ◄ buttons to fine-tune forward and backward.
For improved tuning it is recommended that you activate the automatic fine-tuning feature. AFC will
turn off automatically after the function is complete.
Auto Memory
Press the ▼, ▲ button to move the cursor to “Auto Memory”.
Press the ► direction buttons to enter auto memory mode, the following screen will be displayed as
the unit searches for stations with sufficient signal strength to add to memory.
SEARCHING CH002
EXIT
VHFL 22%
- 17 -
Page 19

TV Function
The auto memory tuning operation will take a few minutes to complete. When the tuning operation
completes the unit will automatically exit and will have memorize the stations with sufficient signal
strength.
During auto memory tuning, press the ◄ button to exit the auto memory tuning process and have the
unit commit all stations found to this point to memory.
General Setup
Press the SCREEN SETUP button three times repeatedly on the remote control to access the TV
setup menu.
In this menu, use the▼, ▲ buttons to select the item you want to set. Once the desired item has
been selected, press the ►, ◄ buttons to scroll through the available options. Once the desired
option has been located, press OK to save and exit from the menu.
Language
Press the ►, ◄ buttons to select the desired language.
Reset
Press the►, ◄ buttons to restore the default settings.
Caption
Press the ►or◄ button to select one of the available caption modes:
CC1,CC2,CC3,CC4,T1,T2,T3,T4 and OFF.
V-Chip Setting
The V-Chip setting is a parental control rating function. Depending on the broadcaster, you can edit
violence, language and explicit content.
Use the ▼,▲ buttons to select the V-CHIP SETTING, press the ► button to enter, “PIN _ _ _ _” will
be displayed on the lower portion of the screen, use the number buttons to enter your PIN.
GENERAL
►LANGUAGE ENGLISH
RESET
CAPTION OFF
V-CHIP SETTING
GENERAL
►LANGUAGE ENGLISH
RESET
CAPTION CC1
V-CHIP SETTING
PIN: _ _ _ _
- 18 -
Page 20

TV Function
V
Note: The default password is 3308. This password will always be effective even after you change
the PIN.
When you input the password, the following menu will be displayed:
At this menu, use the▼
, ▲ buttons to position the cursor over the item you want to set, use ► to
enter the lower menu and reveal the selections allowed. P
menu.
V-Chip
Use the ▼or▲ button to position the cursor over V-CHIP,
TV Rating
Use the
▼or▲ button to position the cursor over TV RATING, press the ► button to enter the TV
rating menu. The following menu will be displayed on the screen:
U = UNBLOCKED, L =BLOCKED,
D- SUGGESTIVE DIALOGUE, L- INDECENT LANGUAGE S- EXPLICIT CONTENT,
V- VIOLENCE, FV- FANTASY VIOLENCE
At this menu, use the ▼or▲ button to position the cursor over the items you wish to change, press
► button to change the item, press the ◄ button to return to the V-CHIP SETTING menu.
the
MPAA Rating
At the V-CHIP setting menu, use the
press the
► button to enter the MPAA rating menu. The following menu will be displayed:
-CHIP SETTING
►V-CHIP ON
TV RATING
MPAA RATING
CHANGE PIN
use the ► button to set to ON or OFF.
TV RATING
L/U FV D L S V
TV-Y U - - - - TV-Y7 U U - - - -
TV-G U
TV-PG U - U U U U
TV-14 L - U L U U
TV-MA L
: PREVIOUS : NEXT
: CHANGE : EXIT
- - - - -
- - L U U
▼or▲ button to position the cursor over the MPAA RATING,
ress the OK button to exit from the
- 19 -
Page 21

TV Function
V
G
PG
PG13 L
R L
NC17 L
X L
: PREVIOUS : NEXT
: CHANGE : EXIT
MPAA RATING
L
L
Use the ▼or▲ button to position the cursor over items you want to change, and then press the ►
button to change the settings. When complete press the ◄ button to return to the V-CHIP
SETTING menu.
Change Pin
In the V-CHIP setting menu, use the
press the
Use the number buttons to input the new password and re-enter it again for confirmation and
press the enter button to exit.
When the rating level of the input signal matches with the set rating, “PROGRAM RATING” will be
displayed on the blue screen. Until the rating is reset, the program can be played. See the below
figure:
► button to enter the change PIN menu shown below.
►CHANGE PIN
▼or▲ button to position the cursor over MPAA RATING,
-CHIP SETTING
V-CHIP ON
TV RATING
MPAA RATING
NEW PIN: _ _ _ _
CONFIRM: _ _ _ _
PROGRAM RATING
TV-PG
- 20 -
Page 22

TV Function
Choosing a Multi-Channel Sound (MTS) Soundtrack
Depending on the particular program being broadcast, you can listen to Stereo, Mono or a Separate
Audio Program. (SAP audio is usually a foreign-language translation. Sometimes SAP has unrelated
information like news or weather.)
Under TV mode, choose a channel with signal, the LCD screen will display the following:
CH002
BTSC STEREO
Stereo
There are four modes: BTSC STEREO, BTSC SAP, BTSC ST+SAP or MONO.
Press the MTS button on the remote control to change the soundtrack, the screen will display the
following:
CH002
BTSC STEREO
Mono
Under BTSC STEREO mode, you can choose mono or stereo.
Under BTSC SAP mode, you can choose mono or SAP.
Under BTSC ST+ SAP mode, you can choose SAP, stereo or mono.
Under MONO mode, there is no selection.
According to the broadcasting program, you can choose the corresponding soundtrack.
Choose Stereo for channels that are broadcasting in stereo.
Choose Mono for channels that are broadcasting in mono, or if you are having difficulty receiving a
stereo signal.
Choose SAP to listen to the Separate Audio Program, which is usually a foreign-language
translation.
- 21 -
Page 23

AUX Function
AUX Function
This unit is equipped with an AUX input, which will allow you to enjoy programs from external
sources. After connecting an external AV signal such as a VCR, camcorder, game player etc.
Press the source button on the remote control to select the AUX input and start viewing the
external source
Picture Parameter setup
Press the SCREEN SETUP button once on remote control to enter picture setup menu. The
following menu will be displayed:
Use the ▼, ▲ button to move cursor to the item you want to set (Bright, Contrast, Saturation, Hue
and Sharpness).
Use the ►, ◄ button to set the desired values.
Press the “OK” button on the remote control and exit from the setup menu.
General Setup
Press the SCREEN SETUP button on the remote control three times to enter the general setup
menu.
Use the ▼, ▲ button to highlight the item you want to change.
Use the
►, ◄ button to set the selected item to desired mode of operation
PICTURE
►BRIGHT 050
CONTRAST 060
SATURATION
HUE
SHARPNESS
070
050
002
Select Language and press the ►, ◄ buttons to select desired language.
Select RESET and press the ►, ◄ buttons to restore the default status.
Select CAPTION V-CHIP SETTING, refer to the TV function paragraph which explains in greater
detail about setting these items.
GENERAL
►LANGUAGE ENGLISH
RESET
CAPTION OFF
V-CHIP SETTING
NTSC-358 60Hz
- 22 -
Page 24

S-VIDEO Function
S-VIDEO Function
This unit is equipped with an S-Video connection, which will allow you to enjoy programs from
external sources. After connecting an external AV signal such as a VCR, camcorder, game player
etc. Press the source button on the remote control to select the S-Video input and start viewing the
external source
Picture Parameter setup
Press the SCREEN SETUP button once on remote control to enter picture setup menu. The
following menu will be displayed:
Use the ▼, ▲ button to move cursor to the item you want to set (Bright, Contrast, Saturation, Hue
and Sharpness).
Use the ►, ◄ button to set the desired values.
Press the “OK” button on the remote control and exit from the setup menu.
General Setup
Press the SCREEN SETUP button on the remote control three times to enter the general setup
menu.
Use the ▼, ▲ button to highlight the item you want to change.
Use the ►, ◄ button to set the selected item to desired mode of operation
PICTURE
►BRIGHT 050
CONTRAST 060
SATURATION
HUE
SHARPNESS
070
050
002
Select Language and press the ►, ◄ buttons to select desired language.
Select RESET and press the ►, ◄ buttons to restore the default status.
Select CAPTION V-CHIP SETTING, refer to the TV function paragraph which explains in greater
detail about setting these items.
GENERAL
►LANGUAGE ENGLISH
RESET
NTSC-358 60Hz
- 23 -
Page 25

Computer Screen Function
This unit’s TFT LCD display may be used as your computer’s monitor. Access the computer setup
menu and follow the steps shown below:
1. Turn off power to the unit and the computer. Connect this unit to the computers VGA port using a
VGA cable.
2. Apply power to the unit and the computer.
3. Press the SOURCE on the remote control to select the “PC” mode;
Press the SCREEN SETUP button once on the remote control to access the PC’s setup menu:
Press the ▼, ▲ button to highlight Bright, press the ►, ◄ button to adjust the desired value.
Bright: This setting allows the user to adjust the picture brightness to the desired level.
Contrast: This setting allows the user to adjust the picture Contrast to the desired level.
Auto: This setting automatically adjusts the display zone and the picture quality.
Clock: This setting allows the user to enlarge or reduce the display horizontal size.
Phase: This setting allows the user to adjust the picture quality.
H. Position: This setting allows the user to adjust the display zone left and right horizontal position.
V. Position: This setting allows the user to adjust the display zone up and down vertical position.
Press the SCREEN SETUP button twice repeatedly to access the PC general setup menu.
Press the ▼/▲ button to highlight the selecting items, press the ►, ◄ button to select setting.
Language: This setting allows the user to select the PC menu language
Color R, Color G, Color B: used to adjust the color level of red, green and blue.
Reset: Press the ► button and all functions in the setup will return to the original factory set mode.
NOTE: Set the PC’s resolution to 1024×768@60Hz.
PICTURE
►BRIGHT 050
GENERAL
►LANGUAGE ENGLISH
RESET
COLOR R 050
COLOR G 050
COLOR B 050
CONTRAST 060
AUTO
PHASE 000
CLOCK 100
H.POSITION 041
V.POSITION 036
1024×768 60Hz
.
- 24 -
Page 26

Play Operation
Preparation: After all connections have been made, turn on the unit and select the desired video
input.
Disc Loading Steps:
1. Press the POWER button on top panel of the unit. The player will detect if there is a disc and
play it automatically if a disc is loaded.
2. Insert the disc into the player with the printed side facing you. (Refer to the below picture.)
3. The disc will be automatically pulled into the tray. "Loading "will be highlighted on the screen
and playback will beg
Warning: Do not play poor quality discs that may damage the player’s lens.
in.
DVD Playback
Menu
Normally there is a selecting menu for DVD discs. You can press the MENU button on the
remote to enter the menu, and use the direction buttons to highlight an item you would like to
select. Press the OK button to select it.
Title & Chapter
Normally there are several titles in a DVD disc, and several chapters (sections) in a title. You
can select any title or chapter quickly by entering the relevant number.
Region Code
The DVD player’s Region code is 1.
- 25 -
Page 27

Play Operation
Language (Audio)
There can be up to 8 audio languages on a DVD disc. When you play a multi-language DVD disc you
can use the AUDIO button on the remote control to select a language.
Subtitle
The DVD player can support multiple kinds of subtitles. When you play a multi-subtitle disc you can
use the SUBTITLE button to select different subtitles.
Various Camera Angles
The movies on some DVDs have been recorded from various camera positions. This lets you enjoy
the same scene from different perspectives. In this case you’ll usually find a marking on the DVD
sleeve.
When playing a DVD containing various camera angles the camera symbol appears on the screen:
Press the ANGLE button repeatedly until the desired perspective is shown. The picture will be
adjusted in 12 seconds.
Volume
During playback, press the VOLUME+ button to increase the volume and press the VOL- button to
decrease the volume.
CD Playback
The player will play all tracks on a CD disc by default. You can use the and (PREV/NEXT skip)
buttons, or the number buttons to select a track.
- 26 -
Page 28

Play Operation
JPEG Playback
JPEG is a common picture format that requires small amounts of storage per image and has low loss
in resolution. Hundreds of pictures can be stored on a disc in this format. In order to view JPEG
photo albums, you can ask your film development company to make a ”PICTURE CD” when they
develop your film.
Normal Playback
Load a JPEG disc in. Use the OK button and the Left/Right direction button to select a submenu with
picture, and then use the Up/Down direction button to select the contents. Many discs have other
contents besides pictures.
Picture Rotation
This can be used only when the picture is normally displayed. Once another picture is selected,
rotation will be cancelled automatically.
During playback you can use the direction buttons to rotate the picture.
Zoom and Move of Picture
The ZOOM button is used to turn on/off the zoom function and the move function.
During zooming status, you can use the direction buttons to move the picture.
During playback, press the STOP button to return to the previous menu.
Some JPEG discs may not support rotation or zooming function.
- 27 -
Page 29

Playback Functions
Stop
Press this button once to stop playback and
then press PLAY button to resume playback
from where it was stopped last. Press the
button twice to stop playback completely. When
the play button is selected, playback will start
from the beginning.
Pause
Press the PAUSE button to pause playback.
Repeat
1. Use the REPEAT button to repeat a chapter
(section), a title, a track or a disc, and also to
cancel repeat.
2. Use the A-B button on the remote control to
repeat a section A to B. The player can repeat
any section A-B. Press once to set the starting
point A, the second time to set the ending point
B, and the third time to cancel repeat.
Some discs do not support the repeat
function.
Search By Time
You can use the GOTO button on the remote
control to search by time, namely to play from a
specific time.
Press the GOTO button to display a menu, and
uses the direction buttons to select Time, Title
or Chapter. Use the number buttons to input
the time (hour, minute, and second) and the
player will play the chosen titles or chapter from
the inputted time. Press the GOTO button once
again to exit from the preview window and
menu.
Some DVD discs do not support the search
function.
Fast Playback
Press the fast FWD/REV SCAN button on
the remote control to activate fast forward or
rewind.
Slow Playback
Press the SLOW button to activate slow
forward.
There is no slow playback for CD discs.
Play
Press the PLAY button (►) to start playback.
Press the POWER button on the remote control
to enter standby status, and press it again to
resume playback.
Zoom
Use the ZOOM button on the remote control to
achieve several zoom effects.
Press the ZOOM button once to achieve the
following zoom sequence, Q2-Q3-Q4-Qoff.
There is no zoom function for CD discs.
- 28 -
Page 30

Playback Functions
r
Programming Chapters / Tracks
You can store up to 12 chapters of a DVD (or 12
tracks of a CD) in an individually programmed
order. Please proceed accordingly:
DVD: Insert the DVD disc and press the stop
button, followed by pressing the PROGRAM
button. The screen shown bellow will be
displayed:
Program Input Title/Chapte
1_ _ _ _ 4_ _ _ _ 7_ _ _ _ 10_ _ _ _
2_ _ _ _ 5_ _ _ _ 8_ _ _ _ 11_ _ _ _
3_ _ _ _ 6_ _ _ _ 9_ _ _ _ 12_ _ _ _
Play Program Clear All
Use the direction buttons to select the
sequence number, then use the number
buttons to input the title number and chapter
number. During inputting, use the CLEAR
button to clear the incorrect input. After
inputting, Press the direction buttons to move
cursor to the “Play Program”, and then press
the OK button to start programming playback.
Select Clear All followed by OK to clear all
inputs. Press the PROG button again to exit.
During playback, press the STOP button to stop
programming playback.
CD: Insert the CD and press the stop button,
followed by pressing the PROGRAM button.
The screen shown bellow will be displayed:
Program Input
1_ _ _ 4_ _ _ 7_ _ _ 10_ __
2_ _ _ 5_ _ _ 8_ _ _ 11_ _ _
3_ _ _ 6_ _ _ 9_ _ _ 12_ _ _
Play Program Clear All
Use the direction buttons to select the song
number, then use the number buttons to input
the play sequence number. During inputting,
use the CLEAR button to clear the incorrect
input. After inputting, press the direction
buttons to move cursor to the “Play Program”,
and then press the OK button to start
programming playback. Select the Clear All to
clear all input. Press the PROG button again to
exit. During playback, press the STOP button to
stop programming playback.
- 29 -
Page 31

Playback Functions
Switching On and Off, Stand-by
Connect the main cord to a wall outlet with a
voltage corresponding to the specifications on
the rear panel of the unit.
1. Press the POWER button on the top panel
to switch on the unit. You can also operate
all functions using the remote control (r/c).
Additionally, many functions have buttons
at the unit as well.
2. Press the SOURCE button to select
DVD-Mode.
If no disc is inserted yet, the display will
display the OSD:
3. To set the unit into standby mode, press
the POWER button on the r/c. In standby
mode the unit is supplied with main
voltage but not active. In this condition
you can switch on the unit using the
POW
4. Correctly put the disc into the disc tray
(label facing you).
ER button on the r/c.
5. Playback starts automatically, usually
DVD discs now shows a menu to choose
from. You can control this menu with the
direction
Select the desired option and press the
OK to activate it. Mostly you find
additional information about the DVD’s
content o
6. To interrupt playback press the STOP
button once. The screen shows STOP
[Play to resume]. Press the PLAY button
to resume playback from position where it
was stopped.
If you press the STOP button twice the
unit completely stops and won’t
remember the
If this symbol appears on the screen while
pressing a button it indicates that the
selected button is not supported by either the
DVD inserted or the current operating m
buttons.
n its sleeve.
last position.
ode.
- 30 -
Page 32

System Setup
Setup Menu
You can change the default settings to your own preference.
Press the ‘DVD SETUP’ button on the remote control to display the settings menu. The menu
includes Language Setup, Video Setup and Audio Setup. Press the Right/Left direction buttons
(,) on the remote control to select a category. All the items in the category will appear on the
screen.
Language Setup
Press the DVD SETUP button to enter the setup menu, use the UP/DOWN direction buttons ()
to highlight the item you want to set. Press the OK button to reveal the allowed settings. Shown
bellow is a sample of the language screen:
Use the UP/DOWN direction buttons () to highlight the desired setting and press the OK button
to confirm selection and return. Press the button to return to the category mode
OSD Menu
There are several OSD menu languages that can be selected.
Subtitle
You can select several different languages or Off. Select Off and no subtitle will be displayed on the
screen.
Audio
There are several Audio languages available for selecting.
Disc Menu
There are several different disc menu languages available for selecting.
Language Video Rating
OSD Menu English
Subtitle English
Audio English
Disc Menu English
Close Caption
Language Video Rating
OSD Menu English English
Subtitle English Français
Audio English Español
Disc Menu English Deutsch
Close Caption On
On
- 31 -
Page 33

System Setup
Close Caption
You can select captions On or Off during playback.
Video Setup
Press the Right direction button () to select Video setup menu, the following screen will be
displayed:
In the Video setup menu, use the UP/DOWN direction buttons (,) to highlight the item to be
changed then press the OK button to reveal the options allowed. Use the UP/DOWN direction
buttons () to select an option and press the OK button to confirm selection. Press the button to
return to the category mode.
TV Display
The program’s screen format is fixed by the DVD. Please note that this format might not necessarily
match your TV’s screen format.
Normal/PS (PAN SCAN): Choose this mode when your TV set has 4:3 screen format. The picture
will fill the screen but the right and left portion will be cut.
Normal/LB (LETTER BOX): Choose this mode when your TV set has 4:3 screen format. The picture
will appear in its entire width but framed by black bars at the top and the bottom.
Angle Mark
If this function is available, a camera symbol will appear on the screen when various angles are
available on the DVD. Choose “Off” and no camera symbol will appear.
Screen Saver
When set to on it activates the screen saver function.
Rating Setup
Press the Right direction button () to select Rating setup menu, the screen will display the
following:
Language Video Rating
TV Display Wide
Angle Mark On
Screen Saver On
Language Video Rating
Password - - - - ±
Rating 8. Adult
Load Factory Reset
Last Memory On
- 32 -
Page 34

System Setup
Password
Parental control features are password protected.
Use the number buttons to input 3308, then press the ▼ button to select Rating. Press the OK button
to select the rating level, then press the ▲ button to select the Password, use the number buttons to
input a new password, press the OK button again, the “±” will be displayed on the screen.
NOTE: The default password is 3308. You can use the 3308 or the new password to enter the
Rating level selecting mode.
Rating
DVD’s that are equipped with the child lock feature are rated according to their contents and settings
vary from disc to disc. Depending on the disc, you can replace or lock out violent scenes, or lock out
playback of the disc altogether. Access the parental controls on the sub-menu by pressing the
direction buttons () on the remote control, then press the OK button. An interactive menu
will appear on the screen.
Load Factory
Select the item and press the OK button to reset all settings, it will return to the original status.
Last Memory
Use the UP/DOWN direction buttons () to select On or Off. Press the OK button to confirm and
return.
- 33 -
Page 35

System Setup
LCD Setup Menu
Turn on the power of the unit and press the SOURCE button on the remote control or front panel to
select DVD mode.
Picture Parameter Setup
Press the SCREEN SETUP button on the remote and the following screen will be displayed:
Press the ▼, ▲ button to highlight Bright, press the ►, ◄ button to adjust the desired value.
Bright: This setting allows the user to adjust the picture brightness to the desired level.
Contrast: This setting allows the user to adjust the picture Contrast to the desired level.
Auto: This setting automatically adjusts the display zone and the picture quality.
Clock: This setting allows the user to enlarge or reduce the display horizontal size.
Phase: This setting allows the user to adjust the picture quality.
H. Position: This setting allows the user to adjust the display zone left and right horizontal position.
V. Position: This setting allows the user to adjust the display zone up and down vertical position.
PICTURE
►BRIGHT 055
CONTRAST 060
AUTO
PHASE 000
CLOCK 100
H.POSITION 041
V.POSITION 036
General setup
Press the SCREEN SETUP button twice to access to general setup menu.
Press the ▼, ▲ button to highlight the desired items, press the ►, ◄ button for setting the desired
options.
GENERAL
►LANGUAGE ENGLISH
RESET
Language: You can select the menu language.
Reset: press the ► button, then all functional setup in LCD SETUP menu will return to the original
mode.
- 34 -
Page 36

Troubleshooting
SYMPTOM CHECK ITEM
Make sure disc is loaded in.
Make sure disc is loaded with label facing forward.
Make sure disc is not dirty or warped.
The player cannot play DVD.
There is no sound.
There is no picture or picture
move up and down Unsteady.
Cannot continue to play and play a
section repeatedly.
Make sure the DVD region code is the same as region code of
DVD player.
Make sure water condensation has not occurred.
Take out disc and leave the player on for at least one hour
when water condensation occurs.
Make sure system connection is correct.
Make sure system is not in mute.
Make sure the sound setup of DVD disc is correct.
Make sure disc is not dirty or warped.
Clean or replace the disc.
Make sure TV is turned on and is in correct video mode.
Make sure system connection is correct. If it is not, access
the setup menu and select the correct system.
Make sure it is not in A-B repeat status.
Press A-B button to cancel it.
Make sure disc is not dirty or damaged.
Clean the disc.
Make sure there are no obstructions between the remote
control and the player.
The remote control does not work.
Other Notes:
Static or other external interfere may cause the player to behave abnormally. If this occurs, unplug
the power-supply cord from the outlet and plug it in again to reset the player. If the problems persist,
then please disconnect the power and consult a qualified technician.
If a Change is made to the Picture settings on one of the setup screens the same changes will be
applied to all the other setup screens.
Make sure the remote control is pointing at the player.
Make sure batteries are inserted or the polarity is correct.
Make sure batteries are not weak.
Replace the weak batteries.
- 35 -
Page 37

Specifications
Specifications:
Model Number: FPE1505DV ver:01 Features
UPC number: 0-44476-02825-0 15" LCD TV/DVD Combo
Display Features Built in Slot -In type Progressive Scan DVD player
Display type TFT LCD DVD, CD, CD-R, CD-RW, Picture CD compatible
Screen Size 15.0 inch (diagonal) Built in Dolby Digital 2ch decoder
Active Area 304.1(H) x 232.1(V) mm Cable/AIR 181 Program channel
Aspect Ratio 4:3 Parental control with V-Chip
Panel Resolution 1024 x 768 Closed Caption (CC)
Brightness 450cd/m² OSD language: English/French/German/Spanish
Contrast ratio 500:1 Viewing Angle: 120° Horizontal & 100° Vertical
Viewing Angle 120°(H),100°(V) Built-in 2×3W speaker
Dot Pitch 0.297mm x 0.297mm Audio input: 2CH Audio input, 1x 3.5mm computer audio input
Maximum Color 16,194,277 Computer input: VGA input
Response time [Tr, Tf] 30ms Audio output: headphone output
Backlight life 50,000hrs (typical) Video input: Video input, RF input, S-Video input
TV Reception
TV System NTSC M Removable adjustable stand
Channel CATV - UHF/VHF CATV/AIR 181 [Channel] wall mount (VESA 100 x 100mm)
Antenna Impedance 75ohm Power supply: 12VDC/4A
Connector type F Accessories in the box
Audio AC/DC adapter
Maximum Audio Output 3W x 2 AC Power cord
Total number of speakers 2 Remote control, (model specific)
Video Connections Quantity Battery for remote
NTSC Analog TV Tuner 1 Owners Manual
Composite Video/Audio Input 1 AV cable
S-Video Input (4pin DIN) 1 VGA Cable (15 pin D-Sub)
VGA Input (15 pin D-Sub) 1 3.5mm - 3.5mm PC Audio cable
Video Standards Supported Power Requirements
Composite Video input PAL /NTS C Power Source
S-Video Input PAL /N TSC Unit input power
RF NTSC M Power ON consumption
Audio Connections Quantity Standby consumption
Stereo Mini Phone Jack Input for PC
(3.5mm)
RCA Input (Red, White) 1 Unit W/stand
Headphone:(3.5mm) 1 Unit W/O stand
VGA Resolutions Supported Giftbox
640x480 @ 60Hz/75Hz Master Carton
800x600 @ 60Hz/75Hz Weight (N.W.)
1 Dimension (WxHxD)
10 buttons on the top for easy control(source/menu/CH-/
CH+/VOL-/VOL+/play/stop/eject/power)
12VDC/4A 48W
18.1 x 13.8 x 7.8 (in)
18.1 x 11.4 x 3.3 (in)
20 x 15.5 x 8.3 (in)
20.5 x 15.8 x 16.8 (in)
110-240VAC
~50-60Hz /
12VDC/3.8A
12VDC/0.07A
- 36 -
Page 38

1024x768 @ 60Hz/75Hz Unit W/stand
Playback Compatibility Unit W/O Stand
Audio CD Yes Warranty
CD-R Yes Parts & Labor
CD-RW Yes Environment
DVD+R Yes Operating Temperature
DVD+RW Yes Operating Humidity
DVD-R Yes
DVD-RW Yes
DVD-Video Yes
Kodak Picture CD Ye s
VCD Yes
SVCD Yes
Playable Format (Codec)
MP3 NO
CD-DA Ye s
.MPEG Yes
.WMA Ye s
Picture CD (JPG) Ye s
VCD 1.1 NO
VCD 2.0 NO
14.2 (lb)
11.2 (lb)
90 Days
41°F - 95°F
10% - 95%
DESIGN AND SPECIFICATIONS ARE SUBJECT T O CHANGE WITHOUT NOTICE
Manufactured under license from Dolby Laboratories.
“Dolby” and the double-D symbol are trademarks of Dolby Laboratories.
Confidential unpublished works. © 1992 -1997 Dolby Laboratories.
All rights reserved.
- 37 -
 Loading...