

Page 1
System 10 PRO Quick Start Guide
Digital Wireless System
Step 1: Charge
• Charge the ATW-T1006 or ATW-T1007 transmitters for 8
hours prior to use.
Step 2: Assemble
• Attach the AC adapter to the ATW-RC13 chassis, then plug
the adapter into an AC outlet.
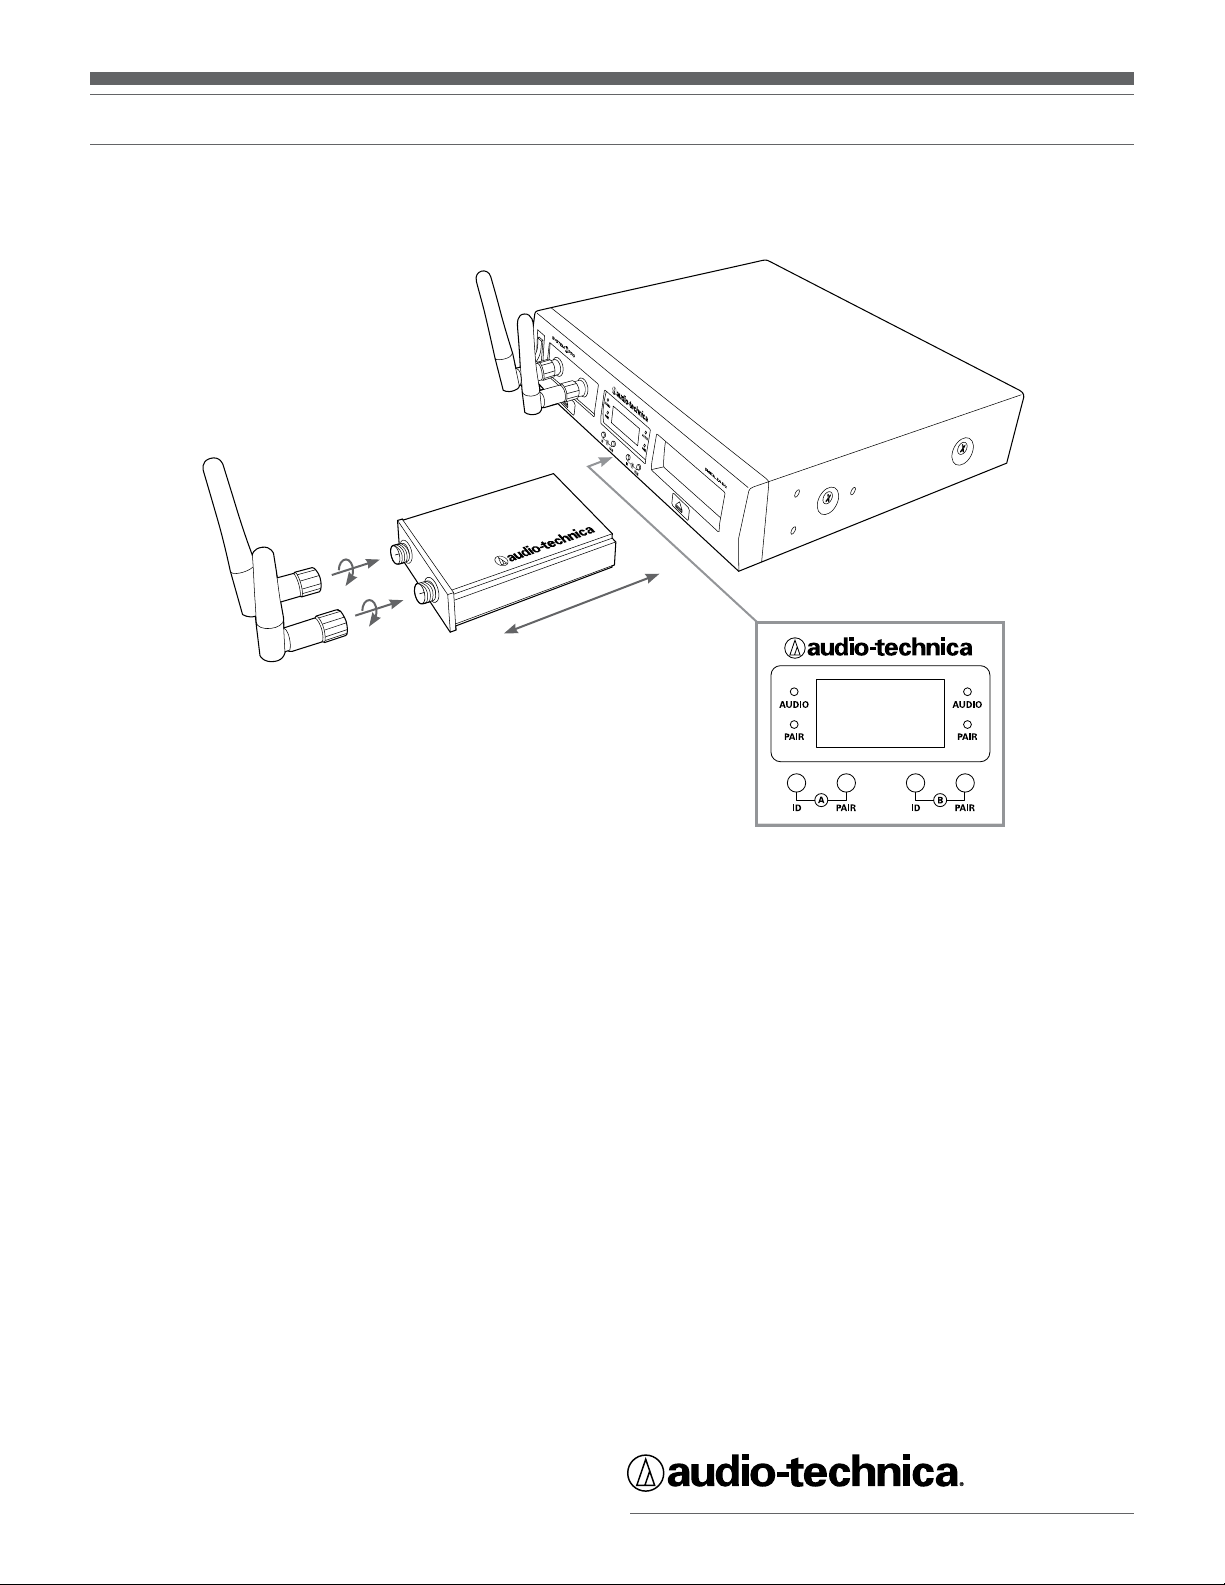
• Screw antennas into the sockets on the front of the
ATW-RU13 receiver units.
• Install receiver units into the docks on the chassis.
• Turn on power to the chassis and to the transmitters.
Step 3: Pair
• Select a System ID number (0 to 9) by pressing the System
ID button on the chassis that corresponds to the receiver
you wish to pair. Once ID number is selected, press and
hold the receiver’s Pair button until the Pairing Indicator
starts to blink green.
• Within 30 seconds, press and hold the Pair button on the
bottom of the transmitter until the System ID number you
selected shows on the transmitter display. The receiver’s
Pairing Indicator will glow steady, indicating that you have
successfully paired the receiver and transmitter.
• Repeat for the second channel.
Step 4: Connect
• Use shielded audio cable to connect the receivers’
balanced or unbalanced outputs to a mixer, amplifier or
recording device.
Audio-Technica Corporation
audio-technica.com ©2017 Audio-Technica P52652
 Loading...