

Page 1
Thank you very much for using
Please read this instruction manual carefully before using your amplifier.
HOUSTON MINI-3
integrated vacuum tube amplifier.
MODEL: MINI-3 (EL84) VACUUM TUBE INTEGRATED AMPLIFIER
-------------------------------------------------------------------------------------------------------
【SPECIFICATIONS】
OUTPUT POWER: 12W×2 /CLASS AB1 P-P
FREQUENCY RESPONSE: 20Hz-20KHz ±2dB
T.H.D.: <1%
INPUT SENSITIVITY: 100mV-500mV
S/N: >90dB
OUTPUT IMPEDANCE: 4~16ohm
CHANNEL BALANCE: <1dB
TUBE COMPLEMENT: V1,V2,V3,V4…EL84×4
12AX7(ECC-83) ×1
12AU7(ECC-82) ×2
POWER REQUIREMENT: AC 220V,50/60Hz
DIMENSION: 266mm×275mm×160mm (W×L×H)
WEIGHT: N.W.: 11KG G.W.: 12KG
【IMPORTANT SAFETY INFORMATION】
【WARNING】
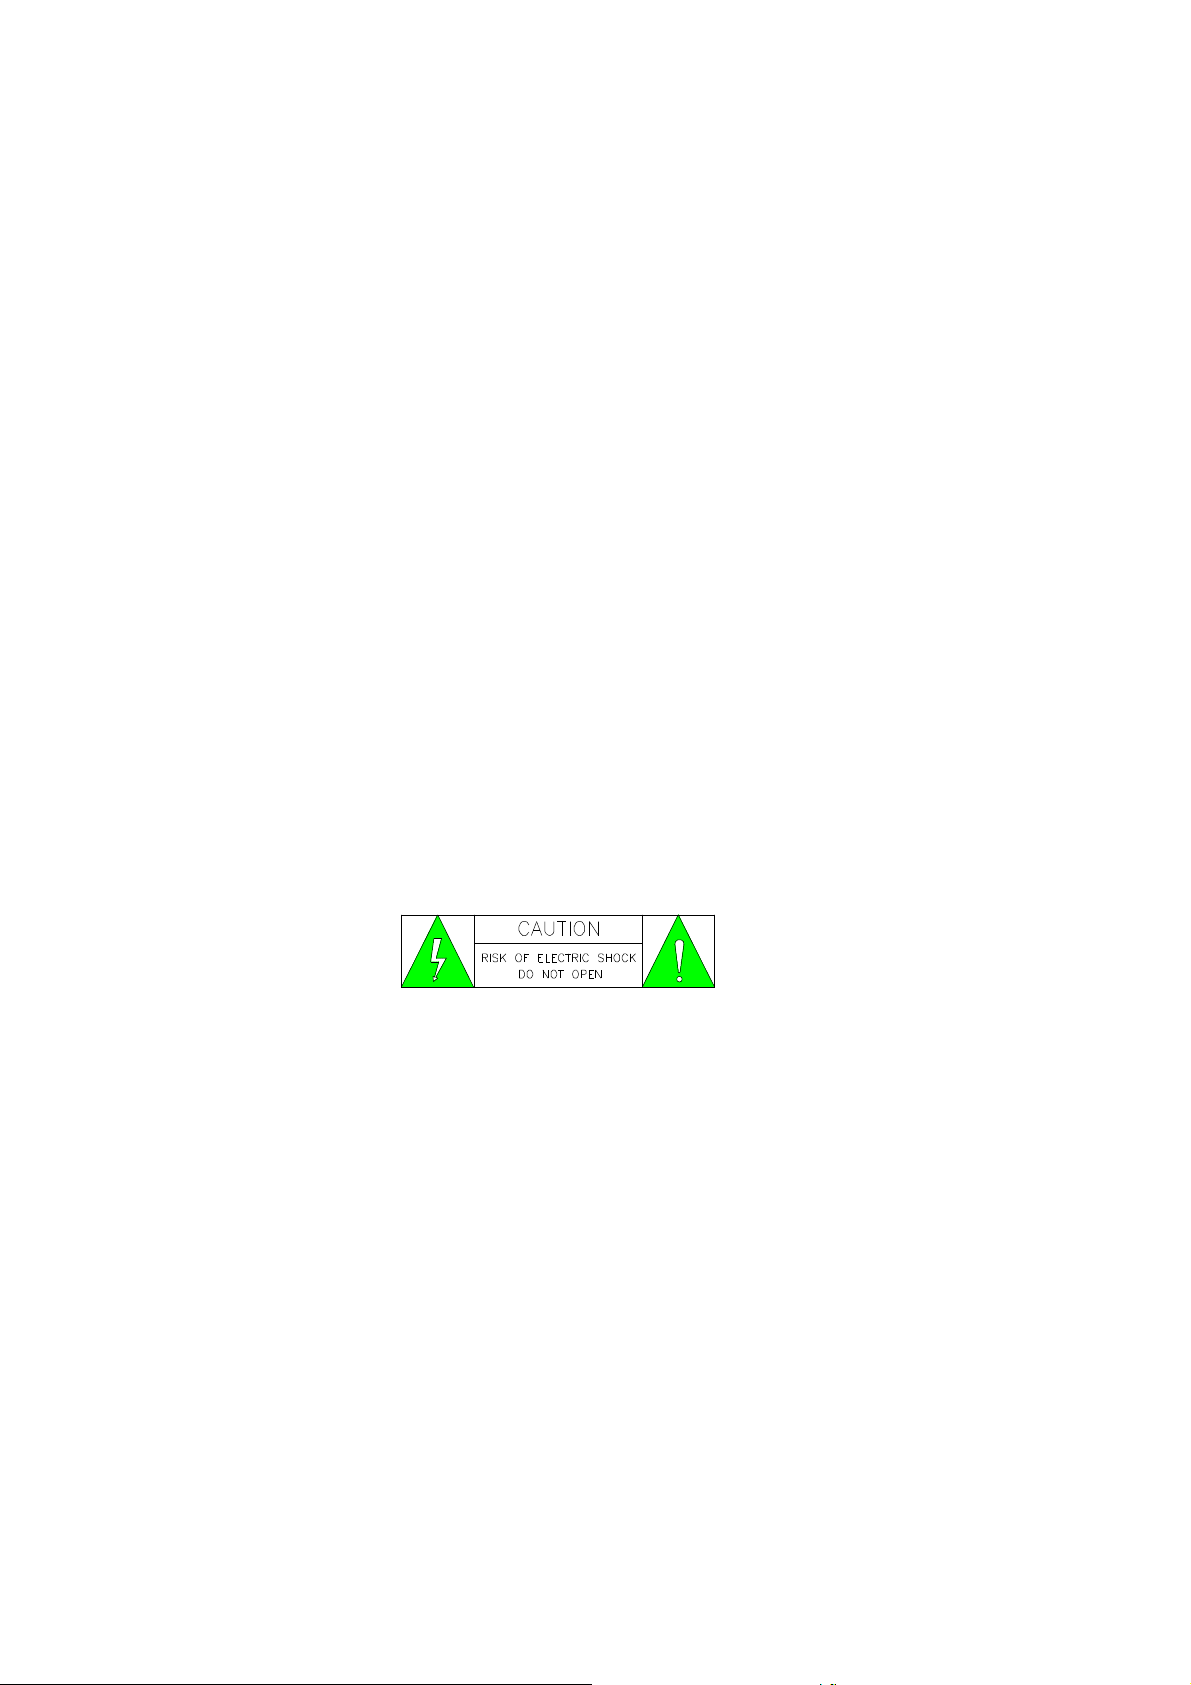
* To reduce the risk of electric shock, don’t remove the cover.
* Don’t attempt to repair the product by yourself.
* No user serviceable parts inside. Refer servicing to qualified service personnel.
* Keep liquids away from the amplifier. If you spill liquid into the unit, pull out
the power plug at once and consult your dealer.
CAUTION: BEFORE OPERATING THIS NEW PRODUCT, PLEASE CAREFULLY
READ THIS OPERATION MANUAL AND THEN SAVE IT FOR FUTURE
REFERENCE. IT WILL BE USEFUL IF YOU HAVE ANY DIFFICULTIES IN
OPERATING THIS NEW PRODUCT IN THE FUTURE.
1. It is dangerous to use this new product if
This product begins to smoke, smell, or make strange sounds. If this happens, immediately
switch off the power, unplug the power cord and contact the nearest authorized service
center.
1
Page 2

2. Never remove the bottom cover
Do not remove the bottom cover of this product. Touching high voltage parts inside the
cabinet can result in electric shock and/or damage to the unit. This product contains
sufficient levels of voltage and current to be “lethal”. Do not tamper with a component or
part inside the unit. Even with the power turned off, a charge remains in the energy storage
capacitors for some time. Refer adjustment inside the cabinet and any needed service to
your authorized Houston dealer or other qualified technician.
3. Avoid exposing this product to direct sunlight, dust, heat sources or moisture
Do not place this product in a location where it is exposed to direct sunlight, dust, heat
sources, high humidity, kitchen smoke, etc., as these may cause malfunctions.
4.
Select a safe and well-ventilated location
Select a safe location from children, dog and cat to keep they or it cannot be easy to touch
the vacuum tubes and the product.
Don’t operating over 6 hours and the cabinet has air vents to allow heat to escape.
Obstructing these air vents may result in malfunction or, in some cases, fire. Always
observe the following guidelines:
Keep this product 10cm or more away from walls.
Do not place this product in a confined spaces with poor ventilation.
5. Handling the power Cord
Using a damaged power cord, or one with the bare wires exposed, could cause fire or result
in electric shock. Always observe the following guidelines:
When unplugging from the AC mains, never pull the cord. Always grip the plug when
unplugging the power cord.
Never place this product itself, furniture, rugs or other heavy objects on the power
cord.
If the power cord must pass near a heater, make sure the cord is far enough from the
heater, that the cord under no circumstances will melt or come in contact with the
heater.
If the power cord is damaged, immediately purchase a new one from the nearest
service center approved by Houston.
6. When the product will not be used for an extended period of time
If you go away on holiday or otherwise will be absent for a long time, as a safety
precaution, unplug the power cord from the AC mains or press the mains power switch (OI)
to move it from ON to OFF.
7. Do not place objects containing liquids on top of this product
Do not place any objects containing water or other liquids on this product.
If liquids enters this product, it can cause malfunction, electrical shock or fire. If
liquid should enter the cabinet, unplug the power cord from the AC mains and contact
the nearest service center approved by Houston.
8. Never insert objects into this product
Do not insert or drop metallic or inflammable objects into this product through the air vents,
as this can cause serious damage, electrical shock, or possibly fire.
9. Keep the product away from strongly magnetic objects.
2
Page 3

WARNING: THIS APPARATUS MUST BE EARTHED
IMPORTANT: THE WIRES IN THIS MAINS LEAD ARE COLOURED
IN ACCORDANCE WITH THE FOLLOWING CODE. GREEN-AND YELLOW: EARTH,
BLUE: NEUTRAL, BROWN: LIVE
As the colours of the wires in the mains lead of this apparatus may not correspond with the
coloured markings identifying the terminals in your plug proceed as follows:
The wire which is coloured GREEN-AND-YELLOW must be connected to the terminal in the plug
which is marked by the letter E or by the safety earth symbol “GND.” or coloured GREEN
or GREEN-AND-YELLOW.
The wire which is coloured BLUE must be connected to the terminal which is marked with the letter
N or coloured BLACK.
The wire which is coloured BROWN must be connected to the terminal which is marked with the
Letter L or coloured RED.
For the U.K.
*The product which is equipped with a THREE WIRE GROUNGING TYPE AC PLUG must
be grounged.
【WARRANTY SERVICE】
1. This product(s) is (are) warranted for a period of twenty-four months beginning
from the date of purchase.
2. To obtain warranty service, the warranty card bearing your dealer’s company chop
or signature must be returned to your dealer or our company within ten days from
the date of purchase.
3. The defective product must be returned to your dealer or our company for repair
when your requirement is accepted by your dealer or our company.
4. The warranty doesn’t extend to any product that has been opened by yourself
without the permission of our company.
NOTICE:
* The information and circuit diagram in this instruction is subject to change without
notice.
【OPERATING INSTRUCTIONS】
(I) UNPACKING
Please check carefully whether or not there is any damage with the carton before
unpacking. Put it on a flat surface with the arrow upward, then unpack the carton and
you will find: (1) an amplifier of
instruction manual (4) a warranty card (5) two pieces of fuse.
PROPOSITION: Please save the carton and the packing material, they will be helpful
if you need to move your unit.
NOTE: * Please check whether your line voltage is the same as that marked on this
unit. If not, please contact your dealer or our company.
HO USTON MINI-3
3
(2) a power suppy cord (3) an
Page 4

(II) INSTALLING TUBES
Refer to the installation illustrations, install the tubes to the suitable sockets on
chassis.
NOTE: * Be sure to disconnect the power cord before you perform these installing
procedures.
(III) CONNECTING
Select the suitable input socket on the side panel for your sound source and set the
input selector to the correct position, connect the amplifier to the sound source with
the signal wire. Don’t confuse L with R.
Select the suitable output impedance terminals on the rear panel for your speaker,
connect the amplifier to the speaker with specialized audio cable. Be sure to connect
only Positive (+) cords to Positive (+) terminals, and Negative (-) cords to Negative (-)
terminals.
Then connect the power cord. At first plug the power cord into the power socket on
the rear panel , and come next plug the other end of power cord into a power outlet.
NOTE: * The power outlet which the amplifier power cord is connected to must
be the 3-pin grounding type.
(IV) TURNING ON
When you are sure the connections are correct, adjust the “
position and turn on the amplifier by pressing the “
POWER
VOLUME
” to the lowest
” button then the indication
lamp will light up, indicating the amplifier is normal . Then you will enjoy the music
by adjusting the “
VOLUME
” while your sound source is working.
NOTE: * To prevent damage to circuit, never short-circuit Positive (+) and
Negative (-) speaker terminals.
* Be sure to set the “
VOLUME
” control to the lowest position before turning
on or disconnecting the speakers while the unit is on.
4
Page 5
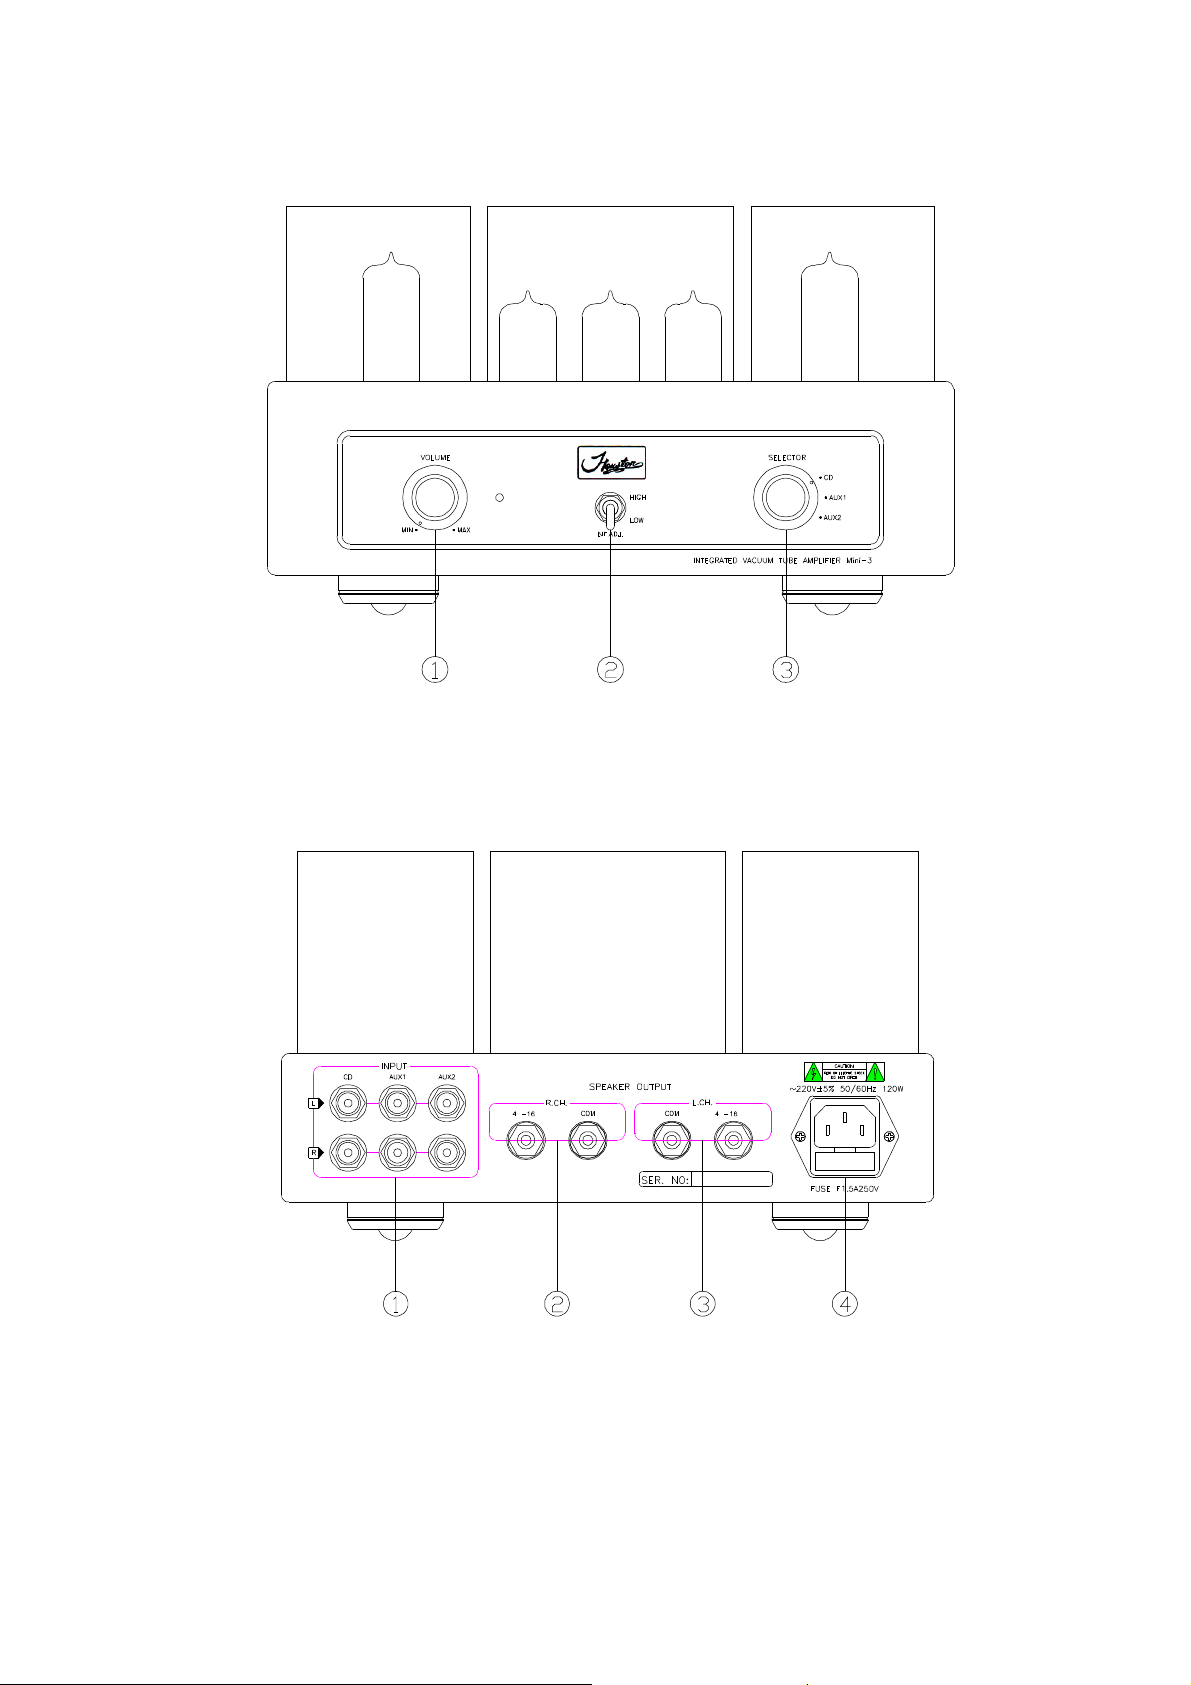
【DIAGRAM】
Diagram 1. MINI-3 FRONT PANEL
① Volume ② NF. adjuster
③ Input selector
Ω Ω ΩΩ
TOP INTERNATIONAL ELECTRONIC H.K. LTD.
Diagram 2. MINI-3 REAR PANEL
① Signal input socket ② R channel output (4~16Ω)
③ L channel output (4~16Ω) ④ Power socket(with fuse)
5
Page 6
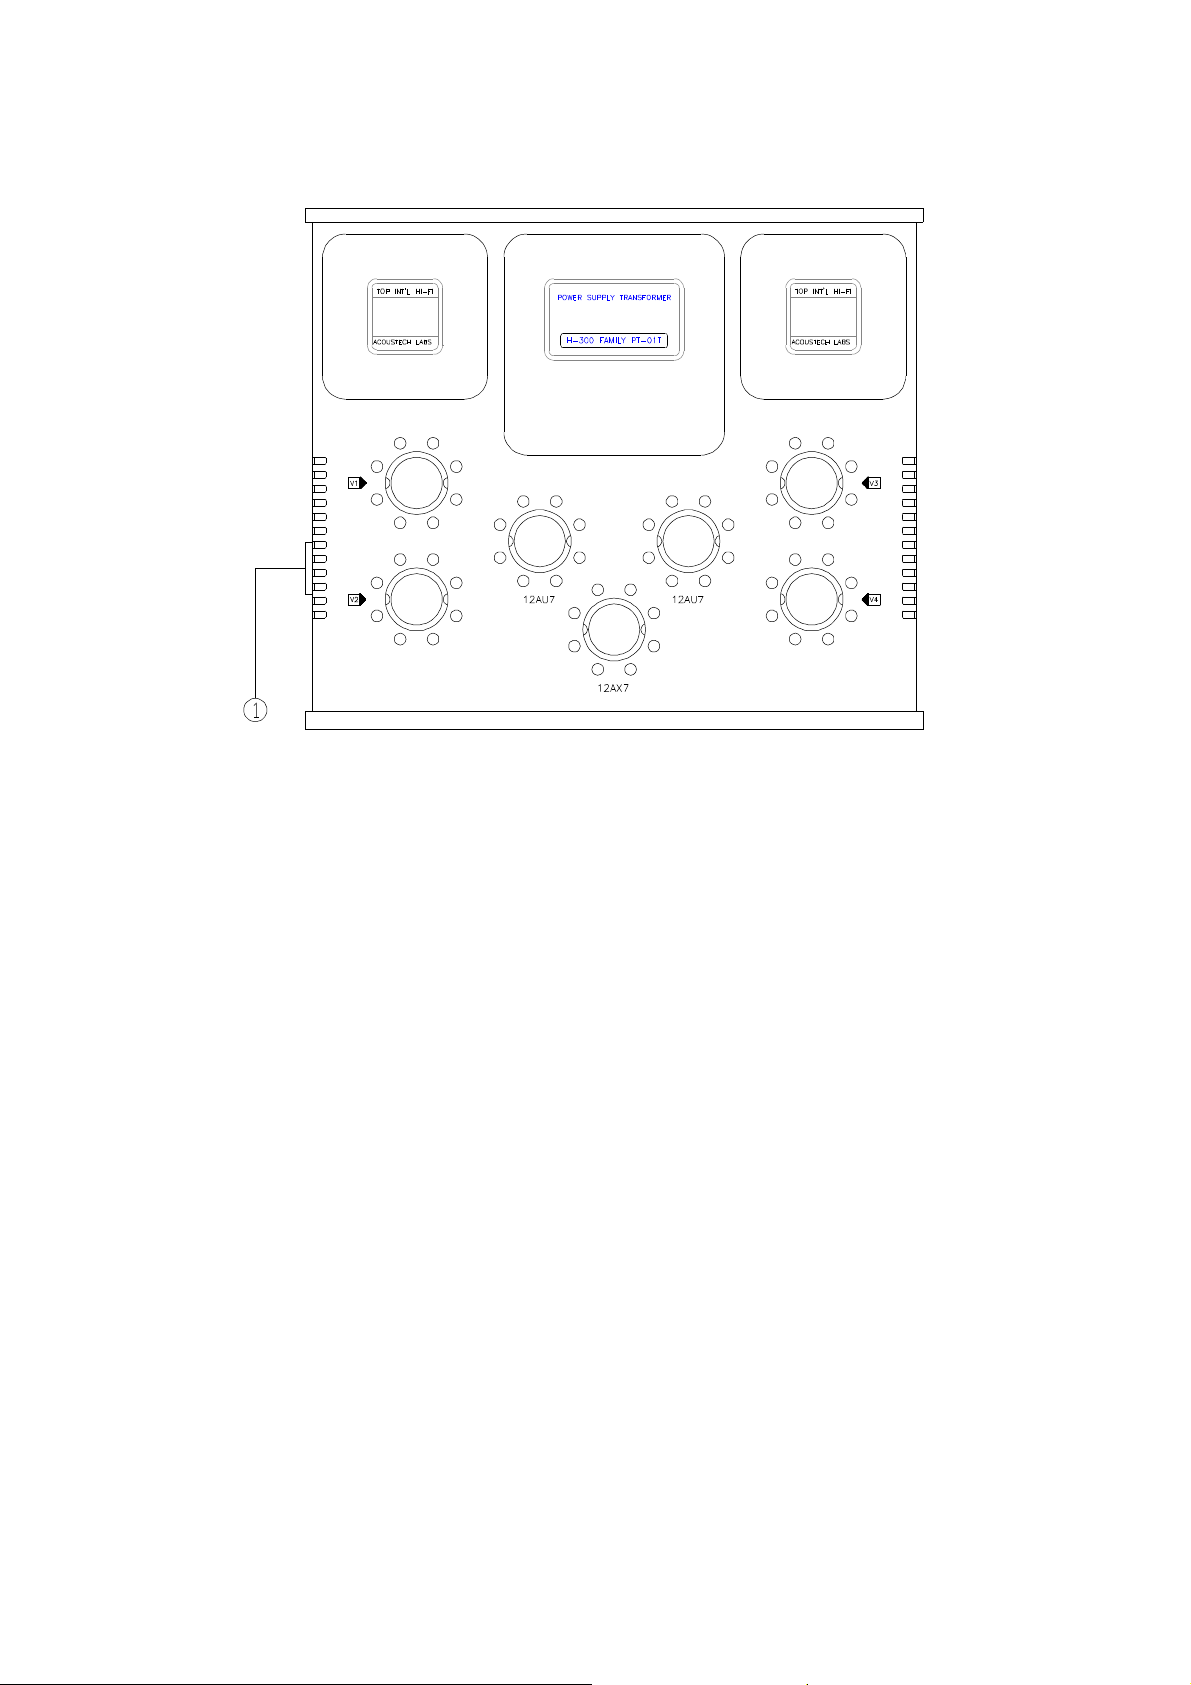
Diagram 3. VACUUM TUBE
V1, V2, V3, V4 : EL84
① Power switch
6
 Loading...