

Page 1
THIS SYSTEM CONTAINS:
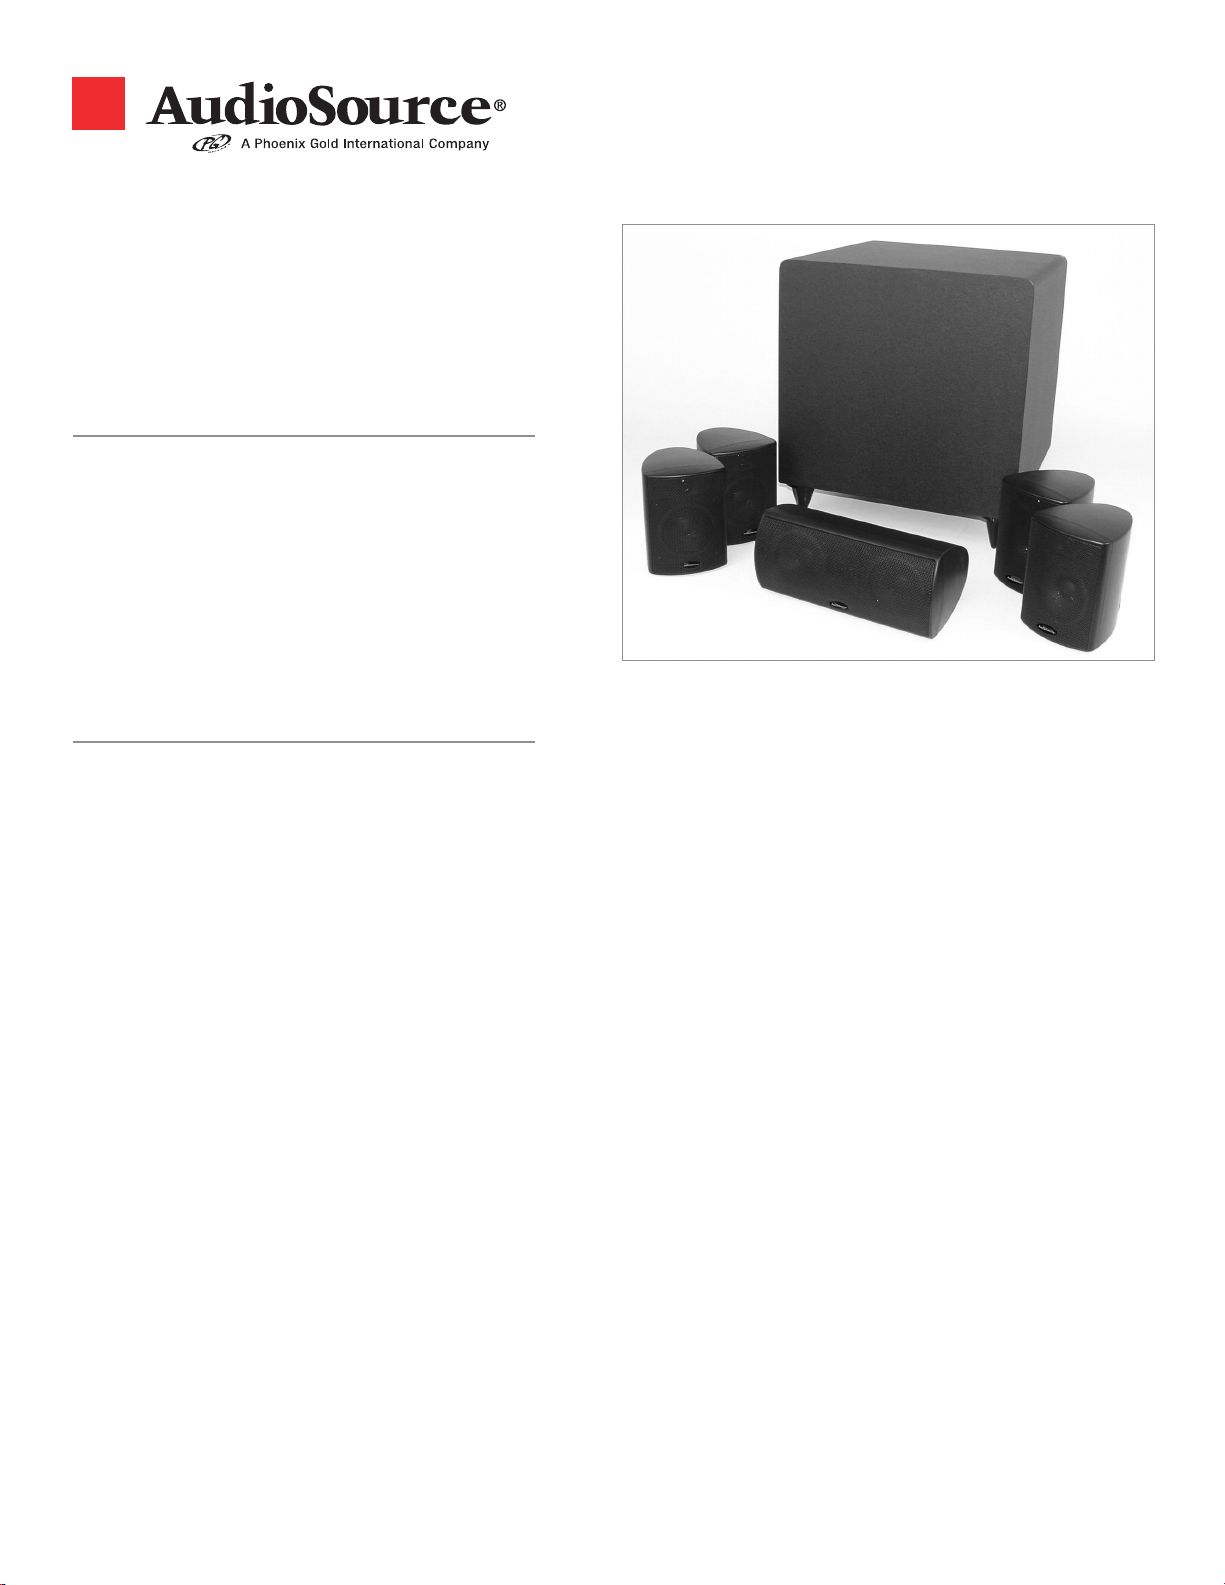
• 4 each LS130 Satellite Speakers
(left front, right front, left rear and right rear speakers)
• 1 each LS130C Center Channel Speaker
• 1 each SW380 Powered Subwoofer
• 1 each UL Approved Power Supply
• 4 each Wall Hangers and 16 Screws
• Color Coded Speaker Wire
Congratulations on your purchase, and welcome to the AudioSource family of satisfied customers. Please take a
few moments to read this manual before you start to install your new speaker system. Also, be sure to retain this
document should you need to refer to it in the future.
The AudioSource System 230 Home Theater Speaker system is designed to accurately reproduce high fidelity
music, including digital source materials. Movies and stereo television broadcasts will sound more realistic, putting
you in the center of the action. The AudioSource System 230 Home Theater Speaker system is video shielded,
allowing placement on or near your television or monitor screen without disturbing the monitoring device’s performance.
With proper placement you should be able to enjoy a true theater experience.
This manual is divided into two sections. The first provides information about the LS130 satellites and LS130C
center channel speaker. The next section concerns the SW380 Powered Subwoofer.
LS130 & LS130C
CONNECTING YOUR SPEAKERS
The spring-clamp connectors will accommodate up to 16-gauge speaker wire. Strip the insulation back about 1/4 inch. Press
the Spring-clamp in to reveal the opening of the connector, insert wire and release.
When connecting the speakers, be sure to maintain the correct polarity. Attach the wire from the (+) Red or positive terminal
of the speaker to the (+) Red or positive terminal of the corresponding component’s speaker output terminal. The (-) Black or
negative terminal of the speaker must connect the respective (-) Black or negative terminal of the corresponding component’s
speaker output terminal. This is easy to do by observing the color, stripe or ribbing that appears on the speaker wire. Note:
The LS130C Center channel uses a Green terminal for (+) or positive, where the LS130 satellites utilize a Red terminal for (+)
or positive. All LS130 and LS130C speakers use Black for the (-) or negative terminal.
If any parts of this system are missing or damaged,
do not return to the store of purchase.
1.800.HELP.115
Please call AudioSource directly.
Page 2
SPEAKER PLACEMENT
The LS 130C Center Channel speaker should be placed as close as possible to the center of the television or display device,
either above or just below the picture area. This locks the sound and dialog to the picture. Place the left and right front speakers
away from the picture toward the corners of the room. They can be placed on bookshelves or wall mounted using the speaker
hangers supplied in the System 230 package. Place the rear or surround speakers on the side walls, directly across or just behind
your listening position. Typical placement is on the side walls, slightly above ear level, about two-thirds of the way back from the
front of the room. This allows the surround speakers to aim directly at the listener, placing you in the middle of a five speaker
sound field.
SPEAKER MOUNTING
The System 230 package includes four wall hangers for mounting any or all of the LS 130 speakers to the wall. For safety, always
mount these speakers on a wall that is reinforced from behind by a wall stud or other rigid material. Never mount a speaker on
a wall that is not reinforced or just drywall or plaster. If you are unsure about where and how to mount the speakers and conceal
the wire, consult a professional installer or contractor. These speakers can also be placed on bookshelves and most speaker
stands.
R Front
+
_
R Rear
+
_
R Front
_
+
L Front
+
_
Center
Center
_
R Rear
_
+
+
L Rear
_
+
To Subwoofer
L Front
+
_
Receiver
L Rear
_
Sub Out
+
+
_
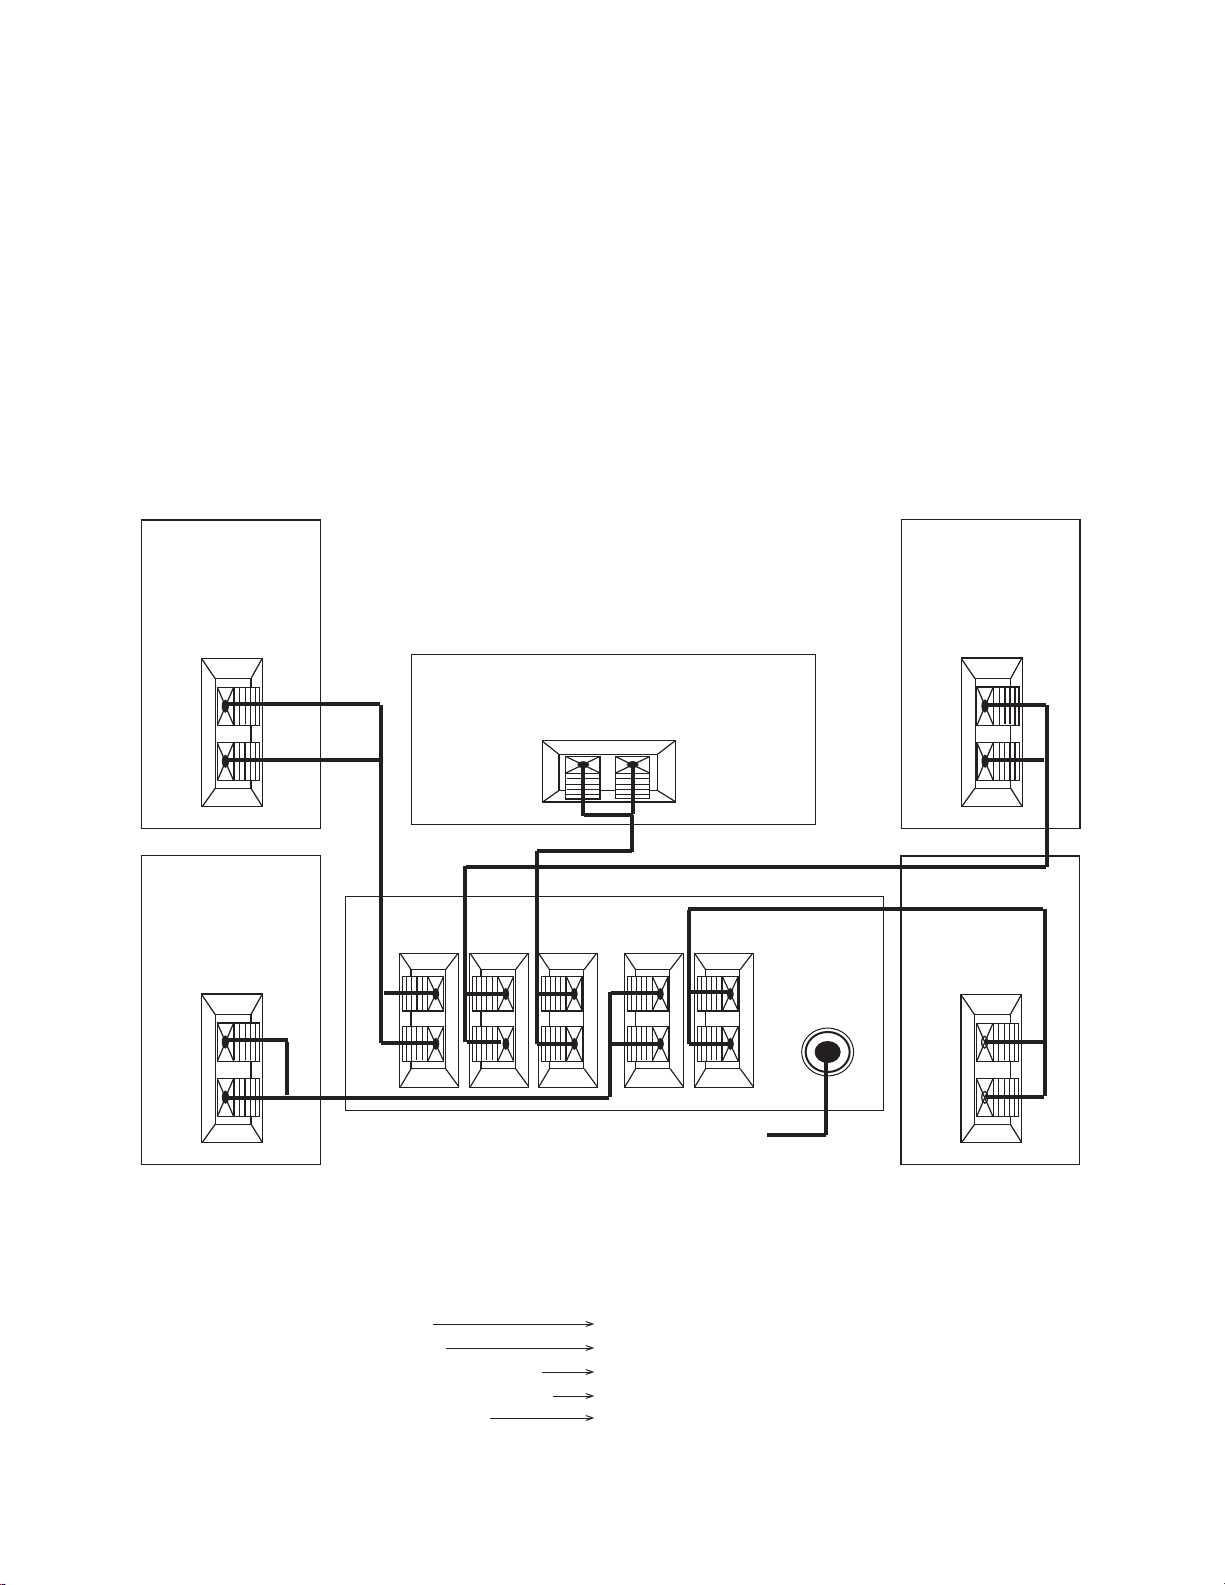
CONNECTION GUIDE
RECEIVER or SURROUND COMPONENT SPEAKER
connect the… to the…
1) LEFT FRONT speaker terminals ( + & - ) left LS130 front speaker
2) RIGHT FRONT speaker terminals ( + & - ) right LS130 front speaker
3) LEFT SURROUND (REAR) speaker terminals ( + & - ) left LS130 surround (rear) speaker
4) RIGHT SURROUND (REAR) speaker terminals ( + & - ) right LS130 surround (rear) speaker
5) CENTER CHANNEL speaker terminals ( + & - ) LS130 C center channel speaker
If you need more information, we offer friendly, toll-free assistance.
1.800.HELP.115
You may also fax us 24 hours a day at 503.978.3302
Page 3

SW380 Powered Subwoofer
ABOUT SUBWOOFERS
Subwoofers extend the bass response of your system beyond the limitations of most speakers. The SW 380 powered subwoofer
is used in conjunction with you left, center and right front speakers, as well as the left and right rear speakers of the System 230
to dramatically enhance the low frequency performance of the overall system with music, television and movies.
FEATURES OF THE SW380
The AudioSource SW380 features a highly efficient ported enclosure, a rugged 8-inch reinforced driver and an eighty watt
amplifier with a passive low frequency crossover network. A choice of line level or speaker level input is provided for fast and
easy connection to virtually any system. If your component has only a single RCA (Line Level ) output, it is recommended to
use a “Y” connector to feed information to both the left and right RCA (Line Level) inputs. If a “Y” connector is not readily available
the subwoofer can be operated nominally with a single RCA connection at the right channel line level input.
PLACEMENT GUIDELINES
Prior to installing your SW 380 Subwoofer, please consider the following guidelines. Placing a subwoofer near a wall or in a
corner will greatly increase it’s perceived bass response. As frequencies reproduced by subwoofers are long and need room
to propagate, a subwoofer placed near the listening position will not sound as full as one placed farther away. Please be careful
about placing anything directly on top of your subwoofer, as the vibrations of the speaker cabinet could cause these items to
shake loose or fall.
USING THE CONTROLS
Power
The Power Switch has two positions: OFF and ON. When the LED is lit, the power is on. Be sure that you have correctly
connected the UL Approved AC Power Supply to your SW 380 before trying to operate the subwoofer.
Frequency
The Frequency Control sets the frequency below which the electronic crossover pass information to the amplifier to be reproduced
as bass. If the frequency is set too low the subwoofer and the satellites will not blend together smoothly. If the frequency is
set to high the mid-bass will be overstated and muddy. Since room conditions will cause variations in how individual speakers
perform, the ability to adjust the crossover frequency of the subwoofer enhances its ability to work seamlessly with the other
speakers. Start with the frequency at about mid point and work in both directions from there until you find the point where the
sub seems to blend smoothly with your satellites. The satellites should be positioned before beginning to make adjustments to
the subwoofer.
Level
The Level Control adjusts the volume of the SW 380. Once set, the level control should not require further adjustment. Begin
with the level control at the minimum position. Slowly increase the volume of the SW 380 until you can hear the subwoofer. A
Subwoofer playing too loud can give your system a “muddy” sound, so be sure to balance the level or volume of the SW 380
carefully with the your other speakers. Output level is relative and can vary from location to location within the listening area.
Always return to your listening position to evaluate and changes. Note: Your surround receiver may provide the ability to balance
the level of all speakers in the system using a Test Tone and the receivers remote control. See the manufacturers user manual
for details on the proper procedure for this operation.
CONNECTING THE SW380
Line In
The RCA-type jacks of your SW 380 are designed to accept a line level signal from a receiver, preamp, surround processor,
television or similar device. When using a single line level output from another component, a “Y”connector should be used to
send the signals to both the left and right channel inputs.
Speaker Level Inputs
The Spring Clamp type speaker level connectors are provided to be used in the event that your receiver, preamp, surround
processor, television or other component does not have a dedicated line-level subwoofer output, or other full range line-level
output. The speaker level inputs should be connected to your components speaker outputs, and then you may connect your
speakers to the speaker level outputs on the rear of the SW 380 subwoofer. The SW 380 extracts the information (signal) it
needs from the speaker level signal, and then passes on the full range speaker level signal to your other speakers. Note: The
speaker level and line-level inputs should never be used at the same time as damage to the subwoofer and your other components
could result from such improper usage.
Page 4

Safety Instructions
WARNING
To reduce the risk of fire or electric shock, do not expose this appliance
to rain or moisture. To reduce the risk of electric shock, do not remove
cover (or back); no user-serviceable parts inside. Refer servicing to
qualified service personnel. To prevent electric shock, match the wide
blade of the AC plug to the wide slot of the AC outlet, and insert fully.
ATTENTION
Pour eviter les chocs electriques, introduire la lame la plus large de la
fichedans la borne correspondeante de la prise et pousser jusqu’au fond.
CAUTION
RISK OF ELECTRIC SHOCK
DO NOT OPEN
The lightning flash with arrowhead symbol, within an equilateral triangle,
is intended to alert the user to the presence of non-insulated dangerous
voltage within the products’ enclosure that may be of sufficient magnitude
to constitute a risk of electrical shock to persons. The exclamation point
within an equilateral triangle is intended to alert the user to the presence
of important operating and maintenance (servicing) instructions in the
literature accompanying the appliance.
!
Read Instructions
All the safety and operating instructions should be read before the appliance
is operated.
Retain Instructions
The safety and operating instructions should be adhered to.
Heed Warnings
All warnings on the appliance and in the operating instructions should be
adhered to.
Follow Instructions
All operating and use instructions should be adhered to.
Water and Moisture
The appliance should not be used near water. For example, near a bathtub,
wash-bowl, kitchen sink, laundry tub, in a wet basement or near a swimming
pool, etc.
Ventilation
The appliance should be situated so that its location or position does not
interfere with its proper ventilation For example, the appliance should not be
situated on a bed, sofa, rug or similar surface that may block the ventilation
openings; or be placed in a built in situation, such as a bookcase or cabinet
that may impede the flow of air through the ventilation openings.
Heat
The appliance should be situated away from heat sources such as radiators,
heat registers, or other appliances (including amplifiers) that produce heat.
Power Sources
The appliance should be connected to a power supply only of the type described
in the operating instructions or as marked on the appliance.
Grounding or Polarization
Precautions should be taken so that the grounding or polarization means of
an appliance is not defeated.
Power Cord Protection
Power supply cords should be routed so that they are not likely to be walked on or
pinched by items placed on or against them, paying particular attention to cords at
plugs, convenience receptacles, and the point where they exit from the appliance.
Cleaning
The speaker should be cleaned only as recommended be the manufacturer.
Non-Use Periods
The power cords of the appliance should be unplugged from the outlet when left
unused for a long period of time.
Object and Liquid Entry
Care should be taken so that objects do not fall and liquids are not spilled into the
enclosure through openings.
Damage Requiring Service
The appliance should be service by qualified personnel when; a) the power cord
or the plug has been damaged; b) objects have fallen, or liquid has been spilled
into the appliance; c) the appliance has been exposed to rain; d) the appliance does
not appear to operate normally or exhibits a marked change in performance; e) the
appliance has been dropped, or the enclosure damaged.
Servicing
The user should not attempt to service the appliance beyond that described in the
operating instructions. All other servicing should be referred to qualified service
personnel.
Product Servicing
In the event your System 230 fails to operate properly, please contact the dealer
where you purchased the unit, or you may contact AudioSource directly for further
assistance.
Specifications:
Powered Subwoofer: 100W, 30Hz ~ 250Hz
Inputs: Line Level or Speaker Level with Speaker Level Pass Through
LED Power Indicator
Subwoofer Level Control
Low Pass Frequency Adjustment
Frequency Response: Satellites: 180Hz to 20kHz ± 5dB
Center Channel: 180Hz to 20kHz ± 5dB
Subwoofer: 30Hz to 250Hz ± 10dB
Recommended Amplifier Power: 50 to 100 Watts per Channel
Speaker Wire Provided: Center Channel (one piece) = 3m
Satellites (four pieces) = 7m each
9300 North Decatur • Portland, Oregon 97203 • tel: 503-286-9300 fax: 503-978-3302
audiosource@phoenixgold.com • www.audiosource.net
© 2003 Phoenix Gold International, Inc.
Printed in China
 Loading...