

Page 1

AS10SW
speaker.
You will need the following tools:
4) A Pencil
that electrical, plumbing and any other services will not
walls or in the ceiling, but is typically used in walls. The
AS10SW is best mounted within 4 feet of a room corner
to take advantage of low frequency corner loading effects
Whenever possible, AudioSource recommends using 2
AS10SW, one in each of the front corners of the listening
you should allow an extra inch in all directions behind the
wall surface to allow room for the “Easy-In” bracket that
wall surface. You should now check for obstructions like
After selection of the mounting location, mark the hole
to be cut out. A cut-out template is provided for your
with pencil on the wall surface. If you are unsure whether
there are obstructions behind the wall surface where
the speakers are to be mounted, cut a small hole in
the center of your marked mounting location. Holding
your drywall saw at a 45 degree angle (see Fig. 2) cut
tions, cut the hole to mount the speaker using the drywall
from blowing loose gypsum dust out and on to the
tape to extend more than 1/2” beyond the edge of the
Page 2
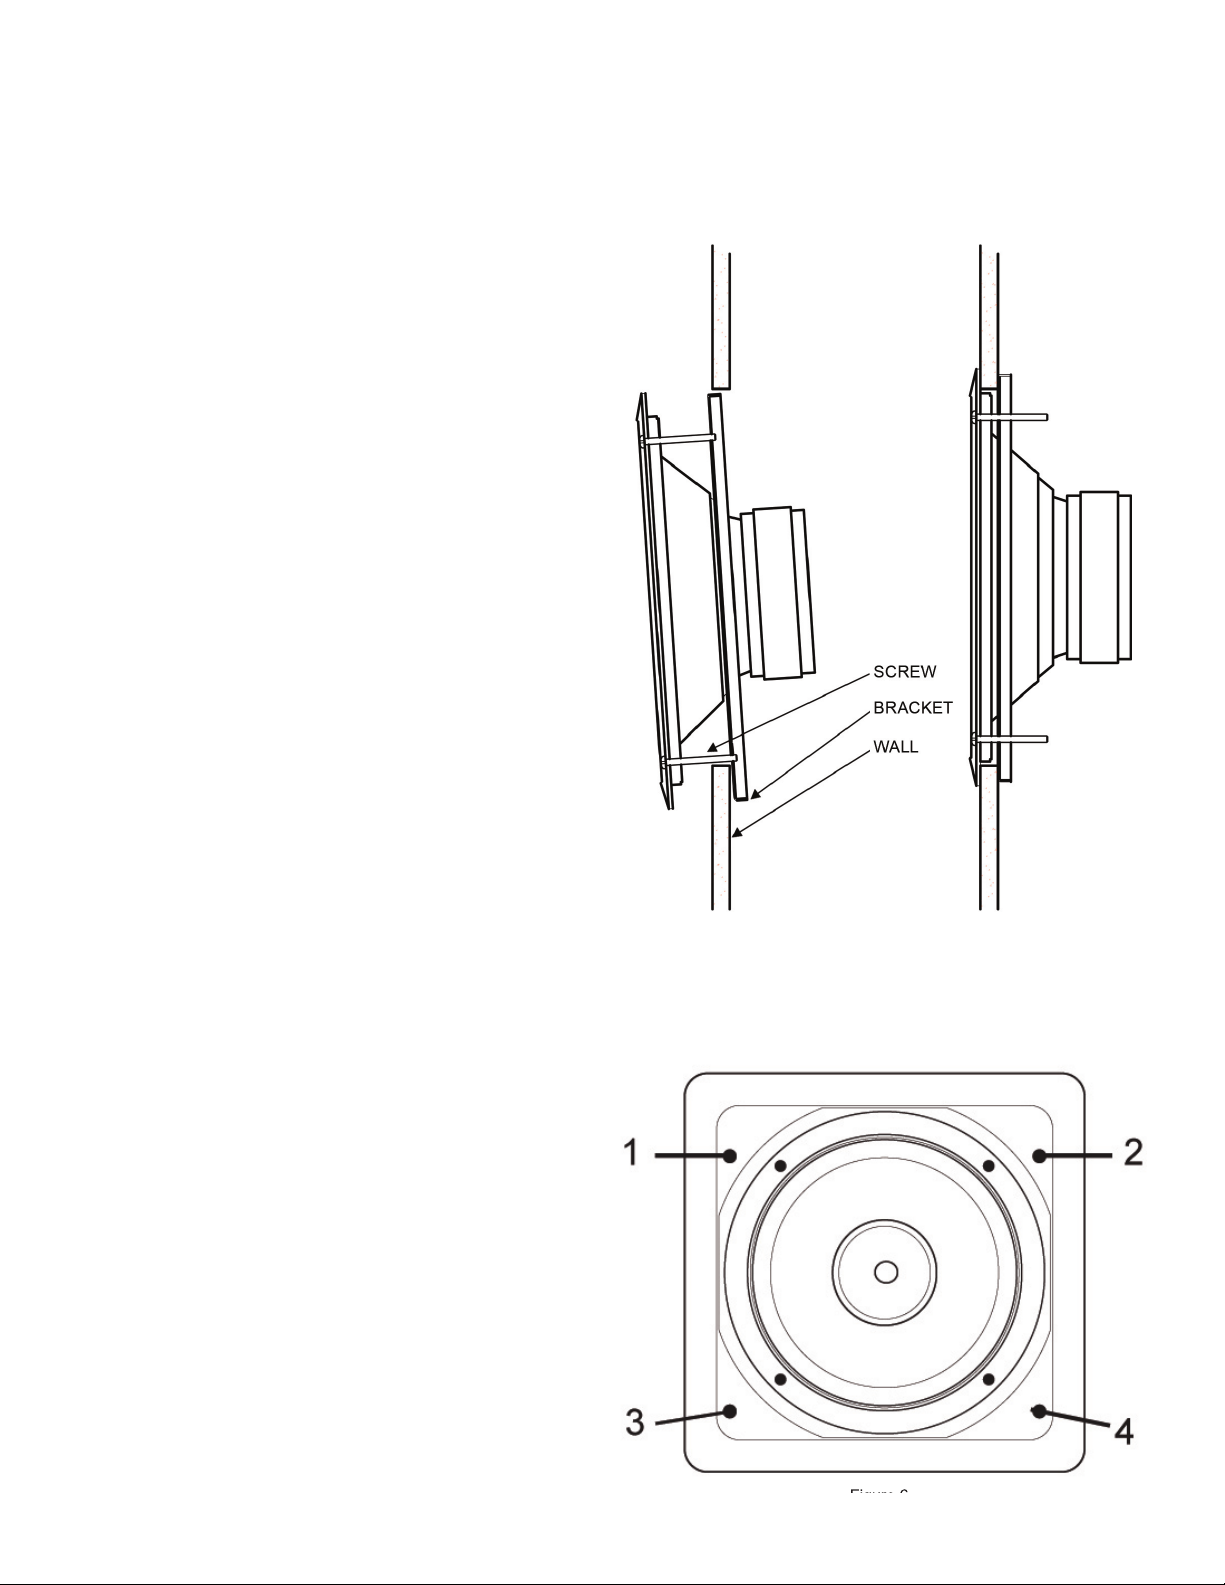
the top of the drywall cut-out. Next gently lift and center
the AS10SW into the cutout, and begin to tighten the 4
Tighten the four mounting screws in the same manner
wall surface. Caution: Do not over tighten! (Fig. 6)
A UL rated CL3 speaker wire is recommended when
to cross a 120V power line at a right angle, this is accept-
yourself in existing construction, it is recommended that
you retain a qualifi ed custom home installation specialist
To further enhance the performance of
your AS10SW speakers, the wall stud cavity where you
the area above and under the speaker opening with 6”
thick insulation to a depth of approximately 2 feet begin-
AS10SW. Your speaker wire is usually coded to identify
fi nd on the other. Identify which type of polarity coding
that your wire is using. You must carefully observe that
the positive terminal of the speaker output on your ampli-
fi er is connected to the positive terminal of the AS10SW
frame on the bottom drywall cut-out. Make sure that the
Page 3

The AS10SW is designed to be used with the sub output
Due to the high sound pressure levels
that the drywall in the area next to the subwoofer could
the sheetrock. Take care to keep the insulation away from
the subwoofers magnet (there is little clearance from
the back of the magnet to the back sheet rock once the
AS10SW is mounted).
to both sides of the 2” x 4” to brace the wall (see Fig. 7).
A paint shield is included in the AS10SW speaker pack-
When painting the grill caution should be taken to en-
the four mounting screws counter-clockwise. Gently pull
the AS10SW forward and lower the frame assembly so
the mounting screws have direct contact with the bottom
top of the AS10SW forward and draw the subwoofer out
The resistance of the speaker wire in your installation can
To prevent this effect in your installation we have recom-
AS10SW SIDE VIEW
2X4 BRACE
2X4 BRACE
Page 4

AS10SW Specifi cations
Woofer 10” Carbon Poly Cone with Butyl Surround
AudioSource, a division of Rodin, warrants this product against defects in materials and workmanship for a
tation to AudioSource or damage in transit. The customer should return their defective product, freight prepaid and
to be defective in workmanship or material, the consumer’s sole remedies will be repair or replacement as provided
to use the product. There are no express warranties other than described above.
Tel: 503.286.9300 Fax: 503.978.3381 Tech Support: 800.950.1449
Web: www.AudioSource.net Email: support@AudioSource.com
 Loading...