

Audio Pro WF100, TX100, RX100 Owner's Manual
GENERAL SETUP
POWER SUPPLY
TROUBLESHOOTING
N
O WIRELESS CONNECTION:
1. Make sure corresponding House
C
ode is the same on
X100 and
X100.
2.
R
eceiver is out of range from transmitter.
W
hen wireless connection is established o n same House
C
ode,
D on both transmitter and
receiver will go blue.
f no connection,
D goes red.
W
IRELESS CONNECTION, BUT NO SOUN
1. Make sure to choose correct source on receiving device.
2.
C
heck your audio source output is correct on transmitting device.
P
OWER SUPPLY:
1. Make sure both transmitter and receiver has power supply.
C
heck all connections and cables.
COM
PUTER
- Mac: Make sure you have chosen correct sound output.
S
ee “Mac
S
etup”.
PC
: Make sure you have chosen correct sound output unit.
S
ee “PCS
etup”.
WF100/RX100/TX100
O
WNER S MANUA L
WIRELESS
H
IFI TRANS
M
ITTER AN
D
RECEIVER
www.au diopro.co m
www.au diopro.s e
FEATURES
W
ireless full
C
D quality sound
obust and dedicated network for your audio
asy setup, get wireless music in seconds
W
ireless range room to room:
U
p to 20 meters
W
ireless range same room:
U
p to 50 meters
W
ireless range open field:
U
p to 100 meters
N
o interference or delays
ime delay max 10ms
W
orks with both Mac and
PC
P
lug ‘n play, no software needed
lexible multiroom possibilities
band: 2.4
G
S
ample rate: 44.1 KHz
- Dedicated proprietary protocol
USB
2.0 interface
PAC
K
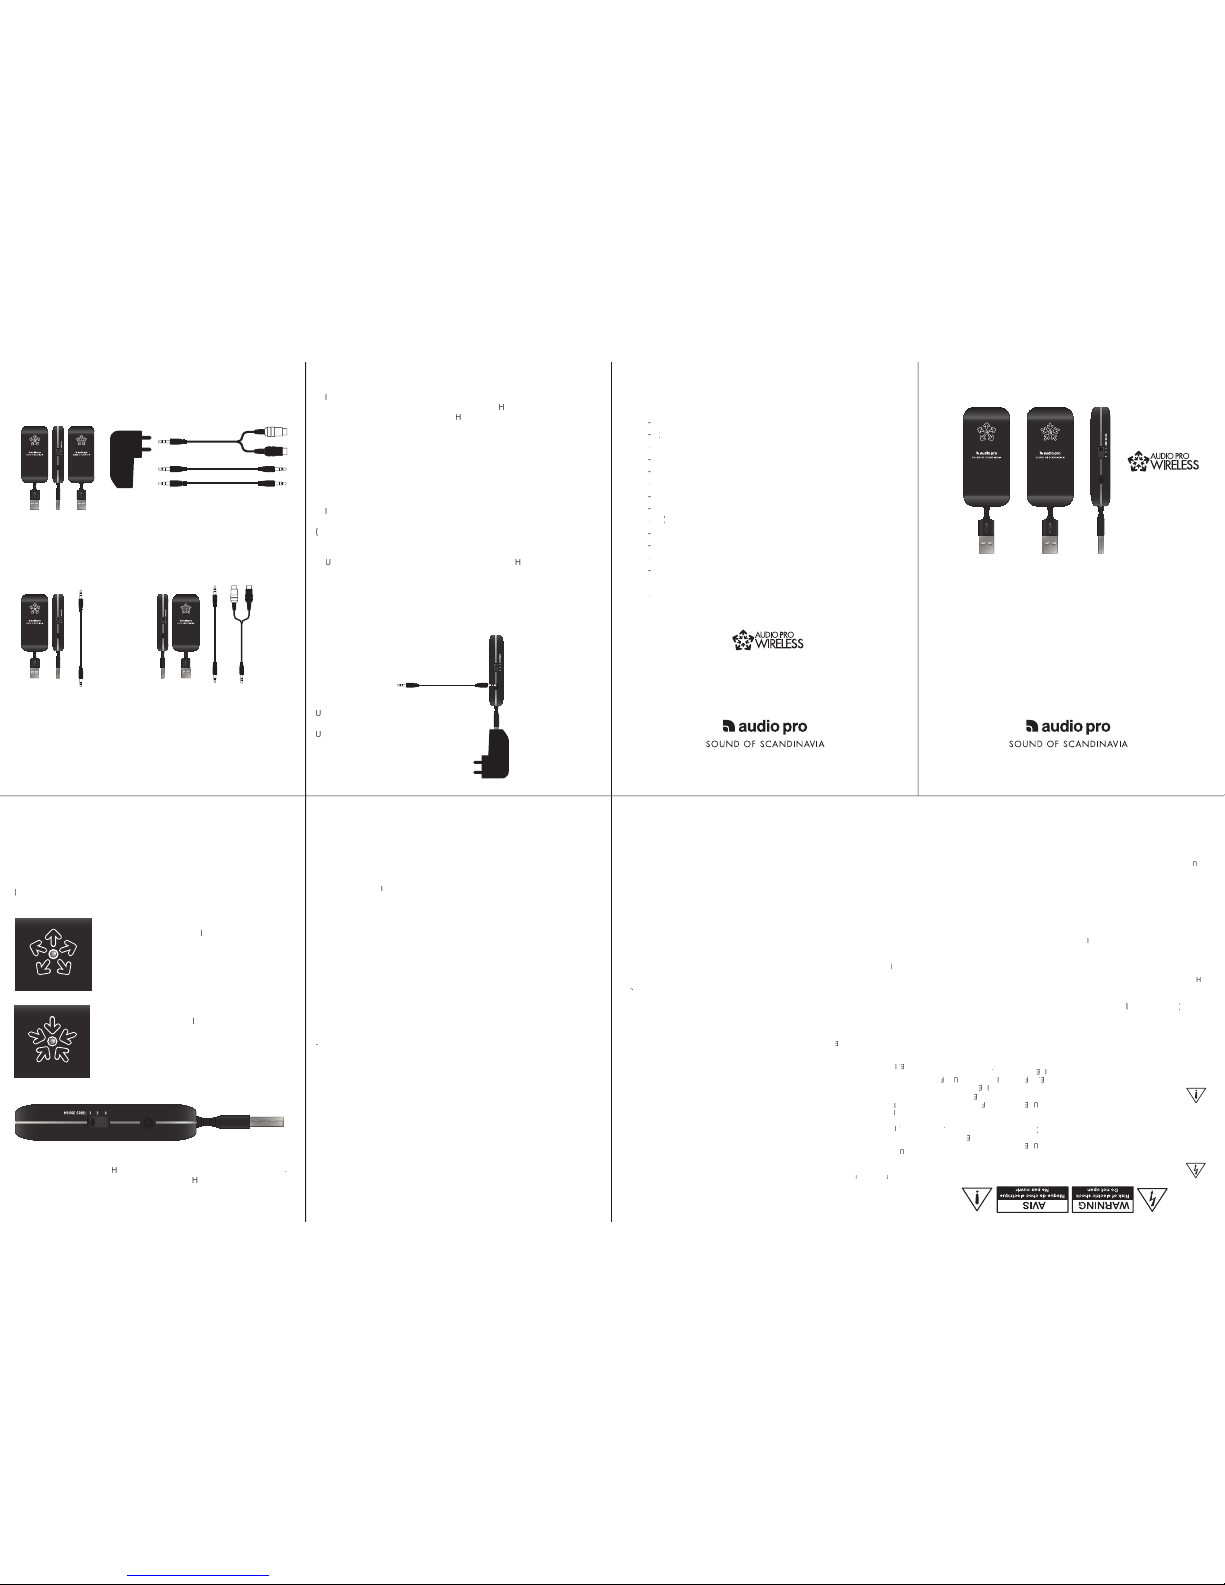
ING CONTENTS
U
se the enclosed AC power adap tor
when no
USB
power supply is available.
U
se cable from
X/
X100 to connect
to your device.
X100 will work on all
computers to send audio with out AC
adaptor.
X100 transmitter unit /
X100 receiver unit /
USB
AC power adaptor
2 x 3.5 mm stereo cable / 1 x Y-cable
CA to 3.5mm stereo
T
X100 transmitter unit
1 x 3.5 mm stereo cable
R
X100 receiver unit
1 x 3.5 mm stereo cable
1 x Y-cable
R
CA to 3.5mm stereo
Connect to device
T
o 220V power outlet
MAC SETUP
1.
nsert
X100 transmitter to a free
USB
socket
2. Go to
S
ystem Preferences, choose
S
ound under
H
ardware.
3. Click
O
utput in menu, choose “
USBHeadset”
Done! You can now send audio from your comp uter.
PC
SETUP
Please do following setup b efore using music playing software
(for example i
T
unes or
S
potify).
1.
nsert
X100 transmitter to a free
USB
socket.
Wait until software has been instal led.
(
S
ee lower right hand corner, message window will o pen when sound device
is ready to use.)
2. Click
S
tart button, go to Contro l Panel and choose
S
ound &
S
ound devices.
3.
U
nder playback of au dio, default unit, choose “
USBHeadset”.
Done! You can now send audio from your comp uter.
TRANS
M
ITTER
he
X100 is the transmitter.
t sends the audio signal.
Connect to device which you want to p lay from.
D lights up blue when wireless co nnection is
established.
D lights up red when no wireless
connection is established
H
OUSE
CO
D
E
With the unique feature of
ouse Codes, you can have up to three t ransmit
ters in one house, and as many reciever on eac h
ouse Code as you want.
Perfect when the house hold want to listen to different wireless music sources.
S
etting up your wireless audio ne twork is real simple.
he transmitter and
receiver need power, either through a
USB
socket or AC adaptor power
supply.
X100 receiver will need the supplied power adapt or for power.
Connect WF100 to any device with audio input or output. Jus t try your
devices, it will work. You may need to go to a retailer f or some additional
cables.
(
USB
2.0 input on receivers and other d evices is not to recommended to plu g
X100 to
as it this may cause noise and int erference.)
RECEIVER
T
he
R
X100 is the receiver.
I
t receives the audio signal.
Connect to the device you want to list en from.
D lights up blue when wireless co nnection is
established.
D lights up red when no wireless
connection is established
3.5 mm audio jack on side
WF100
X100
X100
WARNING:
TO
REDUCE
THE
RISKO
F F
IRE
OR
ELECTRI
C
SHO
CK, D
O
NOT
E
XP
OSE
THIS
APPARA
TUS
ATUSA
TO
R
A
IN
OR MOISTURE
.
CAUTION:
TO
REDUCE
THE
RISKO
F
ELECTRI
C
SHO
CK, D
O
NOT
RE
M
O
V
E
C
O
V
ER
(
OR
B
ACK).
NO
USER-SER
V
ICEABLE
PA
RTS
INSI
D
E.REFER
SER
V
I
C
ING
TO
Q
UALIFIE
D
SER
V
ICE
P
ERSONNEL
.
T
he lightning flash with arrowhead symbol, within
an equilateral triangle, is intended to alert the user
to the presence of uninsulated “dangerous voltage”
within the product’s enclosure that may be of
sufficient magnitude to constitute a risk of electric
shock to persons.
T
he exclamation point within an equilateral triangle
is intended to alert the user to the presence of
important operating and maintenance (servicing)
instructions in the literature accompanying the
appliance.
IMP
ORTAORTAORT
NT
SAF
ETYI
NSTRUCTIONS
1.
R
ead these instructions.
2. Keep these instructions.
3.
H
eed all warnings.
4. Follow all instructions.
5. Do not use this apparatus near water.
6. Clean only with dry cloth.
7. Do not block any ventilation openings.
I
nstall in accordance with the manufacturer’s instructions.
8. Do not install near any heat sources such as radiators, heat registers, stoves, or other apparatus
that produce heat.
9. Protect the power cord from being walked on or pinched particularly at plugs, convenience
receptacles, and the point where they exit from the apparatus.
10.
O
nly use attachments/accessories specified by the manufacturer.
11.
U
nplug this apparatus during lightning storms or when unused for long periods of time.
12.
R
efer all servicing to qualified service personnel.
S
ervicing is required when the apparatus has
been damaged in any way, such as power-supply cord or plug is damaged, liquid has been spilled
or objects have fallen into the apparatus, the apparatus has been exposed to rain or moisture, does
not operate normally, or has been dropped.
IMP
ORTAORTAORT
NT
SAF
ETYI
NSTRUCTIONSCONTINUE
D
13. Damage
R
equiringService
U
nplug the apparatus from the wall outlet and refer servicing to qualified service personnel under
thee following conditions:
A. When the power-supply cord or plug is damaged,
B.I
f liquid has been spilled, or objects have fallen into the
apparatus,
C.
I
f the apparatus has been exposed to rain or water,
D.
I
f the apparatus does not operate normally by following the operating instructions. Adjust only
those controls that are
covered by the operating instructions as an improper adjustment of other controls may result in
damage and will often require extensive work by a qualified technician to restore the apparatus to
its normal operation,
E.I
f the apparatus has been dropped or damaged in any way, and
F. When the apparatus exhibits a distinct change in performance this indicates a need for service.
14.
O
bject and Liquid
E
ntry
N
ever push objects of any kind into the apparatus through openings as they may touch dangerous
voltage points or short-out parts that could result in a fire or electric shock.
T
he apparatus shall
not be exposed to dripping or splashing and no objects filled with liquids, such as vases shall be
placed on the apparatus. Don’t put candles or other burning objects on top of this unit.
15.
B
atteries
Always consider the environmental issues and follow local regulations when disposing of batter
-
Always consider the environmental issues and follow local regulations when disposing of batter-Always consider the environmental issues and follow local regulations when disposing of batter
ies.
16.
I
f you install the apparatus in a built-in installation, such as a bookcase or rack, ensure that
there is adequate ventilation.
L
eave 20 cm (8”) of free space at the top and sides and 10 cm (4”)
at the rear.
T
he rear edge of the shelf or board above the apparatus shall be set 10 cm (4”) away
from the rear panel or wall, creating a flue-like gap for warm air to escape.
17.
This device has no mains switch. To disconnect this device from mains supply, the power
cord must be disconnected.
18. The power supply and power cord for this apparatus is intended for indoor use only.
19. Only use the enclosed A/C adaptor.
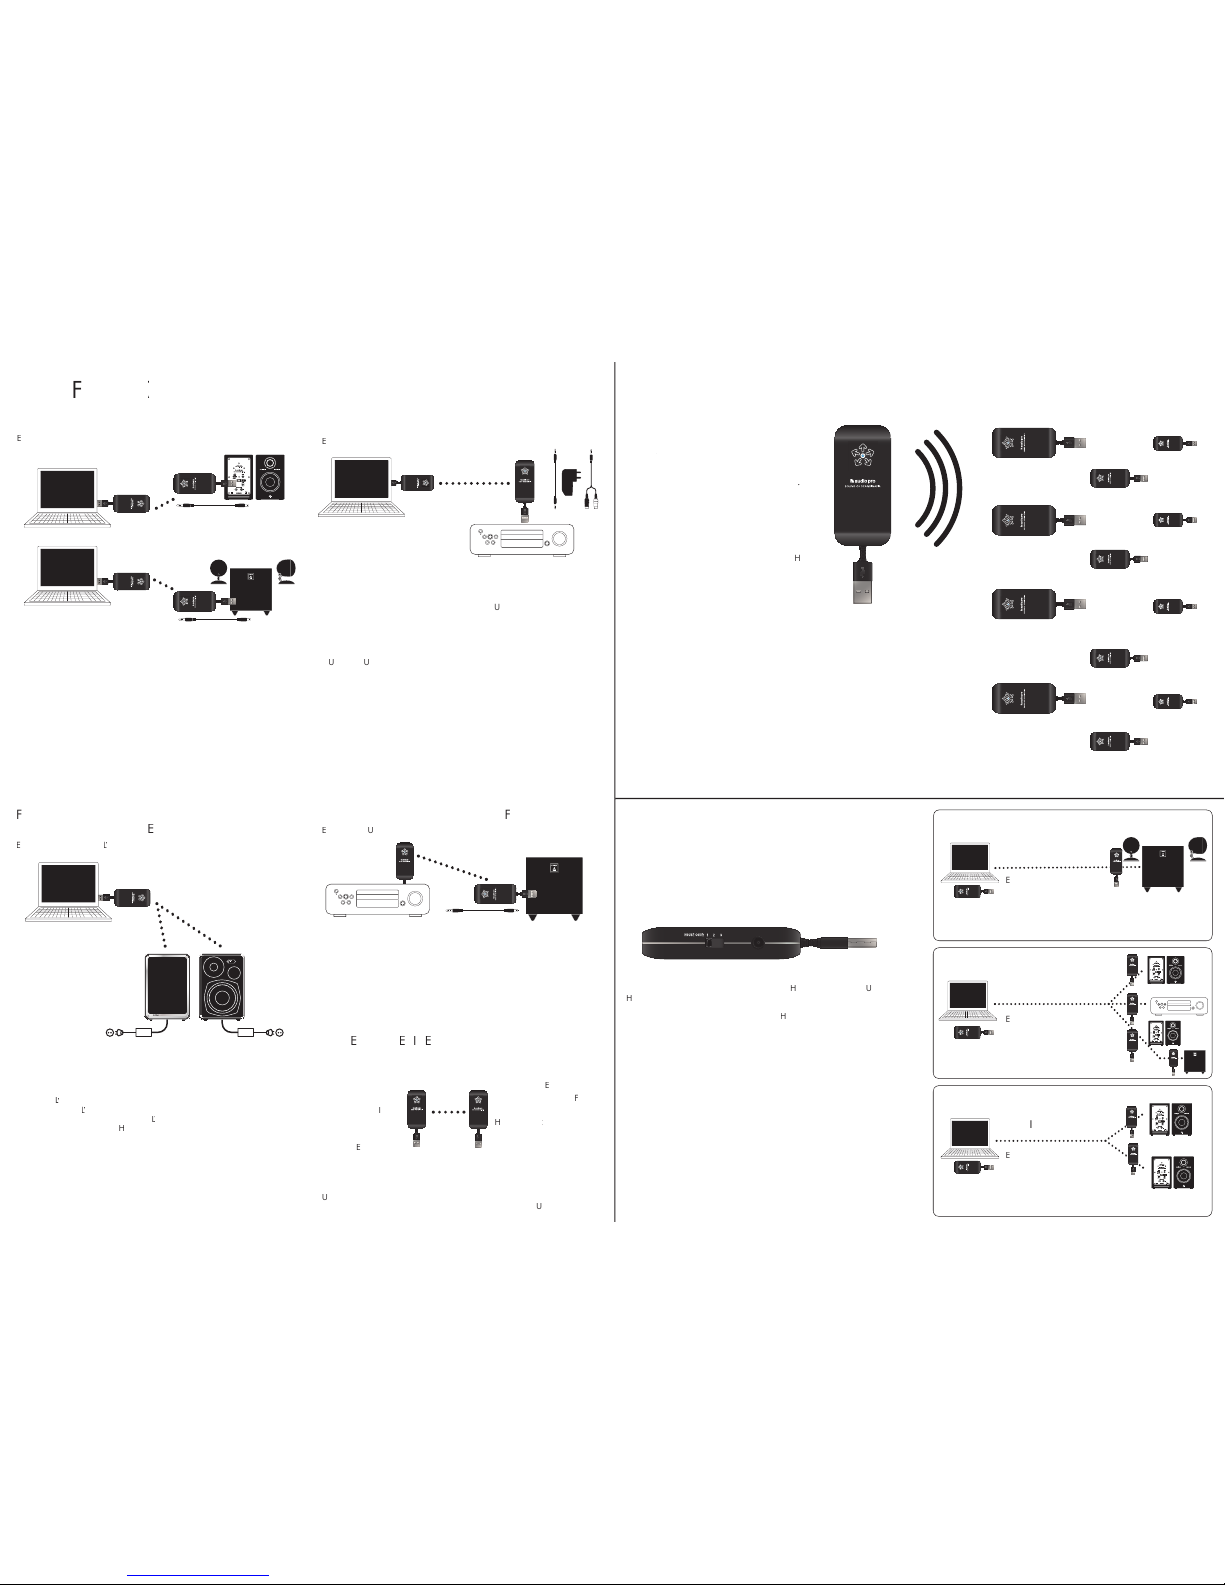
CON
TIONS
M
CO
M
XAMP
MULTIPLE TRANS
M
RECEIVERS,
OUSECO
3
OUSECO
3
xample:
O
sending to 3 receivers, one in
stereo, and two in 2 pairs of
Addon
O
xample:
O
sending to one receiver in
Addon 3 powered speaker
system.
xample:
O
sending to two receivers i t wo
O
speakers. Addon
O
M
AN
M
X
S ROO
M
MULTIPLE RECEIVERS FRO
M
ONE TRANS
M
M
MP
W
W
XAMP
V2
MAK
V
W
T
V
O
MP
AY
C
GAMC
ONSOL
W
OR
AY
STEREO RE
C
V
OW S
OW SUBWOO
STEREO RE
C
V
OMC
V
M
COM SPEA
XAMP
ON ONE & THREE
TEREO TO
W
SUB
W
XAMP
A key feature on the WF100 is the ability to handle 3 ho use codes.
from different sound sourc es to different loudspeakers or stereos/receiver
amplifiers.
different active speakers/stereos a t the same time with no interference.
OTX100 and
X100 is the
ouse Code setting.
se same
ouse code on the transmitt er as on the receiver.
T
audio network. And if you want on e
T
X100 transmitter to play music on all
X100 recievers on your home, just switch
ouse Code on receivers to matc h
the transmitter.
As the WF100 dongles sets up a robust and secure
audio network, all
X100 receivers with same
ouse
Code as the
T
X100 transmitter will work in the same
T
to more rooms, or add more receivers conn ected to
any other device.
et wireless music fill every room of
your home.
ote:
Volume can be adjusted on the device wh ere the
T
X100 transmitter is
connected, or on the devic es connected to the
X100 receiver.
this may damage the device.
T
X100
X100
X100 transmitter to the computer.
2. Play your music on your computer.
ote:
Audio Pro
V2 is an advanced fully powered digita l speaker with built-in
wireless receiver.
V2 is remote controlled and has add ed features such as
zone volume control (up to 3 zones ).
V2 can be mixed in an existing WF100
audio network and handl es
ouse Codes.
T
X100 transmitter to the computer.
2. Connect the
X100 receiver to external
power supply.
X input.
4. Choose source to which you have conne cted cables.
Play your music on your computer.
ote:
T
X100 to any
A
X input.
se the supplied
CA to 3.5 mini-jack Y cable. (you nee d a
CA
extension cable, not supplied.) Co nnect the
X100 receiver to the supplied
X100 transmitter to the computer.
2. Connect the
X100 receiver to the
power supply on Addon
O
Addon Oor Addon
4. Play your music on your computer.
ote:
X100 receiver to the
supplied power adaptor inste ad of a
power supply.
X100 transmitter to the power adaptor.
2. Plug a 3.5 mm stereo/
CA cable to the
SUB
out and into the
X100.
X100 receiver to the
power supply on subwoofer.
4. Connect
X100 to the subwoofer
ote:
S
ome Audio Pro subwoofer has
the
power supply built-in, but if your su bwoofer doesn’t have this feature,
AC adaptor to power the
X100 receiver.
se the WF100 in any configuration with all devices which has he adphones
out or Audio out. And connect to any d evice which has a A
X in or
in.
ONES
&
OUT
AU
X IN
A
M
ORE RECEIVERS TO GET
WIRELESS
AUMORE ROO
M
S.
ORMORE SPEA
M
M
O LIMM
WOR
M
ONE TRANS
M
 Loading...