

Page 1
English
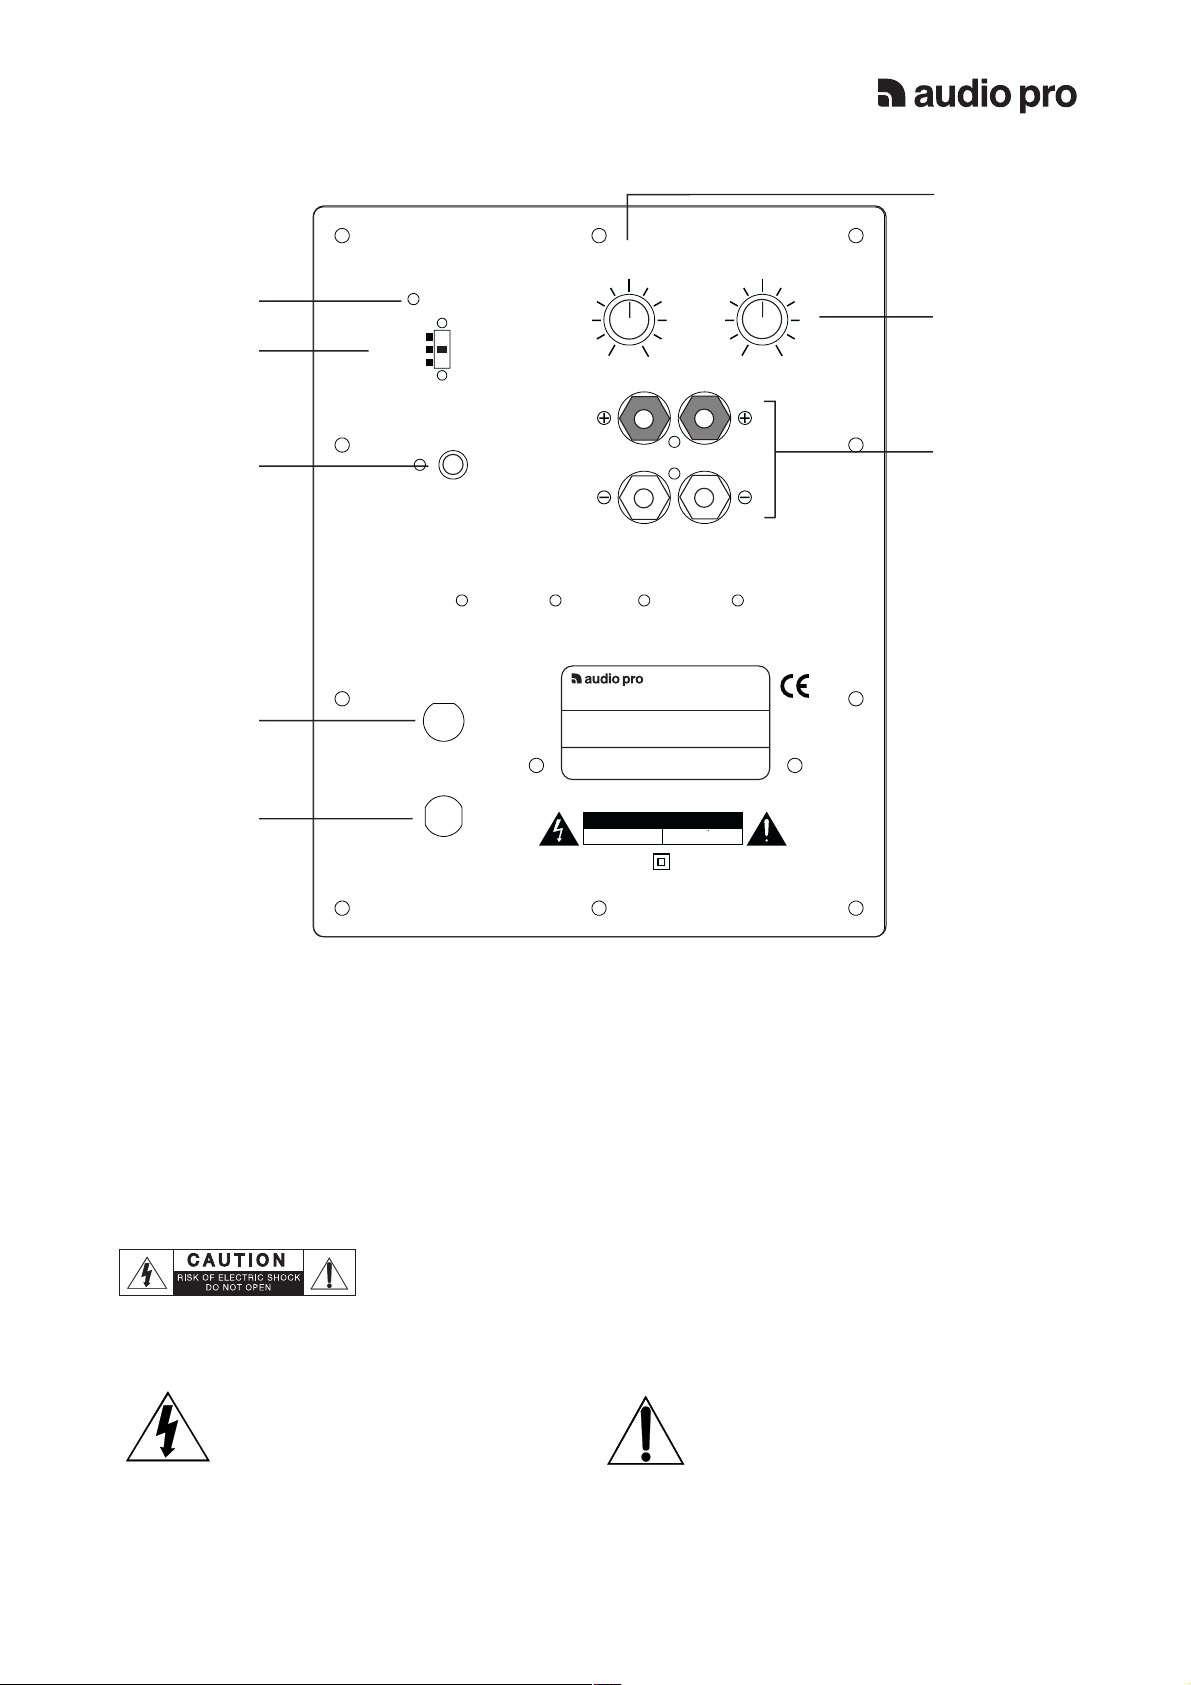
CONTROLS AND INDICAT ORS
( 6
1)
2)
3)
4)
5)
POWER
ON
AUTO
OFF
INPUT
FUSE TYPE:
T 800 mAL
230V~/50Hz
50 WATTS
CROSSOVER
50
Hz
150
LR
FROM RECEIVER
BASIQ SUB
Powered Subwoofer
Audio Pro AB. Sweden
WARNING:
TO REDUCE THERISK OF FIRE OR ELECTRICSHOCK,
DO NOT EXPOSETHIS APPLIANCE TO RAIN ORMOISTURE.
CAUTION
CAUTION
BEFORE OPENING
CAUTION:
TO REDUCE THERISK OF FIRE,
REPLACE WITH ONLY THE SAME
TYPE AND RATING FUSE.
PULL MAINPLUG
LEVEL
MIN
MAX
VORSICHT
VOR DEMOFFNEN
NETZSTECKER ZIEHEN
DOUBLE INSULATIONWhen servicing use only identicalpar ts
( 7
( 8
1) Power LED:
3) Line input
7) Volume control
Green light = ON
Red light = OFF or Standby
2) Mains switch
4) Fuse
5) Mains cord (230V)
8) Speaker level input
OFF / AUTO or ON
6) Lo-Pass crossover
(variable 50Hz - 150 Hz)
WARNING !
To reduce the risk of electric shock, do not open or remove cover or back. Do not expose this appliance to rain or moisture. In case
of malfunction consult qualified service personel.
The lightning flash with arrowhead, within an equilateral
triangle, is intended to alert the user of the presence of
uninsulated "dangerous voltage" within the product´s
The exclamation point, within an equilateral triangle, is intended to alert
the user of the presence of important operating and maintenance (servicing)
instructions in the literature accompanying the appliance.
enclosure; that may be of sufficient magnitude to constitute a
risk of electric shock to persons.
6
Page 2

English
INSTRUCTIONS
Congratulations to your choise of Audio Pro subwoofer and to a new sound experience.
Audio Pro
handle and install. It is equipped with a built-in amplifier and a long throw woofer . T ogether with
the extremely solid cabinet , the subwoofer offers a natural and deep bass reproduction at sound
levels you never thought existed.
The Audio Pro subwoofer offers extraordinary performance and lots of possibilities. In order
to get the most out of your new subwoofer, we recommend you to spend time and carefully read
these instructions before you connect and start up your system.
subwoofer is a unique product built with advanced technique. It is very easy to
1. UNP ACKING
Carefully unpack the Audio Pro subwoofer and check for any damages. If possible, keep the cartonbox if future
transportation is needed.
You should immediately contact your dealer if the subwoofer is damaged .
2. INST ALLA TION
There are different methods to connect your subwoofer to a HiFi / Home Theater system. In the following we explain
2 different ways. NOTE! Do not connect the mains cord until all other installation is completed.
2.1 T o an amplifier / pre-amplifier with Subwoofer-out terminal.
Connect the enclosed wire from your amplifiers subwoofer-out terminal to LINE IN on the subwoofer.
The audio signal is passing through the cord from the subwoofer-out terminal to the built-in amplifier .
By using the LO-P ASS control, the upper frequnency of the subwoofer can be variably selected from
50Hz - 150Hz.
Note: Connect the satellite speakers to the main amplifier speaker terminals.
2.2 To Speaker or (Subwoofer speaker) terminal
(High level)
Connect speaker wires from the speaker terminals of your amplifier/receiver to the Speaker Level input on the
subwoofer amplifier. Carefully check the polarity of the wires (+ to + and - to -). Connect both Left and Right channels.
The satellite speakers are connected to the main amplifier as usual.
7
Page 3
English
3. FUNCTIONS
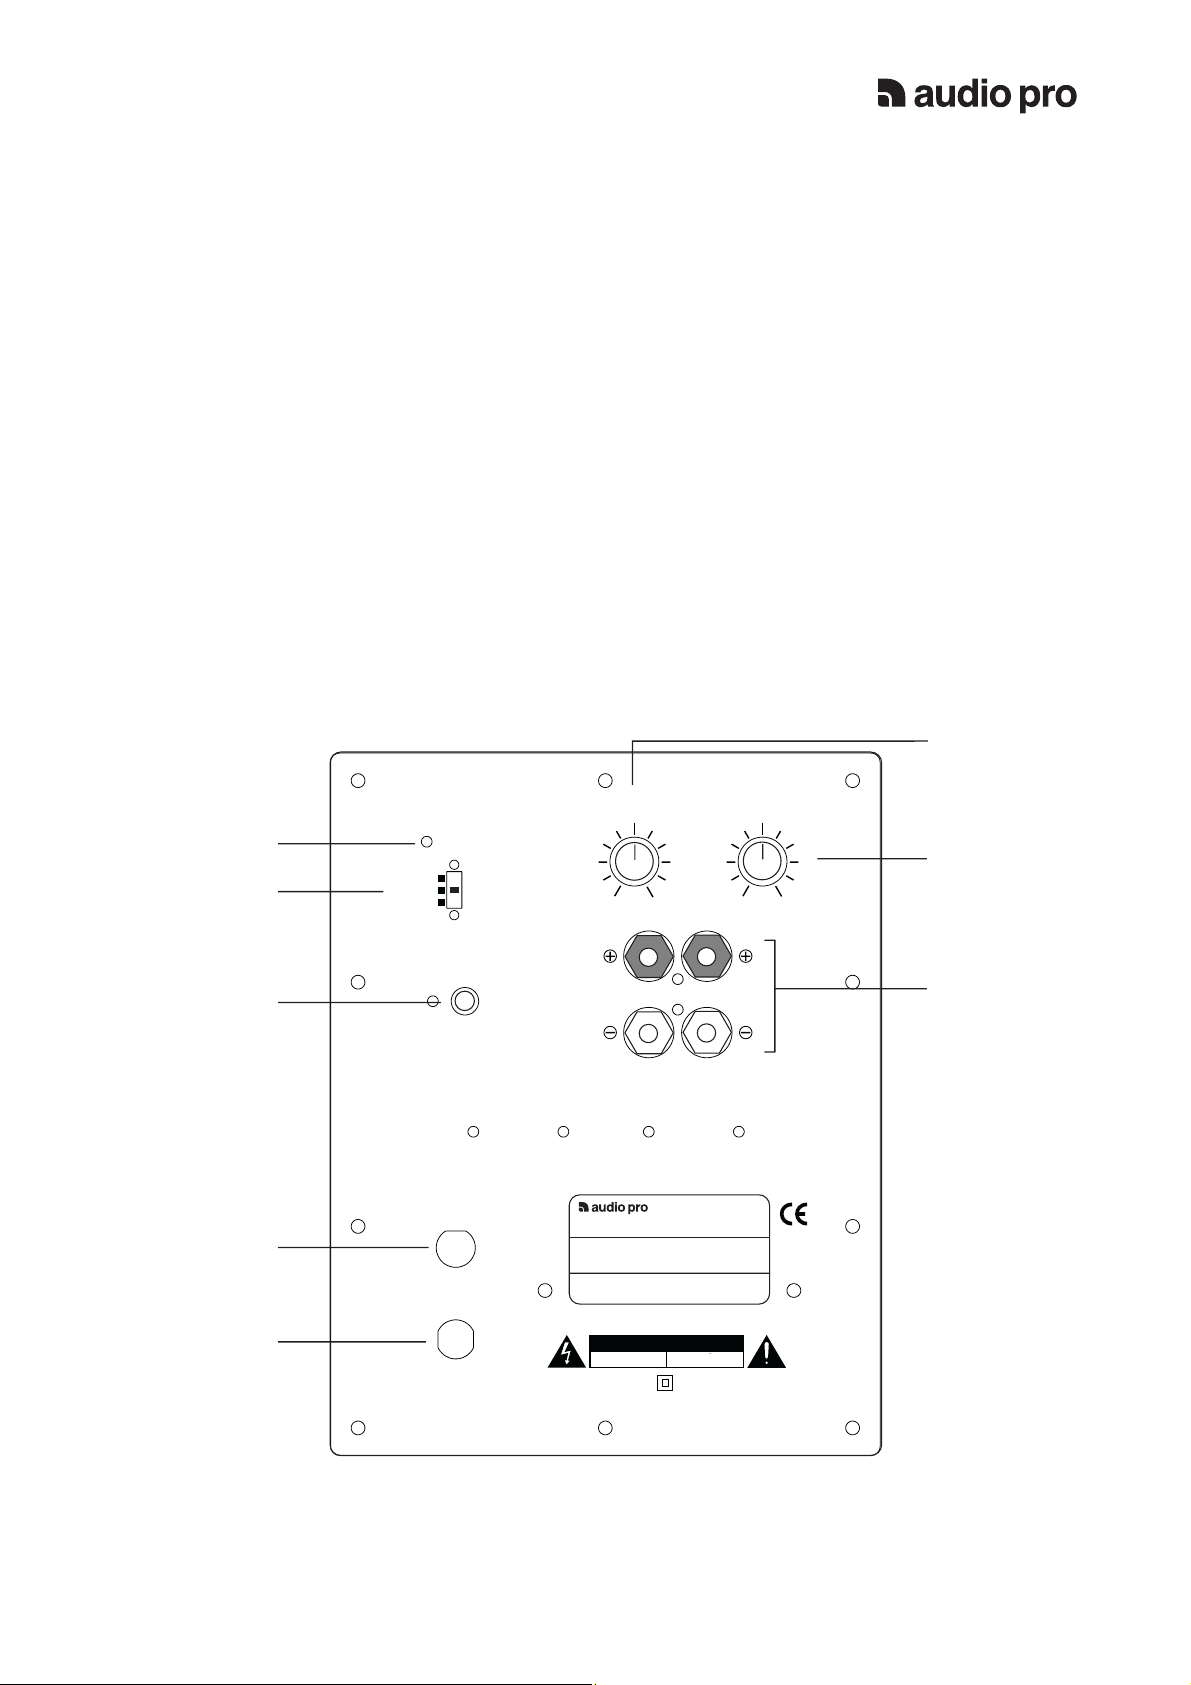
Power switch (2):
T o switch the subwoofer amplifier to ON, AUTO or OFF
mode.
Make sure that the power cord is not connected to
the outlet during installation.
AUTO MODE:
standby mode if no signal been detected in 15 - 20
minutes. It goes on automatically if signal is detected.
ON MODE: The amplifier will be constantly ON.
OFF MODE: The amplifier is off but not totally off.
Diconnect the power cord from the outlet if it will not be
used for a period of time.
The amplifier goes automatically into
ON
AUTO
OFF
POWER
1)
2)
CROSSOVER
Main Power indicator: (1)
Green light indicates the subwoofer is ON.
Red light indicates that the subwoofer is either in
St andby or OFF mode. The red indication will be lit off
when the power cord is disconnected.
Volume control (7):
The sound level of the subwoofer can be adjusted. Use
the Level control carefully , remember that
program material may contain very high energy.
LowPass (6):
The Lowpass crossover frequency can be adjusted
variably between 50 and 150Hz. This gives you a
unique possibility to perfectly match the Subwoofer to
your satellite speakers and to your preference.
( 6
LEVEL
( 7
MIN
50
Hz
150
MAX
3)
4)
5)
INPUT
FUSE TYPE:
T 800 mAL
230V~/50Hz
50 WATTS
FROM RECEIVER
BASIQ SUB
Powered Subwoofer
Audio Pro AB. Sweden
WARNING:
TO REDUCETHE RISK OF FIRE OR ELECTRICSHOCK,
DO NOT EXPOSETHIS APPLIANCE TO RAINOR MOISTURE.
CAUTION
CAUTION
BEFORE OPENING
CAUTION:
TO REDUCE THERISK OF FIRE,
REPLACE WITH ONLY THE SAME
TYPE AND RATING FUSE.
PULL MAINPLUG
LR
VORSICHT
VOR DEMOFFNEN
NETZSTECKER ZIEHEN
DOUBLE INSULATIONWhen servicing use only identicalpar ts
( 8
8
Page 4

5.
English
4. PLACEMENT
Your Audio Pro subwoofer is designed to
produce music information in the frequency
range below 150 Hz. The human ear is being
devoided the ability to localize sound of these
low frequencies why the placement of the subwoofer is not critical. Audio Pro subwoofers
steep lowpass filters make the placement
easier to fit into your listening room. However
you can use the nature of the acoustic laws in
the following ways:
1. To get the most amplification of the room itself,
place the subwoofer close to a corner at a
distance of about 10 cm from the walls. If you
get to much bass, move the subwoofer slightly
out from the corner or adjust the level.
2. By experimenting with the placement of the
subwoofer, you can optimize the sound quality.
One good rule is to place the subwoofer at the
same wall as the satellite speakers.
TROUBLESHOOTING
If you should face any problem with the subwoofer function, please check the below point. If
the problem remains after checking, please
contact your dealer .
1. Check that all connections have been made
properly . Check if any of the wires or connectors
are damaged or short-cirquit.
3. Never cover the subwoofer or place it where the
built-in amplifier will be covered.
6. TECHNICAL SPECIFICATIONS
Amplifier(RMS):.....................................100 Watt
Woofer:.................................................................8"
Frequency range:...................................29-200Hz
Lowpass filter:.......................................50 - 150Hz
Dimensions: (W)..................................320 mm
(H)...................................320 mm
(D)...................................320 mm
Weight:(net):.................................................9,0 Kg
Specifications may be changed without notice, Audio Pro
follows a policy of continous advancement in development
9
 Loading...