

Audio Physic RHEA II Owner's Manual

No loss of fine detail
Owner’s Manual
RHEA II
Safety Instructions
Please take the time to thoroughly read the information provided in this operation manual before you
operate the Audio Physic RHEA II. The following safety instructions must be strictly observed:
- Only use or store the RHEA II in a dry place. Do not spill any kind of liquid on or insert any object
into the subwoofer. If any liquid or object has entered your RHEA II, unplug the subwoofer
immediately from the wall outlet and switch off all other equipment such as amplifier or multichannel decoder. Remove also the cables connecting your RHEA II to the amplifier or multichannel decoder. Refer safety check and servicing of your RHEA II to an authorised Audio Physic
dealer.
- Position the RHEA II on a stable and level floor.
- Make sure the location of the RHEA II allows sufficient air exchange for cooling and ventilation in
order to dissipate the generated heat.
- If your RHEA II has been exposed to a cold environment (for example during transportation), do
not operate the subwoofer until it has regained room temperature and possible condensation has
evaporated.
- Unplug the RHEA II when not in use for a longer period of time.
- Do not leave your RHEA II unattended when in use.
- Make sure that you exactly follow the instructions given in the chapter “Setup, Connection and
Adjustment of your RHEA II”.
- When positioning your RHEA II, leave at least 1m of clearance around any television sets,
computer monitors or other devices equipped with a cathode-ray tube. Otherwise, the magnetic
field created by the drivers of the RHEA II may permanently distort your television or monitor
screen.
- Do not expose your RHEA II to strong and direct sunlight (ultraviolet light).
- Keep the RHEA II and especially the connecting terminals out of reach of small children.
- Make sure that you switch off the RHEA II by pressing the subwoofer’s switch-off button before
you start to clean the subwoofer. Only use a soft, clean cloth, moistened with a mild soap solution
(but not wet!) to clean the cabinet of your RHEA II. Remove residual moisture with a soft, clean
and dry cloth. Never use chemically aggressive liquids such as alcohol, solvents, diluting agents
or petrol to clean the subwoofer. Use only a clean, dry, soft brush to clean the drivers. You should
be extremely careful when doing so. Make sure that no short circuit condition exists at the
connecting terminals and that all terminals and plugs are properly connected before you restart
the RHEA II.
- Contact an authorised Audio Physic dealer if your RHEA II is in need of repair or has to be
opened. If your RHEA II is damaged or if it does not function properly, unplug the subwoofer
immediately and refer safety check and servicing to an authorised Audio Physic dealer.
Introduction
Congratulations! You have chosen an expertly designed and professionally manufactured
subwoofer. The Audio Physic RHEA II is a state-of-the-art audio component which provides
uncompromised quality even in the deepest bass region.
In order to ensure excellent bass performance, it is necessary to precisely adjust the subwoofer to
the main loudspeakers and to the listening room. In designing the RHEA II, this inspired us to
include an adjustment concept which allows perfect adjustment to the features and characteristics
of your listening room. Therefore you will be able to always achieve a high quality balanced
performance, independent of room variations.
We encourage you to read this manual thoroughly and in depth, as there is a great deal of
information provided here. The information enables you to attain the greatest possible
performance from the RHEA II as well as instructions on how to avoid damages to your subwoofer
or associated equipment. Please also follow the recommendations offered in the manual regarding
the positioning of your RHEA II.
Setup, Connection and Adjustment of your RHEA II
Should you encounter any problems which cannot be solved or any questions which cannot be
answered, please contact your authorised Audio Physic dealer.
Enjoy the discovery of a new aspect of music reproduction.
[ audio physic ]
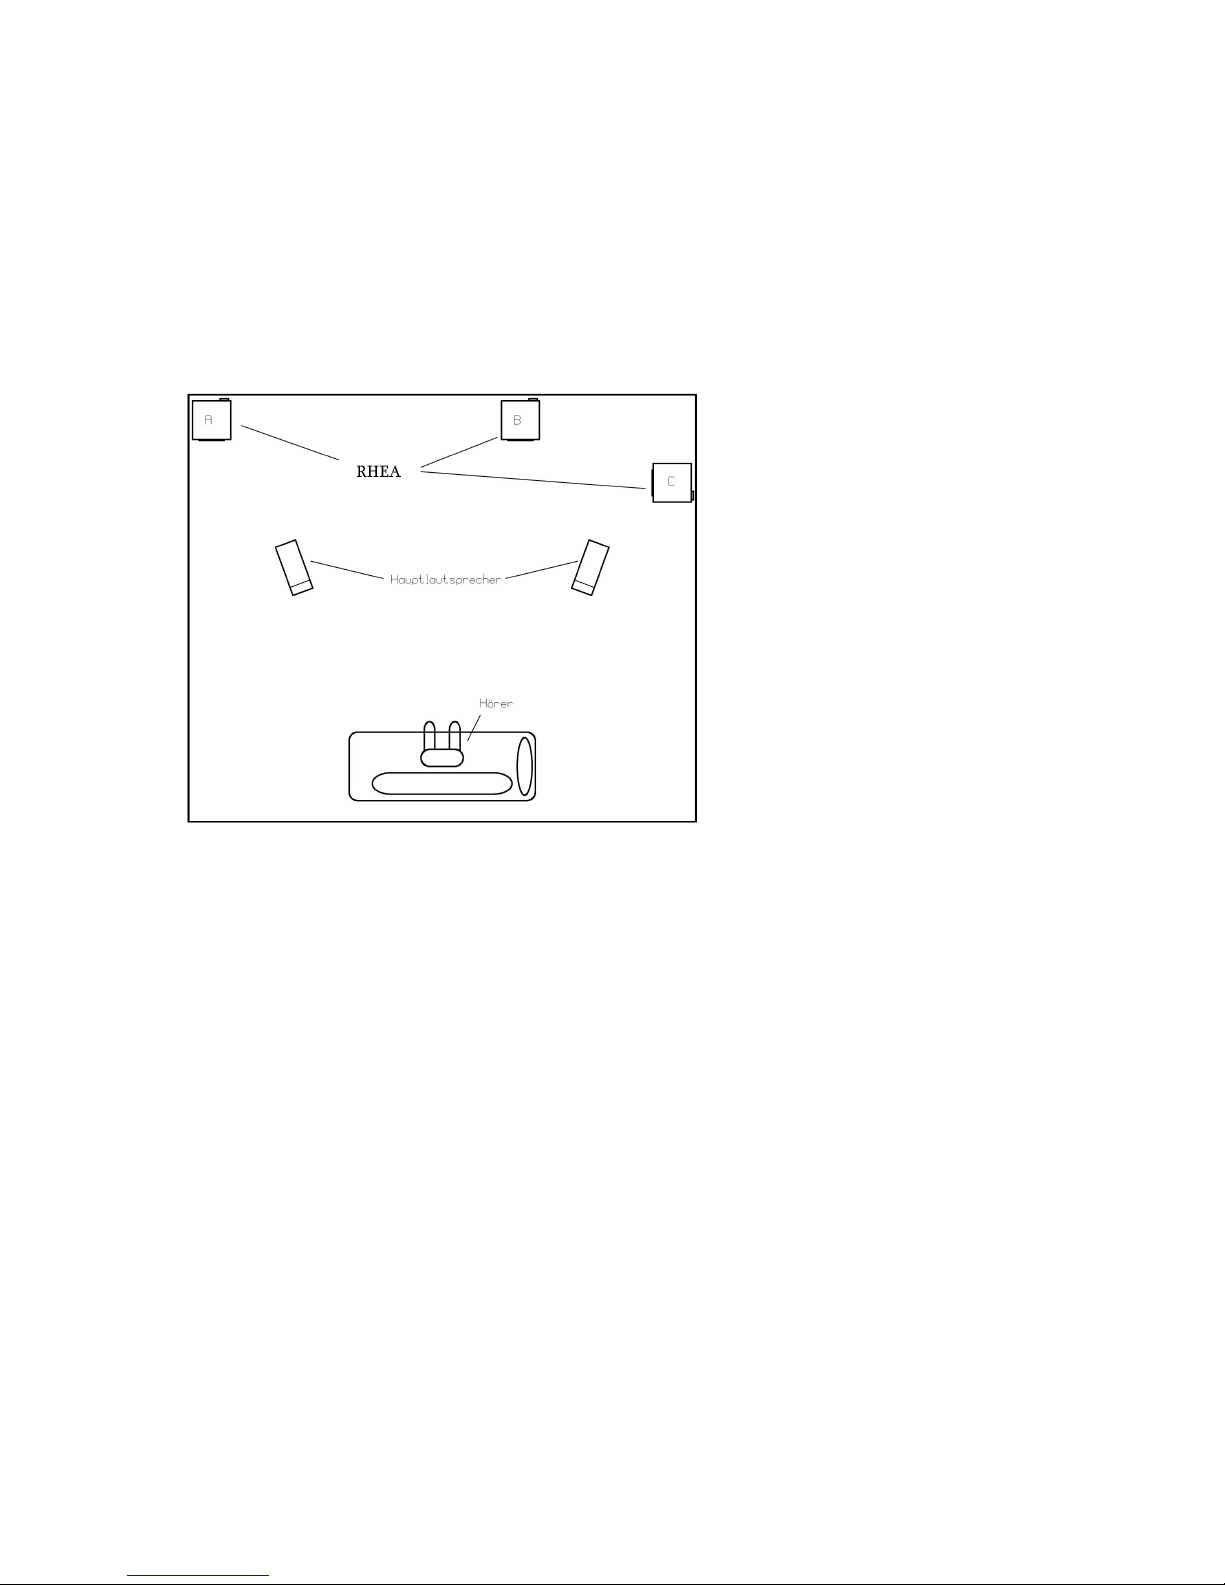
Setup
Setting up the RHEA II is easy and can be done in two different ways:
- The subwoofer can be positioned in a corner of the room (1.A)
- The subwoofer can be positioned alongside a wall (1.B and 1.C)
The RHEA II should be placed in the area of the room opposite the listening seat. Both set-ups are
equivalent in acoustic terms, however, in critical rooms (such as rooms with large reflective surfaces
made of concrete or glass, sparsely furnished or square rooms), we recommend that you place the
subwoofer alongside a wall according to set-up 1.B or 1.C.
Make sure you follow the recommendations for correct positioning provided in the chapter “Safety
Instructions” at the beginning of the manual.
Before you decide on the final position, you need to thread the four spikes included in the delivery
into the inserts mounted at the bottom of the RHEA II and screw them in. Now place the subwoofer
on its four spikes. Adjust the subwoofer by rotating the spikes until they are firmly set on the ground
and the RHEA II is level and stable. In a next step, tighten the lock nuts included in the delivery onto
the spikes.
The same instructions apply if two RHEA II need to be positioned. However if this is the case we
recommend that you align both subwoofers symmetrically along an imaginary axis extending from
the listening seat to the central point between the two loudspeakers.
We recommend that you keep the boxes and packaging material and set them aside for later use.
Connection
The RHEA II is designed for operation at a mains voltage of 230 V/50 Hz AC, unless otherwise
specified on the amplifier module (2.4). Severe damage may occur to the RHEA II if operation is
attempted from a power source other than that indicated on the nameplate.
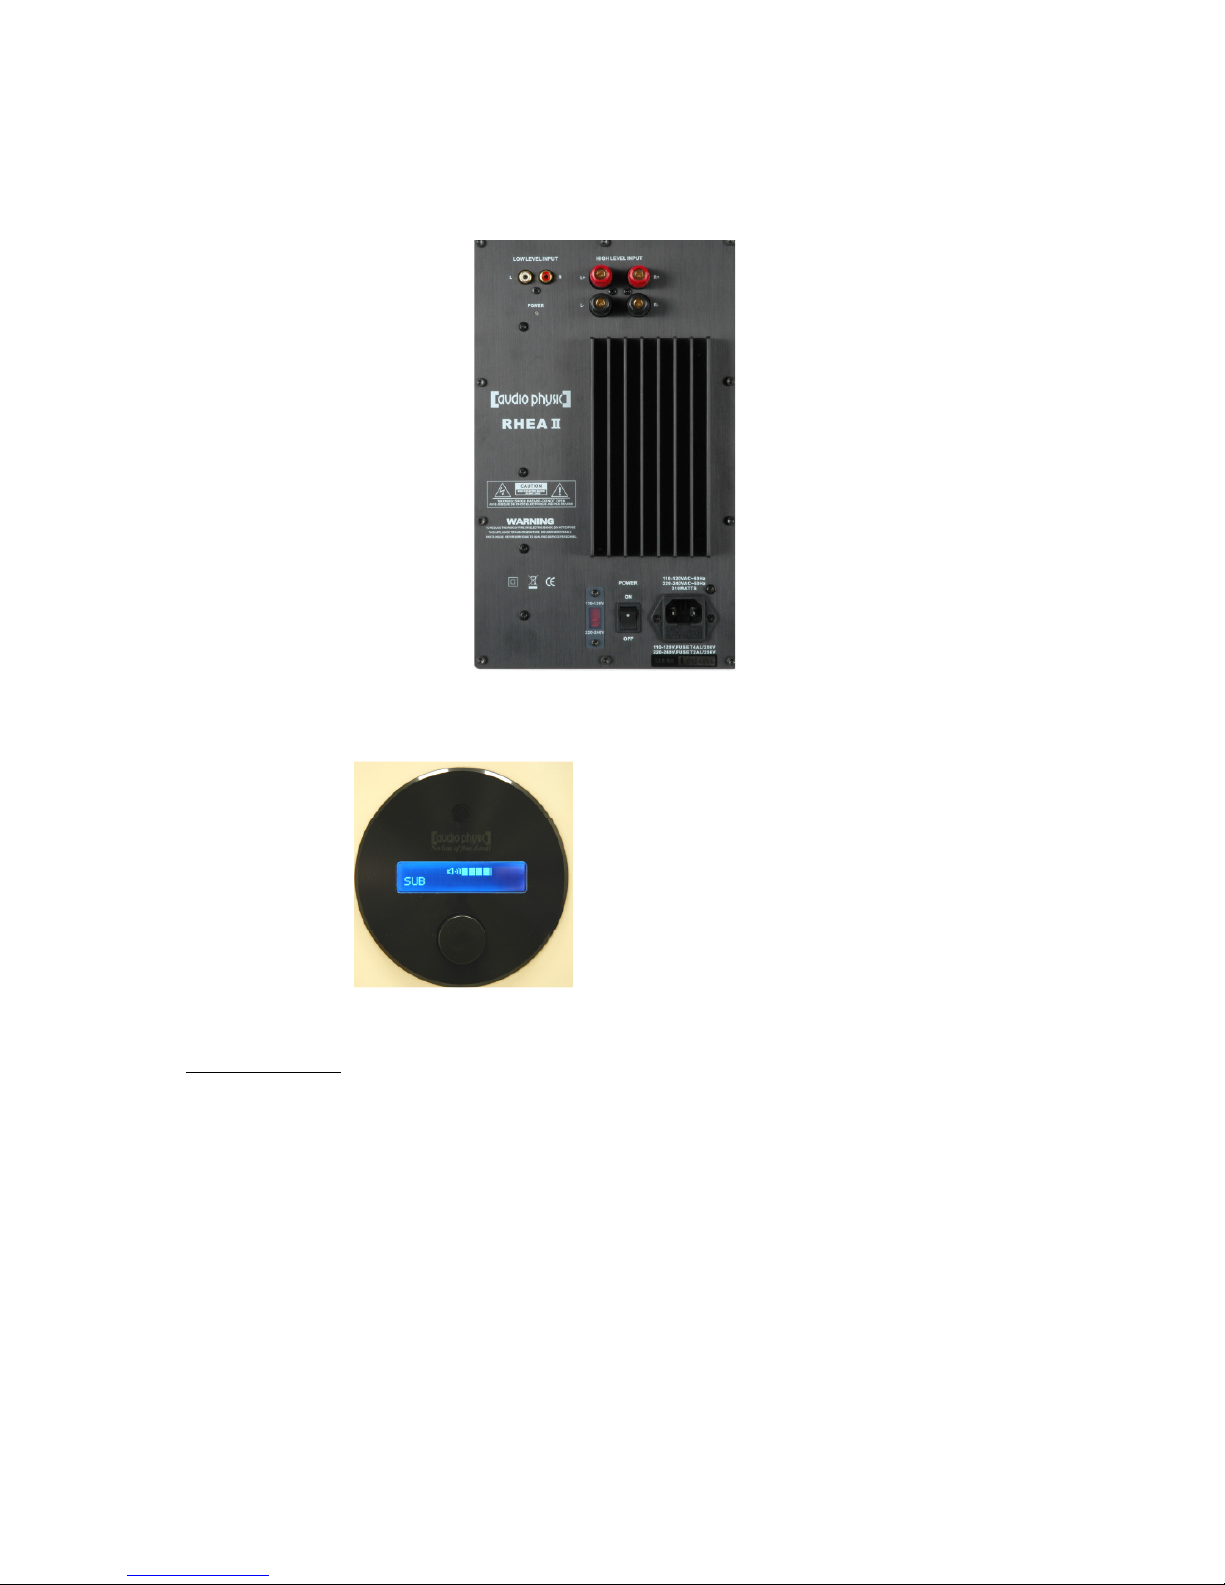
Amplifier Module
Low-level inputs (2.1)
Power indicator (2.2)
Mains voltage indicator (2.4)
High-level inputs (2.3)
Main power switch (2.5) /
Power socket (2.6)
Control Unit
Remote control receiver (2.7)
Display (2.8)
Multifunction switch (2.9)
Power connection:
Make sure that your local AC mains voltage matches the voltage specified and indicated in red (2.4).
Use the supplied power supply cable to connect the mains socket of the subwoofer (2.6) to a wall
socket.
Turn the main power switch to position "ON" (2.5) in order to check the operability of your RHEA II.
The indicator light will glow red.
Now turn the main power switch (2.5) to position "OFF" in order to switch the subwoofer off. Make sure
that you always switch off the RHEA II and the connected amplifier before you start to make changes
to the cables of the subwoofer in order to avoid damage to the subwoofer and to your amplifier.
 Loading...