

Page 1
Telefon - Telephone
Bedienungsanleitung
Operating Instructions
Page 2

- Inhaltsverzeichnis -
Operating Instruction in English _____________________ 15
1 Allgemeine Hinweise......................................................... 3
2 Bedienelemente ............................................................... 4
3 Inbetriebnahme ............................................................... 5
3.1 Sicherheitshinweise...................................................................5
3.2 Verpackungsinhalt prüfen ..........................................................5
3.3 Telefonhörer anschließen ...........................................................5
3.4 Telefon anschließen................................................................... 5
3.5 R-Signaltaste - T-NET Anpassung ...............................................5
3.6 Anbringen der Tischstütze..........................................................6
3.7 Wandmontage..........................................................................6
4 Bedienung....................................................................... 7
4.1 Telefonieren.............................................................................7
4.2 Wahlwiederholung .................................................................... 7
4.3 Mikrofon stummschalten............................................................7
4.4 Einstellbarer Tonruf...................................................................7
5 Telefonnummern speichern................................................ 8
5.1 Rufnummer auf eine Direktwahltaste speichern ............................ 8
5.2 Rufnummer auf die Kurzwahltasten speichern ..............................8
5.3 Telefonieren mit den Direktwahltasten.........................................9
5.4 Telefonieren mit den Kurzwahltasten...........................................9
6 T-NET-Betrieb / Nebenstellenanlagen .................................10
6.1 "R" Taste an Nebenstellenanlagen............................................. 10
6.2 "R" Taste und die T-NET-Funktionen der DEUTSCHEN TELEKOM ... 10
6.3 Telefonnummern wählen und speichern bei dem Betrieb an
Nebenstellenanlagen ............................................................... 10
7 Wichtige Informationen....................................................11
7.1 Fehlersuche ........................................................................... 11
7.2 Telefonkabel austauschen ........................................................ 11
7.3 Garantie ................................................................................ 12
7.4 Konformitätserklärung............................................................. 13
2
Page 3

- Allgemeine Hinweise -
1 Allgemeine Hinweise
Anschlusshinweise
Das Telefon besitzt die Voraussetzungen an einer TAE-Steckdose mit F-/NCodierung gemeinsam mit anderen Anschlussgeräten wie Fax, Anrufbeantworter
oder einem Modem benutzt zu werden.
Aufstellort
Stellen Sie das Telefon nicht in die unmittelbare Umgebung von anderen
elektronischen Geräten wie z. B. Mikrowellen oder HiFi-Geräten, da es sonst zu
gegenseitiger Beeinflussung kommen kann. Der Aufstellort hat einen
entscheidenden Einfluss auf einen einwandfreien Be trieb des Telefons. Stellen Sie
das Telefon auf eine ebene und rutschfeste Fläche . Normalerweise hinterlassen
die Füße des Telefons keine Spuren auf der Aufstellfläche. Wegen der Vielzahl der
verwendeten Lacke und Oberflächen kann es jedoch nicht ausgeschlossen werden,
dass durch die Gerätefüße Spuren auf der Abstellfläche entstehen.
Verwenden Sie das Telefon nicht in explosionsgefährde ten Bereichen. Übermäßige
Belastungen durch Rauch, Staub, Erschütterungen, Chemikalien, Feuchtigkeit,
Hitze oder direkte Sonneneinstrahlung müssen vermieden werden.
Entsorgung
Ist die Gebrauchszeit der gesamten Anlage abgelaufen , entsorgen Sie diese bitte
umweltfreundlich gemäss den gesetzlichen Bestimmungen.
Temperatur und Umgebungsbedingungen
Das AUDIOLINE TEL18 ist für den Betrieb in geschützten Räumen mit einem
Temperaturbereich von -10 °C bis 50 °C ausgelegt. Das Telefon darf nicht in
Feuchträumen wie Bad oder Waschküche aufgestellt werden. Vermeiden Sie die
Nähe zu Wärmequellen wie Heizkörpern und setzen Sie das Gerät keiner direkten
Sonnenbestrahlung aus.
Reinigung und Pflege
Die Gehäuseoberflächen können mit einem trockenen, weichen und fus selfreien
Tuch gereinigt werden. Niemals Reinigung smittel oder gar aggressive
Lösungsmittel verwenden. Außer einer gelegentlichen Gehä usereinigung ist keine
weitere Pflege erforderlich. Die Gummifüße der Basisstatio n sind nicht gegen alle
Reinigungsmittel beständig. Der Hersteller kann daher nicht für evtl. Schäden an
Möbeln o. ä. haftbar gemacht werden.
3
Page 4
- Bedienelemente -
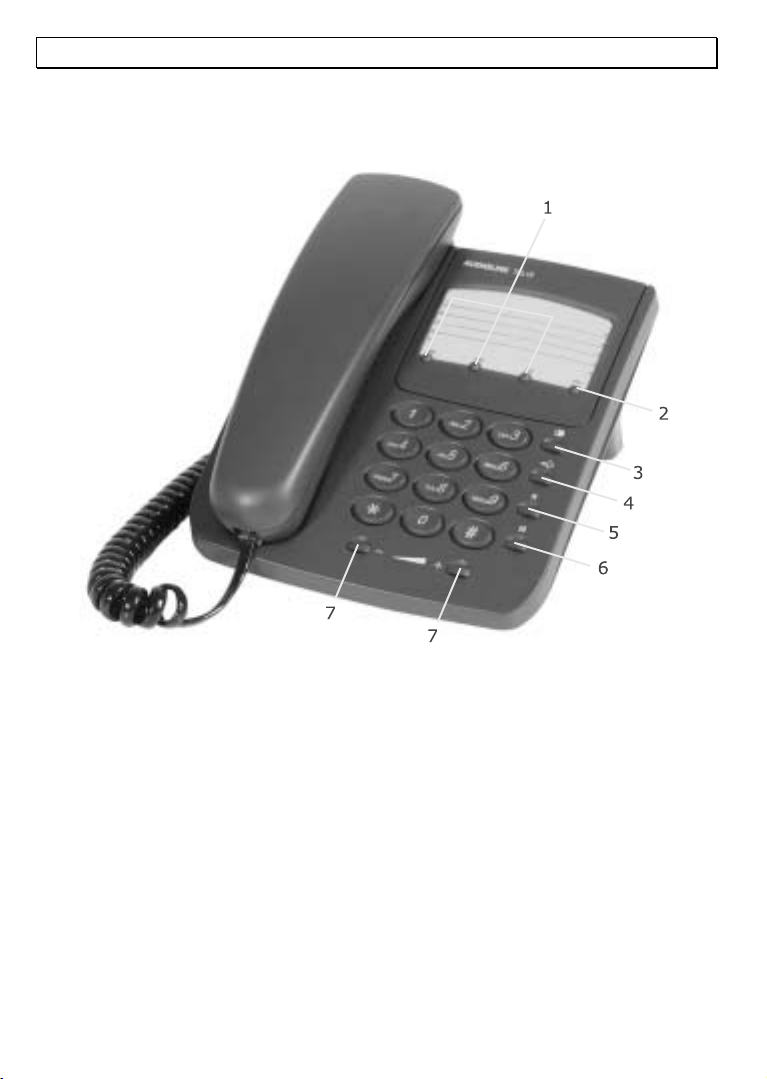
2 Bedienelemente
1 Direktwahltasten M1, M2 und M3
2 Kurzwahltaste
3 Wahlwiederholung
4 Speichertaste
Unterseite des Telefons
Tonrufschalter
FLASH-Schalter
Befestigungen für Tischstütze
Anschluss Spiralkabel Hörer
Anschluss Telefonleitung
4
5 R-Signaltaste
6 Stummtaste mit Kontrollleuchte
7 Einstellung der Lautstärke
Page 5
- Inbetriebnahme -
3 Inbetriebnahme
3.1 Sicherheitshinweise
ACHTUNG! Lesen Sie vor der Inbetriebnahme unbedingt die S icherheitshinweise
am Anfang dieser Anleitung.
3.2 Verpackungsinhalt prüfen
Zum Lieferumfang gehören:
eine Telefonbasis ein Telefonhörer
ein Telefonanschlusskabel ein Spiralkabel
ein Tischstütze eine Bedienungsanleitung
3.3 Telefonhörer anschließen
Nachdem Sie Ihr Telefon ausgepackt haben, müssen Sie zuerst den Telefonhörer
mit dem Grundgerät verbinden. Nehmen Sie nun das kurze Ende des Spiralkabels
und stecken Sie es in die Buchse am unteren Ende des Hörers. Drehen Sie das
Telefon um und stecken Sie das lange Ende in die Buchse
Seite. Klemmen Sie das Kabel in den Kabelkanal nach a ußen.
3.4 Telefon anschließen
Verbinden Sie das beiliegende Telefonkabel mit der Telefonsteckdose und der
Telefonbuchse
durch die Kabelführung entweder nach oben oder nach unten aus dem
Telefongehäuse heraus. Klemmen Sie das Kabel fest in den Kabelkanal.
auf der Unterseite des Telefons. Führen Sie dann das Kabel
auf der rechten
Das AUDIOLINE TELEFON 18 arbeitet mit dem MFV-Wahlverfahren (Tonwahl).
3.5 R-Signaltaste - T-NET Anpassung
Die "R" Signaltaste Ihres Telefons können Sie an Nebenstellenanlagen und bei der
Verwendung der T-NET Funktionen der DEUTSCHEN TELEKOM nutzen.
Nebenstellenanlagen
Haben Sie Ihr Telefon mit einer Nebenstellenanlage verbunden, können Sie alle
Möglichkeiten, wie z.B. Anrufe weiterleiten, automatischen Rückruf usw. nutzen.
Die R-Signaltaste verschafft Ihnen den Zugang zu diesen Möglichkeiten. An einer
Nebenstellenanlage wird die FLASH-Zeit "100ms" benötigt. Stellen Sie dazu den
Schiebeschalter FLASH auf der Unterseite in die Einstellung "100ms". Ob Ihr
Telefon an Ihrer Nebenstellenanlage einwandfrei funktioniert, und welche weiteren
Möglichkeiten Sie dadurch erhalten, erfahren Sie bei d em Händler, bei dem die
Anlage gekauft wurde.
5
Page 6

- Inbetriebnahme -
T-NET Funktionen
Ihr Telefon unterstützt die wichtigsten Mehrwertdienste der DEUTSCHEN TELEKOM
(z.B.: Makeln, Anklopfen, Dreier-Konferenz, u.a.). Zur Freischaltung Ihrer Leitung
für diese T-NET Funktionen (die z.T. gebührenpflichtig sind) wend en Sie sich bitte
an die DEUTSCHE TELEKOM. Stellen Sie dazu den Schiebeschalter FLASH auf der
Unterseite in die Einstellung "300ms".
3.6 Anbringen der Tischstütze
Benutzen Sie das Telefon auf einem Tisch, muss die mitgelieferte Tischstütze
montiert werden. Drehen Sie dazu das Telefon um. Stecken Sie nun die beiden
oberen Haken in die dafür vorgesehenen Öffnungen und drücken Sie die
Tischstütze fest.
Müssen Sie die Stütze einmal entfernen, drücken Sie etwas auf die mittlere
Klemme und ziehen Sie dann die Tischstütze ab.
Für die Wandmontage befindet sich in der Hörerablage eine kleine
Einhängevorrichtung. Bei der Tischmontage wird diese Einhängevorrichtung nicht
benötigt, da Sie das Abheben des Hörers stört. Mit einem kleinen Schraubenzieher
drehen Sie diese Einhängevorrichtung so lange, bis die Schraube vollko mmen
versenkt ist.
3.7 Wandmontage
Ihr TELEFON ist auch zur Wandmontage geeignet. Benutzen Sie zur Befestigung
zwei Schrauben, bohren Sie zwei Löcher im Abstand von 70 mm horizontal
nebeneinander und lassen Sie die Schrauben 5 mm aus der Wand herausstehen.
Stecken Sie nun das Telefon auf die Schrauben und schieben Sie es etwa s nach
unten.
Damit der Hörer bei einer Wandmontage im aufgelegten Zustand nicht
herunterfällt, gibt es in der Hörerablage eine kleine Einhängevorrichtung. Mit
einem kleinen Schraubenzieher drehen Sie diese E inhängevorrichtung so lange,
bis am oberen Ende ein kleiner Haken entsteht.
Ist das Telefon an einer Wand montiert, können Sie den Hörer an das Telefon
hängen, ohne dass die Verbindung unterbrochen wird. Dazu befindet sich am
oberen Ende der Hörerablage ein kleiner Einhängehaken.
6
Page 7
- Bedienung -
4 Bedienung
4.1 Telefonieren
Das AUDIOLINE TELEFON 18 kann wie jedes konventionelle Telefo n benutzt
werden.
1. Nehmen Sie den Telefonhörer ab und warten Sie auf das Freizeichen.
2. Wählen Sie nun die gewünschte Telefonnummer.
3. Ist Ihnen die Hörerlautstärke zu leise oder zu laut, können Sie diese Ihren
Bedürfnissen anpassen. Die Lautstärke lässt sich mit den Tasten
einstellen.
4. Um das Gespräch zu beenden, legen Sie den Hörer wieder auf.
Ankommende Gespräche werden durch das Abheben des Telefonhörers
entgegengenommen und durch das Auflegen des Hörers wieder beendet.
4.2 Wahlwiederholung
Ist ein Anschluss, den Sie gewählt haben, besetzt oder konnten Sie niemanden
erreichen, legen Sie den Telefonhörer einfach wieder auf. Die zuletzt gewählte
Rufnummer mit maximal 31 Zahlen bleibt automatisch im Telefon gespeichert. Um
die Wahlwiederholung zu nutzen, gehen Sie wie folgt vor:
Heben Sie den Hörer ab und drücken Sie die Wahlwiederholungstaste
gespeicherte Rufnummer der Wahlwiederholung wird nun gewählt.
4.3 Mikrofon stummschalten
. Die
Mit der Stummtaste können Sie während eines Telefongespräches das
Mikrofon abschalten. So ist es möglich zu sprechen, ohne dass der
Gesprächspartner Sie hört. Dabei bleibt der Lautsprecher im Hörer eingeschaltet,
und Sie können den Gesprächspartner weiterhin verstehen.
1. Drücken Sie einmal die Stummtaste während eine s Gesprächs, um das
Mikrofon stummzuschalten. Die Kontrollleuchte im Taster blinkt.
2. Um das Mikrofon wieder einzuschalten, drücken Sie erneut die Stummtaste
. Die Kontrollleuchte erlischt und Sie können das Gespräch normal
fortsetzen.
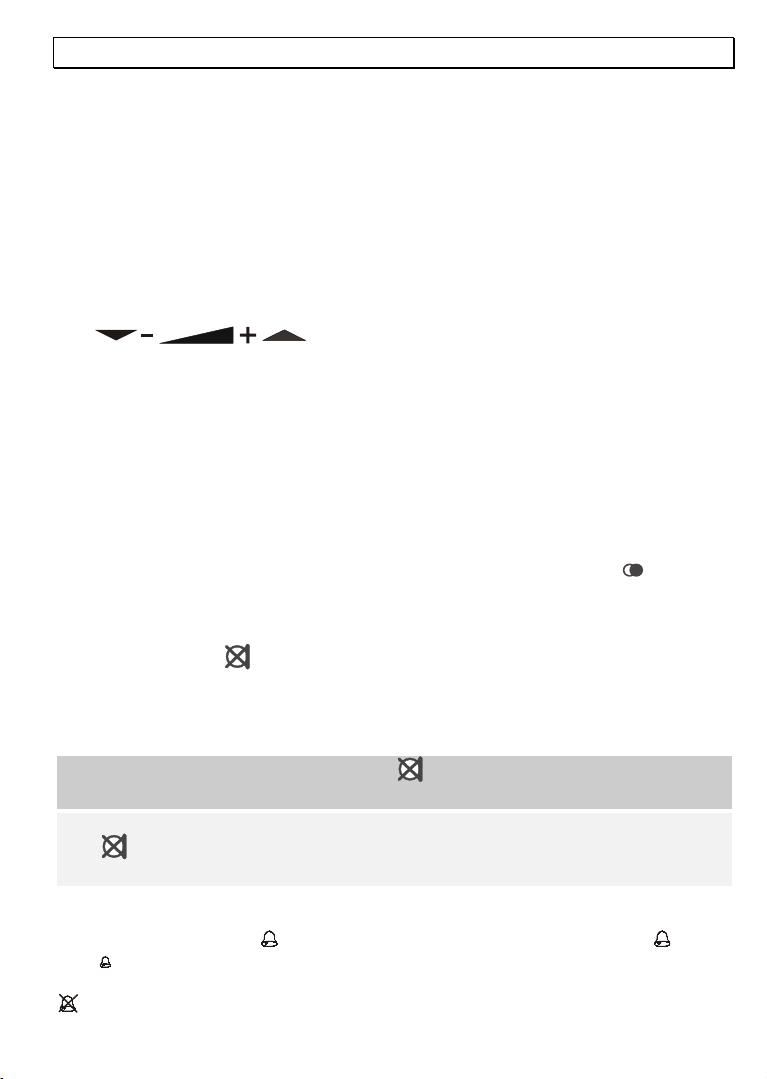
4.4 Einstellbare Tonruflautstärke
Mit dem Schiebeschalter auf der Unterseite können Sie die Stellung en (laut)
oder
(leise) auswählen, um die Lautstärke des Tonrufes I hren Bedürfnissen
anzupassen. Möchten Sie einmal nicht gestört werden, benutzen Sie die Stellung
.
7
Page 8

- Telefonnummern speichern -
5 Telefonnummern speichern
Mit Ihrem Telefon können Sie 13 Rufnummern speichern. Drei Rufnummern
können auf die Direktwahltasten M1, M2 und M3 und zehn weitere auf die
Kurzwahltasten gespeichert werden. Als Kurzwahlspeicherplätze werden die
Zahlen 0 bis 9 auf dem Zahlenfeld benutzt.
5.1 Rufnummer auf eine Direktwahltaste speichern
1. Heben Sie den Telefonhörer ab.
2. Drücken Sie die Speichertaste
3. Drücken Sie nun eine der drei Direktwahltasten M1, M2 oder M3.
4. Geben Sie die gewünschte Rufnummer mit maximal 16 Zahlen über das
Zahlenfeld ein.
Hinweis: Haben Sie eine falsche Rufnummern eingeben, können S ie den
Vorgang hier durch das Auflegen des Hörers abbrechen.
5. Drücken Sie die Speichertaste
6. Legen Sie den Hörer wieder auf, um die Speicherung abzuschließen.
5.2 Rufnummer auf die Kurzwahltasten speichern
1. Heben Sie den Telefonhörer ab.
2. 2 Drücken Sie die Speichertaste
blinkt.
3. Drücken Sie die Kurzwahltaste
4. Wählen Sie nun einen Kurzwahlspeicherplatz, indem Sie auf dem Zahlenfeld
eine Zahl zwischen 0 und 9 drücken.
5. Geben Sie die gewünschte Rufnummer mit maximal 16 Zahlen über das
Zahlenfeld ein.
Hinweis: Haben Sie eine falsche Rufnummern eingeben, können S ie den
Vorgang hier durch das Auflegen des Hörers abbrechen.
6. Drücken Sie die Speichertaste
7. Legen Sie den Hörer wieder auf, um die Speicherung abzuschließen.
. Die Kontrollleuchte der Stummtaste blinkt.
.
. Die Kontrollleuchte der Stummtaste
.
.
8
Page 9

- Telefonnummern speichern -
Hinweise zur Speicherung:
Bereits belegte Speicherplätze können nicht gelöscht werd en. Speichern Sie
einfach eine neue Rufnummer auf den Speicherplatz den Sie löschen möchten.
Damit Sie die Belegung der gespeicherten Rufnummern nicht vergessen, können
Sie auf dem Index die Speicherplätze beschriften. Mit einem Kugelschreiber oder
einem kleinen Stift können Sie den Klarsichtschutz über dem Index entfernen.
5.3 Telefonieren mit den Direktwahltasten
1. Nehmen Sie den Telefonhörer ab.
2. Drücken Sie nun die gewünschte Direktwahltaste M1, M2 oder M3. Die
gespeicherte Nummer wird nun automatisch gewählt.
3. Um das Gespräch zu beenden, legen Sie den Hörer wieder auf.
5.4 Telefonieren mit den Kurzwahltasten
1. Nehmen Sie den Telefonhörer ab.
2. Drücken Sie die Kurzwahltaste .
3. Drücken Sie nun den gewünschten Speicherplatz auf dem Zahlenfeld
zwischen 0 und 9. Die gespeicherte Nummer wird nun automatisch gewählt.
4. Um das Gespräch zu beenden, legen Sie den Hörer wieder auf.
Interessanter Tipp!
Mit Ihrem Telefon können Sie das Telefonieren über die privaten T elefonanbieter
wesentlich vereinfachen. Speichern Sie die Zugangsnummern zu den privaten
Anbietern und die eigentlichen Telefonnummern getrennt auf verschiedene
Speicherplätze. Wählen Sie zuerst den Speicherplatz für den privaten
Telefonanbieter und dann direkt über eine Direktwahltaste oder wieder über die
Kurzwahltaste den Speicherplatz mit der gewünschten Telefonnummer oder
wählen Sie manuell die gewünschte Telefonnumm er.
9
Page 10

- T-NET/Nebenstellenanlagen -
6 T-NET-Betrieb / Nebenstellenanlagen
Die "R" Signaltaste Ihres Telefons können Sie an Nebenstellenanlagen und bei der
Verwendung der T-NET Funktionen der DEUTSCHEN TELEKOM nutzen.
6.1 "R" Taste an Nebenstellenanlagen
Haben Sie Ihr Telefon mit einer Nebenstellenanlage verbunden, können Sie alle
Möglichkeiten, wie z.B. Anrufe weiterleiten, automatischen Rückruf usw. nutzen.
Die "R" Signaltaste verschafft Ihnen den Zugang zu diesen Möglichkeiten. An einer
Nebenstellenanlage wird die FLASH-Zeit "100ms" benöt igt. Stellen Sie dazu den
Schalter "FLASH" auf die Einstellung "100ms". Weitere Information erhalten Sie im
Kapitel 3.5. Ob Ihr Telefon an Ihrer Nebenstellenanlage einwandfrei funktioniert,
und welche weiteren Möglichkeiten Sie dadurch erhalten, erfahren Sie bei dem
Händler, bei dem die Anlage gekauft wurde.
6.2 "R" Taste und die T-NET-Funktionen der DEUTSCHEN
TELEKOM
Ihr Telefon unterstützt die wichtigsten Mehrwertdienste der DEUTSCHEN TELEKOM
(z.B.: Makeln, Anklopfen, Dreier-Konferenz, u.a.). Das T- NET arbeitet mit der
Einstellung "FLASH 300ms". Stellen Sie dazu den Schalter "FLASH" auf die
Einstellung "300ms". Weitere Information erhalten Sie im Kapitel 3.5. Zur
Freischaltung der T- NET Funktionen (die z.T. gebührenpflichtig sind) wenden Sie
sich bitte an die DEUTSCHE TELEKOM.
6.3 Telefonnummern wählen und speichern bei dem
Betrieb an Nebenstellenanlagen
Hinweis! Die in diesem Kapitel erklärte Pausenfunktion zwischen der Kennziffer
für die Amtsholung (meistens 0 oder 9) ist nur bei älteren Nebenstellenanlagen
erforderlich.
Bei einigen Nebenstellenanlagen entsteht eine kurze Pause zwischen der
Amtskennziffer (meistens 0 oder 9) und dem Freizeichen. Beim manu ellen Wählen
und dem Wählen aus dem Telefonbuch kann diese Pause mit eingegeben werden,
damit die weiteren Zahlen nicht zu schnell gewählt werden.
Pause beim manuellen Wählen eingeben
Drücken Sie zwischen der Kennziffer für die Amtsholung und der eigentlichen
Telefonnummer einmal die Wahlwiederholungstaste
wartet Ihr Telefon für 3 Sekunden mit dem Wählen der eigentlichen
Telefonnummer.
Pause mit speichern
Drücken Sie während des Speicherns nach der Kennziffer für die Amtsholung und
vor der eigentlichen Rufnummer einfach die Wahlwiederholungstaste
Wählen aus dem Telefonbuch wird dann nach der Kennziffer für die Amtsholung
automatisch eine Pause von drei Sekunden eingefügt.
. Nach der Amtsholung
. Beim
10
Page 11

- Wichtige Informationen -
7 Wichtige Informationen
7.1 Fehlersuche
Entfernen Sie alle zusätzlichen Telefonapparate und verbinden Sie nur das Telefon
direkt mit der Telefonbuchse. Sollte der Fehler immer noch auftreten, verbinden
Sie ein anderes Telefon (wenn vorhanden) mit der Telefonbuch se. Die Ergebnisse
zeigen Ihnen, ob der Fehler am Gerät oder der Telefonleitung liegt. Natürlich
können Sie auch die Störungsstelle Ihres Telefonnetzanbieters anrufen, die Ihnen
weitere Hinweise zum Überprüfen Ihrer Anlage gibt.
Bei technischen Problemen können Sie sich unter der Hotline - Rufnummer 0180 5
00 13 88 auch an unseren Service wenden.
7.2 Telefonkabel austauschen
Müssen Sie Ihr Telefonkabel austauschen, f in d en Sie anhand der untenstehenden
Zeichnung das passende Kabel bei Ihrem Händler.
F-Codierung - IMPORT Standard
TAE-F
1
2
3
4
5
6
RJ45 6/4
1
2
3
4
5
6
1234
6
5
11
Page 12

- Wichtige Informationen -
7.3 Garantie
AUDIOLINE - Geräte werden nach den modernsten Produktionsverfahren
hergestellt und geprüft. Ausgesuchte Materialien und hoch entwickelte
Technologien sorgen für einwandfreie Funktion und lange Lebensdauer. Sollte Ihr
Gerät dennoch einen Defekt innerhalb der Garantiezeit aufweisen, wenden Sie sich
bitte unter Vorlage Ihrer Kaufquittung ausschließlich an das Geschäft, in dem Sie
Ihr AUDIOLINE - Gerät gekauft haben. Die Garantiezeit beträgt 24 Monate,
gerechnet vom Tage des Kaufs zu nachfolgenden Bedingungen: Innerhalb der
Garantiezeit werden alle Mängel, die auf Material- oder Herstellungsfehler
zurückzuführen sind, kostenlos beseitigt. Der Garantieanspruch erlischt bei
Eingriffen durch den Käufer oder durch Dritte. Schäden, die durch unsachgemäße
Behandlung oder Bedienung, durch falsches Aufstellen oder Aufbewahr en, durch
unsachgemäßen Anschluss oder Installation sowie durch höhere Gewalt oder
sonstige äußere Einflüsse entstehen, fallen nicht unter die Garantieleistung. Wir
behalten uns vor, bei Reklamationen die defekten Teile auszubessern oder zu
ersetzen oder das Gerät auszutauschen. Ausgetausch te Teile oder ausgetauschte
Geräte gehen in unser Eigentum über. Schadenersatzansprüche sind
ausgeschlossen, soweit sie nicht auf Vorsatz oder grober Fahrlässigkeit des
Herstellers beruhen. Alle Gewährleistungsansprüche nach diesen Bestimmungen
sind ausschließlich gegenüber Ihrem Fachhändler geltend zu machen. Nach Ablauf
von 24 Monaten nach Kauf und Übergabe unserer Produkte können
Gewährleistungsrechte nicht mehr geltend gemacht werden.
12
Page 13

- Wichtige Informationen -
7.4 Konformitätserklärung
WIR AUDIOLINE GmbH
IN PROMENADENSTR. 1
D-41460 NEUSS
GERMANY
ALS INVERKEHRBRINGER IN DER EU ERKLÄREN VOLLVERANTWO RTLICH, DASS
DAS PRODUKT
MODEL: TEL 18
BESCHREIBUNG: Schnurgebundenes Telefon
KONFORM IST MIT DEN GRUNDLIEGENDEN ANFORDERUNGEN DER RICHTLINIE:
1999/5/EC
BEVOLLMÄCHTIGTER:
Unterschrift: ________________________________
Name: MANFRED ZINNOW
Position in der Firma: GESCHÄFTSFÜHRER
Datum der Ausstellung: 17.09.2001
Eine Kopie dieser Erklärung wird bis 10 Jahre nach der letzten Produktion
aufbewahrt.
PRODUKT: TEL 18
Dieses Produkt ist für den Betrieb an einem analogen Telefonanschluss (PSTN)
innerhalb Deutschlands entwickelt worden. Allerdings kann, wegen der
Unterschiede zwischen den verschiedenen Telekom-Netzbetreibern, keine Garantie
für einwandfreie Funktion an jedem Telekom-Endgeräteanschluss übernommen
werden.
LIEFERANT: AUDIOLINE GmbH, PROMENADENSTR. 1, D-41460 NEUSS
13
Page 14

- Wichtige Informationen -
14
Page 15

- Contents -
1 General Information........................................................16
2 Operating Elements......................................................... 17
3 Commissioning...............................................................18
3.1 Safety information .................................................................. 18
3.2 Check contents of pack............................................................ 18
3.3 Connecting the telephone receiver ............................................ 18
3.4 Connecting the telephone ........................................................ 18
3.5 R signal button - Setting up for T-NET ....................................... 18
3.6 Fitting the desk support........................................................... 19
3.7 Wall mounting........................................................................ 19
4 Operation ...................................................................... 20
4.1 Using the telephone ................................................................ 20
4.2 Redial.................................................................................... 20
4.3 Muting the microphone............................................................ 20
4.4 Adjustable call tone.................................................................20
5 Storing telephone numbers .............................................. 21
5.1 Saving a number under a direct dial button................................ 21
5.2 Saving numbers under the speed dial buttons ............................ 21
5.3 Making a call using the direct dial buttons.................................. 22
5.4 Making a call using the speed dial buttons ................................. 22
6 Using T-NET / Private exchanges....................................... 23
6.1 “R” Button on private exchanges............................................... 23
6.2 “R” Button and the DEUTSCHE TELEKOM T-NET functions ............ 23
6.3 Dialling and storing telephone numbers when using
on private exchanges .............................................................. 23
7 Important Information..................................................... 24
7.1 Fault finding........................................................................... 24
7.2 Replacing the telephone cable .................................................. 24
7.3 Guarantee.............................................................................. 25
7.4 Declaration of Conformity ........................................................ 26
15
Page 16

- General Information -
1 General Information
Connection information
The unit requires a TAE socket with F/N coding in common with other plug in units
such as fax machines, answering machines or modems.
Location
Do not position the telephone in the immediate vicinity of other electronic
equipment such as microwave or hi-fi units as this can lead to mutual
interference. The location has a deciding influence on the trouble-free operation of
the telephone. Stand the telephone on a flat, non-slip surface. The telephone feet
do not normally leave any marks on the surface. However, on account of the
multitude of varnishes and surface finishes used, surface marks caused by the
feet of the unit cannot be ruled out.
Do not use the telephone in areas where there is the risk of an explosion.
Excessive exposure to smoke, dust, vibrations, chemicals, moisture, heat or the
direct rays of the sun must be avoided.
Disposal
If the useful life of the complete equipment has expired, please dispose of these
carefully in accordance with the statutory requirements and in a man ner friendly
to the environment.
Temperature and ambient conditions
The telephone is designed for use in protected rooms with a temperature range of
-10 °C to 50 °C. The unit must not be installed in damp rooms s uch as a
bathroom or laundry room. Avoid proximity to sources of heat such as radiators
and do not expose the unit to direct sunlight.
Cleaning and care
The surface of the case can be cleaned with a dry, soft, lint-free cloth. Never use
cleaning agents, particularly aggressive solvents. Apart from occasional cleaning
of the case, no other care is necessary. The rubber feet of the base station are not
resistant to all cleaning agents. The manufacturer can therefore not be held
responsible for possible damage to furniture or the like.
16
Page 17

- Operating elements -
2 Operating Elements
1 Direct dial buttons M1, M2 and M3
2 Speed dial button
3 Redial
4 Memory button
5 R signal button
6 Mute button with indicator light
7 Volume adjuste
Lower surface of the telephone
Call tone switch
FLASH switch
Fixings for desk support
Connection for spiral receiver cable
Telephone cable connection
17
Page 18

- Commissioning -
3 Commissioning
3.1 Safety information
NOTE! Before commissioning, it is essential that you read the general
information at the beginning of this manual.
3.2 Check contents of pack
The following items are supplied:
one telephone base one telephone receiver
one telephone connection cable one spiral cable
one desk adapter one Operating Manual
3.3 Connecting the telephone receiver
After unpacking your telephone, you must first connect the telephone receiver to
the base unit. First take the short end of the spiral cable and plug it into the
socket at the bottom of the receiver. Turn the telephone over and plug the long
end into the socket marked
cable channel to the outside.
3.4 Connecting the telephone
Connect the telephone cable supplied to the telephone socket and the telephone
jack
telephone housing either upwards or downwards through the cable guide. Clip the
cable firmly in the cable channel.
on the underside of the telephone. Then feed the cable out of the
on the right hand side. Feed the cable throug h the
The telephone works using the tone dialling system.
3.5 R signal button - Setting up for T-NET
You can use the “R” signal button on your telephone on private exchanges and
when using DEUTSCHE TELEKOM’s T-Net functions.
Private exchanges
If you have connected your telephone to a private exchange, you can use all the
facilities such as call transfer, automatic recall, etc. The “R” signal button gives
you access to these facilities. The FLASH time “100ms” will be required on a
private exchange. To make this setting, move the slide switch on the underside to
the “100ms” position. You can find out from the dealer from whom the equipment
was purchased whether your telephone will work on your private exchange
without any problems and which other facilities you will have access to.
18
Page 19

- Commissioning -
T-NET functions
Your telephone supports the most important DEUTSCHE TELEKOM added value
services (e.g. brokering, call waiting, three-way conferenc ing, etc.). Please
contact DEUTSCHE TELEKOM to gain access to these functions (some of which are
subject to charge). When using T-NET functions, move the slide switch on the
underside to the “300ms” position.
3.6 Fitting the desk support
If you intend to use your telephone on a desk, then the desk support supplied
must be fitted. To do this, turn the telephone over. Now insert the two upper
hooks into the openings provided and push the desk support firmly home.
If you ever need to remove the support, press gently on the middle clips on the
upper edge and then pull the desk support off.
In the receiver rest there is a small hanging device, which is used when the
telephone is wall mounted. This hanging device is not required when the
telephone is used on a desk, as it impedes the lifting of the receiver. Using a small
screwdriver, turn this hanging device until the screw is completely flush and its
upper end does not protrude at all.
3.7 Wall mounting
Your telephone is also suitable for wall mounting. Use two screws for fixing. Drill
two holes horizontally side by side, 70 mm apart, and leave the screws protruding
from the wall by 5mm. Now place the telephone over the screws and push it
slightly downwards.
There is a small hanging device in the receiver rest to prevent the receiver from
falling when it is placed on the rest with the telephone mounted on the wall. Using
a small screwdriver, turn this hanging device until a small hook appears at the
upper end.
If you are using the telephone fitted to the wall, you can hang th e receiver on the
telephone without hanging up. You will find a small hook for this purpos e at the
upper end of the receiver rest.
19
Page 20

- Operation -
4 Operation
4.1 Using the telephone
The AUDIOLINE 18 telephone can be used like any conventional telephone.
1. Lift the receiver and wait until you hear a dialling tone.
2. Now dial the required telephone number.
3. If the receiver volume is too quiet or too loud, you can change this to suit
your requirements. The volume can be adjusted with the
buttons.
4. To end the call, replace the receiver.
Incoming calls are accepted by lifting the receiver and are ended by replacing the
receiver.
4.2 Redial
If a connection that you have dialled is engaged or you were unable to get
through to anybody, simply replace the receiver. The last number dialled with a
maximum of 31 digits will be saved in the telephone automatically. To use the
redial facility, proceed as follows:
1. Lift the receiver.
2. Press the redial button
4.3 Muting the microphone
. The saved redial number will now be dialled.
You can switch off the microphone during a call using the mute button, . It is
thus possible to speak without the other party hearing you. The loudspeaker
remains switched on and you can continue to hear the other party.
1. To mute the microphone, press the mute button once while a call is
being made. The indicator light in the button will flash.
2. To switch the microphone on again, press the mute button once more.
The indicator light will go out and you will be able to continue your call as
normal.
4.4 Adjustable call tone
You can use the slide switch underneath the telephone to select t he settings
(loud) or
not want to be disturbed, use the
(soft) to adapt the ringer volume to your requirements. Should you
(off) position.
20
Page 21

- Storing telephone numbers -
5 Storing telephone numbers
You can store 13 numbers in your telephone. Three numbers can be store d under
the direct dial buttons M1, M2 and M3 and 10 additional numbers under the speed
dial buttons. The numbers 0 to 9 on the number pad are used as speed dial
buttons.
5.1 Saving a number under a direct dial button
1. Lift the receiver.
2. Press the Store button
3. Now press one of the three direct dial buttons M1, M2 or M3.
4. Enter the required telephone number with a maximum of 16 digits using the
number pad.
Note: If you enter the wrong number, you can break off the process at this
point by replacing the receiver.
5. Press the Store button
6. Replace the receiver to complete the save procedure.
5.2 Saving numbers under the speed dial buttons
1. Lift the receiver.
2. Press the Store button
3. Press the Speed dial button
flash.
4. Now select a speed dial storage location by pressing a number between 0 and
9 on the number pad.
5. Enter the required telephone number with a maximum of 16 digits using the
number pad.
Note: If you enter the wrong number, you can break off the process at this
point by replacing the receiver.
6. Press the Store button
7. Replace the receiver to complete the save procedure.
. The indicator light in the mute button will flash.
.
.
. The indicator light in the mute button will
.
21
Page 22

- Storing telephone numbers -
Tips on storing numbers:
Storage locations that have already been used cannot be erased. Simply save a
new number in the storage location that you want to erase.
The storage locations can be written on the index card so that you do not forget
where the numbers have been stored. You can remove the protective transparent
cover using a ballpoint pen or a small pin.
5.3 Making a call using the direct dial buttons
1. Lift the receiver.
2. Now press the required direct dial button M1, M2 or M3. The stored number
will now be dialled automatically.
3. To end the call, replace the receiver.
5.4 Making a call using the speed dial buttons
1. Lift the receiver.
2. Press the speed dial button .
3. Now press the required storage location between 0 and 9 on the keypad. The
stored number will now be dialled automatically.
4. To end the call, replace the receiver.
Interesting note!
With your telephone you can make calling by way of the private telephone
network providers considerably easier. Save the access numbers to the private
network providers and the actual telephone numbers separately in different
storage locations. First dial the memory location for the private network provider
and then a direct dial button or over the speed dial button the memory location
for the required telephone number or dial the required telephone number
manually.
22
Page 23

- Using T-NET / Private exchanges -
6 Using T-NET / Private exchanges
You can use the “R” signal button on your telephone on private exchanges and
when using DEUTSCHE TELEKOM’s T-Net functions.
6.1 “R” Button on private exchanges
If you have connected your telephone to a private exchange, you can use all the
facilities such as call transfer, automatic recall, etc. The “R” signal button gives
you access to these facilities. The FLASH time “100ms” will be required on a
private exchange. For this purpose, set the “FLASH” switch to the “100ms”
setting. You will find more information in Chapter 3.5. You can find out from the
dealer from whom the equipment was purchased whether your telephone will
work on your private exchange without any problems and what further facilities
you will receive from this.
6.2 “R” Button and the DEUTSCHE TELEKOM T-NET
functions
Your telephone supports the most important DEUTSCHE TELEKOM added value
functions (e.g. brokering, call waiting, three-way conference, etc.). The T-NET
works using the "FLASH 300ms" setting. For this purpose, set the “FLASH” switch
to the “300ms” setting. You will find more information in Chapter 3.4. Please
contact DEUTSCHE TELEKOM to gain access to the T- NET functions (some of
which are subject to charge).
6.3 Dialling and storing telephone numbers when using
on private exchanges
Note! The pause function between the code for the outside line (usually 0 or 9)
and the dialling tone described in this chapter is on ly necessary on older private
exchanges.
With some private exchanges, there is a short paus e between the code for the
outside line (usually 0 or 9) and the dialling tone. This pause can be entered when
dialling manually and when dialling from the phone book so that the following
numbers are not dialled too quickly.
Entering the pause when dialling manually
Press the redial button
actual telephone number. After an outside line has been obtained, you telephone
will wait for 3 seconds before dialling the actual telephone number.
Storing the pause with the number
Simply press the redial button
the actual telephone number when storing the number. When dialling from the
phone book, a pause of three seconds will then be automatically inserted after the
code for the outside line.
once between the code for the outside line and the
after the code for the outside line and before
23
Page 24

- Important Information -
7 Important Information
7.1 Fault finding
Remove all extra telephone equipment and connect only the telephone directly to
the telephone socket.
If the fault is still present, connect another telephone (if available) to the
telephone socket. The results will show you whether the fault lies with the unit or
with the telephone line.
Of course, you can always ring your network operator’s service department, which
will give you more advice on checking your installation.
In the case of technical problems you can also contact our Service Department on
the Hotline number 0180 5 00 13 88.
7.2 Replacing the telephone cable
If you have to replace your telephone cable, you can locate the appropriate cable
at your dealer’s with the help of the following diagram.
F-Codierung - IMPORT Standard
24
TAE-F
1
2
3
4
5
6
RJ45 6/4
1
2
3
4
5
6
1234
6
5
Page 25

- Important Information -
7.3 Guarantee
AUDIOLINE equipment is manufactured and tested in acco rdance with the most up
to date production methods. Selected materials and highly developed tech nology
ensure trouble-free operation and long life. If your unit should develop a fault
within the guarantee period, however, please contact the shop where you bought
your AUDIOLINE equipment exclusively and have your purchase receipt available
for inspection. The guarantee period is 24 months from the day of purchase under
the following conditions: within the guarantee period, all defects due to material
or manufacturing faults will be repaired free of charge. The guarantee is
invalidated if the equipment has been tampered with by the purchaser or third
parties. Any damage caused by improper handling or operation, by incorrect
positioning or storage, by improper connection or installation or by excessive force
or other external influences is not covered by the guarantee. In the case of
complaint, we reserve the right to repair or replace defective parts or to exchange
the equipment. Exchanged parts or exchanged equipment become our property.
Claims for compensation are excluded insofar as they do not relate to criminal
intent or gross negligence on the part of the manufacturer. All guarantee c laims
according to these conditions must be raised exclusively with your dealer. Rig hts
under the guarantee can no longer be enforced after the expiry of 24 months from
purchase and delivery of our products. In the case of unnecessary or unjustified
demands on the customer service department, we will levy our usual service
charges for materials, time, postage and packing. Any complaints must be
reported as soon as a problem is found. The guarantee is valid within the German
Federal Republic.
25
Page 26

- Important Information -
7.4 Declaration of Conformity
WE AUDIOLINE GmbH
OF PROMENADENSTR. 1
DECLARE UNDER OUR SOLE RESPONSIBILITY AS EU DISTRIBUTOR THAT THE
PRODUCT
MODEL: TEL 18
DESCRIPTION: Cord connected telephone
IS IN CONFORMITY WITH THE BASIC REQUIREMENTS OF DIRECTIVE: 1999/5/EC
AUTHORISED SIGNATORY:
Signature: __________________
Name: MANFRED ZINNOW
Position in the company: MANAGI NG DIRECTOR
Date of issue : 17.09.2001
A copy of this declaration will be retained for 10 years after cessation of
production.
D-41460 NEUSS
GERMANY
PROMENADENSTR. 1
D-41460 NEUSS
PRODUCT: TEL 18
This product has been developed for use with an analogue telephone line (PSTN)
within Germany. However, no guarantee can be accepted for trouble-free
operation on all telecommunications terminal equipment connections due to the
differences between the different telecommunications network operators.
SUPPLIER: AUDIOLINE GmbH
26
Page 27

- Important Information -
27
Page 28

AUDIOLINE GmbH
Promenadenstrasse 1
41460 Neuss
Service Hotline 0180 5 00 13 88
Internet: www.audioline.de
E-mail: info@audioline.de
 Loading...