

Page 1
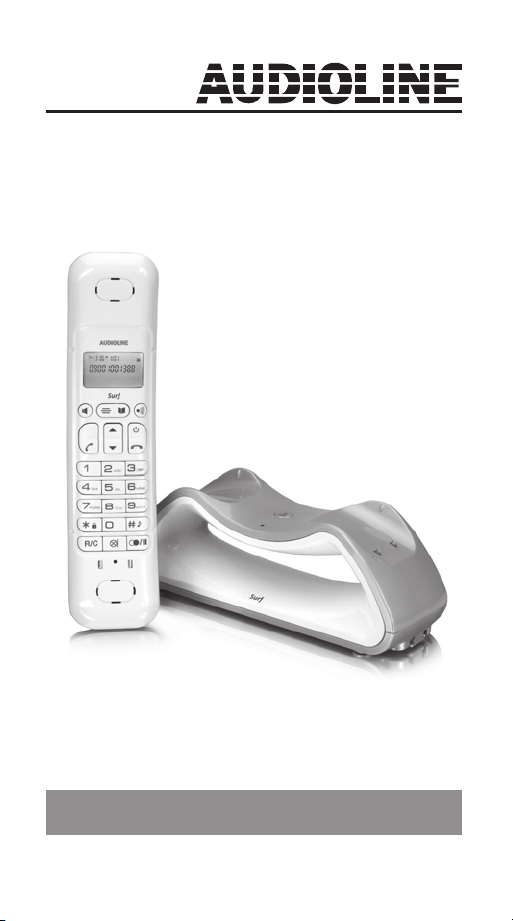
Schnurloses DECT-/GAP-Telefon
Surf
Cordless DECT/GAP telephone
Bedienungsanleitung
Operating Instructions
Page 2

Page 3

Inhaltsverzeichnis
1 Sicherheitshinweise . . . . . . . . . . . . . . . . . . . . . . .4
Bestimmungsgemäße Verwendung . . . . . . . . . . . . . . . . .4
Aufstellungsort . . . . . . . . . . . . . . . . . . . . . . . . . . . . . . . . .4
Netzteil . . . . . . . . . . . . . . . . . . . . . . . . . . . . . . . . . . . . . . .4
Akkus . . . . . . . . . . . . . . . . . . . . . . . . . . . . . . . . . . . . . . . .4
Stromausfall . . . . . . . . . . . . . . . . . . . . . . . . . . . . . . . . . . .4
Medizinische Geräte . . . . . . . . . . . . . . . . . . . . . . . . . . . .5
Entsorgung . . . . . . . . . . . . . . . . . . . . . . . . . . . . . . . . . . . .5
2 Telefon in Betrieb nehmen . . . . . . . . . . . . . . . . . .6
Sicherheitshinweise . . . . . . . . . . . . . . . . . . . . . . . . . . . . .6
Verpackungsinhalt prüfen . . . . . . . . . . . . . . . . . . . . . . . .6
Basisstation anschließen . . . . . . . . . . . . . . . . . . . . . . . . .7
Akkus einlegen . . . . . . . . . . . . . . . . . . . . . . . . . . . . . . . . .7
Akkus aufladen . . . . . . . . . . . . . . . . . . . . . . . . . . . . . . . .7
Datum und Uhrzeit des Mobilteils einstellen . . . . . . . . . .8
Displaysprache einstellen . . . . . . . . . . . . . . . . . . . . . . . .8
Automatische Rufannahme / Direktannahme . . . . . . . . .8
3 Bedienelemente . . . . . . . . . . . . . . . . . . . . . . . . . .9
4 Einführende Informationen . . . . . . . . . . . . . . . .11
Symbole im Display des Mobilteils . . . . . . . . . . . . . . . . .11
Bereitschaftsmodus . . . . . . . . . . . . . . . . . . . . . . . . . . . .12
Navigation im Menü . . . . . . . . . . . . . . . . . . . . . . . . . . . .12
5 Telefonieren . . . . . . . . . . . . . . . . . . . . . . . . . . . . .13
Anruf annehmen . . . . . . . . . . . . . . . . . . . . . . . . . . . . . .13
Anrufen . . . . . . . . . . . . . . . . . . . . . . . . . . . . . . . . . . . . .13
Freisprechen . . . . . . . . . . . . . . . . . . . . . . . . . . . . . . . . .13
Gespräch beenden . . . . . . . . . . . . . . . . . . . . . . . . . . . .14
Wahlwiederholung . . . . . . . . . . . . . . . . . . . . . . . . . . . . .14
Aus der Anrufliste anrufen . . . . . . . . . . . . . . . . . . . . . . .14
Aus dem Telefonbuch anrufen . . . . . . . . . . . . . . . . . . . .15
Anzeige der Gesprächsdauer . . . . . . . . . . . . . . . . . . . .15
Hörerlautstärke einstellen . . . . . . . . . . . . . . . . . . . . . . .15
D
1
Page 4

Inhaltsverzeichnis
Mikrofon ausschalten (Mute) . . . . . . . . . . . . . . . . . . . . .15
Intern telefonieren . . . . . . . . . . . . . . . . . . . . . . . . . . . . .15
6 Weitere Leistungsmerkmale . . . . . . . . . . . . . . .17
Tastensperre . . . . . . . . . . . . . . . . . . . . . . . . . . . . . . . . .17
Tonruf am Mobilteil ausschalten . . . . . . . . . . . . . . . . . .17
Mobilteil ausschalten . . . . . . . . . . . . . . . . . . . . . . . . . . .17
7 Anrufliste / Wahlwiederholung . . . . . . . . . . . . .19
Listen bearbeiten . . . . . . . . . . . . . . . . . . . . . . . . . . . . . .19
8 Telefonbuch . . . . . . . . . . . . . . . . . . . . . . . . . . . . .20
Neuen Eintrag anlegen . . . . . . . . . . . . . . . . . . . . . . . . .20
Telefonbucheinträge bearbeiten . . . . . . . . . . . . . . . . . . .21
9 Telefon einstellen . . . . . . . . . . . . . . . . . . . . . . . .22
Datum/Zeit . . . . . . . . . . . . . . . . . . . . . . . . . . . . . . . . . . .22
Wecker . . . . . . . . . . . . . . . . . . . . . . . . . . . . . . . . . . . . . .22
Tonruf für das Mobilteil einstellen . . . . . . . . . . . . . . . . .23
Hinweistöne einstellen . . . . . . . . . . . . . . . . . . . . . . . . . .23
Displaysprache einstellen . . . . . . . . . . . . . . . . . . . . . . .24
Mobilteilnamen einstellen . . . . . . . . . . . . . . . . . . . . . . . .24
Automatische Rufannahme einstellen . . . . . . . . . . . . . .24
Wahlsperre einstellen . . . . . . . . . . . . . . . . . . . . . . . . . .25
Basis auswählen . . . . . . . . . . . . . . . . . . . . . . . . . . . . . .26
Wahlverfahren einstellen . . . . . . . . . . . . . . . . . . . . . . . .26
Flashzeit einstellen . . . . . . . . . . . . . . . . . . . . . . . . . . . .26
PIN ändern . . . . . . . . . . . . . . . . . . . . . . . . . . . . . . . . . . .27
Basis in den Auslieferungszustand zurücksetzen . . . . .27
Mobilteil in den Auslieferungszustand zurücksetzen . .28
10 Mobilteile an-/abmelden . . . . . . . . . . . . . . . . . . .29
Weiteres Mobilteil des gleichen Typs anmelden . . . . . .29
Einzelnes Mobilteil löschen . . . . . . . . . . . . . . . . . . . . . .29
Alle Mobilteile löschen . . . . . . . . . . . . . . . . . . . . . . . . . .30
2
Page 5

Inhaltsverzeichnis
11 Betrieb an Telefonanlagen/Zusatzdienste . . . .31
Betrieb an Telefonanlagen . . . . . . . . . . . . . . . . . . . . . . .31
Zusatzdienste Ihres Netzbetreibers . . . . . . . . . . . . . . . .31
12 Anhang . . . . . . . . . . . . . . . . . . . . . . . . . . . . . . . .32
Menüstruktur . . . . . . . . . . . . . . . . . . . . . . . . . . . . . . . . .32
Fehlersuche . . . . . . . . . . . . . . . . . . . . . . . . . . . . . . . . . .33
Werkseinstellungen/Auslieferungszustand . . . . . . . . . .34
Technische Daten . . . . . . . . . . . . . . . . . . . . . . . . . . . . .35
Konformitätserklärung . . . . . . . . . . . . . . . . . . . . . . . . . .36
Pflegehinweise . . . . . . . . . . . . . . . . . . . . . . . . . . . . . . . .36
Garantie . . . . . . . . . . . . . . . . . . . . . . . . . . . . . . . . . . . . .36
Stichwortverzeichnis . . . . . . . . . . . . . . . . . . . . . . . . . . .38
D
3
Page 6

Sicherheitshinweise
1 Sicherheitshinweise
Lesen Sie diese Bedienungsanleitung sorgfältig durch.
Bestimmungsgemäße Verwendung
Dieses Telefon ist geeignet zum Telefonieren innerhalb eines
Telefonnetzes. Jede andere Verwendung gilt als nicht bestimmungsgemäß. Eigenmächtige Veränderungen oder Umbauten
sind nicht zulässig. Öffnen Sie das Gerät in keinem Fall selbst
und führen Sie keine eigenen Reparaturversuche durch.
Aufstellungsort
Vermeiden Sie Belastungen durch Rauch, Staub, Erschütterungen, Chemikalien, Feuchtigkeit, Hitze oder direkte Sonneneinstrahlung. Verwenden Sie das Mobilteil nicht in explosionsgefährdeten Bereichen.
Netzteil
a Achtung: Verwenden Sie nur das mitgelieferte Stecker-
netzteil, da andere Netzteile das Telefon beschädigen können.
Versperren Sie den Zugang zum Steckernetzteil nicht durch
Möbel oder andere Gegenstände.
Akkus
a Achtung: Werfen Sie Akkus nicht ins Feuer. Verwenden
Sie nur Akkus des gleichen Typs! Achten Sie auf die richtige
Polung! Bei verkehrter Polung der Akkus besteht beim Aufladen Explosionsgefahr.
Stromausfall
Bei Stromausfall kann mit dem Telefon nicht telefoniert werden. Halten Sie für Notfälle ein schnurgebundenes Telefon
bereit, welches ohne externe Stromversorgung arbeitet.
4
Page 7

Sicherheitshinweise
Medizinische Geräte
a Achtung: Benutzen Sie das Telefon nicht in der Nähe von
medizinischen Geräten. Eine Beeinflussung kann nicht ausgeschlossen werden.
DECT-Telefone können in Hörgeräten einen unangenehmen
Brummton verursachen.
(DECT: Digital Enhanced Cordless Telecommunication = Standard für kabellose Telefone)
Entsorgung
Wollen Sie Ihr Gerät entsorgen, bringen Sie es zur
Sammelstelle Ihres kommunalen Entsorgungsträgers
(z. B. Wertstoffhof). Nach dem Elektro- und Elektronikgerätegesetz sind Besitzer von Altgeräten gesetzlich
verpflichtet, alte Elektro− und Elektronikgeräte einer
getrennten Abfallerfassung zuzuführen. Das nebenstehende Symbol bedeutet, dass Sie das Gerät auf keinen Fall in den Hausmüll werfen dürfen!
Gefährdung von Gesundheit und Umwelt durch
Akkus und Batterien! Akkus und Batterien nie öff-
nen, beschädigen, verschlucken oder in die Umwelt
gelangen lassen.
Sie können giftige und umweltschädliche Schwermetalle enthalten. Sie sind gesetzlich verpflichtet, Akkus
und Batterien beim batterievertreibenden Handel
sowie bei zuständigen Sammelstellen, die entsprechende Behälter bereitstellen, sicher zu entsorgen.
Die Entsorgung ist unentgeltlich. Die nebenstehenden
Symbole bedeuten, dass Sie Akkus und Batterien auf
keinen Fall in den Hausmüll werfen dürfen, sondern
dass diese über Sammelstellen der Entsorgung zugeführt werden müssen. Verpackungsmaterialien ent-
sorgen Sie entsprechend den lokalen Vorschriften.
D
5
Page 8

Telefon in Betrieb nehmen
die Sicherheitshinweise in Kapitel 1.
Verpackungsinhalt prüfen
Zum Lieferumfang gehören:
Basisstation mit Netzteil 1
Mobilteil 1
Telefonanschlusskabel 1
Akkus 2
Bedienungsanleitung 1
Die mitgelieferten Netzteile erfüllen die Ökodesign-Anforderungen der Europäischen Union
(Richtlinie 2005/32/EG). Dies bedeutet, dass
sowohl im Betrieb als auch im Ruhezustand der
Stromverbrauch im Vergleich zu Netzteilen älterer Bauart deutlich niedriger ist.
2 Telefon in Betrieb nehmen
Sicherheitshinweise
a Achtung: Lesen Sie vor der Inbetriebnahme unbedingt
6
Page 9
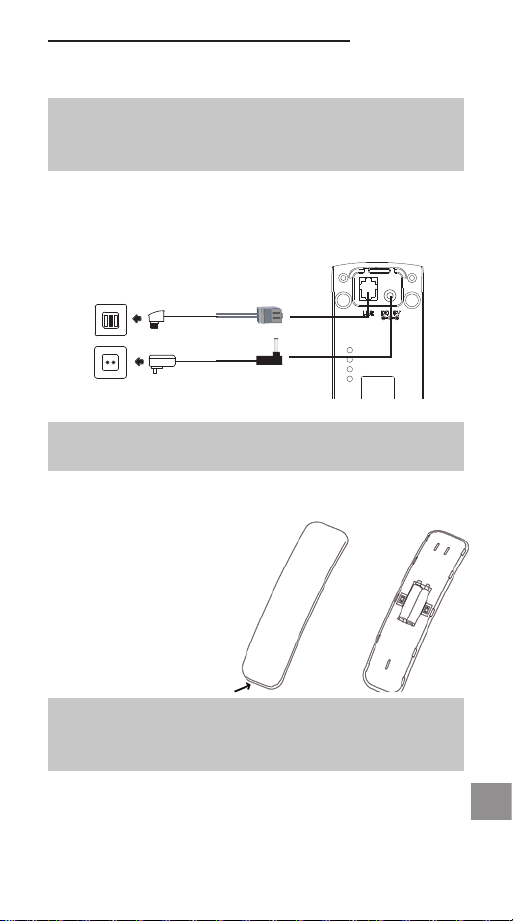
Telefon in Betrieb nehmen
Basisstation anschließen
a Achtung: Stellen Sie die Basisstation mit einem Mindest-
abstand von 1 m zu anderen elektronischen Geräten auf, da
es sonst zu gegenseitigen Störungen kommen kann.
Schließen Sie die Basisstation wie auf der Skizze abgebildet
an. Verwenden Sie aus Sicherheitsgründen nur das mitgelieferte Netzteil sowie das beigefügte Telefonanschlusskabel.
Telefonanschluss
Netzsteckdose
a Achtung: Verwenden Sie für die Basisstation nur das
mitgelieferte Netzteil !
Akkus einlegen
Öffnen Sie das Akkufach.
Legen Sie die Akkus in
das Akkufach ein.
Schließen Sie das Akkufach.
a Achtung: Verwenden Sie nur NiMH-Akkus vom Typ AAA
(Microzellen) / 600 mAh! Niemals Batterien/Primärzellen
verwenden! Achten Sie auf die richtige Polarität!
D
7
Page 10

Telefon in Betrieb nehmen
Akkus aufladen
☞ Legen Sie das Mobilteil bei der ersten Inbetriebnahme für
mindestens 14 Stunden auf die Basisstation.
Das Mobilteil erwärmt sich beim Laden. Dies ist normal und
ungefährlich. Laden Sie das Mobilteil nicht mit fremden Aufladegeräten. Der Akkuladezustand wird im Display angezeigt.
Wenn die Ladung der Akkus die untere Grenze erreicht hat,
blinkt das Akkusymbol ( ) im Display und Sie hören den
Akku-Warnton (falls Akku-Warnton eingeschaltet / Menüpunkt
„MT EINSTELL./TON EINST./AKKU LEER“). Sie haben noch
ca. 10 Minuten Gesprächszeit.
Datum und Uhrzeit des Mobilteils einstellen
Bei Inbetriebnahme verfügt das Mobilteil nicht über eine
korrekte Uhrzeit (z. B. für Einträge in der Anrufliste).
und Uhrzeit stellen Sie über den Menüpunkt „MT EINSTELL./
DATUM & ZEIT“ ein.
Displaysprache einstellen
Die Displaysprache ist in verschiedenen Sprachen einstellbar.
Im Auslieferungszustand ist „Deutsch“ eingestellt. Sie können
die Sprache über den Menüpunkt „MT EINSTELL./ SPRA-
CHE“ ändern.
Datum
Automatische Rufannahme / Direktannahme
Ist die Funktion aktiviert (Auslieferungszustand), wird ein Anruf
automatisch beim Herausnehmen des Mobilteils aus der
Basisstation angenommen. Die automatische Anrufannahme
wird über den Menüpunkt „MT EINSTELL./ AUTO-ANNAHME“
ein- oder ausgeschaltet.
8
Page 11

Bedienelemente
3 Bedienelemente
Hörkapsel
Display
Menütaste / OK
Freisprechen
Anrufliste
Abnehmetaste
Tastensperre
R-Taste
(Signaltaste)
Telefonbuchtaste/Zurück
Intern-Taste
Auflegetaste
Wahlwiederholungsliste
Tonruf ein/aus
Wahlpause
einfügen
Stummtaste
Mikrofon
D
9
Page 12

Bedienelemente
Ladekontakte
(Sie können das Mobilteil in beliebiger Richtung auflegen)
Mobilteil suchen
(Paging)
10
Signal-LED
(grün beim Laden des Mobilteils, rot
bei Gespräch)
Page 13
Einführende Informationen
4 Einführende Informationen
Symbole im Display des Mobilteils
Symbol Beschreibung
Konstant: Verbindung zur Basisstation.
Blinkt: keine Verbindung zur Basisstation.
NEW WEN
RPT TPR
Konstant: Anzeige der Batteriekapazität.
Konstant: Akkus sollten geladen werden.
Blinkend: Laden Sie die Akkus.
Konstant: Sie führen ein Gespräch.
Blinkend: Sie erhalten gerade einen Anruf.
Freisprechbetrieb ist aktiviert.
Tonruf ist ausgeschaltet.
Konstant: Eine Weckzeit ist eingestellt.
Blinkt: Die eingestellte Weckzeit ist erreicht.
Tastensperre ist eingeschaltet.
Sie haben eine Nachricht in der Sprachbox
Ihres Netzbetreibers (abhängig vom Netzbetreiber)
Das Telefonbuch ist geöffnet.
Neuer Anruf in der Anrufliste.
Mehrere Anrufe von derselben Rufnummer.
# #
Beim Durchsehen der Anruflisten: Laufende
Nummer des Eintrags.
D
11
Page 14

Einführende Informationen
Bereitschaftsmodus
Alle Beschreibungen in dieser Bedienungsanleitung gehen
davon aus, dass sich das Mobilteil im Bereitschaftsmodus
befindet. Den Bereitschaftsmodus erreichen Sie, indem Sie die
Taste drücken.
Navigation im Menü
Alle Funktionen sind über unterschiedliche Menüs zu erreichen. Die komplette Menüstruktur finden Sie im Anhang.
Zur Navigation im Menü benutzen Sie die Pfeiltasten.
Mit der Taste öffnen Sie das Menü.
Mit den Pfeiltasten bzw. bewegen Sie sich im
Menü.
Zum Öffnen eines Untermenüs drücken Sie .
Wollen Sie zum übergeordneten Menü zurück, drücken Sie
kurz.
12
Page 15
Telefonieren
5 Telefonieren
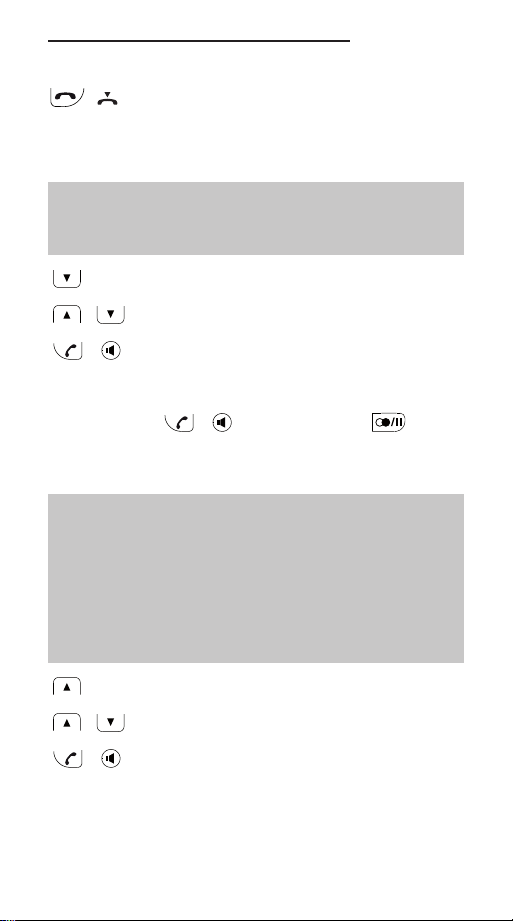
Anruf annehmen
Ihr Telefon klingelt.
Mobilteil nicht auf der Basis:
/
Mobilteil auf der Basis und AUTO-ANNAHME nicht einge-
schaltet:
/
Mobilteil auf der Basis und AUTO-ANNAHME eingeschaltet:
Anrufen
/
Drücken Sie die Abnehmetaste oder die Freisprechtaste.
Nehmen Sie das Mobilteil von der Basis und
drücken Sie die Abnehmetaste oder die Freisprechtaste.
Nehmen Sie das Mobilteil von der Basis; das
Gespräch wird automatisch angenommen.
Geben Sie die Rufnummer ein.
Fehler bei der Eingabe mit oder
korrigieren.
Rufnummer wird gewählt.
☞ Sie können auch zuerst die Abnehmetaste drücken und
erhalten damit das Freizeichen. Die eingegebenen Ziffern Ihrer
gewünschten Rufnummer werden sofort gewählt.
Eine Korrektur einzelner Ziffern der Rufnummer ist bei dieser
Form des Gesprächsaufbaus nicht möglich.
Freisprechen
Zum Ein- bzw. Ausschalten des Freisprechens drücken Sie die Freisprechtaste.
D
13
Page 16
Telefonieren
Gespräch beenden
/
Wahlwiederholung
☞ Ihr Telefon speichert die 10 zuletzt gewählten Rufnum-
mern. Ist für die Rufnummer ein Telefonbucheintrag angelegt,
wird zusätzlich der Name angezeigt.
Auflegetaste drücken oder Mobilteil auf die
Basis legen.
Öffnen Sie die Wahlwiederholungsliste.
/
/
Wollen Sie die zuletzt gewählte Rufnummer noch einmal wählen, drücken Sie
Wählen Sie einen Eintrag aus.
Rufnummer wird gewählt.
und anschließend .
/
Aus der Anrufliste anrufen
☞ Ihr Telefon speichert die letzten 30 Anrufe in der Anrufliste.
Ist für die Rufnummer ein Telefonbucheintrag angelegt, wird
zusätzlich der Name angezeigt.
Die Speicherung kann nur erfolgen, wenn die Funktion „Rufnummernübertragung (CLIP)“ an Ihrem Anschluss verfügbar ist
und die Rufnummer vom Anrufer nicht unterdrückt oder aus
anderen Gründen nicht übertragen wurde.
Öffnen Sie die Anrufliste.
/
/
Wählen Sie einen Eintrag aus.
Rufnummer wird gewählt.
14
Page 17
Telefonieren
Aus dem Telefonbuch anrufen
☞ Das Telefonbuch kann 50 Einträge aufnehmen.
Zum Anlegen von Einträgen siehe Abschnitt „Telefonbuch“.
Öffnen Sie das Telefonbuch.
/
/
Wählen Sie einen Eintrag aus.
Rufnummer wird gewählt.
Anzeige der Gesprächsdauer
Während eines Gesprächs wird die Gesprächsdauer in Stunden, Minuten und Sekunden angezeigt.
Hörerlautstärke einstellen
/ Sie können während eines Gesprächs die
Lautstärke in 5 Stufen einstellen (bei Hörerbetrieb -> Hörerlautstärke, bei Freisprechen
-> Lautsprecherlautstärke).
Die Einstellungen sind getrennt voneinander
und bleiben auch nach Ende des Gespräches
gespeichert.
Mikrofon ausschalten (Mute)
Sie können während eines Gesprächs das
Mikrofon ausschalten, so dass Ihr
Gesprächspartner Sie nicht hören kann.
Zum Einschalten des Mikrofons drücken Sie
die Taste erneut.
Intern telefonieren
☞ Interne Gespräche, Vermitteln und Konferenzgespräche
sind nur möglich, wenn mehrere Mobilteile angemeldet sind.
D
15
Page 18
Telefonieren
Internes Gespräch führen
Drücken Sie die Intern-Taste.
Geben Sie die interne Rufnummer des
gewünschten Mobilteils ein.
Externes Gespräch vermitteln
Während eines Externgespräches . . .
Drücken Sie die Intern-Taste.
Geben Sie die interne Rufnummer des
gewünschten Mobilteils ein.
Das externe Gespräch wird gehalten. Wenn
das gerufene Mobilteil eingeschaltet wird ggf.
Gespräch ankündigen.
Drücken Sie die Auflegetaste. Das Gespräch
ist übergeben.
Konferenz
Während eines Externgespräches . . .
Drücken Sie die Intern-Taste.
Geben Sie die interne Rufnummer des
gewünschten Mobilteils ein.
16
Wenn das gerufene Mobilteil eingeschaltet
wird drücken Sie die Stern-Taste.
☞ Legt einer der beteiligten Konferenzteilnehmer
auf, bleiben die beiden anderen miteinander verbunden.
Page 19
Weitere Leistungsmerkmale
6 Weitere Leistungsmerkmale
Tastensperre
☞ Die Tastensperre verhindert ein unbeabsichtigtes Betätigen
der Tasten. Eintreffende Anrufe können wie gewohnt entgegengenommen werden.
Drücken und halten Sie die Stern-Taste bis
im Display das Symbol für die Tastensperre
und HS gesperrt erscheint.
Zum Entsperren der Tastatur drücken und
halten Sie die Stern-Taste erneut bis das
Symbol wieder erlischt und der Name des
Mobilteils wieder angezeigt wird.
Tonruf am Mobilteil ausschalten
☞ Sie können den Tonruf auch über das Menü
„MT EINSTELL./RUFTON EINST“ ausschalten.
Drücken und halten Sie die Raute-Taste bis
im Display das Symbol für den ausgeschalteten Tonruf erscheint.
Zum Wiedereinschalten des Tonrufs drücken
und halten Sie die Raute-Taste erneut bis das
Symbol wieder erlischt.
Mobilteil ausschalten
☞ Sie können das Mobilteil ausschalten um die Akkus zu
schonen.
Drücken Sie die Auflegetaste und halten Sie
sie gedrückt. Nach wenigen Sekunden wird
das Mobilteil ausgeschaltet. Die Displaybeleuchtung erlischt.
D
17
Page 20

Weitere Leistungsmerkmale
Zum Wiedereinschalten des Mobilteils drücken Sie die Auflegetaste so lange, bis im
Display wieder ein Inhalt erscheint. Alternativ
können Sie das Mobilteil auch einfach auf die
Basisstation legen.
18
Page 21

Anrufliste / Wahlwiederholung
7 Anrufliste / Wahlwiederholung
Listen bearbeiten
Drücken Sie die Menü-Taste.
/ Wählen Sie ANRUFLISTE.
Drücken Sie die Menü-Taste.
/ Wählen Sie eine Liste aus (VERPASST/
EMPFANGEN/GEWÄHLT).
Drücken Sie die Menü-Taste.
/ Wählen Sie einen Eintrag aus.
Drücken Sie die Menü-Taste.
/ Wählen Sie aus den folgenden Möglichkeiten
und bestätigen Sie mit der Menü-Taste:
NR.SPEICHER? Die Rufnummer wird im Telefonbuch gespei-
chert. Geben Sie einen Namen ein, bestätigen oder bearbeiten Sie die Rufnummer und
legen Sie eine Tonrufmelodie für diesen Eintrag fest.
LÖSCHEN? Der Eintrag wird gelöscht.
ALLE LÖSCHE?
Die ganze Liste wird nach einer Sicherheitsabfrage gelöscht.
19
D
Page 22

Telefonbuch
8 Telefonbuch
☞ Im Telefonbuch können Sie 50 Rufnummern und zugehöri-
ge Namen speichern. Sie können jedem Eintrag eine eigene
Melodie zuordnen, mit der ein Anruf signalisiert werden soll.
Geben Sie die Rufnummern immer mit der Ortsvorwahl ein;
das ermöglicht eine korrekte Anzeige des jeweiligen Anrufers,
für den ein Eintrag angelegt ist und dessen Übertragung der
Rufnummer an Ihrem Anschluss verfügbar ist.
Neuen Eintrag anlegen
Drücken Sie die Menü-Taste.
/ Wählen Sie TELEFONBUCH.
Drücken Sie die Menü-Taste.
/ Wählen Sie NEUER EINTR.
Drücken Sie die Menü-Taste.
Geben Sie den Namen ein (maximal 12 Zeichen).
Die Zifferntasten sind mit Buchstaben
beschriftet. Durch mehrmaliges Drücken der
entsprechenden Taste können Buchstaben
und Ziffern eingegeben werden.
Nach kurzer Zeit springt die Einfügemarke
(Cursor) weiter.
Schließen Sie die Eingabe mit der Menü-
Taste ab.
Geben Sie die Rufnummer ein (maximal 20
Ziffern). Ist Ihr Telefon an einer Telefonanlage
angeschlossen, geben Sie die Amtskennziffer
mit ein. Ist eine Wahlpause erforderlich, drücken Sie nach der Amtskennziffer die Taste
; im Display wird P angezeigt.
Schließen Sie die Eingabe mit der Menü-
Taste ab.
20
Page 23

Telefonbuch
/ Wählen Sie eine Melodie für den Eintrag aus.
Bestätigen Sie mit der Menü-Taste.
Zurück zum Bereitschaftsmodus.
Telefonbucheinträge bearbeiten
Drücken Sie die Menü-Taste.
/ Wählen Sie TELEFONBUCH.
Drücken Sie die Menü-Taste.
/ Wählen Sie aus den folgenden Möglichkeiten
und bestätigen Sie mit der Menü-Taste:
LISTE Alle Einträge des Telefonbuchs werden ange-
zeigt (Blättern mit / ).
NEUER EINTR. Sie können einen neuen Eintrag anlegen.
EINTR. BEARB. Sie können den Eintrag ändern. Löschen Sie
Buchstaben und Ziffern mit , geben Sie
mit den Zifferntasten neue Buchstaben und
Ziffern ein. Einzelheiten dazu siehe unter
„Neuen Eintrag anlegen“.
EINTR.LÖSCH. Der Eintrag wird gelöscht.
ALLE LÖSCHE?
SPEICH-STAT. Die aktuelle Belegung wird angezeigt (z. B.
Die gesamte Liste wird nach einer Sicherheitsabfrage gelöscht.
03/50: 3 von 50 möglichen Einträgen sind
vorhanden).
21
D
Page 24

Telefon einstellen
9 Telefon einstellen
Datum/Zeit
Drücken Sie die Menü-Taste.
/ Wählen Sie MT EINSTELL. aus und drücken
Sie die Menü-Taste.
/ Wählen Sie DATUM & ZEIT aus und drücken
Sie die Menü-Taste.
Die letzten zwei Ziffern der Jahreszahl blinken.
/ Stellen Sie mit den Pfeiltasten die Jahreszahl
ein und bestätigen Sie mit der Menü-Taste.
Der Monat blinkt.
Stellen Sie auf diese Weise jeweils mit den
Pfeiltasten und Bestätigung mit der Menü-
Taste Monat, Tag, Stunden (AM=vormittags,
PM= nachmittags) und Minuten ein.
Wecker
Drücken Sie die Menü-Taste.
/ Wählen Sie MT EINSTELL. aus und drücken
Sie die Menü-Taste.
/ Wählen Sie ALARM aus und drücken Sie die
Menü-Taste.
/ Wählen Sie EIN aus und drücken Sie die
Menü-Taste.
/ Stellen Sie mit den Pfeiltasten die Weckzeit
ein (Stunden, Minuten, AM/PM). Drücken Sie
jeweils die Menü-Taste.
/ Wählen Sie SNOOZE EIN oder SNOOZE
AUS und drücken Sie die Menü-Taste.
Ist „Snooze“ eingeschaltet, bedeutet dies,
dass das Wecksignal jeweils nach 5 Minuten
bis zu 9 mal wiederholt wird. Zum Unterbrechen des Wecksignals drücken Sie eine
22
Page 25

Telefon einstellen
beliebige Taste außer der Auflegetaste. Die
Snooze-Funktion wird durch Drücken der Auflegetaste beendet.
Ist „Snooze“ ausgeschaltet, ertönt das Wecksignal einmal zur eingestellten Zeit. Zum
Quittieren des Wecksignals drücken Sie eine
beliebige Taste.
Tonruf für das Mobilteil einstellen
Drücken Sie die Menü-Taste.
/ Wählen Sie MT EINSTELL. aus und drücken
Sie die Menü-Taste.
/ Wählen Sie RUFTON EINST aus und drü-
cken Sie die Menü-Taste.
/ Wählen Sie aus den folgenden Möglichkeiten
und bestätigen Sie mit der Menü-Taste:
INTERNRUFTON Wählen Sie Melodie und Lautstärke für die
Signalisierung eines internen Anrufes aus.
EXTERNRUFTON Wählen Sie Melodie und Lautstärke für die
Signalisierung eines externen Anrufes aus.
☞ Wählen Sie „LAUTST. AUS“ wird das Symbol im Display
angezeigt.
Hinweistöne einstellen
Drücken Sie die Menü-Taste.
/ Wählen Sie MT EINSTELL. aus und drücken
Sie die Menü-Taste.
/ Wählen Sie TON EINST. aus und drücken Sie
die Menü-Taste.
/ Wählen Sie aus den folgenden Möglichkeiten
und bestätigen Sie mit der Menü-Taste:
TASTENTON Schalten Sie den Quittungston für eine Tas-
tenbetätigung ein oder aus.
D
23
Page 26
Telefon einstellen
AKKU LEER Schalten Sie den Hinweiston ein oder aus.
Der Ton signalisiert, wenn der Akku geladen
werden muss.
AUS.REICHW. Schalten Sie den Hinweiston ein oder aus.
Der Ton signalisiert, wenn Sie sich mit dem
Mobilteil am Rande der Reichweite zur Basis
befinden.
Displaysprache einstellen
Drücken Sie die Menü-Taste.
/ Wählen Sie MT EINSTELL. aus und drücken
Sie die Menü-Taste.
/ Wählen Sie SPRACHE aus und drücken Sie
die Menü-Taste.
/ Wählen Sie eine Sprache und bestätigen Sie
mit der Menü-Taste.
Mobilteilnamen einstellen
Drücken Sie die Menü-Taste.
/ Wählen Sie MT EINSTELL. aus und drücken
Sie die Menü-Taste.
/ Wählen Sie MT NAME aus und drücken Sie
die Menü-Taste.
Löschen Sie ggf. den alten Namen mit ,
geben Sie mit den Zifferntasten einen neuen
Namen ein und drücken Sie die Menü-Taste.
Automatische Rufannahme einstellen
Drücken Sie die Menü-Taste.
/ Wählen Sie MT EINSTELL. aus und drücken
Sie die Menü-Taste.
/ Wählen Sie AUTO-ANNAHME aus und drü-
cken Sie die Menü-Taste.
/ Wählen Sie, ob die automatische Rufannah-
me ein- oder ausgeschaltet sein soll, und
24
Page 27

Telefon einstellen
bestätigen Sie die Einstellung mit der Menü-
Taste.
☞ Bei eingeschalteter automatischer Rufannahme wird ein
Anruf sofort angenommen, wenn das Mobilteil aus der Basis
genommen wird.
Wahlsperre einstellen
Drücken Sie die Menü-Taste.
/ Wählen Sie MT EINSTELL. aus und drücken
Sie die Menü-Taste.
/ Wählen Sie RUFSPERRE aus und drücken
Sie die Menü-Taste.
Geben Sie die aktuelle PIN ein und drücken
Sie die Menü-Taste.
/ Wählen Sie, ob die Wahlsperre ein- oder aus-
geschaltet sein soll, und bestätigen Sie die
Einstellung mit der Menü-Taste.
/ Haben Sie die Wahlsperre „EIN“geschaltet,
wählen Sie einen der 4 möglichen Speicherplätze und drücken Sie die Menü-Taste.
Geben Sie maximal 4 Ziffern ein und drücken
Sie die Menü-Taste.
☞ Sie können bis zu vier 4-stellige Nummern eingeben.
Immer wenn bei eingeschalteter Wahlsperre eine gewählte
Rufnummer mit einer der gespeicherten Ziffernfolgen beginnt,
wird die Wahl abgebrochen.
Beispiel: Haben Sie „1234“ eingegeben, werden alle Wählversuche, die mit „1234“ beginnen, abgebrochen.
D
25
Page 28

Telefon einstellen
Basis auswählen
Drücken Sie die Menü-Taste.
/ Wählen Sie MT EINSTELL. aus und drücken
Sie die Menü-Taste.
/ Wählen Sie BASIS AUSW. aus und drücken
Sie die Menü-Taste.
/ Wählen Sie eine Basis und bestätigen Sie mit
der Menü-Taste.
☞ Ist Ihr Mobilteil an mehreren Basisstationen angemeldet
(bis zu 4 Basisstationen), können Sie die „aktive“ Basis auswählen. Die aktuelle Basis ist mit einem „+“ markiert. In der
Einstellung „AUTOMATISCH“ bucht sich das Mobilteil immer
an der ersten Basis ein, die es findet.
Wahlverfahren einstellen
Drücken Sie die Menü-Taste.
/ Wählen Sie BS EINSTELL. aus und drücken
Sie die Menü-Taste.
/ Wählen Sie WAHLVERF. aus und drücken
Sie die Menü-Taste.
/ Wählen Sie TONWAHL oder IMPULSWAHL
und bestätigen Sie mit der Menü-Taste.
☞ Für die meisten Anschlüsse ist TONWAHL die richtige
Einstellung.
Flashzeit einstellen
Drücken Sie die Menü-Taste.
/ Wählen Sie BS EINSTELL. aus und drücken
Sie die Menü-Taste.
/ Wählen Sie FLASH-ZEIT aus und drücken
Sie die Menü-Taste.
26
Page 29

Telefon einstellen
/ Wählen Sie 100 ms, 300 ms, 600 ms oder
1000 ms und bestätigen Sie mit der Menü-
Taste.
☞ Erkundigen Sie sich ggf. bei Ihrem Netzbetreiber nach der
für Ihren Anschluss erforderlichen Einstellung zur Nutzung von
Netz-Leistungsmerkmalen.
PIN ändern
Drücken Sie die Menü-Taste.
/ Wählen Sie BS EINSTELL. aus und drücken
Sie die Menü-Taste.
/ Wählen Sie NEUE PIN aus und drücken Sie
die Menü-Taste.
Geben Sie die aktuelle PIN ein (im Auslieferungszustand 0 0 0 0) und drücken Sie die
Menü-Taste.
Geben Sie eine neue PIN ein und drücken
Sie die Menü-Taste.
Geben Sie die neue PIN noch einmal ein und
drücken Sie die Menü-Taste.
☞ Die vierstellige PIN schützt einige Einstellungen vor
unbefugtem Zugriff. Wenn Sie die PIN vergessen haben
wenden Sie sich bitte an unsere Service-Hotline.
Basis in den Auslieferungszustand zurücksetzen
Drücken Sie die Menü-Taste.
/ Wählen Sie BS EINSTELL. aus und drücken
Sie die Menü-Taste.
/ Wählen Sie BS RÜCKSETZ. aus und drü-
cken Sie die Menü-Taste.
Geben Sie die aktuelle PIN ein und drücken
Sie die Menü-Taste.
D
27
Page 30

Telefon einstellen
Mobilteil in den Auslieferungszustand zurücksetzen
Drücken Sie die Menü-Taste.
/ Wählen Sie MT EINSTELL. aus und drücken
Sie die Menü-Taste.
/ Wählen Sie MT RÜCKSETZ. aus und drü-
cken Sie die Menü-Taste.
Geben Sie die aktuelle PIN ein und drücken
Sie die Menü-Taste.
☞ Das Telefonbuch wird nicht gelöscht. Bitte löschen Sie das
Telefonbuch über das Telefonbuch-Menü.
Angemeldete Mobilteile bleiben angemeldet.
28
Page 31

Mobilteile an-/abmelden
10 Mobilteile an-/abmelden
An einer Basisstation können bis zu 5 Mobilteile angemeldet
werden. Das mit Ihrem Telefon ausgelieferte Mobilteil ist
bereits an der Basis angemeldet. Zum Anmelden eines „fremden“ Mobilteils ziehen Sie bitte auch dessen Bedienungsanleitung zu Rate.
Weiteres Mobilteil des gleichen Typs anmelden
Drücken Sie die Menü-Taste.
/ Wählen Sie ANMELDUNG aus und drücken
Sie die Menü-Taste.
/ Wählen Sie eine Basis aus und drücken Sie
die Menü-Taste.
Geben Sie die aktuelle PIN der Basis ein, an
der das Mobilteil angemeldet werden soll,
und drücken Sie die Menü-Taste.
Drücken und halten Sie die Paging-Taste an
der Basisstation so lange, bis die KontrollLED rot blinkt (ca. 5 s).
Nach einer kurzen Zeit ist das Mobilteil angemeldet.
Einzelnes Mobilteil löschen
Drücken Sie die Menü-Taste.
/ Wählen Sie BS EINSTELL. aus und drücken
Sie die Menü-Taste.
/ Wählen Sie MT ABMELDEN aus und drü-
cken Sie die Menü-Taste.
Geben Sie die aktuelle PIN ein und drücken
Sie die Menü-Taste.
/ Wählen Sie eines der angezeigten Mobilteile
aus und drücken Sie die Menü-Taste.
D
29
Page 32

Mobilteile an-/abmelden
☞ Das Mobilteil, das Sie gerade benutzen, kann nicht
abgemeldet werden.
Alle Mobilteile löschen
Drücken und halten Sie die Paging-Taste an
der Basisstation so lange, bis die KontrollLED rot blinkt (ca. 5 s).
Drücken Sie dann die Paging-Taste 7 mal
hintereinander. Die Kontroll-LED flackert.
Alle Mobilteile sind gelöscht.
30
Page 33

Betrieb an Telefonanlagen/Zusatzdienste
11 Betrieb an Telefonanlagen/Zusatzdienste
Betrieb an Telefonanlagen
Ist Ihr Telefon an einer Telefonanlage angeschlossen, können
Sie über die R- Taste Funktionen, wie z. B. Anrufe weiterleiten und automatischen Rückruf nutzen. Lesen Sie bitte in
der Bedienungsanleitung Ihrer Telefonanlage, welche FlashZeit Sie zur Nutzung dieser Funktionen einstellen müssen. Ob
Ihr Telefon an Ihrer Telefonanlage einwandfrei funktioniert,
erfahren Sie bei dem Händler, bei dem die Anlage gekauft
wurde.
Bitte denken Sie daran, bei Telefonbucheinträgen ggf. die
Amtskennziffer und eine ggf. erforderliche Wahlpause (Taste
) mit einzugeben.
Zusatzdienste Ihres Netzbetreibers
Ihr Telefon unterstützt Zusatzdienste Ihres Netzbetreibers, wie
z. B. Makeln, Anklopfen und Konferenz.
Über die R-Taste können Sie diese Zusatzdienste nutzen. Bitte erkundigen Sie sich bei Ihrem Netzbetreiber, welche
Flash-Zeit Sie zur Nutzung von Zusatzdiensten einstellen müssen. Zur Freischaltung von Zusatzdiensten wenden Sie sich
bitte an Ihren Netzbetreiber.
31
D
Page 34

Anhang
12 Anhang
Menüstruktur
TELEFONBUCH
A
NRUFLISTE VERPASST
EMPFANGEN
GEWÄHLT
BS EINSTELL. MT ABMELDEN
WAHLVERF. TONWAHL
IMPULSWAHL
FLASH-ZEIT 100
300
600
1000
NEUE PIN
BS RÜCKSETZ
MT EINSTELL. ALARM
RUFTON EINST INTERNRUFTON MELODIE
LAUTSTÄRKE
EXTERNRUFTON MELODIE
LAUTSTÄRKE
TON EINST. TASTENTON
AKKU LEER
AUS.REICHW.
SPRACHE
MT NAME
AUTO-ANNAHME
RUFSPERRE
DATUM & ZEIT
BASIS AUSW.
MT RÜCKSETZ.
ANMELDUNG
32
Page 35

Anhang
Fehlersuche
Haben Sie Probleme mit Ihrem Telefon, kontrollieren Sie zuerst
die folgenden Hinweise.
Bei technischen Problemen können Sie sich an unsere Service-Hotline wenden. Die Rufnummer finden Sie auf unserer
Website www.audioline.de
Bei Garantieansprüchen wenden Sie sich an Ihren Fachhändler. Die Garantiezeit beträgt 2 Jahre.
• Nach Betätigung der Abhebetaste ist kein Wählton
hörbar, die Wählleitung wird nicht belegt.
- Telefonanschluss-Stecker an der Basisstation
und an der Telefonsteckdose kontrollieren.
- Netzstecker an der Basisstation und an 230 V
kontrollieren.
• Displayanzeige:„BASIS x”.
- Netzstecker an der Basisstation und an 230 V
kontrollieren.
• Displayanzeige:„NICHT ANGEM.”.
- Mobilteil anmelden.
• Keine Anzeige auf dem Display.
- Mobilteil ausgeschaltet -> einschalten.
- Akku leer -> aufladen.
33
D
Page 36

Anhang
Werkseinstellungen/Auslieferungszustand
Anrufliste Kein Eintrag
Telefonbuch Kein Eintrag
Wecker Aus
Tonruf Mobilteil Intern: Melodie 2
Extern: Melodie 1
Tonruflautstärke: 3
Hinweistöne Tastenton: Ein
Akku leer: Ein
Reichweite: Ein
Sprache Deutsch
Mobilteilname MOBILTEIL 1
Autom. Rufannahme Ein
Wahlverfahren Tonwahl
Flash-Zeit 100 ms
PIN 0 0 0 0
34
Page 37

Anhang
Technische Daten
Standard: DECT / GAP
Kanalzahl: 120 Duplexkanäle
Frequenzen: 1880 MHz bis 1900 MHz
Duplexverfahren: Zeitmultiplex, 10ms Rahmenlänge
Kanalraster: 1728 kHz
Bitrate: 1152 kBit / s
Modulation: GFSK
Sprachkodierung: 32 kBit / s
Sendeleistung: 10 mW (mittlere Leistung pro Kanal)
Reichweite: bis zu 300 Meter im Freien,
in Gebäuden bis zu 50 Metern
Stromversorgung Basisstation:
100~240 V AC, 6 V DC / 500 mA
Stromversorgung Mobilteil: 2 x AAA NiMH / 600 mAh
Betriebsdauer Mobilteil: in Bereitschaft / im Gespräch
600 mAh = ca. 120 h / ca. 8 h
Ladezeit der Akkus: ca. 12 Stunden
Wahlverfahren: MFV / IWV
R-Taste: Flash (100 ms / 300 ms / 600 ms /
1000 ms)
Telefon-Anschluss-Schnur Belegung:
TSV auf Pin 3 und 4 gemäß CTR 37
(Euro-Belegung)
Steckernetzgerät: Eurostecker
35
D
Page 38

Anhang
Konformitätserklärung
Dieses Gerät erfüllt die Anforderungen der EU-Richtlinien:
- 1999/5/EG Richtlinie über Funkanlagen und Telekommunikationsendeinrichtungen und die gegenseitige Anerkennung ihrer Konformität.
- 2005/32/EG Richtlinie „Energiebetriebene Produkte“.
Die Konformität mit den o. a. Richtlinien wird durch das CEZeichen auf dem Gerät bestätigt.
Für die komplette Konformitätserklärung nutzen Sie bitte den
kostenlosen Download von unserer Website www.audioline.de
Pflegehinweise
Reinigen Sie die Gehäuseoberflächen mit einem weichen und
fusselfreien Tuch. Verwenden Sie keine Reinigungs- oder
Lösungsmittel.
Garantie
AUDIOLINE-Geräte werden nach den modernsten Produktionsverfahren hergestellt und geprüft. Ausgesuchte Materialien
und hoch entwickelte Technologien sorgen für einwandfreie
Funktion und lange Lebensdauer.
Ein Garantiefall liegt nicht vor, wenn die Ursache einer Fehlfunktion des Gerätes bei dem Telefonnetzbetreiber oder einer
eventuell zwischengeschalteten Telefonanlage liegt. Die
Garantie gilt nicht für die in den Produkten verwendeten Batterien, Akkus oder Akkupacks. Die Garantiezeit beträgt 24
Monate, gerechnet vom Tage des Kaufs.
Innerhalb der Garantiezeit werden alle Mängel, die auf Material- oder Herstellungsfehler zurückzuführen sind, kostenlos
beseitigt. Der Garantieanspruch erlischt bei Eingriffen durch
den Käufer oder durch Dritte. Schäden, die durch unsachgemäße Behandlung oder Bedienung, natürliche Abnutzung,
durch falsches Aufstellen oder Aufbewahren, durch unsachge-
.
36
Page 39

Anhang
mäßen Anschluss oder Installation sowie durch höhere Gewalt
oder sonstige äußere Einflüsse entstehen, fallen nicht unter
die Garantieleistung.
Wir behalten uns vor, bei Reklamationen die defekten Teile
auszubessern, zu ersetzen oder das Gerät auszutauschen.
Ausgetauschte Teile oder ausgetauschte Geräte gehen in
unser Eigentum über. Schadenersatzansprüche sind ausgeschlossen, soweit sie nicht auf Vorsatz oder grober Fahrlässigkeit des Herstellers beruhen.
Sollte Ihr Gerät dennoch einen Defekt innerhalb der Garantiezeit aufweisen, wenden Sie sich bitte unter Vorlage Ihrer Kaufquittung ausschließlich an das Geschäft, in dem Sie Ihr
AUDIOLINE-Gerät gekauft haben. Alle Gewährleistungsansprüche nach diesen Bestimmungen sind ausschließlich
gegenüber Ihrem Fachhändler geltend zu machen. Nach
Ablauf von zwei Jahren nach Kauf und Übergabe unserer Produkte können Gewährleistungsrechte nicht mehr geltend
gemacht werden.
37
D
Page 40

Anhang
Stichwortverzeichnis
A
Akkus . . . . . . . . . . . . . . . . .4
Akkus aufladen . . . . . . . . . .8
Akkus einlegen . . . . . . . . . .7
Anruf annehmen . . . . . . . .13
Anrufen . . . . . . . . . . . . . . .13
Anrufliste . . . . . . . . . .14, 19
Aufstellungsort . . . . . . . . . .4
Auslieferungszustand . . . .34
Automatische
Rufannahme . . . . . . . . .8, 24
B
Basisstation anschließen . .7
Bereitschaftsmodus . . . . .12
Bestimmungsgemäße Ver-
wendung . . . . . . . . . . . . . . .4
D
Datum/Uhrzeit . . . . . . .8, 22
Direktannahme . . . . . . . . . .8
Displaysprache . . . . . . .8, 24
E
Entsorgung . . . . . . . . . . . . .5
Externes Gespräch
vermitteln . . . . . . . . . . . . .16
G
Garantie . . . . . . . . . . . . . .36
Gespräch beenden . . . . . .14
Gespräch vermitteln . . . . .16
Gesprächsdauer . . . . . . . .15
H
Hinweistöne . . . . . . . . . . .23
I
Intern telefonieren . . . . . .15
K
Konferenz . . . . . . . . . . . . .16
Konformitätserklärung . . .36
L
Lautstärke (Hörer/Lautspre-
cher) . . . . . . . . . . . . . . . . .15
M
Medizinische Geräte . . . . . .5
Menüstruktur . . . . . . . . . .32
Mikrofon ausschalten . . . .15
Mobilteil ausschalten . . . .17
Mobilteile an-/abmelden . .29
Mobilteilnamen . . . . . . . . .24
Mute . . . . . . . . . . . . . . . . .15
F
Fehlersuche . . . . . . . . . . .33
Flashzeit . . . . . . . . . . . . . .26
Freisprechen . . . . . . . . . .13
38
N
Navigation im Menü . . . . .12
Netzteil . . . . . . . . . . . . . . . .4
Page 41

Anhang
P
Pflegehinweise . . . . . . . . .36
PIN . . . . . . . . . . . . . . . . . .27
R
RUFSPERRE . . . . . . . . . .25
S
Sicherheitshinweise . . . . . .4
SNOOZE . . . . . . . . . . . . .22
Stromausfall . . . . . . . . . . . .4
Symbole im Display . . . . .11
T
Tastensperre . . . . . . . . . . .17
Technische Daten . . . . . . .35
Telefonanlagen . . . . . . . . .31
Telefonbuch . . . . . . . .15, 20
Tonruf . . . . . . . . . . . . . . . .23
Tonruf am Mobilteil
ausschalten . . . . . . . . . . .17
V
Vermitteln . . . . . . . . . . . . .16
Verpackungsinhalt . . . . . . .6
W
Wahlsperre . . . . . . . . . . . .25
Wahlverfahren . . . . . . . . .26
Wahlwiederholung . . .14, 19
Wecker . . . . . . . . . . . . . . .22
Werkseinstellungen . . . . .34
Z
Zurücksetzen . . . . . . .27, 28
Zusatzdienste . . . . . . . . . .31
D
39
Page 42

40
Page 43

Table of contents
1 Safety Information . . . . . . . . . . . . . . . . . . . . . . . .4
Intended use . . . . . . . . . . . . . . . . . . . . . . . . . . . . . . . . . .4
Installation location . . . . . . . . . . . . . . . . . . . . . . . . . . . . .4
Power adapter plug . . . . . . . . . . . . . . . . . . . . . . . . . . . . .4
Rechargeable batteries . . . . . . . . . . . . . . . . . . . . . . . . . .4
Power failure . . . . . . . . . . . . . . . . . . . . . . . . . . . . . . . . . .4
Medical equipment . . . . . . . . . . . . . . . . . . . . . . . . . . . . . .5
Disposal . . . . . . . . . . . . . . . . . . . . . . . . . . . . . . . . . . . . . .5
2 Preparing the Telephone . . . . . . . . . . . . . . . . . . .6
Safety information . . . . . . . . . . . . . . . . . . . . . . . . . . . . . .6
Checking the package contents . . . . . . . . . . . . . . . . . . . .6
Connecting the base station . . . . . . . . . . . . . . . . . . . . . .7
Inserting the batteries . . . . . . . . . . . . . . . . . . . . . . . . . . .7
Charging the batteries . . . . . . . . . . . . . . . . . . . . . . . . . . .7
Setting the time and date on the handset . . . . . . . . . . . .8
Setting the display language . . . . . . . . . . . . . . . . . . . . . .8
Auto Answer . . . . . . . . . . . . . . . . . . . . . . . . . . . . . . . . . . .8
3 Operating Elements . . . . . . . . . . . . . . . . . . . . . . .9
4 Preliminary Information . . . . . . . . . . . . . . . . . . .11
Icons in the handset display . . . . . . . . . . . . . . . . . . . . . .11
Standby mode . . . . . . . . . . . . . . . . . . . . . . . . . . . . . . . .12
Navigating in the menu . . . . . . . . . . . . . . . . . . . . . . . . .12
5 Telephoning . . . . . . . . . . . . . . . . . . . . . . . . . . . . .13
Taking a call . . . . . . . . . . . . . . . . . . . . . . . . . . . . . . . . . .13
Making a call . . . . . . . . . . . . . . . . . . . . . . . . . . . . . . . . .13
Hands-free . . . . . . . . . . . . . . . . . . . . . . . . . . . . . . . . . .13
Ending a call . . . . . . . . . . . . . . . . . . . . . . . . . . . . . . . . .14
Redial . . . . . . . . . . . . . . . . . . . . . . . . . . . . . . . . . . . . . . .14
Making a call from the call list . . . . . . . . . . . . . . . . . . . .14
Making a call from the phone book . . . . . . . . . . . . . . . .15
Call timer . . . . . . . . . . . . . . . . . . . . . . . . . . . . . . . . . . . .15
Setting the earpiece/loudspeaker volume . . . . . . . . . . .15
GB
1
Page 44

Table of contents
Muting the microphone . . . . . . . . . . . . . . . . . . . . . . . . .15
Internal calls . . . . . . . . . . . . . . . . . . . . . . . . . . . . . . . . . .15
6 Other features . . . . . . . . . . . . . . . . . . . . . . . . . . .17
Key lock . . . . . . . . . . . . . . . . . . . . . . . . . . . . . . . . . . . . .17
Switching the handset ringer on/off . . . . . . . . . . . . . . . .17
Switching off the handset . . . . . . . . . . . . . . . . . . . . . . . .17
7 Call list / Redial . . . . . . . . . . . . . . . . . . . . . . . . . .19
Editing the lists . . . . . . . . . . . . . . . . . . . . . . . . . . . . . . . .19
8 Phone book . . . . . . . . . . . . . . . . . . . . . . . . . . . . .20
Creating a new entry . . . . . . . . . . . . . . . . . . . . . . . . . . .20
Editing telephone book entries . . . . . . . . . . . . . . . . . . .21
9 Setting the telephone . . . . . . . . . . . . . . . . . . . . .22
Date/Time . . . . . . . . . . . . . . . . . . . . . . . . . . . . . . . . . . . .22
Alarm . . . . . . . . . . . . . . . . . . . . . . . . . . . . . . . . . . . . . . .22
Setting the ringer for the handset . . . . . . . . . . . . . . . . .23
Setting the display language . . . . . . . . . . . . . . . . . . . . .24
Setting the handset name . . . . . . . . . . . . . . . . . . . . . . .24
Setting Auto Answer . . . . . . . . . . . . . . . . . . . . . . . . . . . .24
Setting Call barring . . . . . . . . . . . . . . . . . . . . . . . . . . . .25
Selecting the base . . . . . . . . . . . . . . . . . . . . . . . . . . . . .26
Setting the dial mode . . . . . . . . . . . . . . . . . . . . . . . . . . .26
Setting the Flash Time . . . . . . . . . . . . . . . . . . . . . . . . . .26
Resetting your base station . . . . . . . . . . . . . . . . . . . . .27
Resetting your handset . . . . . . . . . . . . . . . . . . . . . . . . .28
10 Registering/de-registering handsets . . . . . . . .29
Registering a handset of the same type . . . . . . . . . . . .29
Deleting a single handset . . . . . . . . . . . . . . . . . . . . . . .29
Deleting all handsets . . . . . . . . . . . . . . . . . . . . . . . . . . .30
11 PBX / Supplementary Services . . . . . . . . . . . . .31
PBX . . . . . . . . . . . . . . . . . . . . . . . . . . . . . . . . . . . . . . . .31
Supplementary services . . . . . . . . . . . . . . . . . . . . . . . . .31
2
Page 45

Table of contents
12 Appendix . . . . . . . . . . . . . . . . . . . . . . . . . . . . . . .32
Menu Structure . . . . . . . . . . . . . . . . . . . . . . . . . . . . . . .32
In Case of Problems . . . . . . . . . . . . . . . . . . . . . . . . . . .33
Default settings . . . . . . . . . . . . . . . . . . . . . . . . . . . . . . .34
Technical data . . . . . . . . . . . . . . . . . . . . . . . . . . . . . . . .35
Declaration of Conformity . . . . . . . . . . . . . . . . . . . . . . .36
Maintenance . . . . . . . . . . . . . . . . . . . . . . . . . . . . . . . . .36
Guarantee . . . . . . . . . . . . . . . . . . . . . . . . . . . . . . . . . . .36
Index . . . . . . . . . . . . . . . . . . . . . . . . . . . . . . . . . . . . . . .38
GB
3
Page 46

Safety Information
1 Safety Information
Please read this operating instruction manual thoroughly.
Intended use
The telephone is suitable for telephoning within a public telephone network system. Any other use is considered unintended use. Unauthorised modification or reconstruction is not
permitted. Under no circumstances open the device or complete any repair work yourself.
Installation location
Prevent excessive exposure to smoke, dust, vibration, chemicals, moisture, heat and direct sunlight.
Do not use the handset in potentially explosive areas.
Power adapter plug
a Attention: Only use the power adapter plug supplied
because other power supplies could damage the telephone.
Ensure access to the power adapter plug is not obstructed by
furniture or such.
Rechargeable batteries
a Attention: Never throw batteries into a fire. Only use
batteries of the same type. Pay attention to the correct polarity.
Incorrect polarity of the batteries represents a risk of explosion
during charging.
Power failure
The telephone cannot be used to make calls in the event of a
power failure.
Always keep a cord connected telephone which operates without an external power supply available in case of emergency
situations.
4
Page 47

Safety Information
Medical equipment
a Attention: Never use the telephone in the vicinity of
medical equipment. Effects on such equipment cannot be fully
ruled out.
DECT telephones can cause an unpleasant humming sound in
hearing aids.
(DECT: Digital Enhanced Cordless Telecommunication = Standard for cordless telephones)
Disposal
In order to dispose of your device, take it to a collection point provided by your local public waste authorities (e.g. recycling centre). According to laws on
the disposal of electronic and electrical devices,
owners are obliged to dispose of old electronic and
electrical devices in a separate waste container.
The adjacent symbol indicates that the device must
not be disposed of in normal domestic waste!
Batteries represent a hazard to both health and
the environment! Never open, damage or swallow
batteries, nor allow them to get into the environment.
They may contain toxic and ecologically hazardous
heavy
metals. You are legally obliged to dispose of batteries at the point of sale or at appropriate collection
points provided by your local public waste authorities. Disposal is free of charge. The adjacent symbols indicate that batteries must not be disposed of
in normal domestic waste and but at authorised collection points.
Packaging materials must be disposed of according
to local regulations.
GB
5
Page 48

Preparing the Telephone
Chapter 1 before starting up.
Checking the package contents
The package contains:
Base station with power
adapter plug 1
Handset 1
Telephone connection cable 1
Rechargeable batteries 2
Operating instructions 1
The power adapter plugs supplied fulfils the ecodesign directive of the European Council (Directive 2005/32/EC).
This means that power consumption is considerably lower than power adapter plugs of an earlier design both in operating and idling modes.
2 Preparing the Telephone
Safety information
a Attention: It is essential to read the Safety Information in
6
Page 49

Preparing the Telephone
Connecting the base station
a Attention: Position the base station at least 1 m away
from other electronic devices, otherwise there is a risk of
mutual disturbance.
Connect the base station as illustrated in the diagram. For reasons of safety, only use the power adapter plug and telephone
connection line supplied.
Telephone line socket
Mains power outlet
a Attention: Use only the power adapter plug supplied with
the base station!
Inserting the batteries
Open the battery compartment cover.
Put in the batteries.
Close the battery compartment cover.
a Attention: Use only type AAA NiMH 600 mAh recharge-
able batteries. Never use normal batteries / primary cell
batteries. Observe the correct polarity!
GB
7
Page 50

Preparing the Telephone
Charging the batteries
☞ Before the handset is used for the first time, place it on the
base station for at least 14 hours.
The handset warms up during the charging process. This is
normal and does not represent a risk. Use only the adapter
plug unit provided for the charging station. The battery status
is shown on the display. When the battery capacity is nearly
exhausted, the battery symbol ( ) will flash in the display
and you will hear the battery warning sound (if the option is
switched on) / menu item “HS SETTINGS/TONE SETUP/BAT-
TERY LOW“). You still have up to ten minutes of talk time.
Setting the time and date on the handset
At initial operation the handset does not have the correct time
(e.g. for entries in the call list). Date and time are set through
the menu item “HS SETTINGS/ DATE & TIME“.
Setting the display language
The display language is available different languages. The
default setting is “German (Deutsch)“. Set the language using
the menu item “MT-EINSTELL./ SPRACHE“.
Auto Answer
If this function is activated, an incoming call is taken when the
handset is removed from the base station. The automatic answering function is activated and deactivated using the menu
item “HS SETTINGS/ AUTO ANSWER“.
8
Page 51

Operating Elements
3 Operating Elements
Earpiece
Display
Menu key / OK
Handsfree
Call list
Off Hook
button
Keylock
R-key
Phonebook/
Back
Internal call
key
On Hook key
Redial list
Ringer on/off
Insert dialling
pause
Mute key
Microphone
GB
9
Page 52

Operating Elements
Charge contacts
(you can place the handset in both directions)
Locate handset
(Paging)
10
Signal LED
(green during charging of handset,
red during call)
Page 53

Preliminary Information
4 Preliminary Information
Icons in the handset display
Icon Description
On: The connection to the base station is good.
Flashing: The connection to the base station
is lost.
NEW WEN
RPT TPR
On: Indicates the battery charge status.
On: Batteries need charging.
Flashing: Batteries should be charged immediately.
On: A call is currently being made.
Flashing: A call has been received.
Handsfree mode is activated.
The ringing tone has been switched off.
On: The alarm function is activated.
Flashing: The alarm is ringing.
The key lock is activated
You received a message in your answering
machine provided by the telephone network
(depending on telephone network/provider).
The phonebook is open.
New call in the call list.
More than one call from the same telephone
number.
GB
11
Page 54

Preliminary Information
# #
Whilst viewing the call list: number of the
entry.
Standby mode
All descriptions in this operating manual assume that the handset is in Standby mode. The system switches to Standby mode
by pressing the button.
Navigating in the menu
All the functions can be accessed via the various menus. The
entire menu structure can be found in the appendix.
The arrow keys are used for navigation in the menu.
The menu is opened with the key .
Use the arrow keys and to move within the menu
Press to open a sub menu.
To return to the main menu press briefly.
12
Page 55

Telephoning
5 Telephoning
Taking a call
Your phone is ringing.
If the handset is not on the base station:
/
If the handset is on the base station and AUTO ANSWER is
not activated:
/
If the handset is on the base station and AUTO ANSWER is
activated:
Making a call
/
Press the Off Hook button or the handsfree
key.
Remove the handset from the base and
press the Off Hook button or the handsfree
key.
Remove the handset from the base - the call
will be taken automatically.
Enter the telephone number.
Delete wrong characters pressing or
.
The telephone number is being dialled.
☞ You can also press the Off Hook button and you will hear
the dialling tone. The entered number will be dialled immediately. It is not possible to correct wrong digits individually using
this dialling procedure.
Hands-free
For switching hands-free on or off press the
handsfree key.
GB
13
Page 56

Telephoning
Ending a call
/
Redial
☞ Your handset saves the last 10 dialled telephone numbers.
If a caller is stored in your phone book, in addition the name
will be displayed.
Press the On Hook button or replace the
handset on the base station.
Open the redial list.
/
/
If you want to redial the very last dialled phone number press
/
Select an entry.
Dial out the telephone number.
and subsequently .
Making a call from the call list
☞ Your handset saves the numbers of the last 30 incoming
calls in the call list. If a caller is stored in your phone book, in
addition the name will be displayed.
Saving can only take place if the function “Phone number
transmission (CLIP)” is available at your connection and caller
ID is not suppressed by the caller or was not transmitted for
any other reason.
Open the call list.
/
/
Select an entry.
Dial out the telephone number.
14
Page 57

Telephoning
Making a call from the phone book
☞ You can store up to 50 entries in the phone book.
For creating entries see section “Phone book“.
Open the telephone book.
/
/
Select an entry.
Dial out the telephone number.
Call timer
Your handset automatically times the duration of every call in
hours, minutes and seconds.
Setting the earpiece/loudspeaker volume
/ During a call you can adjust the volume in 5
levels (if telephoning “normally“ -> earpiece
volume, with hands-free -> loudspeaker volume).
These seperate settings will remain at the
last selected level when you end the call.
Muting the microphone
During a call you can switch your handset’s
microphone off.
To unmute press the key again.
Internal calls
☞ Internal calls, transfers and conference calls are only
possible if multiple handsets are registered.
GB
15
Page 58

Telephoning
Making an internal call
Press the internal call key.
Enter the internal phone number of the desired handset.
Transferring an external call to another handset
During an external call . . .
Press the internal call key.
Enter the internal phone number of the desired handset.
The external call is put on hold. When the
called handset answers you can announce
the call transfer.
Press the On-Hook key. The call will be transferred.
3-Party Conference
During an external call . . .
Press the internal call key.
Enter the internal phone number of the desired handset.
When the called handset answers ... press
the star key.
☞ Any handset hangs up during a conference call will leave
the other handset still in connection with the external call.
16
Page 59

Other Features
6 Other features
Key lock
☞ The key lock prevents functions assigned to buttons being
activated inadvertently. Incoming calls can still be taken in the
normal way even when the key lock function is activated.
Press and hold down the star-key until the
key lock icon and HS locked appear in
the display.
For unlocking the keypad again press and
hold down the star-key until the icon disappears and the handset’s name is shown again.
Switching the handset ringer on/off
☞ You can turn off the ringer via the menu item “HS SET-
TINGS/RING SETUP“ as well.
Press and hold down the hash-key until the
icon appears in the display.
For turning the ringer on again press and
hold down the hash-key until the icon
disappears.
Switching off the handset
☞ You can switch off the handset for saving battery capacity.
Press and hold down the On Hook-button.
After a few seconds the handset will be switched off. The display illumination goes down.
GB
17
Page 60

Other Features
For switching the handset on again press and
hold down the On Hook-button until the display is activated again. You can also simply
put the handset onto the base station.
18
Page 61

Call list / Redial
7 Call list / Redial
Editing the lists
Press the Menu key.
/ Select CALL LOG.
Press the Menu key.
/ Select a list (MISSED/RECEIVED/DIALED).
Press the Menu key.
/
/
ADD TO PB? The telephone number will be stored in the
DELETE? The entry will be deleted.
DELETE ALL?
Select an entry.
Press the Menu key.
Select one of the following options and confirm with the Menu key:
telephone book. Enter a name, confirm or
edit the telephone number and select a ringtone melody for the entry.
The complete list will be deleted after a confirmation query.
GB
19
Page 62

Phonebook
8 Phone book
☞ Your phone can store up to 50 private phonebook entries
with names and numbers. You can also select different ringtones for your phonebook entries. Always enter the phone
numbers with the area code; this enables a correct display of
the respective caller for whom there is an existing entry and
whose phone number transmission to your connection is
available.
Creating a new entry
Press the Menu key.
/ Select PHONE BOOK.
Press the Menu key.
/ Select NEW ENTRY BOOK.
Press the Menu key.
Enter the name (max. 12 digits).
Letters are also imprinted on the digit keys.
Letters, digits and special characters are
entered by pressing the relevant key the
respective number of times.
After a short time the cursor skips one position forwards.
Confirm with the Menu key.
Enter the phone number (max. 20 digits). If
your telephone is connected to a PBX start
the telephone number with the access code.
If a dialling pause is needed, press after the
access code the key for approx. 2 sec.
A P appears in the display.
Confirm with the Menu key.
/ Select a melody for the entry.
Confirm with the Menu key.
Back to Standby mode.
20
Page 63

Phonebook
Editing telephone book entries
Press the Menu key.
/ Select PHONE BOOK.
Press the Menu key.
/ Select one of the following options and con-
firm with the Menu key:
LIST All entries are shown (scroll using /
).
NEW ENTRY You can create a new entry.
EDIT RECORD You can edit the entry. Use the key to
delete characters and numbers then add new
characters and numbers as required. Please
refer to “Creating a new entry“.
DEL RECORD The entry will be deleted.
DELETE ALL?
MEM STATUS The current allocation will be displayed (e.g.
The complete list will be deleted after a confirmation query.
03/50: 3 of 50 possible entries are present).
GB
21
Page 64

Setting the telephone
9 Setting the telephone
Date/Time
Press the Menu key.
/ Select HS SETTINGS and press the Menu
key.
/ Select DATE & TIME and press the Menu
key.
The last two digits of the year flash.
/ Set the year using the arrow keys and con-
firm with the Menu key.
The month flashes.
In this matter set the month, the day, the
hours (AM/PM) and the minutes using the
arrow keys and confirming with the Menu
key.
Alarm
Press the Menu key.
/ Select HS SETTINGS and press the Menu
key.
/ Select ALARM and press the Menu key.
/ Select ON and press the Menu key.
/ Enter the alarm time (hours, minutes, AM/PM)
using the arrow keys and confirm each with
the Menu key.
/ Select SNOOZE ON or SNOOZE OFF and
press the Menu key.
If “Snooze“ is turned on it means that the
alarm signal is being repeated after 5 minutes
up to 9 times. To confirm the alarm press any
key except the On-hook button. The snooze
function is terminated by pressing the On-
hook button.
22
Page 65

Setting the telephone
If “Snooze“ is turned off the alarm signal is
given once at the specified time. To confirm
the alarm signal, press any key.
Setting the ringer for the handset
Press the Menu key.
/ Select HS SETTINGS and press the Menu
key.
/ Select RING SETUP and press the Menu
key.
/ Select one of the following options and con-
firm with the Menu key:
INT RING Select a melody and set the volume for inter-
nal calls.
EXT RING Select a melody and set the volume for exter-
nal calls.
☞ If you select “VOLUME OFF“ the respective symbol is
shown in the display.
Setting the alert tones
Press the Menu key.
/ Select HS SETTINGS and press the Menu
key.
/ Select TONE SETUP and press the Menu
key.
/ Select one of the following options and con-
firm with the Menu key:
KEY TONE Switch the keytone on or off.
BATTERY LOW
RANGE ALARM
Switch the alert tone on or off. The tone
sounds if “Low battery“ is detected.
Switch the alert tone on or off. The tone
sounds if “Out of range“ is detected.
GB
23
Page 66

Setting the telephone
Setting the display language
Press the Menu key.
/ Select HS SETTINGS and press the Menu
key.
/ Select LANGUAGE and press the Menu key.
/ Select a language and press the Menu key.
Setting the handset name
Press the Menu key.
/ Select HS SETTINGS and press the Menu
key.
/ Select HS NAME and press the Menu key.
Delete the old name with , if neccessa-
ry, enter a new name using the digit keys and
confirm with the Menu key.
Setting Auto Answer
Press the Menu key.
/ Select HS SETTINGS and press the Menu
key.
/ Select AUTO ANSWER and press the Menu
key.
/ Select whether the automatic answer function
will be on or off and confirm with the Menu
key.
☞ If AUTO ANSWER is on an incoming call will immediately
be taken when the handset is taken from the base.
24
Page 67

Setting the telephone
Setting Call barring
Press the Menu key.
/ Select HS SETTINGS and press the Menu
key.
/ Select BARRING and press the Menu key.
Enter the relevant PIN (default 0 0 0 0) and
press the Menu key.
/ Select, whether call barring should be on or
off and press the Menu key.
/ If call barring is set to ON, select one of the
four entries and press the Menu key.
Enter up to 4 digits and press the Menu key.
☞ You can enter up to four different 4-digit numbers.
If call barring is set to on and a dialled telephone number
starts with one of the stored barring numbers, the dial
procedure will be cancelled.
Example: Did you store “1234“, all dialling attempts, beginning
with “1234“ will be cancelled.
GB
25
Page 68

Setting the telephone
Selecting the base
Press the Menu key.
/ Select HS SETTINGS and press the Menu
key.
/ Select SELECT BASE and press the Menu
key.
/ Select a base and and confirm with the Menu
key.
☞ If your handset is registered to more than one base station
(up to 4 base stations), you can select the active base. The
current base station is marked with a “+“.
When “AUTO“ is set, the handset will always connect to the
base station, which first will be detected.
Setting the dial mode
Press the Menu key.
/ Select BS SETTINGS and press the Menu
key.
/ Select DIAL MODE and press the Menu key.
/ Select TONE or PULSE and press the Menu
key.
☞ In most situations the TONE option should be selected.
Setting the Flash Time
Press the Menu key.
/ Select BS SETTINGS and press the Menu
key.
/ Select FLASH TIME and press the Menu
key.
/ Select 100 ms, 300 ms, 600 ms or 1000 ms
and confirm with the Menu key.
26
Page 69

Setting the telephone
☞ If neccessary contact your service provider for the correct
setting for using the network features.
Editing the PIN
Press the Menu key.
/ Select BS SETTINGS and press the Menu
key.
/ Select MODIFY PIN and press the Menu key.
Enter the relevant PIN (default 0 0 0 0) and
press the Menu key.
Enter the new PIN and press the Menu key.
Enter the new PIN again and press the Menu
key.
☞ The four digit PIN protects some settings against
unauthorized changes. If you have forgotten your PIN please
call our service hotline.
Resetting your base station
Press the Menu key.
/ Select BS SETTINGS and press the Menu
key.
/ Select BS DEFAULT and press the Menu
key.
Enter the relevant PIN (default 0 0 0 0) and
press the Menu key.
GB
27
Page 70

Setting the telephone
Resetting your handset
Press the Menu key.
/ Select HS SETTINGS and press the Menu
key.
/ Select HS DEFAULT and press the Menu
key.
Enter the relevant PIN (default 0 0 0 0) and
press the Menu key.
☞ The phone book entries will not be deleted.
Please delete the phone book using the menu item “PHONE
BOOK/DELETE ALL“
The registration of handsets will not be changed.
28
Page 71

Registering/de-registering handsets
10 Registering/de-registering handsets
5 handsets can be registered to a base station. The handset
delivered with your telephone is already registered. To register
a “foreign“ handset please refer to it’s user manual.
Registering a handset of the same type
Press the Menu key.
/ Select REGISTRATION and press the Menu
key.
/ Select a base and press the Menu key.
Enter the relevant PIN for the base, the new
handset should be registered on, and press
the Menu key.
Press and hold down the paging key on the
base station until the LED starts flashing red
(approx. 5 sec).
After a few seconds the handset is registe-
red.
Deleting a single handset
Press the Menu key.
/ Select BS SETTINGS and press the Menu
key.
/ Select DELETE HS and press the Menu key.
Enter the relevant PIN and press the Menu
key.
/ Select a handset and press the Menu key.
☞ You cannot de-register the handset you are currently
using.
GB
29
Page 72

Registering/de-registering handsets
Deleting all handsets
Press and hold down the paging key on the
base station until the LED starts flashing red
(approx. 5 sec).
Subsequently press the paging key 7 times in
succession. The LED starts to flicker.
All handsets are deleted.
30
Page 73

PBX / Supplementary Services
11 PBX / Supplementary Services
PBX
If the telephone is connected to a private branch exchange,
functions such as transferring calls and automatic call back
can be used via the R button .
Refer to the operating manual provided with your private
branch exchange as to which Flash time must be set in order
to use these functions. The sales outlet where you purchased
the exchange can provide information as to whether the telephone will work properly with the exchange.
Please remember to enter the access code and a neccessary
dialling pause ( ) when creating phone book entries.
Supplementary services
Your telephone supports supplementary services provided by
your telephone network provider, such as brokering, call waiting and conference facilities. These supplementary services
can be used via the R-button .
Please contact your telephone network provider regarding
which Flash time must be set to use the supplementary services. Contact your telephone
network provider with regard to enabling supplementary services.
GB
31
Page 74

Appendix
PHONE BOOK
CALL LOG MISSED
RECEIVED
DIALED
BS SETTINGS DELETE HS
DIAL MODE TONE
PULSE
FLASH TIME 100
300
600
1000
MODIFY PIN
BS DEFAULT
HS SETTINGS ALARM
RING SETUP INT RING MELODY
VOLUME
EXT RING MELODY
VOLUME
TONE SETUP KEY TONE
BATTERY LOW
RANGE ALARM
LANGUAGE
HS NAME
AUTO ANSWER
BARRING
DATE & TIME
SELECT BASE
HS DEFAULT
REGISTRATION
12 Appendix
Menu Structure
32
Page 75

Appendix
In Case of Problems
Should problems arise with the telephone, please refer to the
following information first.
In the case of technical problems, contact our Hotline. Please
refer to our website www.audioline.de
ber.
In the case of claims under the terms of guarantee, contact
your sales outlet. There is a 2 year period of guarantee.
• After pressing the on hook button, no ring tone is
audible, the line is not engaged.
- Check the telephone connector on the base stati-
on and on the wall socket.
- Check power connector on the base station and
on 230 V.
• Display: “BASE x“.
- Check power connector on the base station and
on 230 V.
• Display: “UNREGISTERED“.
- Register handset.
• No display.
- Handset turned off -> turn on.
- Battery empty -> recharge.
for the telephone num-
GB
33
Page 76

Appendix
Default settings
Call list No entry
Phonebook No entry
Alarm Off
Ringer handset Internal call: Melody 2
External call: Melody 1
Volume: 3
Tone setup Key tone: On
Battery low: On
Range warning: On
Language German
Handset name HS 1
Auto answer On
Dial mode Tone
Flash time 100 ms
PIN 0 0 0 0
34
Page 77

Appendix
Technical data
Standard: DECT / GAP
Number of channels: 120 duplex channels
Frequencies: 1880 MHz to 1900 MHz
Duplex mode: Time division multiplex, 10ms frame length
Channel spacing: 1728 kHz
Bit rate: 1152 kBit / s
Modulation: GFSK
Voice encoding: 32 kBit / s
Transmitter power: 10 mW (average power per channel)
Range: up to 300 m outside, up to 50 m inside buildings
Electricity supply base station:
100~240 V AC, 6 V DC / 500 mA
Electricity supply handset: 2 x AAA NiMH / 600 mAh
Handset: Operating time: Stand-by time / Talk time
600 mAh = up to 120 h / up to 8 h
Charging time: approx. 12 hours
Dial mode: Tone / Pulse
R-key : Flash (100 ms / 300 ms / 600 ms / 1000 ms)
Telephone line cord:
TSV on Pin 3 and 4 according to CTR 37 (Euro)
Adapter plug: European-type mains connector
GB
35
Page 78

Appendix
Declaration of Conformity
This device fulfils the requirements stipulated in the EU
directives:
- 1999/5/EU directive on radio equipment and telecommuni-
cations terminal equipment and the mutual recognition of
their conformity.
- 2005/32/EU directive “Energy-using products“.
Conformity with the above mentioned directives is confirmed
by the CE symbol on the device.
To view the complete Declaration of Conformity, please refer to
the free download available on our web site www.audioline.de
Maintenance
Clean the housing surfaces with a soft, fluff-free cloth.
Do not use any cleaning agents or solvents.
Guarantee
AUDIOLINE equipment is produced and tested according to
the latest production methods. The implementation of carefully
chosen materials and highly developed technologies ensure
trouble-free functioning and a long service life. The terms of
guarantee do not apply where the cause of equipment malfunction is the fault of the telephone network operator or any
interposed private branch extension system. The terms of guarantee do not apply to the batteries or power packs used in the
products. The period of guarantee is 24 months from the date
of purchase.
All deficiencies related to material or manufacturing errors within the period of guarantee will be redressed free of charge.
Rights to claims under the terms of guarantee are annulled following tampering by the purchaser or third parties. Damage
caused as the result of improper handling or operation, normal
wear and tear, incorrect positioning or storage, improper connection or installation or Acts of God and other external influ-
.
36
Page 79

Appendix
ences are excluded from the terms of guarantee. In the case
of complaints, we reserve the right to repair defect parts, replace them or replace the entire device. Replaced parts or devices become our property. Rights to compensation in the case
of damage are excluded where there is no evidence of intent
or gross negligence by the manufacturer.
If your device shows signs of defect during the period of guarantee, please return it to the sales outlet in which you purchased the AUDIOLINE device together with the purchase receipt.
All claims under the terms of guarantee in accordance with this
agreement can only be asserted at the sales outlet.
No claims under the terms of guarantee can be asserted after
a period of two years from the date of purchase and hand-over
of the product.
GB
37
Page 80

Appendix
Index
A
Alarm . . . . . . . . . . . . . . . .22
Alert tones . . . . . . . . . . . .23
Auto Answer . . . . . . . . .8, 24
C
Call barring . . . . . . . . . . . .25
Call list . . . . . . . . . . . .14, 19
Call timer . . . . . . . . . . . . .15
Charging the batteries . . . .8
Conference . . . . . . . . . . . .16
Connecting the base
station . . . . . . . . . . . . . . . . .7
D
Date/time . . . . . . . . . . .8, 22
Declaration of Conformity .36
Default settings . . . . . . . . .34
Dial mode . . . . . . . . . . . . .26
Display language . . . . . . . .8
Disposal . . . . . . . . . . . . . . .5
E
Earpiece/loudspeaker
volume . . . . . . . . . . . . . . .15
Ending a call . . . . . . . . . . .14
H
Hands-free . . . . . . . . . . . .13
Handset name . . . . . . . . .24
I
Icons . . . . . . . . . . . . . . . . .11
In Case of Problems . . . . .33
Inserting the batteries . . . . .7
Installation location . . . . . . .4
Intended use . . . . . . . . . . . .4
Internal calls . . . . . . . . . . .15
K
Key lock . . . . . . . . . . . . . .17
L
Language . . . . . . . . . . . . .24
M
Maintenance . . . . . . . . . . .36
Making a call . . . . . . . . . .13
Medical equipment . . . . . . .5
Menu Structure . . . . . . . . .32
Muting the microphone . . .15
N
Navigating in the menu . .12
F
Flash Time . . . . . . . . . . . .26
G
Guarantee . . . . . . . . . . . .36
38
P
Package contents . . . . . . . .6
PBX . . . . . . . . . . . . . . . . .31
Phone book . . . . . . . .15, 20
PIN . . . . . . . . . . . . . . . . . .27
Power adapter plug . . . . . .4
Page 81

Appendix
Power failure . . . . . . . . . . .4
R
Rechargeable batteries . . .4
Redial . . . . . . . . . . . . .14, 19
Registering/de-registering
handsets . . . . . . . . . . . . . .29
Reset . . . . . . . . . . . . . . . .27
Ringer . . . . . . . . . . . . . . . .23
S
Safety Information . . . . . . .4
SNOOZE . . . . . . . . . . . . .22
Standby mode . . . . . . . . .12
Supplementary services . .31
Switching off the handset .17
Switching the handset
ringer on/off . . . . . . . . . . .17
T
Taking a call . . . . . . . . . . .13
Technical data . . . . . . . . .35
Transferring an
external call . . . . . . . . . . .16
V
Volume (earpiece/loudspea-
ker) . . . . . . . . . . . . . . . . . .15
GB
39
Page 82

40
Page 83

Page 84

Wichtige Garantiehinweise
Die Garantiezeit für Ihr AUDIOLINE-Produkt beginnt mit dem
Kaufdatum. Ein Garantieanspruch besteht bei Mängeln, die auf
Material- oder Herstellungsfehler zurückzuführen sind. Der
Garantieanspruch erlischt bei Eingriffen durch den Käufer oder
durch Dritte. Schäden, die durch unsachgemäße Behandlung
oder Bedienung, natürliche Abnutzung, durch falsches Aufstellen oder Aufbewahren, durch unsachgemäßen Anschluss oder
Installation sowie durch höhere Gewalt oder sonstige äußere
Einflüsse entstehen, fallen nicht unter die Garantieleistung.
BITTE WENDEN SIE SICH IM GARANTIEFALL AUSSCHLIESSLICH AN DEN HÄNDLER, BEI DEM SIE DAS
GERÄT GEKAUFT HABEN, UND VERGESSEN SIE NICHT,
DEN KAUFBELEG VORZULEGEN. UM UNNÖTIG LANGE
WARTEZEITEN ZU VERMEIDEN, SENDEN SIE REKLAMATIONSGERÄTE BITTE NICHT AN UNSERE BÜROADRESSE.
BEI FRAGEN ZUR BEDIENUNG UND GARANTIELEISTUNG
LESEN SIE BITTE DIE BEDIENUNGSANLEITUNG, FRAGEN
SIE IHREN FACHHÄNDLER ODER WENDEN SIE SICH AN
UNSERE
Service-Hotline
Die Rufnummer der Service-Hotline finden Sie auf unserer Internetseite
www.audioline.de
AUDIOLINE GmbH
Neuss
Internet: www.audioline.de
E-Mail: info@audioline.de
Version 1.0 • 10.10.2014
4 250711 992798
 Loading...