

Audio Innovate AEM-100i User Manual

AEM-100i 2-Channel Pro DJ Mixer
AEM-100i 2-Channel Pro DJ MixerAEM-100i 2-Channel Pro DJ Mixer
AEM-100i 2-Channel Pro DJ Mixer
Please kindly read this manual before using the AEM-100i and save it for future
reference.
2
TABLE OF CONTENTS
Warranty Information p. 3
Getting started p. 4-7
Turntables rear panel p. 4
CDs rear panel p. 4-5
Front panel p. 5
Before powering up the unit p. 6
After powering up the unit p. 7
Faceplate details p. 8-12
MICs, Inputs, Master, headphones p. 9
Effects p. 9-11
Channel LED meters p. 11
Line Faders, Crossfader p. 11-12
Front panel details p. 13
Rear panel details p. 14
Block Diagram p. 15
Specifications back cover
Thank you for purchasing the AEM-100i featuring:
Unique knob controlled dual effect section with individually
controllable filters and sound generators
Line faders with full curve control and reverse.
Extremely durable Pro X Fade crossfader
Up to 8 line level inputs, 2 turntable inputs, and 2 microphone inputs
Balanced Master XLR Outputs
We hope you enjoy our mixer as much as we enjoyed making it!

3
AEM-100i Audio Innovate Warranty and Servicing Policy
Audio Innovate provides a warranty against manufacturing defects for either 1 year after the date of
purchase or 90 days after warranty repair is made, whichever is later. This warranty does not cover
minor visual defects such as scratches and paint wear or defects caused by uses other than the intended
use. In addition, the warranty does not cover damage to the unit due to mishandling by the user or
technicians not specifically authorized by Audio Innovate.
Please go to the website www.audioinnovate.com to register the purchase of your product. Please
save your receipt as a record of your purchase. We also recommend that you save the original packaging
in the event that the product needs to be returned under warranty. You can also order original packaging
through the www.audioinnovate.com website in the event you need it for returning or shipping the
product.
For repairs made under warranty, Audio Innovate will reimburse the cost of standard nonexpedited shipping from the customer and will cover return shipping and repair costs. If the customer
requires faster shipping, Audio Innovate will only bill the difference between the cost of the faster
shipping and regular shipping. For all other repairs, the customer must pay for all shipping and repair
costs.
Customers shall contact Audio Innovate directly prior to sending product back for service. If Audio
Innovate determines that the product requires repair, Audio Innovate will issue an RMA number for the
product and the customer shall indicate the RMA number on the mailing label. Prior to issuing an RMA
number, Audio Innovate will clarify what repairs will be done and what will be covered under warranty.
If during the repair Audio Innovate finds additional issues with the product, Audio Innovate will contact
the customer and confirm repairs required and costs prior to proceeding.
All product returned shall be shipped in the original packaging. In the event that the product is
damaged during shipping due to improper packaging, Audio Innovate may require the customer to pay
for repairing such damage.
Audio Innovate may request a copy of your receipt as proof that the product is covered under
warranty.
Please staple your receipt here and save for future reference.
4
GETTING STARTED: Basic hookups and settings
2 TURNTABLES REAR PANEL
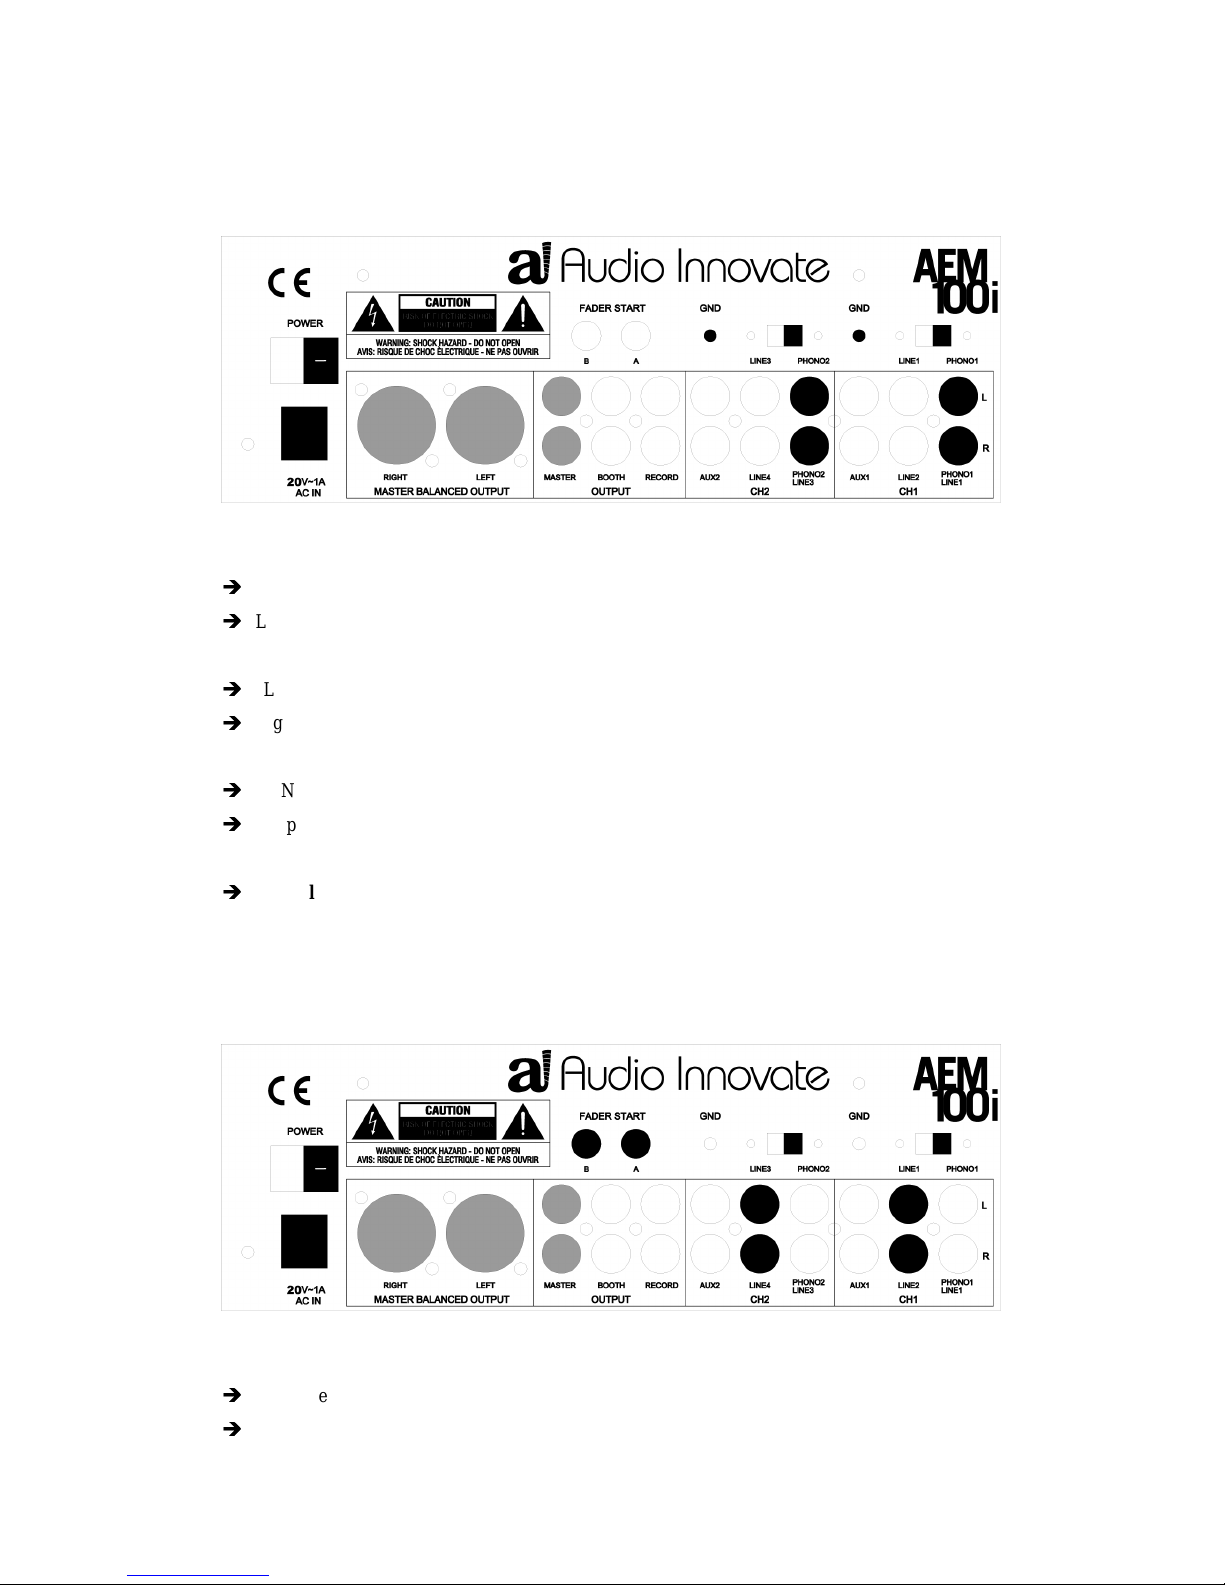
REAR PANEL USING 2 TURNTABLES:
AC power adapter connects to “20V~1A”
Left turntable goes to “PHONO1/LINE1” using dual RCA cords, and the ground wire goes to the
GND screw above AUX2
“LINE1/PHONO1” switch set to “PHONO1”
Right turntable goes to “PHONO2/LINE3” using dual RCA cords, and the ground wire goes to the
GND screw above AUX1
“LINE3/PHONO2” switch set to “PHONO2”
For powered speaker or amplifier connection, either use XLR cables on the “MASTER
BALANCED OUTPUT” or RCA cables on the “MASTER” output.
***Only turn the power switch on once you have finished the hookup, understand the setup,
and set all faders to minimum volume.
2 SINGLE / 1 DUAL CD PLAYER REAR PANEL
REAR PANEL USING 2 SINGLE CD PLAYERS / 1 DUAL CD PLAYER:
AC power adapter connects to “20V~1A”
Left CD source goes to “LINE 2” using a dual RCA cord.
5
“LINE1/PHONO1” switch set to “PHONO1”
Right CD source goes to “LINE 2” using a dual RCA cord.
“LINE3/PHONO2” switch set to “PHONO2”
For powered speaker or amplifier connection, either use XLR cables on the “MASTER
BALANCED OUTPUT” or RCA cables on the “MASTER” output.
Connect “Fader Start A” using a mono 1/8” jack cable to the left CD player input marked “Remote”.
Connect “Fader Start B” using a mono 1/8” jack cable to the right CD player input marked
“Remote”.
***Only turn the power switch on once you have finished the hookup, understand the setup,
and set all faders to minimum volume.
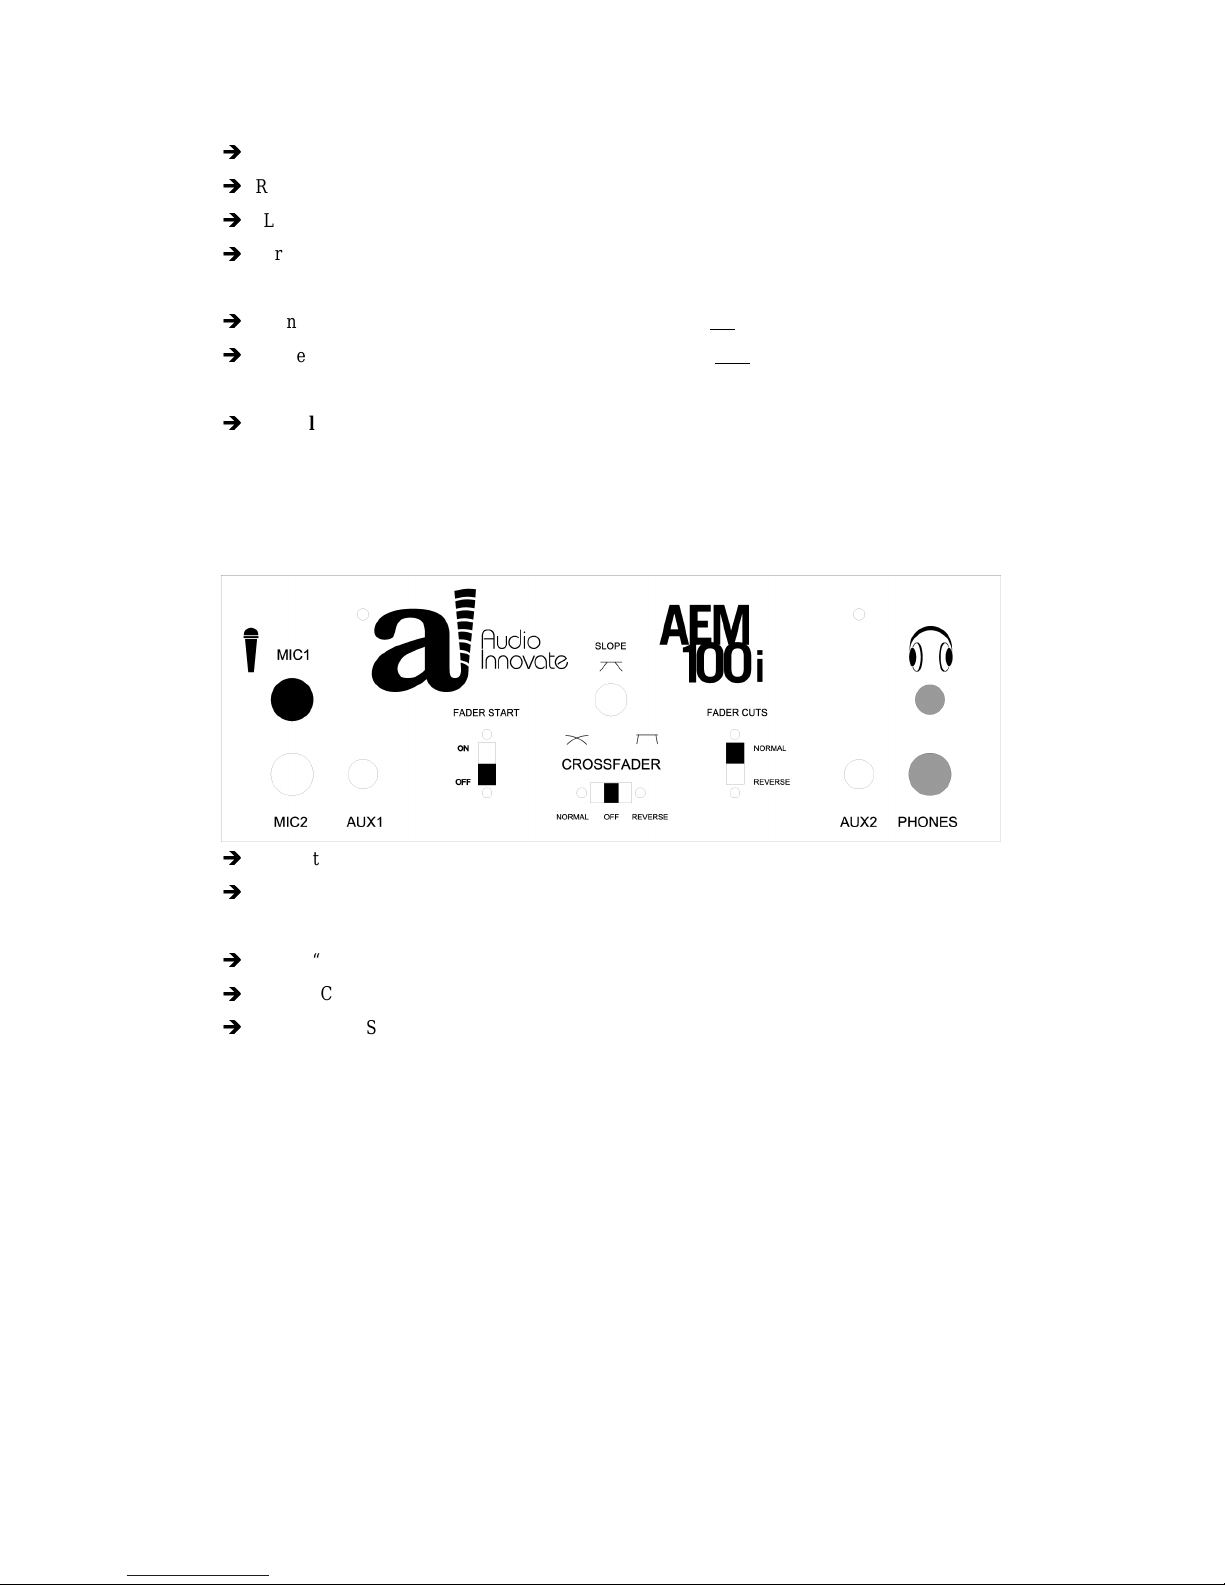
FRONT PANEL
Connect a microphone to the “MIC1” input
Connect the headphones either to the 1/8” or 1/4” socket above “PHONES” depending on the
headphone jack size.
Set the “FADER START” to “OFF” for now.
Set the “CROSSFADER” to “OFF” for now.
“FADER CUTS” isn’t used on the AEM-100i; you can set to “NORMAL”.
***Please note that all of these settings are simply for getting up and running quickly for the first
time with a basic audio setup. Most likely you purchased this product for its advanced features
and hookups. Please only use these options once you are familiar with the product and practice at
home before you attempt to use them in a live situation.
 Loading...