

Page 1

Audio Electronic Supply
Six Pac’s
Vacuum Tube
Monobloc Power Amplifiers
OPERATION MANUAL
NOTE: Before installing your new Six Pac’s power amplifier, please read this manual carefully as it
will inform you of the specifications, proper installation procedures and operation procedures. Also
included in this manual are guidelines on how to properly service and care for your new Six Pac’s
monobloc power amplifier.
Page 2

Specifications for your new SIX PAC’S power amplifier.
Operating the Six Pac’s power amplifier is a simple procedure. Each unit is designed for
long term stability in virtually any home operating situation. Please note, if the unit is
operated outside the parameters outlined in this owner's manual, damage may result.
Please read this manual carefully before putting your new Six Pac’s in operation. The
following definitions are applicable. Warnings should be followed explicitly.
1.2 Specifications
Specifications are subject to improvement without notice or obligation.
DIMENSIONS: 8’’H x 8’’W x 12.5’’D (20.3 cm x 20.3 cm x 31.75 cm)
WEIGHT: 33 lbs. (15 kg.)
CIRCUIT TYPE: Push-Pull, Triode, Class A/AB
POWER OUTPUT: 50 Watts RMS, 110 Watts IHF
INPUT SENSITIVITY: 1.2 volts for 50-Watt output
INPUT IMPEDANCE: 150,000 ohms
NOISE AND HUM: > 80db below full power
FREQUENCY RESPONSE: 15Hz to 23kHz at 50-Watts output
TUBES: 12BZ7 Input gain/phase inverter (12AX7 or 12AY7 may be used)
EL-84(6BQ5) current source for 12BZ7
6- EL-34(6CA7) output tubes
POWER TRANSFORMER: 1- EI laminated, 200% duty cycle
OUTPUT TRANSFORMERS: 2-EI laminated stereo (1-EI mono) Silicon Impregnated
RESISTORS: 1.0 % tolerance, precision metal film resistors
CAPACITORS: Polypropylene
AC CORD: 3 conductor shielded detachable
AC POWER REQUIREMENTS: 117/234 volts AC 50/60Hz
AC POWER CONSUMPTION: 200 Watts
WARM-UP TIME: 3 minutes
BREAK-IN PERIOD: 100 hours of music playing time
FINISH: Black Textured Steel Chassis
FRONT PANEL: Machined, Black Anodized aluminum
WARNING
HAZARD PRESENTS PERSONAL INJURY OR DEATH
Caution
EQUIPMENT DAMAGE MAY OCCUR BUT NOT PERSONAL INJURY
Note
Proper performance of the amplifier cannot be ensured
if disregarded
Page 3

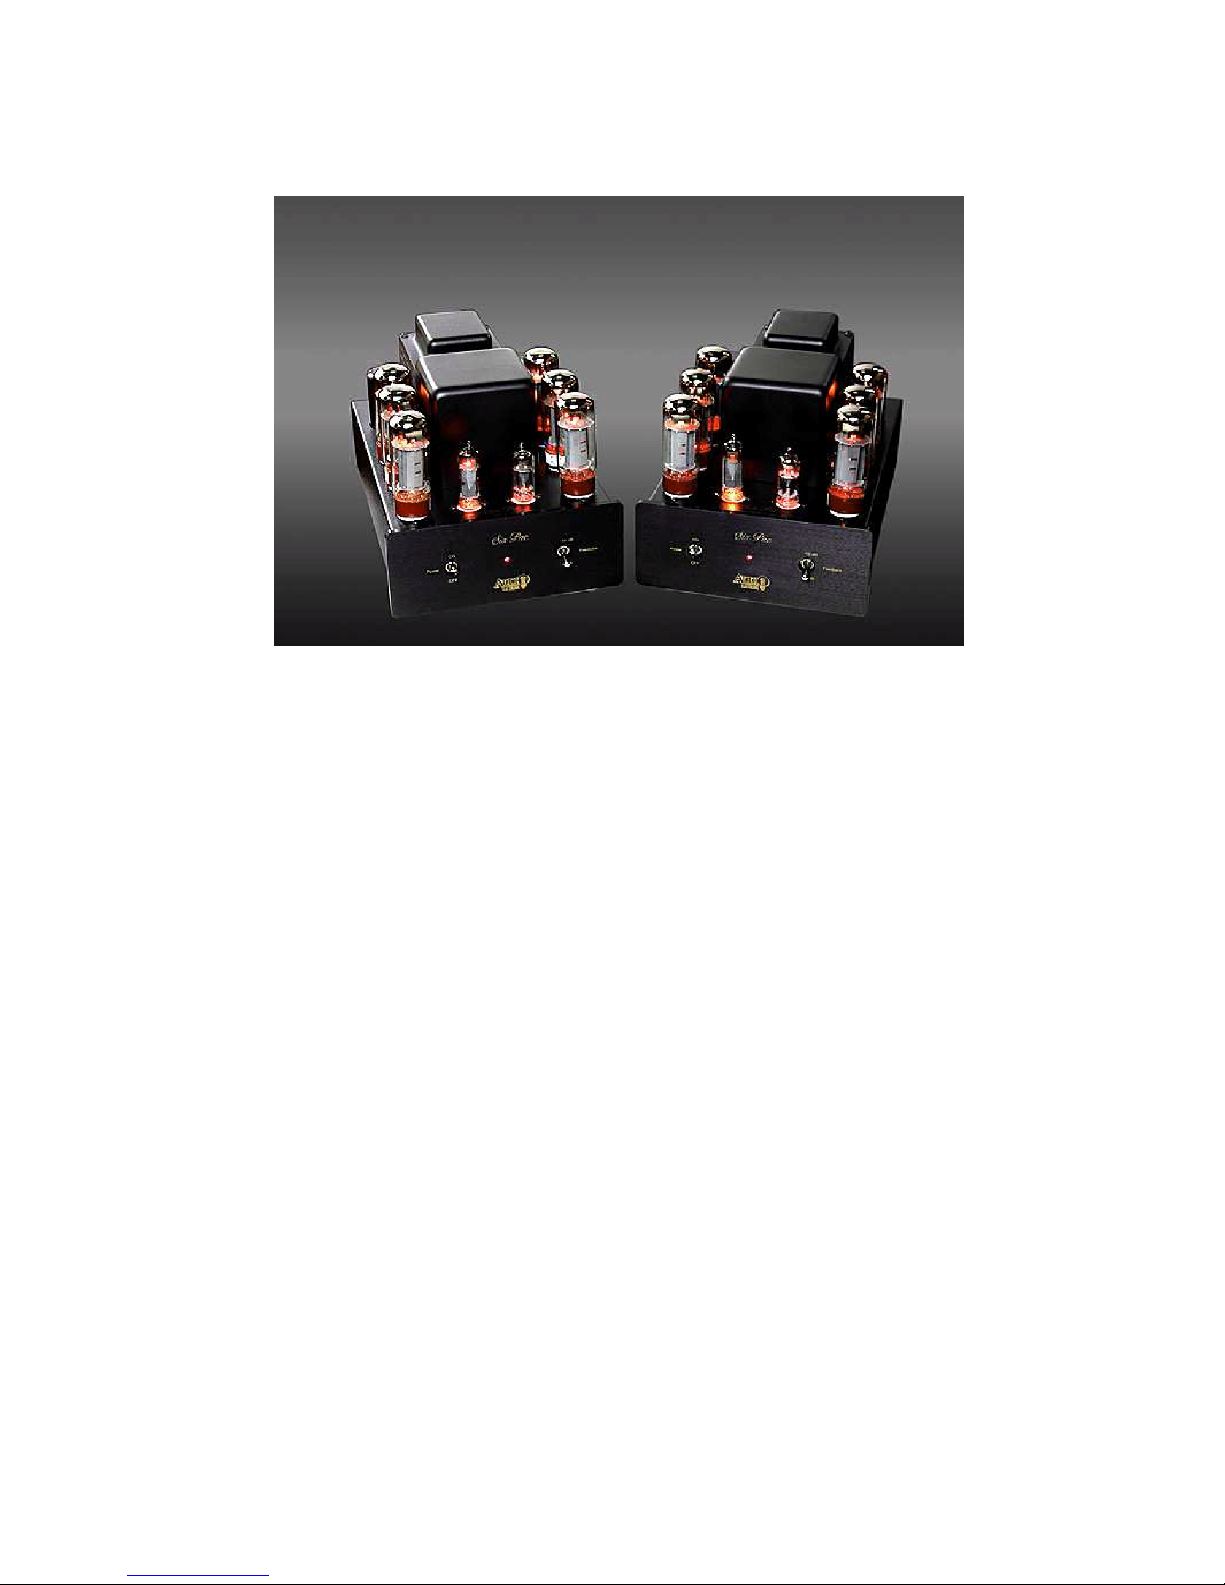
1.3 Front Panel Features
POWER ON/OFF SWITCH: AC mains switch and high voltage in “ON” position
Red LED: Indicates the high voltage supply is ON and the fuse is intact.
FEEDBACK SWITCH: Select between 0 or 10db of feedback.
1.4 Rear Apron Features
RCA INPUT: Signal input connection via shielded interconnect cable
SPEAKER OUTPUT: 5-way binding posts provide the signal output to the
speaker system. Red = (+), Black = (-), ground
IMPEDENCE SWITCH: 4 or 8 ohm selection.
BIAS JACK: _” ‘phone plug’ jack for supplied cable with plug to measure the output
tube bias levels. See tube bias instruction sheet later in the manual.
BIAS POTENTIOMETER: Adjusts to achieve the bias level setting for the output tubes.
AC: 3- conductor shielded power detachable cord to AC power mains.
POWER AC FUSE: This is an over current protection fuse for the power transformer.
Never replace with any other fuse than 3 AMP SLOW BLOW!
250 VOLT! (2 AMP SLOW BLOW IN 220 VAC OPERATION)
Located in rectangular compartment below AC inlet.
TUBE FUSE: This is a protection fuse for the output tubes. Never replace it with any
other fuse than a 0.5 amp fast blow! 0.5A @ 250 volt rating.
INSTALLATION
This section describes the unpacking and installation procedures for the Six Pac’s
amplifier.
2.1 Unpacking
All shipping containers have been specifically designed to protect their contents and
special care has been taken to prevent damage under normal shipping conditions.
CAUTION
EQUIPMENT DAMAGE MAY OCCUR WITH IMPROPER RATED FUSES
CAUTION!
NEVER REMOVE or INSERT AC LINE CORD WHEN THE UNIT IS
ON TO AVOID RISK OF ELECTRICAL SHOCK
WARNING!
MAKE NO ATTEMPT TO PUT THE SIX PAC’S AMPLIFIER IN
SERVICE WITHOUT THE BOTTOM PLATE ATTACHED -
CONTACT WITH HIGH VOLTAGE INSIDE THE CHASSIS CAN BE
FATAL!
Page 4

Mishandling should be evident upon inspection of the shipping container. If chassis
damage is found after a visual inspection, take care not to destroy the evidence.
Page 5

If necessary, document the damage with photographs and contact the transport carrier
immediately. Carefully remove your new power amplifier from its packing carton, and
examine it closely for signs of shipping damage. It is recommended to save all the
original packing cartons to protect your amplifier from damage should you wish to
store it or ship it for after-sales service.
2.2 Warranty Card
Fill out the enclosed warranty registration card and return it to Audio Electronic
Supply, Inc. within 15 days of original purchase or register it on line. Keep your original
sales slip with the packing cartons should you ever need it. Failure to register your
warranty will set the limited warranty time period to 90 days from date of purchase. When
purchased and properly registered, the limited warranty period is extended. See the
limited statement of warranty for details.
2.3 Amplifier Placement
In general, the location of your new Six Pac’s is not critical. Certain precautions must
be taken to ensure optimum performance however. Always avoid extremely hot
locations such as near steam heat radiators or other heating units. Allow 10-12 inches
above the amplifier for proper ventilation. Keep the top of the amplifier clear of books,
paper or other equipment to protect it against overheating! DO NOT place your
amplifier in a closed book case - overheating will damage the amplifier!
2.4 Power Requirements
The Six Pac’s is designed to operate from house current AC mains. The design voltage
is 117 VAC at 50/60Hz. (Foreign units 234 VAC at 50/60Hz.)
2.5 Cables
The speaker cables from the output posts of the Six Pac’s to the speaker system can be
any convenient length your set-up requires. Select speaker cables of sufficient size to
preserve the outstanding performance capabilities of your power amplifier. Heavy
gauge #14 wire is suitable for distances up to 15 feet, #12 wire for up to 30 feet. Your
Authorized Audio Electronic Supply Dealer will have proper speaker cable in stock for this
purpose.
Signal input connection is made via the input jack(s) on the rear of the Six Pac’s. The
interconnect cable(s) from the output of a variable output CD player or preamplifier
can be any convenient length your set-up requires. The choice of a shielded, high quality
interconnect cable is important. Once again, your audio dealer will suggest and have the
proper cables in stock for this purpose.
Page 6

3.1 Operation
Your new power amplifier is ready for operation after the speaker, interconnect cables
and the vacuum tubes have been installed into their proper sockets. Refer to the tube
placement sheet at the end of this manual for proper tube installation.
3.2 4 or 8 OHM Speaker Selection
Select the proper speaker impedance (4 or 8 ohm) for the speaker(s) in your system.
The selection should be based on your current speakers’ rated specifications and
listening tests to confirm the correct selection.
3.3 Feedback Switch
For most systems zero feedback will be the best setting. The (-) 10db will have more
bass control, however it will not soundstage as well.
3.4 Bias Measurement
The bias is factory preset. It is a good idea to measure it during the initial setup to make
sure it is set to the specifications provided at the end of this manual. The AC voltage
may be different from one area to the next. Follow the instructions provided. (210-230
mA is the recommended bias setting range, per side, with 220 mA being the nominal
suggested bias level setting) Make certain to set the test meter used to mA range.
3.5 Power ON and Standby Operate Switches
Flip the power switch to the “On” position. Observe that all 8 vacuum tubes are lit.
The amp will be ready to play in roughly 30 seconds.
3.6 The Break-In Period
The tubes, capacitors and output transformers take approximately 100 hours use to
settle in for peak performance. The Six Pac’s will sound good right out of the box but
it will improve within a short time. After the first 50-100 hours you will notice
increased depth and tighter bass. This break-in period defies engineering theory
perhaps, but we believe it is true with quality audio amplifiers.
SERVICE AND CARE
4.1 SIX PAC’S Care and Cleaning
The case and front of the amplifier may be cleaned with a soft cloth and Windex or a
window cleaner. Moisten the cleaning rag; do not get the amplifier wet. The relative
frequency of cleaning will be governed by the operating environment cleanliness.
WARNING
MAKE SURE AMPLIFIER IS UNPLUGGED FROM AC MAINS BEFORE
SERVICING
Page 7

4.2 Tube Replacement
If it becomes necessary to replace the tubes in the amplifier, a matched set of output
tubes of the same name brand should be used. A new tube kit is available from Audio
Electronic Supply. You should get a few years or more from the output tubes with
everyday usage and many years of use from the smaller 12BZ7 (or 12AY7, 12AX7) and
EL-84 tubes. Other types of output tubes may be used in the Six Pac’s power
amplifiers; 6L6, KT-66, KT-88, 6550C, KT-90, KT-99 or EL-34 tubes are all acceptable
for use in the output stage.
4.3 IN FACTORY SERVICE
Careful consideration has been given to the design of your Six Pac’s amplifier to keep
maintenance problems to a minimum. However, it is possible that some problems may
arise which cannot be cured by a vacuum tube substitution. At this point we suggest you
contact our Customer Service Department phone number (919) 355-0014 from 1 to 5
PM, M-F, to describe your problem in detail. DO NOT return the amplifier to the
factory without a return authorization number (RMA) from the Customer Service
Department. Please always use the ORIGINAL PACKING BOXES from Audio
Electronic Supply to ship your amplifier for moving or for service. Audio Electronic
Supply, Inc. will assume no responsibility if the transportation or shipping company
refuses to pay a damage claim due to your improper packing or lack of insurance should
the unit be lost or damaged in shipment.
All mentions of in factory service are relevant for Audio Electronic Supply products
purchased and used exclusively within the USA only. Non USA distributors of Audio
Electronic Supply products will establish their own local warranty or after service
policies. Ask your dealer about local warranty policies in your locale, if you reside
outside the USA.
Page 8

! PLEASE OBSERVE THE SAFETY DIRECTIONS IN THIS MANUAL
TO AVOID POSSIBLE ELECTRICAL SHOCK OR EQUIPMENT
FAILURE DUE TO IMPROPER INSTALLATION!
Audio Electronic Supply
1020 Goodworth Drive
Apex, North Carolina 27539
Tel: 919-355-0014
Fax: 919-355-0013
www.audioelectronicsupply.com
www.sixpacs.com
www.superamp.com
WARNING!
MAKE NO ATTEMPT TO PUT THE SIX PAC’S IN SERVICE WITH
THE BOTTOM PLATE REMOVED. CONTACT WITH THE HIGH
VOLTAGES FOUND INSIDE THE CHASSIS CAN BE FATAL!
COMPLETELY REMOVE AC POWER PLUG FROM THE WALL AND
ALLOW 30 MINUTES FOR THE HIGH VOLTAGE CAPACITORS TO
DISCHARGE THROUGH BLEEDER RESISTORS BEFORE
ATTEMPTING TO CHANGE TUBES OR CLEAN THE INSIDE OF THE
AMPLIFIER.
CAUTION
NEVER REMOVE OR INSERT AC PLUG WHEN THE UNIT IS ON OR
THE AC POWER SWITCH IS IN THE ON POSITION.
OBSTRUCTION OF THE TOP PORTION OF THE SIX PAC’S WILL
RESULT IN TUBES OVERHEATING AND DAMAGE TO THE
AMPLIFIER.
Page 9
 Loading...