


AUDIO ANALOGUE
soundpleasure
maestro
DIGITAL AUDIO PROCESSOR
COMPACT DISC PLAYER
OWNER’S MANUAL
MANUALE D’ISTRUZIONI

Dear Audiophile,
Congratulations and thank you for choosing the MAESTRO compact disc player. You
have acquired an exceptionally musical, high-precision audio component, capable of extraordinary
performance in any high-end system. Its refined circuit design yelds great sonic purity whereas
its inborn elegance will ensure easy integration with the room’s furniture and with the rest of your
system. To get the best from your new compact disc player, we advise you to use only good-
quality components and cable; follow our advice and maestro will give you years of musical
pleasure. Please take a few minutes to read this booklet before installing your compact disc
player.
Enjoy the AUDIO ANALOGUE sound!
Caro Audiofilo,
Congratulazioni e grazie per aver scelto il lettore di compact disc maestro. Lei ha
acquistato un componente audio eccezionalmente musicale e d’alta precisione, capace di
prestazioni straordinarie inserito in qualunque sistema high-end. Il suo raffinato circuito fornisce
grande purezza sonora mentre la sua innata eleganza assicurerà una facile integrazione con
qualunque ambiente e col resto del sistema. Per ottenere il meglio dal Suo nuovo lettore, Le
consigliamo di usare solo componenti e cavi di alta qualità; segua i nostri consigli e maestro
Le regalerà anni di piacere musicale. La preghiamo di spendere qualche minuto per leggere
questo manuale prima di installare il Suo nuovo lettore di compact disc.
Buon Ascolto con il suono di AUDIO ANALOGUE!
For future reference, please record the serial number printed on the rear panel of your amplifier,
the date of purchase and your dealer's name in the space below.
Per ogni evenienza, consigliamo di annotare il numero di matricola stampato sul pannello
posteriore dell'amplificatore, la data d'acquisto ed il nome del rivenditore nello spazio sottostante.
Serial Number Numero di Matricola:
Date of Purchase Data d'acquisto:
Dealer's Name Nome Rivenditore:

AUDIO ANALOGUE
maestro
DIGITAL AUDIO PROCESSOR & COMPACT DISC PLAYER
OWNER’S MANUAL
MANUALE D’ISTRUZIONI
PAGE/PAGINA
5
INSTALLATION
INSTALLAZIONE
6
CONTROL
COMANDI
7
DISPLAY
DISPLAY
8
CONNECTIONS
COLLEGAMENTI
10
REMOTE CONTROL
TELECOMANDO
11
OPERATION
FUNZIONAMENTO
12
FUNCTIONS SPECIFIC TO THE REMOTE CONTROL
13
FUNZIONI SPECIFICHE DEL TELECOMANDO
NOTES ON THE USE OF THE STANDBY FUNCTION
PARTICOLARITÀ SULL’USO DELLA FUNZIONE STANDBY
14
BURN-IN
RODAGGIO
OPERATION MODES SELECTION
SELEZIONE DELLE MODALITA’ DI FUNZIONAMENTO
15
SPECIFICATIONS
SPECIFICHE TECNICHE
16
SAFETY PRECAUTIONS AND MAINTENANCE
PRECAUZIONI PER LA SICUREZZA E MANUTENZIONE
17
TROUBLESHOOTING
18
RICERCA GUASTI

INSTALLATION
INSTALLAZIONE
5
UNPACKING
APERTURA DELL’IMBALLO
OPERATING POSITION
POSIZIONE DI FUNZIONAMENTO
AC MAINS CONNECTION
COLLEGAMENTO ALLA RETE
The shipping box should contain the following items apart from the CD player and this
ownerís manual:
Remote control unit
2 AA-type batteries for remote control
AC Power Cord
Please check if all has been included: if not, contact your dealer. After opening the box,
carefully extract the CD player and remove its protective plastic bag, check for any
damage that may have been caused by poor transport. Please retain all packing
materials in case the unit needs to be transported for servicing.
Oltre al lettore CD ed a questo manuale díuso, l’imballo deve contenere i seguenti
articoli:
Telecomando a infrarossi
2 pile ministilo ('AA') per il telecomando
Cordone di alimentazione
Nel caso di eventuali mancanze, contattate il rivenditore. Dopo aver aperto líimballo,
estraete il lettore con cura e rimuovete la sua busta protettiva; controllatelo per eventuali
danni causati da un trasporto poco accurato. Si prega di conservare líimballo intatto
nel caso in cui occorra inviare líapparecchio al centro di assistenza tecnica.
The unit must be placed horizontally on a hard, flat surface. Please ensure adequate
ventilation and avoid exposing the unit to high temperatures and humidity.
L’apparecchio deve sempre essere sistemato in orizzontale su una superficie dura e
piana. Si prega di assicurare uníadeguata ventilazione ed evitate di esporre líapparecchio
ad alte temperature ed umidità
Before connecting the CD player to the mains socket, please check that the voltage
setting, indicated on the rear panel near the IEC inlet, corresponds to your local AC
voltage. NEVER CONNECT THE UNIT TO A HIGHER VOLTAGE THAN THAT
INDICATED! After positioning the CD player correctly, first insert the IEC plug of the
mains cable in the inlet on the rear panel then insert the mains plug in the household
wall outlet. The mains fuses (two) are located in a receptacle under the IEC inlet. Their
value is 160mA Slow Blow for 220-240V systems, Whereas for 110-120V systems, the
correct value is 315mA Slow Blow. Always replace with the same type! For the UK only,
please follow the instructions on fitting a mains plug on the "Safety Instructions and
Maintenance page.
Prima di accendere il lettore CD, controllare che la tensione di alimentazione, indicata
sul pannello posteriore in prossimità della presa IEC, corrisponda a quella locale di
rete. NON COLLEGARE MAI L'AMPLIFICATORE AD UNA TENSIONE DI RETE
SUPERIORE A QUELLA INDICATA! Dopo aver collocato il lettore CD correttamente,
prima inserire la spina IEC del cordone di rete nella presa sul pannello posteriore poi
inserire la spina nella presa a muro. I fusibili di rete si trovano nel portafusibile incorporato
nella presa IEC. Il valore corretto È di 160mA ritardato per sistemi a 220-240V, mentre
È di 315mA ritardato per sistemi a 110-120V. Sostituire sempre con altri dello stesso
tipo!
6
maestro
DIGITAL AUDIO PROCESSOR
OPEN
STOP
PREVIOUS NEXT
STAND BY
TRACK
PROGRAM
SCAN SHUFFLE REPEAT 1 PAUSE EDIT
A B
TOTAL
REM TIME
CD
EXT
LOOP
PLAY
PAUSE
MODE
CONTROLS
COMANDI
OPEN Press this key to open the CD tray. When needed, music reproduction is stopped.
When the tray is already open, itís possible to close it by pressing the OPEN key again
OPEN La pressione di questo pulsante provoca l’apertura del cassettino del CD player, dopo
aver eventualmente arrestato la lettura del CD se questa è in corso. Quando il cassettino è
aperto, la pressione di questo pulsante ne provoca la chiusura.
STOP Press this key to end the music reproduction. If a program is stored in the CD player’s
memory, it’s possible to delete it by pressing the STOP key with the disc already stopped.
STOP Premere questo pulsante per interrompere la lettura del CD. Se è stato memorizzato
un programma di lettura, la pressione di questo pulsante quando il disco è già fermo provoca
la cancellazione del programma.
PREVIOUS While listening to a track, itís possible to jump to the previous track by pressing
the PREVIOUS key. When not reproducing music, this key can be used to scan tracks in
descending order to either choose the reproduction starting track or select tracks for a program.
PREVIOUS Durante la lettura del CD, la pressione di questo pulsante provoca il salto
immediato alla traccia precedente a quella letta in quel momento. Quando il CD è fermo, è
possibile utilizzare questo pulsante per decidere da quale traccia iniziare la riproduzione, o
per scorrere in ordine decrescente le tracce presenti nel CD durante la programmazione.
STAND-BY Press this key to either enter or exit stand-by mode. The stand-by mode can be
toggled by using the remote control, too. The stand-by mode is indicated by a red light in the
display.
STAND-BY Premere questo pulsante per attivare o disattivare lo stand-by. Lo stand-by può
essere attivato/disattivato anche tramite il telecomando. Lo stato di stand-by viene evidenziato
dallo spegnimento del display e dal contemporaneo accendersi di una spia rossa.
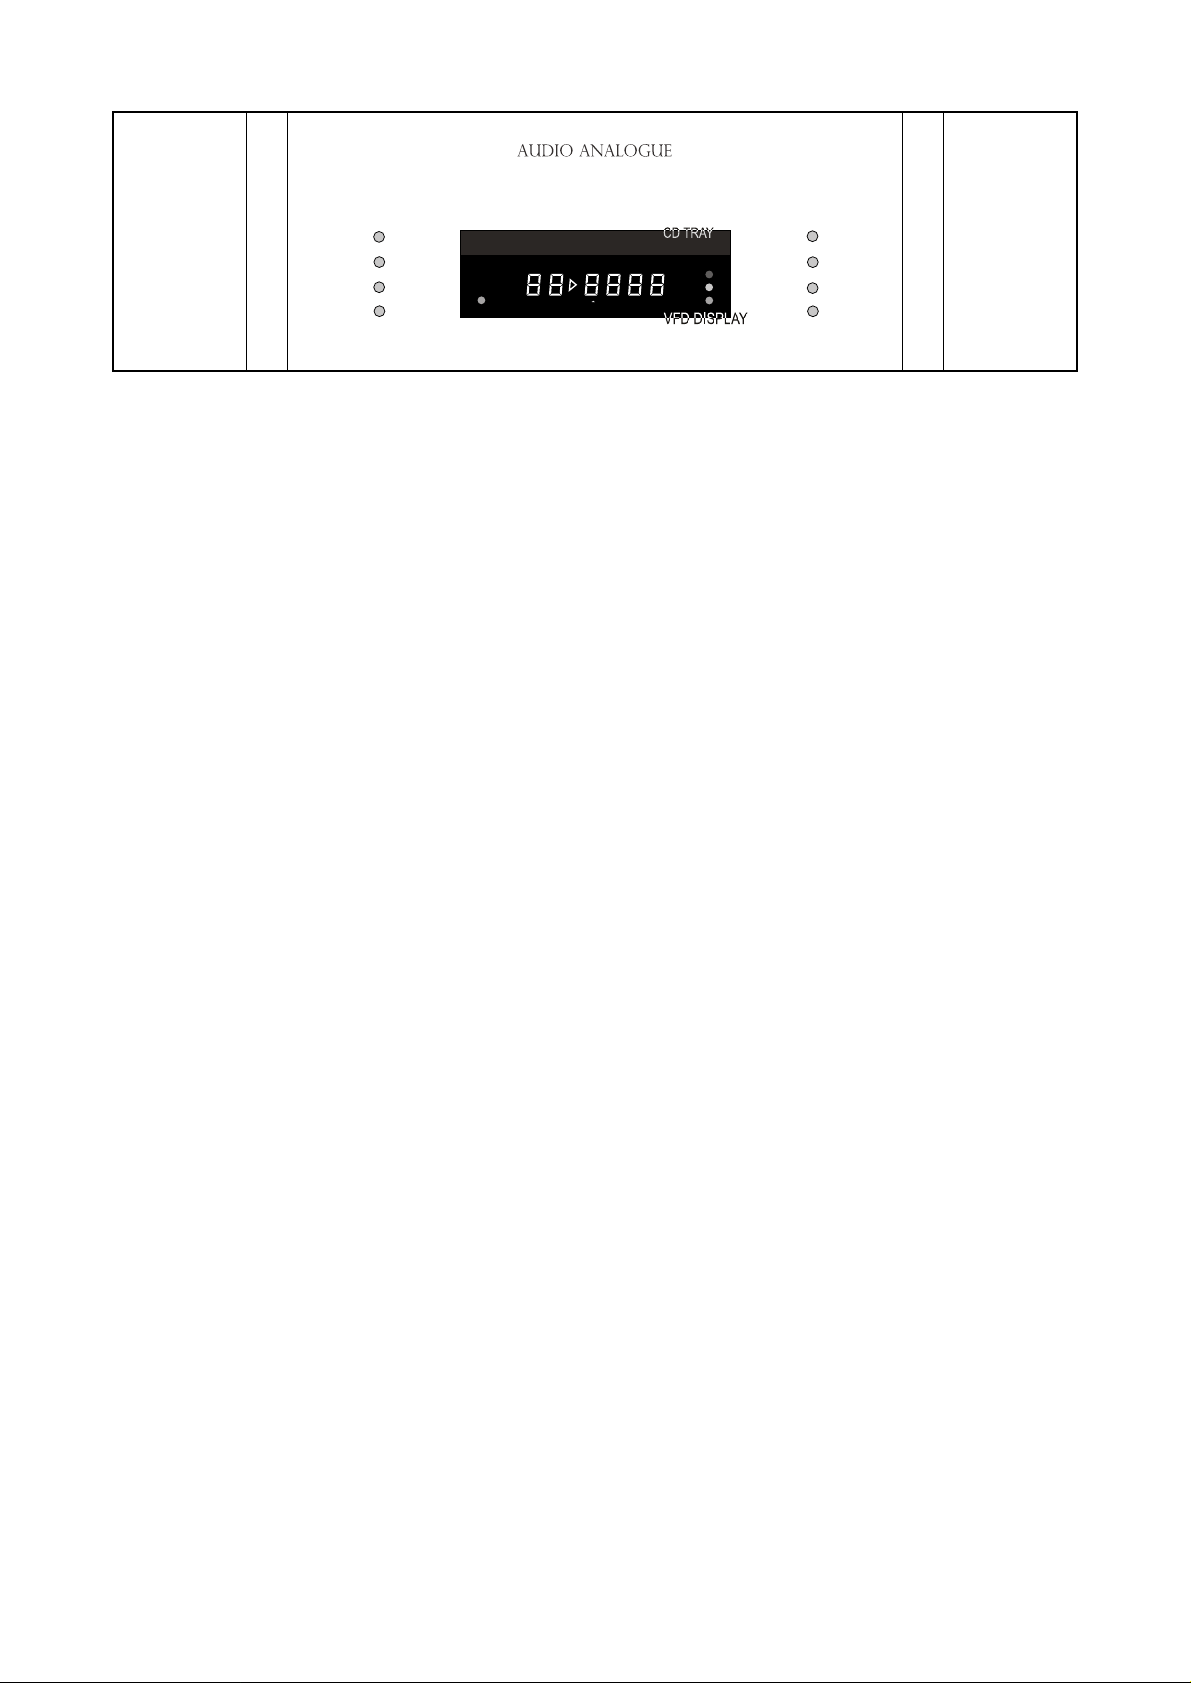
CD TRAY
CASSETTINO PORTA CD
VFD DISPLAY, IR REMOTE RECEIVER AND STAND-BY, CD, EXTERNAL AND LOOP
INDICATORS.
DISPLA Y FLUORESCENTE, RICEVIT ORE DEL TELECOMANDO E INDICATORE DI ST ANDBY, CD, EXTERNAL E LOOP.
PLA Y Press this key to start music reproduction. Pressing PLAY when a track is already being
reproduced causes the track to be restarted.
PLAY Premere questo pulsante per iniziare la lettura del CD. Se si preme il pulsante PLAY
quando il disco è già in lettura si ricomincia la lettura del brano in quel momento letto.
PAUSE Press this key to temporarily stop music reproduction. The pause mode is highlighted
by an indication on the VFD display . Press this key again to restart music reproduction from
the same point. When not reproducing music, pressing the PAUSE key put the CD player into
pause mode such that pressing the PLAY key after the PAUSE key causes the CD to spin,
but music is not reproduced until the PAUSE key is pressed again
P AUSE Durante la lettura del disco, la pressione del pulsante PAUSE provoca il momentaneo
arresto della lettura. L’attivazione della modalità “pause” viene evidenziata da un’apposita
indicazione sul display . La successiva pressione del pulsante PAUSE provoca la ripresa della
lettura dal punto in cui era stata precedentemente interrotta. Quando il CD è fermo, la pressione
del pulsante PAUSE predispone l’attivazione della funzione, in modo che quando si preme
PLAY il CD inizia a girare ma la lettura viene interrotta all’inizio del brano, in attesa di una
successiva pressione del pulsante PAUSE.
NEXT While listening to a track, itís possible to jump to the next track by pressing the NEXT
key. When not reproducing music, this key can be used to scan tracks in ascending order to
either choose the reproduction starting track or select tracks for a program.
NEXT Durante la lettura del CD, la pressione di questo pulsante provoca il salto immediato
alla traccia successiva a quella letta in quel momento. Quando il CD è fermo, è possibile
utilizzare questo pulsante per decidere da quale traccia iniziare la riproduzione, o per scorrere
in ordine crescente le tracce presenti nel CD durante la programmazione.
MODE Press this key to select the source (internal or external) and to choose the digital
output mode (44.1kHz, 96kHz, off). Pressing the MODE key also allows you to enter LOOP
mode.
MODE La pressione di questo pulsante consente di selezionare la sorgente (interna o esterna)
e di scegliere la modalità di funzionamento dell’uscita digitale (44.1kHz, 96kHz, off). Infine
permette di attivare la modalità di funzionamento LOOP.
7
PROGRAM
DISPLAY
DISPLAY
TRACK
SCAN SHUFFLE REPEAT 1 PAUSE EDIT
TRACK
PROGRAM
SCAN SHUFFLE REPEAT 1 PAUSE EDIT
A B
TOTAL
A B
REM TIME
TOTAL
REM TIME
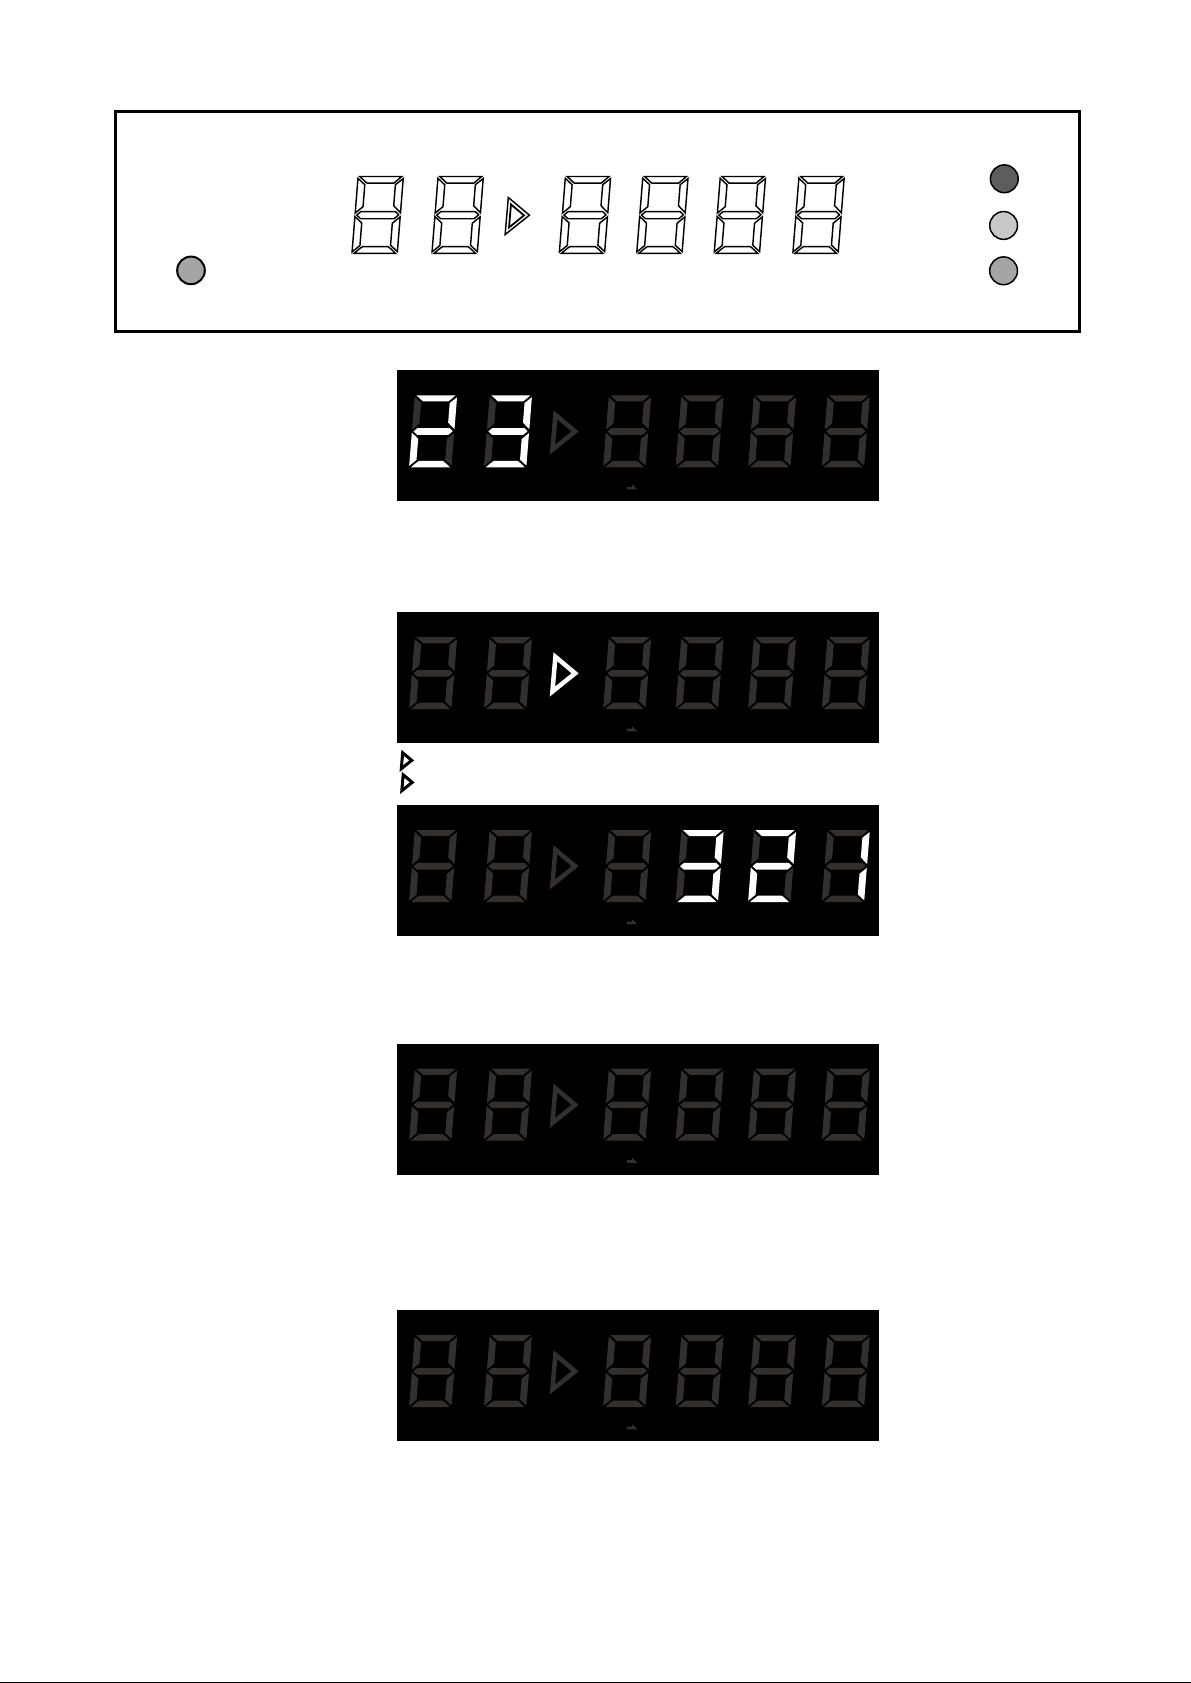
TRACK Track counter: gives information about tracks in the CD, as described in the
next sections.
TRACK Contatore di traccia: fornisce informazioni sulle tracce contenute nel CD con
modalità descritte nelle sezioni seguenti.
TRACK
PROGRAM
TOTAL
SCAN SHUFFLE REPEAT 1 PAUSE EDIT
A B
REM TIME
Indicates that the CD is being read.
Indica che è in corso la lettura del CD.
TRACK
PROGRAM
TOTAL
SCAN SHUFFLE REPEAT 1 PAUSE EDIT
A B
REM TIME
TOT AL REM TIME. Time counter: gives information about reproduction or programming
timings, as described in the next sections.
TOTAL REM TIME Contatore del tempo: fornisce informazioni sul tempo di riproduzione
di una CD o di una sua traccia, secondo modalità descritte nelle sezioni successive.
TRACK
PROGRAM
TOTAL
SCAN SHUFFLE REPEAT 1 PAUSE EDITA B
REM TIME
PROGRAM Flashes when programming is in progress. Glows steady after programming,
until program is deleted.
PROGRAM Lampeggia quando la programmazione è in corso. Rimane acceso
stabilmente al termine della programmazione fino a quando il programma viene
cancellato.
TRACK
TOTAL
REM TIME
PROGRAM
SCAN
SCAN SHUFFLE REPEAT 1 PAUSE EDITA B
SCAN Indicates the activation of automatic CD tracks’ scanning.
SCAN Indica l’attivazione della funzione di scansione dei brani contenuti nel CD.

8
TRACK
PROGRAM
TOTAL
SCAN SHUFFLE REPEAT 1 PAUSE EDITA B
REM TIME
SHUFFLE Indicates the activation of the random CD tracks’ play.
SHUFFLE Indica l’attivazione della funzione di lettura casuale dei brani contenuti nel CD
TRACK
PROGRAM
TOTAL
SCAN SHUFFLE REPEAT 1 PAUSE EDITA B
REM TIME
A Indicates that the starting point for CD subsector repeat has been selected.
A Indica l’avvenuta selezione del punto inziale per la ripetizione di una parte qualunque
del CD.
A B Indicates that the final point for CD subsector repeat has been selected.
A B Indica l’avvenuta selezione del punto finale per la ripetizione di una parte
qualunque del CD.
TRACK
TOTAL
REM TIME
CONNECTIONS
COLLEGAMENTI
PROGRAM
SCAN SHUFFLE REPEAT 1 PAUSE EDITA B
REPEAT (1) Indicates the activation of CD or single track repeat function.
REPEAT (1) Indica l’attivazione della funzione di ripetizione dell’intero CD o di un
singolo brano.
TRACK
PROGRAM
TOTAL
SCAN SHUFFLE REPEAT 1 PAUSE EDITA B
REM TIME
PAUSE Indicates that CD play has been temporarily stopped.
PAUSE Indica che la lettura del CD è stata momentaneamente interrotta.
maestro
DIGITAL AUDIO PROCESSOR
CONNECTIONS
COLLEGAMENTI
AC MAINS
POWER
1 LEFT AND RIGHT UNBALANCED ANALOGUE OUTPUT Connect this output to
the CD unbalanced input of your amplifier or preamplifier, using suitable RCA terminated interconnects.
USCITA ANALOGICA SBILANCIATA LEFT E RIGHT Collegate questa uscita
all’ingresso CD sbilanciato del vostro amplificatore integrato o preamplificatore,
utilizzando un apposito cavo schermato terminato con connettori RCA.

9
2 LEFT AND RIGHT BALANCED ANALOGUE OUTPUT Connect this output to the
CD balanced input of your amplifier or preamplifier, using suitable XLR-terminated
interconnects.
USCITA ANALOGICA BILANCIATA LEFT E RIGHT Collegate questa uscita
all’ingresso CD bilanciato del vostro amplificatore integrato o preamplificatore,
utilizzando un apposito cavo schermato terminato con connettori XLR.
3 DIGITAL OUTPUT Connect this output to the “DIG IN” input of your CD recorder or
Minidisc recorder or to the input of an external D/A conveter.
USCITA DIGITALE Collegate questa uscita all’ingresso “DIG IN” di un CD recorder
o di un registratore Minidisc o ancora all’ingresso di un convertitore D/A esterno.
4 DIGITAL INPUT Connect this input to the digital output of one of these sources: CD
player, DVD player, MINI DISC, DAT, PC audio board.
INGRESSO DIGITALE Collegate questo ingresso all’uscita digitale di una tra queste
sorgenti: lettore CD, lettore DVD, MINI DISC, DAT, scheda audio PC.
5 IEC MAINS SOCKET Connect the AC mains cable supplied to this socket. We
recommend to insert the mains plug into the wall socket AFTER connecting the cable
to the unit’s IEC mains socket.
VASCHETTA DI RETE IEC Collegate il cavo di rete fornito in dotazione a questa
vaschetta. Si raccomanda di collegare la spina di rete alla presa SOLO DOPO avere
effettuato questa connessione.
6 FUSES When needed, fuses can be accessed by extracting the fuse holder located
immediately below the IEC mains socket. Unplug the mains cable from the socket
first.
FUSIBILI Qualora dovesse rendersi necessario, è possibile accedere ai fusibili
estraendo il cassettino porta-fusibili immediatamente sottostante la vaschetta di rete.
Per effettuare questa operazione è necessario rimuovere il cavo di rete dalla
vaschetta.
7 POWER ON/OFF SWITCH
INTERRUTTORE D’ACCENSIONE
OUTPUT CONNECTIONS
COLLEGAMENTO DELLE
USCITE
The CD player has one pair of line-level unbalanced output RCA sockets, one single
S/PDIF-type digital input RCA socket and one single S/PDIF-type digital output RCA
socket. As they are all gold-plated, the best connections are made using gold-plated
jackcs. Besides, there is one pair of line-level balanced output XLR sockets. Connect
the audio outputs to the corresponding inputs on your amplifier, making sure that the
channels match. The digital output is to be used only with digital equipment (D/A
converter, Processor, etc.) that accepts the S/PDIF standard. NEVER CONNECT THE
DIGITAL OUTPUT TO AN ANALOGUE INPUT! The digital input is to be used with
digital sources (CD or DVD transports, DAT tape recorders, mini-disc recorders, PC
audio boards, etc.) Connecting the digital input to a line-level analogue output should
not damage the unit, but it is not recommended. For best sonic results, use high-quality
signal cables, keeping them well away from AC mains cables.
L'apparecchio è provvisto di una coppia di prese RCA per le uscite analogiche sbilanciate,
di un ingresso digitale di tipo S/PDIF e di una uscita digitale pure di tipo S/PDIF, tutte
con prese RCA. Poiché tali prese sono tutte dorate, i migliori collegamenti si possono
avere utilizzando spinotti dorati. Inoltre è prevista una coppia di prese XLR per le uscite
analogiche bilanciate. Collegate le uscite audio agli ingressi corrispondenti sul vostro
amplificatore, assicurandovi che i canali siano corretti. L'uscita digitale è da usare
esclusivamente con apparecchi digitali (convertitore D/A, Processore, etc.) che accettano
lo standard S/PDIF. Utilizzate cavetti di interconnessione digitale di buona qualità, aventi
impedenza caratteristica di 75 . NON COLLEGATE MAI L’USCITA DIGITALE AD UN
INGRESSO ANALOGICO! L’ingresso digitale deve essere utilizzato con sorgenti digitali
(meccaniche CD o DVD, registratori DAT e mini-disc, schede audio per PC, ecc.). Il
collegamento dell’ingresso digitale ad una uscita analogica di linea non dovrebbe
danneggiare l’apparecchio, ma non è consigliabile. Per ottenere i migliori risultati sonori,
utilizzare cavetti di segnale di alta qualità, tenendoli lontani da sorgenti di corrente
alternata.

REMOTE CONTROL
TELECOMANDO
10

OPERATION
FUNZIONAMENTO
11
TRACK
PROGRAM
SCAN SHUFFLE REPEAT 1 PAUSE EDIT
TRACK
PROGRAM
SCAN SHUFFLE REPEAT 1 PAUSE EDIT
TRACK
PROGRAM
SCAN SHUFFLE REPEAT 1 PAUSE EDIT
TRACK
PROGRAM
SCAN SHUFFLE REPEAT 1 PAUSE EDIT
TRACK
PROGRAM
SCAN SHUFFLE REPEAT 1 PAUSE EDIT
TRACK
PROGRAM
SCAN SHUFFLE REPEAT 1 PAUSE EDIT
A B
A B
A B
A B
A B
A B
TOTAL
TOTAL
TOTAL
TOTAL
TOTAL
TOTAL
REM TIME
REM TIME
REM TIME
REM TIME
REM TIME
REM TIME
Turn the power on by pressing the key on the rear panel near the IEC mains socket.
The player will start searching for a disc. If there is already a disc in the tray, the total
time and number of tracks wiIl be displayed; if not "NO DISC " wilI be displayed.
Premere l’interruttore di accensione posto sul pannello posteriore vicino alla presa IEC.
Il lettore inizierà a cercare un disco. Se un disco è già presente sul piatto, il tempo
totale ed il numero di brani compariranno sul display, altrimenti sarà visualizzato “NO
DISC”.
To Ioad a disc, press the OPEN key to expel the CD tray (OPEN on display). Place a
compact disc label side up on the tray and press the OPEN key again or gently push
the CD tray to close it. The player will then read the disc's table of contents (TOC) and
display the total time and number of tracks. Pressing the PLAY key can also close the
tray; in this case, after reading the disc's TOC, the player wiII automatically start playback
from the first track, unless the PAUSE key has been perssed previously. In this latter
case, the disc will start spinning, ready to read the first track.
Per caricare un disco, premere il pulsante OPEN per fare fuoriuscire il cassettino portaCD (OPEN sul displav). Appoggiare un CD sul piatto con líetichetta rivolta verso líalto
e premere ancora il pulsante OPEN o spingere delicatamente il cassettino per richiuderlo.
Il lettore quindi legge l’indice del disco (TOC) e visualizza il tempo totale ed il numero
di brani. Anche premendo il pulsante PLAY si può richiudere il cassettino: in questo
caso, dopo aver letto la TOC, il lettore automaticamente inizia la riproduzione dal primo
brano, a meno che, prima di premere il pulsante PLAY, non si sia premuto il pulsante
PAUSE. In quest’ultimo caso, il CD entrerà in rotazione, pronto per iniziare la lettura
del primo brano.
To play the disc, press the PLAY key; playback wiII start from the first track of the CD
or from the first track selected in the program. If you wish to start play-back from another
track, this can be done by either selecting sequentially using the PREVIOUS and NEXT
keys on the front panel or directly from the remote control using the numerical keypad.
The playback symbol, the current track number and the elapsed track time will appear
on the display.
Per iniziare la riproduzione dal primo brano, premere il pulsante PLAY. Se desiderate
iniziare la riproduzione da un altro brano, questo viene fatto o selezionandolo in modo
sequenziale tramite uno dei due tasti PREVIOUS e NEXT sul pannello anteriore, oppure
direttamente dal telecomando usando il tastierino numerico. Vengono visualizzati sul
display il simbolo di riproduzione, il numero ed il tempo trascorso relativo al brano
attuale.
TRACK
PROGRAM
SCAN SHUFFLE REPEAT 1 PAUSE EDIT
TRACK
PROGRAM
SCAN SHUFFLE REPEAT 1 PAUSE EDIT
A B
A B
TOTAL
TOTAL
REM TIME
REM TIME
If, during playback, the PAUSE key is pressed, the current track wilI be paused (PAUSE
will appear on display), and maintained at the moment of interruption. Pressing the
PAUSE key again wilI resume normal playback.
Se, durante la riproduzione, il pulsante PAUSE viene premuto, il brano attuale viene
messo in pausa ( P AUSE apparirà sul dispIay), e mantenuto sul momento di interruzione.
Premendo di nuovo il pulsante PAUSE, la normale riproduzione riprende.

12
TRACK
PROGRAM
SCAN SHUFFLE REPEAT 1 PAUSE EDIT
TRACK
PROGRAM
SCAN SHUFFLE REPEAT 1 PAUSE EDIT
TRACK
PROGRAM
SCAN SHUFFLE REPEAT 1 PAUSE EDIT
A B
A B
A B
TRACK
PROGRAM
SCAN SHUFFLE REPEAT 1 PAUSE EDIT
A B
TOTAL
TOTAL
TOTAL
TOTAL
REM TIME
REM TIME
REM TIME
REM TIME
The REPEAT key (both on the front panel and on the remote control) allows either the
current track or the whole disc to be replayed. If pressed once, the "REPEAT" symbol
appears on the display and the whole disc wilI be repeated continuously; if pressed a
second time, the " 1 " symbol appears, indicating that the current track only will be
replayed continuously; a third pressure on the key will clear the function.
Il pulsante REPEA T (sia sul pannello anteriore che sul telecomando) permette di ripetere
continuamente il brano attuale oppure tutto il disco. Se premuto una volta sola, il simboli
“REPEAT “ compare sul display e líintero disco (o l’insieme dei brani selezionati dal
programma) viene ripetuto continuamente: se premuto una seconda volta, compare il
simbolo “ 1 ", indicando che il solo brano attuale verrà ripetuto continuamente, una
terza pressione del pulsante riporta il lettore al normale funzionamento.
The MODE key allows to select the operation mode (internal or external source, digital
output mode and loop mode) of this unit. More details will be explained in the section
OPERATION MODES SELECTION.
Il pulsante MODE permette di selezionare la modalità di funzionamento di questo
apparecchio (sorgente interna o esterna, uscita digitale e loop). I dettagli verranno
spiegati nella sezione SELEZIONE DELLE MODALITA’ DI FUNZIONAMENTO
TRACK
PROGRAM
SCAN SHUFFLE REPEAT 1 PAUSE EDIT
A B
TOTAL
REM TIME
FUNCTIONS
SPECIFIC TO THE
REMOTE CONTROL
The STOP key stops operation both in playback and pause modes; it also cancels the
repeat mode, if selected and deletes the program when pressed twice.
Il pulsante STOP arresta il funzionamento sia in riproduzione che in pausa, inoltre,
annulla la funzione "repeat", se impostata e cancella il programma se permuto due
volte.
Time display seIection. Normally, the display shows the time elapsed during the
current track. If the TIME key is pressed once, the “TOTAL” symbol appears on the left
of the “TIME” symbol and the total time elapsed from the beginning of the CD or the
program. If the key is pressed again, the “REM” symbol appears beneath the “TOTAL”
and “TIME” symbols and the total time remaining to he end of the disc or the program
disc wilI be displayed. lf the key is pressed for a third time, the normal display is restored
and the “TOTAL” and “REM” symbols disappear.
Numeric Keypad. Tracks can be accessed directly using the corresponding key. Over
track 9, press trackís digits sequentially. Example: for track 15, press “1“, then “5" within
a couple of seconds.
Programming. A program consists of a collections of track. When a program is stored
in the CD player’s memory, only the tracks collected in the program can be accessed,
until the program is deleted by pressing the STOP key when the CD is already stopped.
To create a program, stop CD and operate as follows:
2 press the “PROGRAM” key on the remote control: the “PROGRAM” symbol will
appear and the track counter will indicate the total number of tracks selected, while the
time counter will show the total program time;
3 repeat steps 1 and 2 until all the desired tracks have been selected in the program.
During the programming process the “PROGRAM” symbol will flash. After programming,
the symbol “PROGRAM” stops flashing. At this point it is possible to review the list of
selected tracks by pressing the PROGRAM key. Tracks donít need to be in the same
order as in the usual CD listing: it is possible to read track 5 after track 9 just selecting
track 9 before track 5. The scan function is not available when a program has been
stored.
Disc Scan. It is possible to listen to the first seconds of every track in the CD by pressing
the SCAN key on the remote control. After completion of the function or when the STOP
key is pressed, the CD stops. It is possible to defeat the function, thus continuing to
listen to a track, by pressing the SCAN key again.

13
A/B Repeat. Continuous repeat of any part of a CD is accomplished by the A/B funcion.
To select the CD part to be repeated, go to the beginning of the section using the ( and
( keys on the remote control, then press the A/B key once. The “Ae symbol will appear
on the display. Then, reach the final point of the section to be repeated and press the
“A/B” key again. The “B” letter will complete the “AeB” symbol and the repeat will
begin. To defeat the A/B repeat, press the A/B key again or stop the CD.
Shuffle Play. Shuffle play means that the tracks in the CD or in the program are played
in random sequence. To enable the shuffle play press the SHUFFLE button on the
remote control. To defeat the shuffle play press the SHUFFLE button again or stop the
disc by pressing the STOP button.
FUNZIONI
SPECIFICHE DEL
TELECOMANDO
Selezione della visualizzazione del tempo. Normalmente, il display visualizza il tempo
trascorso dallíinizio della lettura del brano attuale. Se il pulsante TIME viene premuto
una volta, il simbolo “TOTAL” appare alla sinistra del simbolo “TIME” ed il tempo
trascorso dallíinizio del CD o del programma viene visualizzato. Se il pulsante viene
premuto ancora, il simbolo “REM” compare tra “TOTAL” e “TIME” viene visualizzato il
tempo rimasto sull'intero disco. Con una terza pressione, il display normale viene
ripristinato ed i simboli “TOTAL” e “TIME” scompaiono.
Tastierino Numerico. È possibile selezionare direttamente i brani dall’1 al 9 usando il
pulsante corrispondente. Oltre il brano 9, occorre premere i tasti delle cifre che
compongono il numero della traccia entro qualche secondo. Esempio: per scegliere il
brano 15, premere “1” e subito dopo “5”.
Programmazione. Un programma è una lista di brani. Quando viene memorizzato un
programma nel CD player, solo le tracce contenute nel programma possono essere
riprodotte, finchè il programma non viene cancellato premendo il pulsante STOP con
il CD già fermo. Per creare un programma, fermare il CD ed effettuare le seguenti
operazioni:
2 premere il pulsante PROGRAM sul telecomando: a questo punto il simbolo “PROGRAM”
comparirà sul display , il contatore di traccia indicherà il numero di tracce finora selezionate,
mentre il contatore del tempo indicherà il tempo totale di durata del programma;
3 ripetere i passi 1 e 2 fino a che tutte le tracce desiderate saranno inserite nel
programma. Durante la programmazione il simbolo “PROGRAM” lampeggia. Al termine
della programmazione il simbolo ”PROGRAM” cessa di lampeggiare. A questo punto,
Ë possibile premere ancora il pulsante PROGRAM per scorrere la lista delle tracce
selezionate nel programma. Non è necessario che le tracce vengano selezionate nello
stesso ordine con cui compaiono nel CD: per esempio, se si desidera riprodurre prima
la traccia 9 e poi la 5 è sufficiente inserire nel programma la traccia 9 prima della traccia
5. La funzione di scansione delle tracce non è attiva quando è presente un programma.
Scansione automatica del CD. È possible ascoltare i primi secondi di ciascuna traccia
contenuta nel CD premendo il pulsante SCAN sul telecomando. Alla fine della scansione,
o quando viene premuto STOP, il CD si arresta. È possibile anche interrompere la
scansione, continuando quindi la lettura di un certo brano, premendo ancora il pulsante
SCAN.
Ripetizione di una parte qualsiasi del CD. È possibile selezionare una qualunque
porzione di un CD tramite la funzione A/B. Portarsi sul punto iniziale della sezione da
NOTES ON THE USE
OF THE STANDBY
FUNCTION
PARTICOLARITÀ
SULL’USO DELLA
FUNZIONE STANDBY
telecomando. Sul display apparirà il simbolo “Ae. Raggiungere il punto finale della
sezione da ripetere e premere ancora il pulsante A/B. Sul display la lettera B completerà
il simbolo “AeB” e inizierà la ripetizione. Per terminare la ripetizione premere ancora
il pulsante A/B o terminare la riproduzione premendo il pulsante STOP.
Riproduzione in sequenza casuale. Shuffle significa che le tracce nel CD vengono
lette in ordine casuale. Per attivare questa funzione, premere il pulsante SHUFFLE sul
telecomando. Per terminare la risproduzione in ordine casuale, premere ancora il
pulsante SHUFFLE o terminate la lettura del CD premendo il pulsante STOP.
Even though the standby facility is designed to alIow the player to be left powered-up
continuously and therefore already "warmed up" and ready to give its best, we advice
you to disconnect the player from mains if unattended for a Iong time. This is to avoid
the risk of damage arising from mains survoItages (Iightning).
Benché la funzione di standby serva a lasciare il lettore continuamente acceso e quindi
sempre "caldo" e pronto a dare il meglio, consigliamo di sconnetterlo dall'alimentazione
di rete in caso di un periodo prolungato di inutilizzo. Questo serve a ridurre il rischio
di danni derivanti da sbalzi di tensione (fulmini, etc.) sull'alimentazione di rete.

14
BURN-IN
RODAGGIO
OPERATION MODES
SELECTION
SELEZIONE DELLE
MODALITA’ DI
FUNZIONAMENTO
Long and exhaustive listening tests have shown that the best sonic performance is
obtained after a “burn-in” period of at least 100 hours. Once the unit is fully “burnt-in”,
best sound quality can be obtained after about 30 minutes warming up.
Lunghe ed approfondite prove di ascolto hanno dimostrato che le migliori prestazioni
sonore si ottengono dopo un periodo di "rodaggio" di almeno 100 ore. Una volta
completato il “rodaggio”, la migliore qualità di ascolto puÚòessere ottenuta dopo circa
30 minuti di “riscaldamento”.
MAESTRO digital audio processor has different operation modes selectable by the
MODE key. This unit allows the user to choose between the internal source (CD) or
an external one among CD player, DVD player, MINI DISC, DAT, PC audio board, which
digital output must be connected to MAESTRO digital input. With either internal or
external source it’s possible to activate the digital output (normal or 96kHz mode) or
to defeat it.
LOOP MODE. The signal coming from the internal source (CD) can be processed by
using the LOOP function. When this mode is selected, the digital output of the
MAESTRO must be connected to a digital signal processor (DSP) input. The DSP
output in turn has to be connected to the MAESTRO digital input. This way,
MAESTRO’s D/A converter will convert the CD signal processed by the external DSP.
The selected mode is indicated by one of the three leds on the right of the display, as
indicated in the following table:
GLOWING LED
CD
CD
CD
EXT
EXT
EXT
LOOP
COLOR
Green
Orange
Red
Green
Orange
Red
Red
SELECTED SOURCE
Internal
Internal
Internal
External
External
External
Internal
DIGITAL OUTPUT
Normal (44.1kHz)
96kHz
Off
Normal
96kHz
Off
Normal (44.1kHz)
Il processore audio digitale MAESTRO presenta diverse modalità di funzionamento
che si possono selezionare attraverso il tasto MODE. Con questo apparecchio si può
scegliere di utilizzare la sorgente interna (CD) oppure una esterna a scelta tra lettore
CD, lettore DVD, MINI DISC, DAT e scheda audio PC, collegandone l’uscita digitale
all’ingresso digitale del MAESTRO. Sia che si selezioni la sorgente interna o quella
esterna, è possibile attivare l’uscita digitale in due diverse modalità (normale e 96kHz)
oppure disattivarla.
FUNZIONAMENTO LOOP. E’ possibile elaborare il segnale musicale proveniente dalla
sorgente interna (CD) utilizzando la funzione LOOP. In questa modalità di funzionamento
il segnale digitale del CD viene inviato all’uscita digitale, che deve essere collegata
all’ingresso di un elaboratore digitale di segnale (DSP). L’uscita di questo deve essere
collegata all’ingresso digitale del maestro. In questo modo, il convertitore D/A del
MAESTRO convertirà il segnale del CD elaborato dal DSP esterno.
La modalità selezionata viene visualizzata dall’accensione di una delle tre spie situate
a destra del display, secondo seguente tabella :
LED ACCESO
CD
CD
CD
EXT
EXT
EXT
LOOP
COLORE
Verde
Arancione
Rosso
Verde
Arancione
Rosso
Rosso
SORGENTE SELEZIONATA
Interna
Interna
Interna
Esterna
Esterna
Esterna
Interna
USCITA DIGITALE
Normale (44.1kHz)
96kHz
Off
Normale
96kHz
Off
Normale (44.1kHz)

maestro
AUDIO DIGITAL PROCESSOR
COMPACT DISC PLAYER
15
SPECIFICATIONS
SPECIFICHE
TECNICHE
Analogue Output Level / Livello dell’uscita digitale
2 Vrms (unbalanced / sbilanciato)
4 Vrms (balanced / bilanciato)
Analogue Output Impedance / Impedenza dell’uscita analogica
<40 (unbalanced / sbilanciato)
110 (balanced / bilanciato)
Digital Output Level / Livello dell’uscita digitale
0.5 Vpp @ 75Ω (S/PDIF standard)
Digital Input Sensitivity / Sensibilità dell’ingresso digitale
0.5 Vpp @ 75Ω (S/PDIF standard)
Frequency Response / Risposta in frequenza
0-48,000 Hz (any source)
Jitter Rejection / Rejezione al Jitter
0.00005%
Total Harmonic Distorsion (THD) / Distorsione armonica totale (THD)
<0.001% @ 1kHz
Noise Floor / Rumore di fondo
-140 dB
Channel Separation / Separazione dei canali
Digital Processing / Elaborazione numerica
24bit with real-time resampling, data buffering and low-jitter reclocking
Operation Modes / Modalità operative
CD playback, external source playback, loop
Digital Output Operation Modes / Modalità operative dell’uscita digitale
Normal, 96kHz, Off
Analogue Filter / Filtro analogico
Second order Butterworth
Nominal voltage supply / Tensione nominale di alimentazione
115VAC / 230VAC 50/60Hz
Max. power consumption / Massimo assorbimento di potenza
100 VA
Overall dimensions / Dimensioni totali
17.52" (W); 14.2" (D); 5.3" (H)
445 mm (W); 360 mm (D); 135 mm (H)
Weight / Peso
44 lbs
20 Kg.

16
SAFETY
PRECAUTIONS AND
MAINTENANCE
Avoid opening the unit - No further servicing than that described in this manual should
be attempted. Refer all servicing to authorised Audio Analogue dealers and qualified
technicians.
Do not expose the unit to heat - Keep it away from heat sources such as direct sun,
cookers, radiators, etc.
Do not use the unit near water or in excessively humid or dusty areas.
Do not allow Iiquids to spill on the unit.
Before powering-up, check that the unit it set to your local mains voltage! - Never
connect the unit to a higher voltage than that indicated. If in doubt, consult your dealer.
Before plugging in, make sure the power switch on the rear panel is on the “OFF”
position.
AIways earth this unit - As its enclosure is made of metal, a faulty or missing earth
may be dangerous.
Unplug the unit from mains if unused for Iong periods.
Always replace fuses with same type - Bypassing fuses may represent a safety
hazard.
Cleaning the unit - Always switch off and unplug before cleaning; wipe gently with a
soft, dry cloth. Never use any solvents or alcohol-based cleaning liquids.
Condensation – If the player is moved from a cold place to a warm one, condensation
may form inside the player which could cause malfunctioning. Should this case arise,
alIow the unit to stand at least 1 hour to reach room temperature gradually.
For the UK OnIy
To fit a mains plug, please follow these instructions:
The wires in the mains Iead are coloured in accordance with the following code:
- Green/Yellow Earth (E)
- Blue Neutral (N)
- Brown Live (L)
As the colours of the wires in the mains Iead of this appliance may not correspond with
the coloured markings identifying the terminals in your plug, proceed as follows:
The wire which is coloured green and yellow must be connected to the terminal in the
plug which is marked with the letter E or by the earth symbol …, or coloured green and
yellow;
The wire which is coloured blue must be connected to the terminal which is marked
with the letter N or coloured black;
The wire which is coloured brown must be connected to the terminal which is marked
with the letter L or coloured red.
13 Amp plugs must have a 3 Amp fuse fitted.
PRECAUZIONI PER
LA SICUREZZA E
MANUTENZIONE
Non aprire l'apparecchio - Nessun ulteriore intervento oltre quelli descritti in questo
manuale dovrebbe essere effettuato. Per l'assistenza tecnica, rivolgersi a un tecnico
qualificato o a un rivenditore Audio Analogue.
Non esporre l'apparecchio a calore - Tenete l'apparecchio lontano da fonti di calore
come la luce solare, cucine, radiatori, etc..
Non usare l'apparecchio in prossimità di acqua o in zone eccessivamente umide
o polverose.
Non far cadere liquidi sull'apparecchio.
Prima di alimentare l'apparecchio, controllate che la tensione di alimentazione
indicata sul pannello posteriore corrisponda a quella locale di rete! - Non alimentate
mai l'apparecchio con una tensione di rete maggiore di quella indi-cata. In caso di
dubbi, consultate il vostro rivenditore.
Prima di inserire la spina nella presa a muro, assicurarsi che l'interruttore di
accensione sia in posizione “OFF”.
L'apparecchio deve essere sempre collegato a terra - Poiché l'involucro é costruito
in metallo, una connessione di terra difettosa o mancante potrebbe essere pericolosa.
In caso di lunghi periodi di inutilizzo, staccate la spina dalla presa di rete.
Sostituite i fusibili sempre con altri dello stesso tipo - "Ponticellare" i fusibili può
essere pericoloso.
Pulizia dell'apparecchio - Spegnete sempre prima di pulire: strofinate delicatamente
con un panno morbido e pulito. Non usate mai solventi o detergenti a base di alcool.
Condensa - Se il lettore viene trasportato da un ambiente freddo ad un altro caldo, si
potrebbe formare condensa al suo interno, causando possibili malfunzionamenti. Se
ciò si dovesse verificare, si prega di attendere almeno un'ora prima dell'uso in modo
da permettergli di raggiungere la temperatura ambiente gradualmente.

TROUBLESHOOTING
17
SYMPTOM
CAUSE
REMEDY
CAUSE
REMEDY
SYMPTOM
CAUSE
REMEDY
CAUSE
REMEDY
SYMPTOM
CAUSE
REMEDY
CAUSE
REMEDY
CAUSE
REMEDY
SYMPTOM
CAUSE
REMEDY
No power-up when power switch is pressed
Power cord incorrectly inserted
Check that cord is inserted both in the player and in the mains wall socket
Fuses burnt out
Check the fuses in the fuse holder (unplug cord from mains first!!) under the IEC socket
and if necessary replace with same type
No playback with disc in tray
Disc is dirty or scratched
Clean or change disc
Disc has been loaded upside down
Reload correctly (label side up)
No sound with disc spinning
Faulty or incorrect connections to amplifier
Check and connect cables properly
Player in pause mode
Press PAUSE button
External source selected or Loop Mode selected without any DSP connected to the Maestro
Select CD mode
No sound when external source is used
CD mode selected
Select External source mode or Loop mode
CAUSE
REMEDY
CAUSE
REMEDY
CAUSE
REMEDY
SYMPTOM
CAUSE
REMEDY
CAUSE
REMEDY
SYMPTOM
CAUSE
REMEDY
CAUSE
REMEDY
SYMPTOM
CAUSE
REMEDY
Digital format is not two-channel S/PDIF (e.g. it is compressed multichannel) or its
sampling frequency is more than 96kHz
Enable PCM mode on the digital output of the external source or select a 96kHz
operation mode if available
External source is off
Turn the external source on
Wrong connections between Maestro and external source
Connect units properly
No sound in Loop mode with disc spinning
External DSP is off
Turn DSP on
Input and output connections reversed on Maestro or DSP
Connect the two units properly
Sound jumping (mistracking)
Disc is dirty or scratched
Clean or change disc
Player is receiving vibrations or shocks
Move player to a better position
No remote control operation
Flat (or missing) batteries
Insert or change batteries (2 'AAA' type)
CAUSE
REMEDY
Too far from player or wrong angle
Go closer to player or change angle
If the suggestions do not work, or your problem is not in the Iist, please contact your
Audio Analogue dealer

RICERCA GUASTI
18
SINTOMO
CAUSA
RIMEDIO
CAUSA
RIMEDIO
SINTOMO
CAUSA
RIMEDIO
CAUSA
RIMEDIO
SINTOMO
CAUSA
RIMEDIO
CAUSA
RIMEDIO
CAUSA
RIMEDIO
SINTOMO
CAUSA
RIMEDIO
Il lettore non si accende premendo il pulsante di accensione
Cavo di alimentazione non inserito correttamente
Verificate che il cavo sia inserito correttamente nella vaschetta del lettore e nella presa a muro
Fusibili bruciati
Controllate i fusibili nel portafusibili (scollegate il cavo dalla presa prima!) sotto la
vaschetta IEC ed eventualmente sostituiteli con altri dello stesso tipo
Nessuna riproduzione nonostante il disco sia nel cassettino
Il disco è sporco o graffiato
Pulite o cambiate il disco
Il disco è stato inserito al rovescio
Ricaricate il disco con l’etichetta verso l’alto
Nessun suono con il disco in riproduzione
Collegamenti all’amplificatore difettosi o sbagliati
Controllate i cavi e collegateli correttamente
Player in pause mode
Press PLAY/PAUSE button
E’ selezionata la modalità External o quella Loop senza che alcun DSP sia collegato
al Maestro
Selezionare la modalità CD
Nessun suono quando si utilizza la sorgente esterna
E’ selezionata la modalità CD
Selezionare la modalità External o Loop
CAUSA
RIMEDIO
CAUSA
RIMEDIO
CAUSA
RIMEDIO
SINTOMO
CAUSA
RIMEDIO
CAUSA
RIMEDIO
SINTOMO
CAUSA
RIMEDIO
CAUSA
RIMEDIO
SINTOMO
CAUSA
RIMEDIO
Il formato digitale non è S/PDIF a due canali (ad esempio è multicanale compresso)
o la sua frequenza di campionamento è maggiore di 96 kHz
Attivare la modalità PCM sull’uscita digitale della vostra sorgente o selezionate il
funzionamento a 96kHz se disponibile
La sorgente esterna è spenta
Accendere la sorgente esterna
Il collegamento tra sorgente esterna e Maestro è errato
Ripristinare il corretto collegamento
Nessun suono in modalità Loop mentre il disco gira
Il DSP esterno è spento
Accendere il DSP esterno
I collegamenti di ingresso e uscita sono invertiti al DSP o al Maestro
Ripristinare le corrette connessioni
Il suono “salta”
Il disco è sporco o graffiato
Pulite o cambiate il disco
Il lettore è sottoposto a urti o vibrazioni
Spostate il lettore in una posizione migliore
Il telecomando non funziona
Batterie scariche o mancanti
Inserite o sostituite le batterie (2 ministilo tipo 'AAA')
CAUSA
RIMEDIO
Eccessiva distanza dal lettore o angolo non corretto
Avvicinatevi al lettore o cambiate angolo
Se i rimedi suggeriti non dovessero funzionare o se il problema non è riportato nella
lista, contattate il vostro rivenditore Audio Analogue.

audio analogue
Head Office / Ufficio commerciale:
srl Via C. Bottai, 88B
51015 Monsummano Terme (PT) Italy
tel. (+39) 0572 954513 · fax (+39) 0572 958099
e-mail: info@audioanalogue.com
www.audioanalogue.com
info@audioanalogue.com
soundpleasure
 Loading...