

Audio TX2040 User Manual
User Guide TX2040 transmitter
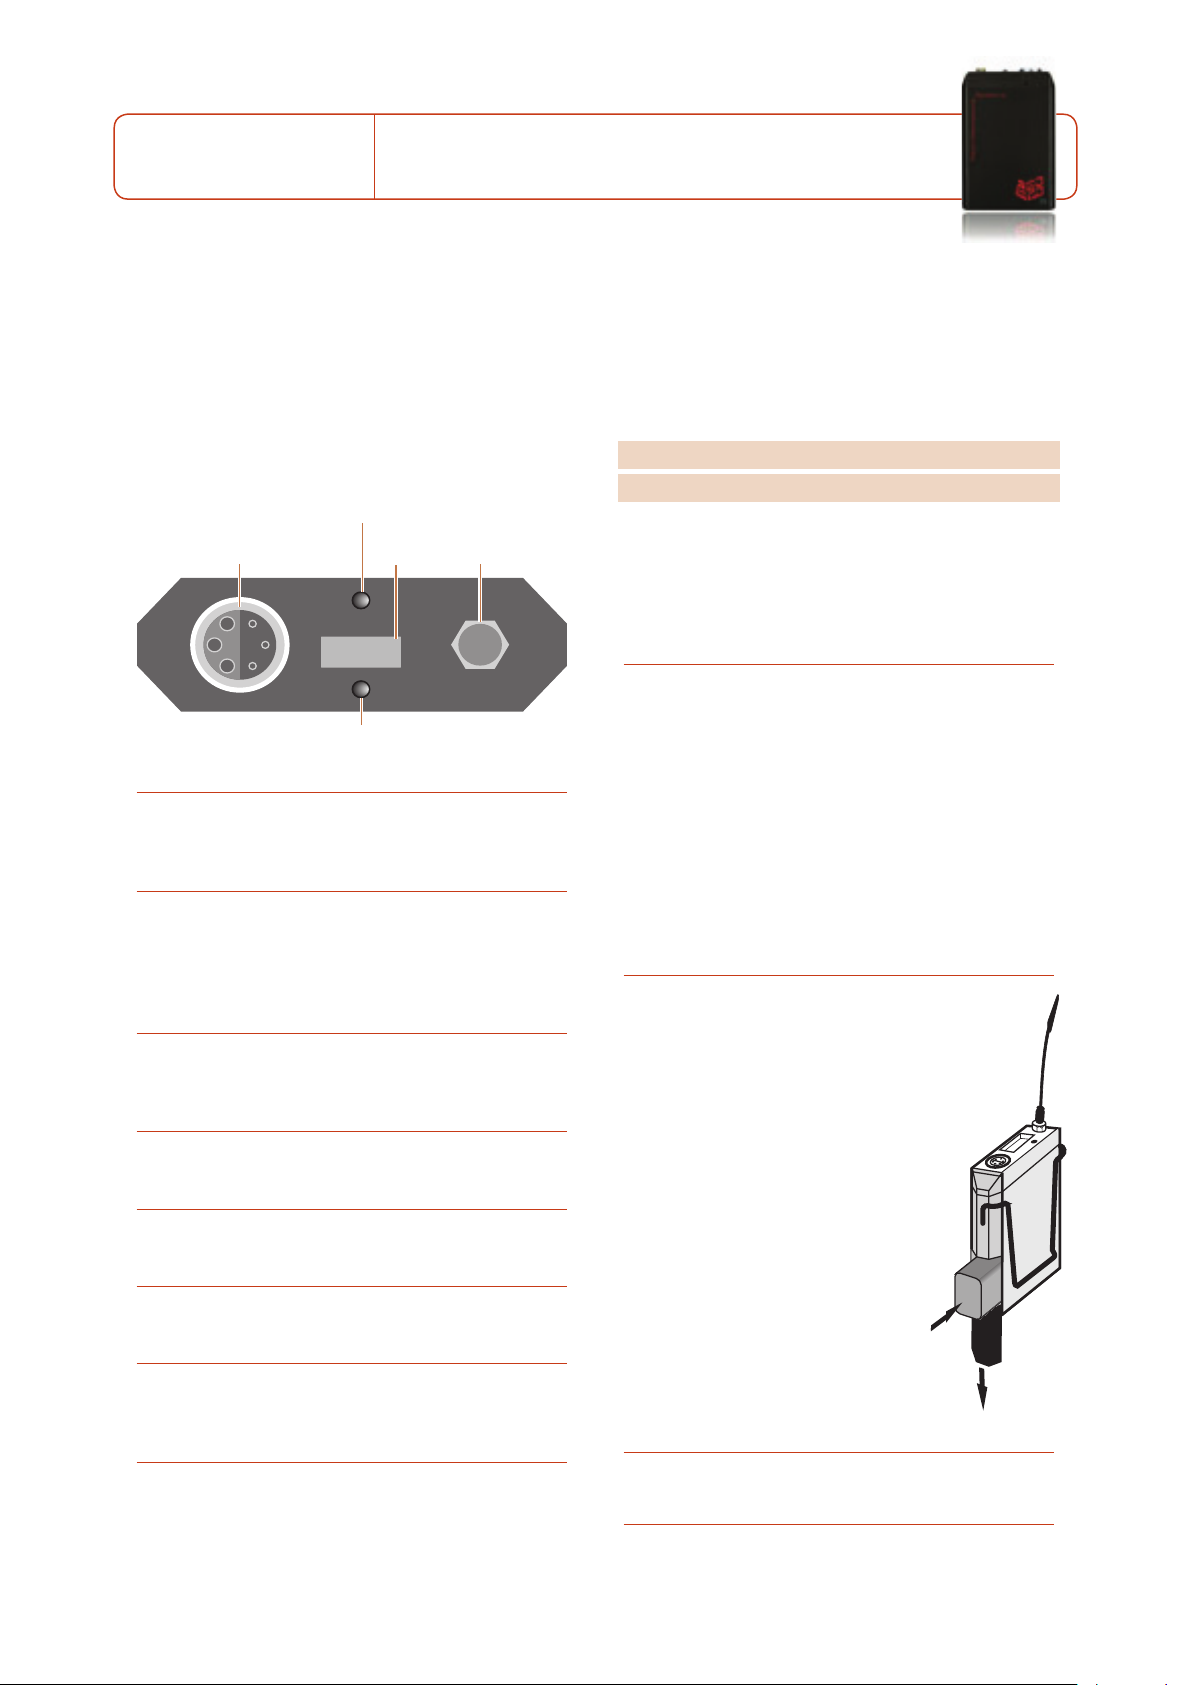
Antenna
On (green)
Overload (orange)
Infra-red
port
Audio
input socket
On/Reset button
Top panel
On (green)
+
_
The TX2040 is a small, lightweight battery-powered pocket transmitter for use with a wide range of
lapel microphones. All settings can be read and changed via the infra-red port using the SwitchiR™.
Controls, display
and connections
Infra-red port
Receives commands from and transmits status information
iR
back to the Switch
On/Overload indicator
The LED glows green while the TX2040 is switched on, but
will flash orange to indicate an overload in the presence of
a high-level audio signal. At this point the low distortion
limiter operates.
Brown reset button
Resets the TX2040 and turns it on again from sleep mode.
Please use the tip of the antenna to press the button.
Battery compartment
Holds a 6LR61 type 9V alkaline battery.
Audio input
Allows a microphone or input cable to be connected.
SMA antenna connector
SMA socket to which the antenna is connected.
LF cut using SwitchiR
Gives approximately 6dB LF cut at 50Hz, to assist in the
reduction of wind noise.
Gain setting using the SwitchiR
Provides eight gain options when used with standard
microphones. Position 9 gives maximum gain and each
position decreases the gain by approximately 3 to 4dB,
giving a total of 30dB of adjustment. Positions 1 and 0
infra-red controller.
provide line-level input.
The following table gives the equivalent settings for the
TX2020:
TX2040 0 1 2 3 4 5 6 7 8 9
TX2020 8 9 0 1 2 3 4 5 6 7
Note: Positions 0 and 1 (8 and 9 on the TX2020) provide
line-level input.
Setting up the TX2040
To set up the TX2040:
Fit the battery.
•
Connect the antenna.
•
Switch on by plugging in the microphone or input cable.
•
Check or select the operating frequency.
•
Check that the receiver’s no signal indicator is not
•
illuminated.
Check or set the microphone gain.
•
Check or set the low frequency cut filter.
•
Check the battery status.
•
These steps are explained below:
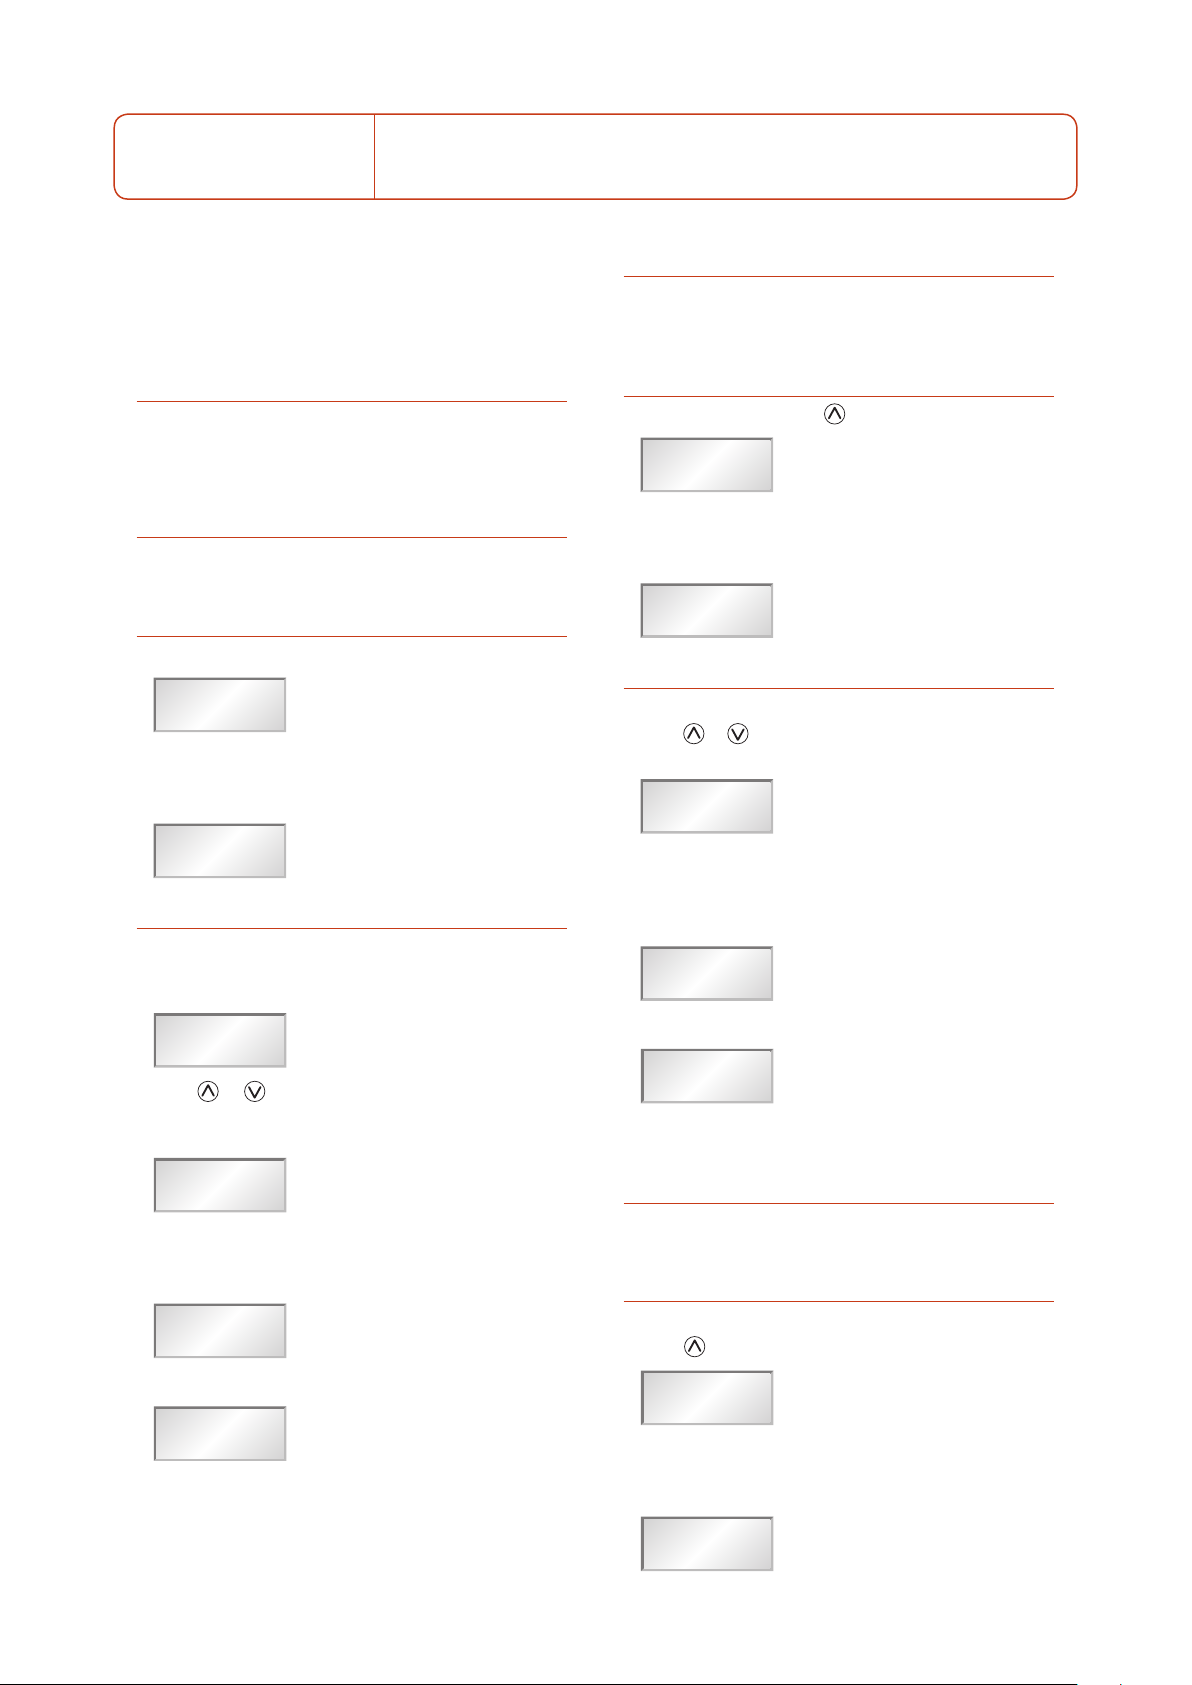
Fitting the battery
Press and slide open the battery
•
compartment door.
Insert a 6LR61 type 9V alkaline battery
•
with its contacts facing downwards
observing the polarity as shown on
the sleeve.
Push the battery down against the
•
spring-loaded contacts and slide the
battery compartment door closed,
pushing against the spring-loaded
contacts.
Do not use excessive force: An
electronic resettable fuse protects the
transmitter from reverse powering.
A low transmitter battery indicator
is provided on the DX2040 receiver
and on the RK2040 rack in addition
to the LED indicator on the TX2040
transmitter.
Connecting the antenna
Connect the flexible antenna to the SMA connector.
•
Switching on
Insert the microphone plug. The LED illuminates green
•
and the transmitter turns on. To turn the transmitter
FREQUENCY
MHz
CHANNEL
CHANNEL
FREQUENCY
Tx MHz
Fr
01
32
857.950
FREQUENCY
MHz
FREQUENCY
Tx MHz
CHANNEL
CHANNEL
FREQUENCY
Tx MHz
Fr
01
32
Error
857.950
854.900
CHANNEL
01
CHANNEL CHANNEL
01
32
CHANNEL
CHANNEL
FREQUENCY
Tx MHz
01
32
857.950
CHANNEL
CHANNEL
FREQUENCY
Tx MHz
01
32
Error
857.950
AF LEVEL
TxRx
AF
Error
AF LEVEL
TxRx
AF
AF LEVEL
Tx
0
Error
AF LEVEL
TxRx
AF
AF LEVEL
Tx
0
AF LEVEL
Tx
9
Error
Tx
LF Cut
Tx
OFF
AF LEVEL
TxRx
AF
AF LEVEL
Tx
0
AF LEVEL
Tx
9
Error
Tx
LF Cut
Tx
OFF
Error
Error
Tx
LF Cut
Error
Tx
LF Cut
Tx
OFF
User Guide TX2040 transmitter
off remove the lemo plug. Alternatively the TX2040 can
be turned off or on, even through clothing, using the
Control-X. The LED flashes green when the battery voltage
falls below 6.5V. The unit should not be used when the
battery is low as poor operation may result.
Connecting the audio input
Connect the microphone or input cable to the six-pin
•
Lemo socket. Both positive and negative microphone bias
voltages are provided, enabling the majority of Lavalier
microphones to be used with the TX2040.
Selecting the operating frequency
You can check or change the operating frequency of the
iR
TX2040 via the infra-red control using the Switch
To check the frequency:
Press MENU. The display shows:
•
Align the front of the SwitchiR with the infra-red port on
•
the TX2040 and press OK. The display shows the current
frequency. For example:
.
Setting the gain
The steps between gain settings 2-9 are approximately 3
to 4dB. Set the gain position so that the Overload indicator
does not flash on during normal operation.
To check the gain setting:
Press MENU followed by . The display will indicate:
•
Align the front of the SwitchiR with the infra-red port
•
of the TX2040 and press OK. The display will show the
current transmitter gain setting:
To change the gain setting:
Press OK again. The display will flash the level setting.
•
Press
•
required gain setting is displayed. For example:
to step between gain settings 2-9 until the
or
To change the frequency:
Press OK. The display will alternately flash between
•
showing the frequency and channel number. For
example:
Press
•
from the transmitter until the desired frequency or channel
is displayed. For example:
Point the SwitchiR at the infra-red port on the TX2040 and
•
press OK. If the command was received successfully the
display will show the new set frequency. For example:
Otherwise it will show:
Repeat the above steps if an error message is displayed,
•
moving the SwitchiR closer to the infra-red port.
to scroll through the 32 frequencies read
or
Align the front of the SwitchiR with the infra-red port
•
on the transmitter and press OK. If the command was
received correctly the display will show the new gain
setting. For example:
Otherwise the display shows:
Repeat the previous steps if an error message is displayed,
•
moving the SwitchiR closer to the infra-red port.
Setting the low frequency cut filter
The LF cut filter gives an approximately 6dB cut at 50Hz to
reduce handling and wind noise.
To check the status of the low frequency cut filter:
Press MENU.
•
Press
•
Align the front of the SwitchiR with the infra-red port on
•
the transmitter and press OK. The current LF cut filter
setting is displayed; for example:
twice until the display shows:
 Loading...