

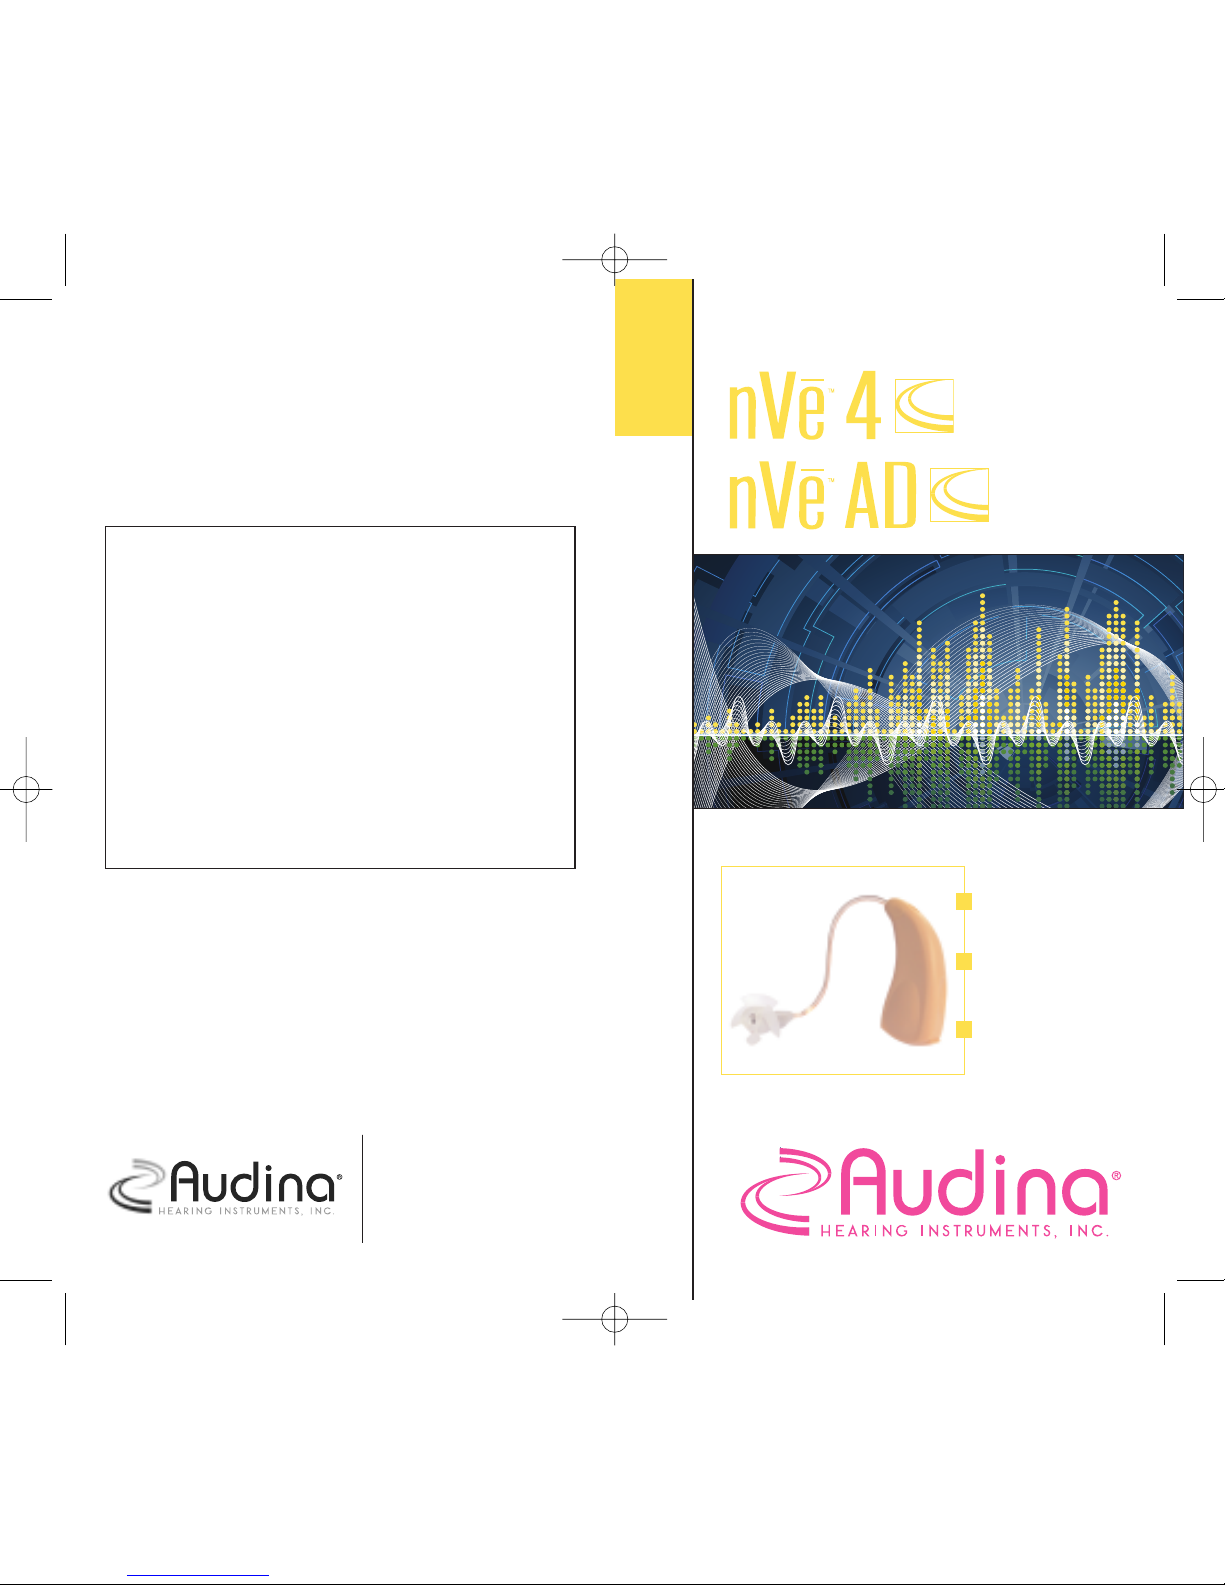
Audina VNVE 4, NVE AD Instruction Manual
ver: 1.0 070108 I NSTRUCTION MANUAL
Superior Comfort
Optimal
Performance
Nearly Invisible
P.O. Box 877
Casselberry, FL 32718
www.audina.net
HEARING HEALTHCARE PROVIDER
MADE IN U.S.A.
nVe instruction manual 8/7/08 9:51 PM Page 1
nVe instruction manual 8/7/08 9:51 PM Page 3
Welcome to a world of better hearing! We understand
that hearing loss affects one's quality of life. That is
why we are dedicated to building the highest quality
hearing instruments. Your new hearing instruments
will soon be indispensable to you and will bring new
pleasure and enjoyment to your life.
Our company was established in 1990 and is wellknown internationally for offering high quality,
reliable, state-of-the-art technology. These Receiver-inCanal (RIC) hearing instruments have been
programmed or adjusted to your individual hearing
loss to precisely fit your hearing and communication
requirements. If necessary, your hearing healthcare
provider can make further modifications to enhance
your listening experience.
A period of adjustment may be needed to become
accustomed to your new hearing instruments and the
renewed world of sounds you will experience. The
adjustment time varies for each individual and may be
as little as a couple of weeks to as long as several
months. Allow yourself time to become familiar with
those sounds you have not heard for a long time.
Before operating your hearing instruments, please read
this manual thoroughly.
WELCOME
i
This manual contains user information for
the following nV
e
¯
hearing instruments.
Your hearing healthcare provider will
“3” the appropriate box for your
hearing instrument.
nV
e
¯
™
AD
nV
e
¯
™
4
nVe instruction manual 8/7/08 9:51 PM Page 5
nVe¯Diagram ..........................................1
Proper Placement on Ear ........................2
Left & Right Instruments ......................5
On/Off Function....................................5
Battery Information ................................6
Memory Control Settings ......................9
Cleaning Your Instrument ....................10
Caring for Your Instrument ..................12
Removing & Inserting a Wax Guard….13
Telephone Use ......................................15
Cell Phone Compatibility ....................15
Push Button Memory ..........................15
Do's and Don'ts....................................17
Troubleshooting....................................19
Why Two Instruments ..........................22
Children with Hearing Loss..................23
Warranty Information ..........................24
Service and Repair Information ............25
Notice to Prospective Users ..................27
Notice to Providers ..............................28
Serial Numbers ....................................29
Owner Information ..............................30
TABLE OF CONTENTS
ii
nVe instruction manual 8/7/08 9:51 PM Page 7
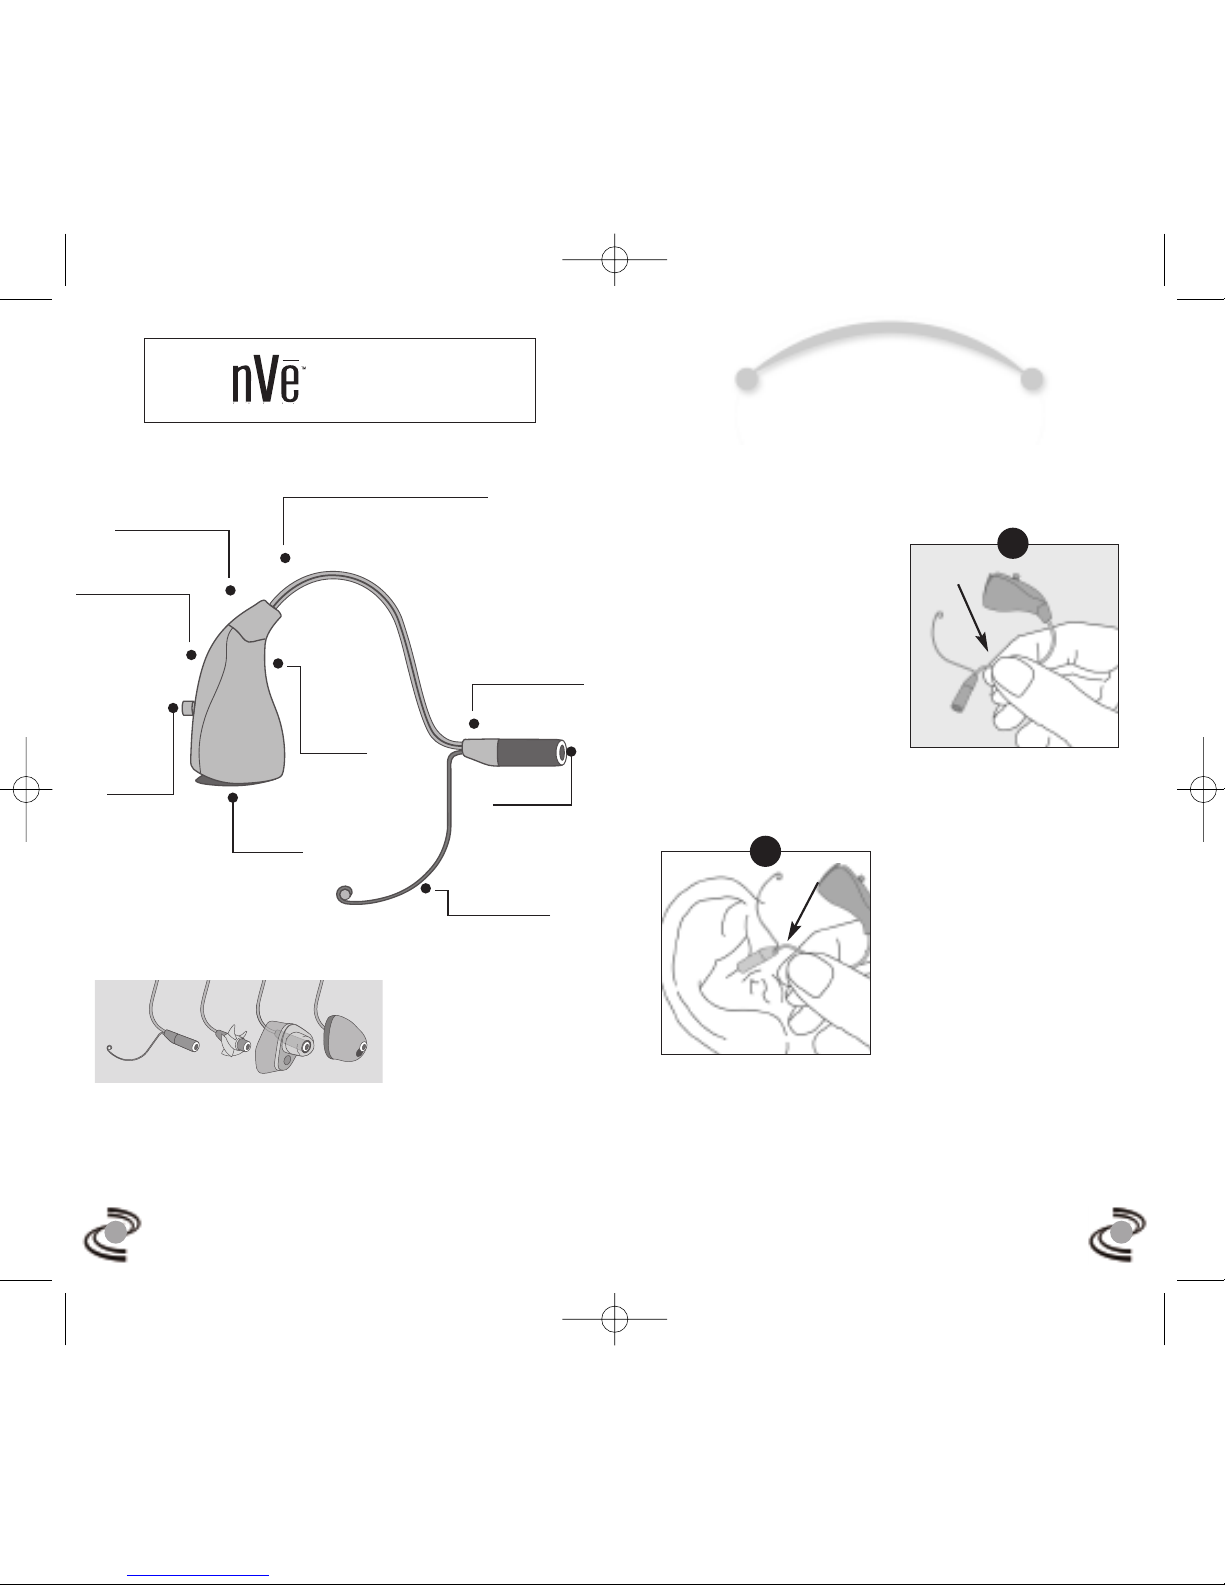
proper placement
on ear
Your hearing instruments should fit
comfortably and easily over the top of your
ears. Your hearing healthcare provider will
provide instruction on proper
insertion and removal.
Step 1: To properly
wear your new hearing
instrument, hold the
base of the receiver link
with the thumb and
index finger, allowing
the receiver module to
be free to easily insert into the ear canal.
Step 2: At this point,
the instrument is
inverted from its final
position. Carefully
insert the receiver
module into the ear
canal. Make sure the
locking wire is located
inside the bowl of
your ear. It may help to pull down or
backward on your lower ear with the
opposite hand.
1 2
Receiver Unit*
(connector, wire, Receiver Module)
Microphone
Second
Directional
Mircrophone***
Program
Button
Battery
Compartment
Digital
Sound
Processor
Locking Wire***
Wax Guard
Receiver Module**
(speaker)
A - RU with Conch Wire
B - RU with Propeller Sleeve
C - Power set with Custom Mold
D - Plus Power RU
Tips and Molds***
*Receiver Units are detachable
and interchangeable for easy
care and fitting.
**Your hearing instruments are
distinguished by colored dots on
the receiver module:
Blue = Left hearing instrument
Red = Right hearing instrument
***Optional components
1.
2.
DIAGRAM
nVe instruction manual 8/7/08 9:51 PM Page 9
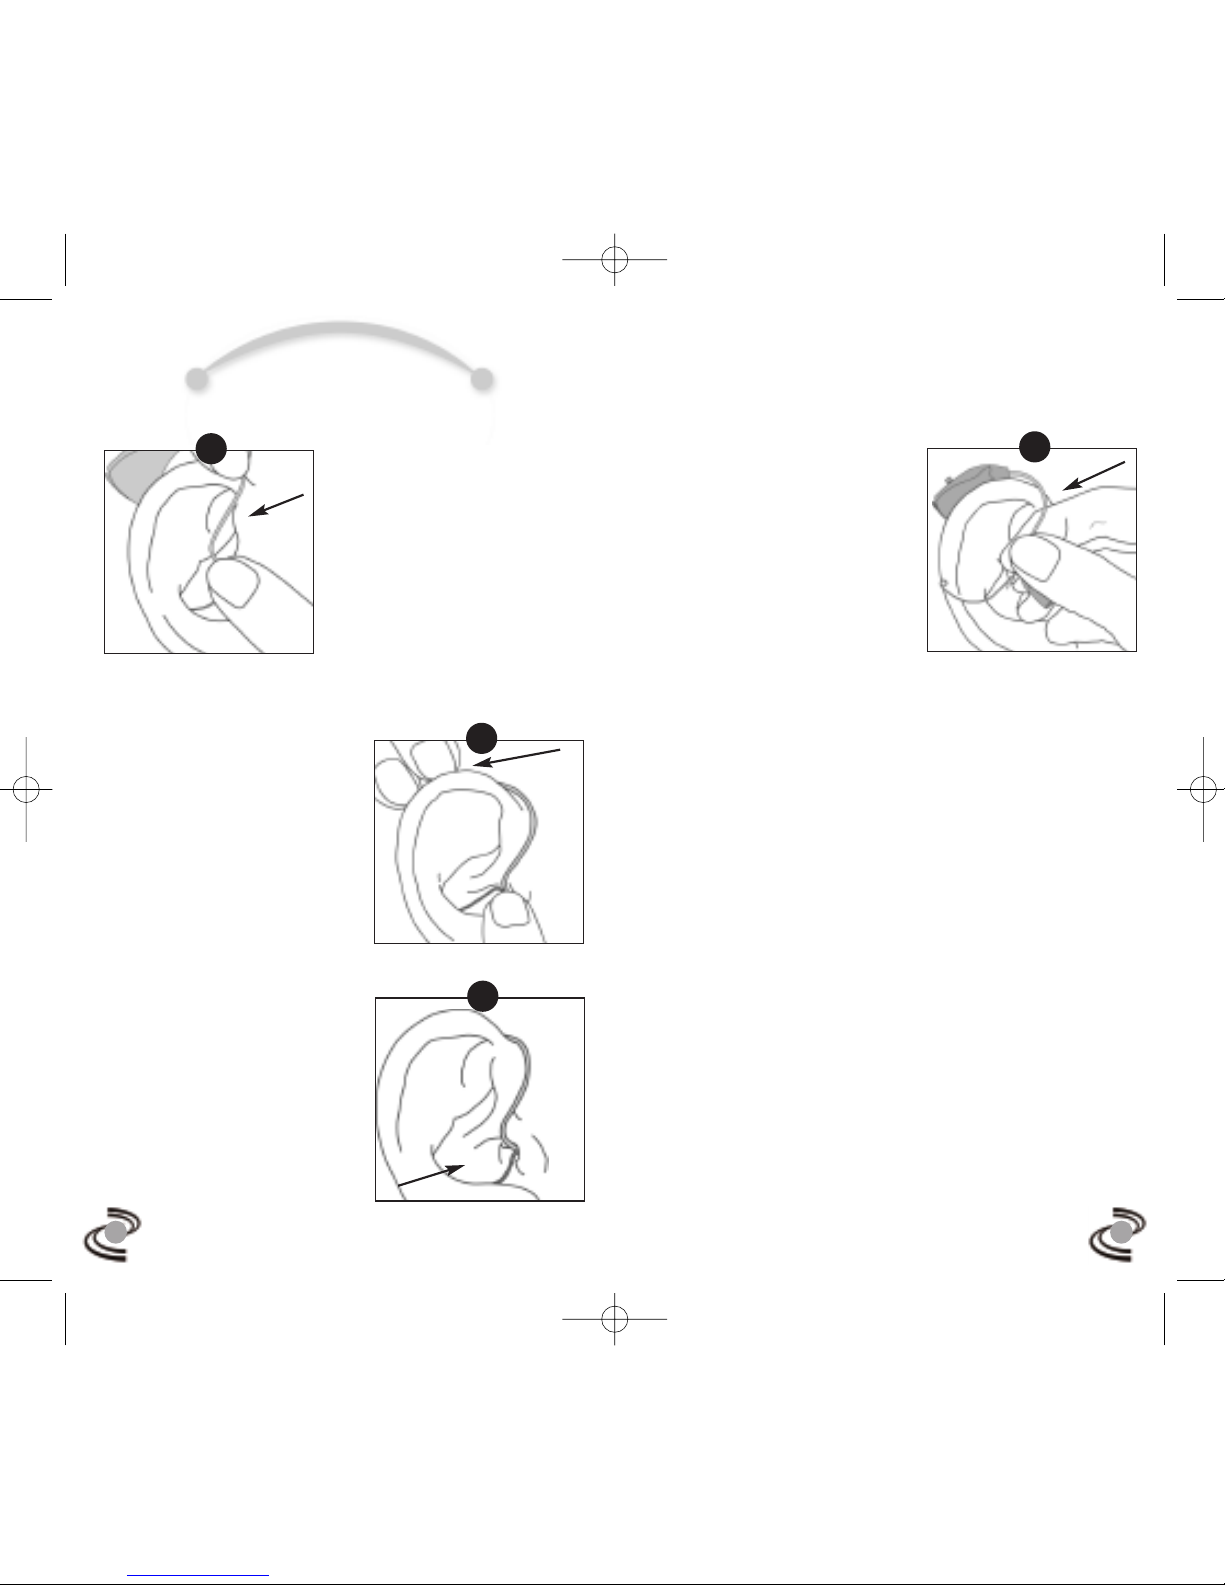
To Remover the receiver
module from your ear
canal, grasp the receiver
link with the thumb
and index finger at the
entrance to the ear canal
and gently pull down
and back as shown in
illustration 6.
CAUTION: When removing the receiver
module, do NOT pull with the body of the
hearing instrument as this may damage the
connection.
Be sure to open the battery door after
removing the instruments from your ears, this
will turn the instruments off and conserve
battery power.
4
proper placement
on ear
Step 3:
While holding
the receiver module in
place in the ear canal
with your thumb or
index finger; carefully
place the hearing
instrument body over
the top of your ear
while pressing it gently against the head as
shown in illustration 3.
Step 4: Correctly
placed, your hearing
instrument will be
virtually invisible to
those with whom you
speak. Make sure, again,
that the receiver module
is still properly
positioned in your ear
canal. (Illustration 4)
Step 5: Be sure the
locking wire (arrow in
illustration 5) is secure
inside the bowl of your
ear.
3
3.
4.
5.
6.
nVe instruction manual 8/7/08 9:51 PM Page 11
 Loading...