


AUDIAL
D88 15032018
DAB Radio Boombox
1
Instruction Manual
Model Ref: D88

Introduction
Thank you for choosing this DAB Radio Boombox. This
product is manufactured to the highest standards of
performance and safety.
Before use, please read this manual carefully. It gives
important instructions about safety, use and maintenance of
your device.
Remove all packaging material. You may wish to keep
the packaging for future use or storage of your device.
Alternatively, dispose of accordingly.
Contents
Important Safety Information 02
Product Specications 04
Product Overview 05
Before First Use 06
Using the Radio 08
Listening to your CD’s 16
Compact Disc Maintenance 20
Disposal Information 21
01

IMPORTANT SAFETY INFORMATION
WARNING - To reduce the risk of re, electric shock, or
injury:
1. This boombox is for domestic use only. Do not use
outdoors or on wet surfaces.
2. Do not handle the plug or boombox with wet hands.
3. Do not immerse the main body in water.
4. This boombox can be used by children aged from 8
years and above and persons with reduced physical,
sensory or mental capabilities, or lack of experience
and knowledge, if they have been given supervision or
instruction concerning the use of the boombox in a safe
way and understand the hazards involved.
5. Children must not play with the boombox.
6. Cleaning and user maintenance shall not be made by
children unless they are older than 8 and supervised.
7. Keep the boombox and its power cord out of reach of
children less than 8 years.
8. This product is not a toy.
9. Do not use the boombox if any parts appear to be faulty,
missing or damaged.
10. Do not use the boombox if it has been dropped or
damaged in any way.
11. Check to ensure that the electricity supply matches that
shown on the rating plate.
12. If the power cord is damaged, it must be replaced by a
qualied service agent in order to avoid a hazard.
13. Only use this boombox for its intended domestic use.
Audial will not accept any liability if the boombox is
subject to improper use, or failure to comply with these
instructions.
14. Keep the boombox and its power cord away from heat
or sharp edges that could cause damage.
02

15. Do not disconnect the boombox from the mains power
supply by pulling the power cord, switch it o and
remove the plug by hand.
16. Do not move the boombox when it is in use.
17. Use of an extension cord with the boombox is not
recommended.
18. This boombox should not be operated by means of an
external timer or separate remote control system.
19. Keep the boombox away from ammable materials.
03

PRODUCT SPECIFICATIONS
CD Section
Channels 2 Channels (Track & Time)
Optical Pick-Up 3 Beam Laser
Frequency Response 100Hz - 16KHz
Compatibility CD/CD-R/CD-RW
Radio Section
Receiving Band DAB/FM
Tuning Range FM 87.5 - 108Mhz
Antenna DAB/FM Rod Antenna
Channel Block DAB (Band III)
General
Output Power 1.2W x 2
Headphone Jack 3.5mm
Power Source 100-240V 60/50Hz
Power Consumption 9W
Weight 1kg
Batteries 8 x C Batteries (Not Included)
04

PRODUCT OVERVIEW
1. Carry Handle
2. CD Compartment
3. Mode Button
4. Stop/Scan Button
5. Preset/Album Button
6. Skip -/+ Button
7. Info/Menu Button
1
2
3
4
5
6
8. Play/Pause/Select Button
9. Sleep Button
10. Telescopic Aerial Antenna
11. 3.5mm Headphone Jack
12. Function Switch
13. Volume Control Dial
14. AC in Socket
10
9
8
7
11
12 13
14
05
Accessories
Instruction Manual
AC Cord
BEFORE FIRST USE
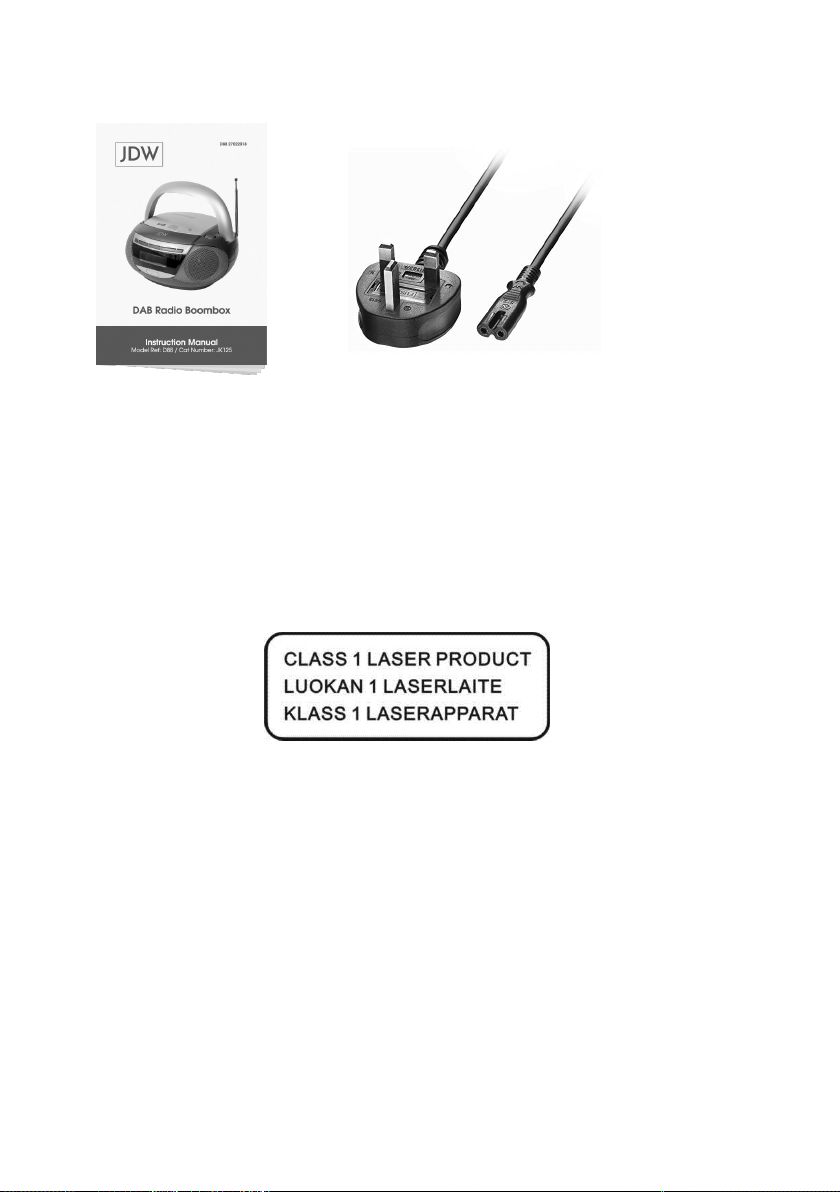
Information on laser products
Reproduction of labels
1. CLASSIFICATION LABEL, PLACED ON BASE
ENCLOSURE.
2. WARNING LABEL, PLACED INSIDE THE UNIT.
CAUTION: DO NOT OPEN THE UNIT. THERE ARE
NO USER SERVICEABLE PARTS INSIDE THE UNIT;
CONSULT ALL SERVICING TO QUALIFIED SERVICE
PERSONNEL.
Discs for Playback
This system can playback all digital audio CD, nalized
digital audio CD-Recordable (CD-R) discs, nalized digital
audio CD-Rewritable (CD-RW) discs and CD-DA format
digital audio CD/CD-R/CD-RW discs.
06

Power Source
This unit is designed to be operated on AC/DC.
AC Operation
Plug the smaller end of AC power cord into AC in socket (14)
located on the unit and then plug the end into the socket. Any
inserted batteries will be automatically disconnected.
DC Operation
On the base of the unit, open the BATTERY
COMPARTMENT DOOR. Install 8 x C Batteries (not
included) into compartment. Please follow correct polarities
as indicated.
CAUTION!
• Remove batteries if they are at or not being used for
a long period of time.
• Batteries contain chemical substances, so they
should be disposed of properly.
Headphone Operation
1. Connecting the headphones into
the 3.5mm headphone jack (11)
will deactivate the speakers.
2. Sound adjustments made to the
Volume Control Dial (13) also
aect the sound through the
headphones.
Note: Be sure to turn down the volume before connecting or
putting on the headphones.
07

USING THE RADIO
During operation, you can enter into the System menu in
either DAB or FM mode - rst press and hold the INFO/
MENU button (7) to enter into the Menu, then repeatedly
press the SKIP- / SKIP+ button (6) followed by pressing the
PLAY/PAUSE/SELECT button (8) to select “System”.
Inside the “System”, you can select the following sub menus:
Language / Factory Reset / Software Upgrade / SW version
To enter into those sub menus, repeatedly press the SKIP- /
SKIP+ button (6) followed by pressing the PLAY / PAUSE/
SELECT button (8) to conrm. To step back through the
menu to the station display, press and hold the INFO / MENU
button (7) again and then release.
Language
You can change the language of your radio, there are
6 options available: English / Dutch / Italian / French /
Portuguese.
Note: A “*” will be displayed to indicate the current setting.
Factory Reset
You can reset your radio and restore all of the original factory
settings.
To perform factory reset, select <Yes> inside the “Factory
Reset” menu, the unit will switch to DAB or FM mode and
perform auto scan function, the display will show ”Restarting
...” and then ”Scanning ...”, after the reset is completed, the
unit will stay in DAB or FM mode.
Note: All of your stored DAB & FM presets will be deleted
once the reset has taken place.
08

SW Version
The SW version will be displayed and you may wish to take a
note here.
Listening to your Radio
HINTS FOR BETTER RECEPTION
This radio is tted with a single DAB/FM telescopic aerial
antenna (10), to obtain the best performance, you should
fully extend the antenna (10) and adjust its position as well
as the direction until you nd the best reception. For ideal
DAB reception, always maintain the antenna (10) in an
upright vertical position is highly recommended.
DAB Mode
To switch the selector on DAB mode , the display shows
“DAB”. If the unit is switched on DAB mode for the rst time
, it will automatically and perform auto scan function. During
the scan the display will show “Scanning …” together with
a slide bar that indicates the progress of the scan and the
amount of stations that have been found so far.
Once the scan has nished, the radio will select the rst
alphanumerically found station. You can now press the SKIP/ SKIP+ button (6) to explore the found stations followed
by pressing the PLAY/PAUSE/SELECT button (8) to select
listening to your desired station.
To enter into the DAB Menu, press and hold the INFO/MENU
button (7), then repeatedly press the SKIP- / SKIP+ button
(6) to step through the following sub menus: Full scan /
Manual tune / DRC / Prune / System
09

Full Scan
The full scan will search for the entire DAB Band III channels.
After the scan has nished, the rst alphanumerically found
station will be automatically selected.
1. To activate full scan, press on the STOP/SCAN button
(4) once, the display will show “Scanning …” and a
progressing slide bar.
2. All the stations that have been found will be stored
automatically, to explore the stations that have been
found, press the SKIP- / SKIP+ button (6) and when you
nd a station that you would like to listen to, press the
PLAY/PAUSE/SELECT button (8).
3. You can also select “Full scan” inside the DAB Menu press and hold the INFO/MENU button (7) to enter into
the Menu, then repeatedly press the SKIP- / SKIP+ button
(6) followed by pressing the PLAY/PAUSE/SELECT
button (8) to select and conrm “Full scan”.
Manual Tune
1. To activate manual tune, press and hold the INFO/MENU
button (7) to enter into the Menu, then press the SKIP- /
SKIP+ button (6) followed by pressing the PLAY/PAUSE/
SELECT button (8) to select and conrm “Manual tune”.
2. The display will show “5A” to “13F” and their associated
frequencies, press the SKIP- / SKIP+ button (6) to move
through the DAB channels, when your desired frequency
appears in the display, press the PLAY/PAUSE/SELECT
button (8) to conrm. The name of the station group
(ensemble/multiplex) will be displayed.
3. To listen to the station selected, press the PLAY/PAUSE/
SELECT button (8) again.
10

DRC
DRC stands for Dynamic Range Control. The dynamic range
for each radio programme is set by the broadcaster for each
radio station and may be dierent for the types of programme
broadcast, such as pop or classical music or a chat show.
The dynamic range control signal is transmitted in parallel
with the audio signal for each programme, And with your
radio, you can use this control signal to expand or compress
the dynamic range (the dierence between the loudest and
quietest sounds) of the reproduced audio signal. Changing
the dynamic range can aect the ‘loudness’ and/or ‘quality of
sound’ of the programme that you hear so that it will be more
suited to your listening conditions and your own personal
listening requirements. E.g. In a noisy environment, where
quiet sounds might be swamped, setting the compression
to maximum will ‘boost’ the quiet sounds, whilst keeping the
loudest sounds at their original level.
There are 3 levels of compression:
DRC O - no compression, this is the default setting.
DRC High - maximum compression.
DRC Low - medium compression.
1. To adjust DRC, in DAB mode, press and hold the INFO/
MENU button (7) to enter into the Menu, repeatedly press
the SKIP- / SKIP+ button (6) followed by pressing the
PLAY/PAUSE/SELECT button (8) to select “DRC”.
2. Press the SKIP- / SKIP+ button (6) followed by pressing
the PLAY/PAUSE/SELECT button (8) to select and
conrm the DRC level - DRC high/low/o.
Note: A “*” will be displayed to indicate the current setting.
11

Prune
You can remove the DAB stations in the station list that
cannot be received in your area. These are listed with a ‘?’
prex.
1. To perform Prune, in DAB mode, press and hold the
INFO/MENU button (7) to enter into the Menu, repeatedly
press the SKIP- / SKIP+ button (6) followed by pressing
the PLAY/PAUSE/SELECT button (8) to select “Prune”.
2. Again press the SKIP- / SKIP+ button (6) followed by
pressing the PLAY/PAUSE/SELECT button (8) to select
<Yes>.
DAB Secondary Services
On some occasions you will see a “>” symbol directly
after the name of the station, this indicates that there
are secondary services available to that station. These
secondary services contain extra services that relate to the
primary station. E.g. a sports station may want to add extra
commentaries. The secondary services are inserted directly
after the primary station. To select the secondary station,
press on the PLAY/PAUSE/SELECT button (8) once.
DAB Display Modes
During DAB operation, repeatedly press on the INFO/MENU
button (7) will cycle through the following display modes:
DLS > Signal strength > Programme Type > Ensemble/
Multiplex (Group name) > Frequency > Signal error > Audio
Bit Rate > Time > Date > DLS > …
DLS
DLS stands for Dynamic Label Segment which is a
scrolling message that the broadcaster may include in their
transmissions. The message usually includes information
such as programme details …etc.
12

Signal Strength
The display will show a slide bar to indicate the signal
strength, the stronger the signal, the longer the bar will be
from left to right.
Programme Type
This describes the style of the programme that is being
broadcast. If the information is not available, the display will
show “<Programme Type>”.
Ensemble/Multiplex (Group name)
The Ensemble/Multiplex is a collection of radio stations that
are bundled and transmitted together in a single frequency.
There are national and local multiplexes, local ones contain
stations that are specic to that area.
Frequency
The frequency of the present station will be displayed.
Signal Error
This is displayed as a number between 0-99. It would not be
possible to satisfactorily listen to a radio station with a signal
error rate of 30 or above. Try adjusting the antenna (13) or
relocating your radio to improve reception.
Audio bit rate
The display will show the digital audio bit rate being received.
Time and Date
The time and date will be automatically updated by the
broadcasted information; there is no need to set the clock
manually.
13

FM Mode
1. To switch the selector on FM mode , the display shows
“FM”. The display will show the frequency and the RDS
info if available. To go through the RDS infos, repeatedly
press the INFO/MENU button (7).
2. To perform manual tuning, repeatedly press the SKIP- /
SKIP+ button (6), when your desired frequency appears
in the display, release the buttons.
3. To activate auto scan for stations, press and hold the
SKIP- / SKIP+ button (6) until it starts to scan down or
up the frequency band, the display will show “Scanning
…”, and it will stop automatically once a station has been
found.
4. To enter into the FM Menu, press and hold the INFO/
MENU button (7), then press the SKIP- / SKIP+ button (6)
followed by pressing the PLAY/PAUSE/SELECT button
(8) to select <Scan setting> and <Audio setting>:
Scan setting - Strong stations only / All stations
Audio setting - Stereo allowed / forced mono
Note: A “*” will be displayed to indicate the current setting.
14

Storing and Recalling Stored Stations
In either DAB or FM mode, you can store up to 20 stations to
the favourite presets; this will enable you to get direct access
to your favourite stations.
1. To store a preset, rst tune to your desired station, then
press and hold the PRESET/ALBUM button (5), the
display will show “Preset Store <1: (Empty) >”.
2. Press the SKIP- / SKIP+ button (6) to select your desired
station preset number and then press the PLAY/PAUSE/
SELECT button (8) to conrm your selection, the display
will show “Preset # stored”.
3. To recall a preset station, rst press on the PRESET/
ALBUM button (5) once, and when the display shows
“Preset Recall”, press the SKIP- / SKIP+ button (6) to
scroll up or down the presets that you have stored, when
you see your desired preset number in the display, press
the PLAY/PAUSE/SELECT button (8).
15

LISTENING TO YOUR CD’S
NOTE: Although this CD/MP3 player can read CD-R and CDRW discs in addition to normal CDs, the playability of CD-R
and CD-RW discs may be aected by the type of software
that was used to create the discs, as well as the quality and
condition of the blank media you are using, 100% playability
cannot be guaranteed. This is not an indication of a problem
with the player.
To select the CD mode, switch the selector to CD/MP3/USB,
then “CD” is displayed.
Playing the entire CD
1. Load the disc with the printed label side facing up and
then close the CD door. The display will rst show
“Reading” and then start playback from the rst track. The
display will show the track number and the play time.
2. To interrupt playback, press the PLAY/PAUSE/SELECT
button (8) once, and the playback will be paused.
3. To resume playback, press the PLAY/PAUSE/SELECT
button (8) again.
4. To stop playback, press the STOP/SCAN button (4), the
display will show the total number of tracks in the disc.
5. To select a dierent track during playback, press the
SKIP- / SKIP+ button (6) button until you read your
desired track number in the display, playback will be
started from this track.
16

Repeat Play and Random Play
During normal playback, you can repeatedly press the
PRESET/ALBUM button (5) to select the repeat play or
random play function.
1. To repeat the same track, press the PRESET/ALBUM
button (5) once, the display will show “Repeat One”.
2. To repeat the entire disc, repeatedly press the PRESET/
ALBUM button (5) until the display shows “Repeat All”.
3. If you are playing a MP3 disc, an additional “Repeat
Folder” option will appear, and the current folder will be
played repeatedly.
4. To select random play, repeatedly press the PRESET/
ALBUM button (5) until the display shows “Random”.
5. To resume normal playback, repeatedly press on the
PRESET/ALBUM button (5) again until the display shows
“Normal”.
17

Program play
You can use the program play feature to play up to 20 tracks
on a disc in any desired order. You may also program a
particular track to play several times within a programmed
sequence.
1. Load your disc as usual and then press the STOP/SCAN
button (4) to select CD stop mode, the display will show
the total number of tracks in the disc.
2. Press the PRESET/ALBUM button (5) once, the display
will show “MEM” and ashing “P_01”.
3. Press the SKIP- / SKIP+ button (6) to select the rst
track to be programmed. When the desired track number
appears in the display, press the PRESET/ALBUM button
(5) to conrm and the rst track to play is programmed.
The program memory number will advance to “P_02” and
ready for the next entry.
4. Repeat the above steps to program other tracks, a
maximum number of 20 tracks can be programmed.
When you have completed programming, press the
PLAY/PAUSE/SELECT button (8) to begin program play,
playback will be started on the rst track you programmed
and will continue until the last programmed track has
played.
5. When the program play is completed, the player stops
and “MEM” will be still displayed, the player remains in
the program play mode. Press the PLAY/PAUSE/SELECT
button (8) will play the programmed sequence again.
6. To erase the program, in CD stop mode, press the STOP/
SCAN button (4) once; in CD play mode, press the STOP/
SCAN button (4) twice. “MEM” in the display will be
disappeared.
18

Repeat Program play
You may use the program play and the repeat play features
together to continuously repeat a programmed sequence.
First program the desired playback sequence, when program
play begins, press the PRESET/ALBUM button (5) to
select repeating the current track or the entire programmed
sequence.
19

COMPACT DISC MAINTENANCE
1. Always use a compact disc bearing the mark as shown.
2. Notes on handling discs
• Take care when removing the disc from its storage case
and loading it.
• Do not touch the reective recorded surface.
• Do not stick paper or write anything on the surface.
• Do not bend the disc.
3. Storage
• Store the disc in its case.
• Do not expose discs to direct sunlight or high
temperatures, high humidity or dusty places.
4. Cleaning a disc
• Should the disc become soiled, wipe o dust, dirt and
ngerprints with a soft cloth.
• The disc should be cleaned from the centre to the edge.
• Never use benzene, thinners, record cleaner uid or
anti-static spray.
• Be sure to close the CD Compartment (2), so the lens is
not contaminated by dust.
• Do not touch the lens.
20

DISPOSAL INFORMATION
IMPORTANT INFORMATION FOR CORRECT DISPOSAL
OF THE PRODUCT IN ACCORDANCE WITH EC
DIRECTIVE 2002/96/EC
At the end of its working life, this product must NOT be
disposed of as urban waste.
It must be taken to a special local authority dierentiated
waste collection centre or to a dealer providing this service.
Disposing of a electrical product separately avoids possible
negative consequences for the environment and health
deriving from inappropriate disposal and enables the
constituent materials to be recovered to obtain signicant
savings in energy and resources. As a reminder of the need
to dispose of electrical products separately, the product is
marked with a crossed-out wheeled dustbin.
21

AUDIAL
Wellington Grove,
Stockport, SK2 6RH
 Loading...