

Page 1

ASP20
Installation Manual
www.audac.eu
Page 2
2
Introduction
360° Spherical loudspeaker
The ASP20 is a 20 Watt, 360° radiating spherical loudspeaker, fitted with a 8” full
range driver and a 100V line transformer with different power tappings for 20W, 10W,
5W and 2.5W.
Its wide smooth frequency response and high efficiency ensure high fidelity reproduction
of music and speech with a 360° horizontal coverage. This makes it perfect for big, open
areas like factory halls or athletic fields.
The ABS housing is moisture and UV resistant and the loudspeaker is equipped with
a 2 meters long 5-core connection cable whereby the desired 100V power tap can
be selected. A steel core provided through the connection cable makes sure that the
loudspeaker can be safely mounted on any location.
Because of the moisture-proof treatment, the ASP20 meets the IP56 standard.
Instructions
Mounting
The mounting of the ASP20 Spherical loudspeaker can be easily done by means
of the included mounting accessories.
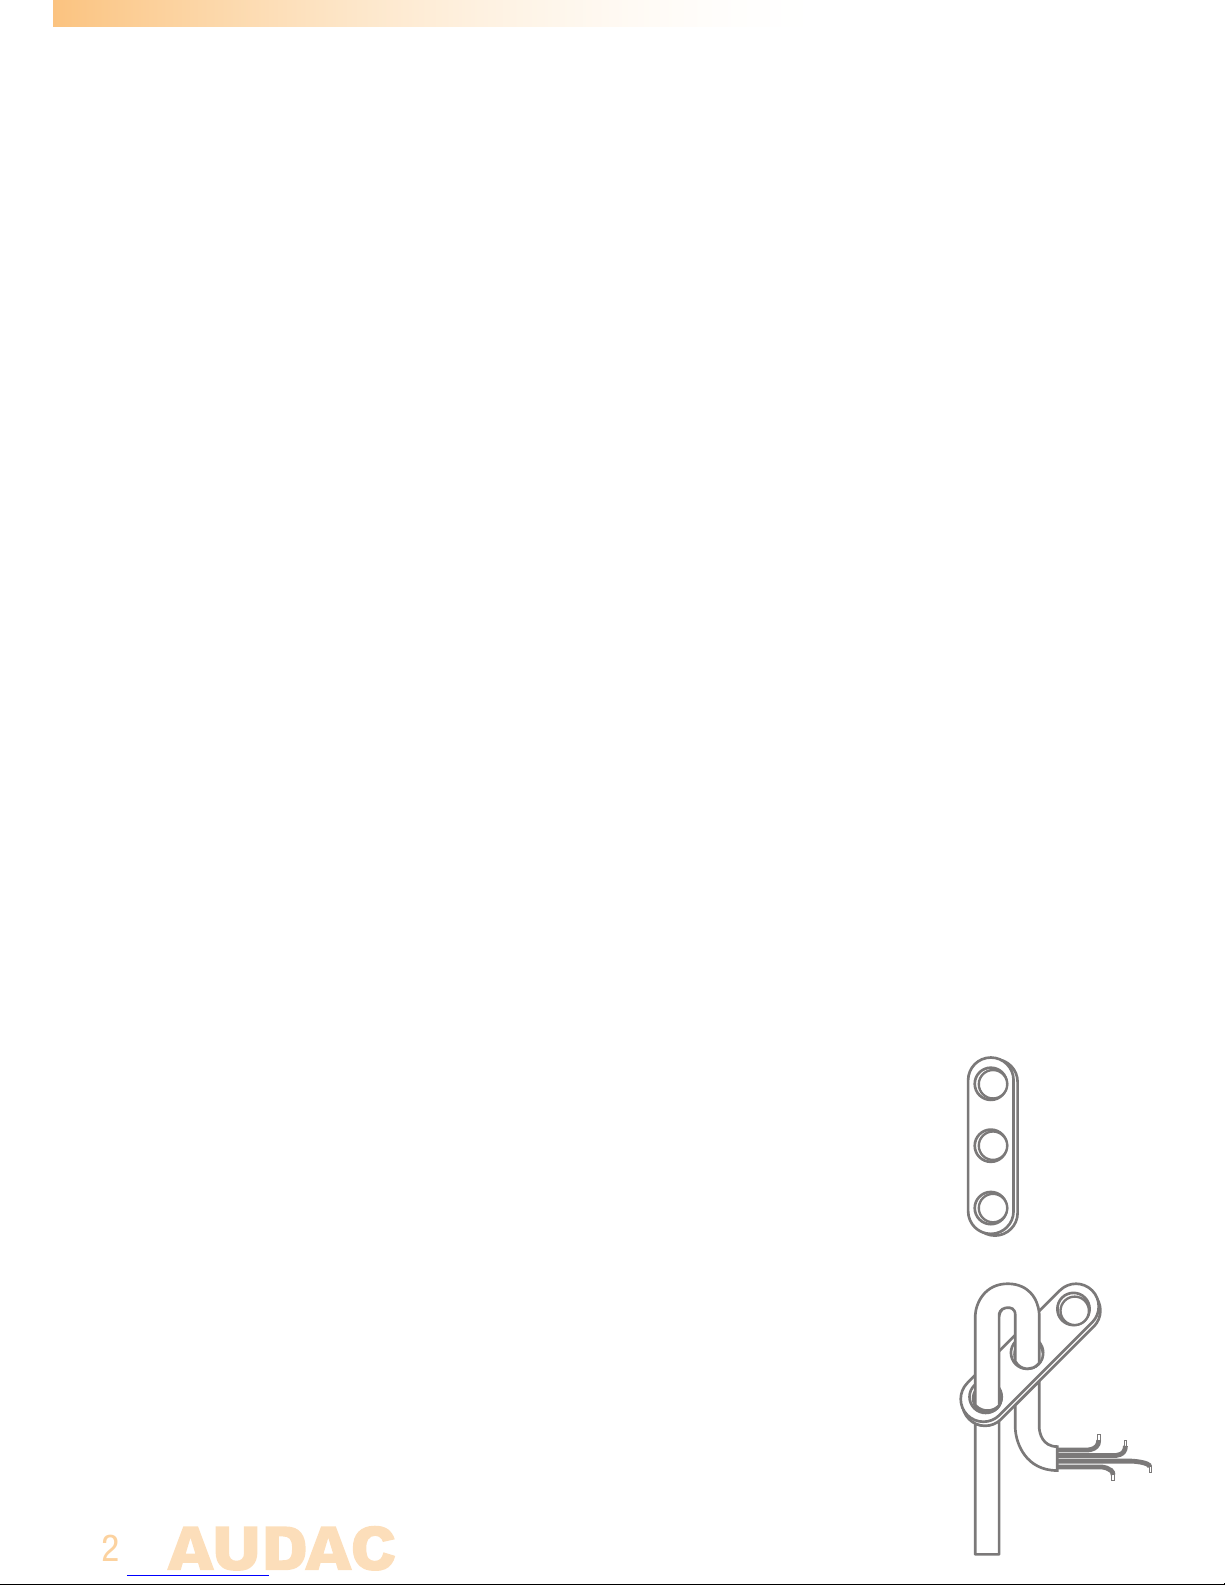
Put the cable through the outer small hole on the plastic wire clamp and pull the
cable through, so the remaining cable length is according to the desired hanging
height of the loudspeaker. Then braid the cable through the second hole (the
middle one) and pull the cable until its tight.
The next step is to cut the cable at the desired length, and remove the cables
outer jacket for about 10 centimeters. The connection cable of the ASP20 consists
of 5 copper conductors and one steel core. By means of the copper conductors,
the desired power tap for the loudspeaker can be selected and the steel core is
meant for suspending and securing the loudspeaker.
Page 3
3
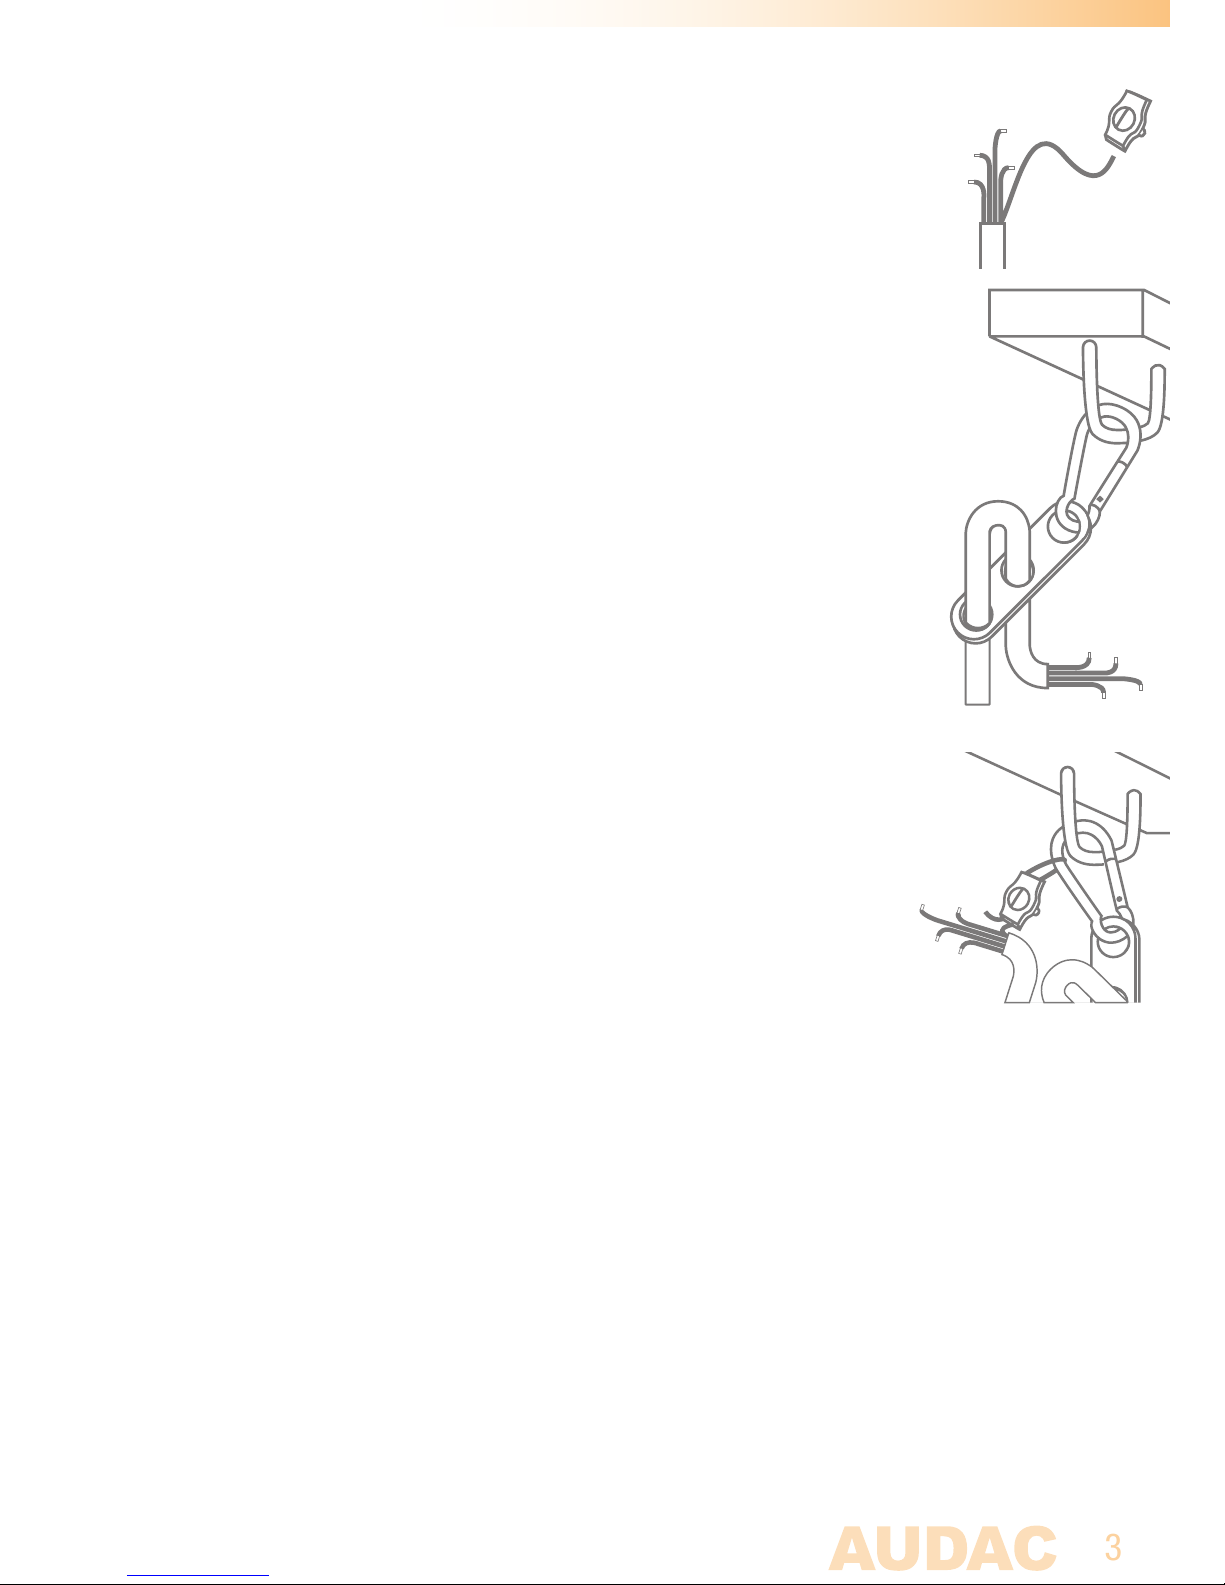
After the outer jacket is removed, the steel core needs to be terminated
by a loop, making it possible to hang the steel cable core to the safety
hook. The termination of the steel core should be done with the included
screw cable clamp. Just insert the steel core through one side of it and
return it though the other side. After this is done, tighten the screw from
the cable clamp.
Then, the loudspeaker can be suspended from the mounting point which
is provided at the desired ceiling location. In order to ensure a secure
mounting for the loudspeaker, it is recommended to provide an eye-bolt
at this location.
The fixing of the loudspeaker should be done by hanging the included
safety hook to the provided eye-bolt.
After the loudspeaker is hung, the steel cable should be attached to the
safety hook.
When all these steps are completed, the loudspeaker is properly fixed to
the ceiling meeting all the strongest safety regulations.
When the connections of the loudspeaker are made according to the
instructions described below, the cover can just be slided over the
connection and fixing parts.
Connecting
Following on this, the loudspeaker connections should be made. Depending
of the desired power tap, the corresponding wires of the 5-core connection
cable should be connected.
The connection cable colouring is:
COM - Black
20 Watt / 500 Ohm - Red
10 Watt / 1000 Ohm - Yellow
5 Watt / 2000 Ohm - Blue
2.5 Watt / 4000 Ohm - Green
The black core always needs to be connected to the COM amplifier
terminal while the other connected core should be selected according to
the desired power.
Page 4

4
Additional information
Technical specifications
RMS Power at 100 Volt 20 Watt
Line transformer power taps 20 Watt / 500 Ohm (Red)
10 Watt / 1000 Ohm (Yellow)
5 Watt / 2000 Ohm (Blue)
2.5 Watt / 4000 Ohm (Green)
Sensitivity (1W/1m) 92 dB
Max SPL (Max W / 1m) 104 dB
Frequency response 80 Hz - 18 kHz
Horizontal coverage 360°
Vertical coverage 150°
Connection cable 2 meter, 5 conductor with steel core
Driver 8” Full range
Construction ABS
Colour White
Weight 2.95 Kg
 Loading...