

Auber WS-1500DPMS User Manual

Guide for Controlling the Bradley Smoker
For Model WS-1500DPMS
Version 1.1
Auber Instruments
5755 North Point Parkway, Suite 99
Alpharetta, GA 30022
770-569-8420
www.auberins.com
May, 2013
Introduction
Thank you for purchasing the Auber WS series temperature controller. We sincerely
appreciate your decision and trust that our machine will meet your expectations in both the
quality of the result and the value of our product. While we are delighted that you may be
anxious to operate the controller for your project, a few minutes of your time reading through
this manual will only serve to enhance your experience in the months and years ahead. In
particular, we urge you to read through the safety warnings below. Although this
plug-and-play controller is very easy to operate, the process inv olves high temperature and
high wattage appliances, and your safety is paramount.
SAFETY WARNINGS
This controller is designed to be used only with devices that have limited power and
their own thermal cut off protection, such as a thermostat or thermal fuse in case of
controller failure.
Do not place any objects on the top of the controller surface as it is used to vent
excess heat during its operation.
The maximum electric current this controller can handle is 15 ampere. For 120 volt AC
in US and Canada, this limits the heater power to1800 watts. Due to its compact size
and the splash proof design for kitchen applications, the controller has a limited ability
to dissipate the heat generated by the internal solid state relay during the initial heat
up. The initial full power heat up process cannot be more than 90 minutes. If the
system needs a longer time to warm up, please read Appendix 1 “Managing the heat
generated by the controller”
Always place the sensor in the controlled subject when the controller is on. Before
turning on the controller, please make sure the sensor is placed inside the container
to be controlled. Leaving the sensor outside will form an open loop operation, and the
controller will assume the temperature is low even if the controlled subject is already
very hot. The controller will provide full power to the heater. It will not o nly overheat
the controller, but also damage your appliance, and possibly ev en cause a fire. If the
sensor is not permanently mounted on the system or is left it outside of the system,
you should enable the open loop alarm function.
The 16 AWG power cord provided with the controller is specially designed for high
power applications. Do not replace it with a regular computer power cord when the
heating device is more than 1200 watts.
If an abnormal display or noise is observed, turn the controller off, unplug the power
cord and contact the manufacturer before using it again.
Clean the controller only when it is cool and unplugged.
Do not allow children to operate the controller.
Operating Instructions
This guide is for using the temperature controller with the Bradley Smoker only. The
WS-1500DPMS controller can also be used for controlling any other house hold cooking
devices under 1800 watts (120VAC). For complete information on how to set up th e
controller for other applications, please read the WS-1500DPM manual
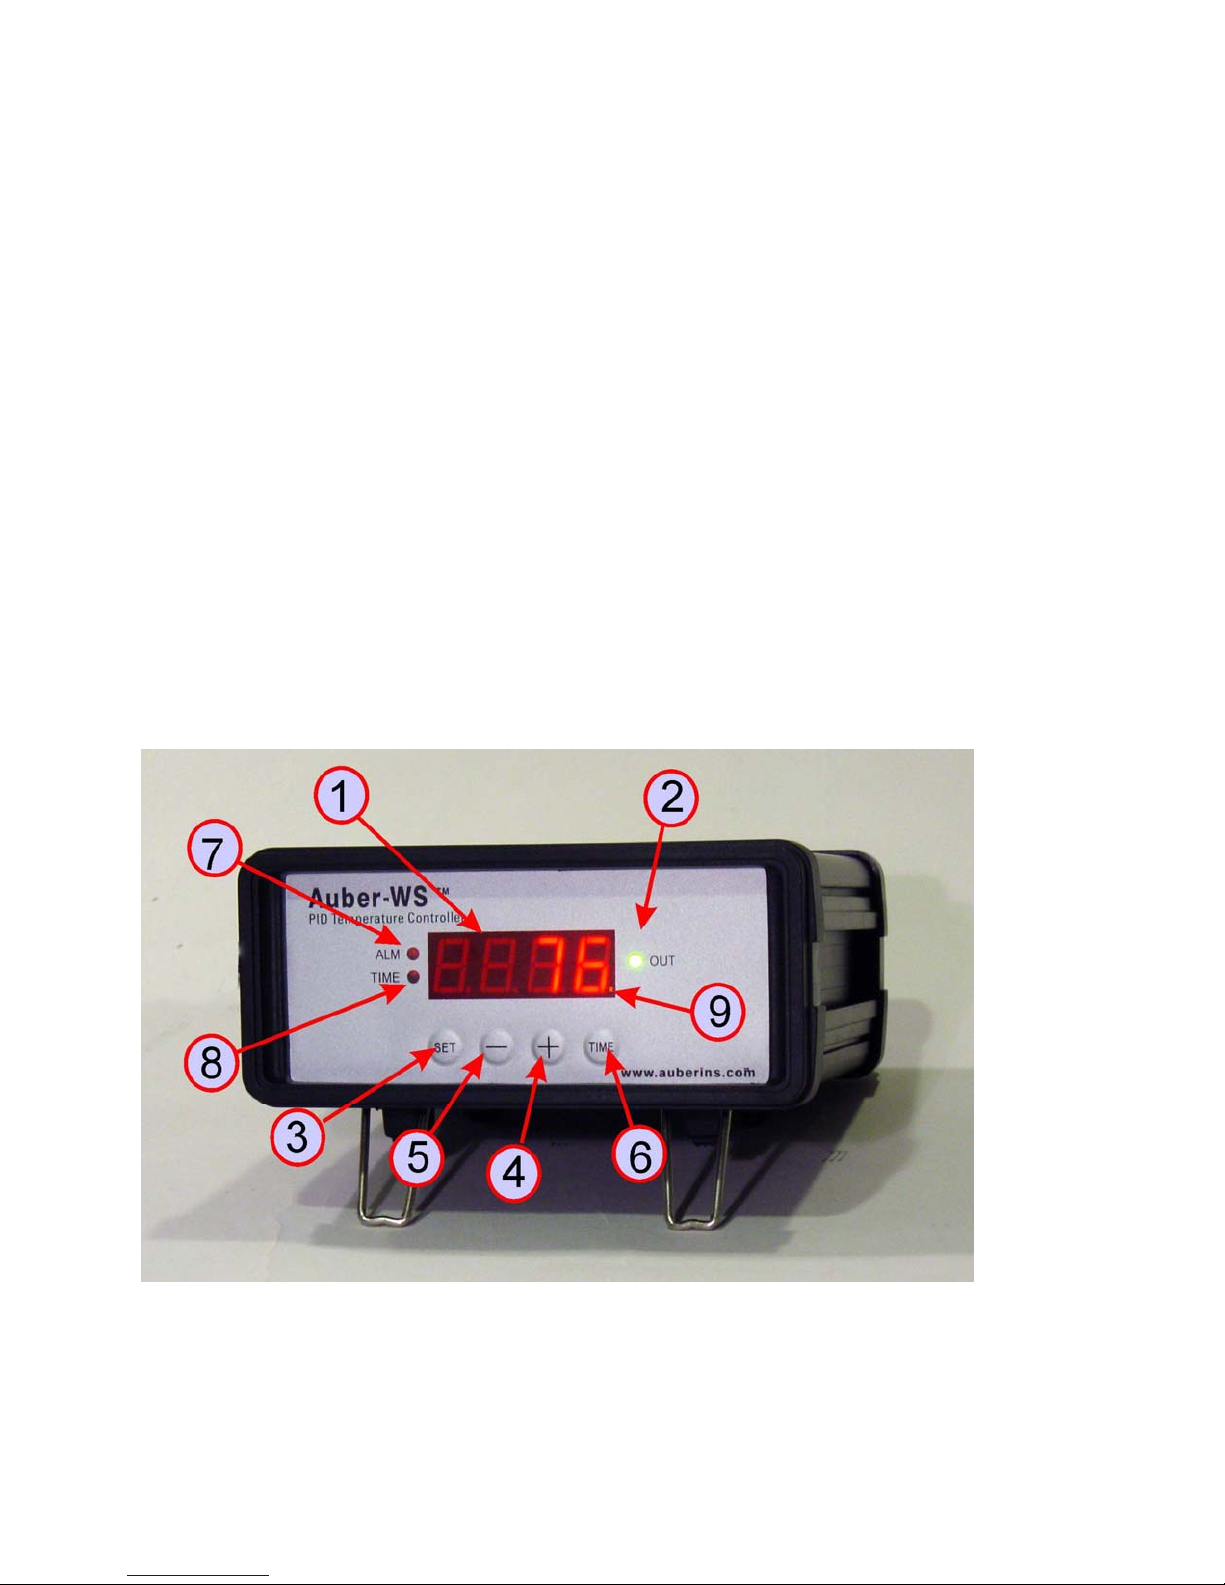
1) Description of the controller.
(1) Parameter Window (LED) - for displaying temperature values and controller's
system parameters.
Figure 1. Front Panel
(2) Output status indicator - In normal mode, this LED indicates the heat er status.
When it is on (lit), the heater is powered. When it is off, the heater power is off. When it is
flashing, it means the heater is on and off intermittently to reduce the power output. It
should be synchronized with the power light on the cooking devic e.
(3) SET Key - for showing current temperature settings, getting into parameters setting
mode and confirming various actions taken.
(4) “+” Key - To increment displayed value.
(5) “-“ Key - To decrement displayed value.
(6) Time Key - Change the Parameter Window b etween current timer and temperature
values, when pressed.
(7) Alarm indicator- Lit when the alarm is on.
(8) Timer status indicator
- In normal mode, When “(8)” is on and “(9)” is flashing, LED
shows the time passed at current program step.
(9) Mode indicator - the small “dot” is used to indicate what mode the controller is in.
When it is flashing and “(8)” stays on, “(1)” is the time that has elapsed at the
current program step.
When it is flashing “(8)” is off, the controller is in the parameter setting mode.
“(1)” is the value to can be changed by using (4) and (5) key.
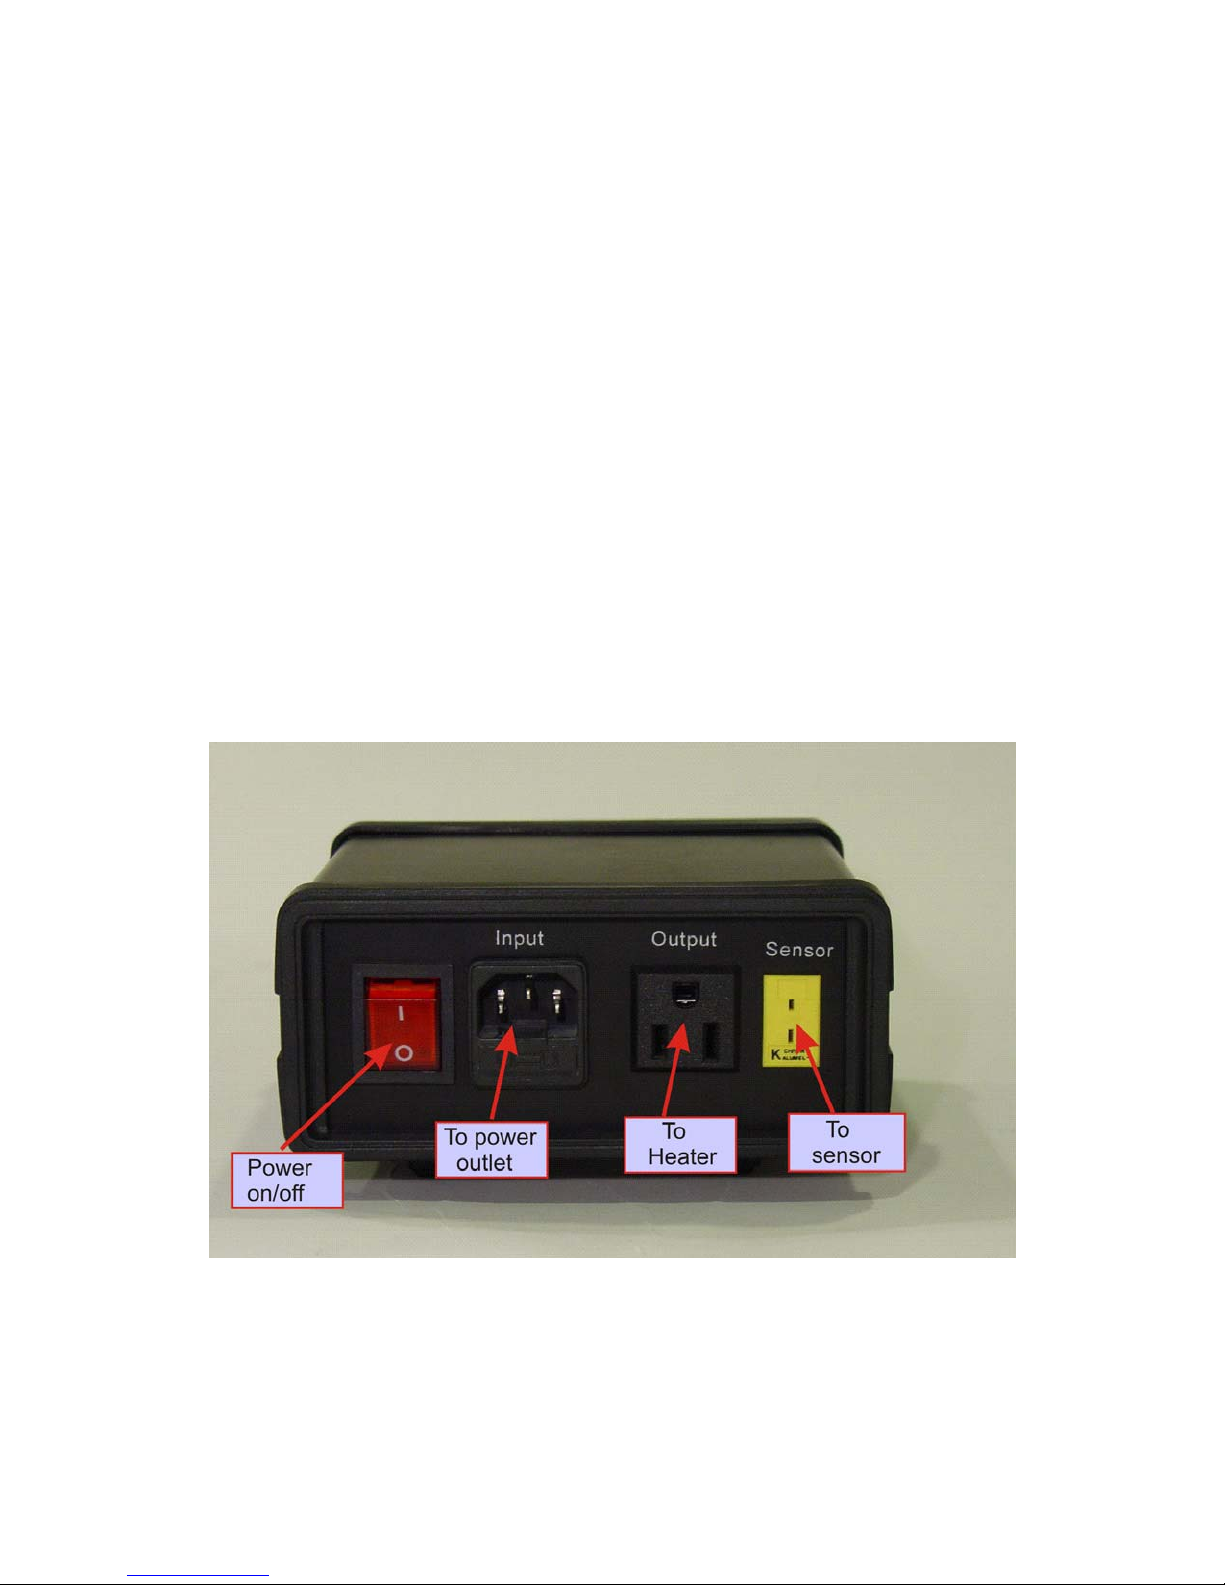
2) Connecting the controller
This set up is good for the “Original”, Stainless Steel, and Digital Bradley Smoker.
Figure 2. Back Panel
 Loading...