

Page 1

Operating Manual
USER'S INSTRUCTIONS
사 용 설 명 서사 용 설 명 서사 용 설 명 서
사 용 설 명 서
Vandal-proof Dome
High Resolution
DNR Day/Night
Color Camera
Rev.1
Page 2
In USA and Canada, Use Class 2 Power Supply Only
USER'S MANUAL
사 용 설 명 서
- 2 -
Page 3
사 용 설 명 서
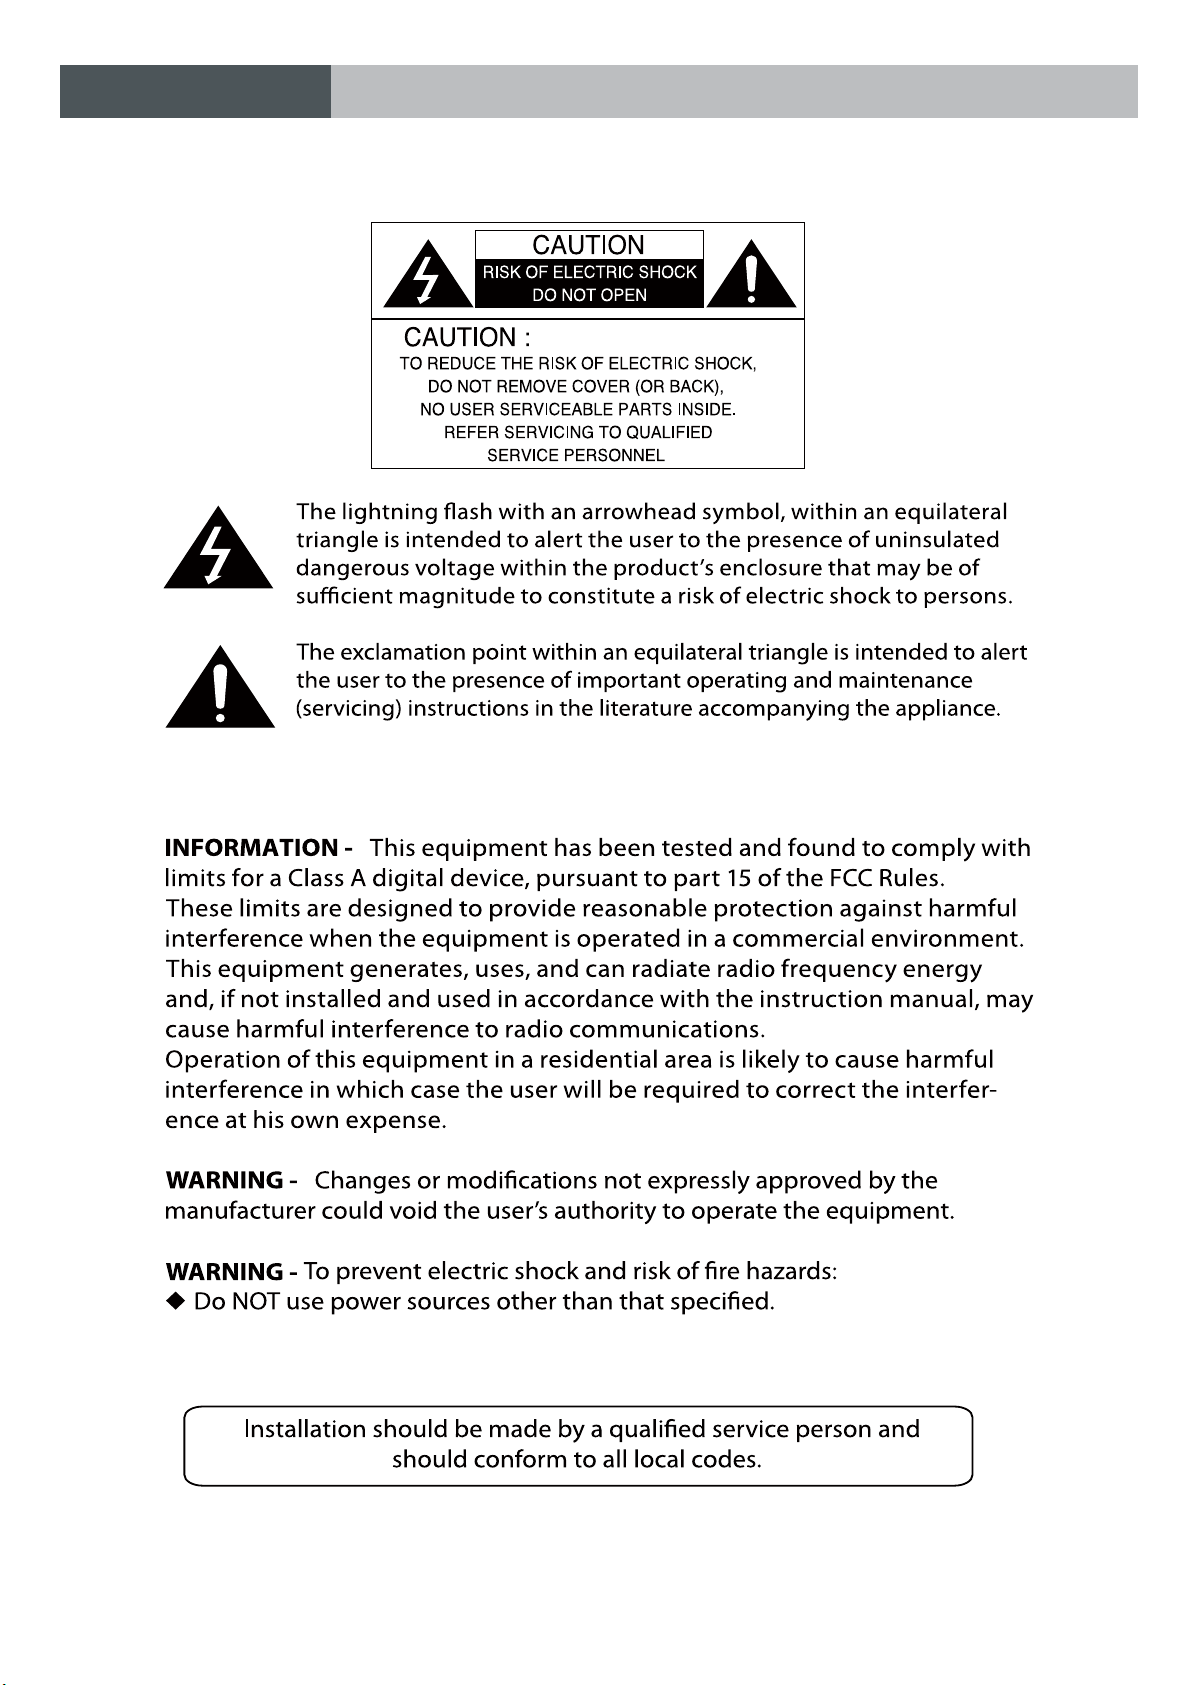
IMPORTANT SAFETY INSTRUCTIONS
1) Read the .snoitcurtsni es
2) Keep these instruct .snoi
3) Heed .sgninraw lla
4) Follow all instructions.
5) Do not use this apparatus nea .retaw r
6) Clean only with dry c .htol
7)
Do not block any ventilation openings. Install in accordance with the manufacturer’s instructions.
8) Do not install near any heat sources such as radiators, heat registers, stoves, or other
apparatus (including
amplifiers) that produce heat.
9) Do not defeat the safety purpose of the polarized or grounding-type plug. A polarized plug
has two blades with one wider than the other. A grounding type plug has two blades and a
third
grounding prong. The wide blade or the third prong are provided for your safety. If the provided
plug does not fit into your outlet. Consult an electrician for replacement of the obsolute outlet.
-
13 U )nplug this apparatus during lightning storms or when unused for long periods of time.
14 ot gnicivres lla refeR ) qualified service personnel. Servicing is required when the apparatus
has been damaged in any way, such as power-supply cord or plug is damaged, liquid has
been moisture, does not operate normally, or has been dropped.
10) Protect the power cord from being walked on or pinched particularly at plugs, conveniance
repeptacles, and the point where they exit from the apparatus.
Only use attachments/accessories specified by the manufacturer.
Use only with the cart, stand, tripod, bracket, or table specified by the manufacturer, or sold
with the apparatus. When a cart is used, use caution when moving the cart/apparatus combination
to avoid injury from tip-over.
11)
12)
USER'S MANUAL
- 3 -
Page 4

Contents
사 용 설 명 서USER'S MANUAL
Camera Features
Installing & Adjusting
Dimension & Specification
OSD Control Button
On Screen Dispaly (OSD) Menu
Menu Set Up
Lens
. . . . . . . . . . . . . . . . . . . . . . . . . . . . . . . . . . . . . . . . . . . . . . . . . . . . . . . . . . . . .
Exposure
White Bal
Day&Night
3DNR
Special
Adjust
. . . . . . . . . . . . . . . . . . . . . . . . . . . . . . . . . . . . . . . . . . . . . . . . . . . . . . . . . . . .
Reset
. . . . . . . . . . . . . . . . . . . . . . . . . . . . . . . . . . . . . . . . . . . . . . . . . . . . . . . .
. . . . . . . . . . . . . . . . . . . . . . . . . . . . . . . . . . . . . . . . . . . . . . . . . . . . . . . . . . .
. . . . . . . . . . . . . . . . . . . . . . . . . . . . . . . . . . . . . . . . . . . . . . . . . . . . . . . . . . .
. . . . . . . . . . . . . . . . . . . . . . . . . . . . . . . . . . . . . . . . . . . . . . . . . . . . . . . . .
. . . . . . . . . . . . . . . . . . . . . . . . . . . . . . . . . . . . . . . . . . . . . . . . . . . . . . . . . . . .
. . . . . . . . . . . . . . . . . . . . . . . . . . . . . . . . . . . . . . . . . . . . . . . . . . .
. . . . . . . . . . . . . . . . . . . . . . . . . . . . . . . . . . . . . . . . . . . . . . . .
. . . . . . . . . . . . . . . . . . . . . . . . . . . . . . . . . . . . . . . . . . . . .
. . . . . . . . . . . . . . . . . . . . . . . . . . . . . . . . . . . . . . . . . . . . . . . . .
. . . . . . . . . . . . . . . . . . . . . . . . . . . . . . . . . . . . . . .
. . . . . . . . . . . . . . . . . . . . . . . . . . . . . . . . . . . . . . . . . . . . . . . . . . . . . .
. . . . . . . . . . . . . . . . . . . . . . . . . . . . . . . . . . . . . . . . . . . . . . . . . . . . . .
5
6
7
8
9
10
11
12
15
17
18
19
24
24
Exit
. . . . . . . . . . . . . . . . . . . . . . . . . . . . . . . . . . . . . . . . . . . . . . . . . . . . . . . . . . . . .
Trouble Shooting
. . . . . . . . . . . . . . . . . . . . . . . . . . . . . . . . . . . . . . . . . . . . . . . . . . .
24
25
- 4 -
Page 5

USER'S MANUAL
사 용 설 명 서
Camera Features
●
700TV Lines
The combination of a 960H CCD image sensor and New DSP provides an excellent resolution
of 700TV Lines.
●
3D-DNR
Smart 3DNR prevents the image blurring of moving object and activates only if moving objects
are appearing on the scene.
●
DIS(Digital Image Stabilizer) Function
Stabilizes the picture and increases clarity when small amounts of motion due to wind or
climate change may cause the picture to appear out of focus.
●
Smart-IR
The "New DSP" provides a vivid image in darkness due to the control of the IR illumination
sensitivity. The image is never saturated because of close objects.
●
Sens-Up
Despite a limited & low light condition, Sens-Up - Max. x256 helps the viewer to get visible
and clear images.
●
Defog
The "Defog" function improves image clarity in poor conditions such as fog, smoke, rain or
snow.
●
OSD Menu
The On-Screen-Display Menu provides easy control and setting of all functions available in the
set-up of the camera.
- 5 -
Page 6
Þ\GGGG[GOPt[GtGGG[GOP
USER'S MANUAL
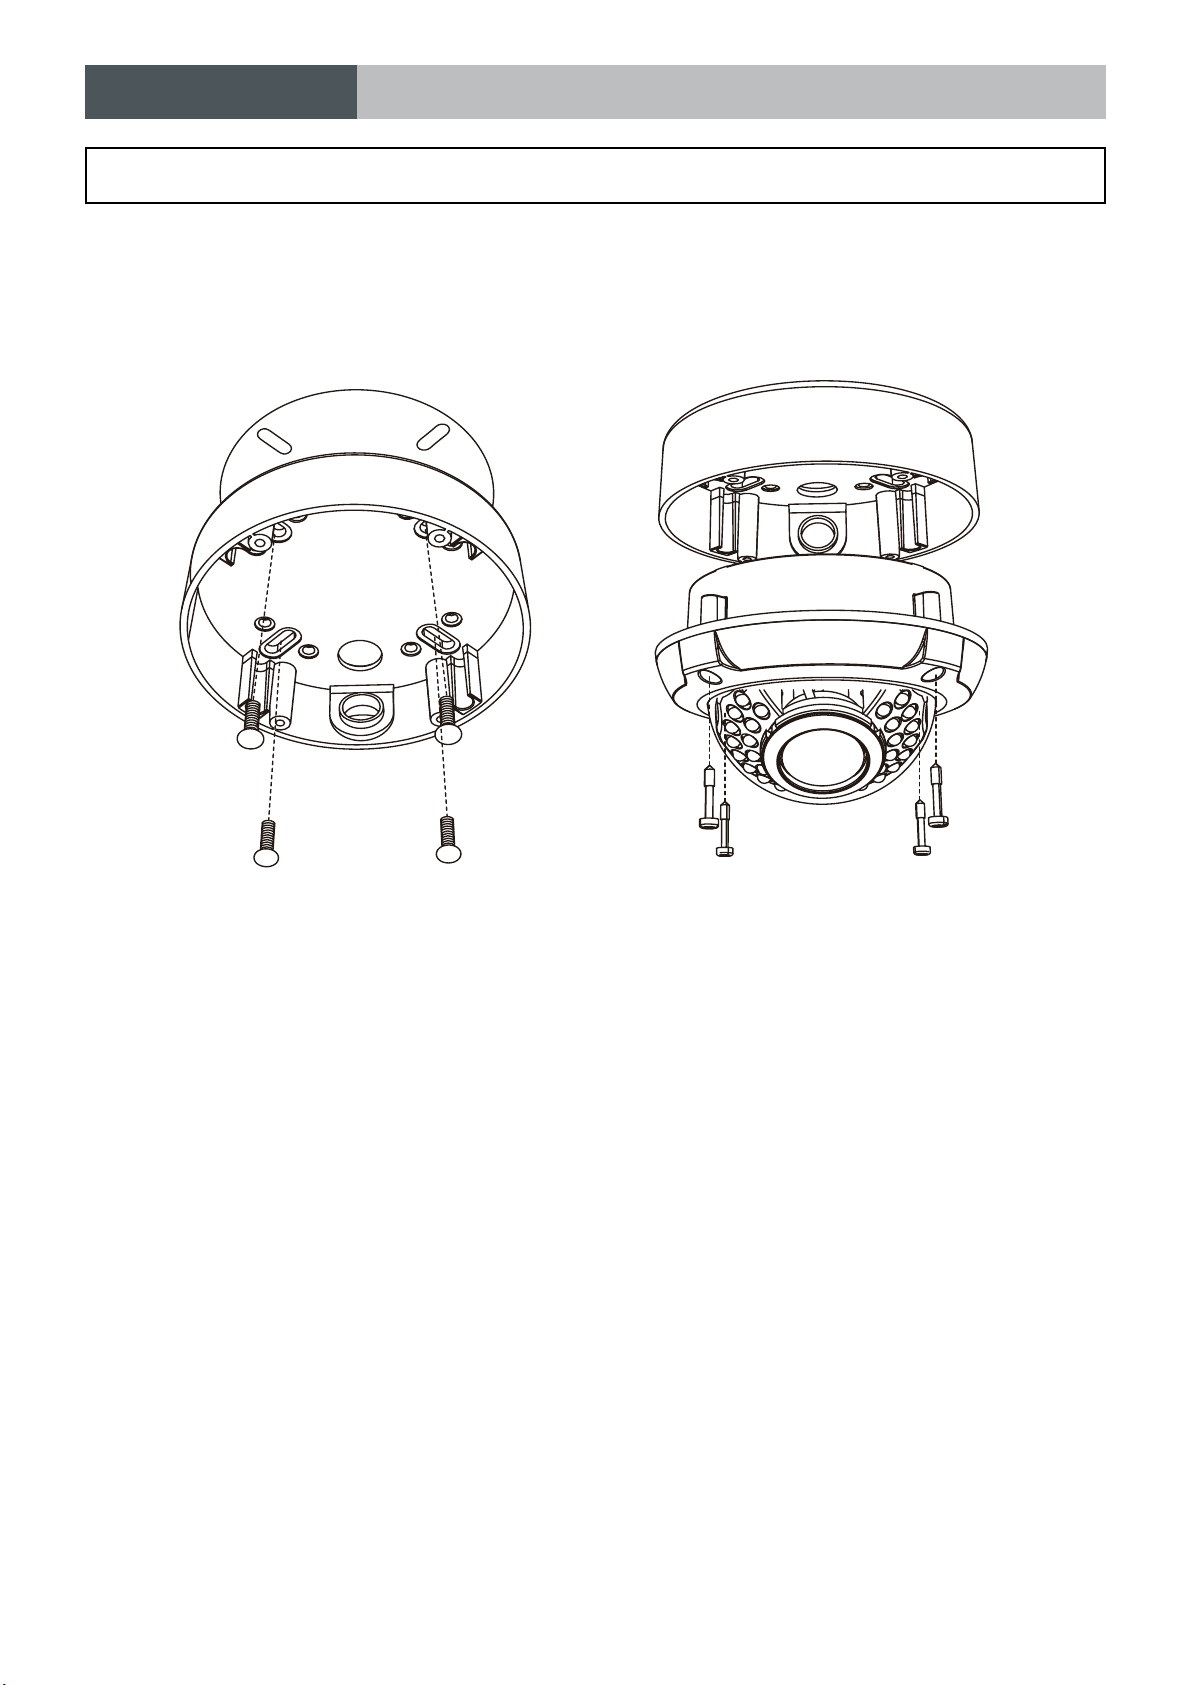
1. Installation
사 용 설 명 서
Installing & Components
- Afx the mounting template to the mounting surface.
- Using the L-wrench provied, remove 4 screws and separate the dome cover.
- Drill holes in the celling by matching the holes in the case bed. Fix the case bed on the ceilling by
using tapping screws.
- Pass the power and video cable through the access hole and connect to the camera before mounting
the camera to the base.
- Position and focus the camera to a desired direction and assemble the dome cover to the mounting
base with machine screws using the L wrench provided.
2. Components
● CAMERA 1piece ● Instruction Manual 1piece ● Mounting Template 1piece
● Service Monitor Cable 1pieces ● Tapping Screw 4pieces ● L-wrench 1piece
- 6 -
Page 7
Dimension Connection
Sensor type
Effective pixels
Total pixels
Resolution
Scanning system
Min. illumination
Video Output
S/N Ratio
AGC
Sens-UP
Backlight Compensation
D-WDR
Motion Detection
Privacy Masking
DIS(Digital Image Stabilizer)
Day & Night
White Balance
3DNR(2D or 3D)
Mirror
D-ZOOM
SMART DZOOM
DEFOG
Power Supply
Power Consumption
Lens
Storage Temperature
Operating Temperature
Dimension(W x H x D)
Weight
1/3" Sony 960H CCD
976 (H) X 494 (V) approx. 480K pixels (NTSC)
976 (H) X 582 (V) approx. 570K pixels (PAL)
1020 (H) X 508 (V) approx. 520K pixels (NTSC)
1020 (H) X 596 (V) approx. 610K pixels (PAL)
700TV Lines
2:1 Interlace
0Lux(IR LED ON)
1.0Vp-p Composite. 75 Ohms
52dB
Low / Middle / High
OFF/AUTO (X2 ~ X256)
OFF/BLC/HLC
OFF/INDOOR/OUTDOOR
4 Zone
8 Zone
OFF/ON
Auto(AGC)/Day/Night/Ext
ATW/AWB/AWC->SET/Manual(1,800K ~ 11,000K)
1 ~ 200 Level Selectable
H-Rev / V-Rev / ROTATE/PIP
X32
OFF/ON
OFF/MANUAL/AUTO
DC 12V/AC 24V Dual Voltage
Dome : DC12V 220mA, HEATER ON : 400mA / AC24V 105mA, HEATER ON : 170mA
IR LED Dome : IR LED ON : DC12V 650mA, HEATER ON : 860mA / AC24V 270mA, HEATER ON : 650mA
DC Auto Iris Varifocal Lens(2.8mm-12mm)
IR Distance
Max 30M(IR LED 33pieces)
-35º ~ +60º Deg C. RH95% MAX.
-20º ~ +60º Deg C. RH95% MAX.
146mm(W) * 105mm(H) * 146mm(D)
1500g
1. Dimension & Connection
Dimension & Specication
사 용 설 명 서
USER'S MANUAL
2. Specication
- 7 -
Page 8
TEMP.
SENSOR
HEAT E R
HEAT E R
SETUP
VIDEO
IR LED
VOLUME
UP
FRONT
DOWN
LEFT
USER'S MANUAL
사 용 설 명 서
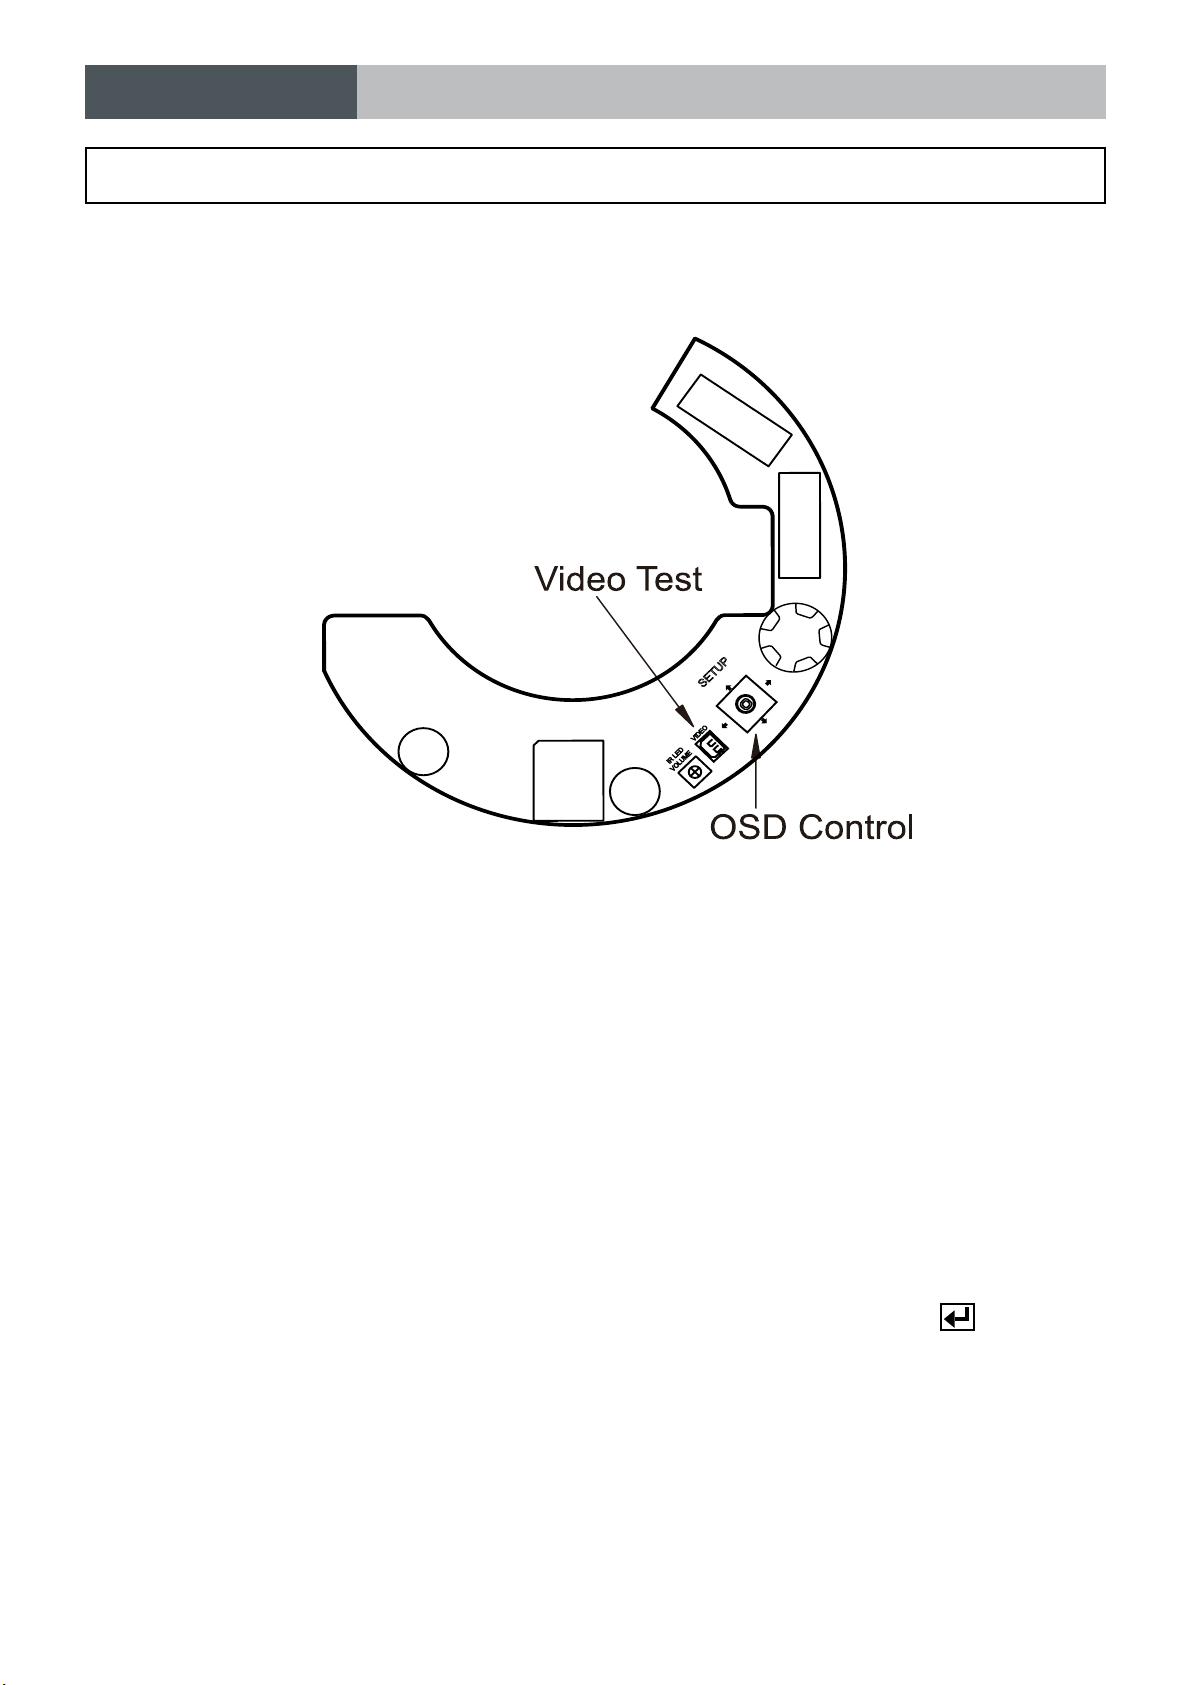
OSD Control Button
1. The OSD Button is a mini-joy stick control switch used to navigate the OSD Menu.
▲ Up switch : Moves the cursor upwards. Use this button to select an item or adjust the parameters.
▼ Down switch : Moves the cursor downwards. Use this button to select an item or adjust the
parameters.
◀
Left switch : Moves the cursor to the left. Use this button to select or adjust the parameters of the
selected item. The parameter changes each time this button is pressed.
▶
Right switch : Moves the cursor to the right. Use this button to select or adjust the parameters of
the selectd item. The parameter changes each time this button is pressed.
◎
Set switch (Push) : Executes selections and displays a submenu for an item with the
mark.
- 8 -
Page 9

사 용 설 명 서
USER'S MANUAL
On Screen Display (OSD) Menu
On Screen Display (OSD) Menu
Camera functions and settings can be adjusted or changed by activating the OSD menu.
When the OSD menu is activated text will display on the monitor. The user can then move the cursor to
the desired function to change the setting.
SETUP Menu
LENS
EXPOSURE
WHITE BALANCE
DAY/NIGHT
3DNR
SPECIAL
ADJUST
● DC
● SHUTTER
● BLC
● ATW
● MANUAL
● COLOR
● EXT
● OFF
● CAM TITLE
● PRIVACY
● RETURN
● SHARPNESS
● MANUAL
● AGC
● D-WDR
● AWB
● B/W
● ON
● D-EFFECT
● DEFECT
● MONITOR
● SENS-UP
● RETURN
● AWC-->SET
● AUTO
● MOTION
● DEFOG
RESET
EXIT
● FACTORY
● RETURN
- 9 -
Page 10

USER'S MANUAL
Menu Set Up
Menu setting can be selected by the OSD Control switch inside the camera.
1. Press the set switch.
* The Set Up menu will be displayed on the monitor.
SETUP
사 용 설 명 서
LENS
EXPOSURE
WHITE BAL
DAY&NIGHT
3DNR
SPECIAL
ADJUST
RESET
EXIT
DCAUTO
ATW
COLOR
ON
2. Move and select the required function using the Up and Down switch.
* Move the triangular indicator Up or Down to select the desired feature by moving
the switch Up or Down.
SETUP
LENS
EXPOSURE
WHITE BAL
DAY&NIGHT
3DNR
SPECIAL
ADJUST
RESET
EXIT
DCAUTO
ATW
COLOR
ON
- 10 -
Page 11

3. Change menu settings using the Left or Right switch.
* Available values or Status are displayed by moving the switch Left or Right.
Continue to press the switch until desired value / status is displayed.
4. After Changing the setting move the arrow indicator to EXIT and press SET to EXIT.
NOTE
* Move to the available submenu by moving arrow to desired feature.
* Submenu is not available when this symbol is displayed “---“.
사 용 설 명 서
USER'S MANUAL
Lens
This function is to adjust the brightness of the scene.
1. Move the triangular indicator to LENS on the Set Up menu screen.
2. Select the desired lens type by moving the switch Left or Right.
SETUP
LENS
EXPOSURE
WHITE BAL
DAY&NIGHT
3DNR
SPECIAL
ADJUST
RESET
EXIT
DCAUTO
ATW
COLOR
ON
- 11 -
Page 12

USER'S MANUAL
NOTE
* When DC is selected, the brightness control range is 1~100.
사 용 설 명 서
DC LENS
BRIGHTNESS
MODE
RETURN
* When you select the mode setup, you can select INDOOR or OUTDOOR depending on the
installation environment.
Exposure
1. In the Set Up menu, Select EXPOSURE.
SETUP
LENS
EXPOSURE
WHITE BAL
DAY&NIGHT
3DNR
SPECIAL
ADJUST
RESET
EXIT
IIIIIIIIII IIIIIIIIII|
DC
ATW
COLOR
ON
50
INDOOR
RET
2. Select the desired shutter mode by moving the switch Left or Right.
EXPOSURE
SHUTTER
AGC
SENSE-UP
BLC
D-WDR
RETURN
AUTO
MID
AUTO
OFF
OFF
RET
- 12 -
Page 13

사 용 설 명 서
USER'S MANUAL
◆ Electronic Shutter : DC lens default is 1/60 and the manual lens default is "Auto Shutter", but the
shutter speed can be adjusted from 1/60 to 1/100,000.
→ DIS (Digital Image Stabilizer) : Select the DIS mode when the image appears to have slight movement
due to weather or nearby vibrations. Sense Up mode is disabled when DIS mode is active.
◆ AGC (Auto Gain Control) : The higher the AGC level is, the more noises is introduced into the picture.
→ Off : Deactivated.
→ Low : 28dB Gain is applied.
→ Mid : 32dB Gain is applied.
→ High : 36dB Gain is applied.
NOTE
* Sense-Up mode is disabled when Electronic shutter is selected as Manual or DIS.
◆ Sense-Up : A usable image can be displayed in low light conditions when set to "Auto".
→ Off : Deactivated status.
→ Auto : Sense-Up auto mode status, The degree of brightness is decided by the Sense Up setting value
in the low light condition.
SENSE-UP
SENSE-UP
RETURN
x32
RET
NOTE
* Sense Up mode is disabled when AGC mode is set to "Off".
- 13 -
Page 14

사 용 설 명 서USER'S MANUAL
◆ BLC (Back Light Compensation) : The camera with 3D-DNR provides the intelligent light level control to
overcome strong backlight conditions.
→ Off : Deactivated status.
→ BLC : Select the area of interest and then set the value of the desired amount of compensation.
BLC
VALUE
AREA
DEFAULT
RETURN
MIDDLE
RET
→ HSBLC (Highlight Suppression Back Light Compensation) : Small areas of very bright lights can be
suppressed so that information in the darker areas of the image can be identified, i.e. car headlights.
HSBLC
GAIN
MODE
DEFAULT
RETURN
IIIIIIIIII IIIIIIIIII|
8
ALL DAY
RET
Nomarl
HSBLC
- 14 -
Page 15

사 용 설 명 서USER'S MANUAL
◆ D-WDR : This camera which is using 3D-DNR DSP provides intelligent light level control in a Wide
Dynamic Range to overcome even strong backlight conditions.
→ Off : Deactivated status.
→ Indoor compensation : Used when the camera is installed indoors.
→ Outdoor compensation : Used when the camera is installed outdoors.
WDR OFF WDR ON
◆ Return : Every function is set up at the EXPOSURE menu, and then return to the previous menu.
White Balance
The White Balance options may be set for best color rendition. ATW is the recommended setting.
1. Move the cursor to WHITE BAL on the SETUP menu screen.
2. Select the desired mode by moving the joystick left or right.
SETUP
LENS
EXPOSURE
WHITE BAL
DAY&NIGHT
3DNR
SPECIAL
ADJUST
RESET
EXIT
DC
ATW
COLOR
ON
- 15 -
Page 16

사 용 설 명 서USER'S MANUAL
Three white balance modes are available to choose from plus manual.
◆ ATW : Use this mode when the color temperature is from 1,800K to 10,500K.
◆ AWB : This mode is for interior white balance to match ambient lighting. This mode can be used when
the color temperature is from 3,000K to 7,000K.
◆ AWC→SET(Use for well controlled lighting conditions) : After letting camera focus on a blank white
paper to current lighting environment, press the SET button. If the lighting condition changes,
Re-adjustment will be needed.
◆ MANUAL : Manual compensation makes more detailed control possible. First, after setting the
white balance using the ATW or AWB mode, change the mode to manual mode and then press Set
button. While looking at the screen make the necessary adjustments to the Blue and Red values. Select
return when finished.
MANUAL WB
BLUE
RED
RETURN
IIIIIIIIII IIIIIIIIII|
IIIIIIII IIIIIIIIIIII|
31
20
RET
NOTE
The White Balance may not work properly in the following conditions.
* When there is a very high color temperature in the scene.
( for example, clear sky, Sunset)
*▶It is very dark.
*▶If fluorescent light is directly in the scene or if there is a drastic lighting change, The
operation of White balance may become unstable.
- 16 -
Page 17

Day&Night
1. Select Day&Night on the Set Up menu screen.
2. Select the desired mode by moving the joystick left or right.
SETUP
사 용 설 명 서
USER'S MANUAL
LENS
EXPOSURE
WHITE BAL
DAY&NIGHT
3DNR
SPECIAL
ADJUST
RESET
EXIT
DC
ATW
COLOR
ON
◆ COLOR : Making the video output color always.
◆ B / W : Making the video output B/W always. (The color burst will also be disabled.)
DAY&NIGHT B/W
BURST
IR SMART
RETURN
OFF
ON
RET
◆ Auto : Automatically, selects color mode in the bright environment and the B/W mode in low light
conditions. Adjust the delay time, starting brightness and end brightness according to the
ambient conditions by pressing the Set button.
DAY&NIGHT AUTO
DELAY
D → N(AGC)
N → D(AGC)
RETURN
IIII IIIIIIIIIIIIIIII|
IIIIIIII IIIIIIIIIIII|
IIIIIIIIII IIIIIIIIII|
5
60
20
RET
- 17 -
Page 18

사 용 설 명 서USER'S MANUAL
◆ EXT : This external contact to ground will change the mode from color to B/W.
3DNR
Using the 3D DNR feature of the DSP chip set will reduce the background video noise in low light
conditions.
1. Move the cursor to 3DNR.
2. Select the mode by moving the joystick left or right.
SETUP
LENS
EXPOSURE
WHITE BAL
DAY&NIGHT
3DNR
SPECIAL
ADJUST
RESET
EXIT
DC
ATW
COLOR
ON
3. Off : Deactivated status.
On : Adjust the 3D DNR level for best reduction of noise in a low light scene.
3DNR
LEVEL
RETURN
IIIIIIIIII IIIIIIIIII|
200
RET
NOTE
* If 3DNR function is used, the cancellation effect of noise is excellent. The higher the
compensation, the better the effect of noise cancellation is, but the ghost effect may occur.
- 18 -
Page 19

Special
The Special section of the Setup Menu contains seven different functions.
1.When the SETUP menu is displayed, select SPECIAL.
2. Select one of the functions by moving the cursor up or down.
SETUP
사 용 설 명 서USER'S MANUAL
LENS
EXPOSURE
WHITE BAL
DAY&NIGHT
3DNR
SPECIAL
ADJUST
RESET
EXIT
SPECIAL
CAM TITLE
D-EFFECT
MOTION
PRIVACY
SYNC
DEFECT
DEFOG
RETURN
DC
ATW
COLOR
ON
OFF
OFF
OFF
L/L
OFF
RET
◆ CAM (Camera) TITLE : Up to 15 alpha numeric characters can be selected for on-screen title display.
Use the cursor to select and position the characters, when finished select "END".
CAM TITLE
0 1 2 3 4 5 6 7 8 9
A B C D E F G H I J K
L M N O P Q R S T U V
W X Y Z ▶ → ← ↑↓ ( )
α - _ ■ / = & : , .
← → CLR POS END
CAMERA 001
_ _ _ _ _ _ _ _ _ _ _ _ _ _ _
- 19 -
Page 20

NOTE
* To erase a letter, move the cursor on the empty space in front of the number 0, and then
letters will be erased by pressing the Set button one by one. Move the cursor on the
“CLR”, press the Set button and all the letters will be erased.
◆ D-EFFECT : The camera is always given the video image effect by this function.
D-EFFECT
사 용 설 명 서USER'S MANUAL
FREEZE
MIRROR
D-ZOOM
SMART DZOOM
DIS
NEG.IMAGE
RETURN
OFF
OFF
- - OFF
- - OFF
RET
→ FREEZE : The image of the monitor is paused temporarily by this function.
→ MIRROR : The image of the monitor is reversed vertically or horizontally.
→ D-Zoom : Digital zoom with x1 ~ x32 magnification.
The higher the digital zoom magnification, the lower the resolution.
D-ZOOM
RANGE
PAN
TILT
RETURN
IIIIIIIIII IIIIIIIIII|
IIIIIIIIII IIIIIIIIII|
x2.0
0
0
RET
- 20 -
Page 21

사 용 설 명 서USER'S MANUAL
NOTE
* When using the digital zoom, SMART DZOOM and DIS cannot be used.
→ SMART DZOOM : This function is interlocked with Digital-Zoom to distinguish a specific object in more
detail when there is a movement detected in a certain area. An extra sensitivity function is used to
detect motions. This function works more effectively with the optical zoom
→ DIS (Digital Image Stabilizer) : DIS offers to compensate the ghost effect of an image and gives a clear
image in a low light condition.
DIS OFF DIS ON
→ NEG. IMAGE
- On : Negative image.
- Off : Normal image.
→ Return : Save the digital zoom setting, then return to the SPECIAL menu.
- 21 -
Page 22

USER'S MANUAL
사 용 설 명 서
◆ MOTION : This can detect the movement of a subject and you can see the moving image of the subject on
the monitor when the camera detects it. In the state of Motion Detection On, a new submenu below
appears when you press the Set button.
MOTION
AREA
AREA DISPLAY
VALUE
MOTION VIEW
RETURN
IIIIIIIIIIIIIIII IIII|
1
ON
80
OFF
RET
- Area : Youcan designate areas up to a maximum of 4.
- AREA DISPLAY : After the selection of an area, the area screen should be activated On to use the motion
detection function in a designated area. When this is activated, you can select the location and size of
area coverage.
- VALUE (Sensitivity) : The higher the setting value, the higher the sensitivity.
- Motion View : If the camera detects a motion, the words “Motion Detection” appears on the
monitor.
- Return : Save the setting value of this menu, return to the SPECIAL menu.
◆ PRIVACY : This is used to hide certain areas on the monitor. You can designate up to 8 different areas.
The size of a designated area can be adjusted. The color of a privacy area can be selected from 15 colors.
When you select the return, the setting values in this function menu are saved.
PRIVACY
AREA
AREA DISPLAY
COLOR
TRANSPAR
RETURN
IIIIIIIIIIIIIIIIIIII|
IIIIIIIIIIIIIIIIIIII|
4
ON
8
3
RET
◆ SYNC : In areas where the supply is at 60Hz(NTSC), 50Hz(PAL), phase synchronization can be set using
the power synchronization function (Line-Lock)
- INT : Internal Synchronization Type.
- L/L : Power Synchronization Type, Line-lock(AC24V Power).
* Press the Function Setup switch.
* Select a desired phase from 0 to 359 when select 'phase'.
- 22 -
Page 23

NOTE
* When using AC power at 60Hz(NTSC), 50Hz(PAL), frequency, you can use the L/L type
synchronization.
* When the power is DC 12V, the SYNC menu is fixed to the 'INT' mode.
◆ DEFECT : You can eliminate white spots (defect) up to max.512 points.
DEFECT
사 용 설 명 서
USER'S MANUAL
SENSE UP
DIFF
THRESHOLD
START
RETURN
IIIIIIIIIIIIIIIIIIII|
IIIIII IIIIIIIIIIIIII|
x32
1
2
RET
- Sense Up : To eliminate defect, set the high level of Sense Up. You can set to max. 64x, but 32x is the
best setting value to eliminate defect.
- DIFF : You can set the size of DEFECT from 0 to 3.
- THRESHOLD
- START : Press Set button on the “<▶” mark, It will start to eliminate defects “PROCESSING NOW…”
will be displayed on the monitor.
- Return : Save the setting value of this menu, return to the SPECIAL menu.
◆ DEFOG : This function helps to recognize the object in a foggy or dusty weather condition.
DEFOG OFF DEFOG ON
◆ Return : Save the setting value and get out of the current menu.
- 23 -
Page 24

USER'S MANUAL
Adjust
This function is needed to control the brightness of the monitor.
1. When the Set UP menu is displayed, select ADJUST using the Up and Down button.
2. Select the desired mode by using Up or Down button.
SETUP
사 용 설 명 서
LENS
EXPOSURE
WHITE BAL
DAY&NIGHT
ADJUST
3DNR
SHARPNESS
SPECIAL
MONITOR
ADJUST
RETURN
RESET
EXIT
◆ Sharpness : The outline of an image becomes sharp and more distinct as the level of sharpness increases.
◆ Monitor : Change the setting value which is suitable for the monitor.
→ LCD : Select this when you use the LCD monitor.
(You can adjust the Gamma, Level, Blue& Red Gain on the submenu)
→ CRT : Select this when you use the CRT monitor.
(You can adjust the Level, Blue & Red Gain on the submenu)
→ USER : If you use a monitor with poor contrast, use the submenu and adjust the Gamma, Level, Blue &
Red Gain.
DC
ATW
COLOR
ON
IIIIIIIIII IIIIIIIIII|
25
LCD
RET
Reset
The camera is set to the Factory Default value.
Exit
Press the Set button in the exit menu to save the current settings and exit the Set Up menu.
- 24 -
Page 25

■ Trouble Shooting
사 용 설 명 서
USER'S MANUAL
- 25 -
Page 26

사 용 설 명 서
USER'S MANUAL
Page 27

사 용 설 명 서USER'S MANUAL
Page 28

사 용 설 명 서
 Loading...