

Page 1

Mini Strip Covert Camera
Please read this manual thoroughly before use, and keep it handy for future reference.
Design and specifications are subject to change without notice.
Page 2
WARNINGS AND CAUTIONS:
TO REDUCE THE RISK OF FIRE OR ELECTRIC SHOCK, DO NOT EXPOSE THIS PRODUCT TO RAIN OR
MOISTURE. DO NOT INSERT ANY METALLIC OBJECTS THROUGH THE VENTILATION GRILLS OR
OTHER OPENINGS ON THE EQUIPMENT.
CAUTION:
CAUTIONCAUTION
CAUTION: TO REDUCE THE RISK OF ELECTRIC SHOCK,
DO NOT REMOVE COVER(OR BACK).
NO USER-SERVICEABLE PARTS INSIDE.
REFER SERVICING TO QUALIFIED SERVICE PERSONNEL.
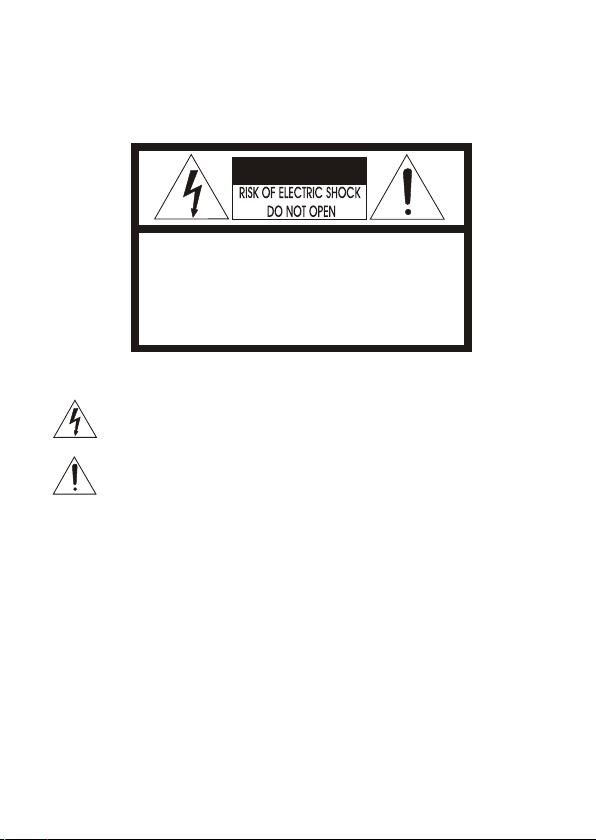
EXPLANATION OF GRAPHICAL SYMBOLS
The lightning flash with arrowhead symbol, within an equilateral triangle, is
intended to alert the user to the presence of uninsulated "dangerous voltage"
within the product's enclosure that may be of sufficient magnitude to constitute a
risk of electric shock to persons.
The exclamation point within an equilateral triangle is intended to alert the user to
the presence of important operating and maintenance (servicing) instructions in the
literature accompanying the product.
PRECAUTIONS
Installation -----------------------------------
Do not install the unit in an extremely hot or humid place or in a place subject to excessive dust.
Cleaning --------------------------------------
Clean the unit with a slightly damp soft cloth.
Use a mild household detergent. Never use strong solvents such as thinner or benzine as
they might damage the finish of the unit.
Retain the original carton and packing materials for safe transport of this unit in the future.
- ii -
Page 3
FCC COMPLIANCE STATEMENT
FCC INFORMATION : THIS EQUIPMENT HAS BEEN TESTED
AND FOUND TO COMPLY WITH THE LIMITS FOR A CLASS A DIGITAL
DEVICE, PURSUANT TO PART 15 OF THE FCC RULES. THESE
LIMITS ARE DESIGNED TO PROVIDE REASONABLE PROTECTION
AGAINST HARMFUL INTERFERENCE WHEN THE EQUIPMENT IS
OPERATED IN A COMMERCIAL ENVIRONMENT. THIS EQUIPMENT
GENERATES, USES, AND CAN RADIATE RADIO FREQUENCY
ENERGY AND IF NOT INSTALLED AND USED IN ACCORDANCE WITH
THE INSTRUCTION MANUAL, MAY CAUSE HARMFUL INTERFERENCE
TO RADIO COMMUNICATIONS. OPERATION OF THIS EQUIPMENT IN
A RESIDENTIAL AREA IS LIKELY TO CAUSE HARMFUL
INTERFERENCE IN WHICH CASE THE USER WILL BE REQUIRED TO
CORRECT THE INTERFERENCE AT HIS OWN EXPENSE.
CAUTION : CHANGES OR MODIFICATIONS NOT EXPRESSLY
APPROVED BY THE PARTY RESPONSIBLE FOR COMPLIANCE
COULD VOID THE USER'S AUTHORITY TO OPERATE THE EQUIPMENT.
THIS CLASS A DIGITAL APPARATUS COMPLIES WITH CANADIAN
ICES-003.
NORME NMB-003 DU CANADA.
CE COMPLIANCE STATEMENT
WARNING
THIS IS A CLASS A PRODUCT. IN A DOMESTIC ENVIRONMENT THIS
PRODUCT MAY CAUSE RADIO INTERFERENCE IN WHICH CASE
THE USER MAY BE REQUIRED TO TAKE ADEQUATE MEASURES.
- iii -
Page 4
IMPORTANT SAFEGUARDS
1. Read these instructions.
2. Keep these instructions.
3. Heed all warnings.
4 . Follow all instructions.
5. Do not use this apparatus near water.
6. Clean only with dry cloth.
7. Do not block any ventilation openings. Install in accordance with the
manufacturer's instructions.
8. Do not install near any heat sources such as radiators, heat registers,
stoves, or other apparatus (including amplifiers) that produce heat.
9. Do not defeat the safety purpose of the polarized or grounding-type
plug. A po la ri ze d pl ug h as t wo b la de s wi th o ne w id er t ha n th e ot he r.
A gr ou nd in g ty pe p lu g ha s tw o bl ad es a nd a t hi rd g ro un di ng p ro ng .
The w id e bl ad e or t he t hi rd p ro ng a re p ro vi de d fo r yo ur s af et y. If t he
provided plug does not fit into your outlet, consult an electrician for
replacement of the obsolete outlet.
10.Protect the power cord from being walked on or pinched particularly
at plugs, convenience receptacles, and the point where they exit from
the apparatus.
11. On ly u se a tt ac hm en ts /a cc es so ri es s pe ci fi ed b y th e ma nu fa ct ur er.
12. Use only with the cart, stand, tripod, bracket,
or table specified by the manufacturer,
or sold with the apparatus.
When a cart is used,use caution when moving
the cart/apparatus combination to avoid injury
from tip-over.
13. Unplug this apparatus during lightning storms or when unused for
long periods of time.
14. Refer all servicing to qualified service personnel. Servicing is
required when the apparatus has been damaged in any way, suc h as
power-supply cord or plug is damaged, liquid has been moisture, does
not operate normally, or h as b ee n dr op pe d.
15. CAUTION THESE SERVICING INSTRUCTIONS AR E FO R US E BY
QUALIFIED SERVICE PERSONNEL ONLY. TO R ED UC E TH E RI SK
OF ELECTRIC SHOCK DO NOT PERFORM AN Y SERVICING OTHER
THAN THAT CO NTA IN ED I N TH E OP ER ATING INSTRUCTIONS
UNLESS YO U QR E QU AL IF IE D TO D O SO .
16. Use satisfy clause 2.5 of IEC60950-1/UL60950-1 or Certified/Listed
Class 2 power source only.
- iv -
Page 5

INTRODUCTION
Features:
High resolution and high performance 1/3" Color CCD
Excellent picture quality
600 lines of resolution(Color)
0.1 lux(Color), 0.04ux(B/W) @ F1.2 50IRE Sensitivity
Auto electronic shutter [1/60(1/50) ~ 1/100,000]
Auto white balance
AGC (Auto Gain Control)
Use Certified / Listed Class 2 power source only
(Digital Noise Reduction)
2D DNR
Side Light Compensation
3.7mm Pin hole Lens
BNC (Video connection) 2-Pin terminal block (Power)
Operates in DC12~15V +/- 10%
IMPORTANT : The user of this camera is responsible for
checking and complying with local, state, and federal laws
and statutes concerning the recording and monitoring of
audio signals.
1
Page 6

Step 1
The gimbal mount surface mounted to ceiling.
Default position of the CSVD37PB out of the box is for vertical orientation of the camera view.
For horizontal orientation of camera the housing must be opened by removing the 4,M3 button
head screws located on each side of the housing.
Camera module rotates 90 degrees in the desired direction.
* The gimbal mount surface mounted vertically.
Module support
Camera module
* The gimbal mount surface mounted horizontally.
Module support
Camera module
Open the box and unwrap the camera housing. Remove the top and bottom M6
Allen head screws and seperate the gimbal mount from the housing.
Drill a feet-thru hole for the camera cable on the mounting surface.
2
Page 7

Step 2
Mount the gimbal vertically
Mount the gimbal horizontally
Feed wire through the 3/4" hole on the gimble mount.
For vertical mounting penetrate door frame at 63 inches from the finished floor.
The CSVD37PB gimbal can be mounted on the top door jam if required.
3
Page 8

Step 3
Mount the gimbal vertically
Mount the gimbal horizontally
Center the gimbal mount to mounting surface and mark the mounting holes for the gimbal
mount on the surface.
Secure the gimbal mount to the surface using installer supplied self tappers for aluminum
frame structure.
If mounting on soft surface such as drywall be sure to use to use anchors.
For drop ceiling tiles it is recommended that toggle bolts be used as anchors.
4
Page 9

Step 4
Completing the housing installation
Pull cable from headend thru the mount gimbal mount. Connect BNC connectors and mark
power connection to the camera.
Note: Polarities must be observed the camera is 12V DC and damage will result if power
polarities are not observed. Power connector has a positive center pin.
Mount the housing to the gimbal using the M6 Allen head screws at the top and bottom.
Place the external tooth washer between the housing and the gimbal mount then the split
lock washer on the M6 screw and insert the screw into the housing through the gimbal
mount and external tooth lock wasker. Install the bolt and washers assembly at the bottom
and top of the gimbal mount finger tight.
Adjust the camera housing right or left to acquire the proper field of view for the installation.
M6 Allen head screw
Split lock washer between gimbal mount and housing
External tooth lock washer under head of bolt
Interface Cable for power and video connection to head end cable.
* Camera lens position can be adjusted up and down 5 degrees
o
92
o
92
o
o
92
5
o
5
5
Page 10

DIMENSIONS
MINI STRIP CAMERA
CSVD37PB
inch
6
Page 11

SPECIFICATIONS
Power
General
Connec tor
&
etc.
MODEL
Power source
Power consumpti on
Image sensor
Number of pixels
Scanning system
Scanning freque ncy
Sync. system
Electronic shut ter
Resolu tion
Min. illuminati on
Side Lig ht Compen sation
Digital Noise Red uction
Video out put
S/N ratio
AGC
Day / Night
White Balance
Power input
Video ou tput
Lens mount
Lens
Operating Temperature
Operating humid ity
External Dimens ion
Weight
NTSC
DC12~15V +/-10%
130mA (1.5 Watts)
768(H) x 494(V)
15.734KHz(H) x 59.94Hz(V)
1/60 ~ 1/100,000 sec.
0.1 lux(COLOR), 0.04 lux(BW) @ F1.2, 50 IRE
1/3" Color CCD
600 TV lines (Color)
1.0 Vp-p (75 ohm, composite)
More than 50dB (AGC off)
Terminal Block
BNC Connector
F3.7mm Pin hole Fixed
o o o o
-10 C ~ +50 C [14 F ~ 122 F
0 ~ 96% (non-condensing)
1.8"(W) x 6.4"(H) x 1.4"(D)
set : 325g packing : 535g
2:1 interlace
15.625KHz(H) x 50Hz(V)
Internal
1/50 ~ 1/100,000 sec.
Auto
2D DNR
ON
Auto
Auto(ATW)
Fixed mount
752(H) x 582(V)
* Use the power consumption 2W over.
PAL
]
7
Page 12

Mini Strip Covert Camera
PRINTED IN KOREA
 Loading...