

Page 1
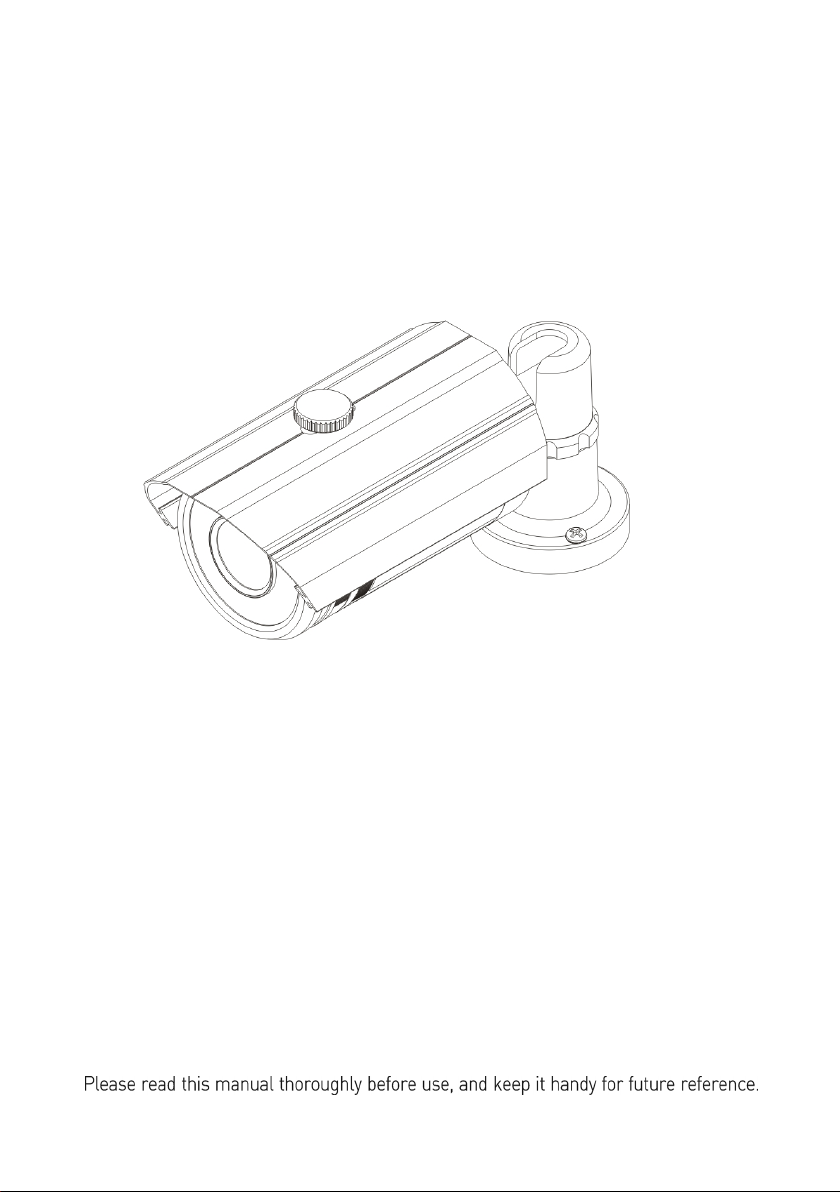
600TV Lines Super
High Resolution Color Camera
1
Page 2
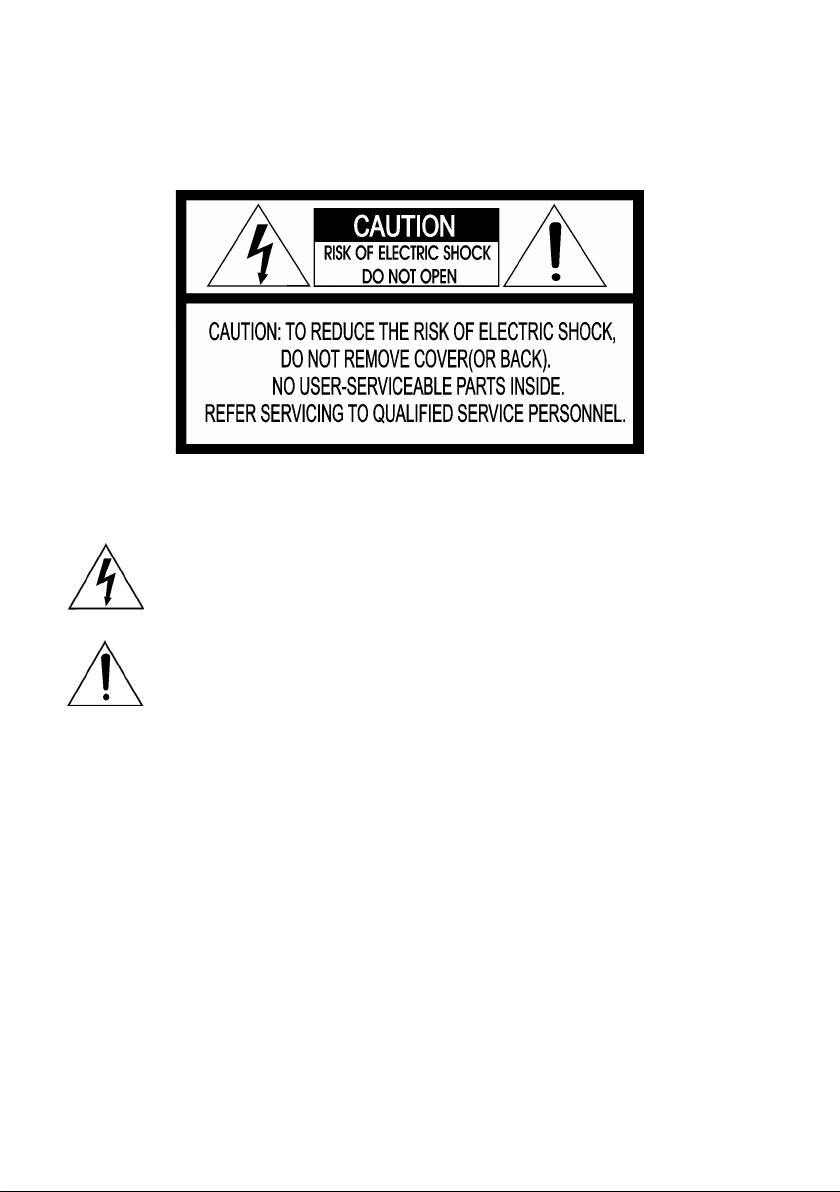
WARNING
A
TO REDUCE THE RISK OF FIRE OR ELECTRIC SHOCK, DO NOT EXPOSE THIS PRODUCT
TO RAIN OR MOISTURE. DO NOT INSERT ANY METALLIC OBJECTS THROUGH THE
VENTILATION GRILLS OR OTHER OPENINGS ON THE EQUIPMENT.
CAUTION
EXPLANATION OF GRAPHICAL SYMBOL
The lightning flash with arrowhead symbol, within an equilateral triangle, is intended to
alert the user to the presence of un-insulated "dangerous voltage" within the product's
enclosure that may be of sufficient magnitude to constitute a risk of electric shock to
persons.
The exclamation point within an equilateral triangle is intended to alert the user to the
presence of important operating and maintenance (servicing) instructions in the
literature accompanying the product.
PRECAUTIONS
Installation
Do not install the unit in an extremely hot or humid
place or in a place subject to excessive dust,
mechanical vibration.
The unit is not designed to be waterproof.
Exposure to rain or water may damage the unit.
Cleaning
Clean the unit with a slightly damp soft cloth.
Use a mild household detergent. Never use strong
solvents such as thinner or Benzene as they might
damage the finish of the unit.
Retain the original carton and packing materials for
safe transport of this unit in the future.
Safety
Should any liquid or solid object fall into the cabinet, unplug
the unit and have it checked by
qualified personnel before operating it any further.
Unplug the unit from the wall outlet if it is not going to be used
for several days or more.
To disconnect the cord, pull it out by the plug. Never pull the
cord itself.
llow adequate air circulation to prevent internal heat build-up.
Do not place the unit on soft surfaces (rugs, carpets, sofas,
etc.) or near materials (curtains, draperies) that may block the
ventilation holes.
Height and vertical linearity controls located on the rear panel
are for special adjustments by qualified personnel only.
2
Page 3

3
Page 4
4
Page 5

INTRODUCTION
Camera Model Features:
● 1/3" Sony Super HAD CCD
● 600TVL colour & 620TVL monochrome resolution
● 0.1Lux (Colour), 0.04 Lux (B/W), 0.003Lux (Low-shutter) @ F1.2, 50IRE Sensitivity
(sense-up x256 – 0.0004Lux (colour), 0.0001Lux (B/W)
● Auto electronic shutter and manual electronic shutter modes
● OSD (On Screen Display)
● 3DNR function
● DRC (Dynamic Range Control)
● Auto and manual white balance modes
● BLC (Back Light Compensation)
● 24no Privacy Zones (B/W, Colour, Mosaic)
● Functions (Nega/Posi, Sharpness, Mirror, Zoom, Pan/tilt)
● AGC (Auto Gain Control)
● Sense-up (x2~ 256)
● Operates on 12VDC or 24VAC (-10% ~ +15%)
● Use Certified / Listed Class 2 power source only
● In DC power, use the Adapter more than DC 12V 2.5A Capacity.
IMPORTANT: The user of this camera is responsible for
checking and complying with local, state, and federal laws
and statutes concerning the recording and monitoring of
audio signals.
5
Page 6

6
Page 7

CAMERA FIXING
Use the 3 location holes
around the base of the
bracket to secure the camera
to a wall or ceiling using fixing
suitable to the type of surface
CAMERA ADJUSTMENT
The camera is supplied with a remote control set up tool. To connect the remote control
to the camera, first remove the Remote control port cap at the rear of the camera:
7
Page 8

Connect the remote control using the 6 pin din connector end to the socket within the
camera:
Connect the BNC to a set up monitor to view the picture and On Screen Menus
To Enter the menus press the button on the remote control.
To Navigate the menus, move the button left/Right/Up and Down, press the button to
Enter.
RET – takes you back a step in the OSD
END – saves changes and exits from the OSD
.
CAMERA CONNECTION
8
Page 9

CAMERA SET UP – OSD
<MAIN MENU>
EXPOSURE
WHITE BALANCE
DAY / NIGHT
PRIVACY
DISPLAY
SYNC
INITIAL
EXIT
<EXPOSURE>
LENS
BRIGHTNESS
BACKLIGHT
SHUTTER
AGC
SENSE UP
ECLIPSE
3D-DNR
DRC
RETURN
<DAY/NIGHT>
D/N MODE
AUTO LEVEL
FILTER DLY
SENSOR IN
BURST
RETURN
<PRIVACY>
AREA
MASK
MODE
LEVEL
TOP
DOWN
LEFT
RIGHT
RETURN
<WHITE BALANCE>
WB MODE
RED CONT
BLUE CONT
PUSH AUTO
RETURN
<DISPLAY>
TITLE
RETURN
<OPTION>
TITLE
NEGA/POSI
SHARPNESS
MIRROR
ZOOM
PAN/TILT
PHASE
RETURN
<SYNC>
AUTO/INT
RETURN
9
<INITIAL>
CANCEL
OK
RETURN
<EXIT>
NB: selecting
RETURN takes
you back to the
menu, CENTRE
push on the tact
switch takes you
our of OSD menu
structure. OSD
times out after
approx 60 seconds
Page 10

OSD MAIN SCREEN
All operation is via the tact switch
- [CENTER] Turn OSD menu ON or OFF
- [UP]/[DOWN] UP or DOWN of Cursor
- [LEFT]/[RIGHT] to go into SUB MENU or change setting
<EXPOSURE>
Press the [LEFT] or [RIGHT] button to access the "EXPOSURE" mode.
1) LENS DC, ELC can be selected.
2) BRIGHTNESS 0 to 60 can be selected.
(Level setting is available in both DC & ELC mode).
3) BACKLIGHT ON or OFF can be selected. (BLC level, location)
(allows the camera to maintain proper exposure within a
certain area, even if the lighting level changes).
4) SHUTTER 1/50, FLC, 1/250, 1/500, 1/1000, 1/2000, 1/4000, 1/10000
1/30000, 1/60000, 1/120000 sec.
(this is only selectable when lens is set to DC mode – FLC reduces
screen flickering caused by discordance of frequency and lighting).
5) AGC AGC OFF, LOW, MID, HIGH can be selected.
As the level of gain increases, the screen gets brighter and
the level of noise also increases.
6) SENSE UP OFF, x2, x4, x8, x16, x32, x64, x128, x256 can be selected.
(SENSE UP helps maintain a bright, clear screen image
by automatically detecting the change in the level of light)
7) ECLIPSE ON or OFF can be selected.
(This function improves the identification capability of
subjects facing a brightly lit situation by filtering out the
strength of the light).
8) 3D-DNR OFF, LOW, MID, HIGH can be selected.
(Reduces the noise on the screen under low light
condition/AGC)
9) DRC OFF, ON can be selected.
(Visibly brightens the subject in a dark area)
10) RETURN Return to MAIN MENU.
10
Page 11

<WHITE BALANCE>
Press the [LEFT] or [RIGHT] button to access the "WHITE BALANCE" mode.
1) WB MODE
- ATW This mode can be used within the colour temperature range
1800°K ~ 10500°K
- AWC Please press the [LEFT] or [RIGHT] button in the PUSH
AUTO mode while the camera is directed at a piece of while
paper to obtain the optimum state under current illumination.
If the environment including the light source is
changed, you have to adjust the White balance again.
- MANUAL Manual mode. User can change R and B Gain manually.
RED CONT Adjust Red Gain Value (0 ~ 127)
(Can only be adjusted whilst in manual mode).
BLUE CONT Adjust BLUE Gain Value (0 ~ 127)
(Can only be adjusted whilst in manual mode).
- INDOOR Set the colour temperature to 3200°K
- OUTDOOR Set the colour temperature to 6300°K
2) PUSH AUTO When it is AWC, OFF to PUSH can be selected.
3) RETURN Return to MAIN MENU.
<DAY/NIGHT>
Press the [LEFT] or [RIGHT] button to access the "DAY/NIGHT" mode
(NOTE: colour / monochrome).
1) D/N MODE AUTO, DAY, NIGHT, EXT can be selected.
2) AUTO LEVEL When D/N MODE is set to AUTO, the 0 to 3 values can be
3) FILTER DLY When set to AUTO, 4 to 10 can be selected. Note that this
- AUTO Automatically changes to the appropriate mode for day-time
or night-time (NB: note that the camera and IR LEDS are
synchronized – LEDS operate via photocell and the
NOT
camera switches by AGC so there may be an undesirable
delay)
- DAY Colour images are displayed only.
- NIGHT Monochrome images are displayed only.
- EXT Automatically changes to the appropriate mode for day-time
(colour) or night-time (monochrome). (Note that the camera
and IR LEDS ARE
and IR cut filter operate at the same time)
synchronized via the photocell e.g. LED’s
selected.
(AGC LOW : 0 AGC MID : 0 ~1 AGC HIGH : 0 ~3)
function does not work when AGC is OFF.
(Adjusts the delay time in seconds when changing from
colour to B/W and vice versa).
11
Page 12

4) SENSOR IN When it is EXT, No or NC can be selected.
5) BURST Removes burst from B/W setting.
(only available in B/W mode).
6) RETURN Return to MAIN MENU.
<PRIVACY>
Press the [LEFT] or [RIGHT] button to access the “PRIVACY” mode.
1) AREA 1 to 24 can be selected.
2) MASK ON or OFF can be selected.
3) MODE When MASK is ON, the privacy mask can be displayed as
either BW, MOSAIC and COLOUR block.
4) LEVEL - BW: 0 to 15 can be selected.
- MOSAIC: SMALL or MIDDLE or LARGE can be selected.
- COLOUR: RED, BLUE, GREEN, YELLOW, CYAN,
MAGENTA can be selected.
5) TOP When MASK is ON, 6 to 150 can be selected.
6) DOWN When MASK is ON, 8 to 152 can be selected.
7) LEFT When MASK is ON, 0 to 185 can be selected.
8) RIGHT When MASK is ON, 2 to 187 can be selected.
9) RETURN Return to MAIN MENU.
12
Page 13

<OPTION>
Press the [LEFT] or [RIGHT] button to access the "OPTION" mode
1) TITLE
2) NEGA/POSI NEGA or POSI image can be selected.
3) SHARPNESS 0 to 15 can be selected.
4) MIRROR NORMAL, MIRROR, VERTICAL, ROTATE can be selected.
- MIRROR Horizontal image inversion
- VERTICAL Vertical image inversion
- ROTATE Horizontal image and Vertical image inversion
5) ZOOM OFF (x1) and ON1 to ON8 (upto max of x4) can be selected.
When PAN/TILT is ON, ZOOM does not work.
6) PAN/TILT OFF or ON (max of x2) can be selected.
(When OSD MENU is OFF and PAN/TILT is ON,
operate by [UP], [DOWN], [LEFT], [RIGHT].
7) PHASE Sync phase is adjustable in line lock mode (Auto mode)
between 0 ~ 624 (PAL).
8) RETURN Return to MAIN MENU
.
<DISPLAY>
Press the [LEFT] or [RIGHT] button to access the "DISPLAY" mode.
1) TITLE ON or OFF can be selected.
2) RETURN Return to MAIN MENU.
<SYNC>
Press the [LEFT] or [RIGHT] button to select between AUTO / INT
<INITIAL>
Press the [LEFT] or [RIGHT] button to access the "USER" mode.
1) CANCEL Cancel defaulting of the camera.
2) OK Returns unit to factory defaults.
13
Page 14

SPECIFICATIONS
MODEL HCUI-G(H)5HNWxE2
Power
General
Power source AC24V ± 10% / DC12V ± 10%
Power consumption 8.0 Watts
Image sensor 1/3” SONY Super-HAD CCD
Total number of pixels NTSC : 811(H) x 508(V), PAL : 795(H) x 596(V)
Scanning system 2:1 interlace
Scanning frequency
Sync. system Internal
Electronic shutter 1/60(1/50) ~ 1/120,000sec
Resolution 600TVL (colour) & 620TVL (monochrome)
Min. illumination 0.1Lux (Colour) @ F1.2, 50 IRE, 0Lux (IR LED ON)
Video output 1.0Vp-p (75ohm, composite)
S/N ratio More than 55dB (AGC OFF, Sense up OFF)
IR LED/SENSOR 72no 850nm IR LED / Photocell Sensor 1EA
IR LED Lighting Distance 60M
Camera Control Plug in joystick at rear of camera
Exposure Shutter 1/60(1/50), FLICKERLESS ,1/250~1/20,000sec
Lens (Auto Iris Control) DC / ELC
Brightness 0 ~ 60
BLC OFF/ON
AGC OFF / LOW / MIDDLE / HIGH
Sense-up OFF / x2~x256
Eclipse OFF / ON
3D-DNR OFF / LOW / MIDDLE / HIGH
DRC OFF / ON
White Balance ATW / AWC / MANUAL / INDOOR / OUTDOOR
F
U
Day & Night AUTO / DAY / NIGHT /EXT
N
Privacy zone OFF / ON (24 zones in BW, Colour, Mosaic)
C
Display Title OFF / ON
T
Video Picture POSI / NEGA
I
Sharpness 0~15
O
Mirror NORMAL / MIRROR / VERTICAL / ROTATE
N
Sync INT / AUTO
Zoom & Pan/Tilt
Phase (LineLock) NTSC : 0~524, PAL : 0~624
Sync INT /AUTO
Initial DEFAULT /USER (CANCEL /OK)
NTSC : 15.734KHz(H) x 59.94Hz(V)
PAL : 15.625KHz(H) x 50Hz(V)
Zoom (upto x4): OFF / ON.
PAN&TILT (upto x2): OFF / ON
14
Page 15

Power input 2-Pin Terminal Block
Video output BNC connector
Day &Night System True ICR
Lens mount Fixed mount
Connector
&
Etc
External Dimension (mm) 88(W) x 275(H) x 88(D)
Lens Varifocal DC auto iris Lens
Operating Temperature -10°C~+50°C [14°F~122°F]
Operating humidity 0~96% (non-condensing)
IP Rating IP66
15
Page 16

50302798A
 Loading...