

Page 1
User’s Guide
AT&T SB67040 Cordless Accessory Handset
© 2009 Advanced American Telephones. All Rights Reserved. AT&T, the AT&T logo and the slogan “Your world. Delivered.” are
trademarks of AT&T Intellectual Property licensed to Advanced American Telephones, San Antonio, TX 78219. Issue 2.0 11/09
Page 2

2
AT&T SB67040 Cordless Accessory Handset User’s Guide
C
ONTENTS
Preface.......................................................................................................................................................6
Topic Navigation .................................................................................................................................................................................................................7
Text Conventions ................................................................................................................................................................................................................8
Procedure Format...............................................................................................................................................................................................................9
Deskset/Handset Menu Navigation........................................................................................................................................................................10
Additional Documentation .......................................................................................................................................................................................... 10
Description..............................................................................................................................................11
Handset Parts List ........................................................................................................................................................................................................... 12
Handset Description.......................................................................................................................................................................................................13
Handset LCD ......................................................................................................................................................................................................................15
LCD Screen Types . . . . . . . . . . . . . . . . . . . . . . . . . . . . . . . . . . . . . . . . . . . . . . . . . . . . . . . . . . . . . . . . . . . . . . . . 16
Soft Keys . . . . . . . . . . . . . . . . . . . . . . . . . . . . . . . . . . . . . . . . . . . . . . . . . . . . . . . . . . . . . . . . . . . . . . . . . . . . . . . 18
Screen Icons . . . . . . . . . . . . . . . . . . . . . . . . . . . . . . . . . . . . . . . . . . . . . . . . . . . . . . . . . . . . . . . . . . . . . . . . . . . . 20
Using the Speakerphone.............................................................................................................................................................................................. 22
Call Deck.............................................................................................................................................................................................................................. 23
Deskset In Use .................................................................................................................................................................................................................. 24
SB67040 Cordless Accessory Handset/SB67030 Deskset Comparison..............................................................................................25
Getting Started ......................................................................................................................................26
Charger Installation........................................................................................................................................................................................................27
Battery Installation ......................................................................................................................................................................................................... 28
Battery Charging.............................................................................................................................................................................................................. 29
Low Battery Notification . . . . . . . . . . . . . . . . . . . . . . . . . . . . . . . . . . . . . . . . . . . . . . . . . . . . . . . . . . . . . . . . . . . 30
Power Save . . . . . . . . . . . . . . . . . . . . . . . . . . . . . . . . . . . . . . . . . . . . . . . . . . . . . . . . . . . . . . . . . . . . . . . . . . . . . 30
Page 3

3
AT&T SB67040 Cordless Accessory Handset User’s Guide
Handset Registration .....................................................................................................................................................................................................31
Handset Setup................................................................................................................................................................................................................... 34
Handset Volume Control.............................................................................................................................................................................................. 38
Link Loss Notification .................................................................................................................................................................................................... 40
Dial Pad Data Entry ........................................................................................................................................................................................................ 41
Searching a List Using the Dial Pad . . . . . . . . . . . . . . . . . . . . . . . . . . . . . . . . . . . . . . . . . . . . . . . . . . . . . . . . . . 42
Handset Help ..................................................................................................................................................................................................................... 43
Making a Call ..........................................................................................................................................46
Predialing............................................................................................................................................................................................................................. 47
Live Dialing ......................................................................................................................................................................................................................... 48
Making a Call From the Directory ........................................................................................................................................................................... 49
Making a Call From the Extension List ................................................................................................................................................................. 51
Making a Call From the Call Log .............................................................................................................................................................................52
Call Log Dialing Options . . . . . . . . . . . . . . . . . . . . . . . . . . . . . . . . . . . . . . . . . . . . . . . . . . . . . . . . . . . . . . . . . . . 53
Making a Call From Redial..........................................................................................................................................................................................54
Making a Call From Quick Dial ................................................................................................................................................................................. 55
Answer a Call .........................................................................................................................................56
New Call Notification..................................................................................................................................................................................................... 57
Call Options........................................................................................................................................................................................................................ 59
Multiple Incoming Calls ................................................................................................................................................................................................ 61
Voicemail.................................................................................................................................................62
Voicemail Notification ................................................................................................................................................................................................... 63
Retrieve Voicemail........................................................................................................................................................................................................... 64
Reviewing Voicemail Records.................................................................................................................................................................................... 65
Voicemail Management ................................................................................................................................................................................................ 66
Page 4

4
AT&T SB67040 Cordless Accessory Handset User’s Guide
Hold/Page/Park ....................................................................................................................................69
Placing and Retrieving a Call on Hold.................................................................................................................................................................. 70
Retrieving a Held Call When There Is More Than One Call in the Call Deck . . . . . . . . . . . . . . . . . . . . . . . . . 71
Held Call Options . . . . . . . . . . . . . . . . . . . . . . . . . . . . . . . . . . . . . . . . . . . . . . . . . . . . . . . . . . . . . . . . . . . . . . . . 72
Parking an Active Call...................................................................................................................................................................................................73
Parking a Held Call.........................................................................................................................................................................................................74
Retrieving a Parked Call From Any Extension . . . . . . . . . . . . . . . . . . . . . . . . . . . . . . . . . . . . . . . . . . . . . . . . . . 75
Paging All Extensions ....................................................................................................................................................................................................76
Call Transfer ...........................................................................................................................................77
Transfer Rules.................................................................................................................................................................................................................... 77
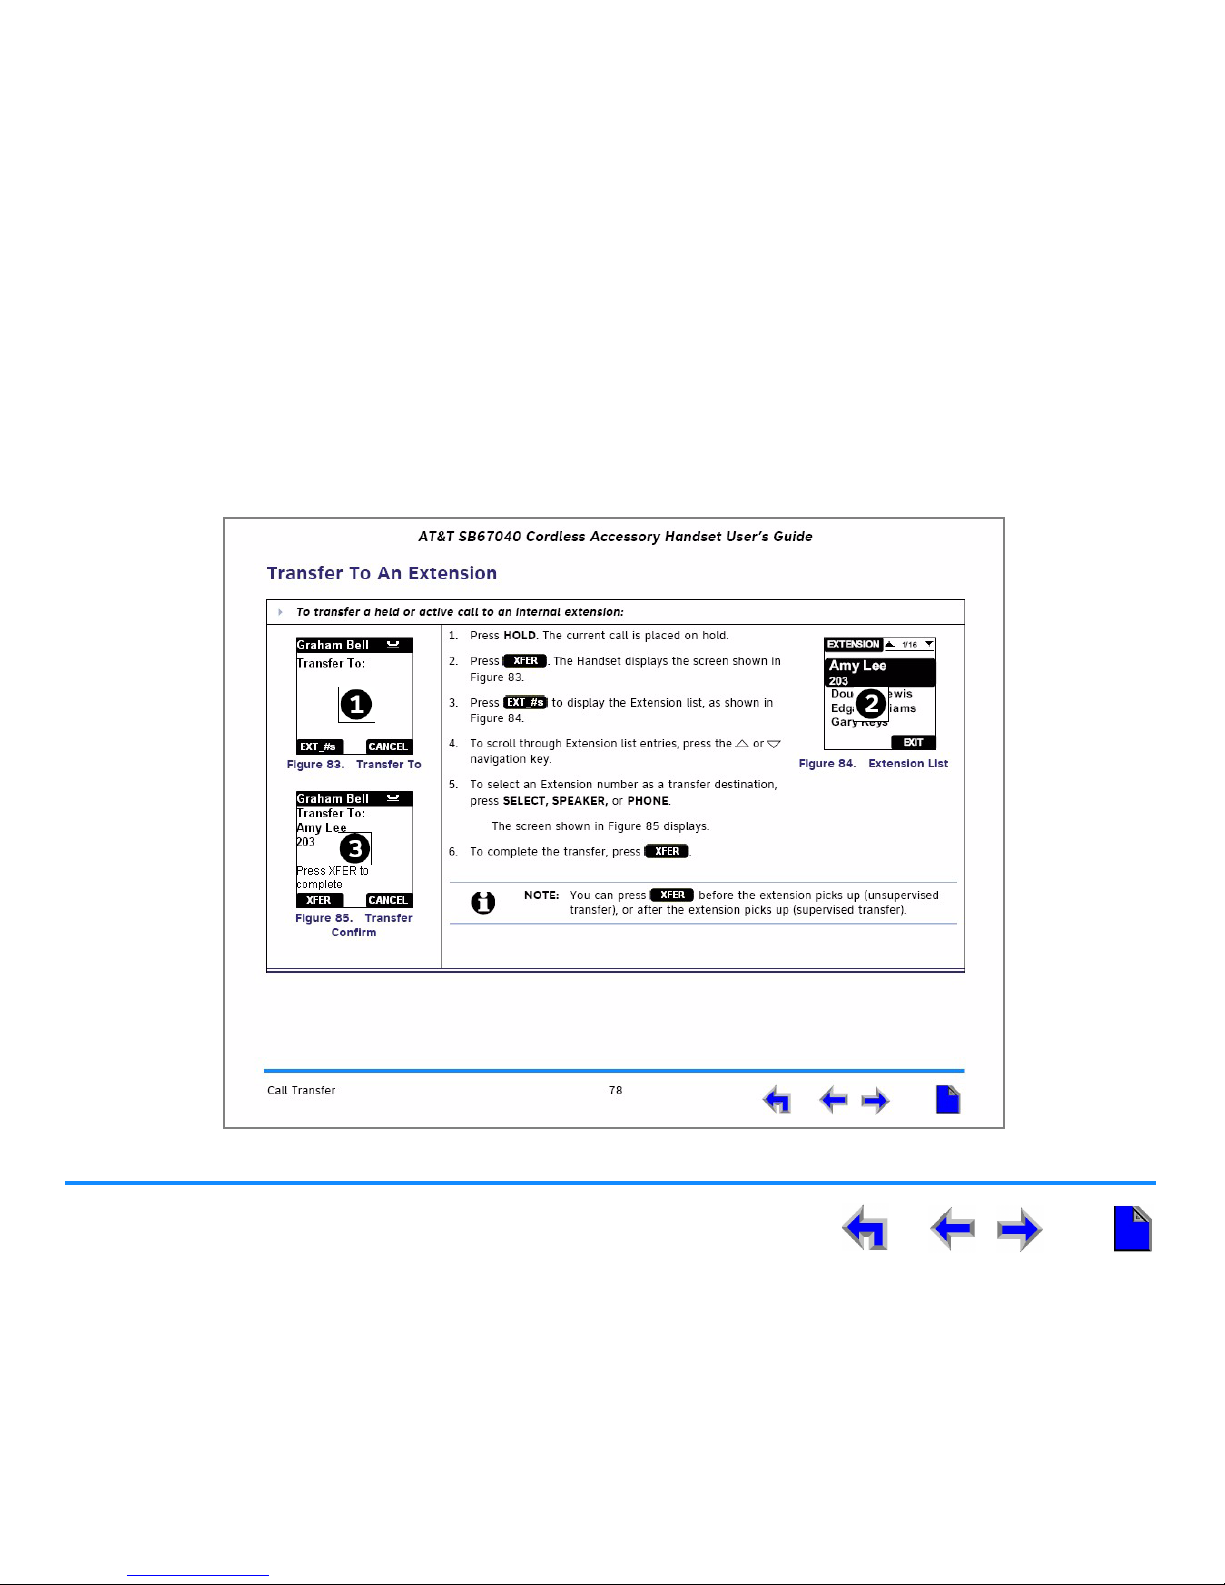
Transfer to an Extension..............................................................................................................................................................................................78
Transfer to an External Number............................................................................................................................................................................... 79
Conference..............................................................................................................................................80
Conferencing Rules......................................................................................................................................................................................................... 80
Conference Setup............................................................................................................................................................................................................ 81
Hold/Unhold a Conference Call............................................................................................................................................................................... 82
End a Conference Call .................................................................................................................................................................................................. 83
Deskset Interaction...............................................................................................................................84
Answering a Call While Another Device is on a Call .................................................................................................................................... 85
Incoming Call..................................................................................................................................................................................................................... 85
Held Calls.............................................................................................................................................................................................................................85
Clocks and Status............................................................................................................................................................................................................ 85
Troubleshooting.....................................................................................................................................86
In Case Of Difficulty ....................................................................................................................................................................................................... 87
Page 5

5
AT&T SB67040 Cordless Accessory Handset User’s Guide
Maintenance ...........................................................................................................................................93
Avoid Rough Treatment................................................................................................................................................................................................93
Avoid Water........................................................................................................................................................................................................................ 93
Electrical Storms ..............................................................................................................................................................................................................93
Cleaning Your Unit.......................................................................................................................................................................................................... 93
Important Safety Instructions.............................................................................................................94
Limited Warranty...................................................................................................................................96
Glossary................................................................................................................................................ 100
Page 6

AT&T SB67040 Cordless Accessory Handset User’s Guide
Preface 6
P
REFACE
This User’s Guide provides a complete set of instructions to guide you through operation of your SB67040 Cordless Accessory
Handset.
Before using this AT&T product, please read “Important Safety Instructions” on page 94. Please thoroughly read this user’s guide
for all the feature operations and troubleshooting information necessary to install and operate your new AT&T product.
“Topic Navigation” on page 7
“Text Conventions” on page 8
“Procedure Format” on page 9
“Additional Documentation” on page 10
NOTE: For customer service or product information, contact the person who installed your system. If your installer
is unavailable, visit our website at
www.telephones.att.com or call 1 (888) 916-2007. In Canada
dial
1 (888) 883-2474.
Page 7

Preface 7
AT&T SB67040 Cordless Accessory Handset User’s Guide
Topic Navigation
Your SB67040 Cordless Accessory Handset User’s Guide allows easy navigation between topics and the ability to return to your
original topic. Figure 1 illustrates the navigation conventions for this user’s guide.
Figure 1. User Guide Navigation
Task
Click on this link to move to the
beginning of the instructions for
this task.
Previous
Page
Next Page First Page in
Current
Chapter
Back to Last
Page Viewed
Return to Main Menu
Acrobat® Navigation
Click on a bookmark
to go to the first page
of the listed topic.
Page 8
Preface 8
AT&T SB67040 Cordless Accessory Handset User’s Guide
Text Conventions
Table 1 lists text formats used in this guide.
Table 1. Description of Text Formats
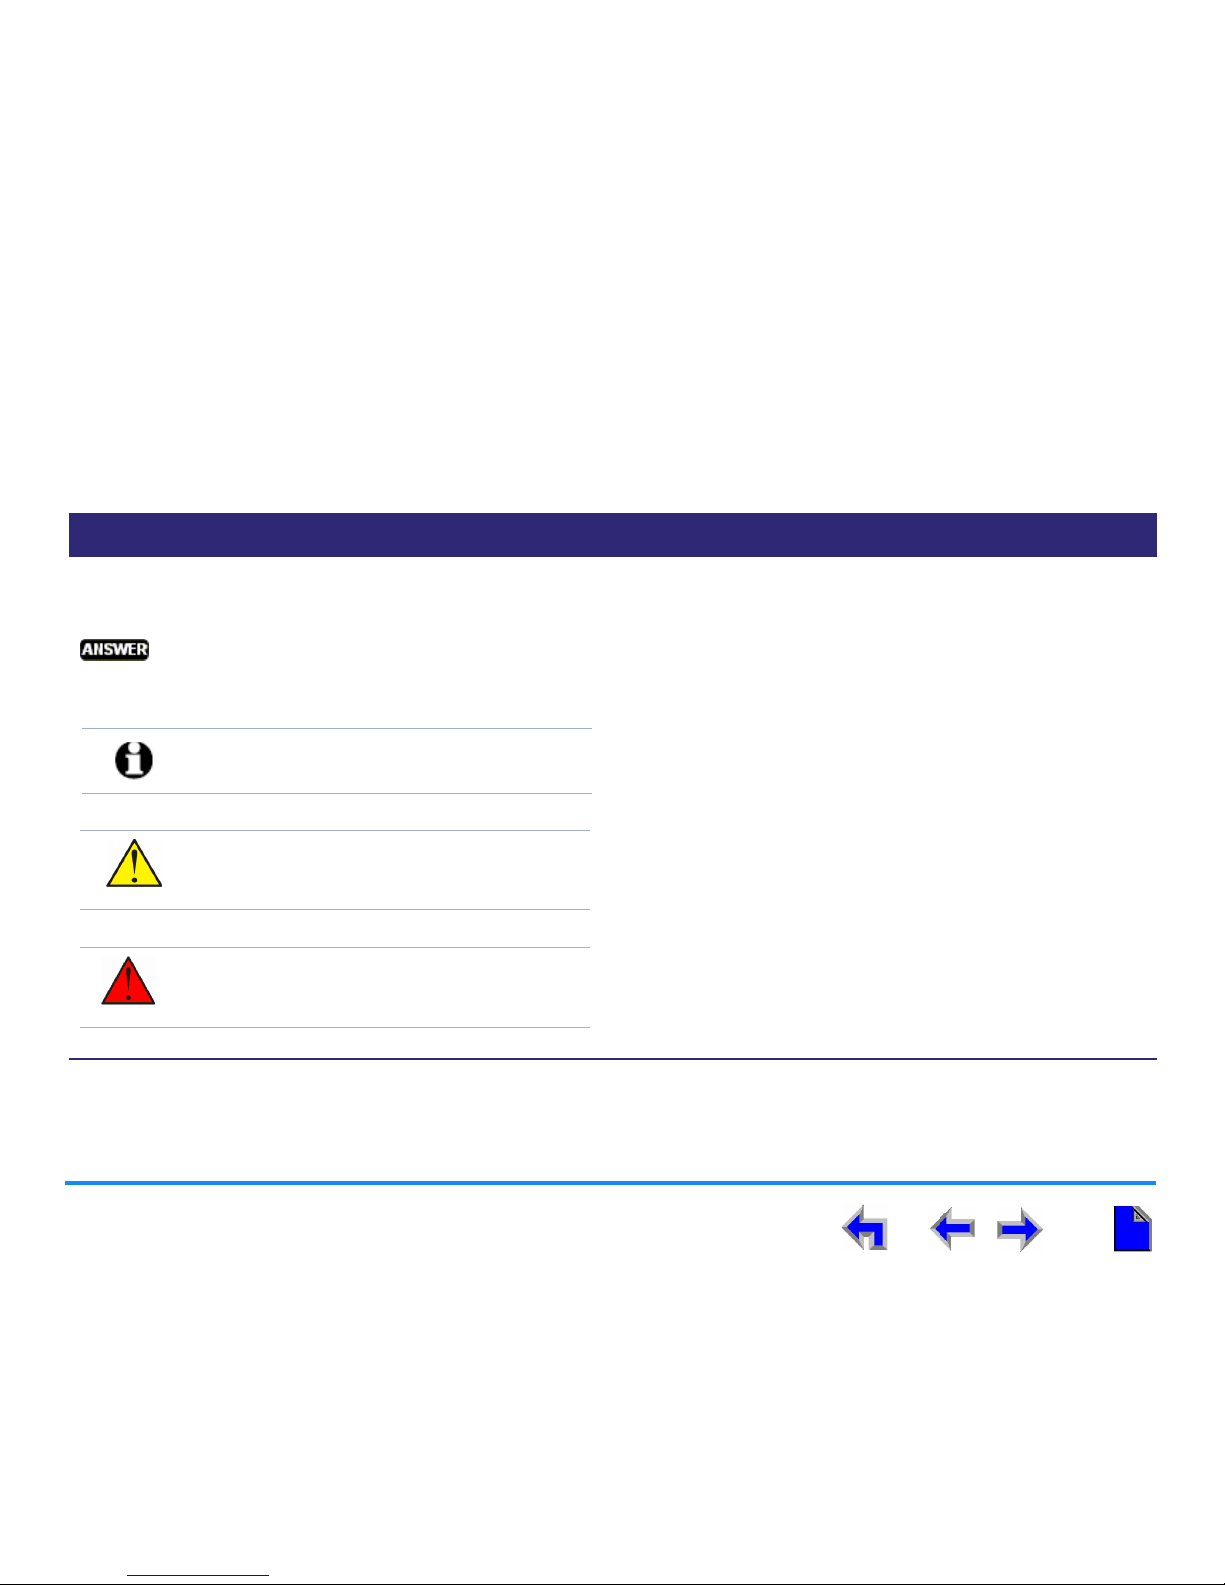
Text Format Description
Screen Identifies text that appears on the screen in a menu or prompt.
HARD KEY or DIAL PAD KEY Identifies a hard key, including the dial pad keys.
Identifies a soft key.
“Topic Navigation” on page 7 Identifies a hyperlink to a task.
Example of a Note.
Example of a Caution.
Example of a Warning.
NOTE: Notes give more information, usually
in a procedure.
CAUTION: A caution means that loss of data
or unintended circumstances may
result.
WARNING: A warning means that the
equipment may be damaged or
made inoperative.
Page 9
Preface 9
AT&T SB67040 Cordless Accessory Handset User’s Guide
Procedure Format
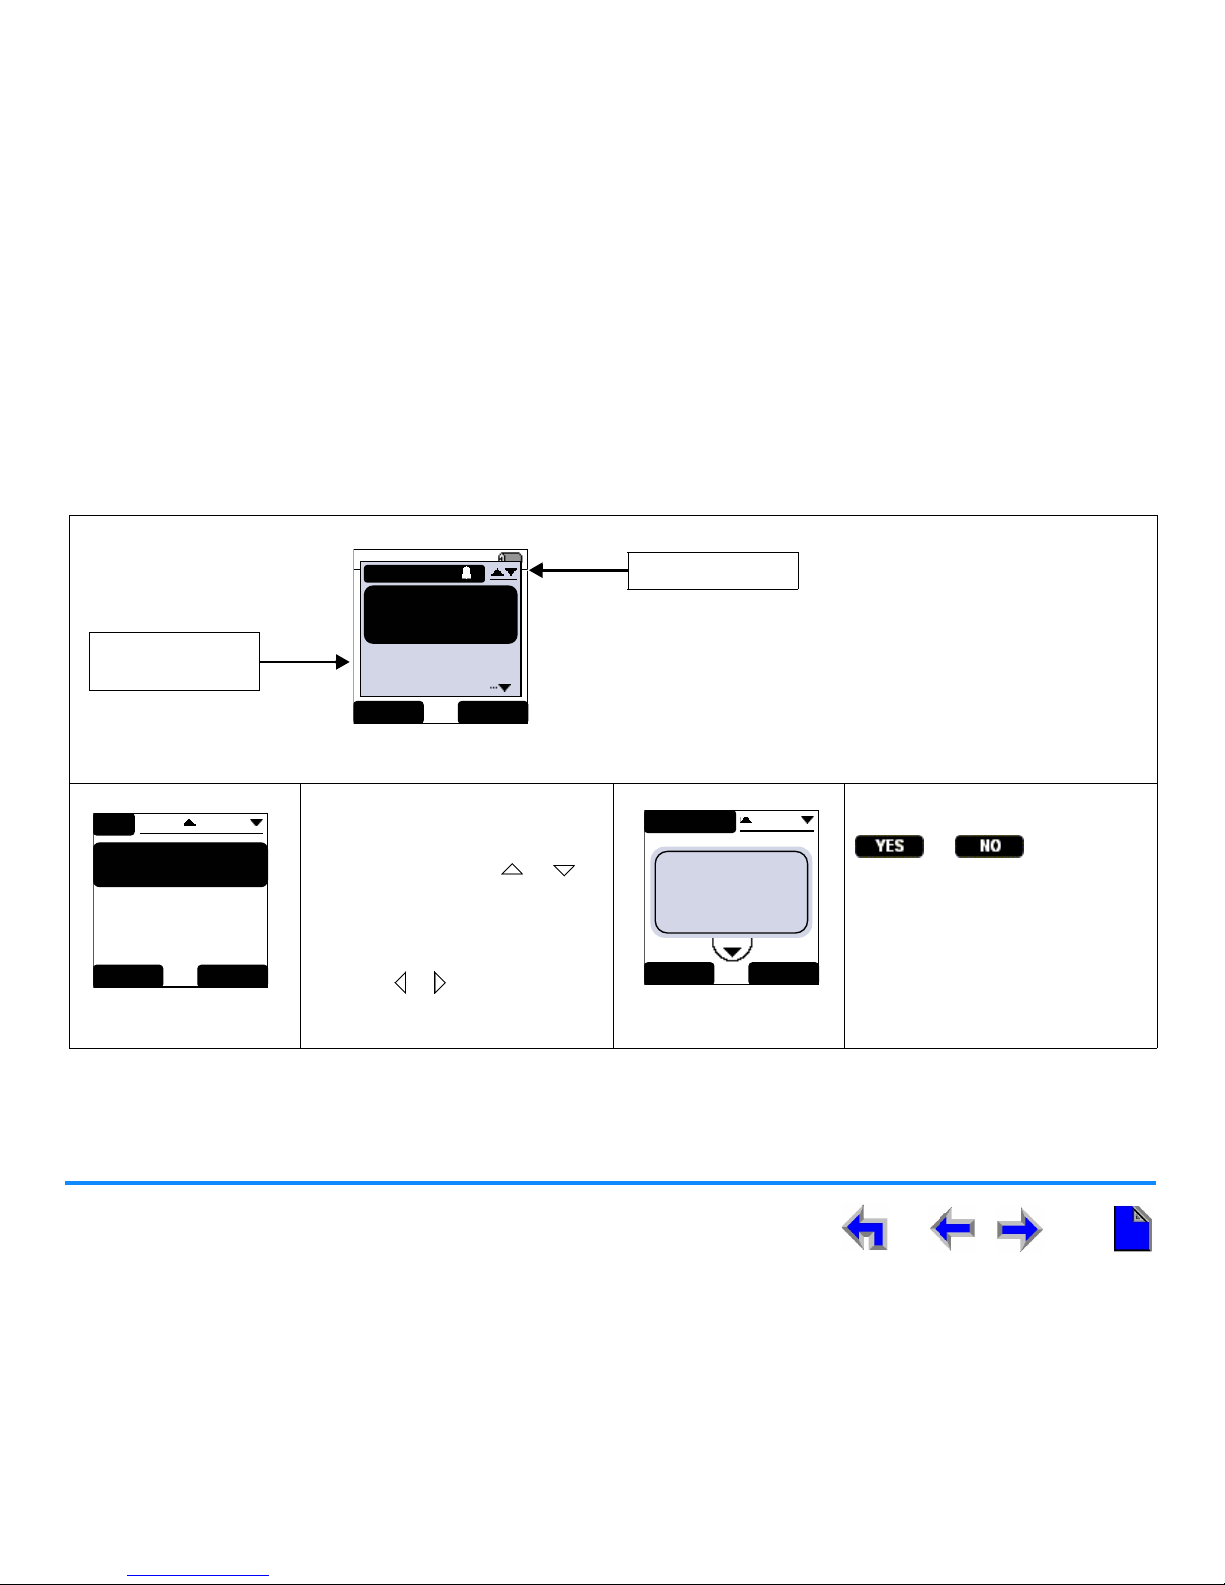
The procedures in this guide are each contained on a single page, unless otherwise noted. Each page contains the topic heading
and a procedure, as shown in Figure 2. The screen images appear in clockwise order as indicated by the numbers in Figure 2.
Figure 2. Sample Procedure
Page 10

Preface 10
AT&T SB67040 Cordless Accessory Handset User’s Guide
Deskset/Handset Menu Navigation
Use your AT&T SB67030 Deskset to register your Cordless Handset. To access items in the Deskset and Handset menus, you can
either use the navigation key to highlight the function and press SELECT or press a numeric key on the dial pad. The procedures
in this guide use the numeric keypad entry as the preferred method for selecting a function.
Additional Documentation
In addition to this guide, this CD contains the following documents:
AT&T SB67010 Gateway, SB67030 Deskset System Administrator’s Guide
AT&T SB67030 Deskset User’s Guide
AT&T TL7600 Cordless Headset User’s Guide.
Page 11
AT&T SB67040 Cordless Accessory Handset User’s Guide
Description 11
C HAPTER
1
D
ESCRIPTION
The SB67040 Cordless Accessory Handset duplicates many of the Deskset features and
provides a high degree of mobility. Only one Handset can be registered to a Deskset, and
you can only be on one active call at a time using either the Handset or the Deskset.
This section describes the following functions and features of the SB67040 Cordless
Accessory Handset.
“Handset Parts List” on page 12
“Handset Description” on page 13
“Handset LCD” on page 15
“SB67040 Cordless Accessory Handset/SB67030 Deskset Comparison” on page 25
Page 12
Description 12
AT&T SB67040 Cordless Accessory Handset User’s Guide
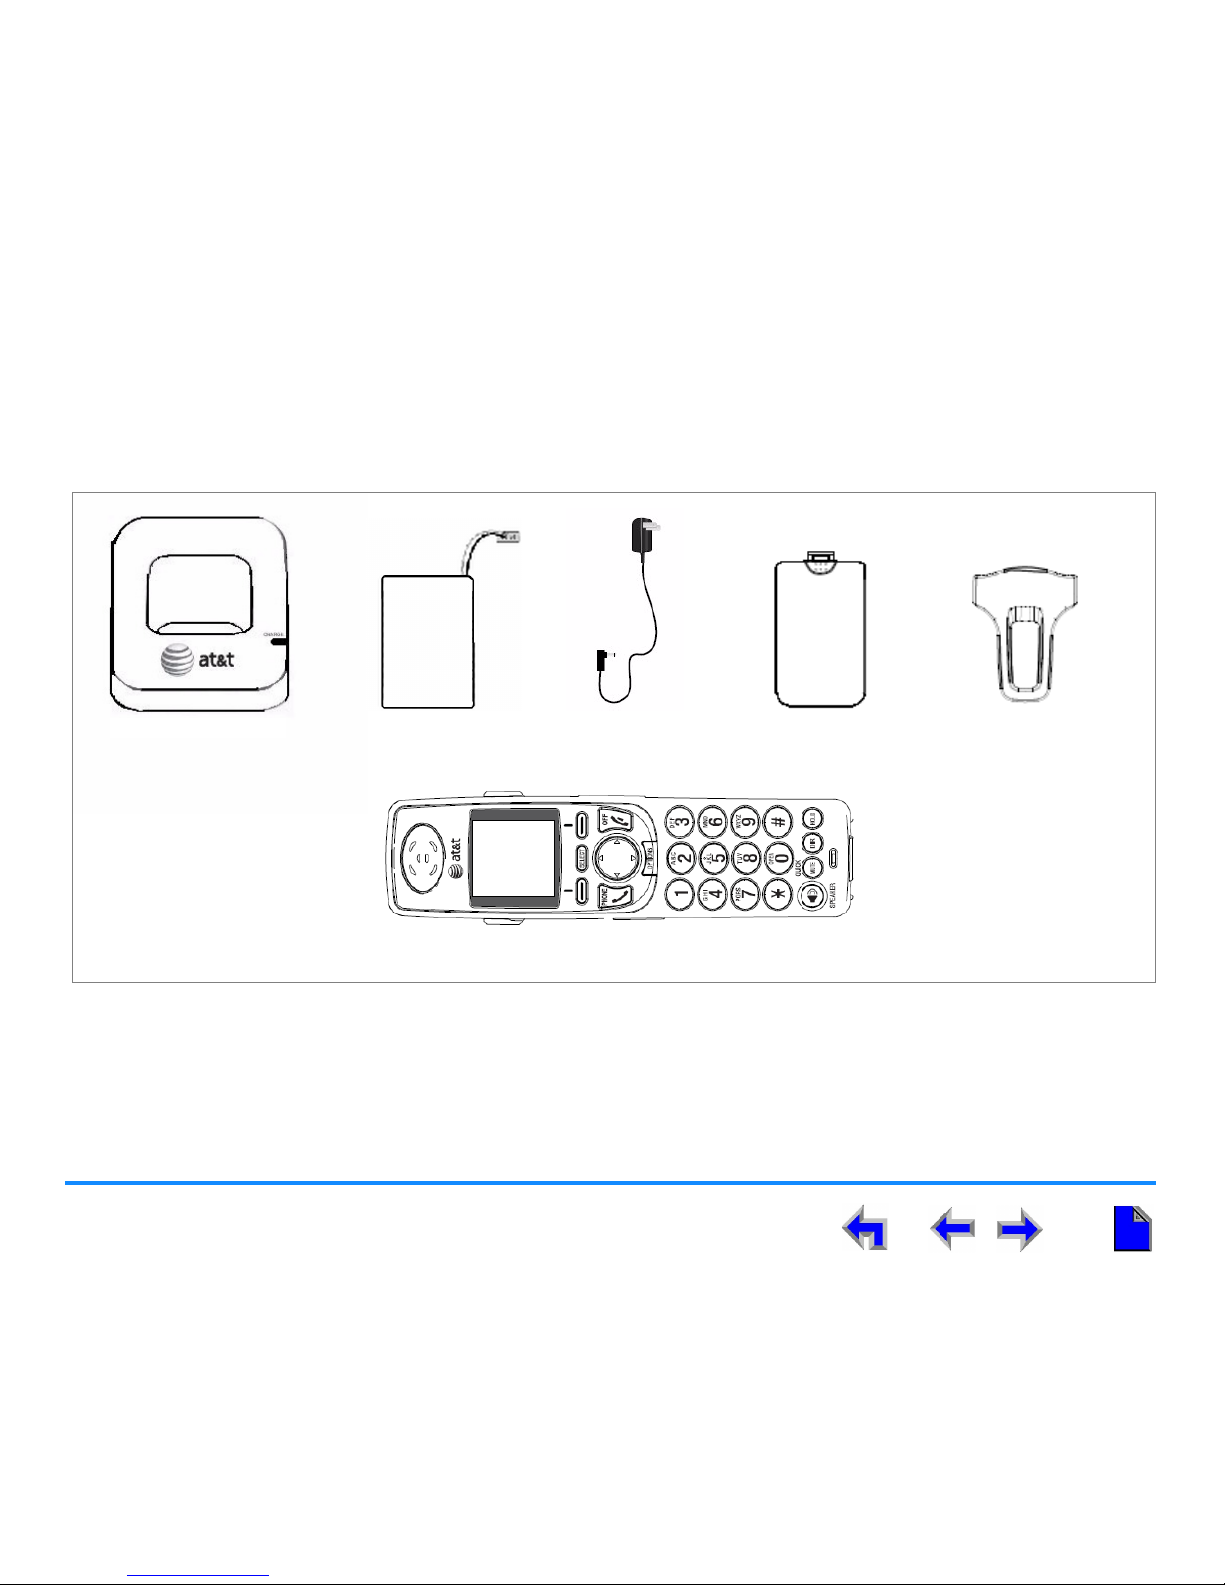
Handset Parts List
Figure 3 illustrates the Handset parts list.
Figure 3. Handset Parts List
BatteryHandset Charger Power Adapter Battery Cover
Handset
Belt Clip
Page 13
Description 13
AT&T SB67040 Cordless Accessory Handset User’s Guide
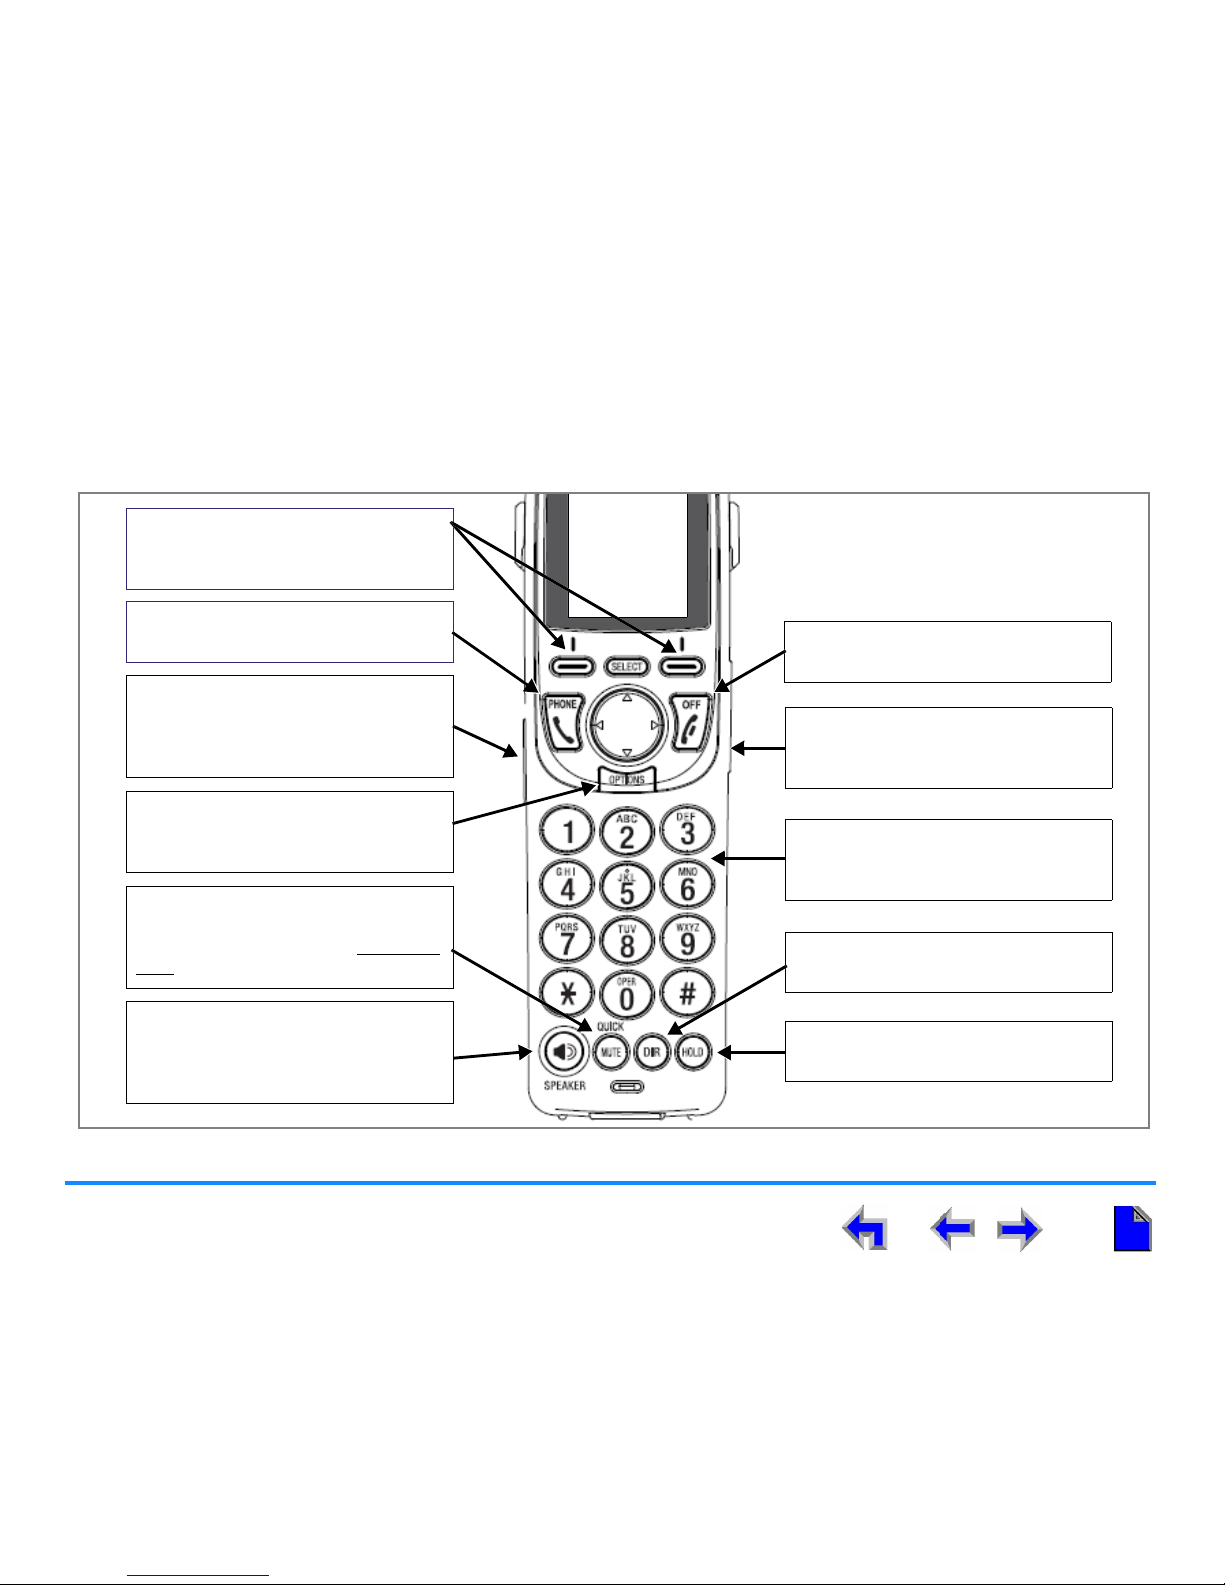
Handset Description
Figure 4 and Figure 5 illustrate and describe the keys and the corded headset jack.
Figure 4. Handset Key Functions
Phone
Starts or answers a call.
Off
Ends current call or ends feature.
Options
Accesses options dependent on the
current mode.
Mute/Quick
Mutes the microphone while on an
active or conference call. Press and
hold
to access quick dial numbers.
DIR
Accesses the Directory.
Volume (on side)
Increases and decreases the ringer or
incoming voice volume.
Dial pad, 0-9, *, #
Dials, performs shortcuts, or accesses
choices in a list.
Hold
Places active call on hold.
SPEAKER
Starts or answers a call in Idle mode.
During a call, toggles audio to and
from speakerphone.
Soft Keys
The labels in the display change
according to the current task.
Headset Jack (on side)
Lift the rubber flap to insert an
optional 2.5 mm headset into the
jack.
Page 14
Description 14
AT&T SB67040 Cordless Accessory Handset User’s Guide
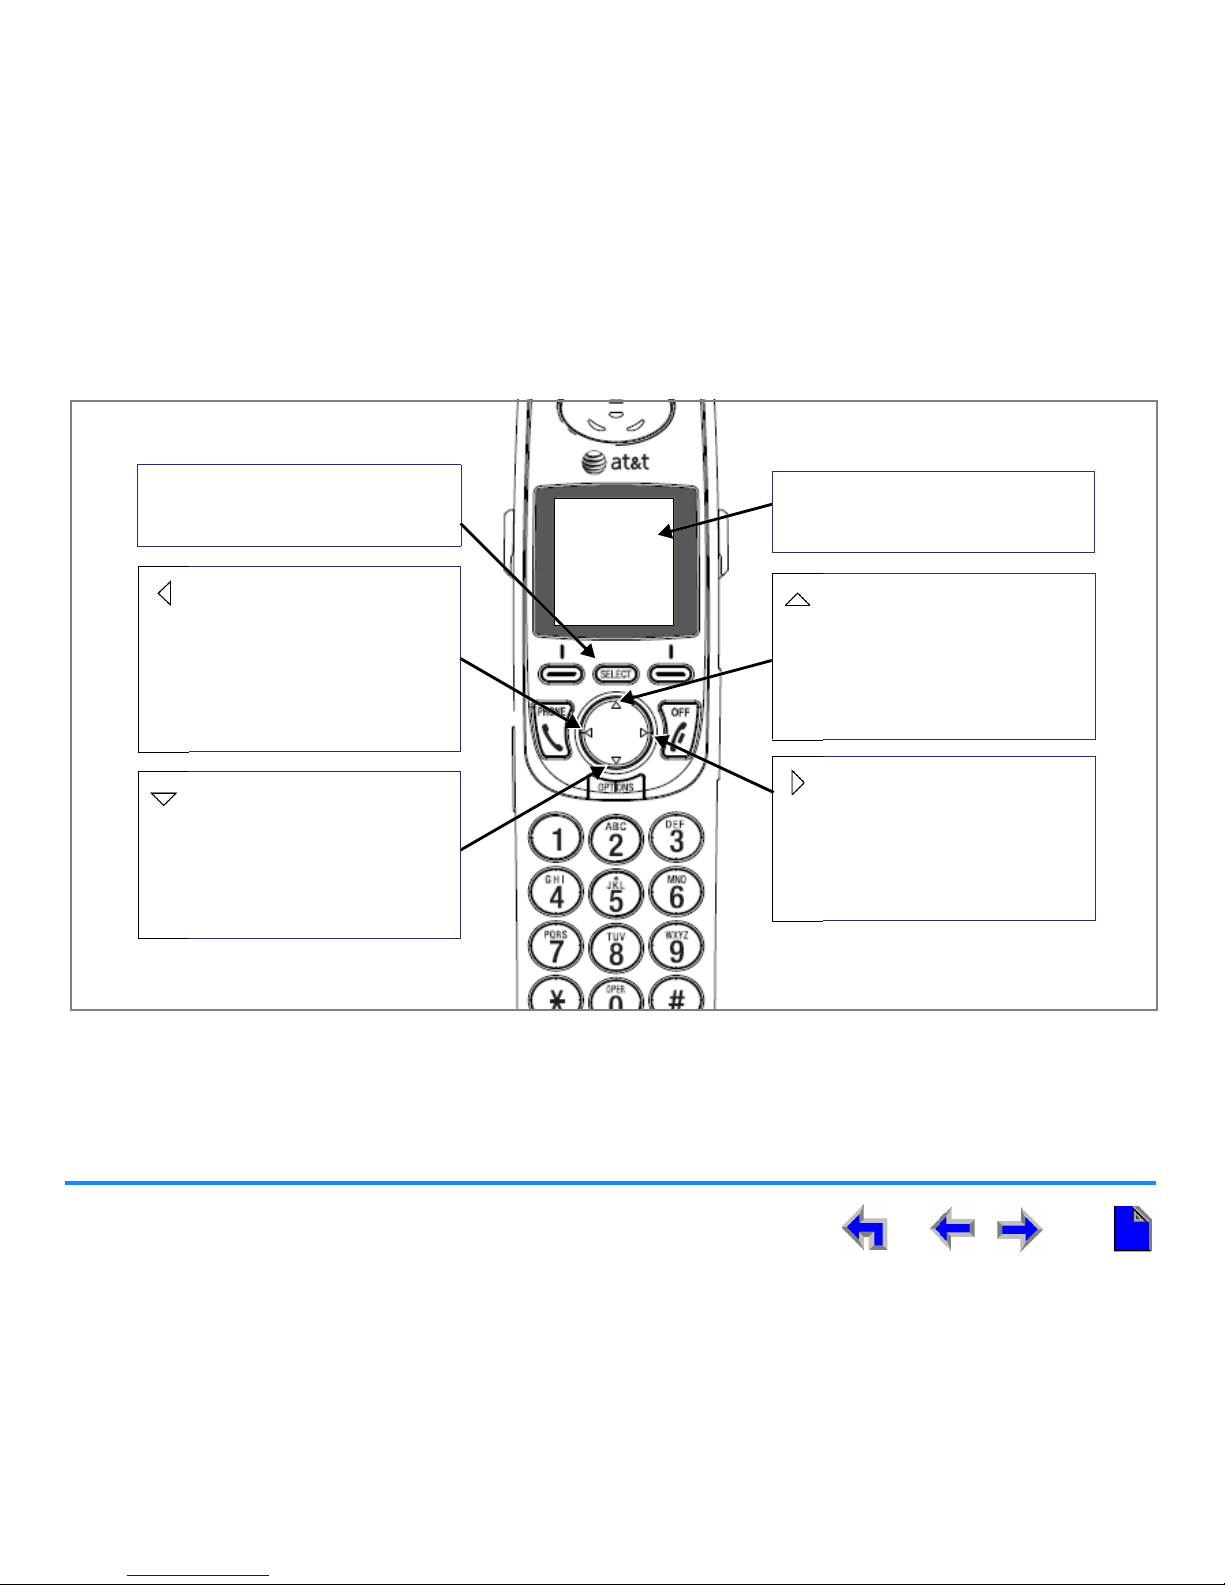
Figure 5. Handset Key Functions
Select
Selects an option out of a menu or
list.
Navigate Up
Steps through list entries.
Highlights new messages and
new calls in Idle mode. Use
during message playback to
play previous message.
Navigate Right
Steps or cycles through list
entries. Adjusts contrast level
in display menu. Use during
message playback to jump
forward eight seconds in
message.
Navigate Left
Steps or cycles through list
entries. Adjusts contrast level
in display menu. Performs
backspace function. Use during
message playback to jump
back eight seconds in
message.
Navigate Down
Steps through list entries.
Highlights new messages and
new calls in Idle mode. Use
during message playback to
play next message.
Liquid Crystal Display (LCD)
Provides instructions and status
information.
Page 15
Description 15
AT&T SB67040 Cordless Accessory Handset User’s Guide
Handset LCD
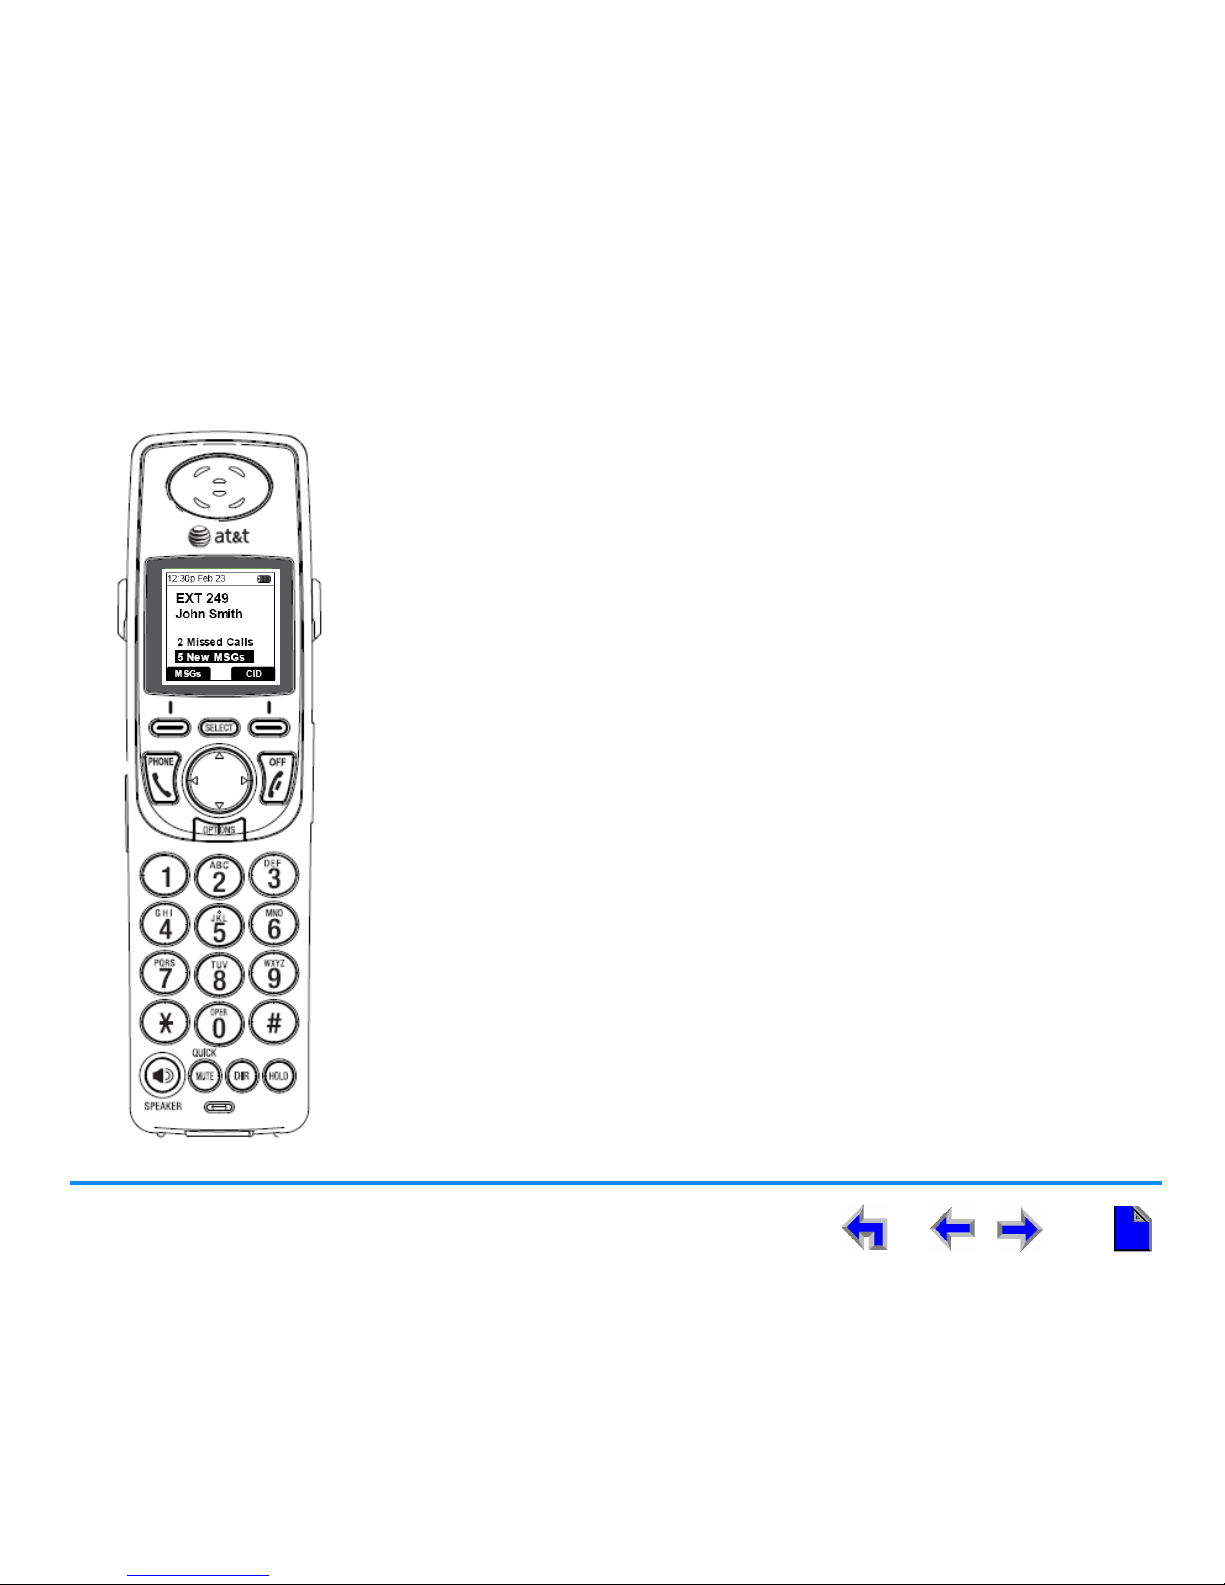
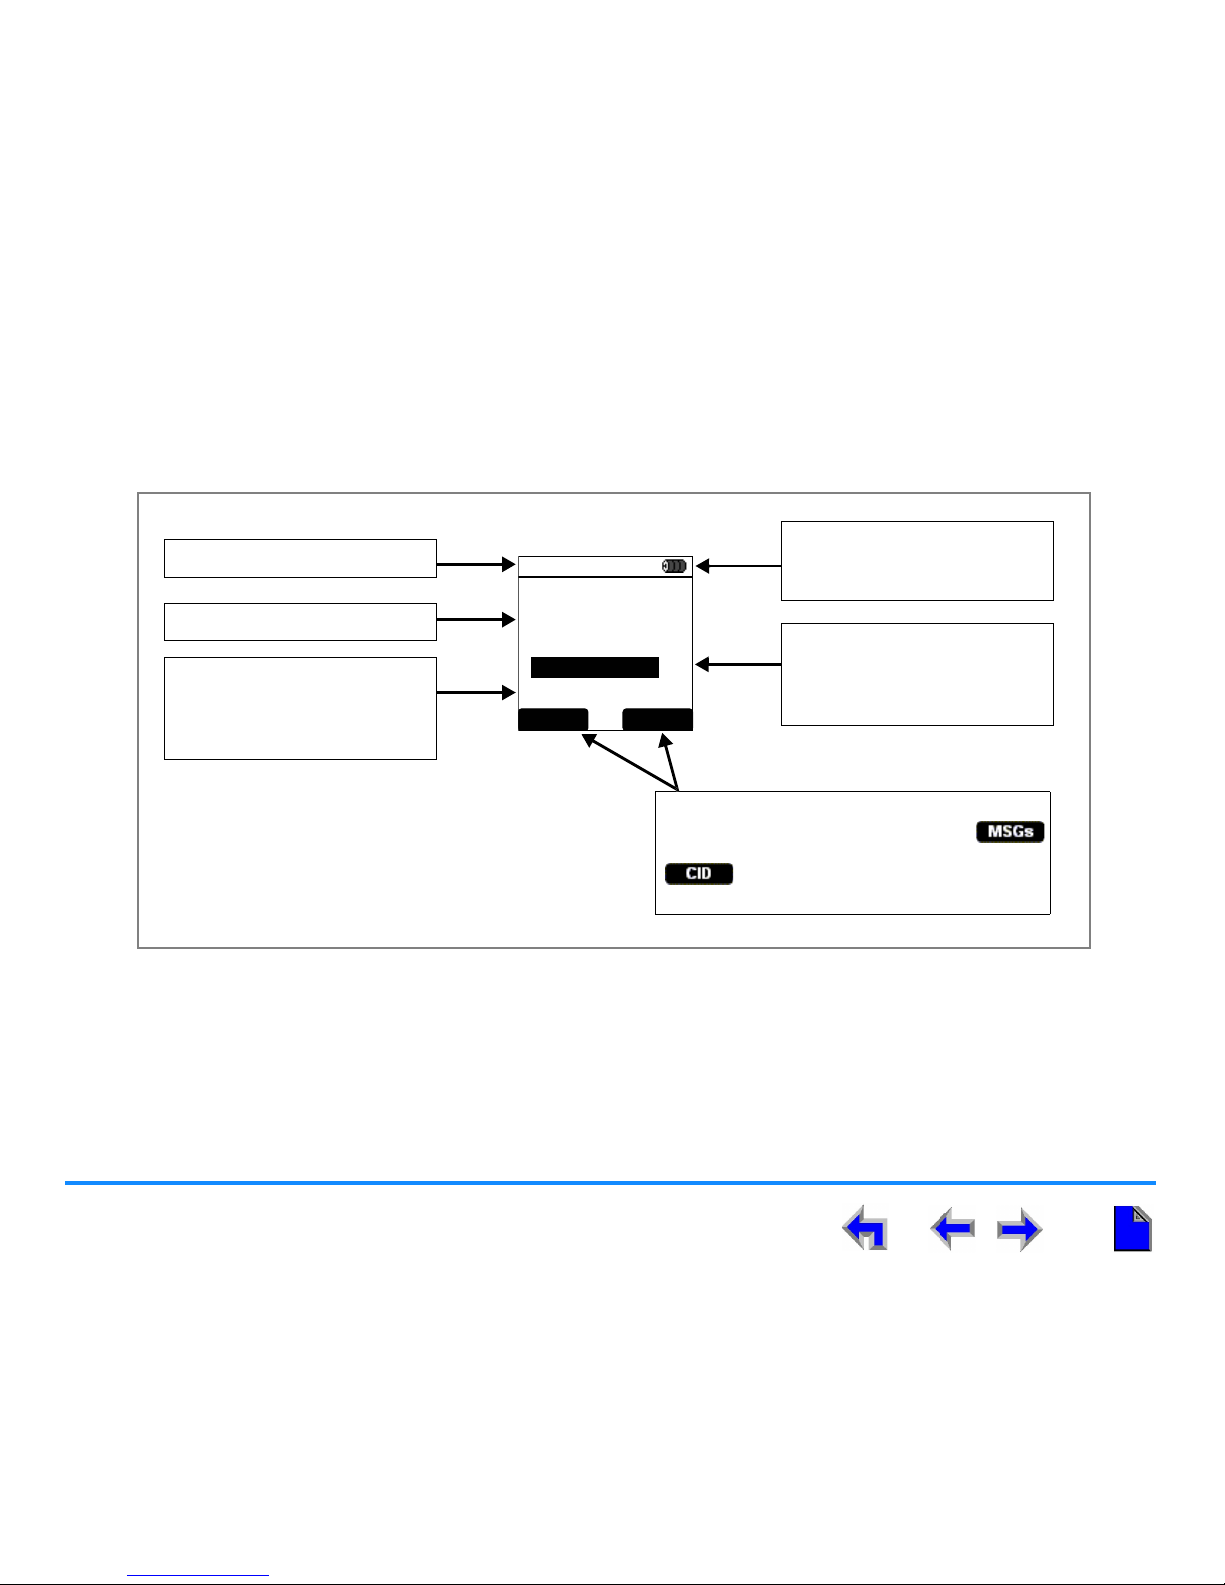
The Idle screen shown in Figure 6 displays when the Handset is on with no active or held calls.
Figure 6. Handset Idle Screen
12:30p Feb 23
2 Missed Calls
5 New MSGs
EXT 249
John Smith
MSGs CID
Status for Battery, Do Not
Disturb, or Call Forward, and
Voicemail memory full.
Time and Date.
Extension number and name.
Number of new missed calls.
Press SELECT when
highlighted to see the missed
calls list.
Number of new messages.
Press SELECT when
highlighted to see the message
list.
Soft Key labels.
For the example, press the key below
to see the message list. Press the key below
to see the entire Call Log. (See Soft
Keys on page 18).
Page 16
Description 16
AT&T SB67040 Cordless Accessory Handset User’s Guide
LCD Screen Types
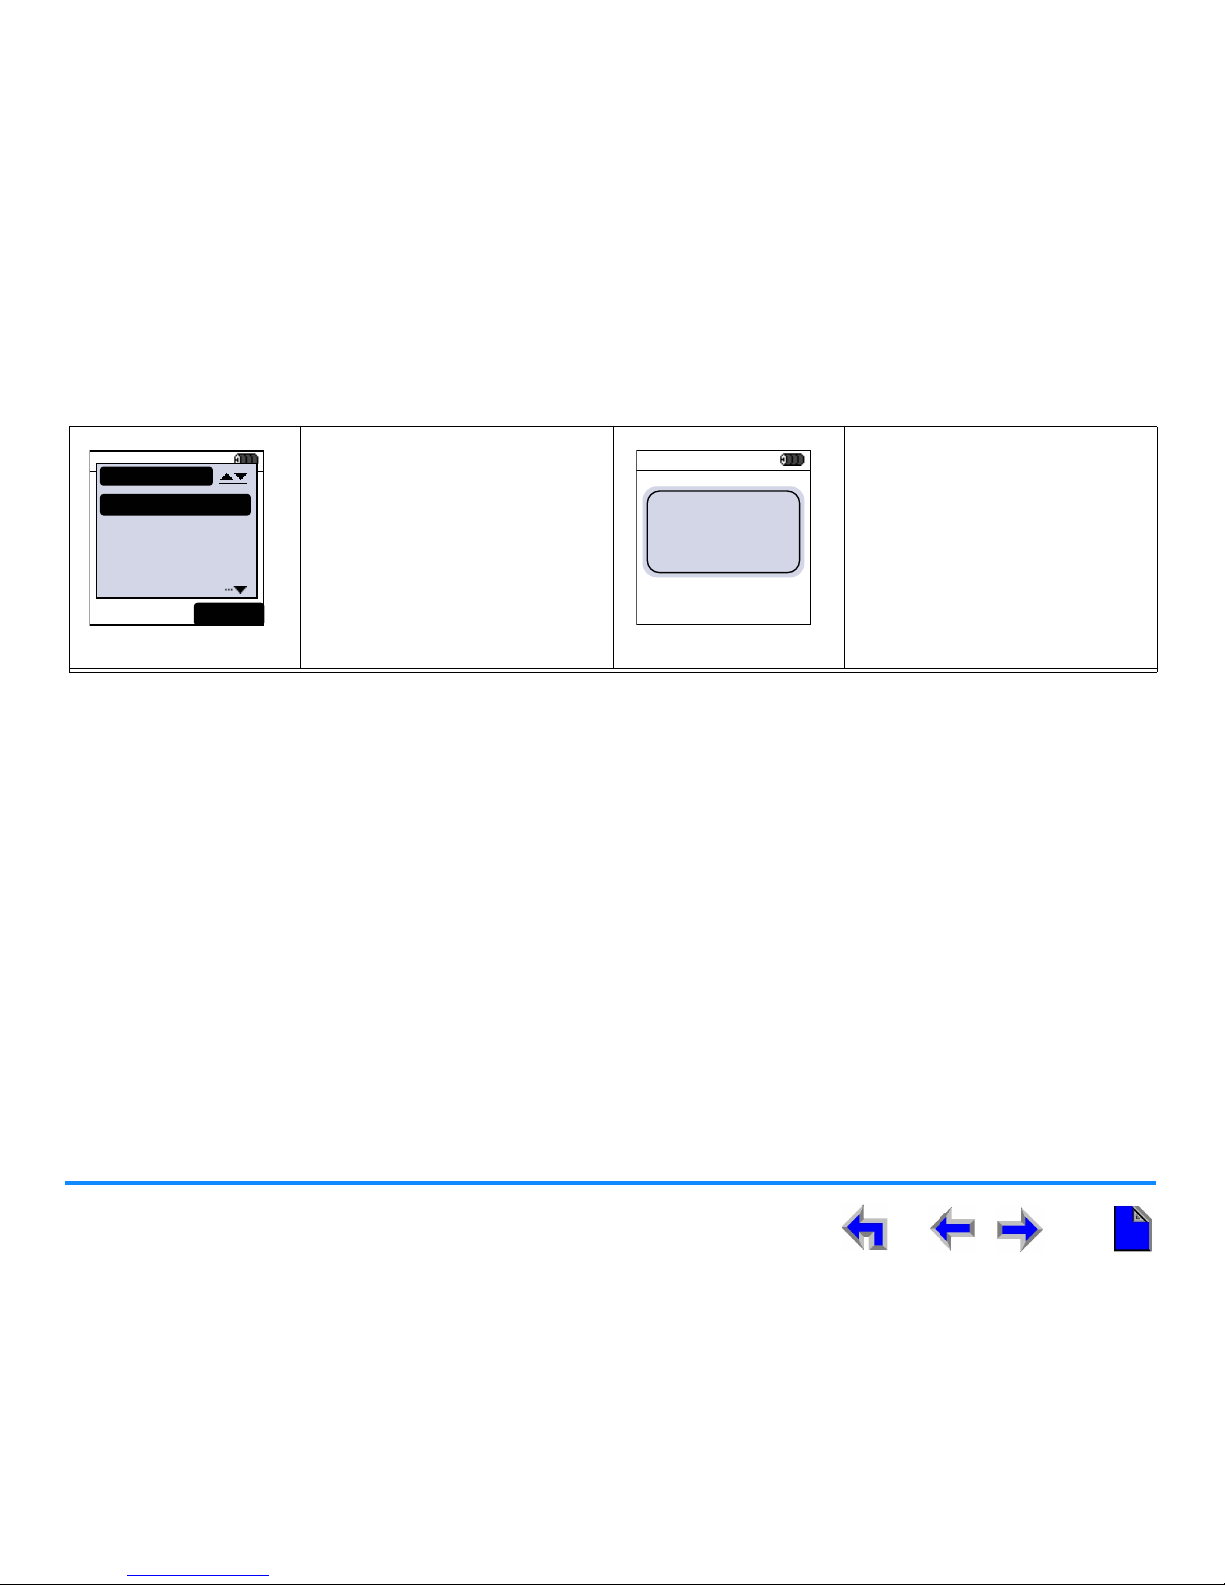
The Handset provides several types of screens to assist you, as shown in Table 2.
Table 2. Handset Screen Types
The highlighted entry in the
Incoming Call screen displays
name (if available) and number.
The other entries display name
only.
List screens display a name and
phone number for each entry. A
Call Log entry also displays the
time called. Press the or
navigation key to cycle through
entries. The left and right arrows
on either side of the name in Call
Log entries indicate that you can
press the or navigation key to
cycle through the dialing options.
Confirmation screens require that
you confirm a choice by pressing
or .
12:30p Feb. 23
1-800-555-0180
0:12 ON CALL
INCOMING
Graham Bell
232-555-0176
Mar y Williams
Charlie Johnson
IG NORE FWD- VM
Incoming Call
Additional
Incoming Calls
Incoming Call Screen
ABC Account...
9-503-555-0194
Amy Lee
Angela Martin
Barry Crick
DIR
1/48
LIST EXI T
List Screen
MESSAGES
1/13
Graham Bell
1-800-916-2007
Jan. 10 @ 12:03pm
PREV
NEXT
05:10
Are you sure you
want to delete all
messages?
YES NO
Confirmation Screen
Page 17
Description 17
AT&T SB67040 Cordless Accessory Handset User’s Guide
Interaction screens display lists of
choices you can make.
Notification screens alert you that
an action has been completed,
provide a status update, or give a
warning.
Table 2. Handset Screen Types (Continued)
12:30p Feb 23
2 Missed Calls
5 New MSGs
EXT 249
John Smith
SETT INGS
1. Display
2. Sounds
3. Restore Default
4. Deregister
EX IT
Interaction Screen
12:00a Dec 0112:00a Dec 0112:00a Dec 01
Sample
notification screen
Notification Screen
Page 18

Description 18
AT&T SB67040 Cordless Accessory Handset User’s Guide
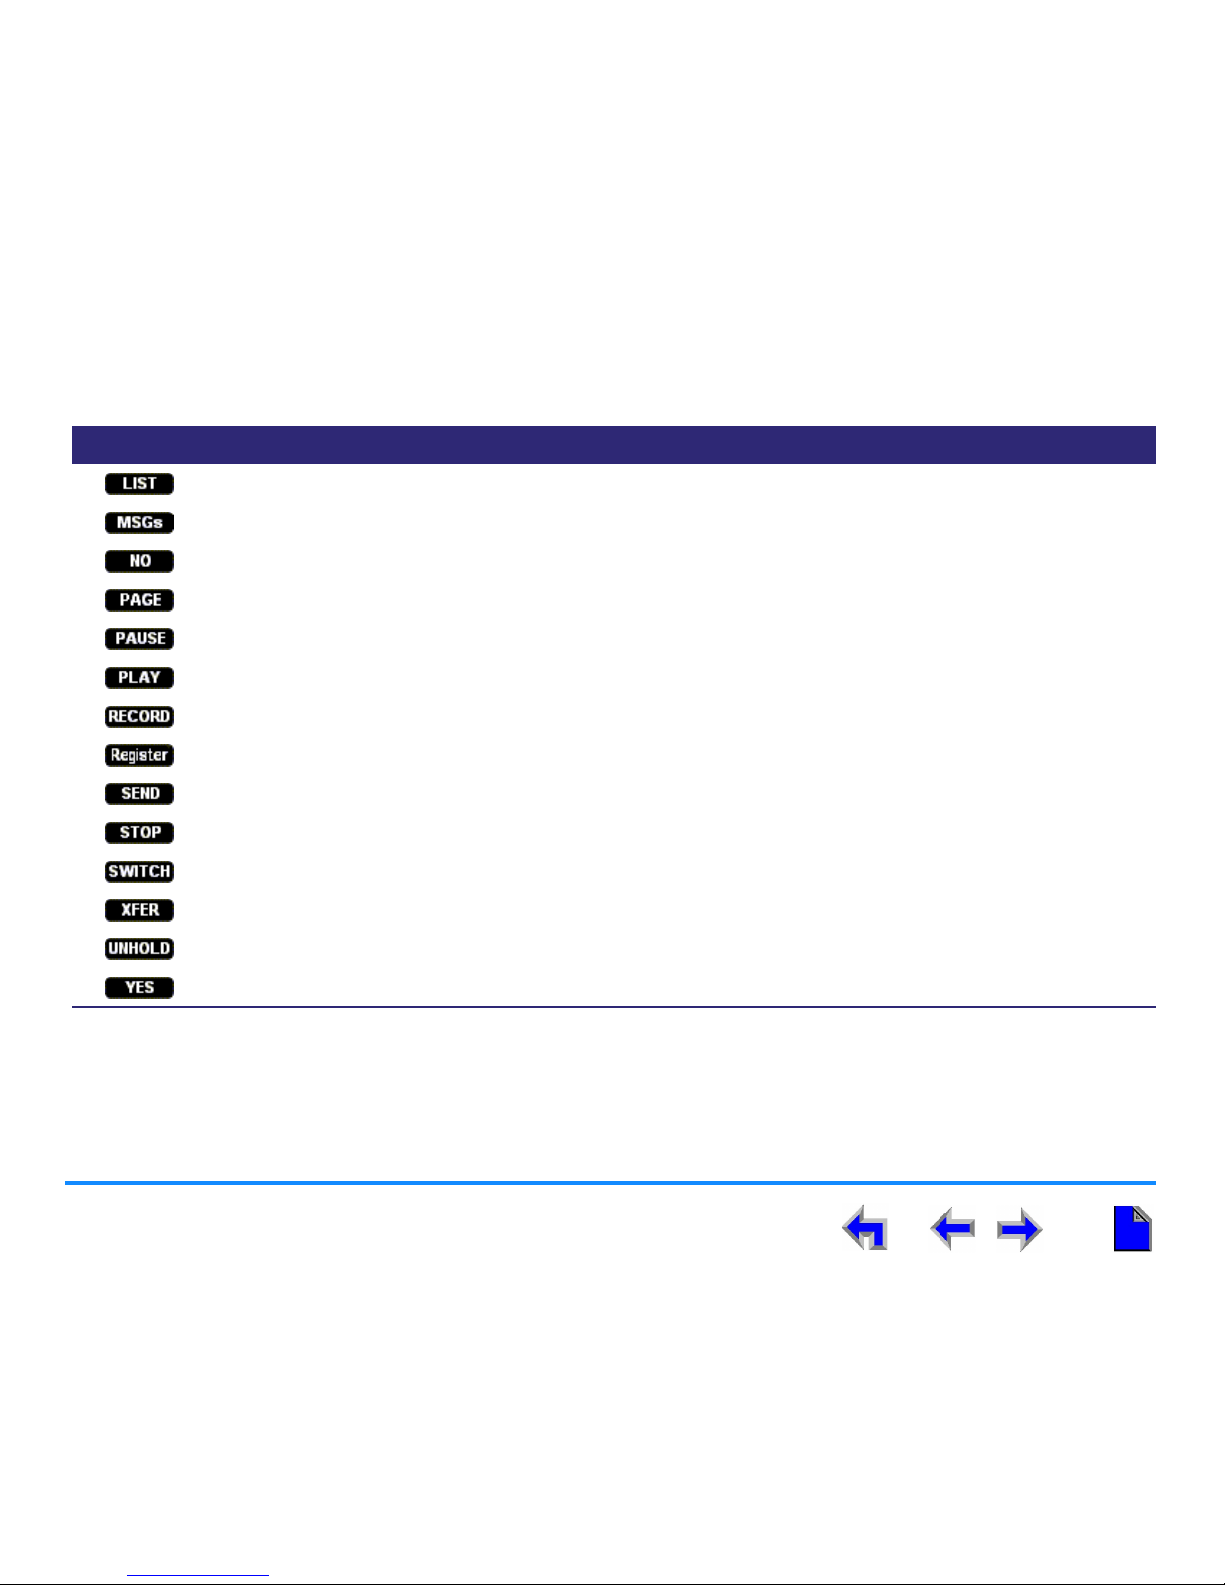
Soft Keys
The Handset soft keys provide a variety of functions determined by the current action. If you are forwarding a call, the soft keys
displayed are different from those displayed if you are making a call. Table 3 lists the soft keys.
Table 3. Handset Soft Keys
Key Function
Answer an incoming call and place it in the Handset Call Deck. During an active call, the current call is
placed on hold and the new call is answered (see “Placing and Retrieving a Call on Hold” on page 70).
Return to the previous level.
Backspace the cursor when entering data.
Terminate the current operation.
Access the Call Log.
Initiate a conference call.
Delete a Call Log or Redial entry.
Deregister the Handset from the Deskset.
Drop a selected call during a three-way conference.
Exit from the current screen and return to the previous mode.
Access the Extension list.
Silence the ringer and forward the incoming call to Voicemail. Return to the previous mode.
Silence the incoming call and place it in the Handset Call Deck.
Complete the conference setup.
Page 19
Description 19
AT&T SB67040 Cordless Accessory Handset User’s Guide
Access the four viewing options for the Directory: All, Personal list, System list, and Extension list.
Access Voicemail messages.
Cancel proposed action in a confirmation screen.
Initiate an all-extension page.
Pause message playback or insert a two-second pause in digit string.
Play Voicemail message.
Record an introductory message to be added to a forwarded message.
Register the Handset to the Deskset.
Forward a message.
Stop recording.
Transfer an active call from the Deskset to the Cordless Accessory Handset.
Begin the process of transferring a held or active call and then confirm transfer.
Take a call off hold and return to active call.
Confirm proposed action in a confirmation screen.
Table 3. Handset Soft Keys (Continued)
Key Function
Page 20

Description 20
AT&T SB67040 Cordless Accessory Handset User’s Guide
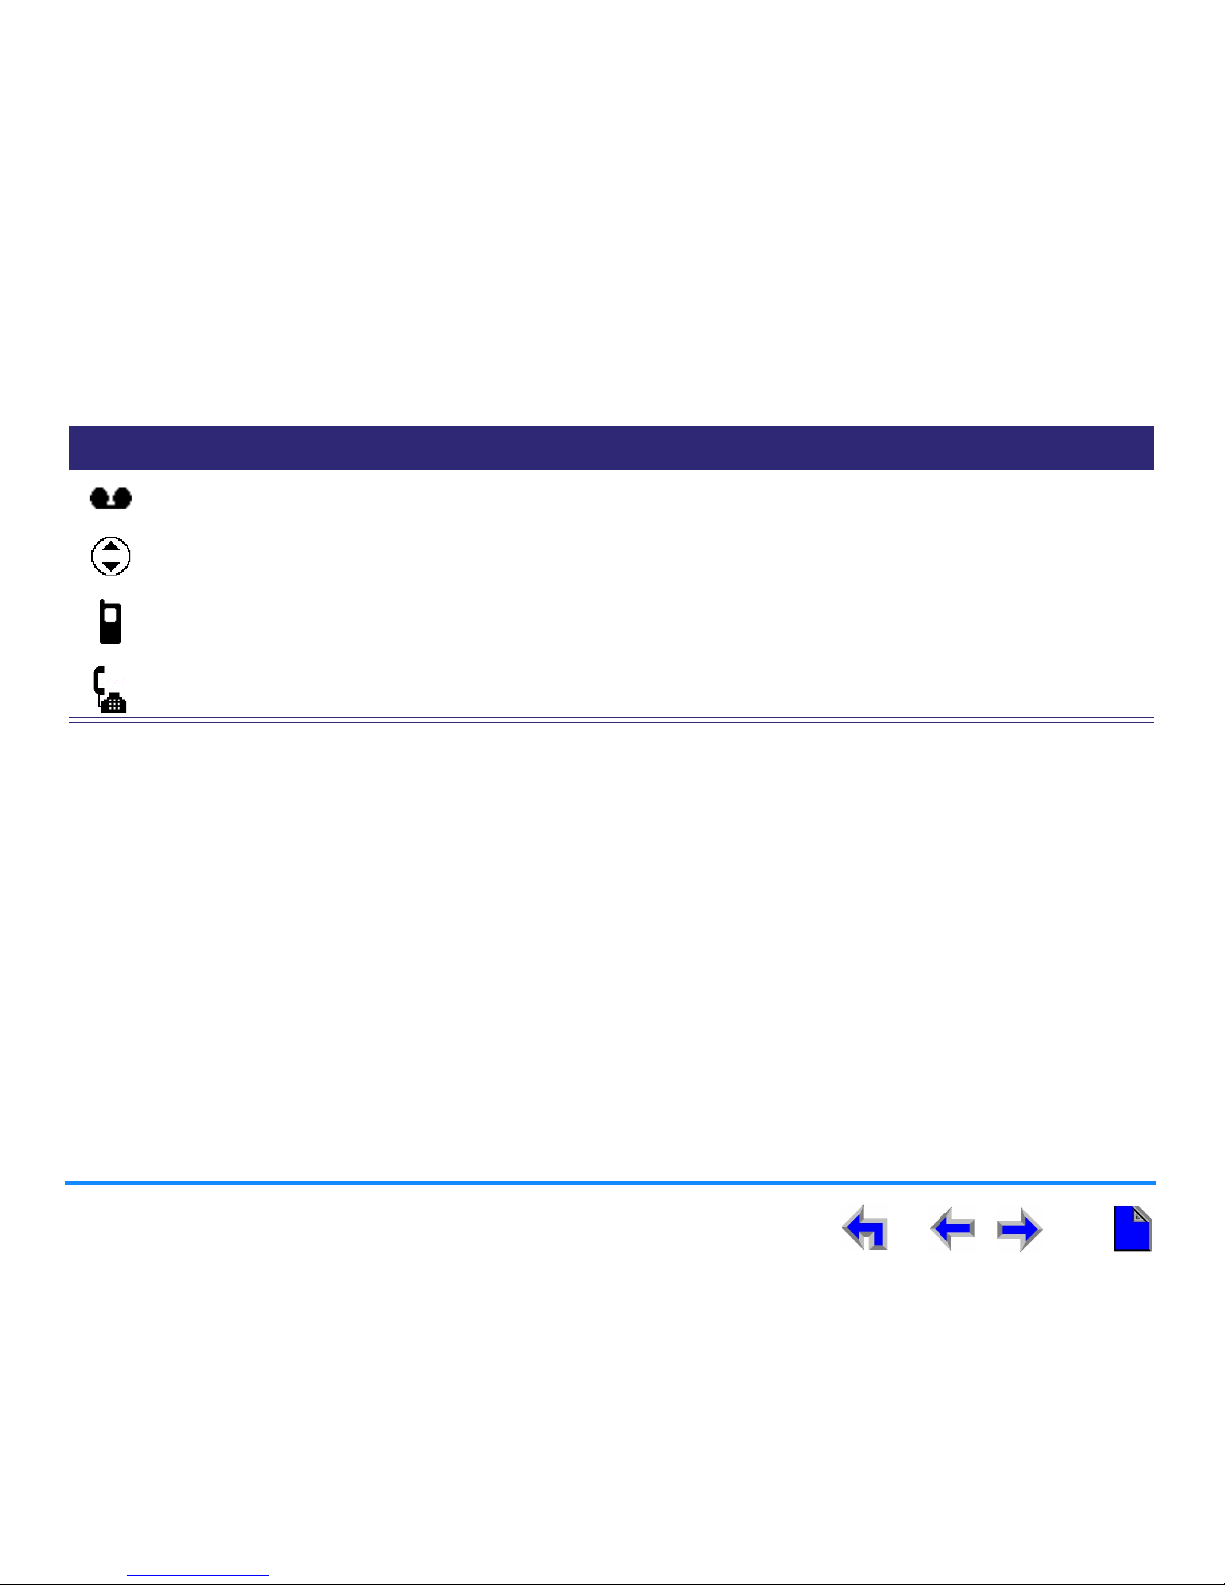
Screen Icons
The Handset screen icons provide an indication of Handset activity. Table 4 lists and describes the screen icons you might see.
Table 4. Handset Screen Icons
Icon Function Description
Navigate up or down list Present whenever the or navigation key can be used to move the highlight
bar to the next or previous entry in a list.
Incoming ring or ringer on Appears during an incoming call, or during volume control.
Silenced incoming ring or
ringer silenced (muted)
Appears during an incoming call, or during volume control.
Active call (off hook) Present during an active call.
Conference Present during a conference call.
Call on hold Appears when a call is placed on hold.
Conference on hold Appears when a conference call is placed on hold.
Speaker or page Appears when user switches to speakerphone or when paging.
Headset in use Appears when a Headset is on a call.
Page 21
Description 21
AT&T SB67040 Cordless Accessory Handset User’s Guide
Voicemail message Appears in the Call Log to indicate that a caller has left a Voicemail message.
Message playback navigation Present during message playback to indicate that there are additional messages
before or after this one.
Handset in use Appears when the Cordless Handset is in use.
Deskset in use Appears when the Deskset is off hook.
Table 4. Handset Screen Icons (Continued)
Icon Function Description
Page 22
Description 22
AT&T SB67040 Cordless Accessory Handset User’s Guide
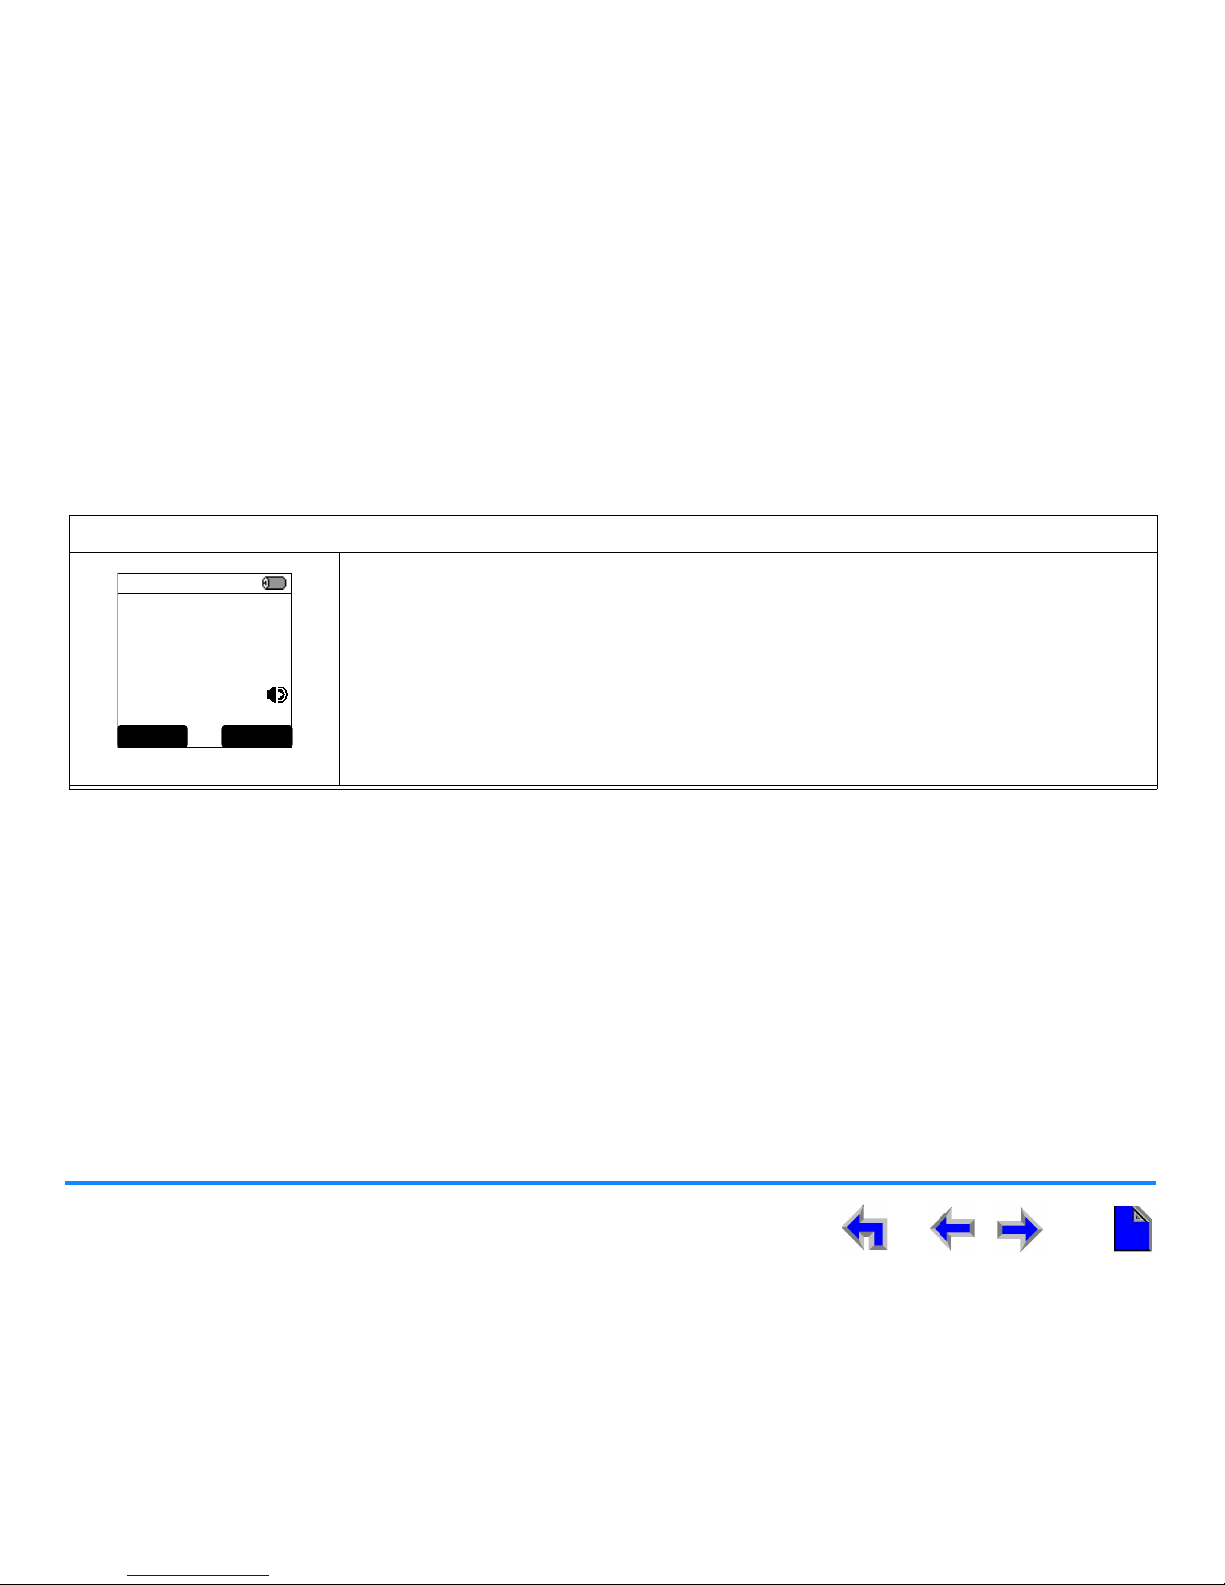
Using the Speakerphone
When the speakerphone is active, the SPEAKER hard key is backlit. In Idle or Dial mode, this hard key behaves like PHONE, except
that audio is from the speakerphone.
To use the speakerphone:
Figure 7. Speakerphone
To initiate a call, press SPEAKER. The key becomes backlit, you hear dial tone, and the
screen shown in Figure 7 displays. You can dial.
To end a call, press OFF. The key backlight goes out, the Idle screen shown in Figure 7
displays.
During an active call, pressing SPEAKER switches audio between the Handset and the
speakerphone.
12:30p Feb. 23
ON CALL
EXT _ # s CONFCID
Page 23
Description 23
AT&T SB67040 Cordless Accessory Handset User’s Guide
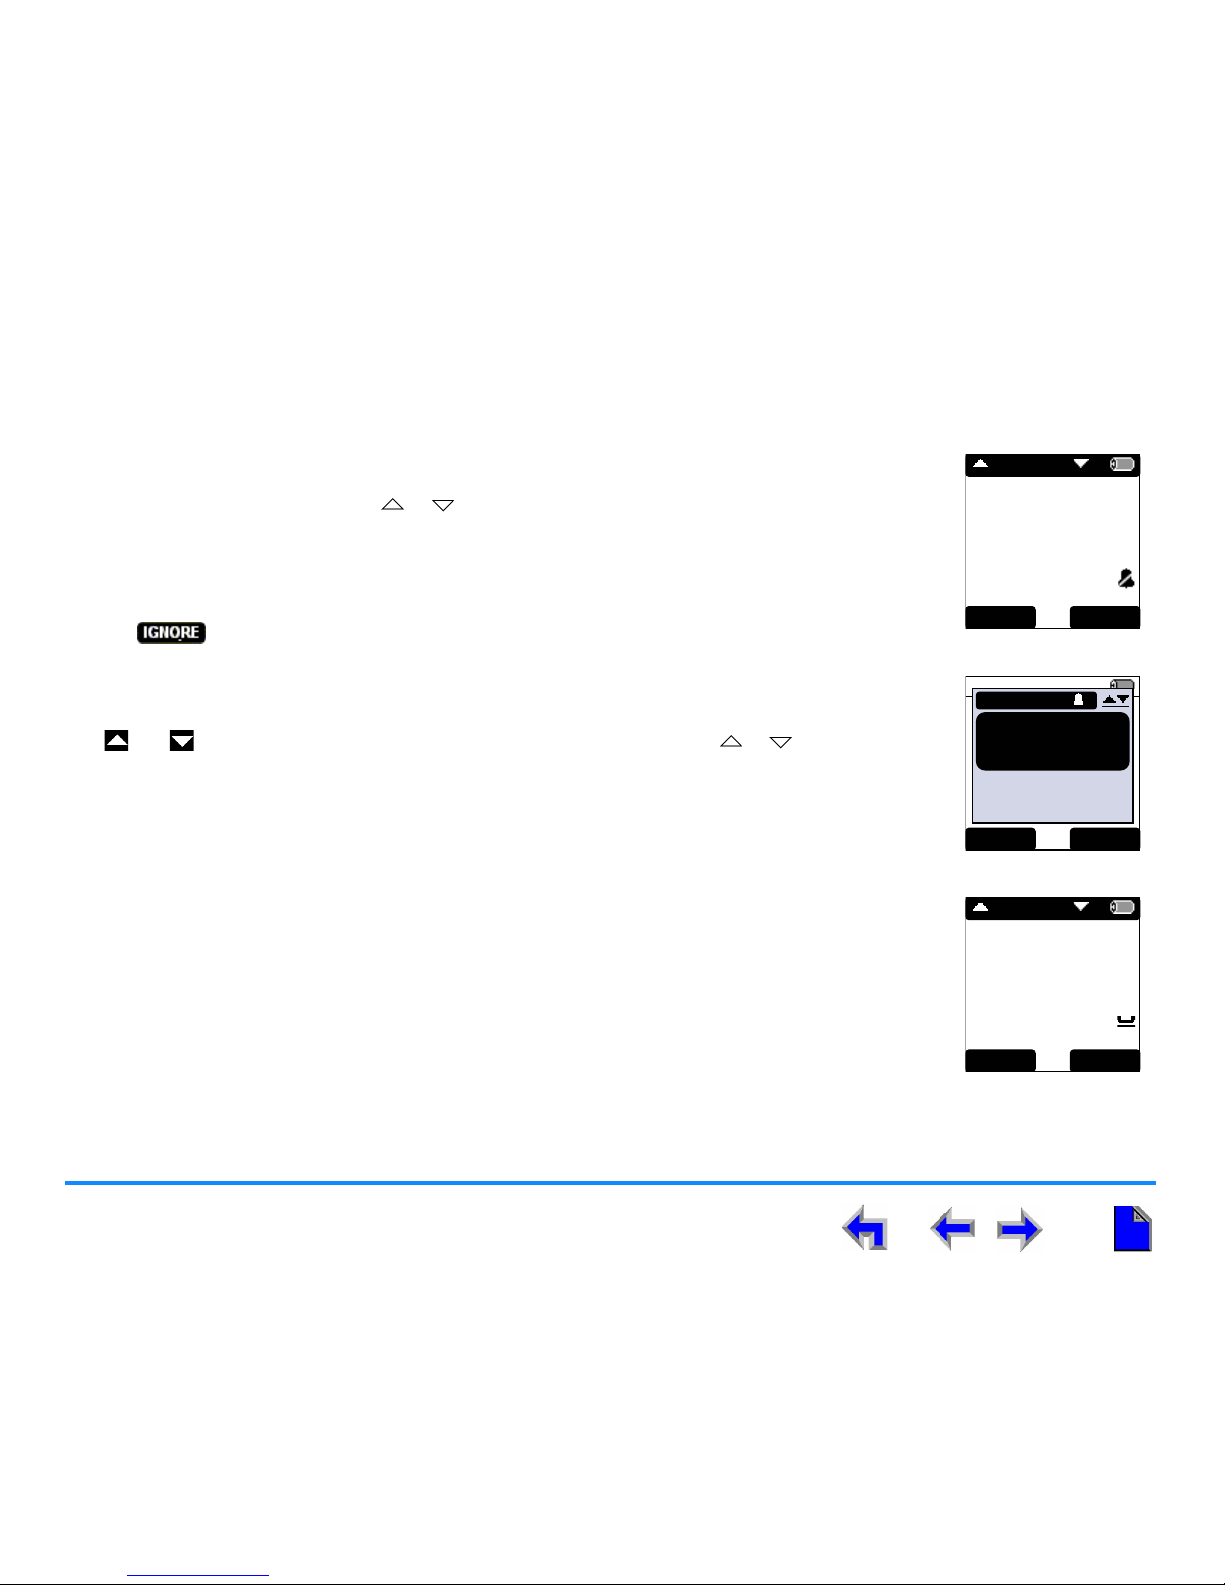
Call Deck
The Call Deck is the list of active, held, parked, and ringing calls. Because the screen is too small to
display multiple calls at the same time, the Handset stacks them like a deck of cards in order of
priority. Review calls by pressing the or navigation key. The Call Deck loops; after reaching the
last call in the deck, press the navigation key again to return to the beginning. The order of priority is:
a. Active Calls — Always on top, as shown in Figure 8.
b. Ignored incoming calls — When you have received an incoming call and have pressed
, as shown in Figure 9.
c. Held calls — If multiple calls have been placed on hold, the display header no longer displays
the date and time. Instead, the phrase Next Call displays, as shown in Figure 10.
The and icons at the top of the display indicate that you can press the or navigation key
to step through the Call Deck.
If you navigate away from a current active call but are still in the Call Deck, you switch back to the
active call after 10 seconds of no activity.
Mary Williams
888-722-7702
0:12 RINGING
ANSWER FWD- VM
NEXT CALL
Figure 8. Active Call
12:30p Feb. 23
2 Missed Calls
5 New MSGs
EXT 249
John Smith
INCOMING
Graham Bell
232-555-0176
IG NORE FWD- VM
Figure 9. Incoming Call
Graham Bell
232 -555-0176
3:00 ON HOLD
XFER UNHOL D
NEXT CALL
Figure 10. Held Call
Page 24

Description 24
AT&T SB67040 Cordless Accessory Handset User’s Guide
Deskset In Use
EXT 201
Fraser Walters
2 New CALLS
0 New MSGs
Deskset in Use.
Press
SW ITCH
to
use this handset.
SWITC H
12:30p Feb 23
CANCEL
Figure 11. Deskset In Use
If the Deskset is being used, pressing PHONE produces the Deskset-in-use notification screen
shown in Figure 11. Press to move the call to the Handset.
Page 25

Description 25
AT&T SB67040 Cordless Accessory Handset User’s Guide
SB67040 Cordless Accessory Handset/SB67030 Deskset Comparison
The following Deskset features are limited on the Handset:
Paging — You can send pages, but you cannot receive pages (see “Paging All Extensions” on page 76).
View other held calls — You can cycle though held calls in the Call Deck (see “Placing and Retrieving a Call on Hold” on
page 70).
View simultaneous incoming calls — You can scroll through simultaneous incoming calls (see “Multiple Incoming Calls”
on page 61).
Predial — You can only predial in Idle and Held Call modes (see “Predialing” on page 47).
View Voicemail List — You can scroll through individual Voicemail records (see “To retrieve Voicemail:” on page 64).
Forward message to extension — You can forward messages to an extension, but with limited functionality (see “To
forward a message:” on page 67).
Directory — You can access the Directory, but you cannot change the sort order (see “Making a Call From the Directory”
on page 49).
Speakerphone Key — You can route audio to/from speaker and pick up calls by pressing SPEAKER, but SPEAKER does
not hang up calls (see “Handset Description” on page 13).
The following Deskset features are not available on the Handset:
Record a Voicemail greeting
Copy Call Log entries into the Directory
Copy a Redial number into the Directory
Create, edit, or delete your Personal list (Directory)
Program Quick Dial entries
Page 26
AT&T SB67040 Cordless Accessory Handset User’s Guide
Getting Started 26
C HAPTER
2
G
ETTING STARTED
This chapter tells you how to install and set up your SB67040 Cordless Accessory Handset.
The chapter covers the following topics:
“Charger Installation” on page 27
“Battery Installation” on page 28
“Battery Charging” on page 29
“Handset Registration” on page 31
“Handset Setup” on page 34
“Handset Volume Control” on page 38
“Link Loss Notification” on page 40
“Dial Pad Data Entry” on page 41
“Handset Help” on page 43
NOTE: For customer service or product information, contact the person who
installed your system. If your installer is unavailable, visit our website
at
www.telephones.att.com or call 1 (888) 916-2007. In
Canada dial
1 (888) 883-2474.
Page 27

Getting Started 27
AT&T SB67040 Cordless Accessory Handset User’s Guide
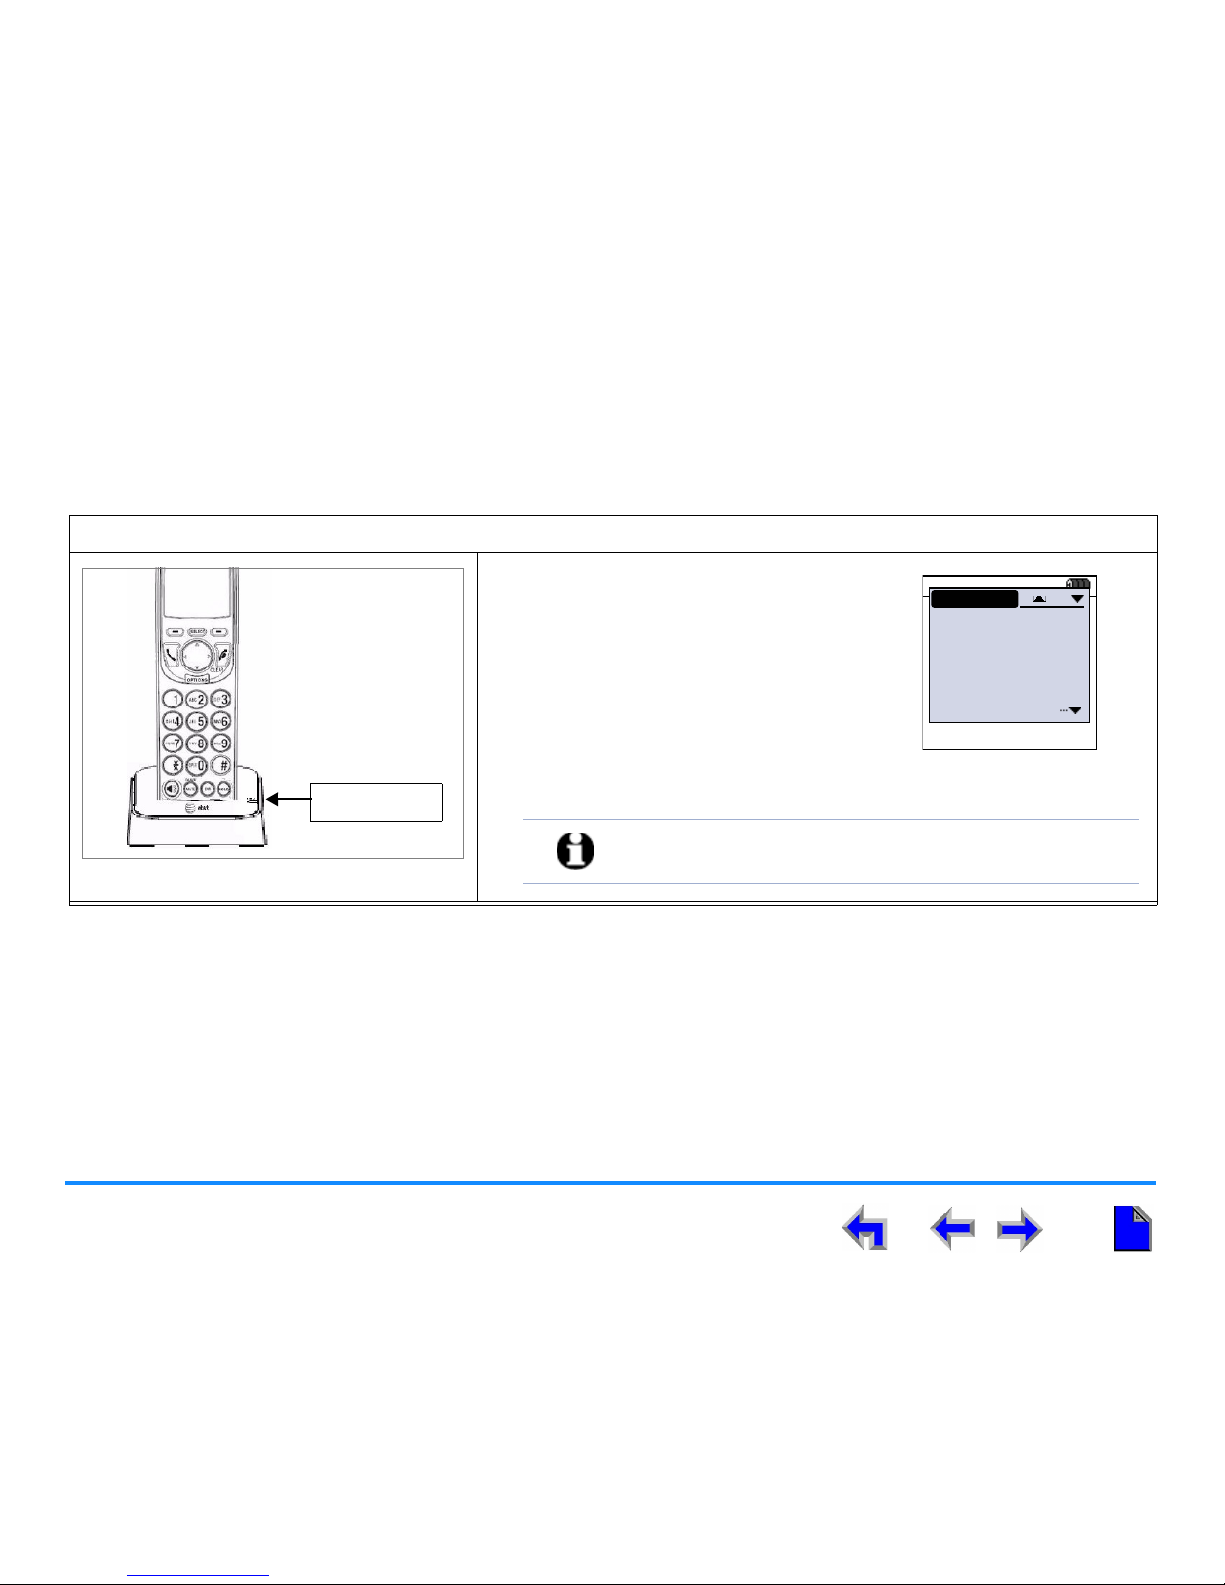
Charger Installation
The Handset uses a rechargeable 2.4V nickel-metal hydride cell (NiMH) pack and comes with a battery Charger. Place the Handset
in the Charger when not in use.
To plug the Handset Charger into AC power:
Figure 12. Handset Charger Power Connect
1. Plug the power adapter into an electrical outlet not controlled by a
wall switch.
2. Plug the small end of the power adapter into the jack on the
underside of the Charger.
3. Route the cord through the slot, as shown in Figure 12.
Page 28

Getting Started 28
AT&T SB67040 Cordless Accessory Handset User’s Guide
Battery Installation
The Handset uses a rechargeable 2.4v nickel-metal hydride cell (NiMH) pack and comes with a battery Charger.
To install the Handset battery:
Figure 13. Install Handset Battery
1. Remove the battery cover by pressing and sliding the cover downward, as
shown in Figure 13.
2. Plug the battery connector securely into the plug inside the Handset
battery compartment, matching the color-coded label.
3. Place the battery in the compartment with THIS SIDE UP facing up as
indicated.
4. Align the cover flat against the battery compartment, then slide it upward
until it clicks into place.
5. Press PHONE. The LCD displays a white background during startup.
After startup, if the battery is sufficiently charged, the LCD displays the
screen shown in Figure 14.
If the screen is blank, place the Handset in the Charger.
Figure 14. Place In Charger
Battery Connector
12:00a Dec 0112:00a Dec 0112:00a Dec 01
Place in charger.
Page 29
Getting Started 29
AT&T SB67040 Cordless Accessory Handset User’s Guide
Battery Charging
Charge the Handset battery for at least 16 hours before use. When fully charged, the Handset battery provides approximately
five hours of talk time or three days of standby time.
To charge the Handset battery:
Figure 15. Handset in Charger
Place the Handset in the Charger, as shown
in Figure 15.
The CHARGE light is on when the
Handset is charging.
If the Handset has not yet been
registered, the Register screen shown
in Figure 16 displays within 15
seconds.
Charge Light
12:00a Dec 0112:00a Dec 0112:00a Dec 01
To register Handset:
1. Go to your
Des ks et.
2. Pres s MENU.
3. Select User
REGISTER
1/3
Figure 16. Register Screen
NOTE: Place the Handset in the Charger when not in use.
Page 30
Getting Started 30
AT&T SB67040 Cordless Accessory Handset User’s Guide
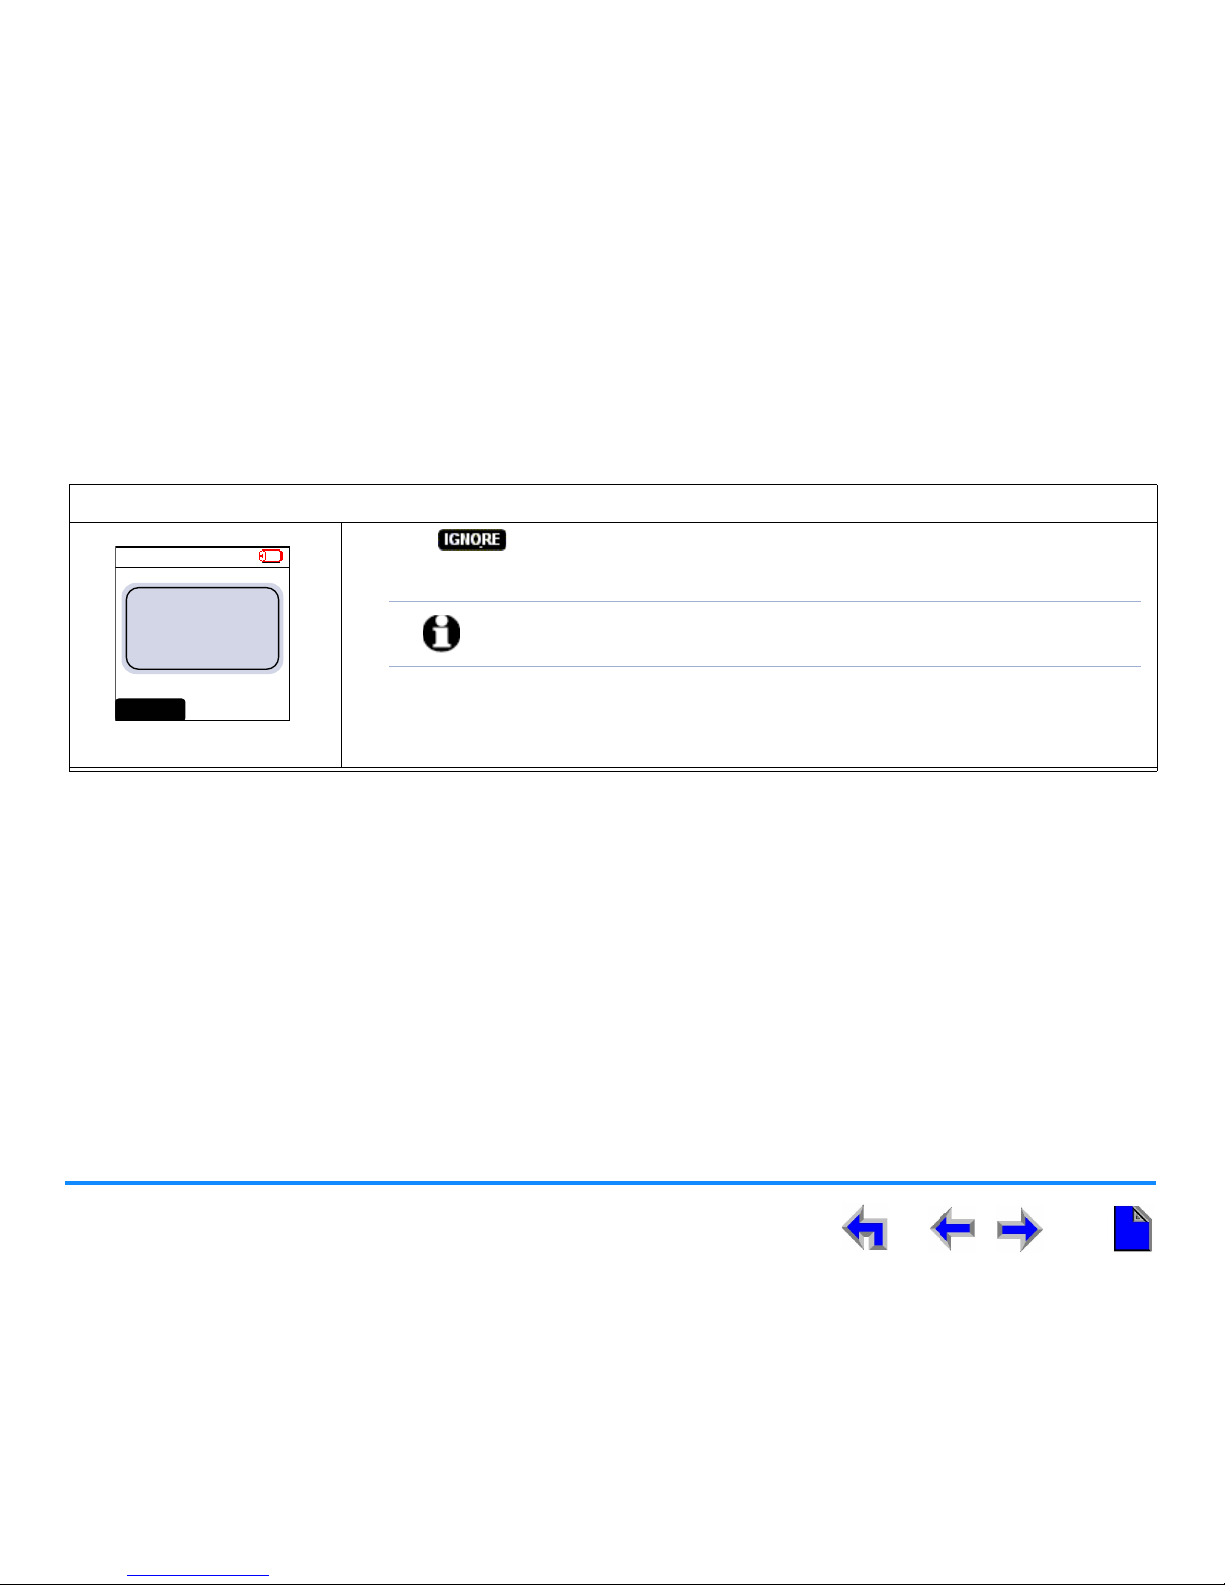
Low Battery Notification
When the battery is low, the Handset emits an alert tone and displays the notification screen shown in Figure 17.
Power Save
If you are not on an active call and press no keys for 30 seconds, the system goes into Power Save mode.
If you were in a feature or menu list, such as the Directory or Call Log, the system returns to Idle mode before going into
Power Save mode.
In this mode, the backlight turns off.
Press any key to end Power Save mode.
To handle low battery notification:
Figure 17. Low Battery
1. Press to exit the notification screen.
2. Place the Handset into the Charger.
12:30p Feb 23
2 Missed Calls
5 New MSGs
EXT 249
John Smith
Low Battery.
Please place in
charger.
IG NORE
NOTE: If the Handset stops working when you are on a call because of low
battery charge, that call is auto-held on the Deskset.
Page 31

Getting Started 31
AT&T SB67040 Cordless Accessory Handset User’s Guide
Handset Registration
This procedure provides instructions for registering a Handset. Only one Handset and one Headset can be registered to a Deskset.
For complete information on cordless device registration, see the “SB67030 Deskset User’s Guide”.
To register the Handset:
Figure 18. Place In Charger
Figure 19. Register Handset
If the Handset is not registered to a Deskset, the Place in charger notification
screen shown in Figure 18 displays upon powering up.
1. Place the Handset into the Charger. The Handset generates a beep and the
Register Handset screen shown in Figure 19 displays.
2. Press MENU on the Deskset.
3. Press 2 on the Deskset dial pad.
If you have set a user password, the User
Password screen shown in Figure 20
displays.
Enter your password and press
SELECT.
To correct errors, use the key.
To c an cel y our c hang es on tha t s cree n,
press at any time. The set will
return to the previous screen.
12:00a Dec 0112:00a Dec 0112:00a Dec 01
Place in charger.
12:00a Dec 0112:00a Dec 0112:00a Dec 01
To register Handset:
1. Go to your
Des ks et.
2. Pres s MENU.
3. Select User
REGISTER
1/3
Quick
Dial
User Password
Enter user password:
Backspc Can cel
Use dial pad to enter user password.
Press SELECT when done.
Figure 20. Enter User Password
Page 32

Getting Started 32
AT&T SB67040 Cordless Accessory Handset User’s Guide
To register the Handset: (Continued)
Figure 21. Cordless Registration
4. Press 5 on the Deskset dial pad to display the
Cordless Registration menu shown in Figure 21. The
screen reflects whether the Handset and Headset
are registered.
5. Press 1 on the Deskset dial pad to begin the
registration process.
6. To register the Handset press , as shown in
Figure 24.
Once the Handset registration begins, the Handset
and Deskset display the registration messages shown
in Figure 22.
The Handset displays Handset Registered, as
shown in Figure 22.
The registration process on both Deskset and
Handset ends after two minutes.
If the registration process times out, the Handset
displays Registration Failed, as shown in
Figure 23, generates an error tone, and resets.
Try registration again.
When registration is complete, the Handset
generates a confirmation tone.
7. Press to return to the Cordless Registration
screen.
Figure 24. Register Cordless
Handset
12:00a Dec 01
Registration in
progress ...
12:00a Dec 01
Handset
Registered.
Figure 22. Registration
Messages
12:00a Dec 01
Regis tration
Failed.
Figure 23. Registration
Failed
Quick
Dial
Cordless Handset Registration
Cordless Handset is currently
Not Registered.
Register Ex it
Place C ordless Hands et in charger.
Press Register t o begin process .
Page 33

Getting Started 33
AT&T SB67040 Cordless Accessory Handset User’s Guide
To register the Handset: (Continued)
To deregister the Handset:
Figure 25. Deregistration Screen
1. Perform Steps 1 through 4 of the procedure “To register the Handset:” on page 31.
2. Press 1 on the Deskset dial pad to begin the deregistration process.
3. To deregister the Handset, press , as shown in Figure 25.
4. To confirm deregistration, press . Press to keep the Handset
registered.
5. To return to the Cordless Registration screen, press .
If the Deskset is unavailable, you can also deregister the Handset at the Handset.
1. Press OPTIONS.
2. Press 5 for SETTINGS.
3. Press 4 for Deregister.
4. Press .
NOTE: If registration fails, it may be because the Handset is already registered. Follow the instructions “To
deregister the Handset:”, below, to verify if the Handset is registered and deregister it if necessary. Then
try registration again.
Quick
Dial
Cordless Handset Registration
Cordless Handset is currently
Registered.
Ex i tDeRe g
Press DeReg to deregis ter the C ordless
Handset.
Page 34

Getting Started 34
AT&T SB67040 Cordless Accessory Handset User’s Guide
Handset Setup
Handset setup begins with the Idle screen illustrated and described in Figure 6 on page 15.
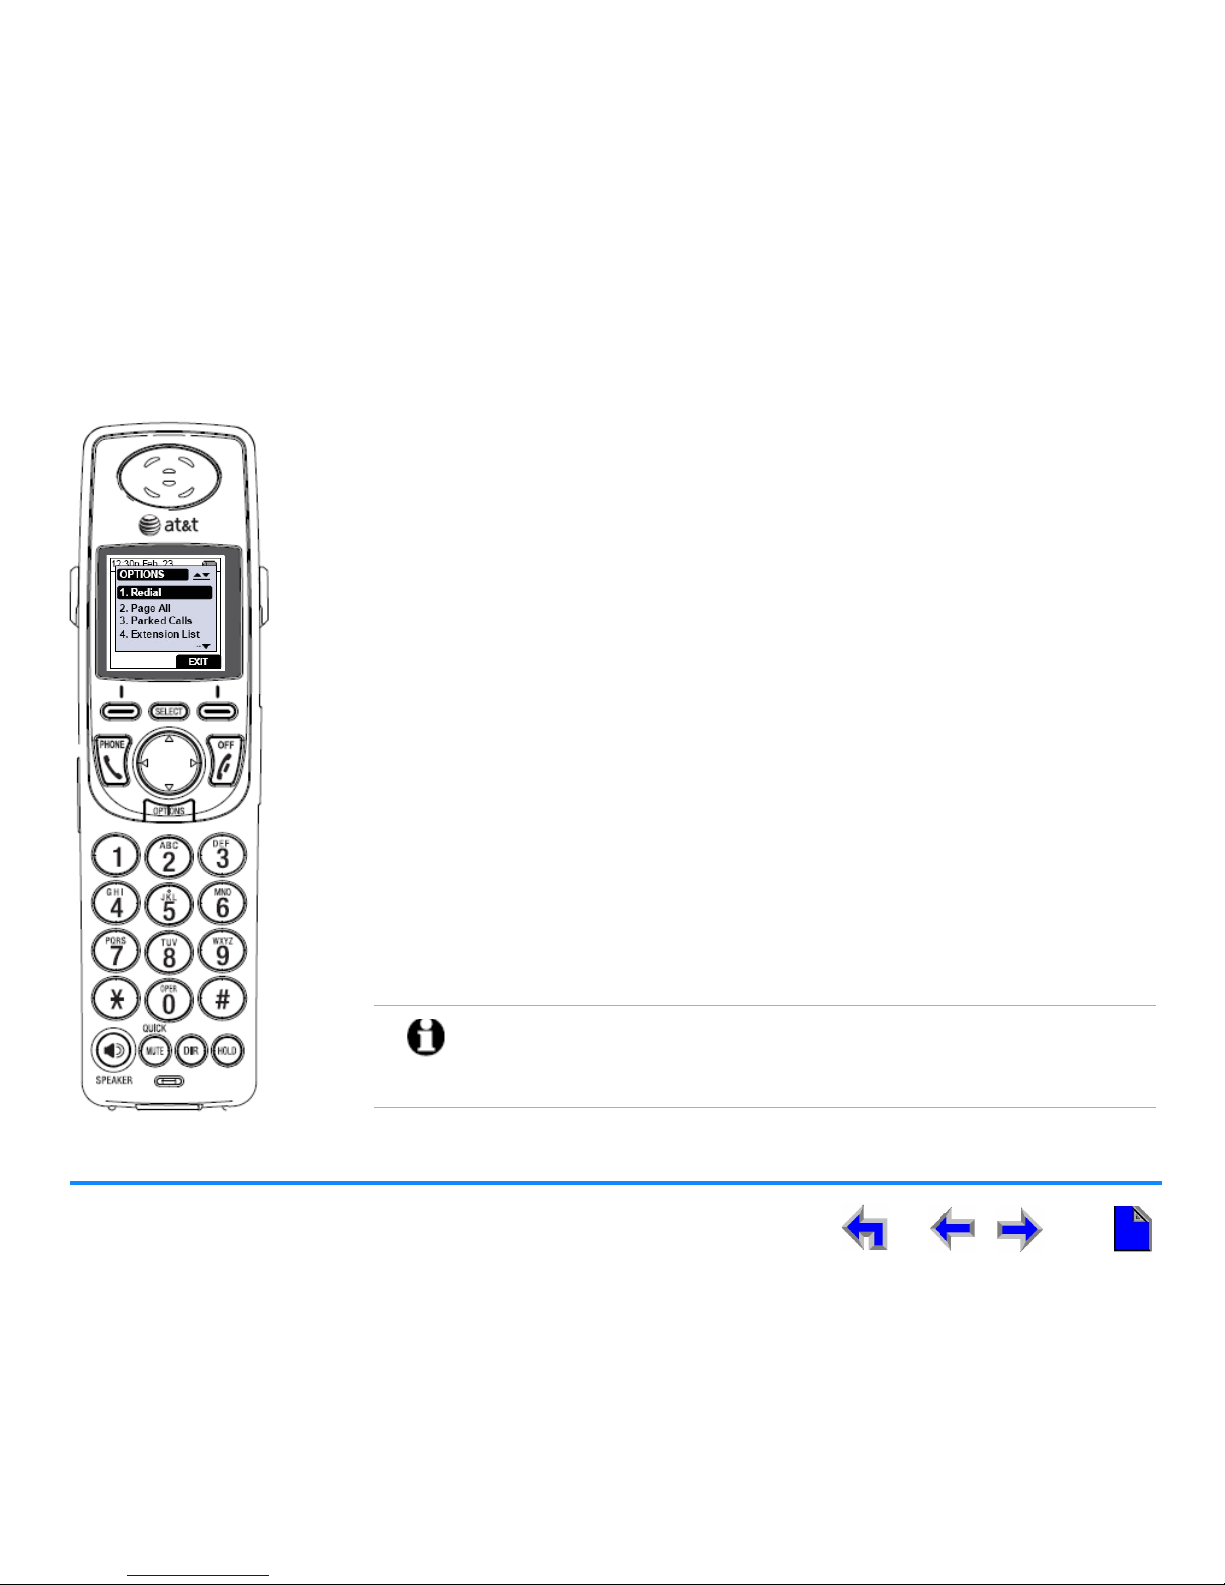
To view and alter configuration settings on the Handset:
Figure 26. Options Settings
1. Press OPTIONS. The menu shown in Figure 26 displays.
2. Press 5 to display the Settings menu shown in Figure 27.
3. Perform one of the following functions:
“To adjust the display contrast:” on page 35
“To adjust the sound:” on page 36
“To reset the Handset to default settings (factory defaults):” on
page 37
“To deregister the Handset:” on page 33
“To view the Product ID:” on page 37
Figure 27. Settings Menu
12:30p Feb 23
2 Missed Calls
5 New MSGs
EXT 249
John Smith
CIDEX IT
OPTIONS
6. Help
3. Parked Calls
4. Extension Lis t
5. Settings
12:30p Feb 23
2 Missed Calls
5 New MSGs
EXT 249
John Smith
CIDEX IT
OPTIONS
1. Redial
2. Page All
3. Parked Calls
4. Extension List
12:30p Feb 23
2 Missed Calls
5 New MSGs
EXT 249
John Smith
SETT INGS
1. Display
2. Sounds
3. Restore Default
4. Deregister
EX IT
Page 35

Getting Started 35
AT&T SB67040 Cordless Accessory Handset User’s Guide
To adjust the display contrast:
Figure 28. Settings Menu
1. To display the Settings menu shown in Figure 28, perform steps 1 and 2 of the “To view
and alter configuration settings on the Handset:” on page 34.
2. Press 1 to display the Contrast screen shown in Figure 29.
3. Press the or navigation key to adjust the contrast until the desired level is reached.
4. To accept the changes you have made and return to the Settings menu shown in Figure 27
on page 34, press .
Figure 29. Contrast Menu
12:30p Feb 23
2 Missed Calls
5 New MSGs
EXT 249
John Smith
SETT INGS
1. Display
2. Sounds
3. Restore Default
4. Deregister
EX IT
Page 36

Getting Started 36
AT&T SB67040 Cordless Accessory Handset User’s Guide
To adjust the sound:
Figure 30. Settings Menu
1. Perform steps 1 and 2 of “To view and alter configuration settings on the Handset:” on
page 34. The Settings screen shown in Figure 30 displays.
2. Press 2 to display the Sounds menu shown in Figure 31.
3. Press the or navigation key to cycle through audio options:
To adjust the ringer volume from 0 to 6, press the or navigation key. Decreasing
the volume to zero silences the ringer. The ringer sounds as it is adjusted. You can
also alter the ringer volume in the Idle mode by pressing Volume.
To choose one of nine ringtones, press the navigation key once to highlight
Ringtone. To select the ringtone press the or navigation key. This setting only
applies to this Handset.
To change whether there are Key Beeps, press the navigation key twice to highlight
Key Beeps. Press the or navigation key to adjust the Key Beeps ON or OFF.
4. To accept the adjustments and return to the Settings menu shown in Figure 27 on page
34, press .
Figure 31. Sounds Menu
12:30p Feb 23
2 Missed Calls
5 New MSGs
EXT 249
John Smith
SETT INGS
1. Display
2. Sounds
3. Restore Default
4. Deregister
EX IT
SOUNDS
Ringer Volume 3
Ringtone [ 5 ]
Key Beeps [ On ]
EX IT
Page 37

Getting Started 37
AT&T SB67040 Cordless Accessory Handset User’s Guide
To reset the Handset to default settings (factory defaults):
Figure 32. Settings Menu
1. Perform steps 1 and 2 of “To view and alter configuration
settings on the Handset:” on page 34 to display the menu
shown in Figure 32.
2. Press 3 to display the Restore Default screen shown in
Figure 33.
Press to clear all Handset customization.
Press to keep current settings.
To view the Product ID:
Figure 34. Settings Menu
1. Perform steps 1 and 2 of “To view and alter configuration
settings on the Handset:” on page 34 to display the menu
shown in Figure 34.
2. Press 5 to display the Product ID screen shown in Figure 35.
This page displays the Handset’s identification information,
including serial number, model number, software version, and
registration status. This information cannot be altered.
3. Press to return to the Settings menu shown in
Figure 27 on page 34.
12:30p Feb 23
2 Missed Calls
5 New MSGs
EXT 249
John Smith
SETT INGS
1. Display
2. Sounds
3. Restore Default
4. Deregister
EX IT
Figure 33. Restore
Default
12:30p Feb 23
2 Missed Calls
5 New MSGs
EXT 249
John Smith
SETT INGS
1. Display
2. Sounds
3. Restore Default
4. Deregister
EX IT
Figure 35. Product ID
Page 38

Getting Started 38
AT&T SB67040 Cordless Accessory Handset User’s Guide
Handset Volume Control
The Handset volume control changes both ringer and incoming voice volume. You can increase or decrease the incoming voice
volume during an active call or during message playback. You can increase or decrease the ringer volume only if not on an active
call.
To adjust the ringer volume:
Figure 36. Ringer Volume
When not on an active call:
Press Volume to increase the ringer volume.
OR
Press Volume to decrease the ringer volume.
A screen similar to the one shown in Figure 36 displays. The example shows the volume set
to 3. The minimum ringer volume is zero (silenced) and maximum volume is 6.
If you set the ringer to zero (silenced), the silent ring icon (see “Screen Icons” on page 20)
displays on the Idle screen during an incoming call, as shown in Figure 37
.
Figure 37. Silenced Ringer
12:30p Feb 23
2 Missed Calls
5 New MSGs
EXT 249
John Smith
RINGER
EX IT
12:30p Feb. 23
2 Missed Calls
5 New MSGs
EXT 249
John Smith
IG NORE FWD-V M
INCOMING
Graham Bell
232 -555-0176
Silent Ring Icon
Page 39

Getting Started 39
AT&T SB67040 Cordless Accessory Handset User’s Guide
To adjust the incoming voice volume:
Figure 38. Voice Volume
During an active call or during message playback:
Press Volume to increase the incoming voice volume
OR
Press Volume to decrease the incoming voice volume
A screen similar to the one shown in Figure 38 displays. The example shows the volume set
to 3. There are six volume levels.
12:30p Feb 23
1-800-555-0180
0:12 ON A CALL
PHONE
EX IT
Page 40

Getting Started 40
AT&T SB67040 Cordless Accessory Handset User’s Guide
Link Loss Notification
If the Handset leaves the operating range of the Deskset, or if there is radio frequency (RF) interference, a Lost connection with
Deskset notification screen displays, as shown in Figure 39. The Handset will search for the Deskset. After five seconds, the
Searching for Deskset… notification screen displays. If you see either of these screens, move closer to the Deskset.
.
Figure 39. Link Loss Notification Screens
If you are on a call, that call is not dropped immediately, but there is no voice transmission or reception until a connection with
the Deskset is re-established. The Deskset displays as the Call Appearance icon for that call. Any active or held calls are
dropped after four minutes of continuous link loss.
12:30p Feb 23
Lost connection
with Deskset.
12:30p Feb 23
Searching for
Deskset...
Page 41

Getting Started 41
AT&T SB67040 Cordless Accessory Handset User’s Guide
Dial Pad Data Entry
Use the dial pad to enter alphabetical characters into a text field, such as when searchi ng a Directory (see “Searching a List Using
the Dial Pad” on page 42). Digits 2, 3, 4, 5, 6, and 8 have three assigned letters, while digits 7 and 9 have four assigned letters.
The keys function as follows:
1. Pressing the dialing key once enters the uppercase first letter.
2. Pressing the dialing key twice enters the uppercase second letter.
3. Pressing the dialing key three times enters the uppercase third letter.
4. Pressing the dialing key four times enters the number.
5. Pressing the key further cycles through the letters again.
The # and * keys have been assigned special characters. Pressing these keys cycles through each special character in the order
shown.
Repeatedly pressing # (pound) cycles through the following characters: # & ‘ , - . @ “.
Repeatedly pressing * (star) cycles through the following characters: ! ( ) * + ?.
Page 42

Getting Started 42
AT&T SB67040 Cordless Accessory Handset User’s Guide
Searching a List Using the Dial Pad
To search for a list entry:
Figure 40. Directory
1. To display the Directory shown in Figure 40 press DIR.
2. Pressing a dial pad key causes a letter to display in the center of the handset screen. The
Handset finds a name that begins with that letter. If there is no name starting with that
letter, the Handset finds the next name in the alphabet. Examples follow:
If you enter K [Press 5 twice] and an exact match is found, the highlight bar moves to
that entry.
If you enter L [Press 5 three times] and the Handset cannot find an exact match, the
highlight bar moves to the entry with the closest alphabetical match.
ABC Account...
9-503-555-0194
Amy Lee
Angela Martin
Barry Crick
DIR
1/48
LIST EXI T
Page 43

Getting Started 43
AT&T SB67040 Cordless Accessory Handset User’s Guide
Handset Help
Access help by pressing OPTIONS, and selecting Help, which is always last on the Options screen. The information you see
depends on what you were doing when you selected Help. Table 5 provides an illustration of each help screen and a description
of the screen function.
Table 5. Help Content
1. Idle screen info 1. Status indication Identifies the status messages that appear in the upper
right-hand corner of the display.
2. Missed Calls Describes the Missed Calls counter in the center of the
screen.
3. New messages Describes the New MSGs counter that indicates the number
of unreviewed Voicemail messages for this extension.
2. Voicemail 1. Message playback Provides instructions for playing old and new messages.
2. Forwarding a msg Provides instructions for forwarding messages.
3. Deleting msgs Provides instructions for deleting one or all messages.
HELP
EX IT
5. Making a call
6. Call manageme nt
7. Conference calls
9. Battery status
8. Incoming ca lls
Page 44

Getting Started 44
AT&T SB67040 Cordless Accessory Handset User’s Guide
3. Directory 1. Reviewing list Provides instructions for reviewing the Directory.
2. Triple-tap search Provides instructions for using the Triple-tap search (see
“Dial Pad Data Entry” on page 41).
3. Directory sort Provides instructions on using the Directory sort menu.
4. Call Log and Redial 1. Reviewing the list Provides instructions for reviewing the Call Log lists for
unanswered incoming calls and the Redial lists for outgoing
calls.
2. Playing voicemail Provides instructions for accessing the Voicemail feature.
3. Deleting entries Provides instructions for deleting one or all of the Directory
entries.
5. Making a call 1. Pre-dialing digits Describes the operation of the predial feature.
2. Going off-hook Describes the procedure for going off hook from predial.
3. Calling from a list Provides instructions for placing a call from the Directory,
Call Log, Redial, Messages, or Extension list.
4. Quick Dial Describes how to use the Quick Dial feature.
6. Call management 1. Transferring a call Provides instructions for transferring an internal or external
call to another extension or to an external number.
2. Holding a call Describes the operation of the Hold function.
3. Parking a call Provides instructions for parking and unparking a call.
4. Paging Provides a description of the paging feature operation.
Table 5. Help Content (Continued)
Page 45

Getting Started 45
AT&T SB67040 Cordless Accessory Handset User’s Guide
7. Conference calls 1. How to host Provides instructions for hosting a conference call.
2. Placing on hold Describes how to place a conference call on hold.
3. Dropping a party Describes how to drop a party from a conference call.
4. How to end Describes how to end a conference call.
8. Incoming calls 1. Handling calls Describes how to answer a call while the phone is idle.
2. Ringer volume Describes how to change the ringer volume while the
Handset is ringing or when it is in Idle mode.
3. Call Fwd and DND Describes the function of the Call Forward and Do Not
Disturb (DND) features.
9. Battery status 1. Low battery Describes Handset operation when the battery is low.
2. Using the charger Describes how to use the Charger to maintain Handset
operation.
Table 5. Help Content (Continued)
Page 46

AT&T SB67040 Cordless Accessory Handset User’s Guide
Making a Call 46
C HAPTER
3
M
AKING A CALL
This section describes making a call, either on hook or off hook. A phone is on hook when
there is no call started or in progress. The phone is off hook starting from when you can hear
the dial tone to when you hang up the call. You can make a call in the following ways:
“Predialing” on page 47
“Live Dialing” on page 48
“Making a Call From the Directory” on page 49
“Making a Call From the Extension List” on page 51
“Making a Call From the Call Log” on page 52
“Making a Call From Redial” on page 54
“Making a Call From Quick Dial” on page 55
Page 47

Making a Call 47
AT&T SB67040 Cordless Accessory Handset User’s Guide
Predialing
You can predial a phone number before pressing PHONE or SPEAKER. Pressing a dial pad key in these cases initiates the Predial
mode. In this mode the Handset produces no dial tone. You can also predial from a list.
To make a call while the Handset is on hook:
Figure 41. Predial Mode
1. Press any dial pad key to initiate predialing, as shown in Figure 41.
Dial 9 first for an external call.
2. Press additional dial pad keys. You have the following options:
Press the navigation key to delete a digit and move the cursor back one space.
Press OFF or to clear all digits. The Idle screen displays.
Press to insert a two-second pause.
3. Press PHONE or SPEAKER to go off hook and dial the Predial digits.
12:30p Feb. 23
9- 1-800-555-018
CANCELPAUSE
Press to backspace
Page 48

Making a Call 48
AT&T SB67040 Cordless Accessory Handset User’s Guide
Live Dialing
Live dialing refers to dialing when the phone is already off hook.
To make a call off hook:
Figure 42. Live Dial Mode
1. Press PHONE or SPEAKER to initiate a call, as shown in Figure 42.
2. Press the dial pad keys to dial, as shown in Figure 43.
Dial 9 for an external call.
Hyphens are automatically inserted for all 7, 8, 10, and 11 digit dialing, except when
9 is followed by a zero for an outgoing international call.
When you enter 9 and another digit other than 1, is replaced by , as
shown in Figure 43.
Figure 43. Live Dial Digits
12:30p Feb 23
EXT _ # s CID
ON A CALL
12:30p Feb 23
9-1-250-555-0123
00:01 ON A CALL
XFER CONF
Page 49

Making a Call 49
AT&T SB67040 Cordless Accessory Handset User’s Guide
Making a Call From the Directory
You can access the Directory by pressing DIR except while the phone is ringing.
To make a call from the Directory:
Figure 44. Directory Call
1. Press DIR to access the Directory, as shown in Figure 44.
2. Press the or navigation key to scroll to the desired entry
OR
Press a dial pad key to reach the first name in the alphabetical Directory that matches or
is after the first letter on the dial key as shown in “Dial Pad Data Entry” on page 41.
3. You have the following options:
To dial out the number selected (highlighted) in the Directory, press SELECT, PHONE
or SPEAKER.
Press to access the four viewing options for the Directory, see “To view the
Handset lists:” on page 50.
4. Press to return to the previous mode.
ABC Account...
9-503-555-0194
Amy Lee
Angela Martin
Barry Crick
DIR
1/48
LIST EXI T
NOTE: You cannot sort the Directory from the Handset.
Page 50

Making a Call 50
AT&T SB67040 Cordless Accessory Handset User’s Guide
To view the Handset lists:
Figure 45. Directory
Figure 46. Options Menu
Your Handset displays All lists (the combination of your Personal list, the System list, and the
Extension list) when you press DIR. However, you can temporarily view and select from a
specific list.
1. Press DIR to access the Directory, as shown in Figure 45.
2. Press to display the Options menu shown in Figure 46.
3. Press 1 though 4 to select the desired list
OR
Use the or navigation key to scroll to the desired list; then press SELECT.
4. Press to return to the previous mode.
ABC Account...
9-503-555-0194
Amy Lee
Angela Martin
Barry Crick
DIR
1/48
LIST EXI T
ABC Account...
9-503-555-0194
Amy Lee
Angela Martin
Barry Crick
DIR
1/48
OPTIONS
1. All
2. Personal list
3. System list
4. Extension lis t
EX IT
Page 51

Making a Call 51
AT&T SB67040 Cordless Accessory Handset User’s Guide
Making a Call From the Extension List
You can make a call from the Extension list in Idle or during Dial mode.
To make a call from the Extension list:
Figure 47. Select Option -
Extension
1. Press OPTIONS. The screen shown in Figure 47 displays.
2. Press 4. The Extension List screen shown in Figure 48 displays.
3. Press the or navigation key to scroll to the desired Extension entry, or press a dial
pad key to reach the first name in the list on or after the first letter on the dial key entered.
4. You have the following options:
Press SELECT or PHONE to dial the number selected (highlighted) in the Extension
list. If you are accessing the Extension list from Idle mode, pressing SPEAKER also
dials the selected number.
Press to return to the previous mode.
Figure 48. Extension List
12:30p Feb 23
2 Missed Calls
5 New MSGs
EXT 249
John Smith
CIDEX IT
OPTIONS
1. Redial
2. Page All
3. Parked Calls
4. Extension List
NOTE: To access the Extension list during Dial mode, press . This
soft key is not available once you have entered 9 and an additional
digit other than 1.
Amy Lee
203
Douglas Lewis
Edgar Williams
Gary Keys
EXT EN SI ON
1/16
EX IT
Page 52

Making a Call 52
AT&T SB67040 Cordless Accessory Handset User’s Guide
Making a Call From the Call Log
You can access the Call Log anytime except when the Handset is ringing.
To make a call from the Call Log:
Figure 49. Call Log
1. To access the Call Log shown in Figure 49 from Idle mode, press .
OR
To access the Call Log when the phone is not idle, press OPTIONS and then scroll down
to Call Log and press SELECT.
2. Press the or navigation key to scroll to the desired Call Log entry.
Press SELECT or PHONE to dial out the number selected (highlighted) in the Call Log. If
you are accessing the Call Log from Idle mode, pressing SPEAKER also dials out the
selected number.
3. Press to return to the previous mode.
Mary Williams 1 0:01a
Unknow n C... Jan. 1 4
CALL LOG
01/07
Graham Bell
232 -555-0176
NEW
Feb 23. 9:55a
Page 53

Making a Call 53
AT&T SB67040 Cordless Accessory Handset User’s Guide
Call Log Dialing Options
The Call Log displays the actual Caller ID information first.
Call Log entries may not be in the proper format for dialing. In some areas, you need to remove the area code or add or remove
a 1. Press the or navigation key to step through the dialing options. The options are in a circular list, so if you press the
navigation key when the last option is visible, you return to the first option. The following dial options are available:
nnn-nnnn (7 digits)
1-nnn-nnnn (8 digits)
nnn-nnn-nnnn (10 digits)
1-nnn-nnn-nnnn (11 digits)
NOTE: A 9 is automatically prefixed to the digit string before the number is dialed out.
Page 54

Making a Call 54
AT&T SB67040 Cordless Accessory Handset User’s Guide
Making a Call From Redial
You can make a call from the Redial list from Idle, Dial, Held Call, or Active Call modes.
To make a call from the Redial list:
Figure 50. Idle Redial
1. Press OPTIONS to display the menu in Figure 50.
2. Press 1 to display the Redial list shown in Figure 51.
3. Press the or navigation key to scroll through the Redial list.
4. You have the following options:
Press SELECT or PHONE to dial the number selected (highlighted) in the Redial list. If
you are accessing the Redial list from Idle mode, pressing SPEAKER also dials the
selected number.
Press to return to the previous mode.
Figure 51. Redial List
Mary Williams
9-1-888-722-7702
May 23 8:55a
Wanda Peters 8:23a
Unknown Ca... May 22
REDIAL
1/13
EX ITDELETE
Page 55

Making a Call 55
AT&T SB67040 Cordless Accessory Handset User’s Guide
Making a Call From Quick Dial
Create Quick Dial entries from your Deskset or the WEBUI to allow two-key dialing for frequently dialed or important phone
numbers. Access the Quick Dial list by pressing and holding
MUTE/QUICK.
To make a call from the Quick Dial list:
Figure 52. Quick Dial List
1. Press and hold
MUTE/QUICK to access the Quick Dial list, as shown in Figure 52.
2. Press the or navigation key to scroll through Quick Dial entries.
3. Press SELECT, PHONE, or a digit from 1 to 6 to dial the quick number. If you access Quick
Dial from the Idle mode, pressing SPEAKER also dials the selected number.
QUICK
1-- Kate
2 -- Enrico
3 -- Doug
4 -- <Empty>
5 -- Titan
6 -- <Empty>
1/06
EX ITHELP
Page 56

AT&T SB67040 Cordless Accessory Handset User’s Guide
Answer a Call 56
C HAPTER
4
A
NSWER A CALL
If the system receives an incoming call in Idle mode, the Handset rings and the incoming call
information displays as shown in Figure 55 on page 59. The screen displays the caller’s name
(if available) and number. If there is more than one incoming call, they are all displayed on
the screen, but only the call that you can answer by pressing PHONE displays the name and
telephone number, as shown in Figure 57 on page 61. To cycle through incoming calls, press
the or navigation key.
This section contains the following:
“New Call Notification” on page 57
“Call Options” on page 59
“Multiple Incoming Calls” on page 61
Page 57

Answer a Call 57
AT&T SB67040 Cordless Accessory Handset User’s Guide
New Call Notification
The Handset records incoming call information in the Call Log and displays a notification on the Idle screen. Unanswered calls
that have not been reviewed are considered missed. Once you review a call, the new missed call count goes down by one. If there
are no new calls, the Idle screen displays 0 Missed Calls.
To review the Call Log:
Figure 53. Idle
Figure 54. Call Log
To review the entire Call Log from Idle or Dial mode, press . To see new calls only,
press SELECT when # Missed Calls is highlighted on the Idle screen, as shown in Figure 53.
Press the or navigation key to scroll through the Call Log entries, as shown in
Figure 54.
Press the or navigation key to step through the phone number dialing options for
the Call Log entry.
Press SELECT or PHONE to dial the phone number highlighted in the Call Log.
Press to delete the highlighted call entry.
Press to return to the previous mode.
If the Caller ID is unavailable, the Call Log entry displays the name as Unknown.
z The tag indicates that the Call Log entry has not been reviewed.
z The icon indicates that a Voicemail message is available.
z The icon (exclamation mark) indicates that the message has not been played.
If you are accessing the Call Log from Idle mode, pressing SPEAKER also dials the
highlighted number. A 9 is automatically inserted before the number when dialed and
is shown on the display.
12:30p Feb 23
2 Missed Calls
5 New MSGs
EXT 249
John Smith
MSGs CID
Mary Williams 1 0:01a
Unknow n C... Jan. 1 4
CALL LOG
01/07
Graham Bell
232 -555-0176
NEW
Feb 23. 9:55a
Page 58

Answer a Call 58
AT&T SB67040 Cordless Accessory Handset User’s Guide
To review the Call Log: (Continued)
NOTE: This system has a caller ID feature that works with caller identification service provided by your
telephone service provider. There is a fee for this service, and it might not be available in all areas.
This telephone can provide information only if both you and the caller are in areas offering caller
identification service, and if both telephone companies use compatible equipment.
Page 59

Answer a Call 59
AT&T SB67040 Cordless Accessory Handset User’s Guide
Call Options
You have the following options for an incoming call:
Figure 55. Incoming Call
Press SELECT, PHONE, or SPEAKER to answer a call, shown in Figure 55.
Press to silence the ringer and ignore the call.
Press to forward the call to the destination defined in the Call Forward-No
Answer setting.
The system administrator sets the call-forwarding options. For more information
on this setting, see the “AT&T SB67010 Gateway, AT&T SB67030 Deskset System
Administrator’s Guide”.
.
12:30p Feb. 23
2 Missed Calls
5 New MSGs
EXT 249
John Smith
INCOMING
Graham Bell
232-555-0176
IG NORE FWD- VM
NOTE: Press Volume to decrease or increase the ringer volume.
Page 60

Answer a Call 60
AT&T SB67040 Cordless Accessory Handset User’s Guide
If you are already on an active call and receive another incoming call, the system emits an abbreviated ring and displays a screen
similar to the one illustrated in Figure 56 with incoming call information.
You have the following options when you are on a call and receive an incoming call:
Figure 56. Incoming Call/
Active Call
Press PHONE to answer the incoming call. The current call is automatically placed
on hold.
Press to forward the call to the destination defined in the Call Forward-No
setting and return to current call.
The system administrator sets the call-forwarding options. For more information
on this setting, see the “AT&T SB67010 Gateway, AT&T SB67030 Deskset System
Administrator’s Guide”.
12:30p Feb. 23
2 Missed Calls
5 New MSGs
EXT 249
John Smith
INCOMING
Graham Bell
232-555-0176
IG NORE FWD- VM
Page 61

Answer a Call 61
AT&T SB67040 Cordless Accessory Handset User’s Guide
Multiple Incoming Calls
If the Handset receives more than one call at a time, the Handset rings in Idle mode or emits an abbreviated ring during an Active
Call. All incoming calls are displayed.
You have the following options during multiple incoming call events:
Figure 57. Multiple
Incoming Calls
Press SELECT, PHONE, or SPEAKER to answer a call, shown in Figure 57.
Press to silence the ringer.
Press to forward the highlighted incoming call to Voicemail.
The Incoming Call screen remains active during multiple incoming calls.
Press Volume to decrease or increase the ringer volume.
12:30p Feb. 23
1-800-555-0180
0:12 ON CALL
INCOMING
Graham Bell
232-555-0176
Mar y Williams
Charlie Johnson
IG NORE FWD- VM
NOTE: Unanswered incoming calls are handled according to the Call
Forward-No Answer setting.
The system administrator sets the call-forwarding options. For
more information on this setting, see the “AT&T SB67010 Gateway,
AT&T SB67030 Deskset System Administrator’s Guide”.
Page 62

AT&T SB67040 Cordless Accessory Handset User’s Guide
Voicemail 62
C HAPTER
5
V
OICEMAIL
The Handset Voicemail system provides the ability to receive messages and save, replay, or
forward those messages. The Voicemail system includes the following:
“Voicemail Notification” on page 63
“Retrieve Voicemail” on page 64
“Reviewing Voicemail Records” on page 65
“Voicemail Management” on page 66
Page 63

Voicemail 63
AT&T SB67040 Cordless Accessory Handset User’s Guide
Voicemail Notification
Unanswered incoming calls are handled according to the Call Forward-No Answer setting. The default setting is to send the calls
to Voicemail. You can also forward a ringing call to Voicemail by pressing , as shown in Figure 59.
If a caller leaves a Voicemail message, the Idle screen displays a New MSGs indication, as shown in Figure 58.
Once the new message is reviewed in the Voicemail records, the Handset updates the Idle screen notification.
Figure 58. Voicemail Notification Figure 59. Incoming Call
12:30p Feb. 23
2 Missed Calls
5 New MSGs
EXT 249
John Smith
INCOMING
Graham Bell
232-555-0176
IG NORE FWD- VM
Page 64

Voicemail 64
AT&T SB67040 Cordless Accessory Handset User’s Guide
Retrieve Voicemail
To retrieve Voicemail:
Figure 60. Retrieve
Voicemail
1. Press from the Idle screen shown in Figure 58 on page 63 to retrieve all
Voicemail.
OR
When # New MSGs is highlighted, press SELECT to play new messages.
2. The Individual Message screen shown in Figure 61 displays. You have the following
options:
Press to begin playing the Voicemail (see “Reviewing Voicemail Records” on
page 65).
Press to return to the Idle screen.
Figure 61. Individual
Message
ENTER PASSWORD
Enter passw ord:
CANCELBCKS PC
Press SELECT when done.
NOTE: If you have created a user password, you are prompted to enter it,
as shown in Figure 60.
Graham Bell
232 -555-0176
Jan. 10 @ 12:03pm
NEW
05:10
PLAY EXI T
01/05
PREV
NEXT
MESSAGES
Page 65

Voicemail 65
AT&T SB67040 Cordless Accessory Handset User’s Guide
Reviewing Voicemail Records
Reviewing Voicemail records:
Figure 62. Retrieve Voicemail
Press to begin Voicemail message playback, as shown in Figure 62.
Once message playback starts:
z The soft key becomes , as shown in Figure 63.
z The message progress bar indicates how much of the message has played.
z The message time counter displays the remaining time, in seconds, of
message playback.
z Press SPEAKER to hear message playback through the speaker.
z Press the navigation key to play the previous message.
z Press the navigation key to play the next message.
z Press and hold the navigation key to rewind the message in eight-
second increments.
z Press and hold the navigation key to forward the message in eight-
second increments.
Press PHONE to exit message playback and call the phone number from the
message.
Press OPTIONS to access the Options menu (see “Voicemail Management” on
page 66). If a message is playing, message playback stops.
Press to return to Idle mode.
Figure 63. Message Playback
MESSAGES
01/13
Graham Bell
232 -555-0176
Jan. 10 @ 12:03pm
PREV
NEXT
05:10
PLAY EXI T
MESSAGES
01/13
Graham Bell
232 -555-0176
Jan. 10 @ 12:03pm
04:49
PAUSE EXI T
PREV
NEXT
Progress
Bar
Time
Counter
Page 66

Voicemail 66
AT&T SB67040 Cordless Accessory Handset User’s Guide
Voicemail Management
You can delete a message or forward a message to an internal extension.
To delete a message:
Figure 64. Message Options
Press OPTIONS from Message Playback mode. Message playback
stops and the screen shown in Figure 64 displays. You have the
following options:
To delete all of your messages:
a. Press 1. The screen shown in Figure 65 displays.
b. Press to confirm. Press to cancel.
To delete a single message:
a. Press 2.
b. Press the or navigation key to highlight the
desired message. Then press SELECT. The screen shown
in Figure 66 displays to confirm that the message has
been deleted.
Figure 66. Delete
Confirmed
MESSAGES
1/13
Graham Bell
1-800-916-2007
Jan 10 12:03p
PREV
NEXT
05:10
OPTIONS
1. Delete All
2. Delete
3. Forward MSG
4. Help
CANCEL
MESSAGES
1/13
Graham Bell
1-800-916-2007
Jan 10 12:03p
PREV
NEXT
05:10
Are you sure you
want to delete all
messages?
YES NO
Figure 65. Delete All
Messages
MESSAGES
Mary Williams
1-888-722-7702
Jan. 09 @ 3:23pm
02:26
PLAY EXI T
1/12
PREV
NEXT
Message Deleted.
Page 67

Voicemail 67
AT&T SB67040 Cordless Accessory Handset User’s Guide
To forward a message:
Figure 67. Message Options
1. From Message Playback mode, press OPTIONS. Message
playback stops and the screen shown in Figure 67 displays.
2. Press 3 to display the Forward Destination Start screen,
shown in Figure 68.
3. Enter the Extension number:
Using the dialing keys.
OR
Press to display the Extension list shown in
Figure 69.
z Press the or navigation key until the desired
entry is highlighted to scroll through the Extension
list. Then press SELECT.
OR
z Use the dial pad to find the desired entry by name
(see “Dial Pad Data Entry” on page 41).
Once you have selected the destination, a confirmation
screen displays, as shown in Figure 70.
Figure 70. Forward
Confirmation
MESSAGES
1/13
Graham Bell
1-800-916-2007
Jan 10 12:03p
PREV
NEXT
05:10
OPTIONS
1. Delete All
2. Delete
3. Forward MSG
4. Help
CANCEL
Figure 68. Forward
Destination Start
Figure 69. Extension List
Page 68

Voicemail 68
AT&T SB67040 Cordless Accessory Handset User’s Guide
To forward a message: (Continued)
Figure 71. Message
Confirmation
4. Press to forward the message to the selected
extension.
The confirmation screen shown in Figure 71 displays to
confirm that the message has been forwarded.
The Handset returns to the same message, as shown in
Figure 72.
MESSAGES
1/13
Graham Bell
1-800-916-2007
Jan 10 12:03p
PREV
NEXT
05:10
PLAY EXI T
Message
Forwarded.
MESSAGES
01/13
Graham Bell
232 -555-0176
Jan. 10 @ 12:03pm
PREV
NEXT
05:10
PLAY EXI T
Figure 72. Message
Playback
Page 69

AT&T SB67040 Cordless Accessory Handset User’s Guide
Hold/Page/Park 69
C HAPTER
6
H
OLD
/P
AGE
/P
ARK
Parking a call and placing it on hold are similar operations. The difference is that a held call
can only be retrieved at the Deskset or Handset that placed the call on hold, and a parked
call can be retrieved at any extension.
A maximum of five calls can be held. If you have reached the maximum number of held calls,
a Maximum of 5 held calls reached notification screen appears.
This section contains the following:
“Placing and Retrieving a Call on Hold” on page 70
“Parking an Active Call” on page 73
“Paging All Extensions” on page 76
Page 70

Hold/Page/Park 70
AT&T SB67040 Cordless Accessory Handset User’s Guide
Placing and Retrieving a Call on Hold
To place an active call on hold and to retrieve it:
Figure 73. Active Call
Press HOLD. The screen shown in Figure 73 displays.
z Press to transfer the held call to another number.
z Press to return to Active Call mode.
Press PHONE to start a new call.
Press dial pad keys to make a new call while on hook (see “Predialing” on page 47).
12:30p Feb. 23
Graham Bell
232 -555-0176
3:00 ON HOLD
XFER UNHOL D
Page 71

Hold/Page/Park 71
AT&T SB67040 Cordless Accessory Handset User’s Guide
Retrieving a Held Call When There Is More Than One Call in the Call Deck
To retrieve a held call when there is more than one call in the Call Deck:
Figure 74. Next Call
Press the or navigation key to review calls in the Call Deck shown in Figure 74.
Press when the call you want to retrieve is displayed. You return to Active
Call mode.
Graham Bell
232 -555-0176
3:00 ON HOLD
XFER UNHOL D
NEXT CALL
NOTE: Pressing PHONE or SPEAKER does not release the call from hold.
Those keys start a new call. Pressing SELECT has no effect.
Page 72

Hold/Page/Park 72
AT&T SB67040 Cordless Accessory Handset User’s Guide
Held Call Options
To view Held Call options:
Figure 75. Hold Options
Press OPTIONS with a held call displayed to access the Hold options, as shown in Figure 75
and listed below.
12:30p Feb. 23
Graham Bell
9-800-916-2007
3:00 ON HOLD
OPTIONS
7. Conference
5. Extension List
6. Call Log
8. Messages
EXI T
1. Redial Accesses the Redial list (see “Making a Call From Redial” on page 54).
2. Page All Pages all other extensions (see “Paging All Extensions” on page 76).
3. Park Places the current held call in the Park Call list (see “Parking a Held Call”
on page 74).
4. Parked Calls Accesses the Park list (see “Retrieve Parked Call” on page 75).
5. Extension List Accesses the Extension list (see “Making a Call From the Extension List”
on page 51).
6. Call Log Accesses Call Log (see “Making a Call From the Call Log” on page 52).
7. Conference Goes to conference setup and uses the current held call (see
“Conference Setup” on page 81).
8. Messages Accesses Messages feature (see “Retrieve Voicemail” on page 64).
9. Help Accesses Help menu.
Page 73

Hold/Page/Park 73
AT&T SB67040 Cordless Accessory Handset User’s Guide
Parking an Active Call
To park an active call:
Figure 76. Park Call
1. Press OPTIONS to display the parked call options, as shown in Figure 76.
2. Press 3 to park the call, as shown in Figure 77.
The parked call is given a 3-digit number that starts with 1.
To page others to let them know about this call, see “Paging All Extensions” on page 76.
Figure 77. Parked Call
12:30p Feb 23
Graham Bell
9-800-916-2007
03:00 ON HOLD
OPTIONS
1. Redial
2. Page All
3. Park
4. Parked Calls
EX IT
MSGs CID
EXT 249
John Smith
2 Missed Calls
5 New MSGs
12:30p Feb. 23
Graham Bell
232 -555-0176
parked at 109
Page 74

Hold/Page/Park 74
AT&T SB67040 Cordless Accessory Handset User’s Guide
Parking a Held Call
To park a held call:
Figure 78. Held Call
1. To display the held call in the Call Deck (see “Call Deck”
on page 23), press the or navigation key as shown
in Figure 78.
2. Press OPTIONS to display the Held Call options, as shown
in Figure 79.
3. Press 3 to park the call, as shown in Figure 80.
The call disappears from the Held Calls list and appears in
the Parked Call list, which is available system-wide. The
parked call is given a 3-digit number that starts with 1.
To page others to let them know about this call, see “Paging
All Extensions” on page 76.
.
Figure 80. Parked Call
Graham Bell
232 -555-0176
3:00 ON HOLD
XFER UNHOL D
NEXT CALL
12:30p Feb 23
Graham Bell
9-800-916-2007
03:00 ON HOLD
OPTIONS
1. Redial
2. Page All
3. Park
4. Parked Calls
EX IT
Figure 79. Held Options
MSGs CID
EXT 249
John Smith
2 Missed Calls
5 New MSGs
12:30p Feb. 23
Graham Bell
232 -555-0176
parked at 109
Page 75

Hold/Page/Park 75
AT&T SB67040 Cordless Accessory Handset User’s Guide
Retrieving a Parked Call From Any Extension
If you know the number of the parked call, press PHONE and dial the parked call number. If you don't know the number, find the
parked call in the Parked Call list.
To retrieve a parked call:
Figure 81. Retrieve Parked
Call
To access the Parked Call list:
1. Press OPTIONS. The screen shown in Figure 81 displays.
2. Press 3 and press SELECT.
The Parked Call List appears, as shown in Figure 82.
To retrieve a parked call:
1. Press the or navigation key to highlight a parked call from the list shown in
Figure 82.
2. Press SELECT, SPEAKER, or PHONE to unpark the selected call and make it an Active Call.
Figure 82. Parked Call List
12:30p Feb 23
2 Missed Calls
5 New MSGs
EXT 249
John Smith
CIDEX IT
OPTIONS
1. Redial
2. Page All
3. Parked Calls
4. Extension List
PARK LIST
9-604-555-0129 -100
David Ca rter
Graham Bell
232 -555-0176
Robert Brown
01/09
-101
-102
-103
-104
Page 76

Hold/Page/Park 76
AT&T SB67040 Cordless Accessory Handset User’s Guide
Paging All Extensions
Once you have parked a call, you can page all other extensions in the system to request that someone retrieve the parked call.
To page all extensions:
Figure 83. Held Options
Figure 84. Paging
1. Begin the page:
From Held or Idle:
a. Press OPTIONS. The screen shown in Figure 83 displays.
b. Press 2 to begin the page. The screen shown in Figure 84 displays.
OR
From the Parked Call list:
Press to begin the page.
The Handset originating the page emits a single short tone for half a second just before
paging commences. An alert tone also sounds on all paged extensions.
2. Speak into the microphone.
3. Press or OFF to end paging.
12:30p Feb 23
Graham Bell
9-800-916-2007
03:00 ON HOLD
OPTIONS
1. Redial
2. Page All
3. Park
4. Parked Calls
EX IT
12:30p Feb 23
Paging...
Pr ess OFF or
EX IT
to end paging.
EX IT
Page 77

AT&T SB67040 Cordless Accessory Handset User’s Guide
Call Transfer 77
C HAPTER
7
C
ALL TRANSFER
You can transfer an active or a held call. An unsupervised transfer occurs if you do not talk
to the transfer recipient. The transfer recipient does not have to pick up the phone and talk
to you before receiving the transferred call. A supervised transfer occurs if you talk to the
transfer recipient before completing the transfer. You can transfer a call to an internal
extension or external number. For more detail refer to:
“Transfer to an Extension” on page 78
“Transfer to an External Number” on page 79
Transfer Rules
The following rules apply to transferring a call:
Only one Transfer at a time is allowed per extension.
The Transfer action can be canceled by pressing . The call remains on hold.
Page 78

Call Transfer 78
AT&T SB67040 Cordless Accessory Handset User’s Guide
Transfer to an Extension
To transfer an active or held call to an extension:
Figure 85. Transfer To
1. Press . The Handset displays the screen shown in
Figure 85.
2. Press to display the Extension list, as shown in
Figure 86.
3. Press the or navigation key to scroll through the
Extension list entries.
4. Press SELECT, SPEAKER, or PHONE to select an
Extension number as a transfer destination.
The screen shown in Figure 87 displays.
5. Press to complete the transfer.
Figure 87. Transfer Confirm
Amy Lee
203
Douglas Lewis
Edgar Williams
Gary Keys
EXT EN SI ON
1/16
EX IT
Figure 86. Extension List
NOTE: You can press before the extension picks up (unsupervised
transfer), or after the extension picks up (supervised transfer).
Page 79

Call Transfer 79
AT&T SB67040 Cordless Accessory Handset User’s Guide
Transfer to an External Number
To transfer an active or held call to an external number:
Figure 88. External
Transfer
1. From either an active or held call, press . An active call is placed on hold, and the
Handset displays the screen shown in Figure 88.
2. To transfer a call to an external number, dial the number directly or access the external
number through the Call Log, Redial list, Directory, or Quick Dial.
3. To dial the selected number as a transfer destination, press SELECT, SPEAKER, or PHONE.
The screen shown in Figure 89 displays.
4. Press to complete the transfer.
Figure 89. Pending Transfer
NOTE: You can press before the extension picks up (unsupervised
transfer), or after the extension picks up (supervised transfer).
Graham Bell
Transfer To:
9-1-232-555-0134
Press XFER to
com plete
CANCELXFER
Page 80

AT&T SB67040 Cordless Accessory Handset User’s Guide
Conference 80
C HAPTER
8
C
ONFERENCE
You can initiate a conference during an active call or when calls are held.
“Conference Setup” on page 81
“Hold/Unhold a Conference Call” on page 82
“End a Conference Call” on page 83
Conferencing Rules
You can combine two calls, (active, held, or parked) to create a conference call. The following
rules apply to conferencing:
Only one Conference at a time is allowed per extension.
To drop one of the calls press .
To hold the conference call and start a new call, press PHONE or HOLD.
To hang up all calls, press OFF. If you have held calls, the Handset returns to Held
Calls mode. If there are no held calls, the Handset returns to Idle mode.
Page 81

Conference 81
AT&T SB67040 Cordless Accessory Handset User’s Guide
Conference Setup
To set up a conference:
Figure 90. Start
Conference
1. Once you establish a call, press . The
Conference screen shown in Figure 90 displays.
The Handset automatically places the current
call on hold and goes to Conference Setup
mode. The Handset is ready to add the second
call.
The name and Call-on-hold icon appear in the
top line of the display.
2. Place the second call.
Dial a number using the dial pad, as shown in
Figure 91.
OR
Press OPTIONS to retrieve a parked or held call
or to dial a number from the Redial or Call Log
list.
OR
Dial a number from the EXT_#s list.
3. Press to complete the conference setup, as
shown in Figure 92.
The screen shown in Figure 93 displays.
Figure 93. Conference
Confirmed
Figure 91. Dial Second
Call
Figure 92. Join
Conference
12:30p Feb 23
Graham Bell
01:09
Mary Williams
00:03
ON A CALL
DROP
Page 82

Conference 82
AT&T SB67040 Cordless Accessory Handset User’s Guide
Hold/Unhold a Conference Call
To put a conference call on hold:
Figure 94. Conference on
Hold
Press HOLD or PHONE to place the conference on hold. The screen shown in Figure 94
displays. If you press PHONE, you hear a dial tone and are in the Dial mode.
The first and second calls are placed on hold but are still able to communicate with each other.
To take a conference call off hold:
Figure 95. Conference on
Hold
When the call is on hold, the screen shown in Figure 95 displays.
Press to take the call off hold.
Page 83

Conference 83
AT&T SB67040 Cordless Accessory Handset User’s Guide
End a Conference Call
To end a conference call:
Figure 96. Current
Conference
You have the following options:
To hang up all calls, press OFF.
OR
To drop one call, press from the conference
screen shown in Figure 96.
Scroll through the list to the call you want to drop, as
shown in Figure 97, using the or navigation key.
To drop the highlighted call from the conference and
hang it up, press SELECT. You return to an Active Call
mode with the remaining call, as shown in Figure 98.
Press to return to the three-way conference as
shown in Figure 96.
r
Figure 98. Active Call
12:30p Feb 23
Graham Bell
01:09
Mary Williams
00:03
ON A CALL
DROP
12:30p Feb 23
James Holden
and
Thomas Smith
0:03 ON CALL
Conference with:
CANCEL
DROP CALL
Graham Bell
Mary Williams
Figure 97. Drop Call
NOTE: If you have held calls, the system returns to Held Calls mode. If
there are no held calls, the system returns to Idle mode.
Mary Williams
9-1-888-722-7702
00:32 ON A CALL
XFER CONF
12:30p Feb 23
Page 84

AT&T SB67040 Cordless Accessory Handset User’s Guide
Deskset Interaction 84
C HAPTER
9
D
ESKSET INTERACTION
This section identifies similarities and operating interactions between the SB67030 Deskset
and the AT&T SB67040 Cordless Accessory Handset.
“Answering a Call While Another Device is on a Call” on page 85
“Held Calls” on page 85
“Clocks and Status” on page 85
Page 85

Deskset Interaction 85
AT&T SB67040 Cordless Accessory Handset User’s Guide
Answering a Call While Another Device is on a Call
The Deskset, Cordless Handset, and Cordless Headset are all the same extension. If there is an active call, it must be placed on
hold before other calls can be placed or answered. You must also switch control to the device you want to use.
Incoming Call
An Incoming Call appears on both devices. Both devices emit ring tones. If one device answers the call, the other device ceases
to ring but receives visual notification of the call in progress and stays in a mode where Call Appearance notification is available
This behavior allows an additional incoming call to appear on either device. If there is a subsequent incoming call, the device
currently on an active call emits an abbreviated ring tone but the other device does not.
Held Calls
Both the Handset and Deskset display held calls. The Deskset shows held calls in the Call Appearance slots. The Handset displays
the current held call with an option to cycle through the Call Deck (see “Placing and Retrieving a Call on Hold” on page 70) using
the or navigation key. When there are held calls, either device can pick up a held call.
Clocks and Status
The Handset and the Deskset show the current date and time, DND status, the same new calls and new message notifications.
The clocks on each of the devices run independently. The system synchronizes the real time. Because the clocks are independent,
there may be occasions when the time shown on each are slightly different. The system status, such as missed calls, new
messages and clock status, is broadcast from the Deskset to the Cordless Handset as new events occur. This ensures the Handset
status remains the same as the Deskset.
NOTE: The Handset goes into Power Save mode after a period of inactivity. When it is in Power save mode, the
display is dark. The held call information is not visible until you or an incoming call wakes up the handset.
You can wake up the handset by pressing any handset key.
Page 86

AT&T SB67040 Cordless Accessory Handset User’s Guide
Troubleshooting 86
C HAPTER
10
T
ROUBLESHOOTING
This section provides information that can assist you in locating and correcting problems with your SB67040 Cordless Accessory
Handset.
NOTE: For customer service or product information, contact the person who installed your system. If your installer
is unavailable, visit our website at
www.telephones.att.com or call 1 (888) 916-2007. In Canada
dial
1 (888) 883-2474.
Page 87

Troubleshooting 87
AT&T SB67040 Cordless Accessory Handset User’s Guide
In Case Of Difficulty
If you have difficulty operating your SB67040 Handset, try the following suggestions.
:
Symptom
Probable Cause Corrective Action
Handset does not work at all
(LCD is black).
No power to the device. Confirm the battery is installed and charged
correctly.
Place the Handset into the accessory Charger. Ensure
the Charger is securely plugged into an outlet not
controlled by a wall switch.
If the battery is completely depleted, it can take up
to 10 minutes to charge the battery before the low
battery icon displays on screen.
Handset registration is not
working.
The Handset and Deskset are not
communicating with each other.
Confirm you have placed the Handset in the Charger
before you press the soft key on the
Deskset.
If registration does not start, try lifting the Handset
out of the Charger for a few seconds then placing it
back.
The Deskset may have been recently upgraded or
restored without saving the Cordless Handset
registration settings. Deregister the Handset: on the
Handset, press OPTIONS -> Settings -> Deregister.
Then register the Handset to the Deskset: on the
Deskset, press MENU -> User Settings -> Cordless
Settings -> Handset.
Page 88

Troubleshooting 88
AT&T SB67040 Cordless Accessory Handset User’s Guide
Extension number does not
match Deskset.
The Handset has been registered
to another Deskset.
Check the Deskset to see if a Handset has been
registered. If so, deregister it: MENU -> User
Settings -> Cordless Settings -> Handset ->
DeReg.
Deregister your Handset (OPTIONS -> Settings ->
Deregister).
Start the registration process again.
Cannot make external calls. The Handset cannot
communicate with Deskset.
First, check if the Deskset can make external calls.
If the Deskset cannot make external calls,
consult Deskset troubleshooting in the
“AT&T SB67030 Deskset User’s Guide”.
Check that your Handset is registered to your
Deskset (Press OPTIONS -> Settings -> Product ID
and check that status reads Registered: YES.
You might be out of range of the Deskset. Try moving
closer. If you see the Idle screen, then the Handset is
successfully communicating with the Deskset.
Symptom
Probable Cause Corrective Action
Page 89

Troubleshooting 89
AT&T SB67040 Cordless Accessory Handset User’s Guide
Handset does not receive
incoming calls.
The incoming call notifications
have been suppressed or are
unable to reach the Handset.
Check if you can receive incoming calls on the
Deskset.
If the Deskset cannot receive incoming
calls, consult Deskset troubleshooting in
the “AT&T SB67030 Deskset User’s Guide”.
Confirm that your Handset is registered to a Deskset
(Press OPTIONS -> Settings -> Product ID and
check that status reads Registered: YES.
You might be out of range of the Deskset, try moving
closer.
If the Handset does not ring on an incoming call,
press Volume on the side of the Handset to
increase ringer volume.
Incoming calls may be directed to a Ring Group that
you are not part of. Your system administrator
administers the Ring Groups.
Cannot locate Handset using
Deskset.
The Handset battery is dead, out
of range, or not registered.
If does not appear on the Deskset, then the
Handset is not registered.
If the Handset battery is dead or the Handset is out
of range, the locator tone does not sound.
Symptom
Probable Cause Corrective Action
Page 90

Troubleshooting 90
AT&T SB67040 Cordless Accessory Handset User’s Guide
Handset displays “Deskset in
Use” when trying to make a
new call.
When the Deskset is on a call,
you must switch the Active Call
to the Handset before making a
new call.
Press PHONE on the Handset.
The Handset asks if you wish to switch the current
active call to the Handset.
Press on the Handset to take the call on the
Handset. Continue the call, or end it to make a new
call.
Handset continuously
displays “Searching for
Deskset…”
The Handset is out of range or
not registered.
Check if the Deskset is powered and fully functional.
If the Deskset is not on, the Handset will not work.
You may be out of range of the Deskset. Try moving
closer.
The Deskset may have deregistered the Handset
when undergoing upgrades or being reset. If so, then
repeat the registration process. (See “Handset
Registration” on page 31).
Cannot find a way to activate
Call Forward or Do Not
Disturb.
These functions can be enabled
only on the Deskset.
To activate Call Forward All or Do Not Disturb (DND),
press or on the Deskset while in
Idle mode.
Symptom
Probable Cause Corrective Action
Page 91

Troubleshooting 91
AT&T SB67040 Cordless Accessory Handset User’s Guide
Poor audio quality. Speech is
cutting out.
The Handset is almost out of
range or is experiencing
interference.
You may be close to being out of range. Try moving
closer to the Deskset.
Other electronic products can cause interference
with your Handset. Try installing the Deskset far away
from devices such as TVs, microwaves, or other
cordless devices, including other Handsets.
If the problem persists, check audio quality on the
Deskset. If Deskset audio quality is poor, contact your
system administrator.
Handset does not receive a
global page.
This feature is not supported on
the Handset.
The Handset can send a page but not receive one.
The page is transmitted to all Desksets in the
network.
Cannot create new Directory
or Quick Dial entry.
This feature is not supported on
the Handset.
Although you can access the Directory or Quick Dial
on the Handset, creating, deleting, or editing entries
can only be done on the Deskset or WEBUI.
Symptom
Probable Cause Corrective Action
Page 92

Troubleshooting 92
AT&T SB67040 Cordless Accessory Handset User’s Guide
Caller ID isn’t working. Your organization does not
subscribe to this service or you
have DSL phone lines without
filters installed.
Caller ID is a subscription service. You must subscribe
to this service from your local telephone company for
this feature to work on your phone.
The caller must be calling from an area that supports
caller ID.
Both you and your caller’s telephone companies must
use caller ID compatible equipment.
If you have DSL phone lines, make sure you have a
DSL filter plugged in between each DSL line and the
wall jack.
Calls dropped. Restoring Deskset settings while
that extension is in use causes all
calls to be dropped.
Update software and restore Deskset settings only in
Idle mode with no calls pending.
Symptom
Probable Cause Corrective Action
Page 93

Maintenance 93
AT&T SB67040 Cordless Accessory Handset User’s Guide
M
AINTENANCE
Your system contains sophisticated electronic parts, so it must be treated with care.
Avoid Rough Treatment
Handle the unit gently. Save the original packing materials to protect your equipment if you ever need to ship them.
Avoid Water
Your unit can be damaged if it gets wet. Do not use the equipment outdoors in the rain or handle it with wet hands. Do not install
the equipment near a sink, bathtub, or shower.
Electrical Storms
Electrical storms can sometimes cause power surges harmful to electronic equipment. For your own safety, exercise caution when
using electrical appliances during storms.
Cleaning Your Unit
Your unit has a durable plastic casing that should retain its luster for many years. Clean it only with a soft cloth slightly dampened
with water or a mild soap solution. Do not use excess water or cleaning solvents of any kind.
Page 94

Important Safety Instructions 94
AT&T SB67040 Cordless Accessory Handset User’s Guide
I
MPORTANT SAFETY INSTRUCTIONS
When using your telephone equipment, basic safety precautions should always be followed to reduce the risk of fire, electric
shock and injury, including the following:
Read and understand all instructions.
Follow all warnings and instructions marked on the product.
Unplug this product from the wall outlet before cleaning. Do not use aerosol or liquid cleaners. Use a damp cloth for
cleaning.
Do not use this product near water (for example, near a bathtub, kitchen sink, or swimming pool).
Do not place this product on an unstable table, shelf, stand, or other unstable surfaces.
This product should be operated only from the type of power source indicated on the marking label. If you are not sure
of the type of power supply in your home or office, consult your dealer or local power company.
Do not allow anything to rest on the power cord. Do not install this product where the cord may be walked on.
Never push objects of any kind into this product through the slots in the unit because it may touch dangerous voltage
points or create a short circuit. Never spill liquid of any kind on the product.
To reduce the risk of electric shock, do not disassemble this product but take it to an authorized service facility. Opening
or removing parts of the unit other than specified access doors may expose you to dangerous voltages or other risks.
Incorrect reassembling can cause electric shock when the product is subsequently used.
Do not overload wall outlets and extension cords.
This symbol alerts you to important operating or servicing instructions in this document. Always follow basic safety
precautions when using this product to reduce the risk of injury, fire or electric shock.
Page 95

Important Safety Instructions 95
AT&T SB67040 Cordless Accessory Handset User’s Guide
Unplug this product from the wall outlet and refer servicing to an authorized service facility under the following conditions:
When the power supply cord or plug is damaged or frayed.
If liquid has been spilled on the product.
If the product has been exposed to rain or water.
If the product does not operate normally when following the operating instructions. Adjust only those controls that are
covered by the operating instructions. Improper adjustment of other controls may result in damage and often requires
extensive work by an authorized technician to restore the product to normal operation.
If the product has been dropped and the unit has been damaged.
If the product exhibits a distinct change in performance.
The power adapter is intended to be correctly oriented in a vertical or floor mount position. The prongs are not designed
to hold the plug in place if it is plugged into a ceiling or an under-the-table or cabinet outlet.
Page 96

Limited Warranty 96
AT&T SB67040 Cordless Accessory Handset User’s Guide
L
IMITED
W
ARRANTY
The AT&T brand is used under license. For customer service, repair, replacement, or warranty service and all questions about this
product, contact the person who installed your system. If your installer is unavailable, visit our website at
www.telephones.att.com or call 1 (888) 916-2007. In Canada, call 1 (888) 883-2474.
1. What does this Limited Warranty cover?
The manufacturer of this AT&T-branded product warrants to the holder of a valid proof of purchase (“CONSUMER” or “you”) that
the product and all accessories provided in the sales package (“PRODUCT”) are free from defects in material and workmanship,
pursuant to the following terms and conditions, when installed and used normally and in accordance with the PRODUCT operating
instructions. This Limited Warranty extends only to the CONSUMER for products purchased and used in the United States of
America and Canada.
2. What will be done if the PRODUCT is not free from defects in materials and workmanship during the Limited Warranty
period (“materially defective PRODUCT”)?
During the Limited Warranty period, the manufacturer’s authorized service representative will repair or replace at the
manufacturer’s option, without charge, a materially defective PRODUCT. If the manufacturer repairs the PRODUCT, they may use
new or refurbished replacement parts. If the manufacturer chooses to replace the PRODUCT, they may replace it with a new or
refurbished PRODUCT of the same or similar design. The manufacturer will retain the defective parts, modules, or equipment.
Repair or replacement of the PRODUCT, at the manufacturer’s option, is your exclusive remedy. The manufacturer will return the
repaired or replacement products to you in working condition. You should expect the repair or replacement to take approximately
30 days.
3. How long is the Limited Warranty period?
The Limited Warranty period for the PRODUCT extends for ONE (1) YEAR from the date of purchase. If the manufacturer repairs
or replaces a materially defective PRODUCT under the terms of this Limited Warranty, this Limited Warranty also applies to the
repaired or replacement PRODUCT for a period of either (a) 90 days from the date the repaired or replacement PRODUCT is
shipped to you, or (b) the time remaining on the original one-year Limited Warranty, whichever is longer.
Page 97

Limited Warranty 97
AT&T SB67040 Cordless Accessory Handset User’s Guide
4. What is not covered by this Limited Warranty?
This Limited Warranty does not cover:
PRODUCT that has been subjected to misuse, accident, shipping or other physical damage, improper installation, abnormal
operation or handling, neglect, fire, water or other liquid intrusion; or
PRODUCT that has been damaged due to repair, alteration or modification by anyone other than an authorized service
representative of the manufacturer; or
PRODUCT to the extent that the problem experienced is caused by signal conditions, network reliability or cable or
antenna systems; or
PRODUCT to the extent that the problem is caused by use with non-AT&T accessories;
PRODUCT whose warranty/quality stickers, PRODUCT serial number plates or electronic serial numbers have been
removed, altered or rendered illegible; or
PRODUCT purchased, used, serviced or shipped for repair from outside the United States of America or Canada, or used
for commercial or institutional purposes (including but not limited to products used for rental purposes); or
PRODUCT returned without a valid proof of purchase (see item 6 on the next page); or
Charges for installation or setup, adjustment of customer controls, and installation or repair.
5. How do you get warranty service?
To obtain warranty service, contact the person who installed your system. If your installer is unavailable, visit our website at
www.telephones.att.com or call 1 (888) 916-2007. In Canada, call 1 (888) 883-2474.
NOTE: Before calling for service, please review the user’s guide. A check of the PRODUCT's controls and features
may save you a service call. Except as provided by applicable law, you assume the risk of loss or damage
during transit and transportation and are responsible for delivery or handling charges incurred in the
transport of the PRODUCT to the service location.
Page 98

Limited Warranty 98
AT&T SB67040 Cordless Accessory Handset User’s Guide
The manufacturer will return any repaired or replaced PRODUCT under this Limited Warranty. Transportation, delivery or handling
charges are prepaid. The manufacturer assumes no risk for damage or loss of the PRODUCT in transit. If the PRODUCT failure is
not covered by this Limited Warranty, or proof of purchase does not meet the terms of this Limited Warranty, the manufacturer
will notify you and will request that you authorize the cost of repair prior to any further repair activity. You must pay for the cost
of repair and return shipping costs for the repair of products that are not covered by this Limited Warranty.
6. What must you return with the PRODUCT to get warranty service?
You must:
1. Return the entire original package and contents, including the PRODUCT, to the service location along with a description of
the malfunction or difficulty; and
2. Include a “valid proof of purchase” (sales receipt) identifying the PRODUCT purchased (PRODUCT model) and the date of
purchase or receipt; and
3. Provide your name, complete and correct mailing address, and telephone number.
7. Other limitations
This warranty is the complete and exclusive agreement between you and the manufacturer of this AT&T branded PRODUCT. It
supersedes all other written or oral communications related to this PRODUCT. The manufacturer provides no other warranties for
this PRODUCT. The warranty exclusively describes all of the manufacturer’s responsibilities regarding the PRODUCT. There are no
other express warranties. No one is authorized to make modifications to this Limited Warranty and you should not rely on any
such modification.
State/Provincial Law Rights: This warranty gives you specific legal rights, and you may also have other rights which vary from
state to state or province to province.
Limitations: Implied warranties, including those of fitness for a particular purpose and merchantability (an unwritten warranty that
the PRODUCT is fit for ordinary use), are limited to one year from date of purchase. Some states/provinces do not allow limitations
on how long an implied warranty lasts, so the above limitation may not apply to you. In no event shall the manufacturer be liable
for any indirect, special, incidental, consequential, or similar damages (including, but not limited to lost profits or revenue, inability
Page 99

Limited Warranty 99
AT&T SB67040 Cordless Accessory Handset User’s Guide
to use the PRODUCT or other associated equipment, the cost of substitute equipment, and claims by third parties) resulting from
the use of this PRODUCT. Some states/provinces do not allow the exclusion or limitation of incidental or consequential damages,
so the above limitation or exclusion may not apply to you.
Please retain your original sales receipt as proof of purchase.
Page 100

Glossary 100
AT&T SB67040 Cordless Accessory Handset User’s Guide
G
LOSSARY
This glossary provides definitions that are specific to this business telephone system.
10/100 Ethernet Port: An Ethernet port that supports two different speeds of Ethernet on the same port. The two speeds
supported are 10Base-T and 100Base-TX.s
10Base-T/100Base-TX: An Ethernet network operating at up to 100 megabits per second
active call: An established telephone call that is not on hold
analog: A continuously variable signal
analog phone: A non-system telephone that plugs directly into a normal telephone wall plug
Auto Attendant: A system that automatically answers incoming calls and provides instructions to callers
Auto-MDIX (Automatic Medium-Dependent Interface Crossover): A computer networking technology that automatically
detects the required cable connection type (straight-through or crossover) and configures the connection appropriately
Available ( ): A screen icon that indicates that there is a Call Appearance key that is not busy with predialing, dialing, ringing,
or an active
or held call
Call Appearance: The five icons on the right side of the Deskset display and the keys and LEDs associated with those icons. The
keys access active and held calls, and calls that are being dialed or predialed. The LEDs and icons indicate the state of each call
or potential call.
Call Deck: When there is more than one active call on an optional Cordless Handset, each screen in the Call Deck represents
and provides access to active and held calls, and calls that are being dialed or predialed. Display each screen by pressing the
or navigation key in Idle mode.
Cat 5 wiring: A twisted pair data cable commonly used in offices for computer communication.
 Loading...