

Page 1
•
••
II II
Page 2
1
User's
Guide
Contents
Introduction
Welcome 1-2
Organization
What
You See
Which
Computer
Getting Started Dual Floppy
Users
What
You Will
Inserting a Diskette
Seeing
Correcting Typing
Preparing
Copying Files 2-15
Selecting a Different
Starting
Diskette
The
Benefit of Copying Your
Points
to
of
What
Is
a New
the
Computer
Remember
the
User's Guide
and
What
You Should Do
Do You Have? 1-4
Need
On
Your
Diskette
Mistakes
Diskette
for
Diskette
With
Use
Drive 2-17
the
Copied
Diskettes
1-3
1-3
2-2
2-3
2-9
2-11
2-12
2-18
2-19
2-20
Getting Started Hard
Users
What
You Will
Inserting a Diskette
Seeing
Correcting Typing
Preparing
What
Is
Your
Need
On
Your
Mistakes
Hard
Diskette
Disk
for
Use
Disk
3-2
3-3
3-8
3-10
3-11
Page 3
User's
Guide
Starting
Selecting a Different Disk Drive 3-16
Copying Files 3-17
The Benefit of Copying Your Diskettes 3-20
Points to Remember 3-21
What Every
The
4
All About Diskettes 4-15
Diskette Drives
Files
File Maintenance
Points to Remember
What To Do
Doesn't Work
5
Introduction 5-2
What
How to Use Diagnostics
Testing Options 5-7
What
Selecting a
Logging
Up Your Computer from
Hard
Disk 3-15
User
Parts
of Your Computer
If
Something
Is "Diagnostics?"
Each
Test
Does
Test
Errors
the
Should Know
4-2
4-23
4-27
4-31
4-45
5-3
5-4
5-10
5-12
5-15
Glossary
Index
Page 4
• Welcome
•
Organization
•
What
should
•
Which
you
do
computer
will
Introduction
of
the
see
do
User's
and
you
what
Guide
you
have?
1-1
Page 5
Introduction
WelcoDle
Your AT&T
enter a new
where
cated
Both
User's
they
get
Mter
plore MS
begin
you
tasks
your
AT&T
Guide
provide you
up
and
using
TM
to
run
Personal
world
have
easily
are
running
this
-DOS
Computer
of
increased
the
power
and
quickly.
Personal
designed
with
the
fast.
guide
you
further
to
handle
Computer
to
be
tools you
may
in
the
a software application
6300
enables
you to
productivity, a world
large,
compli-
6300
and
the
easy-to-use.
want
choose
MS-DOS
to
either
Guide
Together
and
need
ex-
or
program.
to
1-2
MSTMDOS
is a registered
trademark
of
Microsoft®
Page 6
Introduction
Organization
Your
User's
first
part,
stallation
stallation
instructions
to do.
traneous
This
first
tions: one for
Disk
users. You will only
for
your
get a better
To
the
second
swer
many
explains how to
individual
diskettes.
on
disk
Guide is organized into two
called
of
your
Pamphlet
and
It
gets
you
conceptual information.
part
is
Dual
computer.
part
of
the
needs
It
also
file storage.
of
the
User's
Getting
computer.
examples showing you exactly
started
separated
grasp
of
the
questions
adjust
and
introduces
Started,
left off
Floppy
of
computer
manual.
your
how to
It
starts
and
quickly
into
users,
use
the
It's
that
computer
handle
more
continues
provides
with
two
the
section
concepts,
designed to
every
advanced
Guide
parts.
where
hands-on
very
independent
other
for
appropriate
user
to
suit
and
care
The
the
in-
the
In-
what
little
ex-
sec-
Hard
turn
to
an-
asks.
It
your
for
your
concepts
What
What
In
resents
boldface
board.
Type:
A>dlr
only type
to help you follow
screen.
the
examples
For
You
You
what
text
example,
the
Will
Should
you see on
is
what
boldfaced
See
in
this
you should
if
what
and
Do
book,
your
you see:
dlr.
The
is
happening
the
indented
display screen.
type
A>
prompt
on
on
text
your
your
rep-
The
key-
is
shown
display
1-3
Page 7
Introduction
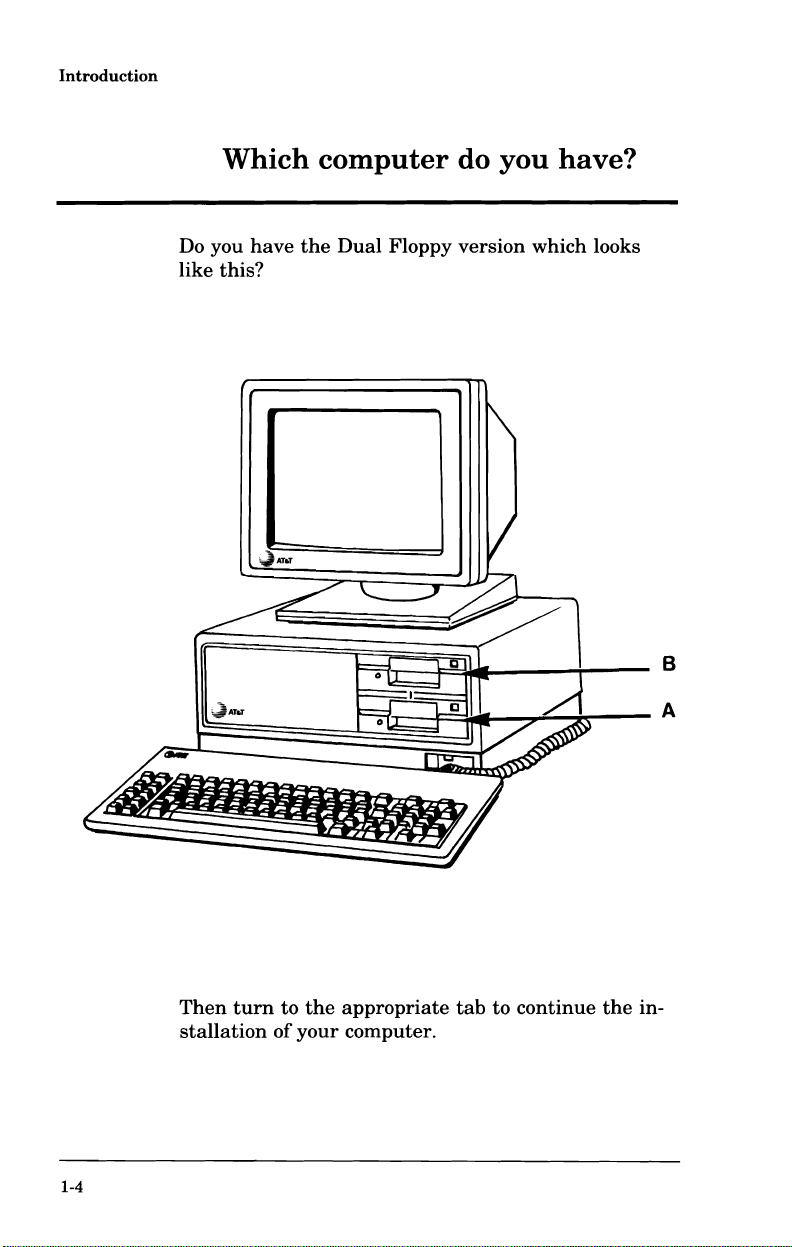
Which
Do you
this?
like
have
com.puter
the
Dual
Floppy
do
you
version
have?
which looks
1-4
Then
turn
stallation
to
of
the
appropriate
your
computer.
tab
to
continue
the
in-
Page 8
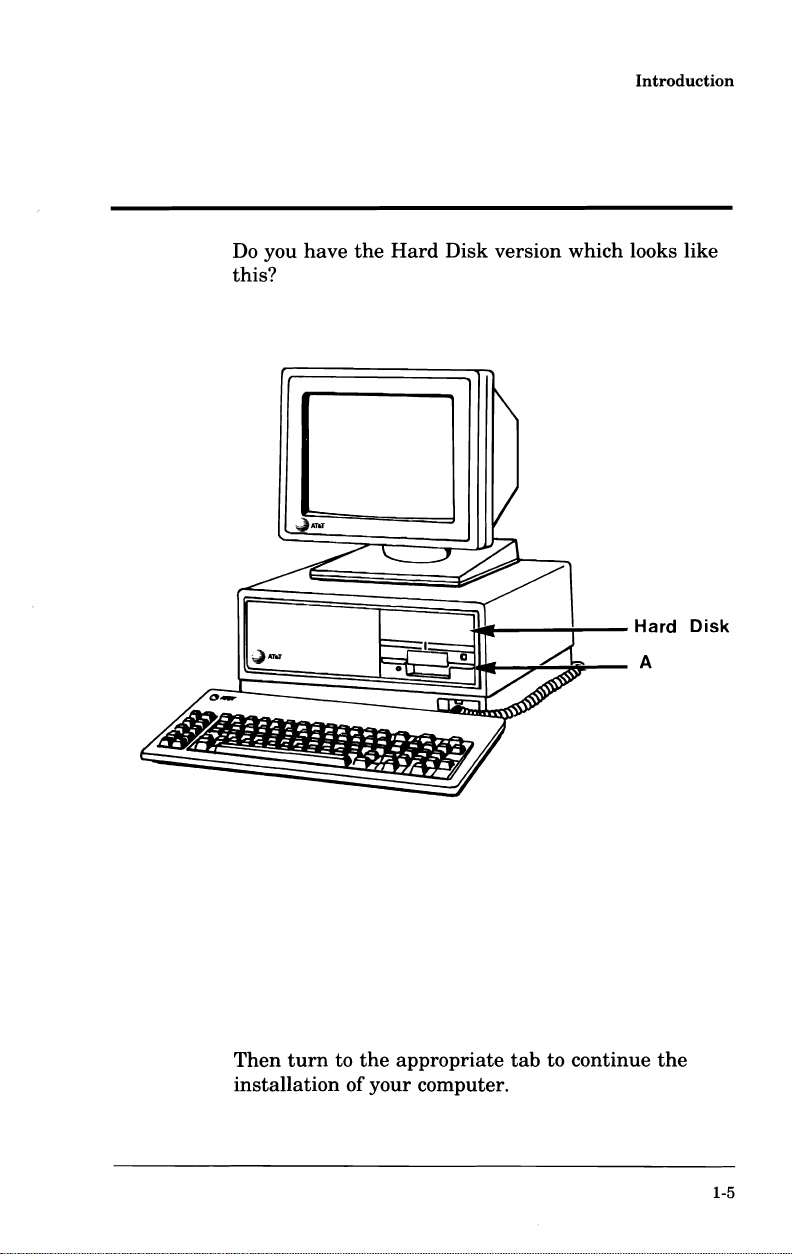
Do
you
this?
have
the
Hard
Disk version which looks like
~~
__
........
__
Introduction
Hard
Disk
Then
turn
installation
to
of
the
your
appropriate
computer.
tab
to continue
A
the
1-5
Page 9
Getting Started
2
•
What
•
Inserting a diskette
•
Seeing
•
Correcting
•
Preparing a new
•
Copying
•
Selecting a different
•
Starting
copied
you
will
what
typing
files
the
diskette
is
computer
Dual
need
on
your
mistakes
diskette
disk
Floppy
Users
diskette
for
use
drive
using
the
•
The
diskettes
•
Points
benefit
to
remember
of
copying
your
2-1
Page 10
Getting
Dua_
Floppy
Started
Users
What
• Your computer completely
Installation Pamphlet
• The
• A new blank diskette
MSTM-DOS/GW
enclosed
in
the
you
BASIC System Diskette which is
MSTM-DOS
will
set
User's Guide
need
up as directed
in
the
2-2
Page 11
Dual
Inserting a diskette
Getting
Floppy
Started
Users
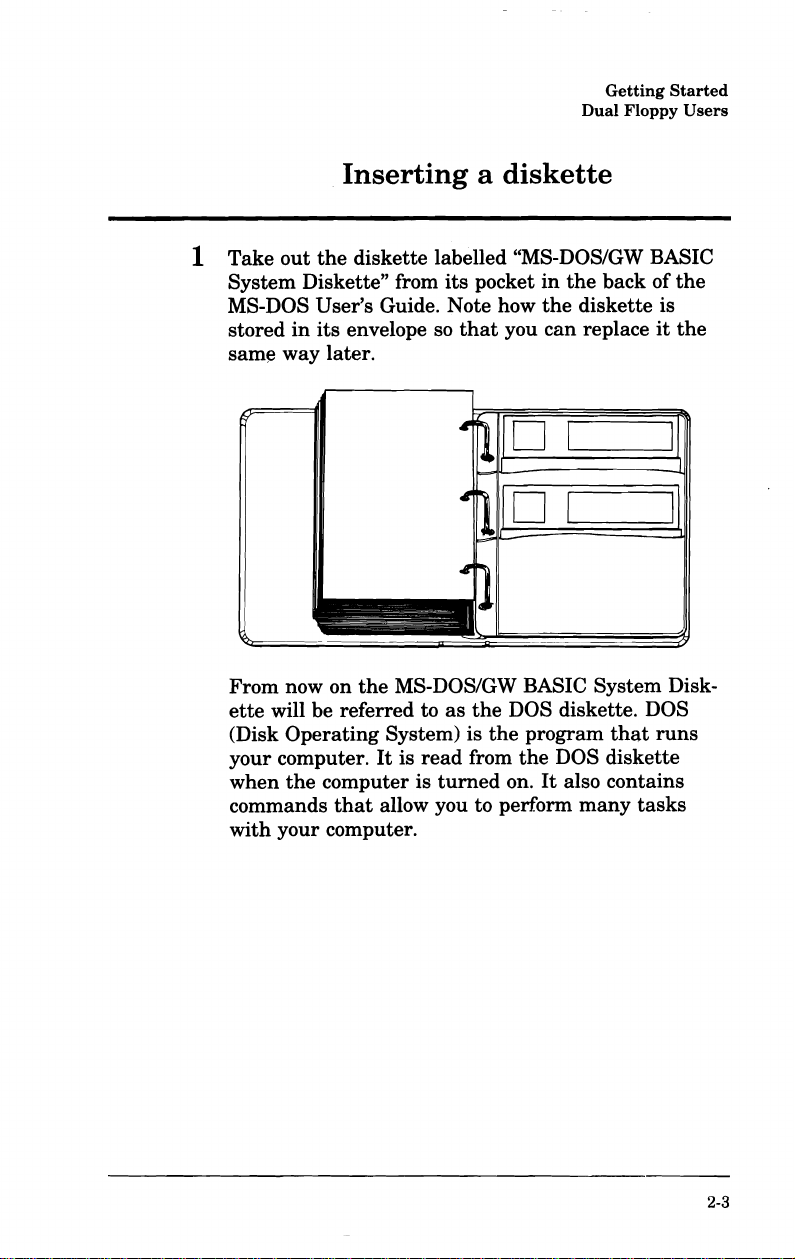
1 Take
out
the
diskette labelled "MS-DOS/GW BASIC
System Diskette" from
MS-DOS User's Guide. Note how
stored
same way later.
From now on
ette
(Disk
your computer.
when
commands
with your computer.
in
its
envelope so
the
will be referred to
Operating
the
computer is
System) is
It
that
allow you to perform
its
MS-DOS/GW BASIC System Disk-
as
is
read
turned
pocket
that
you
in
the
the
diskette is
can
D 1 _
01
the
DOS diskette. DOS
the
program
from
the
DOS diskette
on.
It
also contains
many
back of
replace
that
tasks
the
it
the
runs
2-3
Page 12

Getting
Dual
Floppy
Started
Users
2 Remove
This
jacket
dust
and
Letters
ette
drives
A;
drive
3
Open
the
locked, a
switch. You
switch
NOTE:
ette
drives
drives
the
DOS
diskette
is
designed
dirt.
(e.g., A, B, C)
on
your
the
upper
diskette
red
square
unlock
to
the
right.
Your
computer
that
do
don't
have
locks,
from
to
protect
are
used
computer.
one is
drive
appears
the
drive door
may
not
have
continue
drive
door.
its
protective
the
diskette
o
to
identify
The
lower
B.
If
the
drive
to
the
right
by
sliding
be
equipped
locking doors.
to
step
the
drive
door is
of
the
the
with
If
4.
jacket.
from
disk-
is
lock
lock
disk-
your
2-4
Page 13
Getting
Dual
Floppy
Started
Users
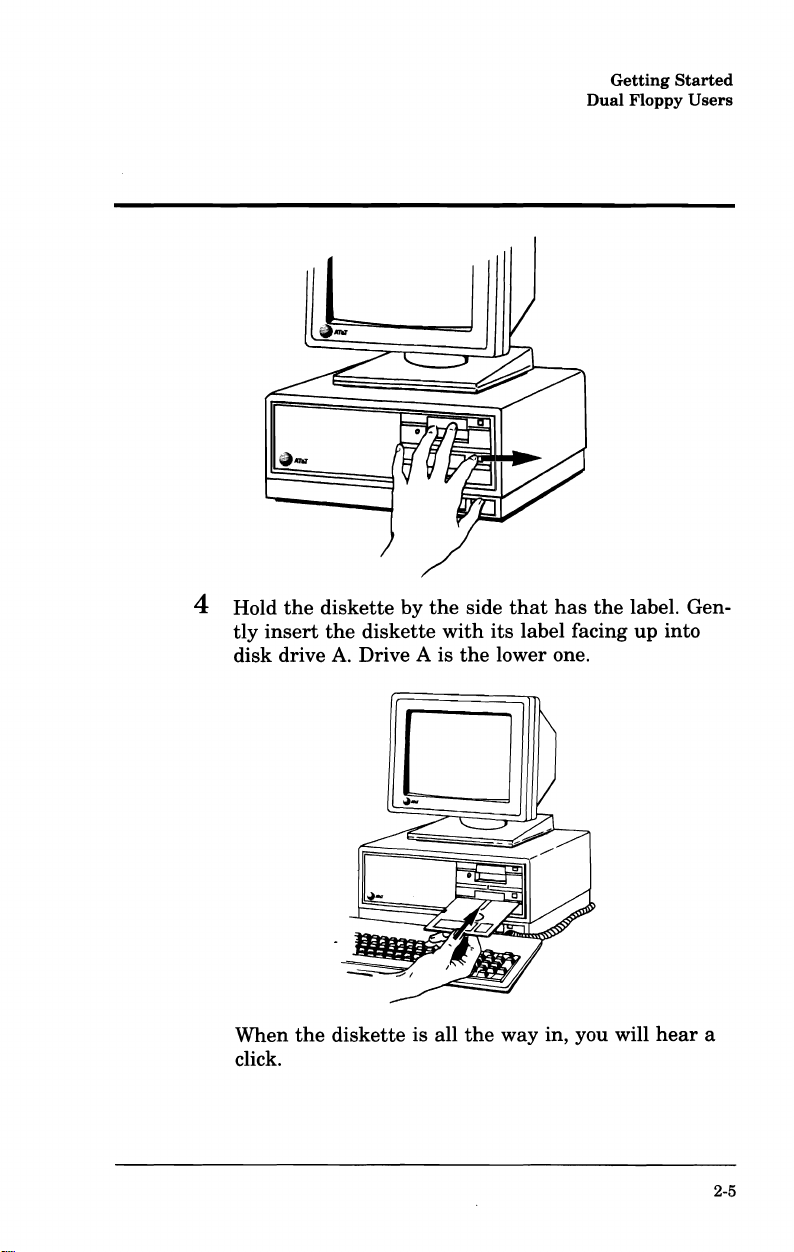
4 Hold
tly
insert
disk
When
click.
the
drive
the
diskette
the
diskette
A.
Drive A is
diskette
by
is all
the
with
side
that
has
its
label facing
the
lower one.
the
way in, you will
the
label. Gen-
up
into
hear
a
2-5
Page 14
Getting
Dual
Floppy
Started
Users
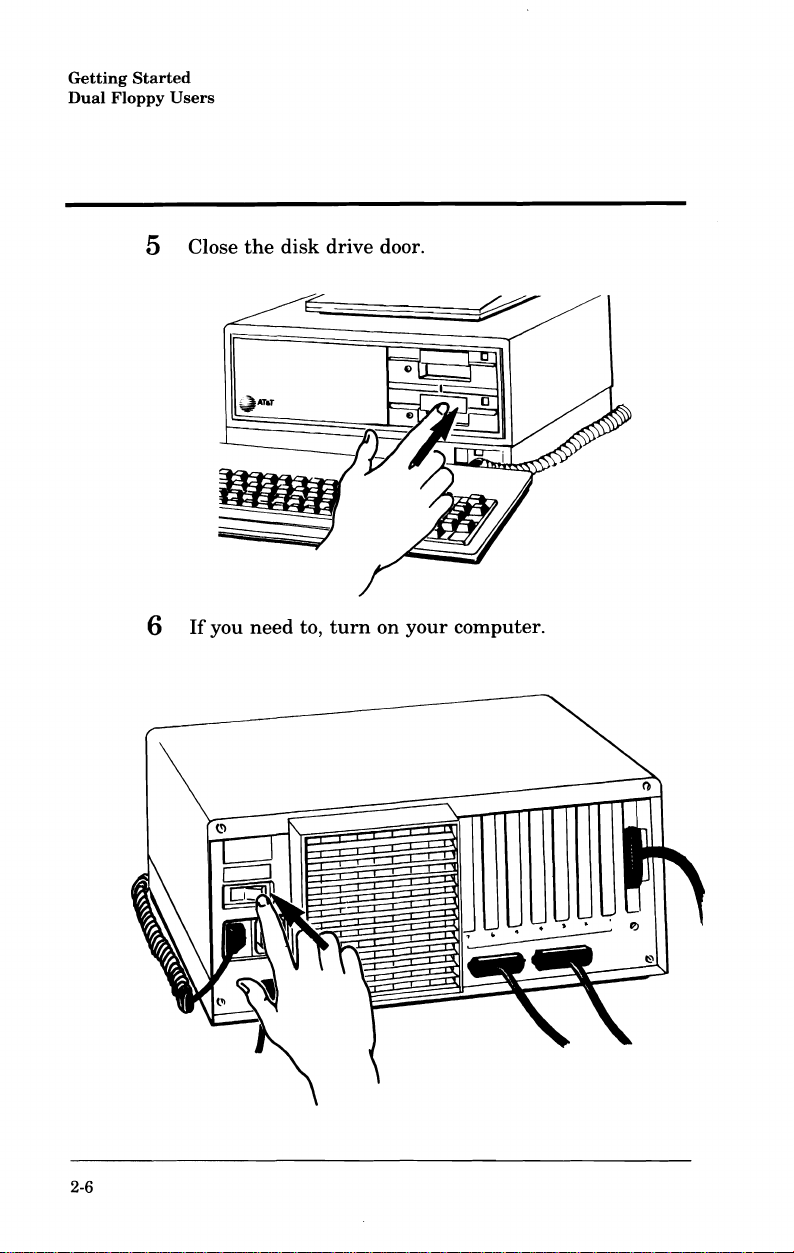
5 Close
6
If
you
the
need
disk
to,
drive door.
turn
on
your
computer.
2-6
Page 15
For
about
on,
it
ing
properly.
five seconds
runs a self
after
check to
your
make
Dual
computer
sure
that
Getting
Floppy
is
it
is work-
Started
Users
turned
NOTE:
move a
to
mation
by
It
is
diskette
the
computer. Doing so
on
the
is accessing a
light
on
the
extremely
while
diskette. You
diskette
drive
that
important
it
is
being
can
can
by looking
the
diskette
that
read
destroy
tell
if
at
the
is in.
you
never
from
or
the
the
computer
indicator
re-
written
infor-
2-7
Page 16
Getting
Dual
Floppy
Started
Users
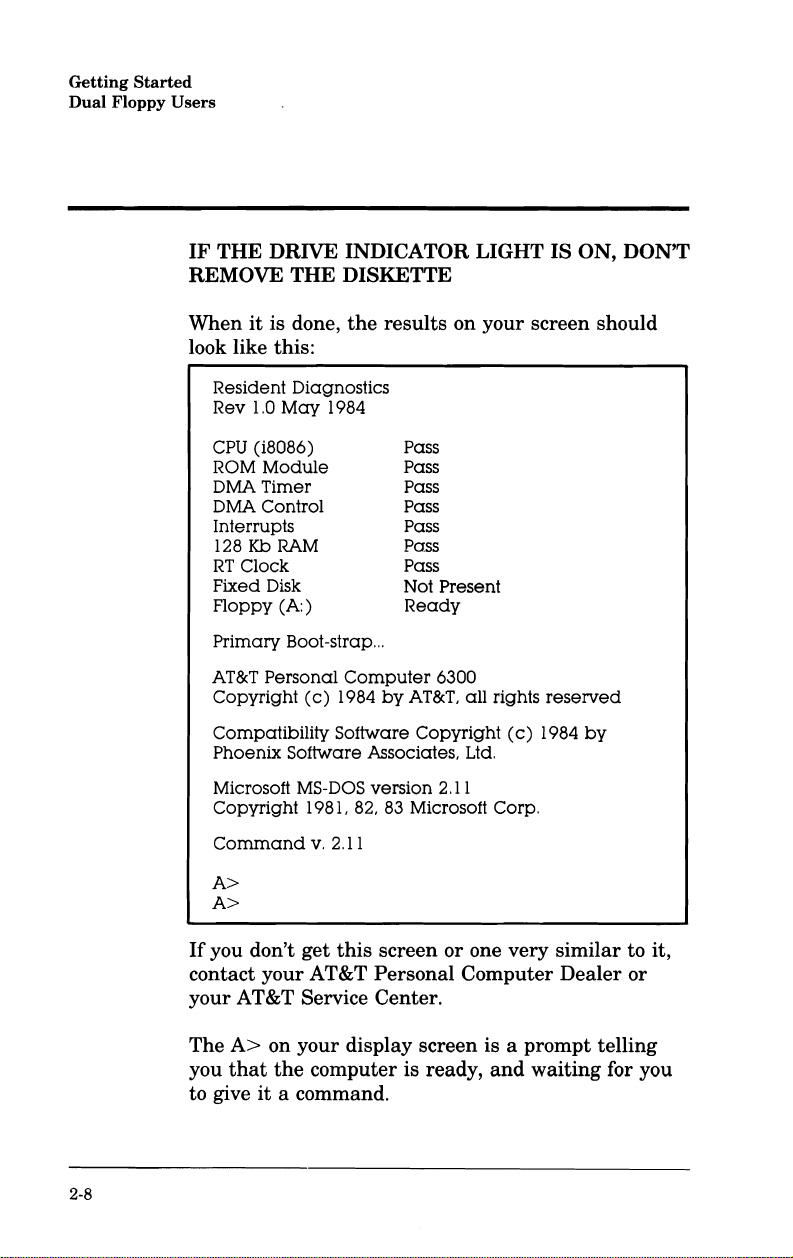
IF
THE DRIVE INDICATOR LIGHT IS ON, DON'T
REMOVE THE DISKETTE
When
it
is done,
the
look like this:
Resident Diagnostics
1.0
May
Rev
CPU
(i8086)
ROM
Module
DMA
Timer
DMA
Control
Interrupts
128
Kb
RT
Clock
Fixed
Disk
Floppy
Primary
AT&T Personal
Copyright
Compatibility
Phoenix
Microsoft MS-DOS version
Copyright
Command
1984
RAM
(A:)
Boot-strap
(c)
Software Associates, Ltd.
1981,
v.
...
Computer
1984
Software
82,
2.11
A>
A>
results
by
83
on your screen should
Pass
Pass
Pass
Pass
Pass
Pass
Pass
Not
Present
Ready
6300
AT&T,
all
Copyright
2.11
Microsoft Corp.
rights
(c)
reserved
1984
by
2-8
If
you don't
get
this
screen
or
one very similar to it,
contact your AT&T Personal Computer Dealer
your AT&T Service Center.
A>
The
you
to give
on your display screen is a prompt telling
that
the
computer is ready,
it
a command.
and
waiting for you
or
Page 17
Getting
Dual
Floppy
Started
Users
Seeing
Your DOS
mation
In
prompt
your
is
the
following example, only
is provided to
screen.
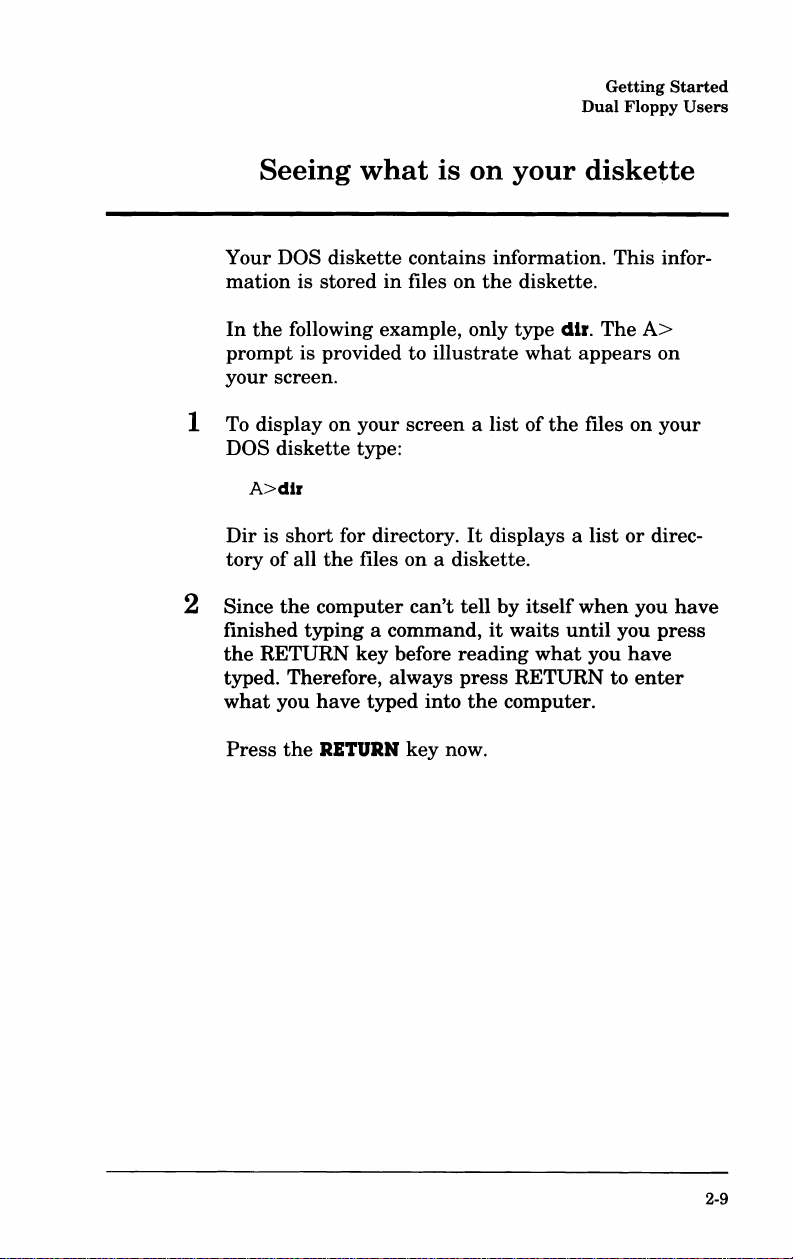
1 To display
DOS
diskette
A>dlr
Dir
is
short
tory
of
all
2 Since
the
finished
the
RETURN
typed. Therefore, always
what
you
Press
the
what
diskette
stored
on
your
type:
for directory.
the
files
computer
typing
key
have
RETURN
is
contains
in
files on
illustrate
screen a list
on
a diskette.
can't
tell
a command,
before
typed
into
key
reading
press
now.
on
your
information.
the
diskette.
type
what
of
It
displays a
by
itself
it
waits
what
RETURN
the
computer.
diskette
dlr.
The
appears
the
files
list
when
until
you
This
on
or
you
you
have
to
enter
infor-
A>
on
your
direc-
have
press
2-9
Page 18
Getting Started
Dual Floppy
~ATIoT
Users
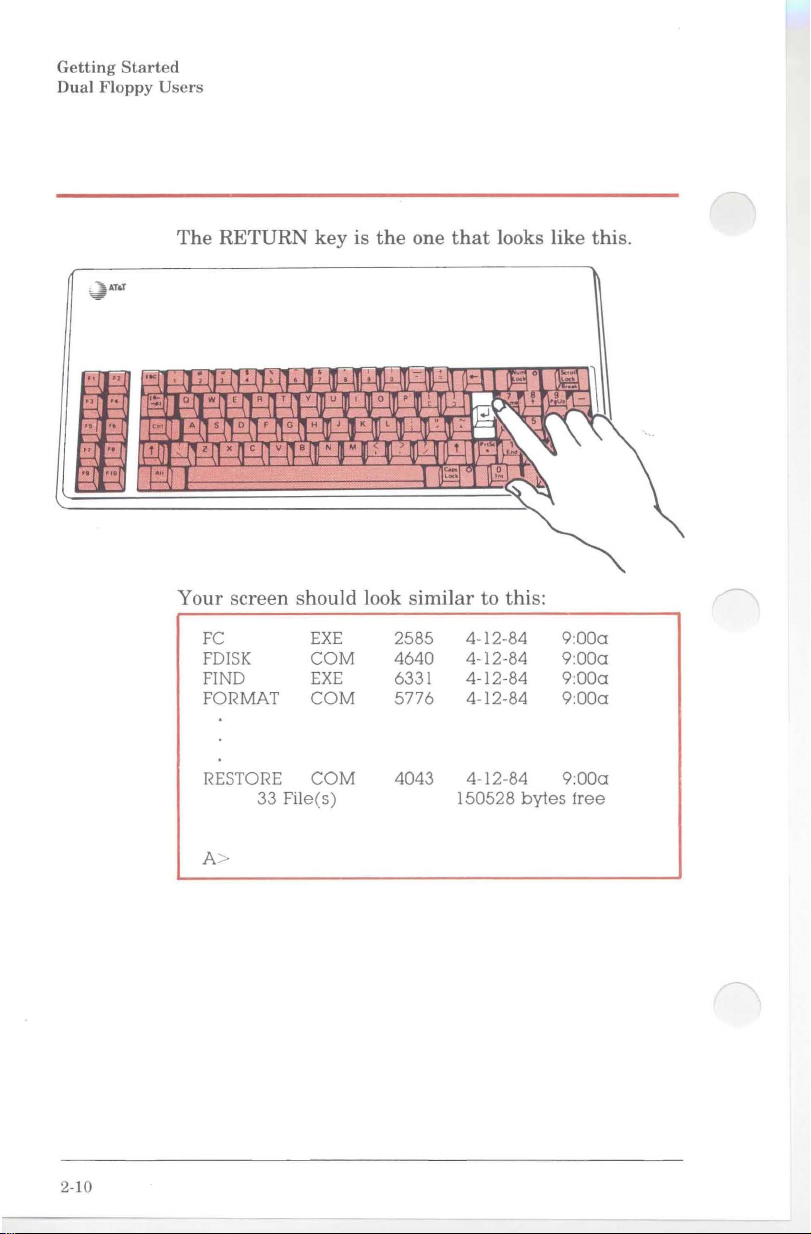
The RETURN key is the one that looks like this.
Your screen should look similar to this:
2-10
FC
FDISK
FIND
FORMAT
RESTORE
EXE
COM
EXE
COM
COM
2585
4640
6331
5776
4043 4-12-84
33 File(s) 150528
A>
4-12-84
4-12-84
4-12-84
4-12-84
bytes
9:000
9:000
9:000
9:000
9:000
tree
Page 19
Getting
Dual
Floppy
Started
Users
~AT
~'jE
~J;;-
~ ~
S
~
t:;
~
."
t:j~
..
r
1
At
take.
ply
typed
do
DOS
lee:
~~
j:::
tJl
~
Try
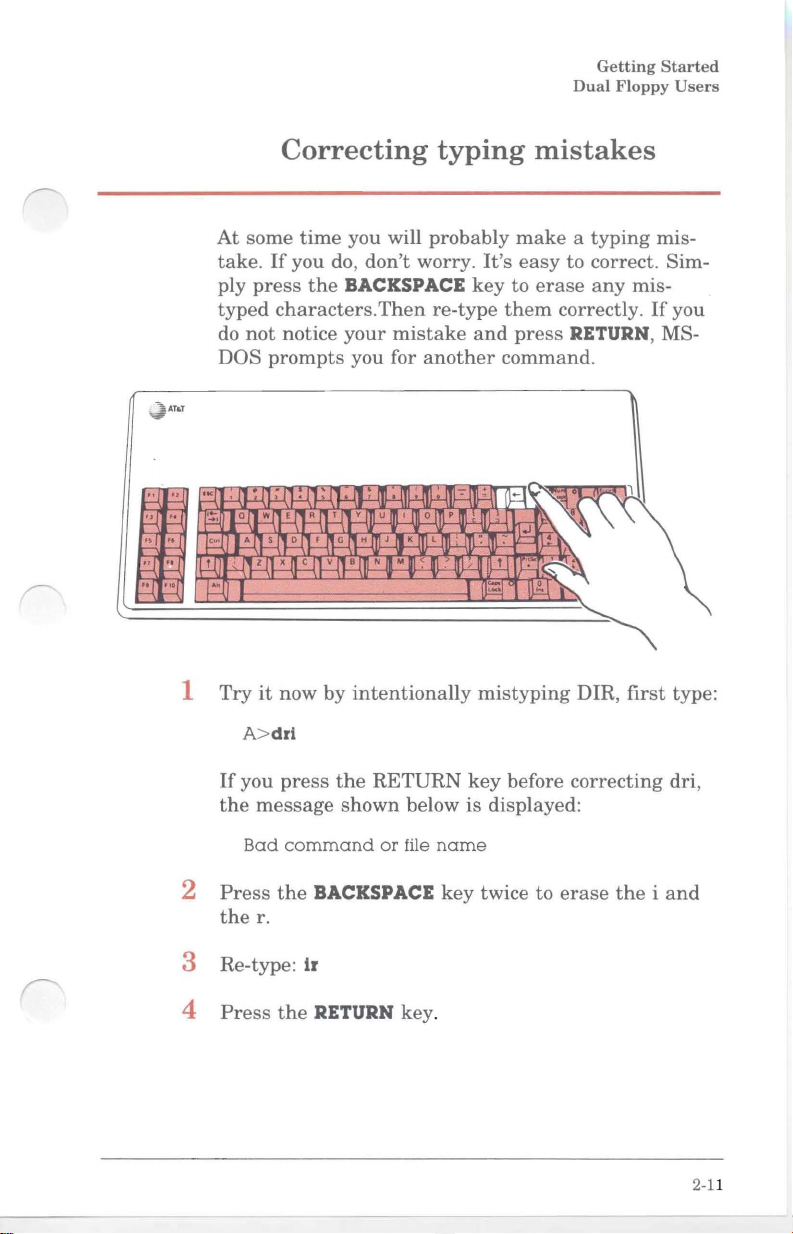
Correcting
some
time
If
you do,
press
the
characters.
not
notice
prompts
I
11
:
11.
'1
E Rf1
QI1W
toy
AJl
S
x
..:>.'"
nellv11
l
it
now by
you will probably
don't
worry.
BACKSPACE
Then
re-type
your
mistake
11
T
f
you for
l1~m.
Y u
G
"mJ
8
Nil"
another
m'.1II
'lDom
_m
L
II
~
1111"1/ n
intentionally
typing
make a typing
It's
key
to
them
and
press
command.
m.
m-
~.
;r
I;IT
_ .J
•n
.
1;':'-
~
U
~
mistyping
mistakes
easy
to correct. Sim-
erase
any
correctly.
RETURN, MS-
~~
-
Ii"
~
It
''!J
"-
.........
DIR,
mis-
If
first
mis-
you
type:
A>dri
If
you
press
the
message
Bad
command
2
Press
the
the
r.
3 Re-type: 1r
4
Press
the
the
RETURN
shown
BACKSPACE
RETURN key.
below is displayed:
or
file
key
name
key
before correcting dri,
twice to
erase
the i and
2-11
Page 20
Getting
Dual
Floppy
Started
Users
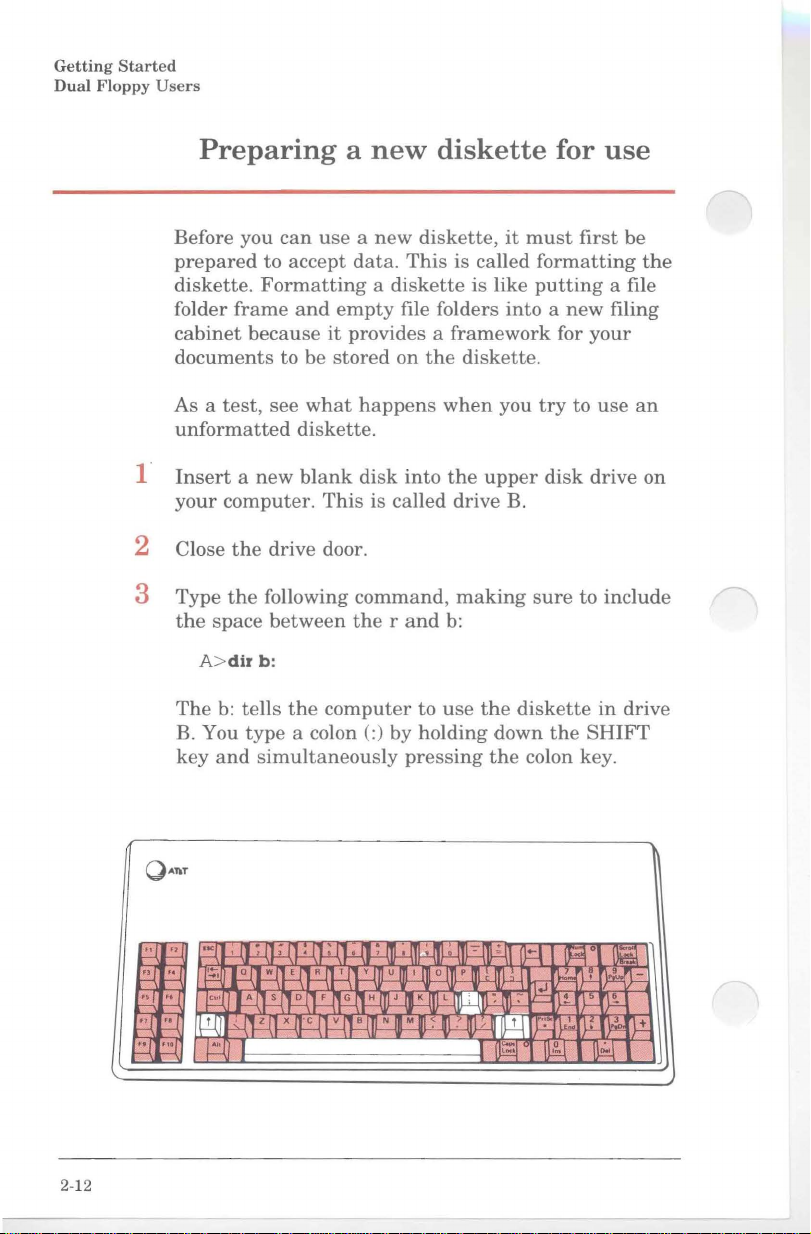
Preparing a new
Before you
prepared
diskette.
folder
cabinet
documents
As a
unformatted
1"
Insert a new
your
2 Close
3 Type
the
space
A>dir
The
B. You
key
and
can
use a
to accept
data.
Formatting a diskette
frame
test,
and
because
to be
see
what
empty
it
provides a
stored
happens
diskette.
computer.
the
drive door.
the
following
between
b:
b:
tells
the
type
blank
a colon (:) by holding down
disk
This
command,
the
computer
simultaneously
diskette
new
diskette,
This
file folders
on
the
when
into
is called drive B.
rand
to
use
pressing
it
is called
is like
into a new
framework
diskette.
you
the
upper
making
b:
the
the
for
must
first
formatting
putting
for
your
try
to
disk
drive on
sure
to include
diskette
the
SHIFT
colon key.
use
be
a file
filing
use
in
drive
the
an
2-12
QAnT
'~.r
,f1~Il:n.ll"".I1;m.m~1fI
W
R
l§. IOI1
~
W-(
l.':,..I'
~
E
Il
I1.
JPJ
YIlIUm,
(Ajl-sJloIlF"a'HmJIIKIlIL
z
11
x
11""
v
Bill
N II M
n
oll\plU
III ~ III
Ill"-'m~
:m~
.
rn
/ n
1[J1;l
fJ=.t
~o
.J
7 1 ,ll", -
~
J.-!-.1lr:",'
~
I'
•
~
~!
~
,~n
+
Page 21
4
Press
Since
puter
the
RETURN
the
new diskette is
cannot
read
key.
it
and
Dual
not
formatted, your com-
displays
the
message:
Getting
Floppy
Started
Users
5 To
Sector not
Abort
return
found
Retry,
to
Ignore?
the
A>
error
reading
prompt, type: a
The following steps show you how to
diskette for use.
1
2
Format
Press
the
A>formal/l
the
RETURN
new disk
b:
key.
in
drive B by typing:
The following message is displayed:
Insert
new
and
3 Since
the
RETURN
the
As
plays
Formatting."
diskette for
strike
any
key
the
new diskette is
key
diskette is being formatted, your screen dis-
the
message:
or
drive
when
any
ready
already
other
B:
drive
key.
B:
prepare
in
drive B,
a new
press
2-13
Page 22

Getting
Dual
Floppy
Started
Users
When
playa
formatting
message
is
complete,
similar
to
this:
your
screen
will dis-
Formatting
System
362496 bytes
31
Format
Don't
be
don't
exactly
4 Type: n
You
have
ready
...
transferred
43008
bytes
9488
bytes
another
concerned
successfully
for use.
Format
total
used
available
(YIN)?
match
Complete
disk
by
if
the
those
formatted
space
system
on
disk
numbers
shown
on
here.
the
your
screen
diskette
and
it
is
2-14
Page 23

Getting
Dual
Floppy
Started
Users
As you
such
use
your
as
word processing, financial modeling,
information, etc. you will
diskette
The
1 Copy
in
The
DISKETTE to
having
2
Press
As
A to
displayed on
to
another.
following example shows you how to do this.
the
files from
drive B by typing:
A>copy
a:*.
*.* copies
*
b:
all
the
to
separately
the
RETURN
each
file is
being
the
diskette
your
Copying
computer
the
of
diskette
key.
in
Drive B,
screen,
for various applications
need
DOS
the
files from
type
in
copied from
similar
files
to copy files from one
diskette
in
drive B
each
the
your
file's
the
diskette
name
to
the
to
the
SYSTEM
without
name.
of
that
following:
storing
diskette
you
in
Drive
file is
A>copy
A:COMMAND.COM
A:ANSI.SYS
A:ASSIGN.COM
A:AUTOEXEC.BAT
A:BASIC.COM
A:RESTORE.COM
A>
When
A>
prompt
a:*.*
the
lights
is displayed,
b:
33 File(
on
s)
your
copied
disk
drives
the
copy is completed.
go
out
and
the
2-15
Page 24
Getting
Dual
Floppy
Started
Users
3 To verify
tory
A>dlr
4
Press
Displayed
copied (rom
and
and
5 Now
that
of
the
diskette
b:
the
RITURN key.
are
date
to
time
that
make
the
the
the
the
the
a copy of your MS-DOS Supplemental
Programs Diskette using
files were copied, check
in
drive
B.
Type:
names
DOS diskette
right
of
the
in
of each file
files
drive
name
file was created.
the
same
procedure.
that
A.
are
the
direc-
you
just
The time
the
date
2-16
Page 25

Getting
Dual
Floppy
Started
Users
Selecting a different
Have you noticed
pletes a
displays
This is because your computer always
disk drive
The
which drive is
ample,
A.
Remember, before you
put
when
the
However, you
task
the
it
letter
beginning
A>
means
B>
indicates
the
DOS diskette
your
computer is
default drive.
1 Type:
A>b:
that
(such
as
A>
prompt again?
began on
the
the
current
that
that
the
can
change
each
time
DIR
or
after
it
screen prompt indicates
or
the
default
default drive is drive
turned
in
drive
turned
the
disk
the
COpy)
completes
default drive.
or
on
the
A.
This is because
on,
it
default drive. To
drive
computer com-
your computer
returns
its
task.
For
current
computer, you
makes
drive A
to
the
ex-
drive is
B.
do
so:
Don't forget
2
Press
Your screen looks like this:
A>b:
B>
You
are
the
now
the
colon.
RETURN
using
key.
drive
B.
2-17
Page 26
Getting
Dual
Floppy
Started
Users
Starting
using
1 Remove
2
Insert
3 Remove
from drive
4
Turn
5
Insert
close
6 Wait 5 seconds,
again.
When
screen looks
your computer
drive
the
DOS diskette from drive
the
DOS diskette into
the
copy
B.
your computer
the
copy of your DOS diskette into drive A
the
disk drive door.
the
A>
just
A.
the
that
then
prompt
the
with
the
the
cODlputer
copied
you
made
off.
turn
the
ap_pears, notice
same
as
original DOS diskette
diskette
A.
its
envelope.
of
your DOS
computer back on
it
did when you
that
diskette
and
YO\lr
started
in
2-18
It
makes
computer
no difference
using
the
original
whether
diskette
you start" your
or
the
copy.
Page 27

Getting
Dual
Floppy
Started
Users
The
Starting
diskette
ettes
ALWAYS USE WORKING COPIES OF YOUR PROGRAM DISKETTES.
From
like
DOS
make
You should
ettes
insures
diskette.
Your computer is now
benefit
up
illustrates
can
wear
now on, use only copies of your DOS diskette
the
one
diskette
new "working" copies
as
well
that
of
copying
the
computer from
an
important
out
or get damaged:
that
you
just
made.
away
in
a safe place
make
working copies of your
and
then
only use
you will always have a good original
ready
your
the
copy of
point. Since disk-
Put
your origirial
and
when
you need them.
the
copies. Doing
to use.
diskettes
the
only use
other
DOS
it
disk-
this
to
2-19
Page 28
Getting
Dual
Floppy
Started
Users
Points
1. Always hold
2.
Always
3. Drive A is
4.
Drive B
5. Always
command
command.
6. Before a
matted.
7.
If
ette
get
To
more
the
Tutorial
insert
is
press
new
you
want
to
another,
some more
about
your
Diskette
the
the
such
to
your
diskette
your
diskettes
lower
disk
upper
disk
the
RETURN
as
DIR
diskette
to copy all
use
the
hands-on
computer
that
rem.em.ber
by
the
side
with
the
drive.
drive.
key
after
or
COpy
can
of
the
*.*
practice
and
comes
be
to execute
used
it
files from one disk-
option.
and
what
it
with
with
label up.
typing
must
to
can
this
label.
that
be for-
learn
do,
use
guide.
in
a
2-20
Page 29
Getting Started
Hard Disk
3
•
What
•
Inserting a diskette
•
Seeing
•
Correcting
•
Preparing
•
Starting
the
•
Selecting a different
•
Copying
The
•
diskettes
you
what
up
hard
benefit
disk
files
will
is
typing
your
your
of
need
on
your
mistakes
hard
copying
disk
computer
disk
Users
diskette
for
use
from
drive
your
•
Points
to
remember
3-1
Page 30
Getting
Hard
Disk
Started
Users
What
• Your computer completely
Installation
•
The
enclosed
MSTM-DOS/GW
Pamphlet
in
the
you
BASIC System Diskette whicll is
MSTM-DOS
will
set
User's Guide
up
need
as
directed
in
the
3-2
Page 31

Inserting a diskette
1
Take
out
the
diskette
System
MS-DOS User's Guide. Note how
jacket
Diskette" from
so
that
you
labelled "MS-DOS/GW BASIC
its
can
replace
pocket
it
in
the
it
is stored
the
same
D 1 _
D
Getting
Hard
back
Disk
in
way
Started
of
the
its
later.
Users
1"-----_
From
now
on
ette
will be referred to
Operating
(Disk
your
computer.
when
the
computer
commands
with
your
that
computer.
the
MS-DOS/GW BASIC
as
the
DOS diskette. DOS
System)
It
is
allow you to perform
read
is
turned
is
the
from
the
on.
System
program
DOS
It
also contains
many
Disk-
that
runs
diskette
tasks
3-3
Page 32

Getting
Hard
Disk
Started
Users
2 Remove
The
jacket
dust
and
Letters
drives on
computer
drive
C.
3
Open
the
locked, a
You unlock
to
the
right. Your
with
a locking door.
the
DOS
is designed to
dirt.
(e.g.,
A,
B,
your
computer.
is
disk
diskette
red
square
the
drive door by sliding
diskette
C)
are
drive A.
drive door.
appears
computer
If
so,
from
protect
o
used
to identify
The
diskette
The
hard
If
to
may
just
continue
its
protective
the
diskette
drive on
disk
the
drive door is
the
right
the
not
be equipped
jacket.
from
the
disk
your
drive is
of
the
lock.
lock switch
to
step
4.
3-4
Page 33

4
Holding
gently
computer's
the
insert
diskette
diskette
it
with
by
the
its
label facing
drive.
side
that
up
Hard
has
into
Getting
Disk
the
your
Started
Users
label,
When
click.
5 Close
the
the
diskette
disk
drive
is all
door.
the
way in, you will
hear
a
3-5
Page 34

Getting
Hard
Disk
Started
Users
6
If
you
need
For
about
it
runs a self
properly.
to,
turn
5 seconds
check to
on
your
after
make
computer.
you
turn
sure
your
that
computer
it
is working
on,
3-6
It
NOTE:
move a
to by
mation
is extremely
diskette
the
computer. Doing so
on
the
is accessing a
light
on
the
IF
THE
DRIVE
REMOVE
THE
while
diskette. You
diskette
drive
that
INDICATOR
DISKETTE
important
it
is being
can
can
by looking
the
diskette
LIGHT
that
read
destroy
tell
if
at
the
is in.
you
never
from
or
the
the
computer
indicator
IS
ON,
re-
written
infor-
DON'T
Page 35

Getting
Hard
Disk
Started
Users
When
the
self
check is done,
screen should look
Resident Diagnostics
Rev
1.0
May
1984
CPU
(i8086)
ROM
Module
DMA
Timer
DMA
Control
Interrupts
256Kb
RT
Fixed
Floppy
AT&T Personal
Copyright
Compatibility
Phoenix
Microsoft
Copyright
RAM
Clock
Disk
(A:)
(c)
Software Associates, Ltd.
MS-DOS Version
1981,
similar
Pass
Pass
Pass
Pass
Pass
Pass
Pass
1
Ready
Ready
Computer
1984
by
Software
82,
83
the
results
to
this:
6300
AT&T,
Microsoft Corp.
all
Copyright
2.11
rights
(c)
on
your
reserved
1984
by
Command
A>
A>
If
you don't see a
it,
contact
your
The
you
that
to give
your
AT&T Service
A>
on
the
it
a command.
v.
2,11
screen
AT&T
your
display
computer
like
Personal
Center.
screen
is ready,
this
or
Computer
is a
and
very
similar
prompt
waiting
Dealer
telling
for you
to
or
3-7
Page 36

Getting
Hard
Started
Disk
Users
Seeing
Your DOS
mation
In
prompt
your
is
the
following example, only
is provided
screen.
1 To display
DOS diskette, type:
A>dlr
Dir
is
short
tory
of all
the
Since
finished
the
RETURN
typed. Therefore, always
what
you
2
Press
the
what
diskette
stored
on
your
for directory.
the
files on a diskette.
computer
typing
key before
have
RETURN
is
on
your
contains information.
on
the
diskette
type
to
illustrate
screen a
can't
a command,
typed
into
key
It
tell by
reading
press
the
now.
list
displays a
it
waits
computer.
diskette
This
in
files.
db.
The
what
appears
of
the
files on
list
itself
when
until
you
what
you
RETURN to
infor-
A>
on
your
or direc-
you
have
press
have
enter
3-8
The
RETURN
key
is
the
one
that
looks like this.
Page 37

Your
screen
should look
similar
to this:
Getting
Hard
Disk
Started
Users
FC
FDISK
FIND
FORMAT
RESTORE
A>
EXE
COM
EXE
COM
COM
33 File(s)
2585
4640
6331
5776
4043
4-12-84 9:00a
4-12-84 9:00a
4-12-84
4-12-84
4-12-84
150528
bytes
9:00a
9:00a
9:00a
free
3-9
Page 38

Getting
Hard
Disk
Started
Users
dATal
1
Some
time
If
you
press
the
Then
re-type
mistake
for
another
Try
it
A>drl
Correcting
you will probably
do, don't worry,
BACKSPACE key to
it
correctly. Ifyou do
and
press
RETURN, MS-DOS
command.
now by
intentionally
typing
make a typing
it
is
easy
erase
mistyping
mistakes
mistake.
to correct. Simply
the
mistake.
not
notice
prompts
DIR. Type:
your
you
3-10
If
you
press
the
following
Bad
command
2
Press
the
the
r.
3 Re-type:
4
Press
the
the
RETURN
message
or
file
BACKSPACE key twice to
ir
RETURN key.
key
before correcting dri,
is displayed:
name
erase
the i and
Page 39

Getting
Hard
Disk
Started
Users
Preparing
Before you
prepared
disk.
frame
because
to be
This
and
hard
As a
directory of
to accept
Formatting
and
empty
it
provides a
stored
initial
takes
about 5 minutes.
disk.
Step
test,
see
can
use
on
the
one
time
2 is
what
your
unformatted
your
your
data.
the
disk
file folders
framework
hard
preparation
to
happens
1 Type:
A>dlr
The
tells
tory. To type a colon, hold down
simultaneously
c:::
c:
identifies
the
computer
the
hard
to display
press
the
hard
hard
This
is like
disk.
Step
format
disk
colon.
disk
disk,
it
must
is called
putting
into a new
for
your
is done
1 is to
it.
when
you
hard
disk.
to
the
computer.
the
hard
the
SHIFT
for
use
first
be
formatting
a file folder
filing
cabinet
documents
in
two
steps
partition
try
to
list
It
disk's direc-
key
and
the
the
the
OA'ftT
t;;'r;-;
t=
J;;
,.
J=
J="
..
c;
~
"
~~
........
8
'K
•
/1 ~ 11:
11-.11-.
,.,
•
11
~
m•
~,
Q W E
(l~
.....
{l2.r
P
E
Wi
~
~~l
J...I'
oJ1
l x C
I I
Y U I 0
F G " H mJ
11
vJ
Bill
N II M II
m.1II
m-m
ITI
II
K ml ' :
~
11.IfL
P If
~
If
[]f;J
a
~
~
~
.J
~
.
~
Itt
lW
I':"
~
~
~
~!
.3
,~
+
I
~
':'J
n
3-11
Page 40

Getting
Hard
Disk
Started
Users
2
Press
the
Since
the
cannot
read
Disk
error
Abort, Retry,
RETURN
hard
it
reading
key.
disk is not formatted, your computer
and
displays
drive
Ignore?
C
the
message:
3 To
return
to
The following
hard
disk for use.
the
steps
A>
prompt, type: a
show you how to
Partitioning Your Hard Disk
Partitioning
that
holds file folders
1 To
2
partition
A>fdlsk
Press
the
The screen below is displayed.
Fixed
FDISK
Choose
Create
I
2
Change
3 Delete MS-DOS Partition
Display
4
the
the
RETURN
Disk Setup
Options
one
of the following:
MS-DOS Partition
Active
Partition
hard
disk is like installing
in
the
hard
disk, type:
key.
Program
Partition
Information
prepare
your
the
frame
filing cabinet's drawers.
3-12
Enter Choice
Press
Esc
to
""""",..,.,
return
to
....
DOS
"""" ..'"".,."
...",..,...
,.",."",..,..,."
...
,.".,..,(1)
( )
Page 41

Getting
Hard
Disk
Started
Users
3 Option 1
tion,
If
you
first
In
Do
for
has
press
the
wanted
type
its
response to
you
want
MS-DOS (YIN) (Y)
4 Select Yes by
The
screen displays
Total
fixed
The
current
5
Return
twice.
Your
part
Formatting
Formatting
folders
hard
of
this
in
to
the
disk
one
the
the
been
pre-selected. To
RETURN
key.
create
the
parti-
to select a different option, you would
number
the
to
pressing
disk
active
A>
and
then
press
prompt:
use
the
entire
fixed
the
RETURN
the
message:
space
is
305 cyls.
partition
prompt
is
by
pressing
I
is partitioned. Now, to
time
preparation.
the
Hard
hard
disk
Disk
is like
hanging
RETURN.
disk
key.
the
ESC
the
second
empty
key
folder frame.
file
For
that
using
1 To do
A>formal/s
convenience, you
when
you
turn
the
hard
disk
this
type:
c:
can
set
on
your
instead
up
your
computer,
of
the
DOS diskette.
hard
it
disk
starts
so
up
3-13
Page 42

Getting
Hard
Disk
Started
Users
2
Press
the
RETURN
key.
The following message is displayed:
Press
any
key
to
begin
3
Press
the
RETU~N
key
formatting
or
any
other
C:
key.
Your screen displays
Formatting",
After
about
3 minutes,
A>formatls
Press
Formatting",Format
System
10592256 bytes
10549760 bytes
A>
c:
any
key
transferred
42496 bytes
Don't be concerned
don't exactly
will
vary
your
cOII).puter.
match
depending
to
begin
the
message:
your
formatting
Complete
total
disk
used
by
available
if
the
numbers
the
numbers
011
the
screen looks like this:
space
system
on
specific disk installed
You have successfully completed
process. Your
hard
disk is
ready
C:
disk
on your screen
shown above. They
the
preparation
for use.
in
3-14
Page 43

Getting
Hard
Disk
Started
Users
Starting
from
Remember, before you
put
the
DOS diskette
when
your computer is
the
programs
Since you formatted your
tion, you
the
hard
1
Try
it
now. Leave
2
Turn
the
Notice
did
DOS diskette
now
Now
switch to drive C
grams
computer
the
that
when
C>
that
it
default drive.
it
can
start
disk.
computer off
your screen looks much
you first
in
instead
your
hard
needs
in
using
up
your
the
turned
in
drive
turned
needs to
the
drive
of
if
drive
the
run
hard
up
your computer directly from
diskette drive door OPEN.
and
turned
A>.
it
on your computer
A.
Except
disk is
doesn't find
A.
hard
disk,
com.puter
hard
then
set
When you
disk
on your computer, you
A.
This is because
on,
it
on drive
disk
using
back on.
the
that
up,
the
the
the
C drive becomes
first looks for
A.
the
/s op-
same
as
it
with
the
prompt is
computer will
MS-DOS pro-
start
up
the
the
3-15
Page 44

Getting
Hard
Disk
Started
Users
Selecting a different
The
letter
beginning
which drive is
means
the
You
you want. To do so:
that
current
can
1 Type:
C>a:
Don't forget
2
Press
the
Your screen looks like this:
C>a:
A>
You
are
the
the
current
drive is drive
change from one drive to
the
colon.
RETURN
now on drive
disk
the
screen prompt indicates
current
key.
drive is
C.
A.
drive.
For
A.
C>
another
drive
example,
indicates
whenever
A>
that
3-16
Unless you change drives, your computer always returns
to
the
drive
it
was
using
after
it
completes a
task.
Page 45

Getting
Hard
Disk
Started
Users
As you
such
as
Copying
use
your computer for various applications
word processing, financial modeling, storing
files
information, etc. you will need to copy files from one
diskette to another.
For
convenience
the
files from your DOS diskette to
and
safety, you should copy all of
the
hard
The following example shows you how to do this.
1 Close
2 Copy
the
drive door.
the
files from
the
DOS diskette to
the
by typing:
A>copy
The
DISKETTE to
separately
3
Press
a:*.
* c:
*.
*copies all of
the
type
the
RETURN
the
files from your SYSTEM
hard
disk without you
in
each file's name.
key.
having
disk.
hard
disk
to
As each file is being copied from
the
hard
disk,
the
name
to
the
copied
of
following:
A to
on your screen,
A>copy
A:COMMAND,COM
A:ANSI.SYS
A:ASSIGN.COM
etc..,
A:RESTORE,COM
A>
a:*.*
similar
c:
33
File(5)
the
diskette
that
file is displayed
in
Drive
3-17
Page 46

Getting
Hard
Started
Disk
Users
4
When
prompt
A.
drive
5
Insert
there
Since
MS-DOS
should also copy
the
hard
6
Insert
drive
A.
the
light
on drive A goes
is displayed, remove
the
DOS
diskette
are
several
Supplemental
the
useful
Programs
files from
disk.
the
Supplemental
out
the
into
its
envelope.
programs
this
Programs
and
DOS
diskette
Diskette,
diskette
Diskette
the
on
A>
from
your
you
over
into
to
7
Pressing
that
you
Press
the
The
copy
typed
it
A>copy
the
F3
typed
into
F3
key
command
last
time.
a:·.·
c:
key re-displays
your
computer.
now.
appears
on
the
the
last
command
screen
just
as
you
3-18
Page 47

Getting
Hard
Disk
Started
Users
8 Copy
The
files on
copied onto
9 To verify
tory
of
A>dlr
10
Press
11 Type:
A>C:
12
Press
This
13 Type:
C>dlr
14
Press
the
diskette
that
drive C
the
RETURN
the
RETURN
makes
the
RETURN
by
pressing
the
Supplemental
the
hard
disk.
the
files were copied, check
against
drive C
key.
key.
the
key.
that
current
the
Programs
of
drive
drive.
RETURN
Diskette
A.
Type:
key.
the
are
direc-
Notice
this
The
both
that
time
directory
DOS diskettes.
you
didn't
because C
of
drive C
have
was
the
lists
to
type
the
current
the
drive.
files copied from
C:
after
DIR
3-19
Page 48

Getting
Hard
Disk
Started
Users
The
Since
benefit
diskettes
of
can
wear
copying
out
or
your
get
ALWAYS USE WORKING COPIES OF YOUR
PROGRAM DISKETTES.
From
now on,
the
originals
to
make
U
sing
only working copies
insures
gram
It
DISKETTE
disk to
Your computer is NOW
diskettes.
is
best
that
start
use
only copies of
away
in
a safe place
new "working" copies
of
you will always
to
put
your
original MS-DOS SYSTEM
away
in
a safe place
your
computer
each
ready
your
and
when
your
program
have
good original pro-
and
time.
to use.
diskettes
damaged:
programs.
only
use
you need
diskettes
use
the
Put
them
them.
hard
3-20
can
copy
hard
This
many
disk
is
not
but
faster
You
onto your
SYSTEM DISKETTE
hard
disk.
original diskettes,
write information
of
your
just
and
only
as
then
safer
your
than
application
you did
run
than
hard
a floppy diskette.
your
them
disk
programs
MS-DOS
using
can
all from
your
read
and
the
Page 49

Getting
Hard
Disk
Started
Users
Points
1. Always hold
label.
2.
Always
3. Always
command
command.
4.
When
clude
When
5.
leave
6.
If
use
get
To
more
the
Tutorial
insert
press
such
specifying a drive
the
colon. (e.g.,
starting
the
diskette
you
want
the
*.
* option.
some more
about
your
Diskette
to
your
diskettes
your
diskettes
the
RETURN
as
DIR
the
computer
drive door open.
to
copy all
hands
computer
that
reDleDlber
by
the
with
key
after
or
COpy
letter,
A:
or
of
the
on practice
and
comes
to execute
don't forget to in-
C:)
from
files on a
what
with
side
the
the
and
it
this
can
with
label up.
typing
the
hard
drive,
diskette,
to
learn
do,
guide.
the
in
use
a
3-21
Page 50

What
Every
•
The
• All
•
Diskette
• All
File
•
•
Points
parts
about
about
maintenance
of
your
diskettes
drives
files
to
remember
User
computer
Should
Know
4-1
Page 51

What
Every
User
Should
Know
The
parts
of
your
computer
The Main Unit
The
main
unit
of
your
computer
contains
drive
the
that
computer.
The
lock,
drive is
~'T"
the
two
and a hard
computer's
does
the
diskette
and
in
an
use.
drives
indicator
diskette
disk. Besides
memory
processing.
drives or a single
and
This
have
a drive door, drive door
light
p;~~~~rt---t-lINDICATOR
L~=~::::::::::~~~§§~~t:::::=::/,.-L-_....J
the
the
electronic
is
which
is
the
drives,
the
lights
large
heart
up
box
diskette
it
contains
board
of
your
when
LIGHTS
that
the
4-2
Page 52

On
the
back
often called
These
other
enable
devices
equipment,
of
the
Main
ports
(e.g.,
parallel
you to connect
such
as
printers,
or
other
computers.
What
Every
Unit
are
port
the
computer
communications
User
several
or
serial
Should
Know
connectors
port).
to
many
()
ON-OFF
INPUT
OUTPUT
KEYBOARD
.......~..
AC
-~~~"f.J1I1
AC
-~~IIiIiI:!!~1
--~~~~~
m:::mJ
.'
"-
.'
SERIAL
PARALLEL
\
4-3
Page 53

What
Every
User
Should
The
Your
glare
graphics.
individual preference for
viewing position.
Know
Display
computer
display
screen
The
Screen
comes
display
with a high
capable
can
of
be
adjusted
brightness,
resolution
displaying
to
contrast,
text
suit
anti-
or
your
and
Adjusting
Your display
It
comfort.
left
or
swivel
joint
Adjusting
the
screen
can
right
are
controlled
providing
the
the
the
Display
screen
to change
be
tilted
an
infinite
display
way
you
is fully
Screen
adjustable
up
or
down
the
viewing angle.
by
a simple continuous friction
range
screen
want
is
easy; simply position
it.
for viewing
and
swivelled
of
adjustment.
The
tilt
and
4-4
Page 54

1
To
adjust
Facing
case to
the
the
the
screen's
screen,
knob
reach
on
the
What
Every
brightness:
underneath
left.
User
the
Should
screen's
Know
2 To
To decrease
To
1
Facing
case to
2
At
intensity
trast
monitor.
increase
adjust
times
knob found on
the
the
text
the
the
the
screen,
knob
of
that
screen's
on
r
brightness,
brightness,
contrast:
reach
underneath
on
the
right.
your
screen
highlighting
the
lower left side
turn
the
knob forward.
turn
the
may
be highlighted.
is controlled
knob backward.
the
screen's
The
by
the
con-
of
the
BRIGHTNESS
CONTRAST
4-5
Page 55

What
Every
User
Should
Know
The Keyboard
The
keyboard
four sections:
on
your
computer
can
be divided into
typewriter
• a
typewriter
• special
with
• a
lator
feature
the
numeric
and
• a block of
that
with
that
would
~AT.T
-r
(IT~
0\;-'
¥
I~
\;"~
,","'11,""""':.'·:·'·'"
r
~
~
WJ
..nzJPJl.CJPPITlNmMI1~m.lf];"~I{':"
~
=t:
section -
similar
in
function to a
normal
keyboard
keys -
typewriter
keypad -similar
doubling
ten
function keys -
only one
normally
a
/1 VI11
E~'
. 1 I
All sj'1 a r F
I r
used
keys
as a cursor
keystroke
require
v U
In
I
~
G H mJ
"K
primarily
to
the
keypad
control
that
can
you
can
several
III a 11'1
m
~
Il'
p
mL ' ';
..
rs
in
conjunction
on
a calcu-
keypad
be
set
up
perform
keystrokes
I§
[11!'
~
r
Lr1
.J
~
•
I'
.),111
aTl,o.H:
::n~1:E
so
tasks
1Iifil1!
~".
r!..l
II
'\.~
,3rlltl
4-6
On
the
when
cation
tions
following pages,
using
DOS is given.
programs,
under
the
these
control
the
function of
When
keys
may
of
those
the
running
perform
programs.
keys
your
other
appli-
func-
Page 56

What
Every
User
Should
Know
Typewriter
The
keys
mal
typewriter.
~."r
~r.r
~~
t;;-P;;- .
l=;J=
H~
~~
3d
Return
return
computer
command.
Section
in
this
section
"'f,ll'
performs
key
;
,~,
a w
rl
A S 0 F G H J
~
f
"Z
/.:
1 0
on
typewriters.
know
This
Keys
are
.":1'1
11:
t"'R"r
VrnUml
_I1C
1If"18rnNIIM~.m.
a function
that
you
key
is often called
similar
l!I;m,1'I ,'m;
are
key.
Shift
pressed
gives you a
tuation
in
conjunction
capital
letter.
key gives you
Pressing a shifted
the
upper
key.
to keys on a nor-
L , :
G
;n
t
~
0 "
l<
similar
Pressing
finished
the
with
typing a letter
symbol on
~
If'"
.J
.!"j
U
to
the
it
lets
typing
ENTER
!~
r
,
r:'
rJ-!-.I
0":"1
carriage
the
a
punc-
the
Tab
moves
similar
Caps
It
only affects
the
shift
letter
indicator
Space
the
to
the tab
Lock locks
the
key
to
keys.
When
light
on
Bar
inserts
cursor
to
right
on
key on a typewriter.
the
keyboard
letters.
get
the
upper
the
CAPS LOCK is "on"
the
key is lit.
spaces
in
You still
characters
into
the
the
the
have
text.
screen.
shifted
to
on non-
It
mode.
use
the
is
d----~
4-7
Page 57

What
Every
User
Should
Know
Special Feature Keys
The
special
keys.
feature
keys work
with
the
typewriter
•~ .11
fF1-'Ollw
Escape cancels
~
lAIt!Jl.oj1f
tJ
L..::.."
~
fl-Il..Jl.J1
E'''~ Tvlllumlmolll'n~lTi~
"ol1
l nxn
cJPJP
the
new one.
used
Control is
with
tion or command.
text
from scrolling off
Alternate
function
keypad,
is
used
or
command. Combined
it
displays special
screen.
Backspace moves
acter,
erasing
Delete
erases
positioned.
edit
previously
It
the
the
is
entered
rt;
m•m I'fl m--m;
H
m'
II-
IIINII
current
other
For
with
.
em:
m:
M
1\
.
111
.
ft1
/ n
entry
keys to perform a funcexample, CTRL S will
the
screen.
other
keys
characters
the
cursor
last
character
used
with
to
character
where
the
function keys to
commands.
~
.J
j---,
'I
rr:"
~ ~
and
to
with
the
left one
typed.
the
~
\iii
?
~
t
I'!.
\.~
It
l.?o.
~
waits
for a
stop
perform a
the
numeric
on
the
char-
cursor
II
-J
,
rL+
is
4-8
Page 58

Print
Screen
shifted,
screen to
it
the
prints
sends
printer.
What
an * when
whatever
Every
User
Should
unshifted.
is displayed on
Know
When
the
~
~
......
SCROLL LOCK is
Insert
When
inserted
places
in
the
into
position. All
moved to
time
Numeric
The
numeric
whether
the
light
When
''f
I~
~
~
~
the
.11
p...o.
the
turns
Keypad
keypad
the
NUM LOCK
is on,
light
11
Il.dhl'l
a w
E~1Y
A
11
s
11
0 F G
Z x
11cIlY'"III N
I Tffi;!
the
insert
text
data
right.
off
the
is off,
not
computer
mode,
on
to
Pressing
the
insert
has
Numeric
the
1'1, m
um'
~
H mJ
II
used
by DOS.
in
the
whatever
the
screen
the
right
of
the
mode.
two functions
key
is "on"
keypad
Cursor
,m
moll
II'
M
1\
III
m--m~
'\urr ~ r
mL . m
•
11
. In.lft
keys
~
insert
at
the
INS
you
the
cursor
key
mode.
type
cursor's
depending
or
"off."
is activated.
are
activated
-~
(J:!!!'
?,;"
,
~
"
~
I~
~
is
will be
a second
on
When
.
l);id'l
~,I
<;.
,'.
fL+
4-9
Page 59

What
Every
User
Should
Know
When
is
DEL
.
~
digits on them.
~
g
@
A Warning About Numbers
Numbers
the
either.
numbers
when a
When
or
use
a computer,
the
NUM LOCK key is on,
operational. The keys labeled 1 - 9 give you
=
the
.DEL
OINS = the
- =
minus
decimal point
digit 0
sign
the
numeric keypad
+ = plus sign
appear
numeric keypad. Numbers
The
come from, providing
number
using
an
uppercase I for
the
letter
both
in
the
computer is
is required.
a typewriter, you
0 for
the
results
not
the
digit one. Similarly, you
the
digit zero.
are
typewriter section
can
be keyed
concerned where
that
it
can
use
If
you
unpredictable. Therefore:
in
gets a
a lowercase I
do
this
the
and
from
the
number
can
with
4-10
ALWAYS USE NUMERIC KEYS FOR ONE AND
ZERO.
Page 60

What
Cursor Control Keypad
When
a
[..!.fj
the
cursor
..;..'"
z
NUM LOCK key is off,
control keypad.
11
x
"c
v Bill N
II M 11 ~ 11 . ITI/
I.::
1
Every
m
~
the
~
!\
User
keypad
~I·I
J~
t,:'
I\.!!!.!
Should
IHl
II
18
acts
3 +
Know
as
~
@
@)
~
~
HOME is
Up
Arrow is
Left Arrow moves
erasing
Right
the
The
the
the
on
not
used
not
the
last
character
Arrow re-types one
previously
Down Arrow is
Down Arrow moves
screen.
entered
by DOS.
used by DOS.
the
cursor
typed.
character
command.
not
used
the
cursor down one line
one
character
at a time
by DOS. However,
left,
from
4-11
Page 61

What
Every
User
Should
Know
END
is
the
cursor
the
screen.
The
Page
Up
is
used
the
information
The
Page
Page
Down is
downward
not
used
to
Up
by
Down is
the
by
DOS. However,
the
first
is
not
used
many
programs
on
the
not
used
by
information
character
by
on
DOS. However,
to scroll
screen.
used
by DOS. However,
many
programs
on
the
END
the
last
upward
to
screen.
moves
line
Page
scroll
on
Function
The
to
the
programs,
erations.
ent
For
at
the
sor
~AT.T
c;;-r;;
J=
l=
"
r~
~
~
;;:
S
*.S
~C
Keys
function keys
software
these
The
meaning
on
the
program
example,
beginning
at
the
,
''''1"
~,
•
LAll.S
£::
L:JlZ
tJ
~
in
end
11
,
/1,
11.
aWE
~.,
,Ofl
x"cllvI1BllINIIMII~II.IrI/m
I
being
keys
one
of
of
the
/'1;
1"1.
F "011"
perform
used.
usually
of
that
you
program
a file
file.
fI
, m•m•
Y III U I
mJ
11
different
In
different
perform
the
function keys
are
currently
F9
positions
and
FlO
1ft
,
m··rn
III
0
IT! PIfl
K
mL :
tasks
application
different
positions
~
~
If
.~r
~
oJ
~
1
Ie;:
.~
~
according
op-
is
depend-
running.
the
cursor
the
cur-
VI~-
~
~.!
~
I"
_
It
I~n+
~
4-12
Page 62

What
Every
User
Should
Know
DOS only
uses
scribed below:
Re-types
the
character
Re-types
first
then
the
time a character
the
character.
Re-displays
the
the
first
F4
the
and
remainder
Deletes
to
Type
see
Allows you to
using
the
and
DEL
Fl
through
F5;
these
previously displayed
at
a time.
previously displayed
you specify occurs. Type F2,
the
previously
entered
previously typed line from
time a character
then
the
of
the
edit
the
right
and
left
you specify occurs.
character.
line.
currently
arrow
displayed line
keys
keys.
keys
act
command
line
up
line.
memory
Now
type
and
the
as
to
one
the
F3
INS
de-
up
to
4-13
Page 63

What
Every
User
Should
Know
Resetting
You
can
computer
the
computer.
Pressing
It
has
and
back
re-load a
by
the
an
effect
on
the
Computer
diskette
pressing
reset
similar
again,
supply's electronics.
Executing a reset
startup
computer's
this
status.
memory
facility should be
CTRIJALTIDEL = Reset
Holding down
taneously
reset
the
computer.
and
returns
Any
the
then
in
the
reset
button
but
stops all
to
switching
is less
the
information
is lost
used
the
when
with
CTRL key
pressing
drive A
button
computer
the
stressing
computer
currently
reset
care.
Computer
and
the
the
DEL
or
re-start
on
the
your
front
activity.
power off
on
the
power
to
its
initial
in
the
is executed, so
ALT
key
simul-
key
will also
of
4·14
~
,11:
J§
lollw
~
IAllsJlo~F
'11L.::...
~
J1:I1-:Jli11
"'"1"11'
c
1
xn
I'I~
m. m
um o n
N
II"II.II.II'I/n
111
om,n
y
"GI'tHm J 11K L .
v
8I11
m··m:
m:
I
TJ
[J1;l
~
..
IW
L.!.
I!
~
(i~!
f ~ -
I"
~
18
+
Page 64

All
about
What
Every
User
diskettes
Should
Know
What
Diskettes
information. The diskettes
are
about
Is a Diskette?
are
flexible magnetic disks
5 1/4 inch
250 pages of
and
that
double sided.
typewritten
DI~-
CO
o
Why
Your computer needs programs
programs come on diskettes.
portant
computer won't work because
the
Do I
Need
diskette
program, called DOS,
Diskettes?
is
the
DOS diskette. Without
Perhaps
this
that
used
for storing
your computer
Each
diskette
text.
in
order
to work,
the
most
diskette contains
runs
the
computer.
uses
holds
and
im-
it
your
4-15
Page 65

What
Every
User
Should
Know
Additionally, application software such
or
essing, filing programs,
distributed
The most frequent
ettes
on diskettes.
is to save
the
use
data,
accounting programs is
that
you will have for disk-
text, files, etc.
ate. You use diskettes to store your
the
sessions on
you
turn
off your computer,
computer. This is because everytime
it
loses
as
word proc-
that
data
between
whatever
you cre-
is
memory.
If
you
have a hard
with
the
computer's memory. The
age device,
cause a loss
How
Diskettes
Diskettes
are
turning
of
disk, don't confuse your
the
computer off
data
saved on
the
hard
and
hard
hard
disk is a stor-
on will not
disk.
Work
magnetic media, like cassette tape, protected inside of a cardboard jacket. The diskette
spins inside
record. As
information from
The surface of
(concentric circles
(parts
bered. This enables
tion on
sector 4
the
same
mation
its
jacket
the
diskette spins,
it
or
the
diskette is divided into
around
of a track). The
the
the
diskette
or
track
location
and
read
at
23 sector
the
it
back into
similar to a phonograph
the
computer
can
write information onto it.
tracks
the
tracks
center
and
hole)
sectors
and
are
computer to store informa-
specific locations (e.g.,
7).
Later, by going back to
computer can locate
the
computer.
the
num-
track
infor-
in
its
disk
read
sectors
3
4-16
Page 66

What
Every
User
Should Know
Information is
through
the
slot
read
in
from
its
writes information onto
unused
space. You
can
write over information
might
do
this
to
You
update
stance. Note however,
it
the
back.
over old information,
you cannot get
or
written
jacket. When
the
diskette,
also
instruct
that
is already on a diskette.
an
if
you write new information
old information is
onto
the
diskette
the
computer
it
does so
the
computer to
inventory file for in-
erased
in
-
4-17
Page 67

What
Every
User
Should
Know
Care
Although
handling
ful
them.
DO:
• Keep
and
Handling
diskettes
will minimize
diskettes
of
Diskettes
are
not
particularly
the
in
their
envelopes
~DI_
risk
of
damaging
when
fragile, care-
not
in
use.
4-18
Page 68

DON'T:
What
Every
User
Should
Know
• Don't touch
can
scratch
• Don't expose
the
exposed surface of a diskette. This
its
surface.
the
diskette to
dust
• Don't place heavy objects, such
diskettes.
• Don't
attach
rubber
• Don't bend diskettes. They
too far,
anything
bands.
the
diskette surface
to diskettes
are
can
or
dirt.
as
books, on
with
paper
clips
flexible but,
if
bent
crease permanently.
or
4-19
Page 69

What
Every
User
Should
Know
D
o
o
• Avoid
Labeling
All
diskettes
can
display
not
always
trying
unlabeled
ettes
what
Here
diskettes:
diskette.
with a hard
diskette's
to
find a specific file quickly
is like
you
want
are
some suggestions
writing
If
Diskettes
look
pretty
a directory
very
practical.
diskettes
labeling
quickly.
on
a label
you
must
or
sharp
surface.
Only
on
your
do so,
point
much
of
what's
Imagine
your
files.
that
use
alike.
on a diskette,
desk.
Labeling
It
facilitates finding
about
labeling
is
already
don't
use a pen
which
felt
might
tipped
Although
the
time
if
you
o
o
attached
damage
pens.
wasted
have
your
your
or
you
it
is
ten
disk-
to
pencil
the
a
4-20
Include
•
made
backups
• Don't
one before
remove
on a flat surface
on
or
stick
and
the
label
updated.
or
locating
labels on
applying
apply
the
This
the
top
the
labels is
and
inside
date
when
is helpful
latest
version
of
old labels.
new
one.
with
its
cardboard
the
when
The
the
copy
reviewing
of
a file.
Peel
off
best
way
diskette
envelope.
was
the
to
resting
old
Page 70

What
Every
User
Should
Know
Write-Protecting
Protecting
erasure
prevents
altered. A write-protected
by
the
rity
stops you from
tant
If
you
protect
carton
protect
your
is called write-protection. Write-protection
the
contents
computer.
information
want
to
write-protect a diskette, peel a write-
sticker
of
notch
off
diskettes.
on
Diskettes
diskettes
of a diskette
It
cannot
inadvertently
stored
the
the
Then
edge of
on
sheet
o
o
against
diskette
be
written
a diskette.
supplied
wrap
it
the
diskette.
unintentional
from
being
can
only be
on.
destroying impor-
with
around
This
each
the
read
secu-
new
write-
4-21
Page 71

What
Every
User
Should
If
you
Know
want
to remove
change some information on
the
write-protect sticker. With
computer
Of
course,
until
diskette
this
should
can
write on
there
is no need to write-protect a diskette
it
contains some worthwhile information. One
that
already does is your DOS diskette.
reason,
do
if
it
so now.
isn't
write-protected already, you
the
write-protection, to
the
diskette,
the
sticker
the
diskette.
just
off,
add
or
peel off
the
For
4-22
Page 72

What
Every
User
Should
Know
Diskette
The
identify
•
The
•
The
• The
The
The
or
default
computer
ette,
diskette
prompt.
For
prompt,
drive
list
Diskette
Drive
drives
lower
upper
hard
on
them.
diskette
diskette
disk
Default
letter
beginning
drive.
to look somewhere else for a file
the
computer
in
the
example,
typing
A.
If
the
the
files
on
Letters
your
computer
drive is drive
drive,
drive,
Drive
This
assumes
drive
when
the
DIR
prompt
the
diskette
if
present,
if
present,
the
screen
means
with
lists
that
that
the
screen displays
the
is
B>,
in
drives
are
assigned
A.
is drive
prompt
unless
the
same
letter
files on
then
entering
drive B.
letters
is drive
C.
is
the
you tell
or
file
is
on
as
the
A>
the
diskette
B.
current
disk-
the
the
DIR
to
the
in
will
computer
Your
drive
when
you
must
A
when
hard
disks perform
ette
in
drive A
computer
hard
disk
read
To
diskette
is
set
up
to
you
turn
on
the
always
you
will look for DOS on
drive
information from
other
turn
when
than
insert
the
then
your
computer
an
extra
the
computer
becomes
the
default
make
computer.
DOS
on.
step.
the
the
or
write
drive, you
drive A
diskette
If
hard
default
information to a
the
That
is
into
Computers
there
is no disk-
is
turned
on,
disk.
drive.
must
default
why
with
The
drive
the
4-23
Page 73

What
Every
User
Should
Know
specify
which
the
the
drive
letter
diskette
followed by a colon (:)
is loaded.
file SORT.BAS from drive B
displayed, type:
A>B:SORT.BAS
Then
press
the
Remember
a colon
include
or
as
the
you will
Changing
You
can
change
that
in
colon
get
RETURN
the
the
example above. You always
immediately
an
error
the
Default
the
key.
drive
letter
message.
default
so, type:
A>B:
Then
press
the
Of
course,
B
in
hard
any
the
above example.
disk
and
you
RETURN
drive
letter
want
key.
For
it
to be
type:
For
example, to load
when
the
must
after
Drive
drive
if
you
can
be
substituted
instance,
the
in
A>
prompt
be followed by
have
the
drive
letter,
want.
To do
for
if
you
have
default
drive,
the
is
to
the
a
4-24
A>C:
Then
press
the
RETURN
key.
Page 74

What
Every
User
Should
Know
How
1
Open
2 Hold
3
Gently
into
diskette
4 Close
NOTE:
inserted
be
tor
light
to
the
the
insert
the
the
If
Insert a
diskette
diskette
the
diskette
is all
the
drive door.
the
computer
into
is
off.
Diskette
drive door.
by
the
diskette
drive.
When
way
in.
the
diskette
side
that
with
is on, a
drive
has
its
label facing
you
hear
diskette
if
the
label.
a click,
may
the
drive indica-
up
the
safely
------------------------
-----
4-25
Page 75

What
Every
User
Should
Know
How
1 Lift
the
pushed
removed.
2 Remove
diskette
A
turned
to
Remove a Diskette
drive door.
out
far
the
diskette
can
on
if
the
The
diskette
enough
safely be removed
drive
so
and
insert
indicator
that
is
automatically
it
can
be easily
it
into
its
with
the
light
is
envelope.
computer
off.
4-26
NOTE:
move a
to by
mation
is accessing a
light
IF
REMOVE
the
on
THE
It
is
diskette
computer. Doing so
on
the
the
DRIVE
THE
extremely
while
diskette. You
diskette
drive
that
INDICATOR
DISKETTE.
important
it
is being
can
can
by looking
the
diskette
LIGHT
that
read
destroy
tell
if
at
the
is in.
you
never
from or
the
the
computer
indicator
IS
ON,
re-
written
infor-
DON'T
Page 76

All
What
about
Every
files
User
Should
Know
What
Your
ette
formation
your
Separating
quickly
on a
on
File
All
name
wouldn't
filing
However, on different
same
with
office.
each
Is
a File?
computer
into files,
into
office.
the
retrieve
diskette
the
diskette.
Names
the
files on a
so
that
have
cabinet
file name. You
the
same
The
two files
other.
groups
similar
file folders
information
the
without
diskette
they
are
two files
in
your
name
mayor
related
to
exact information
having
uniquely
with
office.
diskettes
may
as
a file
information on a disk-
the
way you
stored
must
have
in
a filing
into
files
to
retrieve
have
identified. You
the
same
two files
a file
in
another
may
not
be duplicates
put
related
enables
that
everything
a different file
name
can
in
your
company
cabinet
you to
you
want
in
one
use
office
in-
the
in
of
The
file
names
low
certain
A file
this
name
ways begin
or 3 characters.
File
names
case,
case.
name
but
rules.
can
can
with
can
are
always displayed on
that
your
be
up
be
added
a period (.)
be
entered
computer
to
eight
an
extension.
in
characters
and
are
either
the
can
recognize fol-
long. To
Extensions
followed by 1, 2
upper
or
lower
screen
in
upper
al-
4-27
Page 77

What
Every
User
Should
Know
4-28
•
•
•
Valid
the
letters
the
numbers
the
characters
characters
A to Z
0 to 9
! @ # $ % " & ( ) - { } , _
for file
names
are:
Page 78

What
Every
User
Should
Know
Examples
The
following four file
because
characters.
REPORT
FOSDICK.LTR
MEMO.JUN
MA
YSALES.$&%
These
are
file
listed
4THQUARTER Too long (it will be
LETTER/4 Illegal
NEW
Types
There
of
Valid
they
are
names
to
the
right
MEMO.JUN
of
Files
are
two basic types
File
Names
names
not
too long
are
invalid file names.
of
to 8 chars)
Spaces
each
of
are
and
name.
character
files:
valid file
use
in
the
valid
The
in
name
names
reasons
truncated
name
•
program
•
data
Program
form a
formation (data)
For
files
files
files
task.
example,
are
Data
the
program file. The files
files
files
used
by
file you
that
do something;
are
files
program
use
for word processing is a
that
run
they
per-
that
contain
files.
the
in-
your computer are
4-29
Page 79

What
Every
User
Should
Know
program files. A
data
be a
file.
The file containing
anything
by itself.
designed to
do
so without a list of names.
Program
.BAT file
tensions
Data
file
file
name
are
names
list
of
The
two types of files
the
But
sort a list
names
always have a .COM, .EXE, or
extension. These
reserved exclusively for program files.
mayor
extensions.
names
names
and
and
a program file
of
names
alphabetically
three
may
not have file
addresses would
are
interrelated.
addresses
that
can't
is
can't
file
name
ex-
name
do
4-30
Page 80

What
Every
User
Should
Know
Seeing
You
can
ette
using
File
What's
display
the
:maintenance
On a Diskette
the
names
DIR (i.e. Directory) command. The
of files stored on a disk-
directory of a diskette is like a table of contents
book. This command also gives you information
the
amount
amount
To see
A>dlr
Then
A>dlr
Volume
COMMAND
AUTOEXEC BAT
AGORA
AGORA
MODE
PROPOSAL DOC
FOSDICK
SALES
SALES
SALES
of
space occupied by each file
of space still available on
what
is stored on a diskette. Type:
press
the
in
10
RETURN
drive
is DOCUMENTS
File(s)
key.
COM
DOC
BAK
COM
LET
APR
MAY
JUN
and
the
the
diskette.
Directory
15957
128
11008 5-28-84 2:34p
9716 5-27-84
1882
29056 6-05-84 3:30p
3607 6-07-84
15877 5-14-84 10:560
16384
16384
235,688 bytes
ot
A:
4-12-84 9:010
5-01-84 11:340
4-12-84 9:000
6-14-84
7-14-84 1:43p
10:280
5:00p
11:230
in
a
about
tree
Preparing a New
Before you
pared
diskette.
In
order
puter,
can
use a new
to accept
data.
for a diskette to be able to
it
must
have special files on
Diskette
diskette,
for
it
Use
must
be pre-
This is called formatting
start
up
the
it
called DOS
the
com-
4-31
Page 81

What
Every
User
Should
Know
system
either
mand.
storage
Typically,
should
you
the
diskette
the
system
storage
format
To
1
Insert
2 Type:
A>format/s
Notice
format.
3
Press
The
files. These files
when
it
is being
The
system
files
space on a diskette.
if a diskette
write
the
is going
files off
to
and
space available.
the
new
disk
your
DOS
diskette
the
Is (for system) following
the
RETURN
following
key.
message
can
be
formatted
take
up
is going to
system
files on it. However,
be
used
take
advantage
with
in
drive
is displayed:
put
on
or
about
contain
only for
the
system
A.
the
the
by
the
12% of
data,
of
command
diskette
SYS com-
the
a program,
if
leave
the
extra
files:
4-32
4
Insert
and
strike
Insert
the
RETURN
the
As
plays
diskette
the
Formatting
new
diskette for
any
new
key
or
message:
...
drive
key
when
diskette
any
other
A:
ready
into drive A
key.
is being formatted,
and
your
press
screen
the
dis-
Page 82

After
the
displays
lights on
the
message:
the
disk drives
What
Every
User
go
out, your screen
Should
Know
Formatting
System
Format
...
transferred
362496 bytes
43008 bytes
31
9488 bytes
another
The message indicates
the
system files.
5
If
you
want
to format more diskettes, type: y
If
you
are
done formatting diskettes, type: n
The diskette is
up
your computer.
To
1
format
Insert
the
your DOS diskette
2 Type:
A>
format
Format
(YIN)?
ready
new
Complete
total
disk
used
by
available
that
for use
disk
without
in
space
system
on
disk
43008 bytes were
and
can
be used to
the
system
drive
A.
used
start
files:
by
3
This time
Press
the
RETURN
the
Is is left
key.
off.
The following message is displayed:
Insert
new
diskette for
and
strike any key when ready
drive
A:
4-33
Page 83

What
Every
4
User
Should
Insert
RETURN
the
As
plays
Know
the
new
key
diskette
the
message:
diskette
or
any
into
other
drive A
key.
and
press
is being formatted, your screen dis-
the
Formatting
Mter
the
...
lights on
the
displays a message
Formatting
Format
Note
for
data
5
If
you
If
you
The
diskette
NOTE: You
do this, type A
type
362496 bytes
362496 bytes
that
C>A:FORMAT/S to
...
Format
total
available
another
the
total
(YIN)?
capacity
storage.
want
to format more diskettes, type: y
are
done
formatting
is
ready
may
format a
>B:FORMAT/S.
WARNING: Keep a supply of
readily available.
may
not
have
When
the
opportunity
disk
drives go out,
similar
to:
Complete
disk
space
on
of
disk
the
diskettes, type: n
to receive
diskette
format a diskette
formatted
you
need
to format one.
your
screen
disk
is available
data.
in
the
B drive. To
With a hard
disk, you
in
drive
diskettes
a new diskette, you
A.
4-34
Page 84

What
Every
User
Should
Know
Copying
As you
There
want
Other
safety.
01
__
r--
use
are
to
make
times
Files
your
computer, you will
many
reasons
copies
it
may
-
"'J
of
be to
A
need
to copy files.
for this.
files for someone else to use.
have
Sometimes
an
extra
you
copy for
may
-------,,~
COpy
To
copy
1 Place
drive).
the
a file
original
from
diskette
one
diskette
in
drive A
to
another:
(the
lower
4-35
Page 85

What
Every
User
Should
Know
2 Place
drive B
3 Type:
A>copy
Substitute
for
filename.
4
Press
When
the
diskette
NOTE: You
You
you
can
To
make a copy
Files
But
can
be
the
diskette
(the
upper
a:fUename
the
name
the
RETURN
the
A>
returns,
in
drive B.
don't
can
copy from B to A.
copy from A
are
usually
if a new
made
file
on
that
the
file will
drive).
b:
of
the
file
key.
the
file
always
have
If
you
to C and
of
a file
on
the
copied from one
name
is
substituted,
the
same
diskette.
be
copied
that
you
want
has
been
copied onto
to
copy from A
have a hard
also from C
same
diskette:
diskette
a copy
to
to
to
disk,
back
to
another.
of
in
copy
B.
to
A.
a file
4-36
1
Place
2 Type:
A>copy
Substitute
to
rename
newname
the
diskette
oldname
the
current
for
oldname
in
the
in
drive A
ne.name
name
and
example
(the
of
the
the
above.
lower drive).
file
that
new
name
you
for
want
Page 86

3
Press
A copy
onto
still
The
You should
diskettes
keep
the
RETURN
of
the
the
diskette
intact.
Value
that
them
file
of
make
contain
in
reserve
key.
with
the
in
the
drive A.
Backing
"backups"
important
for
an
What
Every
new
file
The
Up
Your
or
extra
information
emergency.
User
name
is copied
original
Diskettes
copies
Should
file is
of
your
and
Know
Then
lost
any
your
backup
backup
work.
Many
that
have
if a diskette
valuable
diskette,
away
again
computer
been
users
updated
is
lost
time
or
make a new
and
make
or
damaged,
information.
then
continue
backup
at
the
end
you
Just
copy
copies
of
each
of
with
haven't
take
it,
put
your
of
files
day.
out
the
4-37
Page 87

What
Every
User
Should
Know
Backing
There
The first uses
uses
have a
Up a Diskette
are
two ways
the
the
COpy
hard
disk,
that
you
can
back
up
DISKCOPY command.
command discussed above.
the
backup command is also avail-
diskettes.
The
able to you.
Making a Backup
Using
DISKCOPY
DISKCOPY is a quick way to backup your diskettes.
It
also formats
the
diskette for you.
To use DISKCOPY:
1
Insert
the
DOS diskette
in
drive A
and
turn
computer.
2
With
the
A>
3
4
A>dlslcc:opy
Press
the
In
response to
prompt
a:
RETURN
the
displayed, type:
b:
key.
prompt:
If
you
on
second
the
4-38
Insert source disk
Insert
Strike
5 Remove
6
Insert
the
(target)
the
diskette
in
drive
target
disk
any
the
key
in
when
DOS diskette from drive
drive
ready
A
B
original diskette (source)
that
will become
in
drive
B.
in
the
backup copy
A.
drive
A,
and
Page 88

7
Press
the
RETURN key
or
any
The following message is displayed:
What
other
Every
User
key.
Should
Know
Copying
2 side(s), 9 sectors
When DISKCOPY is finished,
the
message:
Copy
complete
Copy
8
If
If
you
you
another
want
are
diskette (YIN)?
to
make
done, type: n
Making a Backup
To back
1
Insert
computer.
2 When
diskette
3
Insert
drive B.
up
a diskette
the
DOS diskette
the
A>
prompt is displayed,
in
drive
the
diskette
A.
that
another
Using
using
in
drive A
the
per
track
the
screen will display
copy, type: y
COpy
COPY:
and
tum
on
insert
the
original
file will be copied to
the
in
4 Type:
A>copy
You
too.
Just
example.
can
back
a:*.*
b:
up
files on
substitute
c:
the
for a:
hard
and
disk
a: for
using
b:
in
COpy
the
above
4-39
Page 89

What
Every
5
User
Should
Press
Know
the
RETURN
key.
As each file is copied from
the
the
diskette
screen.
in
drive
B,
its
the
file
diskette
name
is displayed on
in
drive A to
When
the
A>
prompt
is displayed,
the
backup is
complete.
The
Difference
Although both DISKCOPY
diskettes,
there
Between
is
an
important
DISKCOPY
and
COpy
difference.
and
COpy
backup your
DISKCOPY copies a diskette from beginning to
without
a
COPY,
mirror
regard
image of
when
to
used
what
is on
the
the
original diskette.
with
the
*.*
diskette.
It
produces
option, copies all
files on a diskette file by file.
To
illustrate
what
happens, consider a file
named
REPORT.
If
you
add
more information to REPORT,
needs more room on
the
REPORT on
which
longer fit
larger
PORT
written
until
ing
it
was read. However, since REPORT will no
in
than
must
back onto
the
original space is full
data
is
diskette
the
same
it
used to be),
be broken
the
written
the
diskette. DOS begins writing
in
the
same
amount
up
diskette
in
the
of space (the file is
the
revised version of RE-
on
the
diskette. Report is
in
the
and
then
next
available space on
the
file
space from
original space
the
remain-
diskette.
end
the
the
4-40
Page 90

What
Every
User
Should
Know
As you
parts
ing wrong
You
a report
folders vs finding
folder.
can
spread
might
with
see,
over
with
think
parts
DISK
COpy
this,
after
a while your files
the
entire
but
it
of
the
difference
inserted
the
report
-
•
can
have
diskette. There is noth-
is inefficient.
as
piecing together
randomly
complete
in
different file
in
one file
COpy
-.-
DISKCOPY
just
as
ette. COPY, on
vidually.
and
file
Thus
your
when
therefore
transfers
broken
It
locates all of
then
writes
disk is reorganized for you automatically
you
use
the
the
files to
up
as
they
are
the
other
hand,
the
them
as
COpy
recommended procedure.
to back
the
new diskette
on
the
original disk-
copies each file indi-
separate
one continuous file.
up
your diskettes
parts
of each
and
is
4-41
Page 91

What
Every
User
Should
Know
Deleting
Eventually
to free
It
for old
sions
To
up
is
a good
or
of
delete
a file
Files
you will
space for
idea
duplicate
want
to
erase
new
files on a diskette.
to periodically review
files. A
can
be confusing.
diskette
a file from a diskette:
old
unwanted
your
with
diskettes
many
files
ver-
4-42
1
2
Insert
in
With
Substitute
lete
the
drive A.
the
A>
Del
for
filename
diskette
A>
prompt
filename
the
name
that
contains
displayed, type:
of
the
file
in
the
example
the
that
above.
file to be
you
want
deleted
to de-
Page 92

What
Every
User
Should
3
Press
the
RETURN
To delete files from
hard
disk
the
3 above.
You
can
delete all
command. This is a quick way to free
ette
for new files,
key.
the
current
of
but
hard
disk, first
drive.
Then
the
files on a diskette
it
can
be dangerous.
follow
up
make
steps 2 and
an
ONCE INFORMATION IS DELETED USING THIS
METHOD, IT CANNOT BE RESTORED. THE INFORMATION IS GONE.
If
you don't
information is lost.
To
delete
have
all
a backup
of
the
of
this
files
from a diskette:
diskette, all of
your
with
old disk-
Know
one
the
1
Insert
in
drive
2 With
A>Del
3
Press
4
In
response to
Are you
Type:,
5
Press
the
diskette containing
A.
the
A>
prompt
-.-
the
RETURN
the
prompt:
sure
(yin)
the
RETURN
the
displayed, type:
key.
key.
files to be deleted
4-43
Page 93

What
Every
User
Should
Know
Points
1.
Press
the
RETURN
mand
to execute it.
2.
If
you
get
numbers
move
or
vice
versa,
3.
The
system
up
the
when
like this: A>formatls.
4.
Always
capital
5. Don't forget to
ters
(e.g.,
files
computer
it
is being formatted.
use
the
letters I and 0 in
A:
or
to
reDleDlber
key
after
when
you expect
press
the
that
make a diskette
can
only be
The
numbers 1 and
place of 1
add
the
colon following drive let-
B:).
you
enter
a com-
the
cursor
NUM LOCK key.
able to
written
on a diskette
command looks
O.
Don't
use
the
or
O.
to
start
4-44
Page 94

What
Every
User
Should
Know
The
In
this
guide, you
use
your
MS-DOS commands you'll
However, MS-DOS
MS-DOS User's Guide explores
tail. Use
as
a reference
MS-DOS.
MS-DOS is a powerful
time
to
learn
the
most
MS-DOS
computer.
it
both
as
manual
it
well.
from
your
User's
have
learned
And
you
have
need
has
many
a resource to
whenever
and
flexible tool.
The
rewards
computer.
more commands. Your
Guide
how to
on a daily basis.
these
learn
learned
in
you
want
enable
set
up
and
the
greater
MS-DOS
to review
Take
the
you to
de-
and
get
4-45
Page 95

What to Do
if
Something
5
•
Introduction
•
What
•
How
•
Automatic
mode
•
Testing
•
What
•
Selecting a test
•
Logging
is
"diagnostics?"
to
use
options
each
errors
Doesn't Work
diagnostics
vs.
nonautomatic
test
does
5-1
Page 96

What
to
Something
Do
if
Doesn't Work
Introduction
Your computer is engineered to work trouble free,
but
at
some point a problem
the
are
following:
many
ample, consider
One
day
while a program
running,
your screen displays
occurs. There
obvious being a damaged diskette or a faulty drive.
the
program
other
copy
surely
most
ror
recurs
drive is
able cause
To
help isolate
works successfully
of
the
original diskette,
a damaged diskette. If, however,
when
a back
the
probable cause. Note
--
not
a certainty.
the
cause of
of diagnostic routines is provided.
may
still occur.
that
you use regularly is
the
message: disk
possible causes,
when
up
diskette is used, a faulty
that
hardware
the
run
from an-
the
problem is al-
this
is a prob-
problems, a
For
ex-
error
two most
If
the
er-
set
5-2
This section provides
routines.
an
overview of
the
diagnostic
Page 97

Something
What
to
Doesn't
Do
Work
if
What
"Diagnostics" is
routines
of
that
the
various components
are
the
used
is
"diagnostics"?
name
of
a collection
to
test
the
correct functioning
of
the
AT&T Personal
Computer 6300. The program is supplied on
ette
labeled CUSTOMER TEST DIAGNOSTIC DISK-
that
ETTE
routines to
comes
test
with
your computer.
the
following components.
• Main Board
• Computer's Memory
• Keyboard
• Display
Parallel
•
Interface
• Serial Interface
• Disk Drives
of
diagnostic
It
contains
the
disk-
Mter
each
test
is
run,
a TEST RESULTS
screen is displayed.
The easy-to-use program
and
menu,
instructions
lists
testing
are
displayed on
summary
options
the
in
a
screen.
5-3
Page 98

What
to
Something
Do
if
Doesn't Work
How
Diagnostics should be
nent
is suspected. Messages issued by Diagnostics
are
self-explanatory,
and
pass
repair
duce
All
of
have
learned
Following is a guide to
cover every
a sample
whichever
In
order
know
the
•
•
•
amount
whether
if
you have a
along - by
time.
the
tests
to
test,
test
that
test
to work
the
following information about
of
memory
you
have 1 or
hard
to
use
diagnostics
used
whenever a faulty compo-
and
the
information you collect
running
follow similar· procedures. Once you
run
one test, you
using
but
instead
will enable you to choose
you wish.
through
disk
these
that
2 diskette drives
the
package
can
run
Diagnostics.
provides instructions for
tests, you will need to
your
your computer
can
re-
them
all.
It
does
not
and
run
computer:
has
5-4
•
if a printer
port
•
if a printer
•
whether
play
is connected to
is connected to
you have a monochrome
the
computer's parallel
the
computer's serial
or
color video dis-
port
Page 99

To
start
the
1
Insert
the
diskette labeled CUSTOMER TEST
NOSTICS into drive
program from
A.
the
Something
MS-DOS
What
to
Doesn't Work
A>
prompt:
DIAG-
Do
if
2 Type:
3 Press
Customer
the
RETURN
key.
The screen shown below is displayed:
••
·CUSTOMER
VERSION 1,03
DO
YOU WISH TO RUN THE
MODE?
('0' = NO,
ENTER DESIRED
(MARCH
'I'
= YES)
TEST
PROGRAM···
ACTION
18,
-
1984)
TESTS
IN AUTOMATIC
5-5
Page 100

What
to
Do
Something
if
Doesn't
Work
Autom.atic
The
automatic mode checks
one
at
a time, according to a
Any
errors
In
nonautomatic mode, you
test
once
computer's components. Detected
displayed on
If
you
specific component, select
and
run
You select a mode by
mode
detected
or
are
concerned only
the
or
a 0 for nonautomatic mode.
vs.
nonautom.atic
are
displayed on
repeatedly
the
appropriate test.
test
screen.
entering
1 Type: 0 for nonautomatic.
2
Press
the
RETURN
key.
your
computer's
prearranged
the
can
either
any
combination
about
the
the
nonautomatic mode
a 1 for automatic
run
errors
functioning
lIlode
parts
checklist.
screen.
a specific
of
are
your
of
a
5-6
 Loading...